Answering:
- What tasks have been completed, and what tasks remain?
- What has worked? what hasn't?
- What questions need to be resolved?
- What will happen when?
- What have you learned?
Documentation during development, demand- vs supply-side time management, spiral development, system integration & finish
The focus of the project
In the beginning of June, I had a conversation with my regional instructors. During that talk we developed the next stages for my final project. I wanted to finish the first stage by June 7th. I understood it isn’t realistic to accomplish more than the first stage by the end of the course.
Spiral Development: Thoughts from Fab Lab Wgtn:
what we suggest is that you think of this project as a big goal to be completed in six months.
Each of the spirals below allow you to be successful, and help you to develop the next spiral.
1st spiral development:
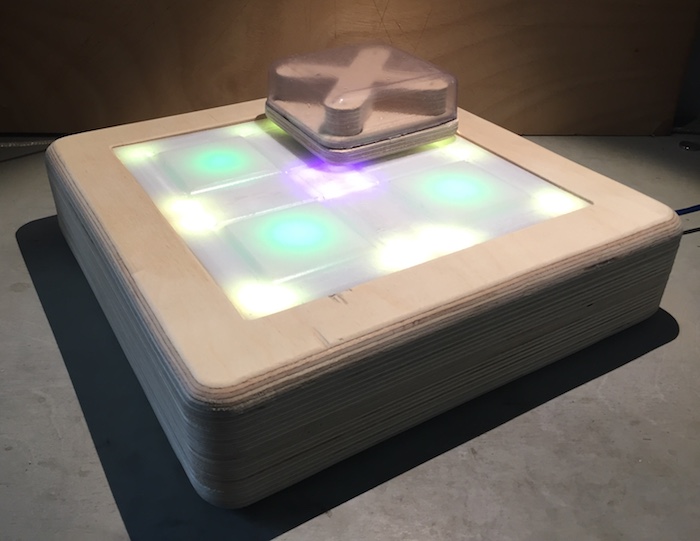
to make one module with four squares, with LEDs and a reed switch or hall effect sensors (small switch turned on and off by magnets) for each square, which are activated by the magnet in the car/brick/box. The brick is moved by hand. You can play with code to change the way that the lights behave.
Wonderful, but not an interesting game…
With your vacuum mold, take out a square from the middle, to create a one square mould. Vacuum form a few single ones, but can still use the mould to make 2x bricks, and add a modification to make 3x bricks. (keep the development with minimal extra development time.)
ormake some ‘checker’ type components. new process, not scaleable.
2nd spiral development:
create 3 more modules and connect them together, so that the game isn’t boring. still moving the bricks by hand. You can mess with the code to make the game more interesting. Then put the cut-out back in and mould some double ones. + you’ve already done the work to develop the moulds for this. Ideally, this is where you’ll get to by the end of Fab Academy.
3rd spiral development:
it would be incredible if you got this far!!!! start investigating how to create the CNC piece. We will think some more about how you can achieve this, and whether the stepper motor and the h-bridge are the best solution.
About the working process:
For planning I used two methods. First, I listed all the assignments needed to be completed in a table divided to different categories (each category presented with a unique color) .Then I created a timeline to guide me through my work.

Electronics:
The simulation board was made in the purpose of designing the inner section of the game’s board and understanding the logic of the led’s matrix. The challenge was to connect the complete panel with a single strip. After being satisfied with the result, the mission was soldering and testing the actual game’s board.

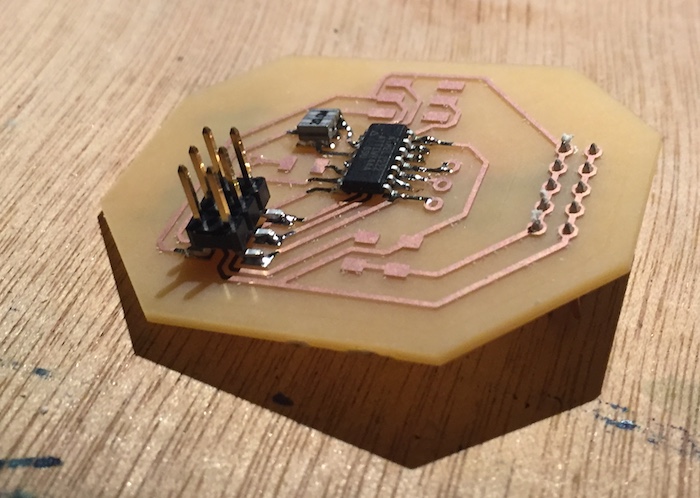
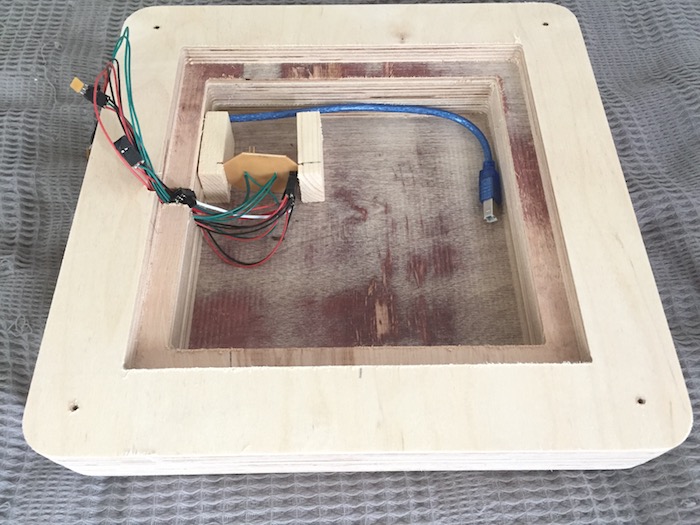
I designed the circuit board over Eagle. I used an ATtiny44 microcontroller to supply enough inputs and outputs options for 4 hall effect sensors and a strip of 20 leds. The sensors were external to the main board and located beneath the upper surface of the game’s board together with the led’s strip.


The milling was made with Othermill. For figuring the traces design I chose a nonconventional FTDI connection of a 2x3 header. All the outer components, Ground and Voltage ordered in two lines. The led’s output and the sensors input connections were wired directly to the board.


download sch.file download brd.file download sch.file download brd. file
Programing:
- Testing of the leds simulation board.
- First experience of the hall effect sensor was during week no. 13 input’s assignment.
- The next stage was to integrate between the leds and the sensors.
- The game’s board divided into four panels. Each panel has 5 leds and one sensor on this stage I tried to operate one panel.

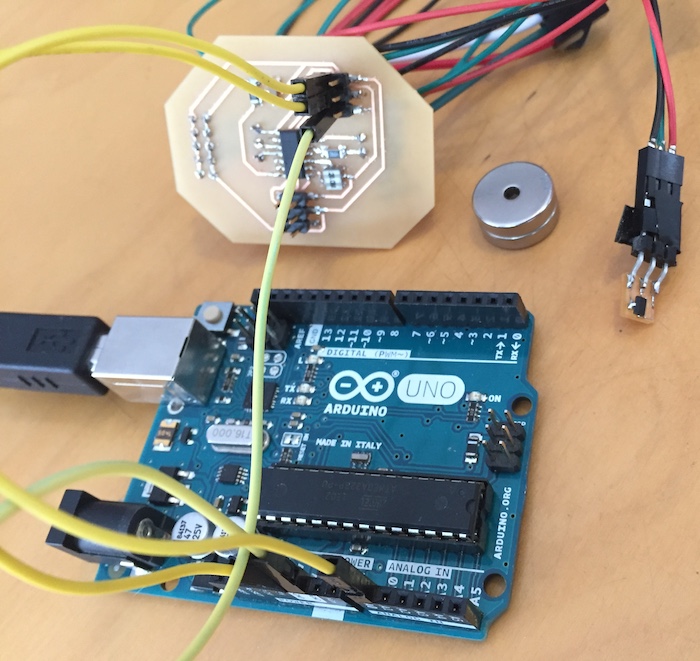

All the above steps were operated with Arduino Uno over Arduino IDE. After these stages I turn to write a code for my designed board.
- Adjusting the hello.mag.45.c to the board and the Attiny44 microcontroller, setting the right port, pins etc. for receiving reads of the sensor.
- Operating the leds with the board I’ve designed with the Cpldcpu’s light_ws2812 library.
- Figuring how to lighted a specific led from the strip, in order to divide the strip into groups.
- Integrating the sensors to trigger the leds
- The challenge to be completed is writing a complete game’s move in which there will be continuity. A red dart will guide the player where to place the game’s unit.
Editing Neil’s hello.mag.45 code for receiving a single output

I found over Pietro Rustici’s Fab Academy web page instruction about operating the ws2812 strip of leds and a link to Cpldcpu’s light_ws2812 directory. I’ve downloaded it and also Pietro’s C code and make file. There are some important things that I’ve learn. The order of the linked librarys has a meaning and in order to use the make file that originally was made by Cpldcpu I needed to follow their directory hierarchy.

The code I wrote is demonstrating the principle of my project. In this code all the twenty leds lighted up in green and each time a different square of five leds is lighted in red until its sensor detecting the position of the magnet nearness.


download c.file download make.file
Designing and planning:
3D Modeling
I’ve modeled the game’s board, frame and unit over Rhino.I had to plan all the parts of the game. Figuring out details such as the unit’s rails on the game’s board, the unit’s parts, the mold’s of the top and the bottom’s layers. This was an essential stage prior to the fabrication process.
download 3dm.file
2D Fabrication files included:
- Layout for milling the bottom (2 layers of 18mm birch plywood) and top’s mold (4 layers of 22mm MDF) of the game’s unit download dxf.file
- Layout for laser cutting parts of the game’s unit (3mm plywood) download dxf.file
- Layout for milling the top of the game’s board (8mm Polyethylene) download dxf.file
- Layout for laser cutting the game’s board bottom layers (2 layers of 8mm plywood, 1 layer of 3mm plywood) download dxf.file
- Layout for milling the board’s frame (4 layers of 18mm birch plywood) download dxf.file
Making of:
2square2 Timeline

My final project video:
My personal experience
This experience gave me an understanding of electronics and programing. Still, I have plenty of learning to do. I improved my fabrication skills - How to plan for machining and how to design in planning matters. I’ll continue studying how to manage and develop projects.