Group Assignment:
Test the design rules for your printer(s)
We had tested a Prusa i3 printer and
a Hephestos 2 printer.
These are the following rules we had tested:
- The possible angle of printing without support
- The minimalist wall thickness
- Possible height
- Printing complex structures
These are the links for the testing files found on Thingivers:
- Notes:
- Every complex structures is printable if you adjust the speed of printing, the printing fill and the wall thicknes.
- There is another printing method for printing the most narrow wall thickness that is possible named Spline, for printing vase for example.
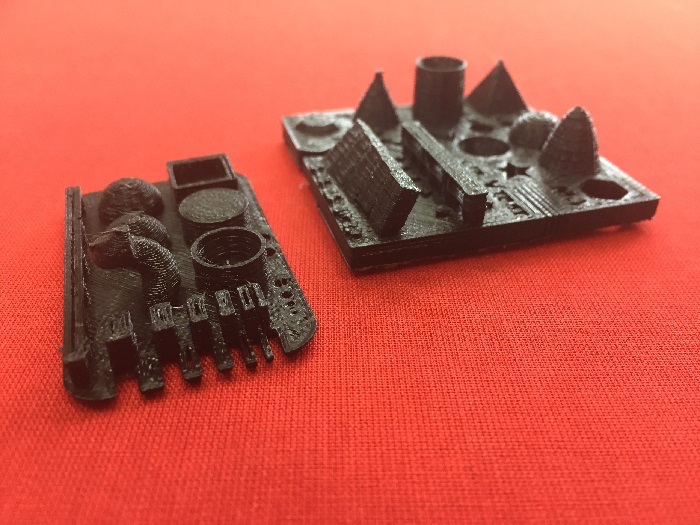
Testing over the Hephestos 2
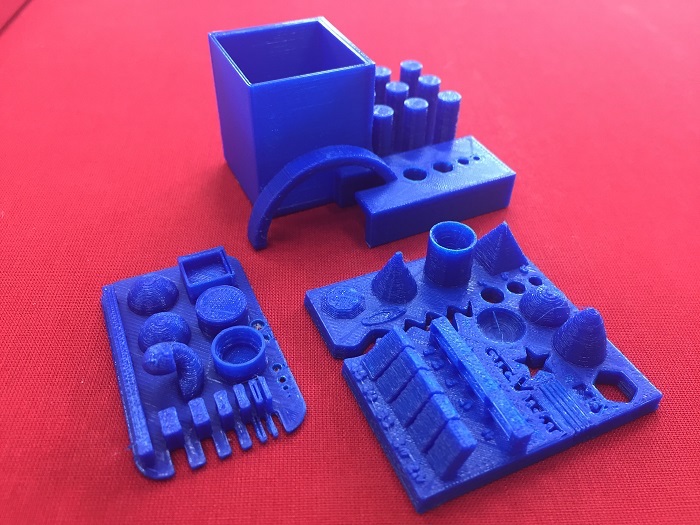
Testing over the Prusa i3

Individual assignments:
3D Modeling:
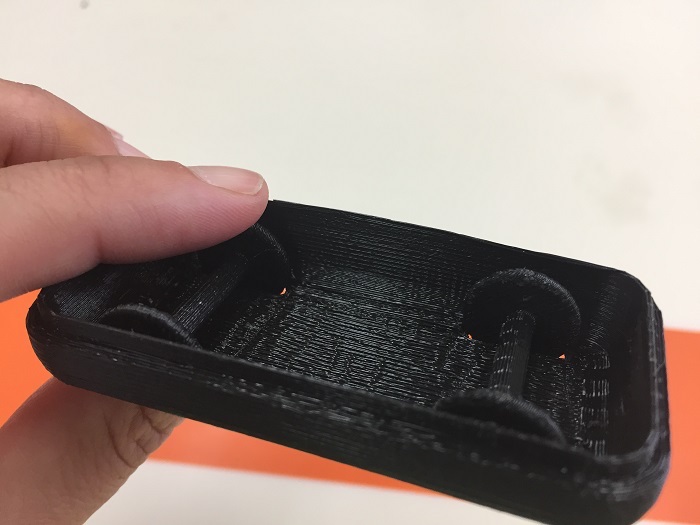
Designing a small scale prototype of a single brick unit for my final project
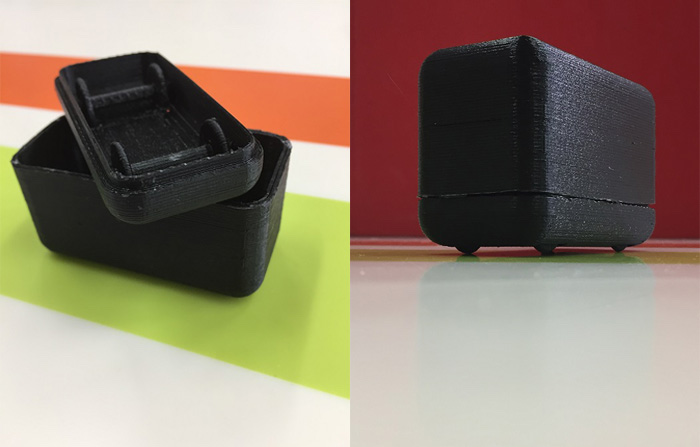
I’ve made the design in 123D Design as I found there a simple solution for filleting the cube’s edges. I’ve separate the cube into two (top and bottom) parts which can be assembled to one unit. The bottom includes two pairs of wheels. After finishing the design i’ve exported two separated STL’s files for the top and the bottom. See the design at the attached file.
The model consists three parts. The unit’s bottom and two pairs of wheels each pair connected to a pole. On the edge of each pole there is a tooth connected to the unit’s bottom that function as an axis causing the pole to rotate. The three parts fabricated in a single process. This is the reason I chose the 3D printing method for this design. It’s saves the assembly of the model’s parts and the result is very accurate.
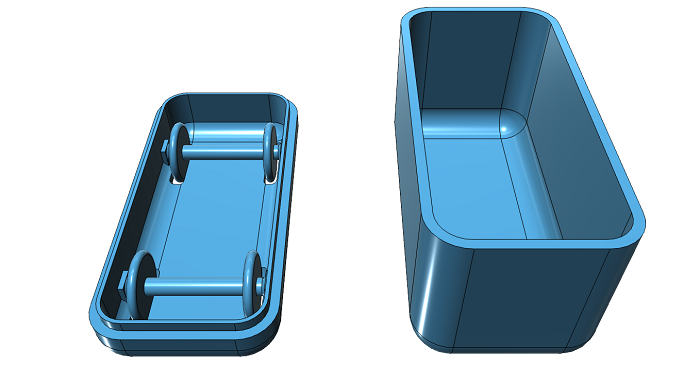
The cube's top and bottom parts
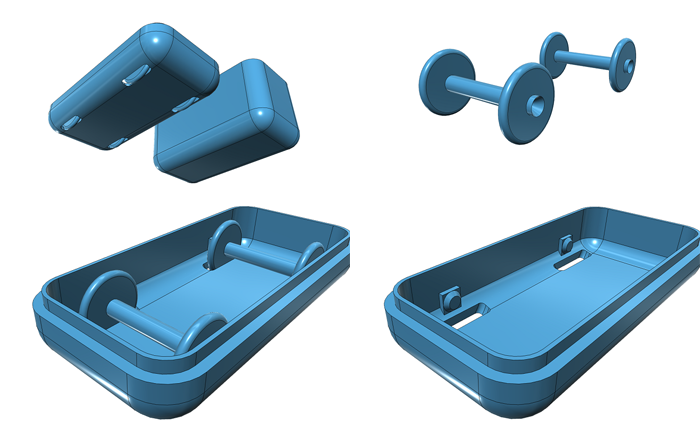
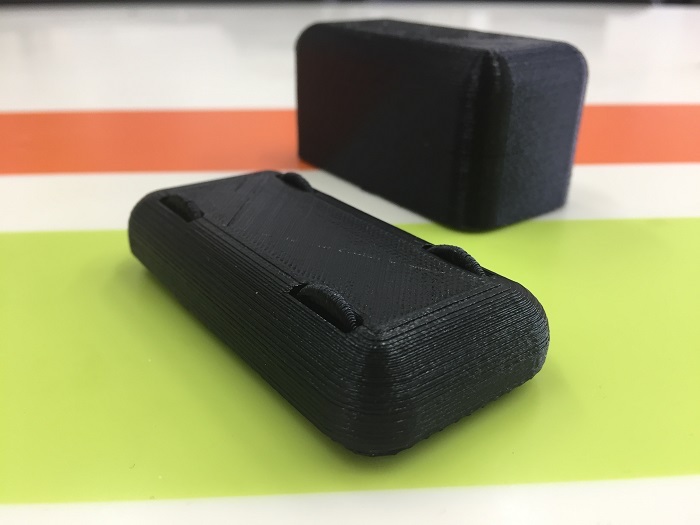
The two pairs of wheels over the bottom
3D Printing:
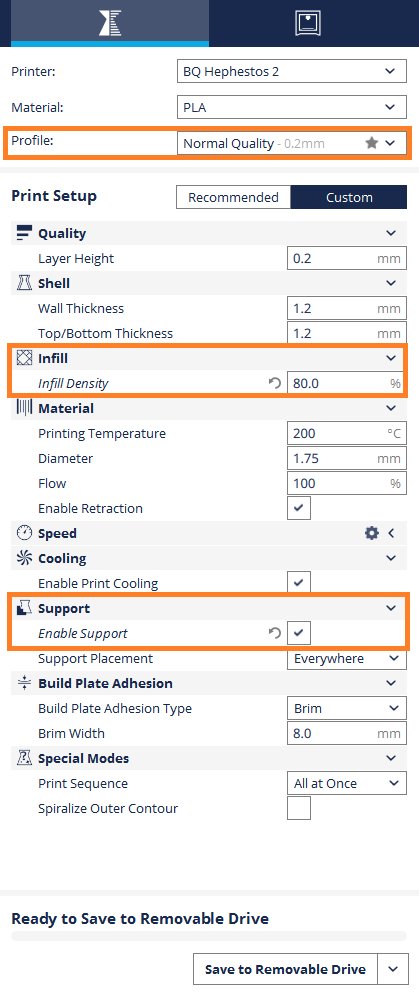
Setting the parametters
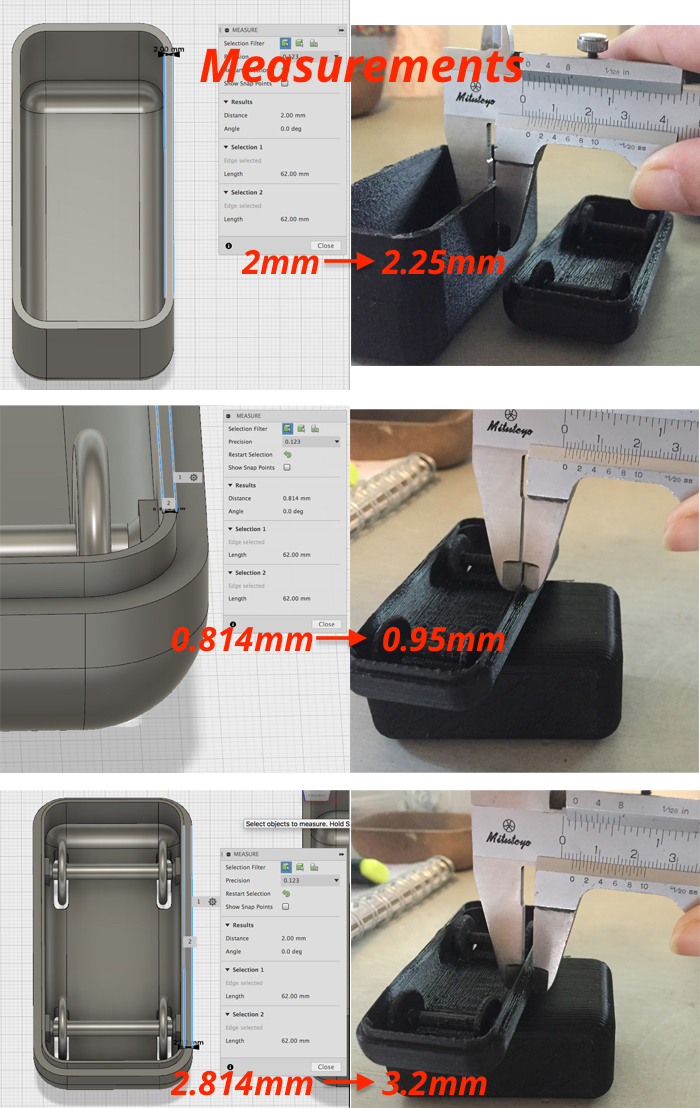
I’ve imported each STL file into Cura and made the file’s Gcode for printing in Hephestos 2 printer. The bottom and the wheels were printed in a single operation. The parts were placed turning the fillet side up in order to achieve a fine casing. I set the fill to 80% for securing it not to be separate in the middle because of the wall’s thin thickness.
I took into account the tolerance of the printing while designing the rail detail for insuring that the parts will fit appropriately.
In addition in order to spin the wheels I left a minimally gap between the wheels pole and its undercarriage.
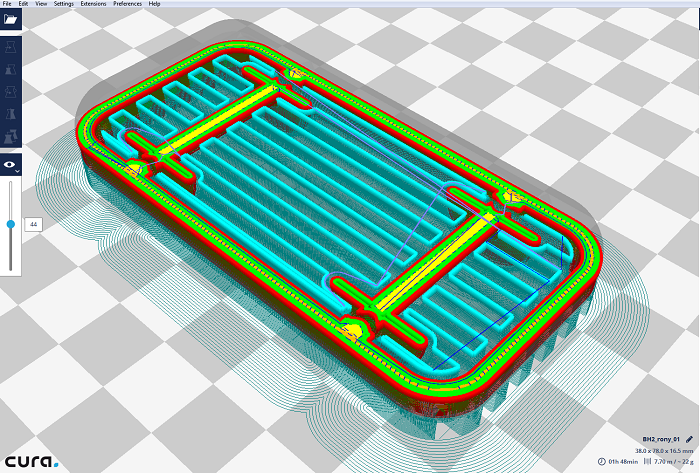
Layers view over Cura
Setting the parametters
Scanning and 3D Printing
Scanning and modeling a three hads totem
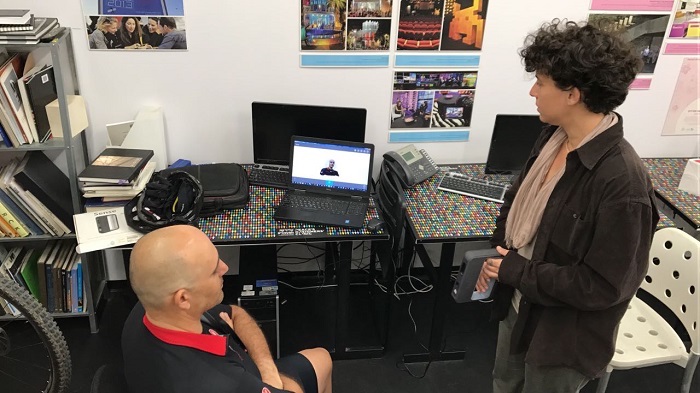
For this assignment we decided to work as a group. Each student had scanned another student head with a Sense scanner. At first the scanned person sat steel and walked around him holding the scanner. Our scanning turn out badly as our hands shaked while scanning . Our second try was to stand steel with the scanner and to rotate the scanned person using a swivel chair. The result came out with overlapping areas.The third attempt was combining both of the method. The scanned person set on a swivel chair, the scanner walked around him, 180 degree and then we rotated the person sitting in the swivel chair and scanned his other half. We got a fine outcome. After scanning we exported the files into Meshmixer software for fixing the models. Then we imported the models into Rhino. We combined our heads into a totem and made a podium. We exported a STL file into Cura and made the Gcode for the printing in a Hephestos 2 printer.
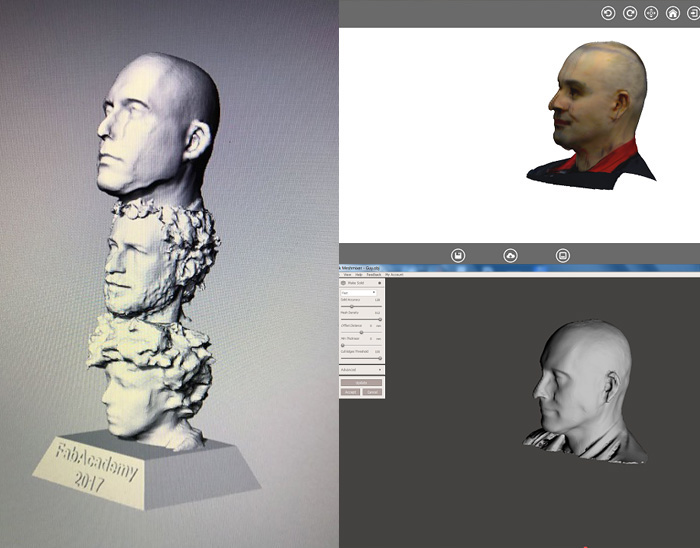
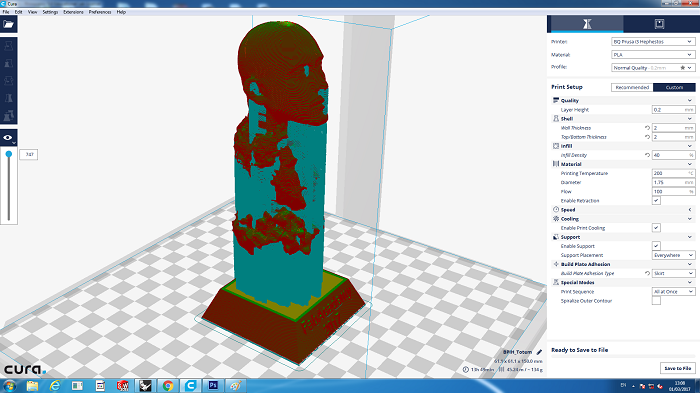
The printed model
