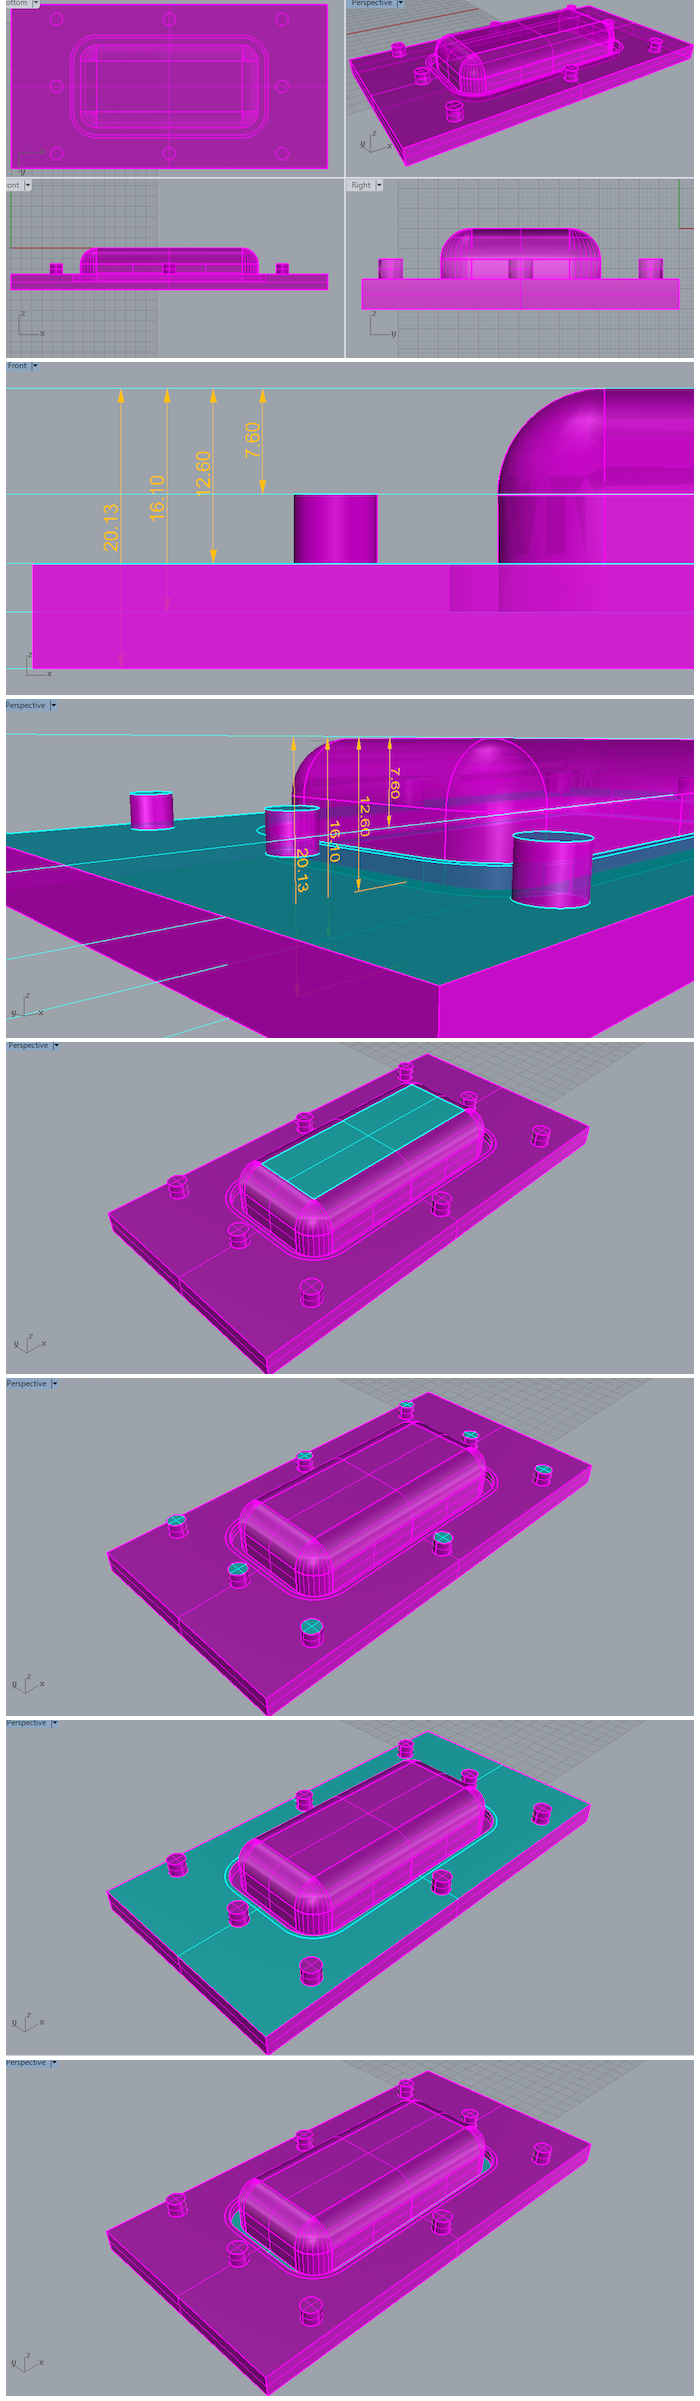
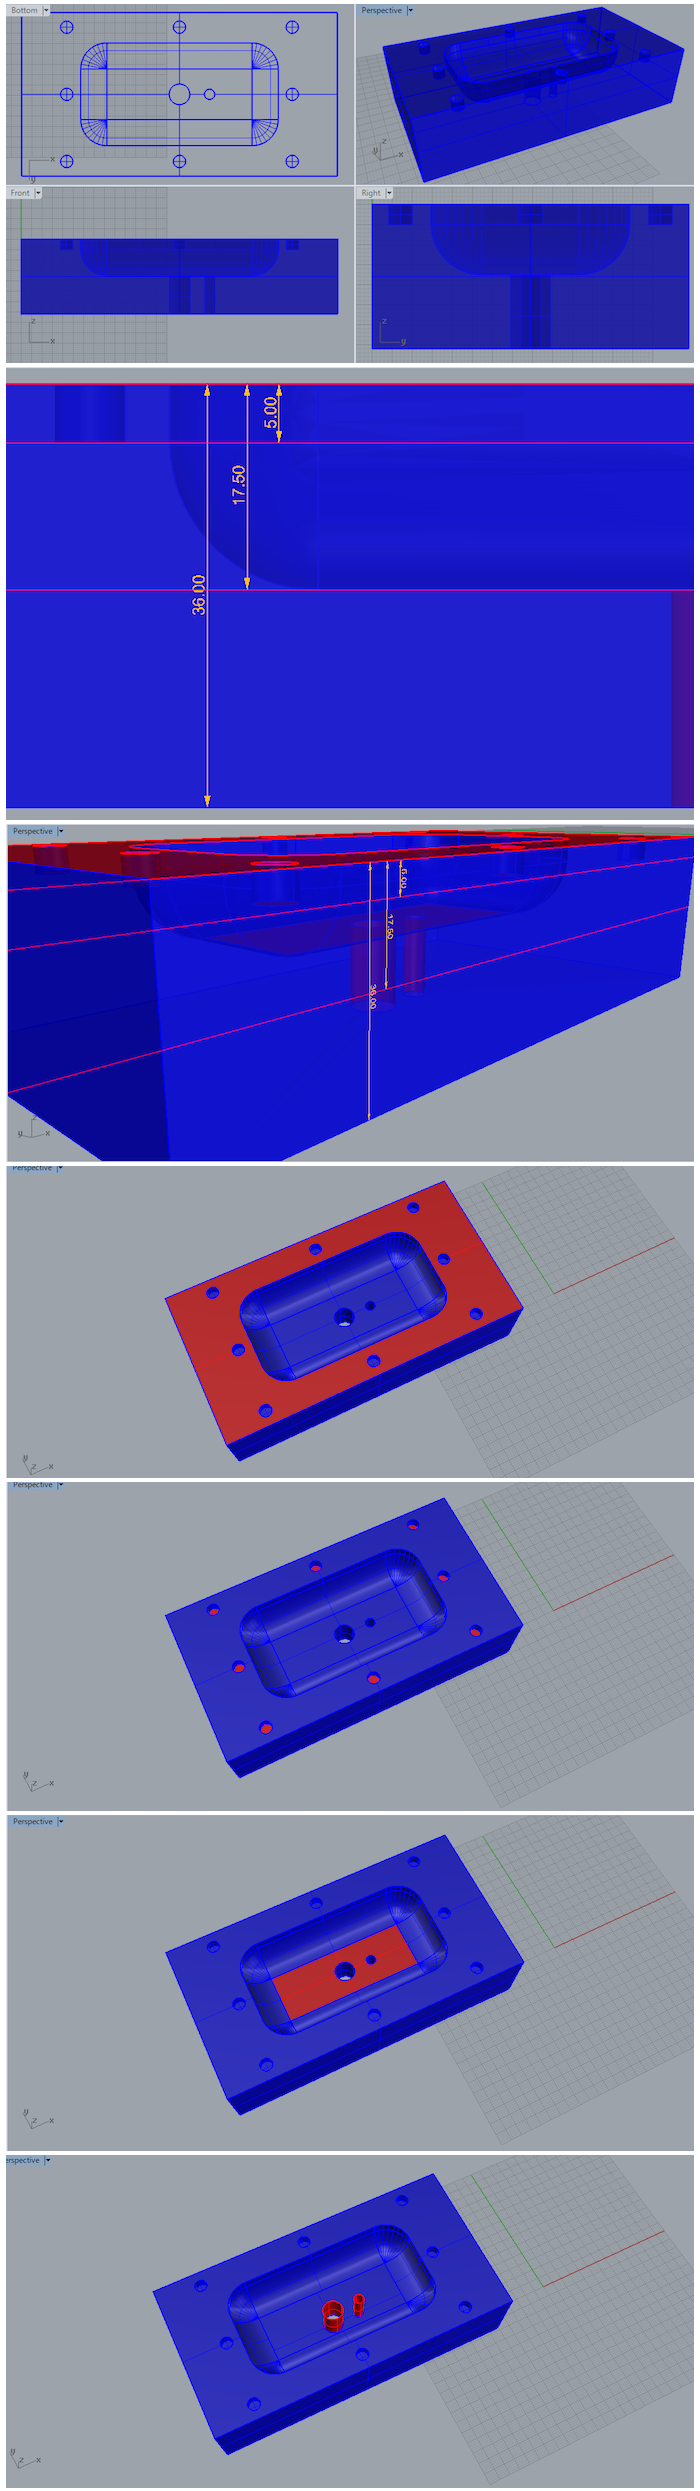
Designing the mold
This week I wanted to create the bottom part of my game unit. You can see the design on the fifth week assignment, 3D Scanning and Printing. I didn’t included the weals this time. As I couldn’t decide if I needed to plan the negative side or the positive side for the molding, I planed both of them. Eventually with my instructor advice I decided to milling the wax into the negative side form for the molding, and to cast it directly into the positive form, to the final product shape.
download 3dm.file
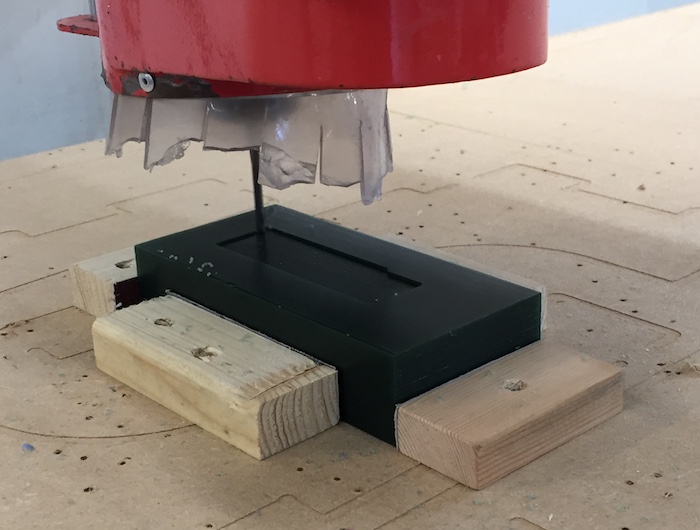
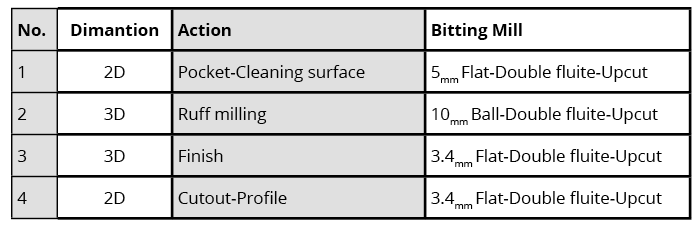
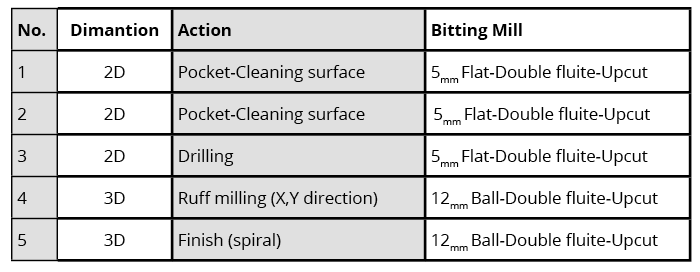
Making the files for machining
This is the details for preparing the milling files. The molds divided to several different level’s surfaces. Each surface dictates a separate milling action.
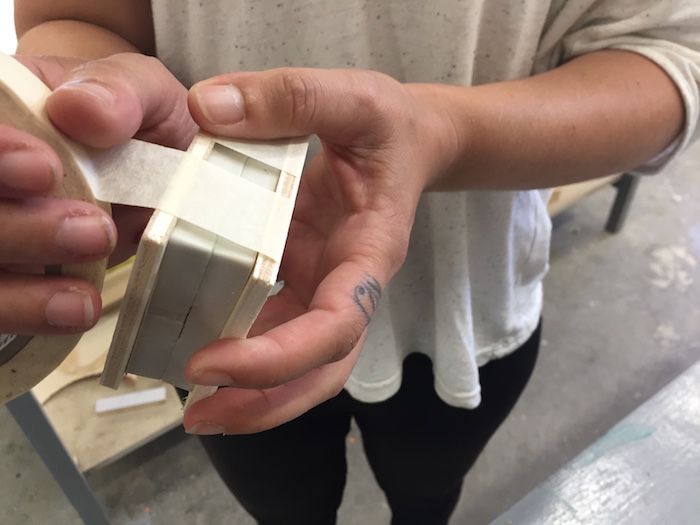
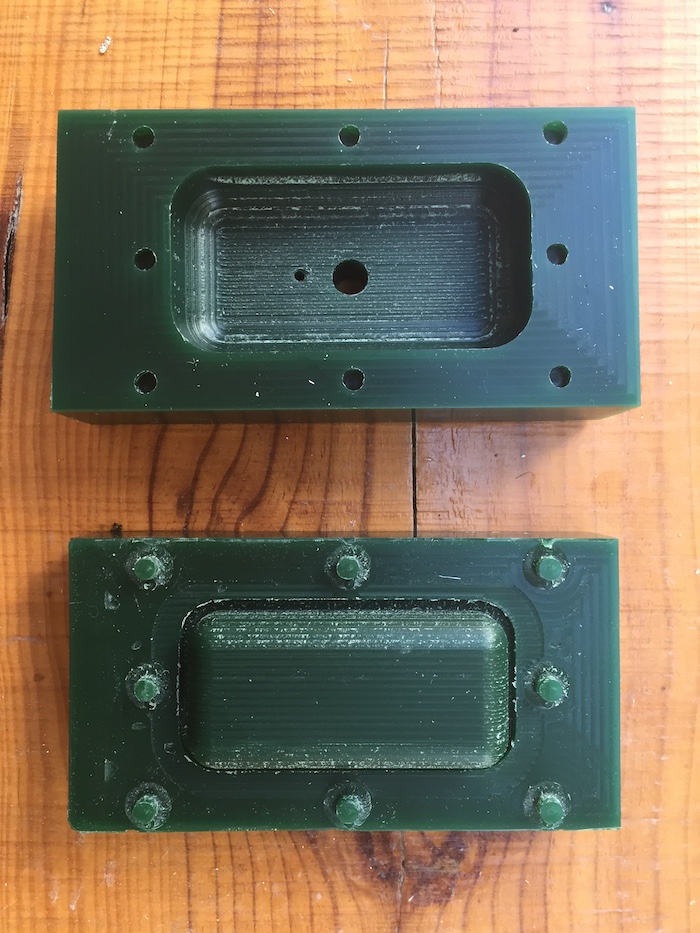
The mold's finishes
Some adjustments been made in order to assembling the parts together. Reshaping the molds holes and pins edges to fit together by “breaking” their grads and smoothing the molding surfaces for achieving a finer result in the casting.
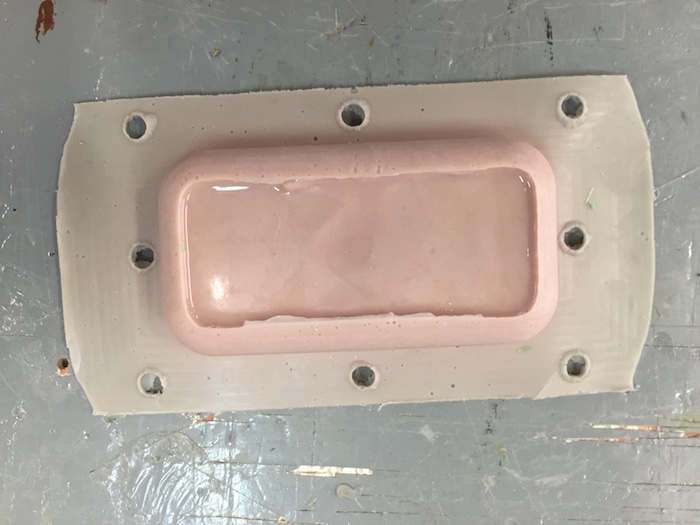
Casting
After assembling the molding parts together I sealed them and prepared the silicon SORTA-Clear 40 for the casting. During casting I had to insure that no air bubbles will be caught inside the mold. It appear that the silicon was old and it took allot of drying time.
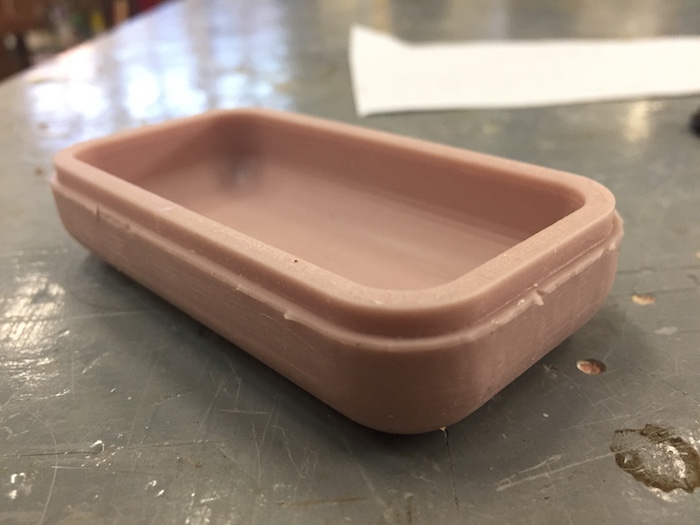
***In Spite of my efforts an air bubble caught on the bottom of the molding and prevented the material reaching there***
Group Project:
In order to follow the weekly instruction assignment and creating a “positive, negative, positive” process, we made a group project.
download 3dm.file download stl.file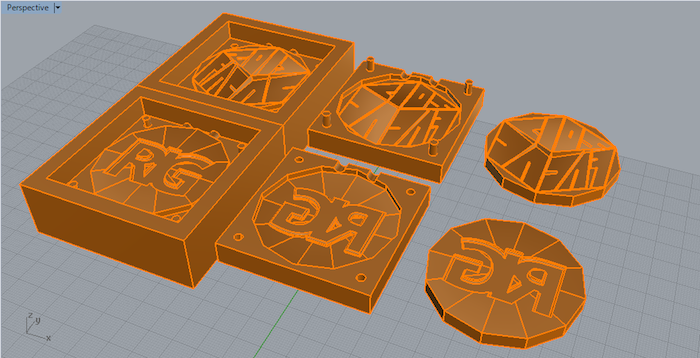
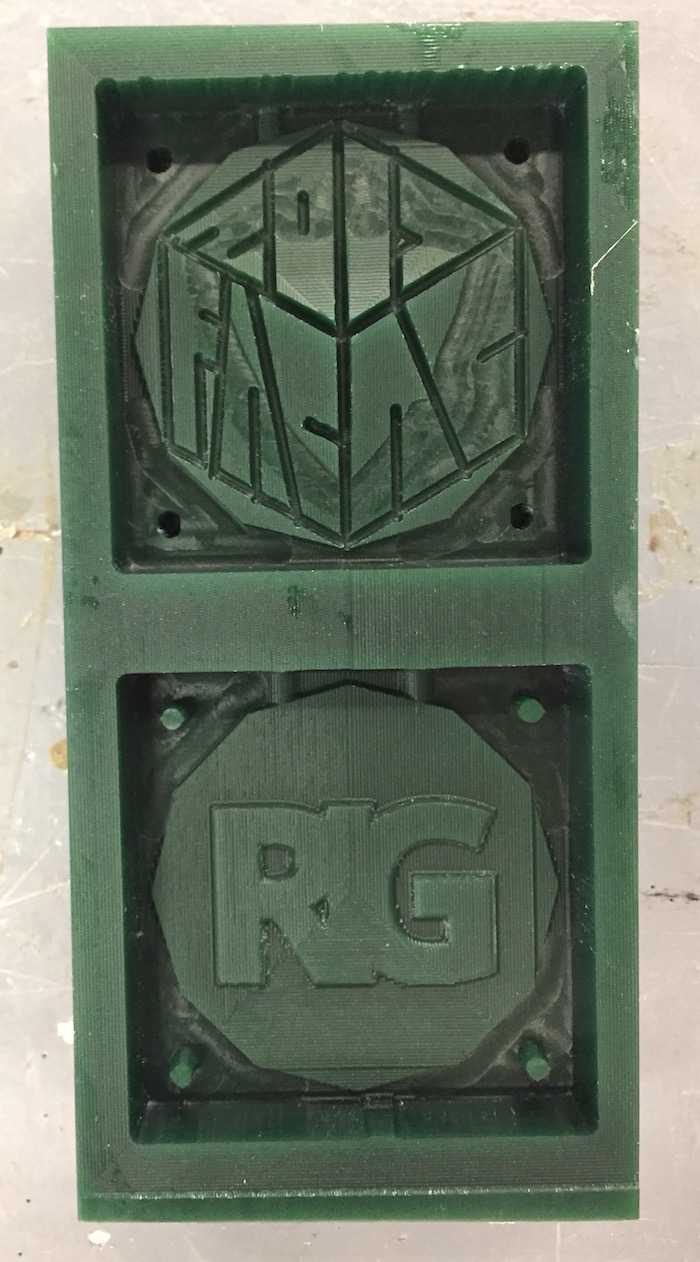
Milling a wax mold
First we design a two sided medallion. Then divided the medallion to two ‘positive’ molds parts each part has a different surface of the medallion. The parts were placed in a “bath” for creating the ‘negative’ molds while taking into account the sizes of the wax brick.
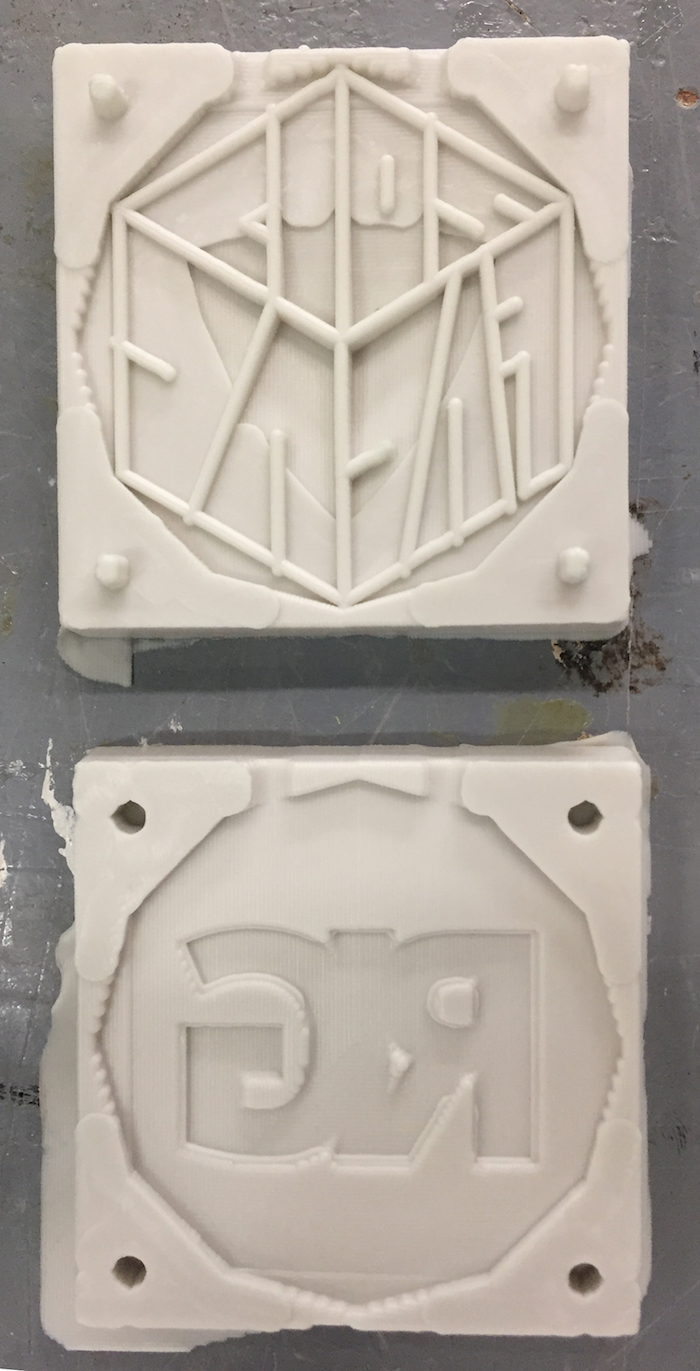
Casting the negative mold
Casting silicon into the wax mold in order to get negative molds of the medallion two sides. We used a soft material with a one to twenty proportion.
Casting the medallion
After three hours drying we removed the silicon mold from the wax. We sold the parts together and cllamped them with pieces of wood. we cast plaster Inside the mold and placed it on top of a vibration table to rescue out the air.
After another three hours drying we got the medallion!!!