WEEK FIVE-3D-DESIGNING AND PRINTING
Ultimaker 2
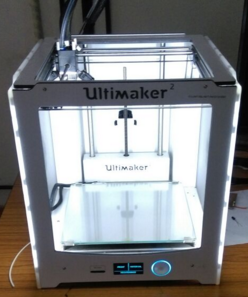
Our lab posses 2 3d printers that is ultimaker and stratasys dimension,This week i am using ultimaker 2 which has print speed of up to 300mm/s and 0.02mm layer resolution
Materials Used for 3d printing
I am going to use PLA (Poly Lactic Acid) for my 3d design
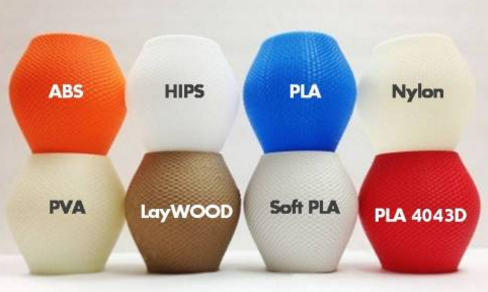
these are the various 3d printable materials available in the market, each day technology is expanding now we can 3d-print customized chocolates.

image showing the melting point an other factors of various 3d printing materials including PLA.
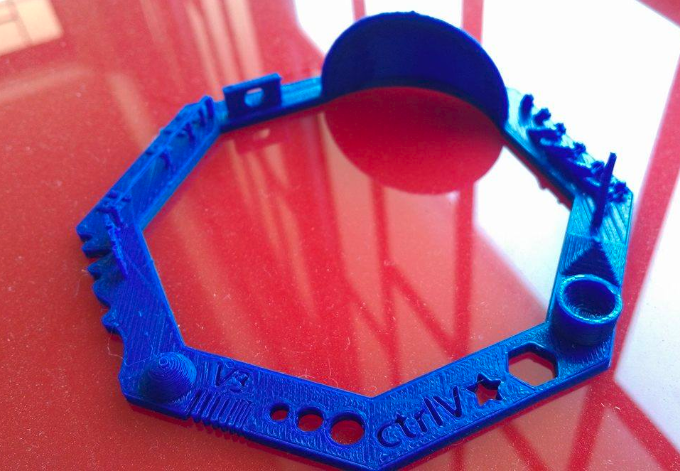
We used the testfile stl downloaded from thingiverse.com from the link http://www.thingiverse.com/thing:1363023 and tried to print it
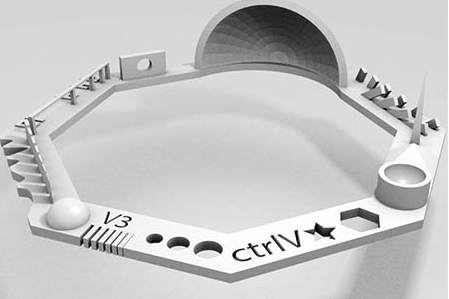
this is a test to check various parameters of 3d print
- Nut, Size M4 Nut should fit perfectly:
yes got perfect fit - Wave, rounded print:
Looks fine - Star, Sharp Edges:
yes - Name, Complex Shapes:
Look fine - Holes, Size 3, 4, 5 mm:
Came out nicely. Measured 2.8,3.74,4.7 - Minimal Distance: 0.1, 0.2, 0.3, 0.4, 0.5, 0.6, 0.7 mm:
0.5 mm was the minimum gap that was clearly visible, smaller than that wasn’t - this is probably because we were using the 0.4 mm nozzle size. - Wall Thickness: 0.1, 0.2, 0.3, 0.4, 0.5, 0.6, 0.7 mm
Printed only 3 walls. This too would be because of the nozzle size. - Bridge Print: 2, 4, 8, 16 mm:
Dimensions match - Sphere, Rounded Print 4.8mm height:
Was around 4mm. - Overhang: 25, 30, 35, 40, 45, 50, 55, 60, 65, 70°:
It was able to print all
Here
Scope and Limitation
In this week what i understood is that there are much application that we can put 3d printer into where recently we have scene fully 3d printed cars, human organs ....... this machines altogether helps to get job done under time constraints and made sense to the keyword "Rapid Prototyping"
eventhough it is minimizing the cost and other constraints there are still to go for 3d printinting technology ,we got a "ULTIMAKER 2" we cannot make all complex structure since its layer by layer grafting of the materials ,nothing can be brought up in air but upto an extent we can avoid printing in air by giving support materials,but still it has limits,also i felt it as very time consuming, the maximum size of objects that can be made in ultimaker 2 is
210x210x205mm. (length,breadth,height)
Non subtractable design
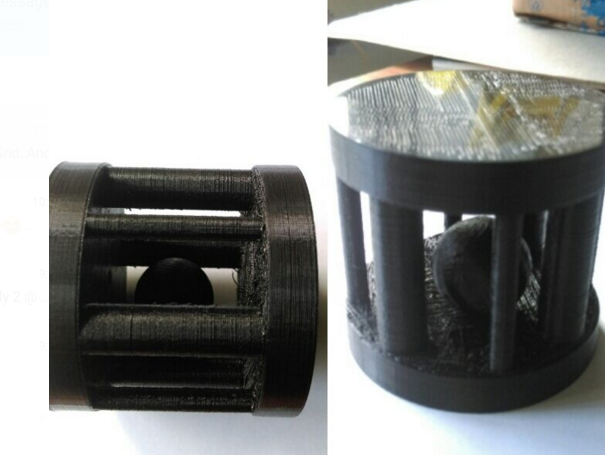
I started thinking what to make, then decided to make a cage like structure with varying cylindrical wall radius and a ball inside the cage so i am think the ball can move inside the cage freely and if you shake it makes a sound thats it! Started designing in rhino what i did was made a cylindrical base and made walls by 2 varying cylinder thickenss and placed a sphere inside it and then closed the other side with the same base dimensions it looks like this:-
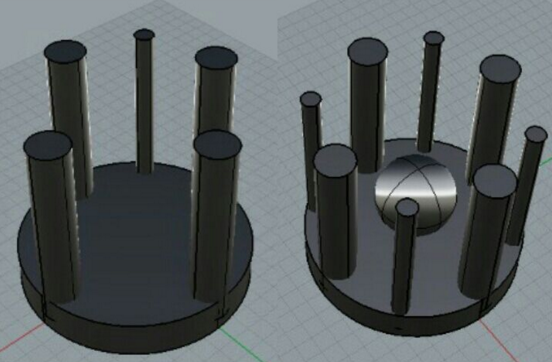
the above image represents the design with and without the inner sphere, below is the screen shot of my design.
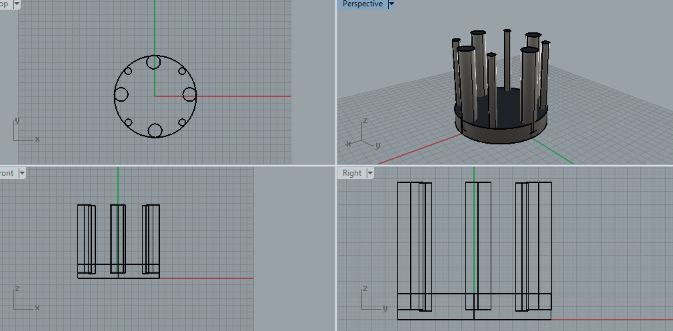
Its almost done..! no problems eventhough i did'nt gave any support material , it went ok
I loaded the same in Cura and checked the size time and material consumption and generated gcode of the same. i am using Ultimaker 2 here.I have to just load the gcode file to the SD card
i have the set the speed to 90% so as to obtain little more finished product and it took about 06:00 hours to print the cage
so the entire process be like:Make Design(used Blender) -> save it(.blend) -> Open it in Cura->Export to gcode->Print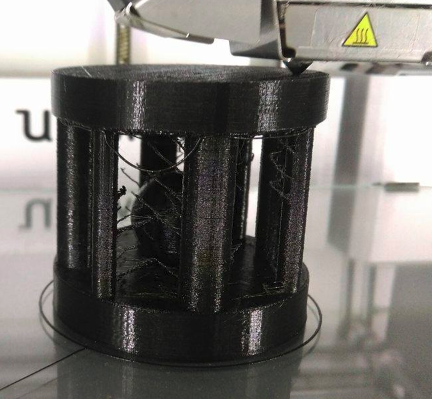
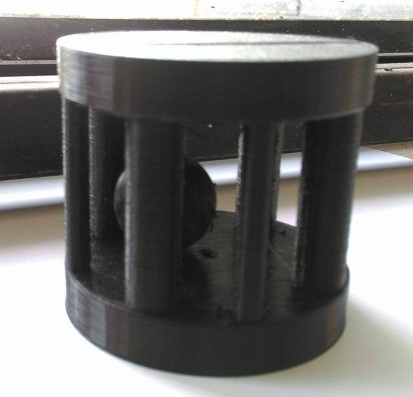
After finishing the print i have finished it up with a paper knife and this is how it looks like.
Why its non-subtractible?
What is non subtractive?This design is non subtractive since traditional tools cannot make the inner sphere inside the cage, here the inner sphere is movable.
oldest form of design where it involves removing material, as in wood carving or stone sculpture, to create a finished work.
Cute Chair
while searching for the designs i saw a chair design which felt so cute for me so this week i will also try this chair too
Eventhough i have used support material there is problem with the other side of the handrest of the sofa it actually printed in the air for the first few layers.
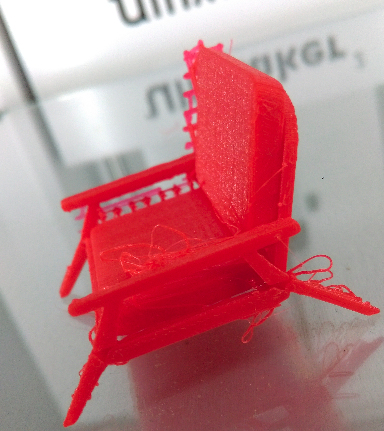
Just printing wont finish the job there is more thing to do which gives the final finishing to the product , Main tool used is dremal and knife.
Changing the Material
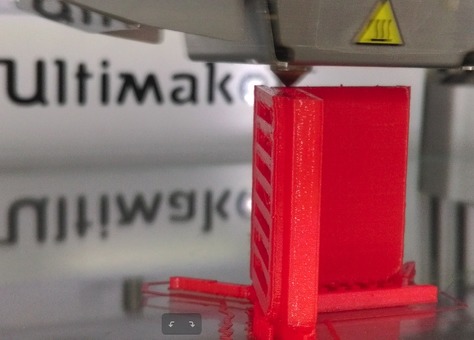
Eventhough i have printed many times i have'nt changed the material out of 3d printer so for this time i am using a simple multicolor design so as to try the same,just started to learn changing material and tried for multi layer 3D-printing and came to know about mosaic manufatuaring which is pretty cool. For now i have designed a simple cone shape and loaded the design
In Cura if we switch to expert setting we are able to access few more advanced options.
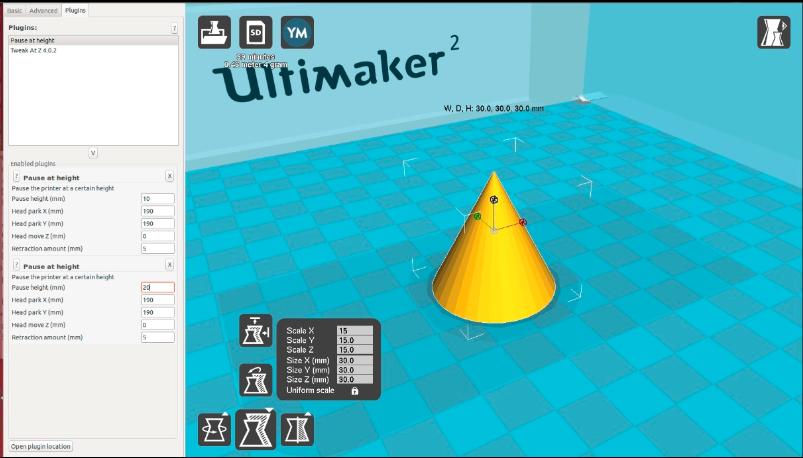
Cura->Expert->Switch to full settings->plug ins->pause at height
Here i just made 2 break points in between the printing,my entire design is 30mm height so i made two breaks at 10mm and 20mm respectively so what i am planning is a cone with three different colour in the same design
Scanning
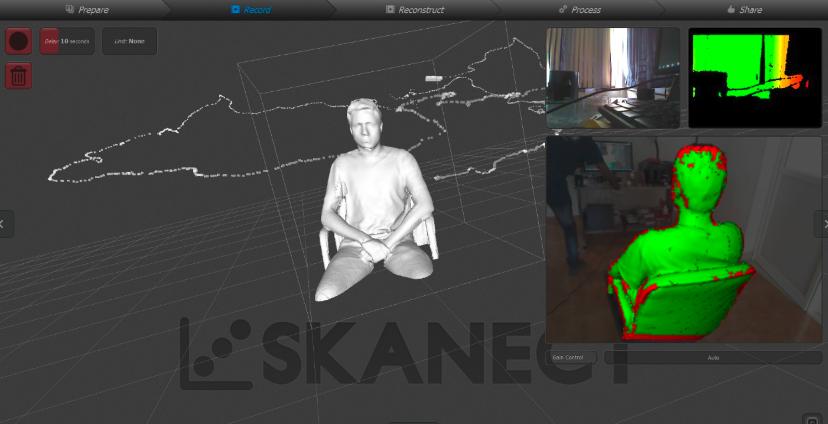
I planned to scan my friend and also an object,Currently using Kinect.i used two softwares to scan the objects
- Skanect
- Kscan
- 123D CATCH
- Momento
Secondly i have tried to scan objects, but for the first time i planned to scan the reading lamp but the part between the lamp and the base is not scanning properly
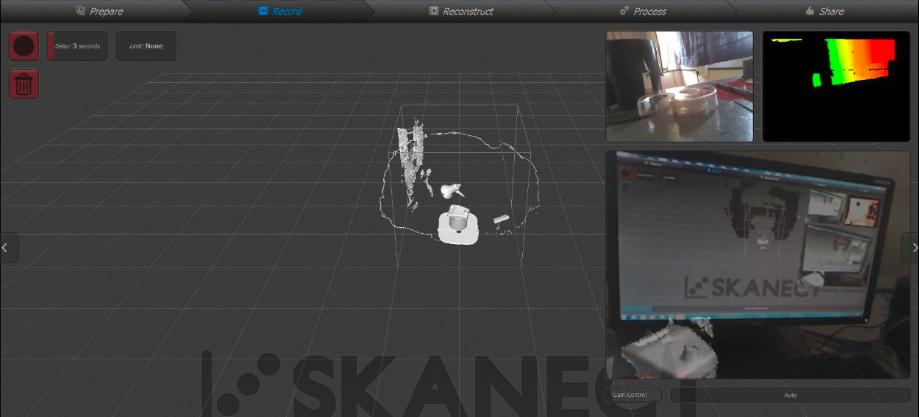
so i planned to scan a driller machine,and it goes here..
I have Tried Autodesk 123D and MeshMixer By help of this Tutorial.I just tried to scan the same driller machine and it looks like this,What we wanted to do is to capture some images in all the angles and then allow sometime to process
i have Tried Autodesk Momento with this Tutorial.scanning using Modela
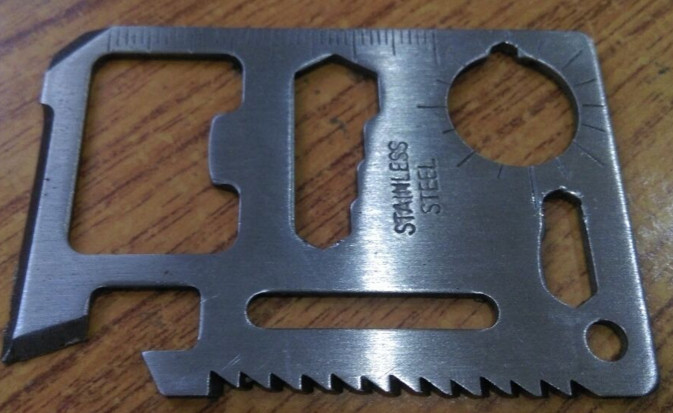
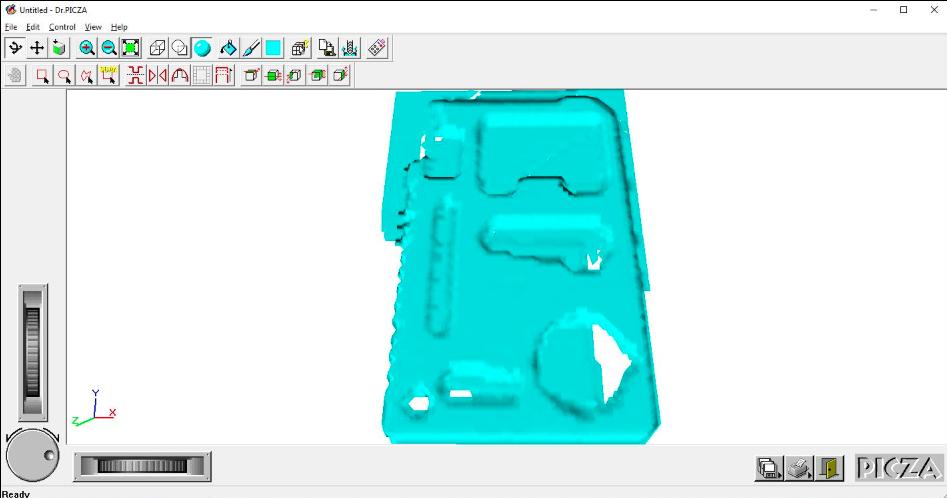
Today i am going to scan a multi tool i got with roland modela MDX-20, for that i have change the head and replace it with the scanning module.I am going to scan a multi tool i have
i am using the software so called DR.PICZA in which i will set the bedsize and other settings
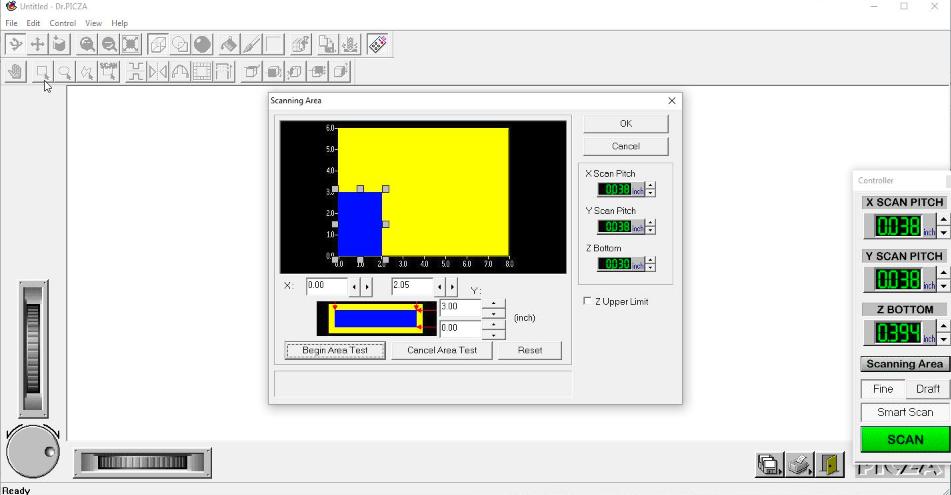
The output was not pretty very well for me, it looked like this:-
DIY 3D-scanners
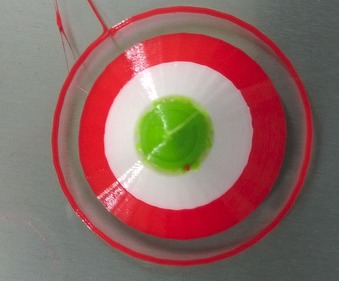
- Milk Scan
- Laser Scan Methods
I am learning new ways of 3d scanning techniques like milk scan, came to know that any opaque liquid will do the same, a object will be dipped in any opaque fluid and a camara is placed above and gradually little by little fluid is filled such that it sinks completely and images are captured at every stage and then the images are coverted to monochromatic images then have to take the images that shows each depth of taken object
Milk scanner example
use laser pointers in this method which is high intensity points so as to mark adjescent points
You can download Files here.