Composites
Types of composites
Aliphatic, cycloaliphatic and aromatic amines are all employed as epoxy hardeners. Amine type will alter both the processing properties (viscosity, reactivity) and the final properties (mechanical, temperature and heat resistance) of the cured copolymer network.
Araldite

This is the available epoxy resin, this is adhesive in nature its produced this new synthetic resin adhesive for bonding metals, glass, porcelain, china and other materials. Araldite sets by the interaction of a resin with a hardener. Heat is not necessary although warming will reduce the curing time and improve the strength of the bond.
Design 1
First of all for design i was after creating topographic mapping,
In modern mapping, a topographic map is a type of map characterized by large-scale detail and quantitative representation of relief(landforms and terrain), drainage (lakes and rivers), forest cover, administrative areas, populated areas etc.


I am planning to map the topography of my near by hill station,so called ponmudi which is one amoung the highest peak in kerala, for grabbing the satelite imagery i used google sketch up with the help of google-earth(in built option in sketch up make)

In google sketch up there is an embedded option to add location where we wil get topographic imagery by enabling the "Show terrain" option and if we keep on adding adjescent places from map it automatically stitches with the rest of the images
NOTE:- Its always better to grab overlapped mapping otherwise there is chance for inconsistant sticthing of images.

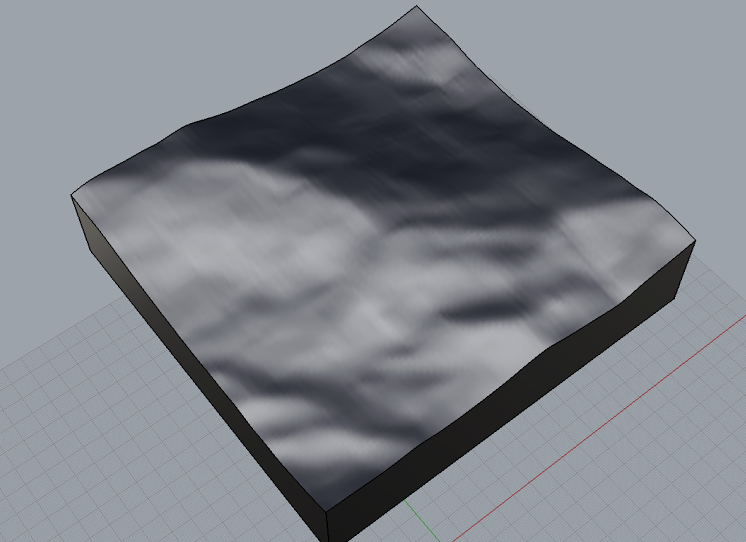
once done i saved it and imported the same in rhino ,where i ungrouped and removed un wanted polysurface also draped the plane.In that i obtained the following surface.
what i obtained is the surface i need to bring to a surface and substract the surface so that i will obtain a cube like structue where once edge of the cube which is topographic image so that i can mill it easily
Why did'nt milled "Design-1"
For topographic mapping eventhough i selected a peak ,the variation to express the same for a small area is not seems impressive, especially i amplanning to used 3 layered fibre (cloth-sack mesh-cloth) so the little variations wont be that impressive or promising
design 2
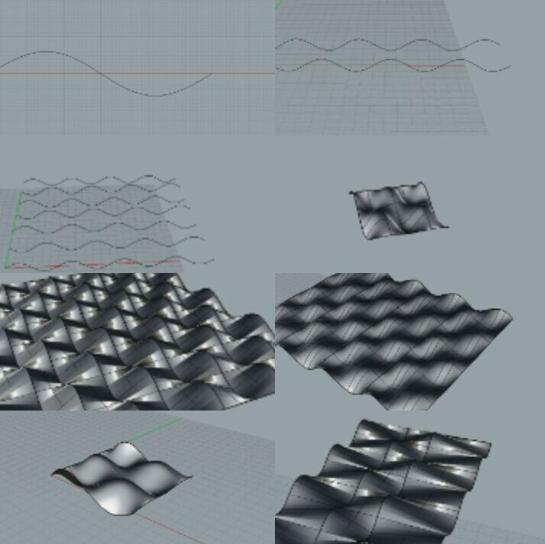
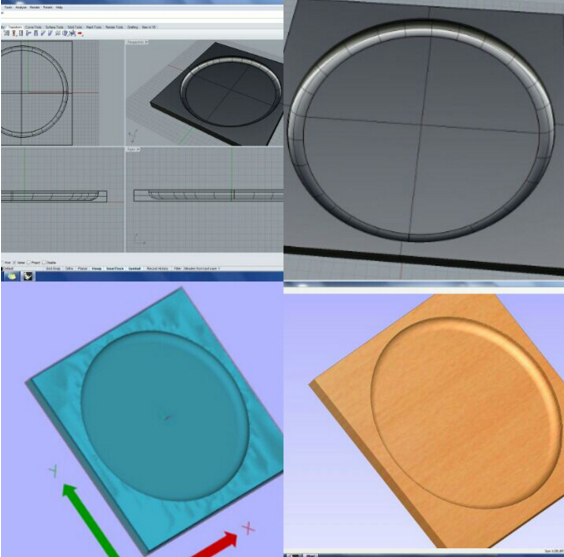
Started designing various surfaces using rhino using sweep and loft functions mainly below are the some
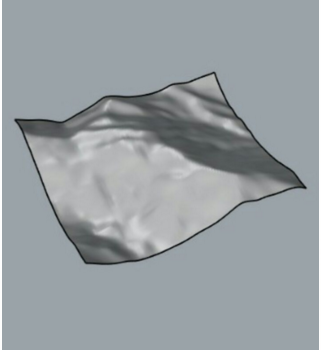
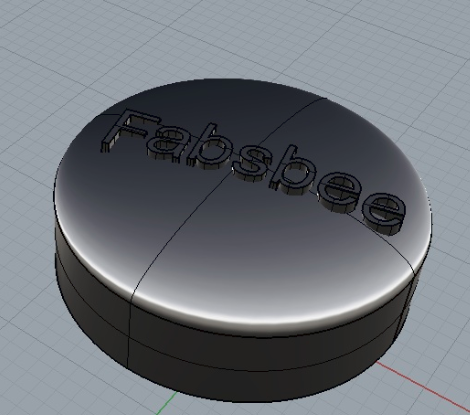
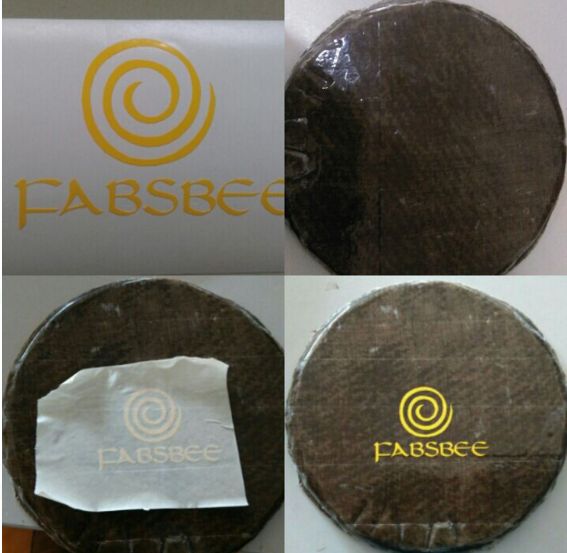
I decided to make a "fabsbee" (frisbee) atlast

started designing in rhino first of all i made the frisbee shape and make the rest of the workplace a pocket,then on second thought i made the negative that is a pocket in shape of frisbee which looked like this:
since frisbee swift through air the extruded writing will effect its aerodyanamics,so i made it simple like below:
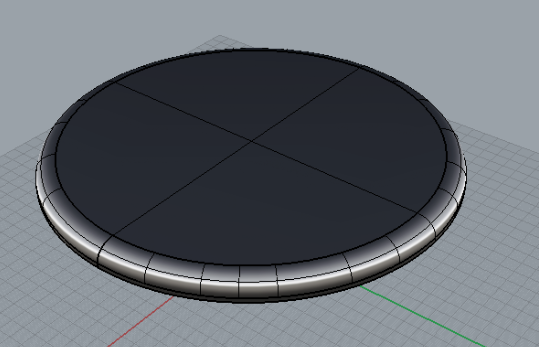
mad the same as negative design so i will obtain a pocket in the shape of frisbee.
Making process
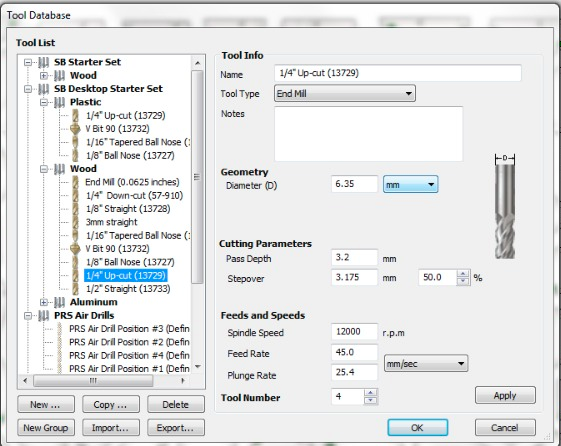
shopbot
Milling the mould,loaded the piece since its the 3d structure i will be using part works, its the first time i am using part works earlier i was used up with Vcarve software,gave the below settings
this is how roughcut looked like
 finishcut
Error
#1
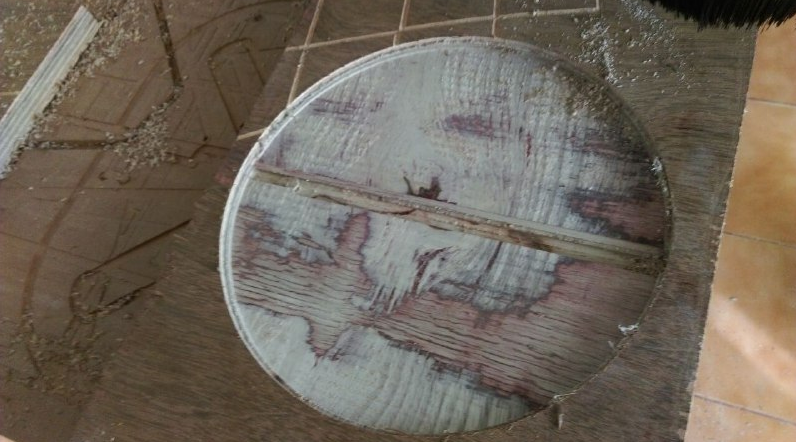
I dont what happend to my shopbot at some point of time it gone wild and gave me a surprise a hard rough line on my mould, made the mess
what i did was i took the soft wax and stuffed inside the extra cut surface, and once stiffly pressed and made firm i used a small waste piece of craft wood to wipe of the extra wax on the same,that part was suprisingly better than finished surface
#2
i was using a small piece of wood which exactly matches my design so when i did the outline cut , i calculated and there was place for the same but i got somthing like this
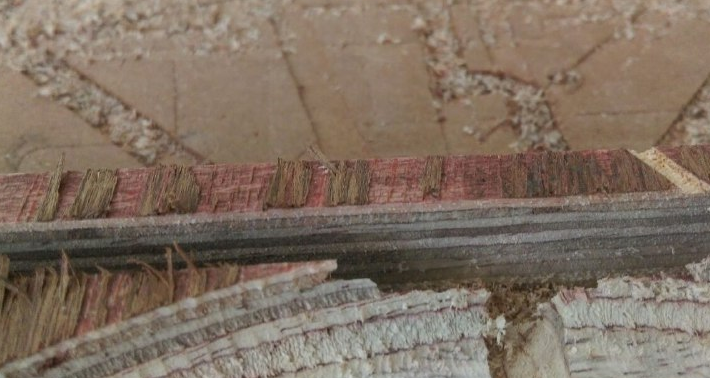
for this i used waste piece of the craft wood and cut the same to fit exactly to the mould height and glued it to such a way to neglect the gap or hollow part formed

composite
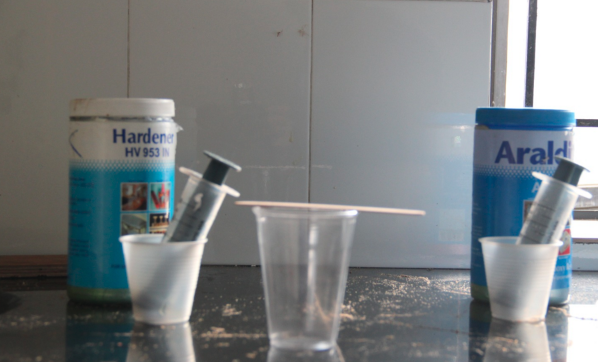
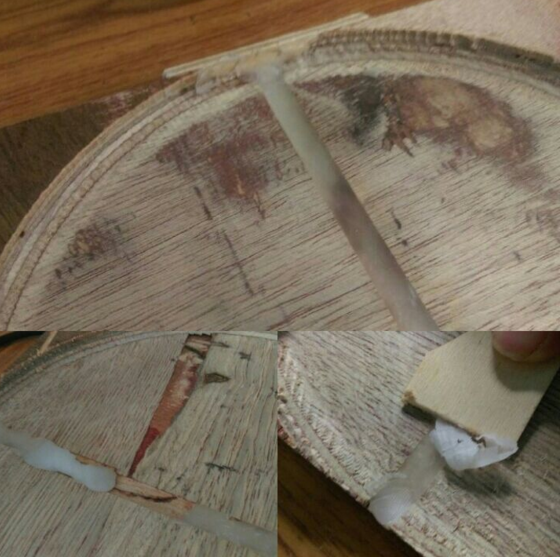
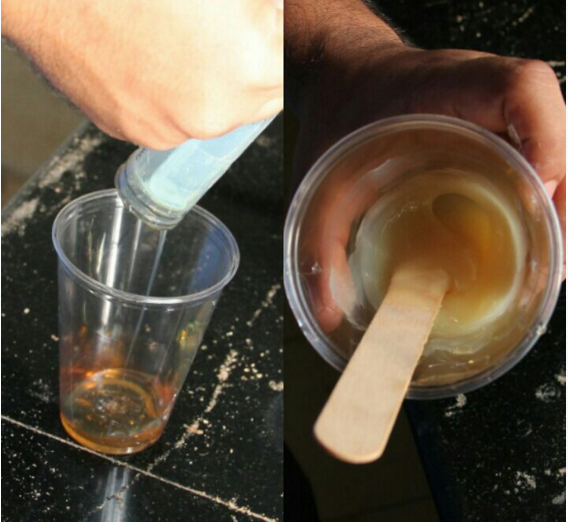
I need to use 1:1 propotion for resin and hardner
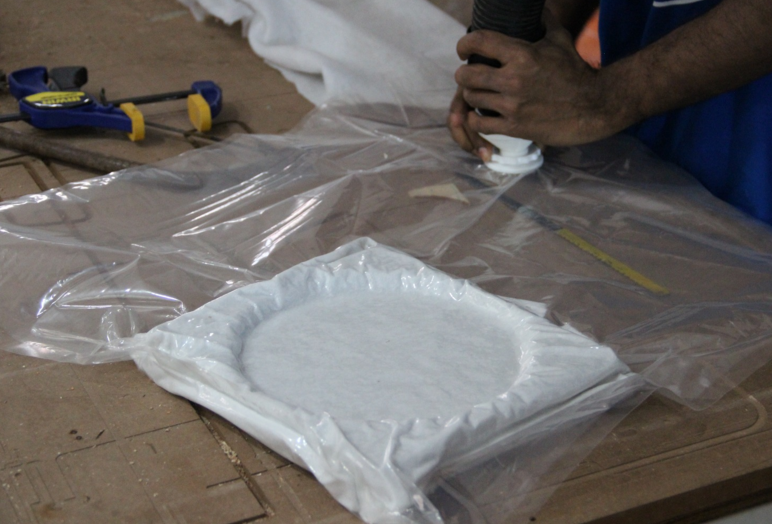
Here i am using the cloth and sack which is marked and cut along the path which fit into my mould

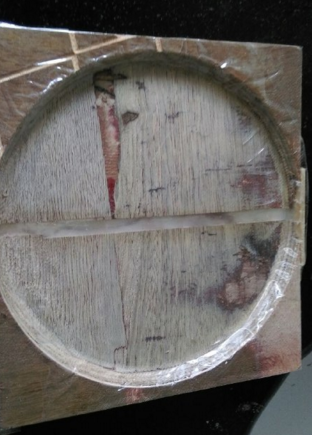
plastered the mould inorder to avoid the contact of epoxy with the wood,since while setting it will set with the wood
placed the first layer of cloth which is coated with the epoxy and using the stick i made sure that it went fine on curved edges
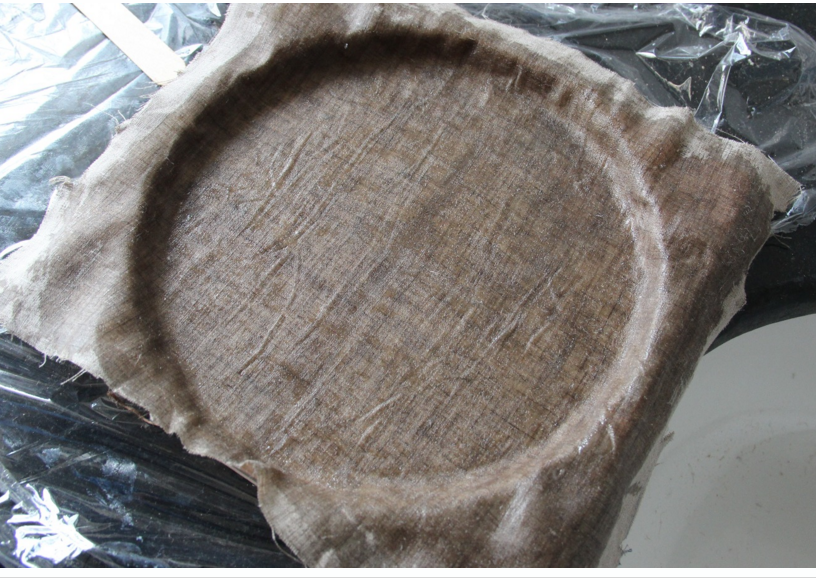
like wise placed the second layer with sackthread mesh and third layer with cloth

Coverd it with the plastic wrapper and put some small holes to keep the air out while vaccuam process
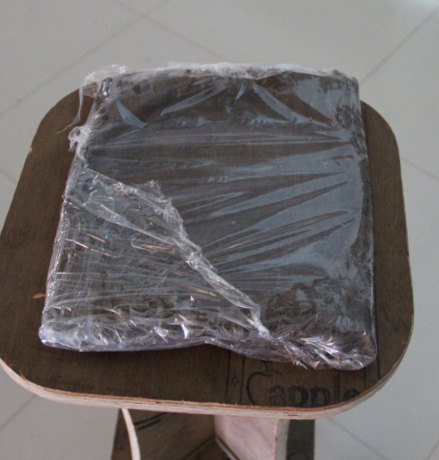
once done i kept in neat white cloth to to prevent the spread of epoxy eventhough by-chance its leaked,
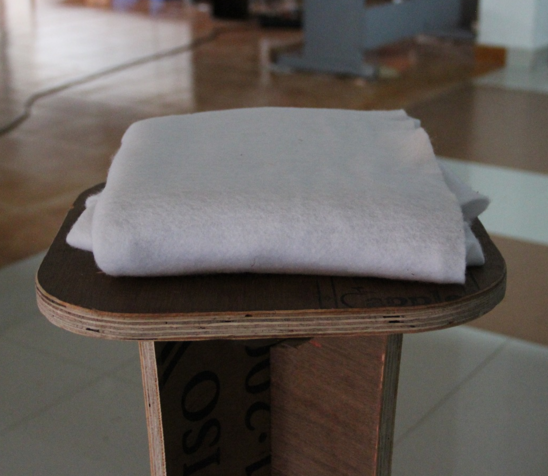
placed it in the vaccuam bag and using vaccuam cleaner to keep it tight
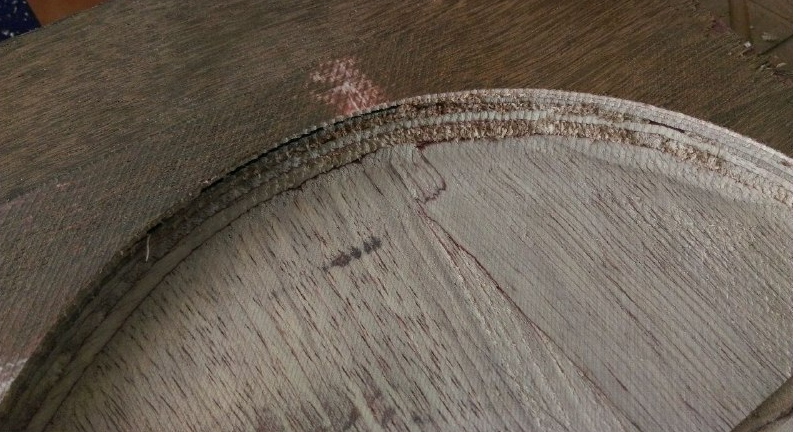
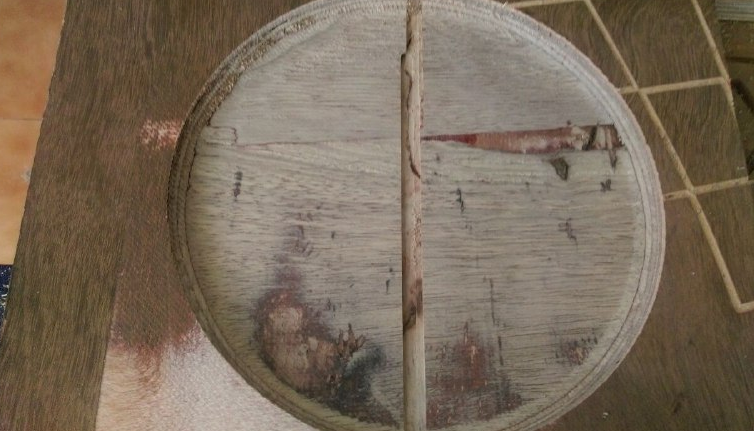
removed from the vaccuam bag ,and also peeled of the wrapping and this is how it looked
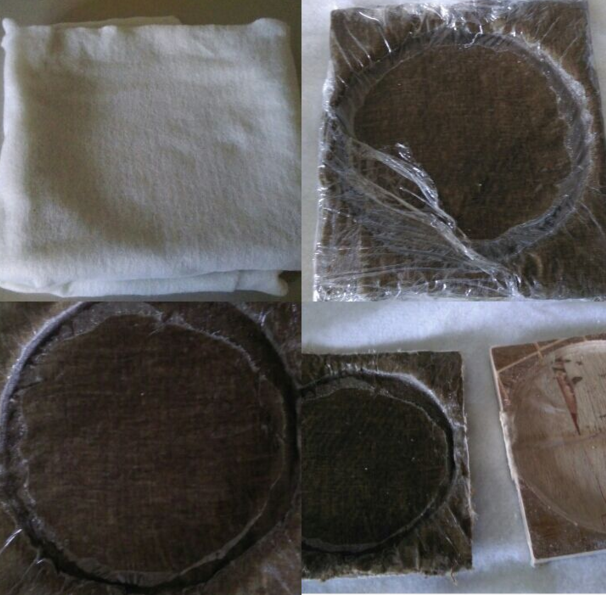
Both side of the fabsbee

pic and hero shot
once done most happy moment was that everyone became childish in between hectic work hours.
You can download Files here.