Interface and Application Programming
Introduction
There are various Interfacing protocols that include bluetooth,wifi,TCP,UDP,zigbee etcMy idea..!
Here what i am going to do is interface my mobilephone with the servo where bluetooth as transmitting medium,so what all i need
- Bluetooth module
- Mobile phone
- Mobile application
- microcontroller board
Here my ultimate aim is to make automated feeder system for my final project, planned to connect a 3d printer auger shape so as to work as a rotor which will slide the food from the container connected to the auger to food plate.
Interfacing medium ::bluetooth
what is bluetooth?
"Bluetooth is a wireless technology standard for exchanging data over short distances (using short-wavelength UHF radio waves in the ISM band from 2.4 to 2.485 GHz) from fixed and mobile devices, and building personal area networks (PANs)."
While learning about bluetooth i came to know a intersting thing about bluetooth logo, the logo is name after danish king,the logo is the merge of his initials in danish (H and B).
The basic operation principle of bluetooth is master-slave method, if one system is connected with other systems with in the range of 10 metres(Approx.) then such networked is so called as piconnect
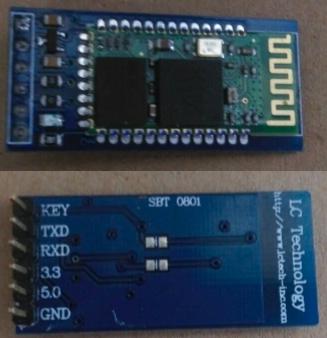
The above is the image that depictin the pinout of the bluetooth module,it has 6 pins,inwhich i will be using four of them (ie, GND,VCC (5.0v),Rx(Recieving end),Tx (Transmitting end) )
Board
I am using the same board used for driving my servo in my output week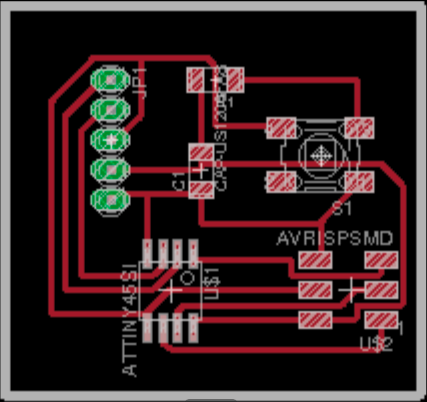
Making the Application
What is snap and scratchSnap! is an HTML5 reimplementation of BYOB, a modification of Scratch 1.4 that adds many new, advanced features. It's programmed by Jens Mönig , a former Scratch Team member, and Brian Harvey . Its codebase is completely different from Scratch's, but they're both based off of Scratch 1.4.
I am using MIT app inventor for creating my application which provide the gui to the end user to control my servo,which is scratch based developing platform
Once authenticated goto Projects -> Start new project and its done ,ready to go! Its very easy to use ,just drag an drop what all functions we need simoultennously we can see the screen and once dragged everything needed.have to switch to Block view
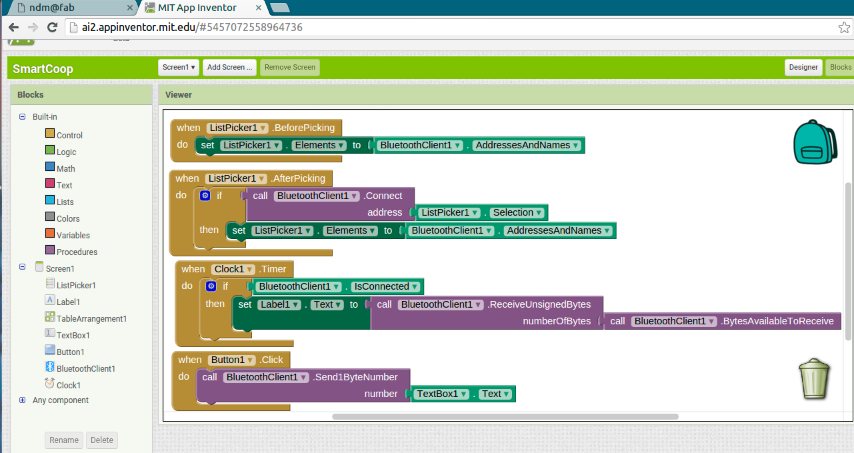
i managed to make these blocks, this Tutorial helped me.
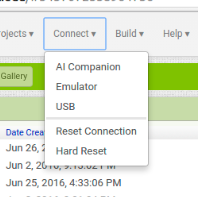
once done inorder to simulate it in our mobile need to connect phone with the appinventor with a QR code scan
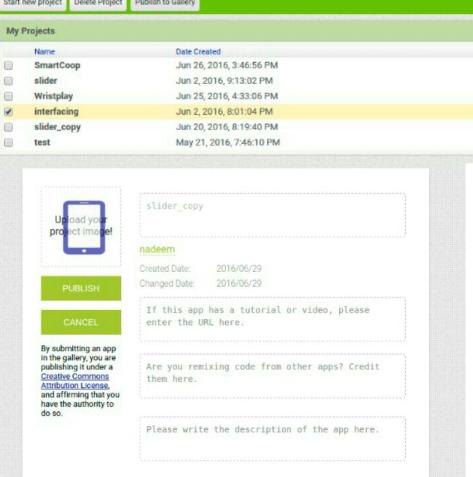
For publishing our finished app,as seen on the below image have to mark the project and click on publish on above menu then have to fill the manifest form of the Application
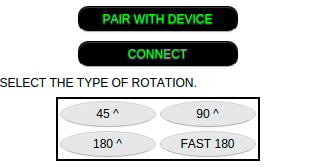
This is the screenshots of the application in my mobile

Later on i have tried changing the interface a bit which looked like :-
Once done with application i conneted the bluetooth and servo to the microcontroller,and burned the following code:-
          #include <SoftwareServo.h>


int pos = 0;

SoftwareServo myservo;

#include <SoftwareSerial.h>

   #define RxD 3

   #define TxD 4

   #define DEBUG_ENABLED  1

   SoftwareSerial blueToothSerial(RxD,TxD);

   int state = 0;


   void setup() {


       myservo.attach(0);

     blueToothSerial.begin(9600);

   }

   void loop()


   {


   if(blueToothSerial.available() > 0){

    state = blueToothSerial.read();

    blueToothSerial.write(state);

   if(state >=0)

   {


    for(pos = 0; pos < state; pos += 2)

  {

    myservo.write(pos);

    delay(15);

    SoftwareServo::refresh();

  }

  for(pos = state; pos>=1; pos-=2)

  {

    myservo.write(pos);

    delay(15);

    SoftwareServo::refresh();

  }

        }

   else if(state ==0)

   {


     blueToothSerial.write("Test");

   }

   }

   }
This is the final video showing rotation of the servo according to the intruction from mobile.
NOTE: In the above video the arduino is used to give VCC and GND to bluetooth module which was not provided extra pin for bluettoth in my board