


Mission & initial concepts
Assignment
Design and build a wired &/or wireless network connecting at least two processors
I choose to work with ESP8266-12E (2.4 GHz Wi-Fi) with could be an initial approach to Internet of Things
Concepts and Inspiration
This assignment is for me very important because seems to be the start of the understanding for Internet of Things a topic that i am researching. I think that the concept of Thinkspeak.com is fantastic!
Because of TCPIP and Wifi are very know for me i choose to work with ESP3266 (Wifi Module) and try many scenarios like TCP client and TCP Server
In order to make in easy to understand i am referring to web page:
http://www.thegeekstuff.com/2011/11/tcp-ip-fundamentals/
There you can review some basic concepts i am using here.
Files i used in this assignment
(From Fab Academy)
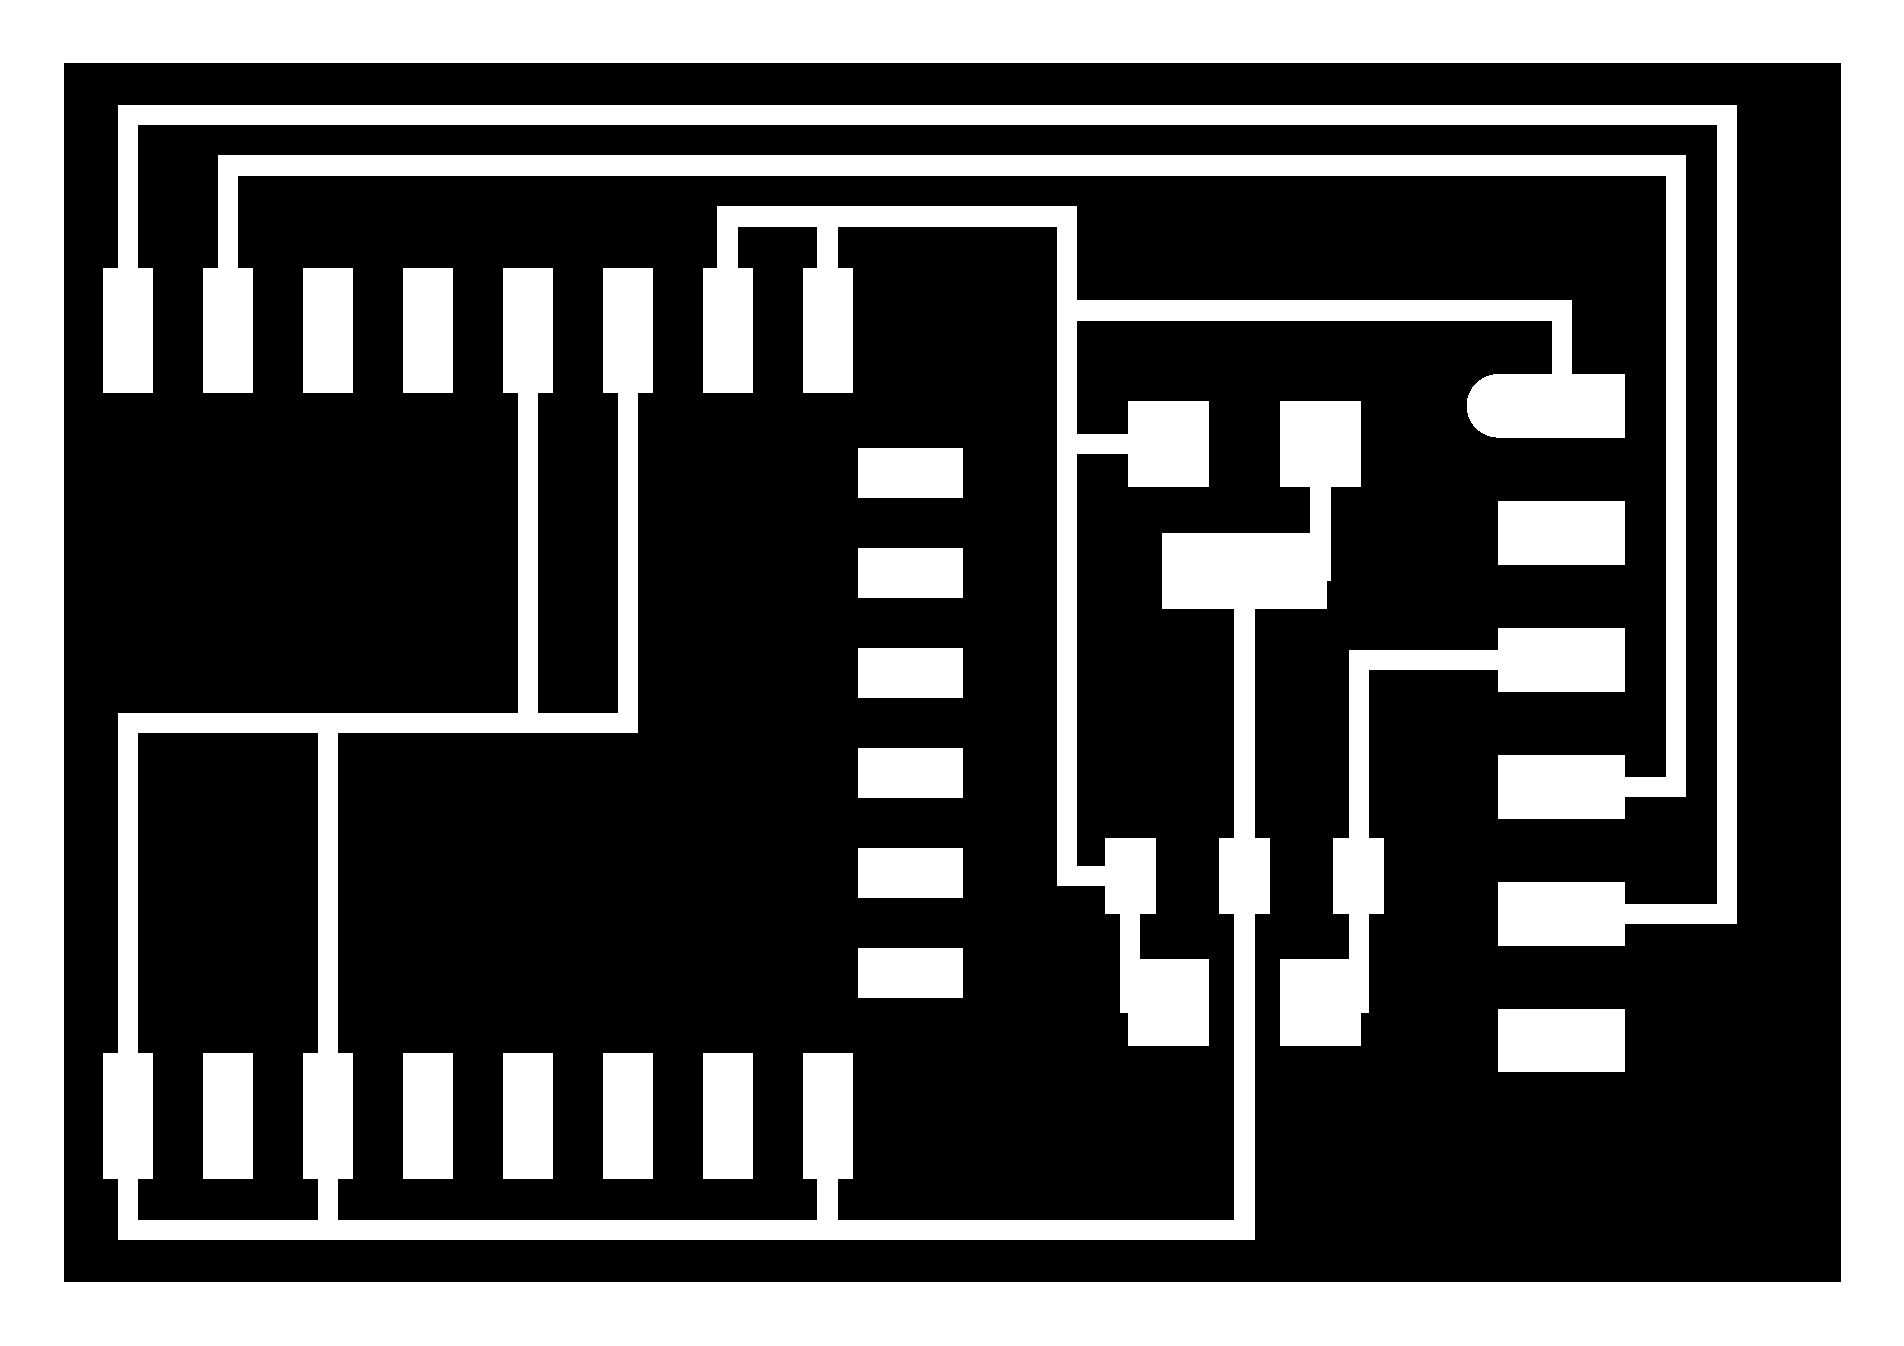
Electronic code
Board
http://archive.fabacademy.org/archives/2016/fablabesan2016/students/70/projectfiles/w15/esp8266.jpg
Components
Traces
Interior
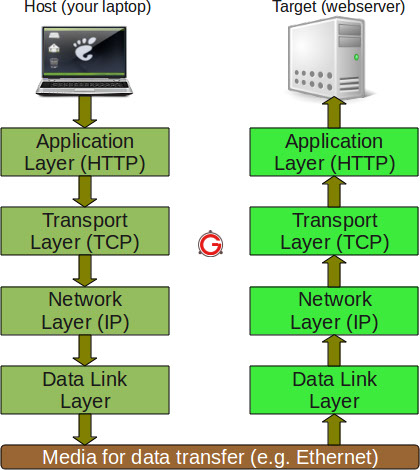
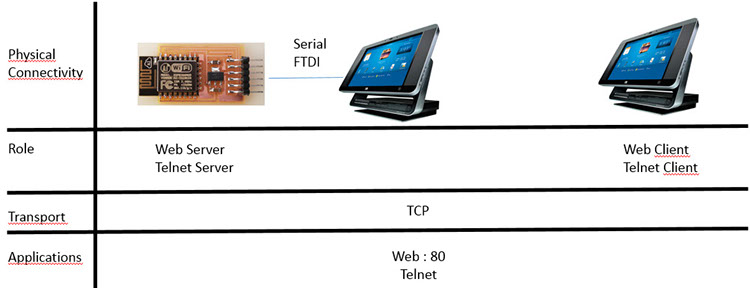
TCP/IP PROTOCOL SUITE
Communications between computers on a network is done through protocol suits. The most widely used and most widely available protocol suite is TCP/IP protocol suite.
A protocol suit consists of a layered architecture where each layer depicts some functionality which can be carried out by a protocol.
Each layer usually has more than one protocol options to carry out the responsibility that the layer adheres to. TCP/IP is normally considered to be a 4 layer system.
The 4 layers are as follows :
- Application layer
- Transport layer
- Network layer
- Data link layer
Application layer
This is the top layer of TCP/IP protocol suite. This layer includes applications or processes that use transport layer protocols to deliver the data to destination computers.
At each layer there are certain protocol options to carry out the task designated to that particular layer. So, application layer also has various protocols that applications use to communicate with the second layer, the transport layer. Some of the popular application layer protocols are :
- HTTP (Hypertext transfer protocol), in the testing I will use this protocol.
- FTP (File transfer protocol)
- SMTP (Simple mail transfer protocol)
- SNMP (Simple network management protocol) etc
Scenario 1:
Scenario 2:
Technology
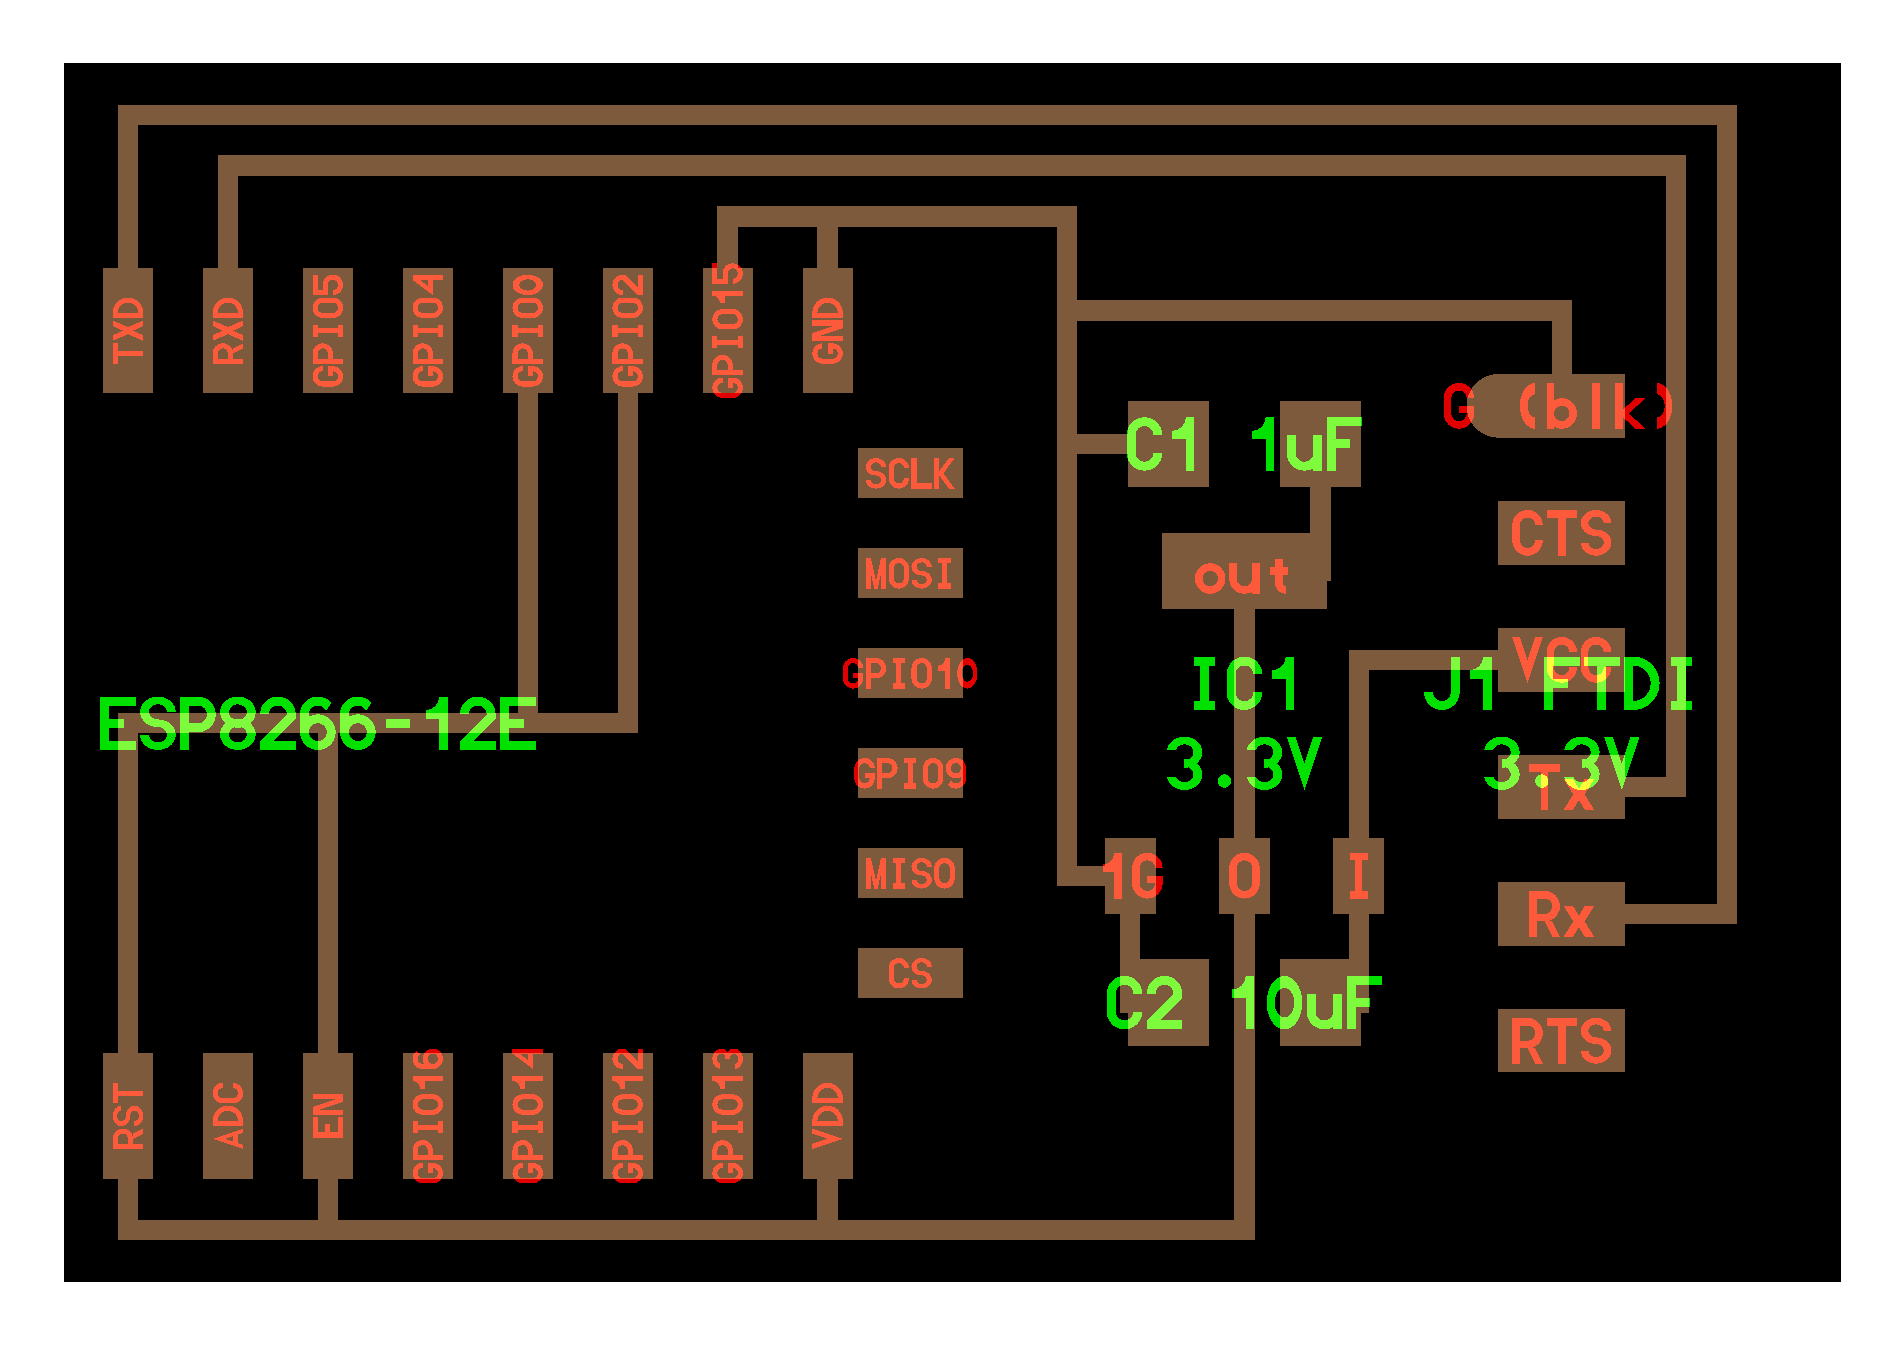
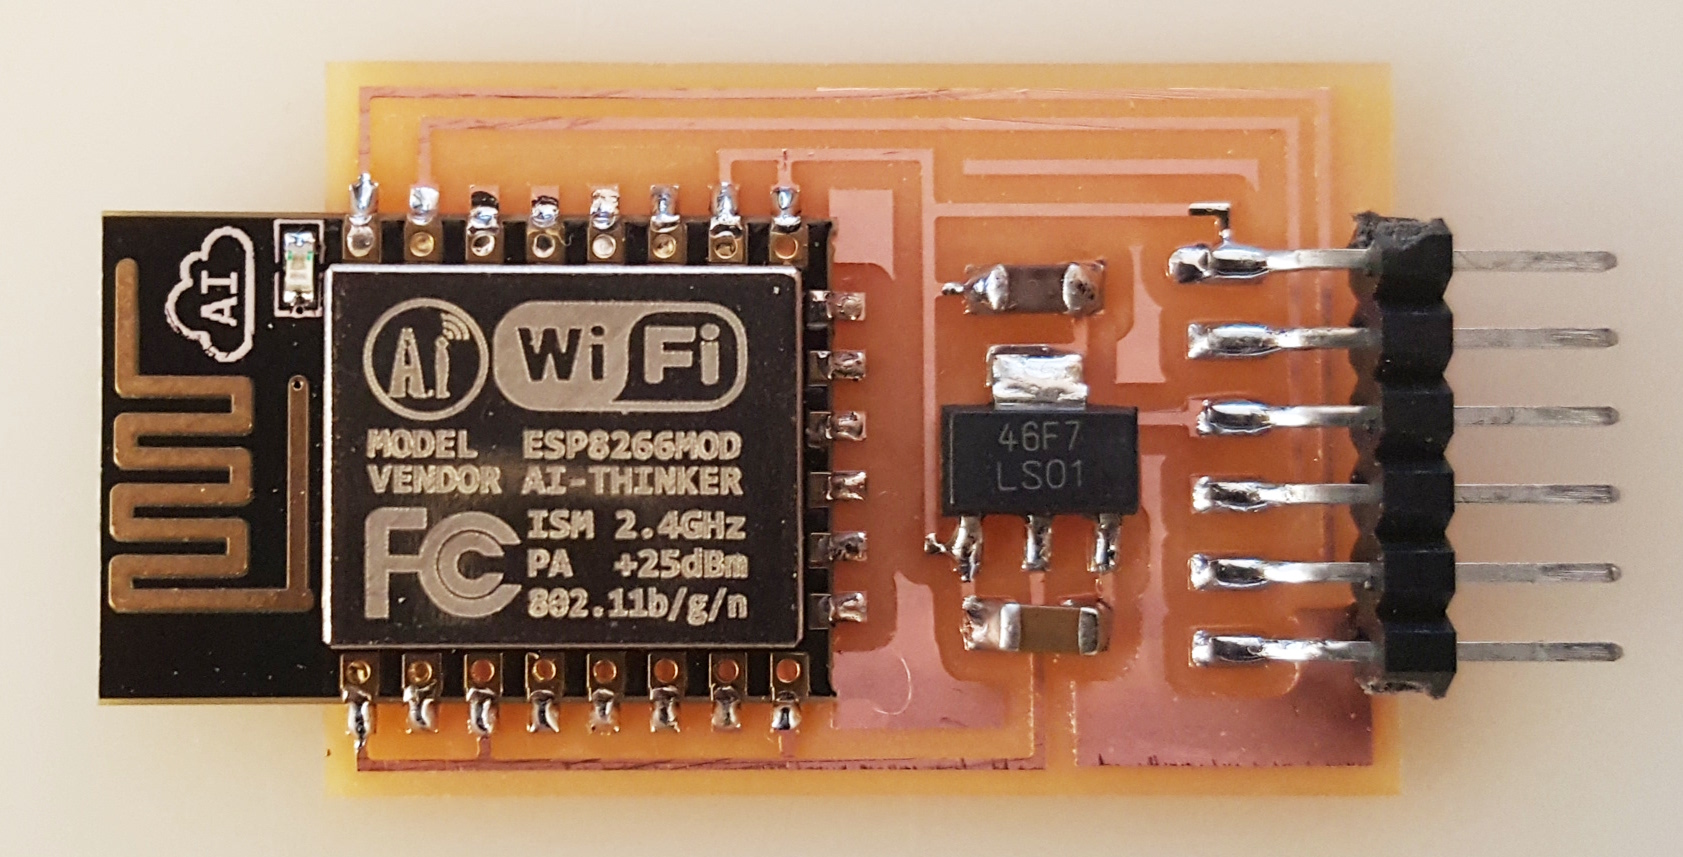
The principal element for this asssigment is ESP8266 that seems to be a star. Initially comes with a firmware that support commands via serial interface (FTDI cable), but you can change the firmware to support other environments. I will research later in some IDE call LUA and also support Arduino.
This ESP8266 are not just only components, seems to have an internal microcontroller.
I found a good link (in spanish) related ESP8266
https://www.vispo.es/2015/07/19/introduccion-al-modulo-soc-wifi-esp8266-esp-12/
The module i get is the ESP8266 ESX
You can find here a lot of information of applications or use
http://espressif.com/en/products/hardware/esp8266ex/overview

Tools (for Windows testing)
LUA Uploader v.10.2.4
The main reason of this tool is to change the firmware. However has a good interface to send AT commands with continuosly looking of the feedback that is impossible to look with a normal terminal or miniterm.py
Hercules from HW Group, with it you can simulate a Web server on your PC
http://new.hwg.cz/files/download/sw/version/hercules_3-2-8.exe
AT Commands
You will find very useful to print this page
Procedure
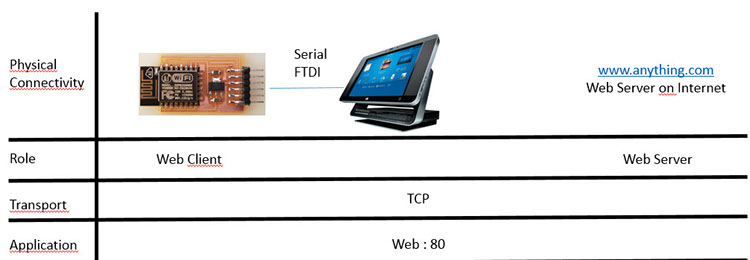
Scenario 1: ESP8266 working as Web Client
Electronics:
Board
http://academy.cba.mit.edu/classes/networking_communications/ESP8266/hello.ESP8266-12E.ftdi.png
Components
http://academy.cba.mit.edu/classes/networking_communications/ESP8266/hello.ESP8266-12E.ftdi.jpg
Traces
Interior
Also i recommend to have printed the list of commands AT
On Linux:
At first you should have installed 2 components :
- minterm.py
- python serial
- Connect the Electronic you constructed with the FTDI cable with your computer.
- Verify that your Linux recognize your serial device with the : lsusb command
- Check the /dev subdirectory
-
Search for the ttyUSB devices :
- ls -la ttyUSB*
- You will receive something like : ttyUSB0 or ttyUSB1
-
Use the info you get with the command
- sudo miniterm.py /dev/ttyUSB1 112500

You are going to configure your ESP8266 as a web client with the following sequence of commands
AT
AT+GMR
AT+CWMODE=1
AT+CWLAP
AT+CWJAP="access_point_ssid","access_point_password"
AT+CIFSR
AT+CIPMUX=0
AT+CIPSTART="TCP","fab.cba.mit.edu",80
AT+CIPSEND=50
***** Here you wiil feel that everything does not work, dont worry. Continue copy and paste, with enter the following 2 sentences*************************
GET /test.html HTTP/1.1
HOST: fab.cba.mit.edu
AT+CIPCLOSE=1
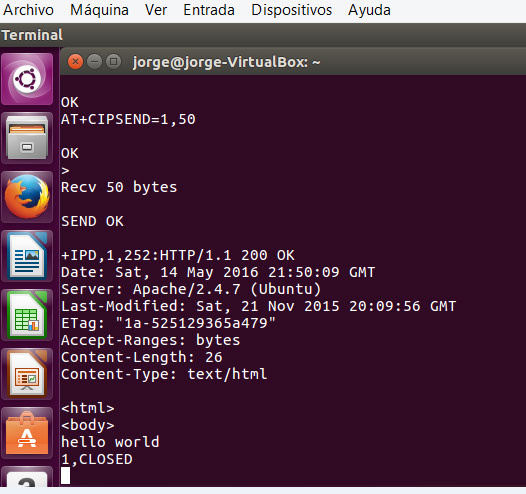
This is the output you will receive.
You are receiving some info from
fab.cba.mit.edu through TCP 80 port using web.
Notes:
AT+CWLAP is for listing the networks around you
AT+CWJAP is for connection to the network, use your own local values
AT+CIFSR is for listing your IP address and validate you succesfuly have an IP.
AT+CIPSTART y for defining the protocol you will use, pointing to an IP adddress
AT+CIPSEND define how many bytes you are going to transfer
Reference:
http://www.pridopia.co.uk/pi-doc/ESP8266ATCommandsSet.pdf
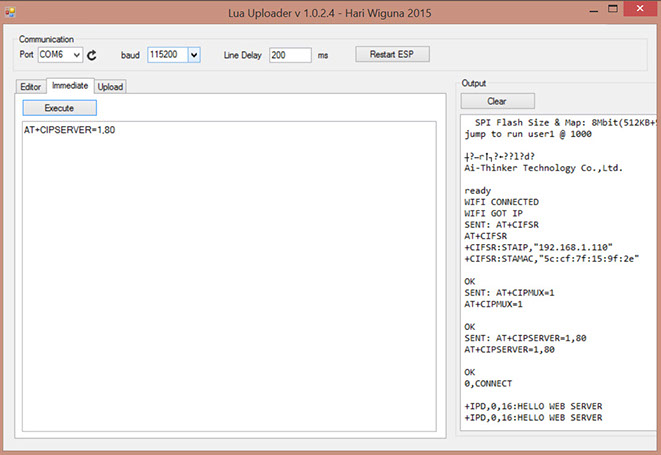
Scenario 2: ESP8266 working as Web Server
On Windows: (yes i tried also it)
At first you should have installed 2 components :
- LUA Uploader v.10.2.4
- Hercules from HW Group, with it you can simulate a TCP Cient on your PC
- http://new.hwg.cz/files/download/sw/version/hercules_3-2-8.exe
- Connect the Electronic you constructed with the FTDI cable with your computer.
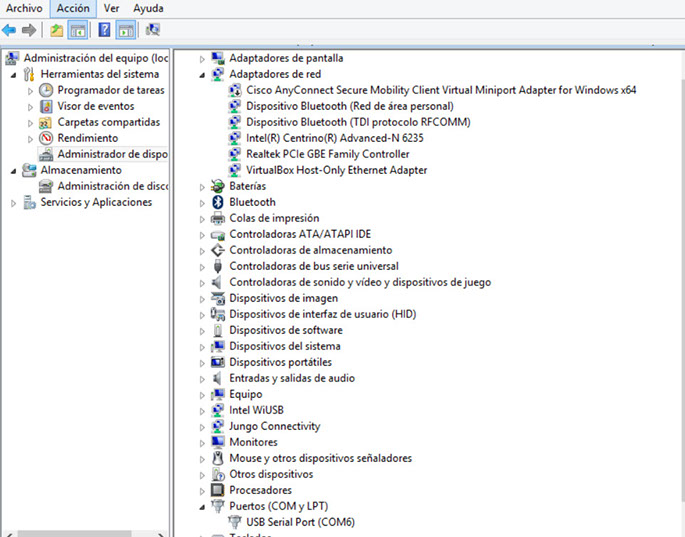
- Verify that your Windows recognize your serial device with "PC Administration", in my case i am using COM6
Now you can open the Lua Uploader and send the AT Commands to ESP8266. You can view them at Output field.Yoy previously should verify if already TCP connected and you have an IP addres.
AT+CIFSR is very useful to validate it.
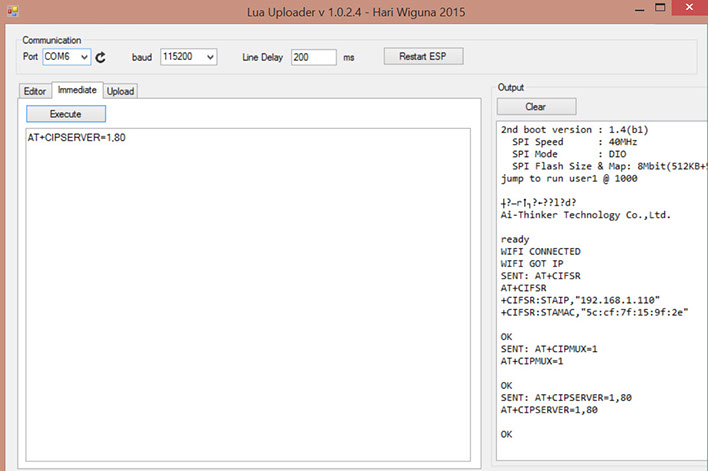
Commands you will need (just copy the text BEFORE the **
AT ** Verify it is connected
AT+GMR ** Display level of firmware
AT+CIFSR ** Verify if you have an IP Adress, if not, execute
** next 4 steps
AT+CWMODE=1 ** Define that you are a station
AT+CWLAP ** List Networks
AT+CWJAP="access_point_ssid","access_point_password"
AT+CIFSR **Verify IP Addreess
AT+CIPMUX=1 ** Define Multiple connections
AT+CIPSERVER=1,80 ** Start Web Server
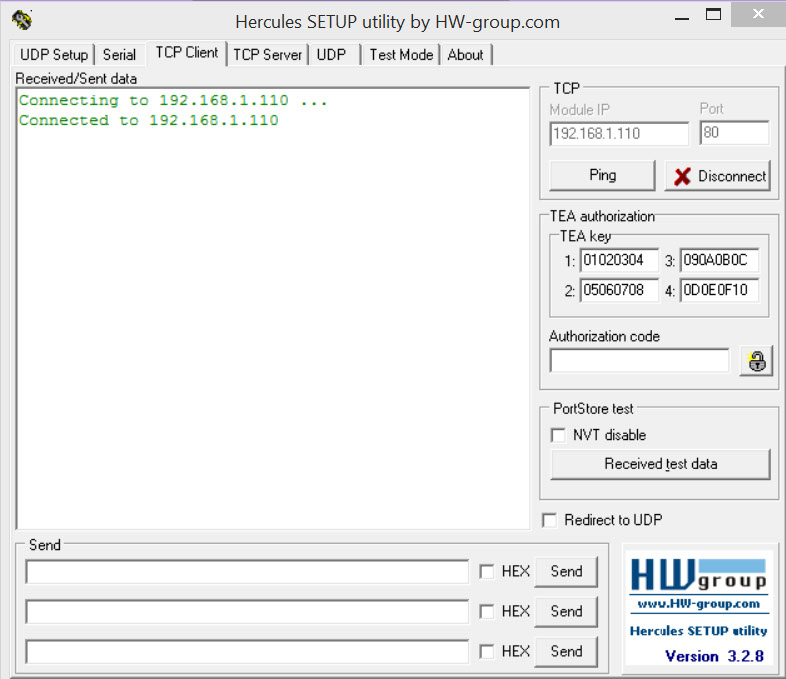
From the Hercules tool, select TCP client, point to the IP Address of your ESP8266, in my case 192.168.1.110 (remember you can get it with AT+CIFSR command, remember to select 80 port
Connecting.....
Connected...!!!
Now, test sending a message "HELLO WEB SERVER, from Hercules utility.
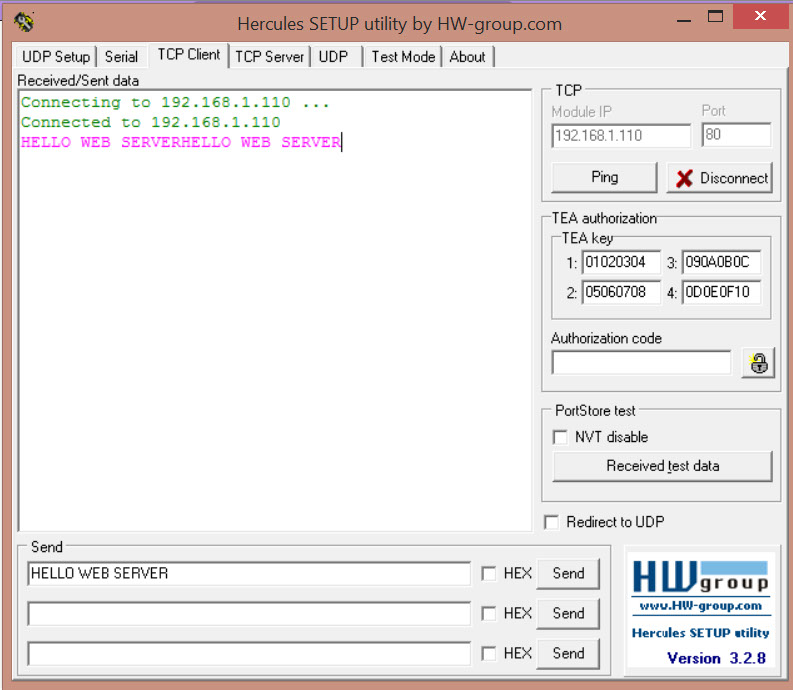
You will receive the answer, Notice Lua Uploader Output Field. Done!