Objectives:
- Add an output device to a microcontroller board you've designed and program it to do something Intro, Board Design, Soldering, Testing, Programming Downloads
Intro
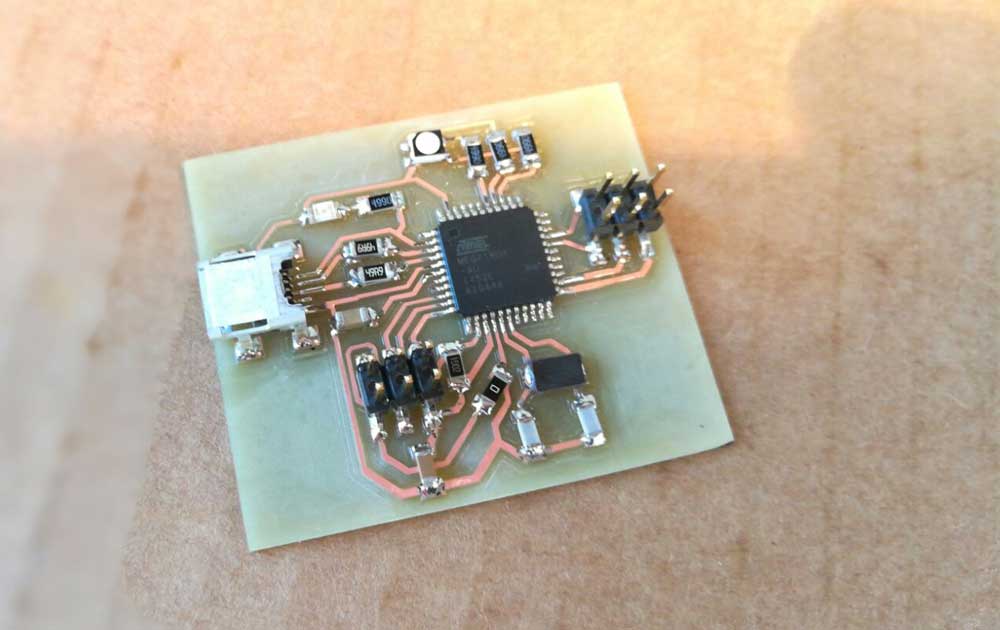
The assignment of the week was to build a custom board or connect to an existing board some output devices and test them.
During the previous weeks i used both ATtinys and ATxMega boards so this week i used an ATmega.
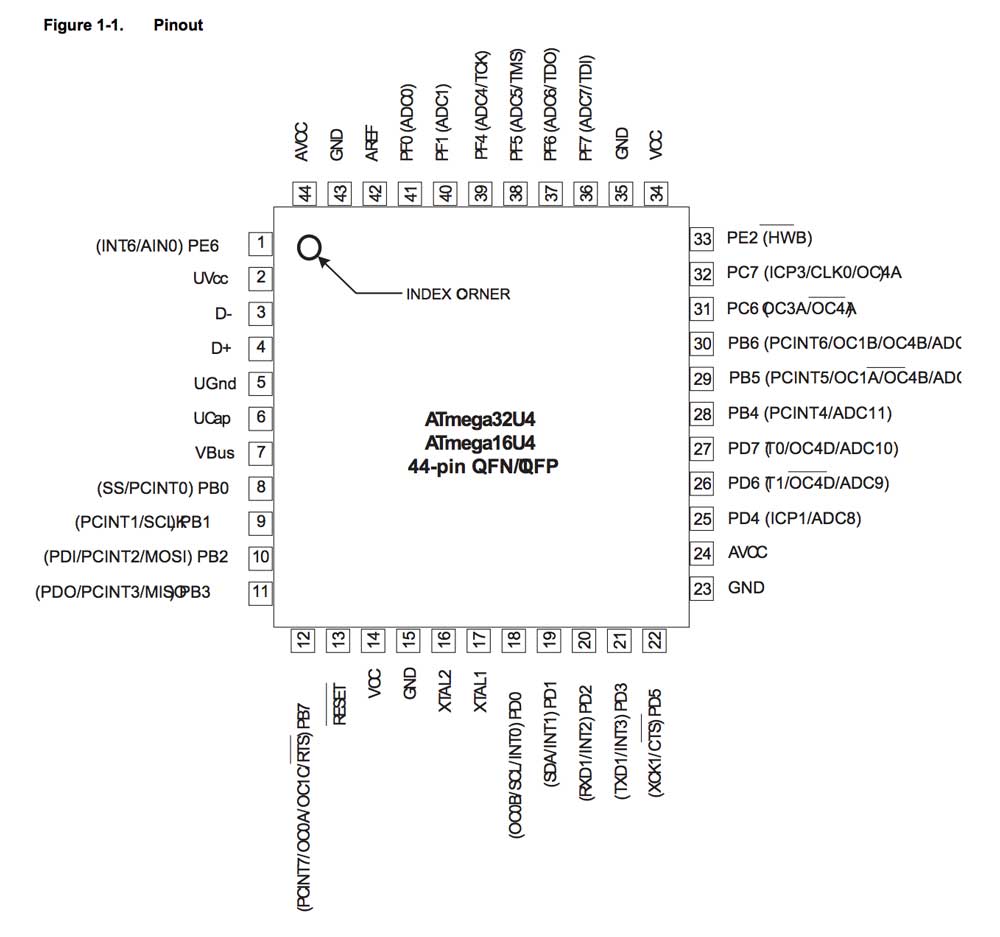
I chosed the ATmega16U4 because of the integrated hardware USB.
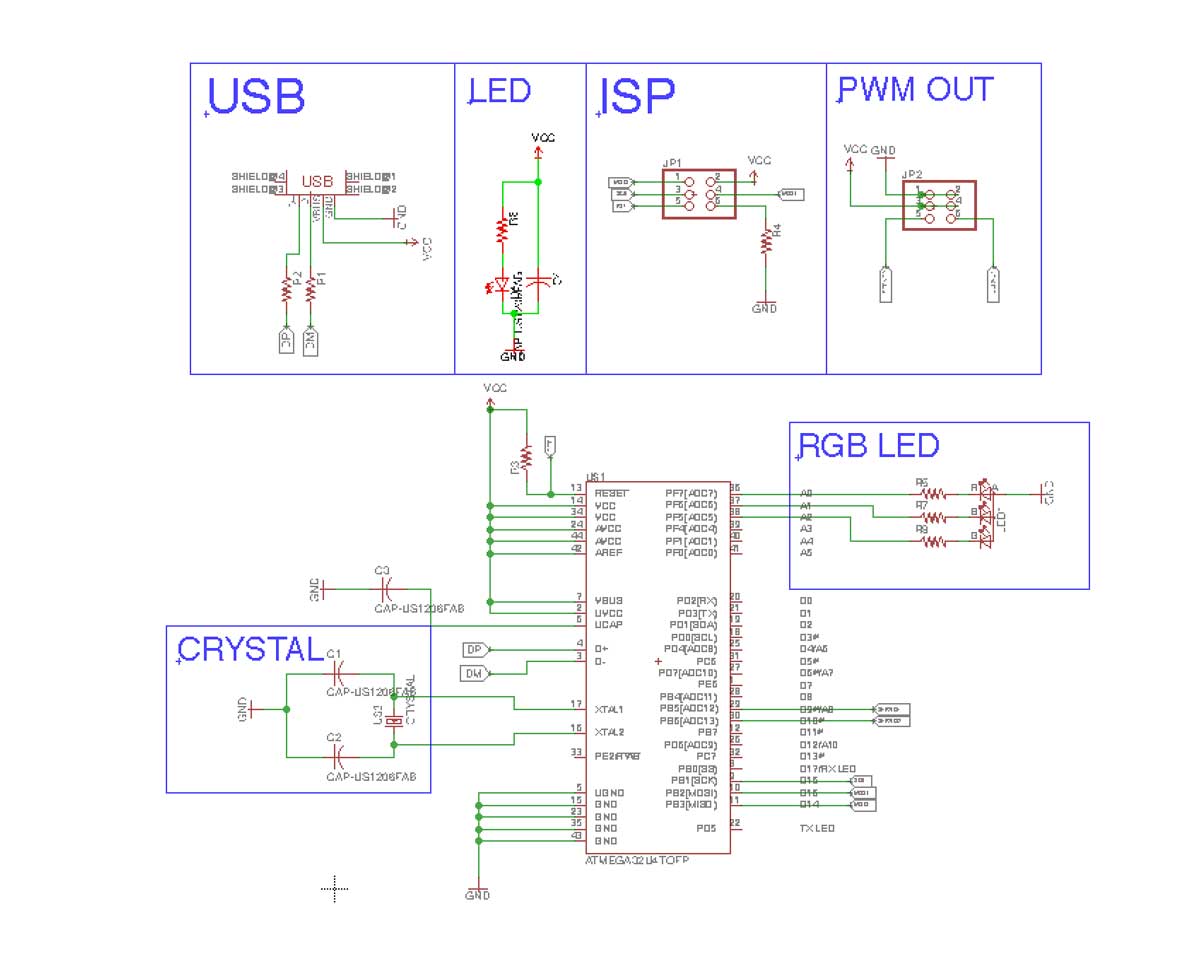
In the design i placed an RGB led and 2 pwm output.
Board Design
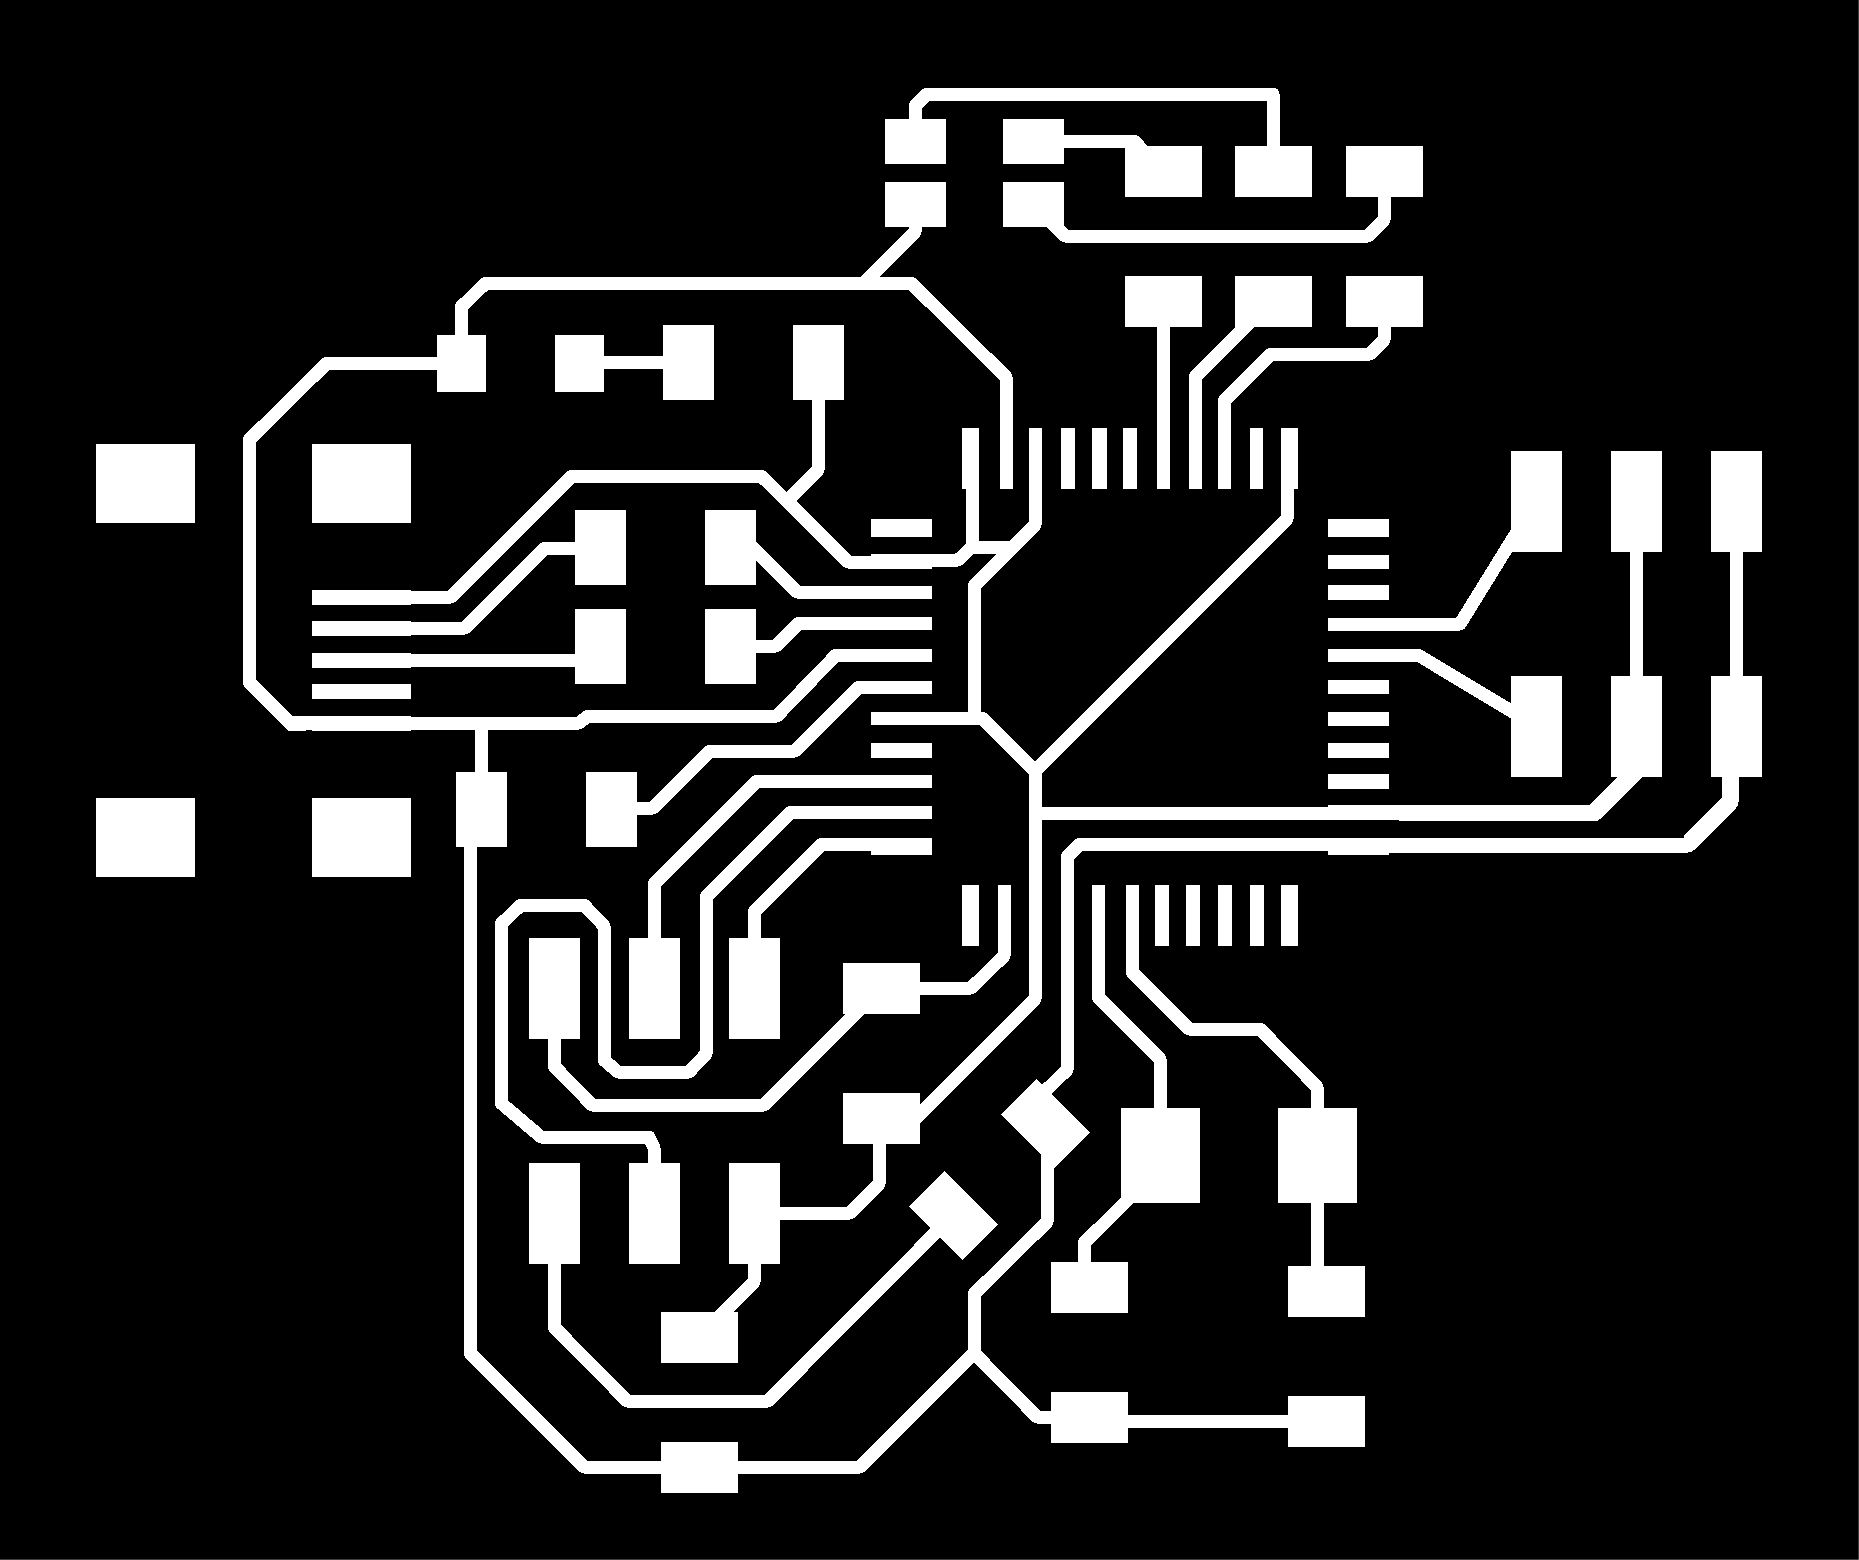
The board design is really simple it needs particular attention on the USB/External Crystal.
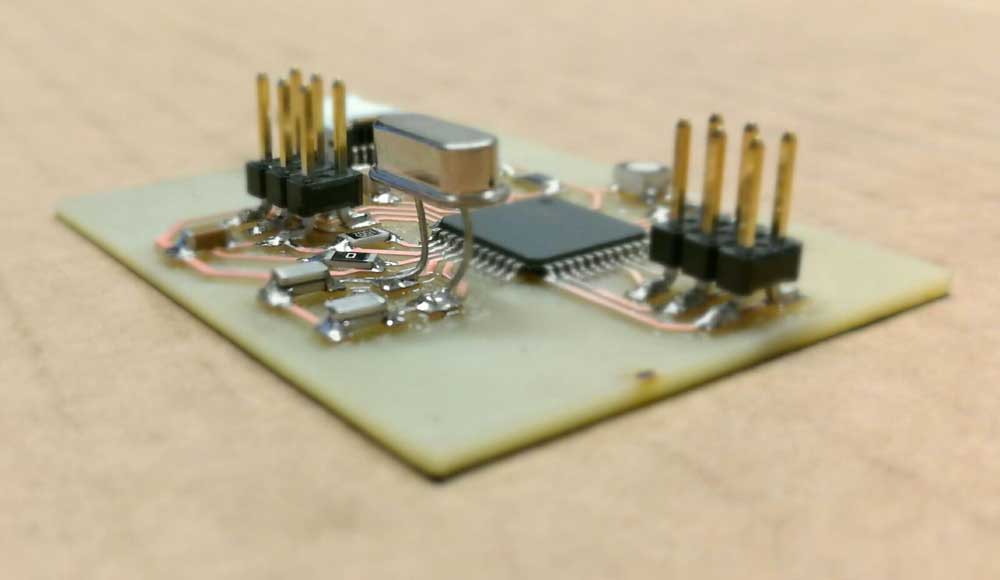
The USB needs 22ohm resistor in series on the datalines to limit the edge-speed of pulses and also to match the total impedance of the line.
The DFU USB firmware comes pre configured to work with 8 or 16 Mhz external Crystal.
Each crystal needs two capacitors sized to match the crystal frequency in my case with the 16Mhz one i need two 22pF capacitors.
I didn't insert a reset button but i tied a 10kohm resistor from Vcc to reset so that the pin never go low unintended.
There’s a 1uF capacitor between the UCAP pin and ground as noted in the datasheet.
I used eagle to design the schematic and route the traces.
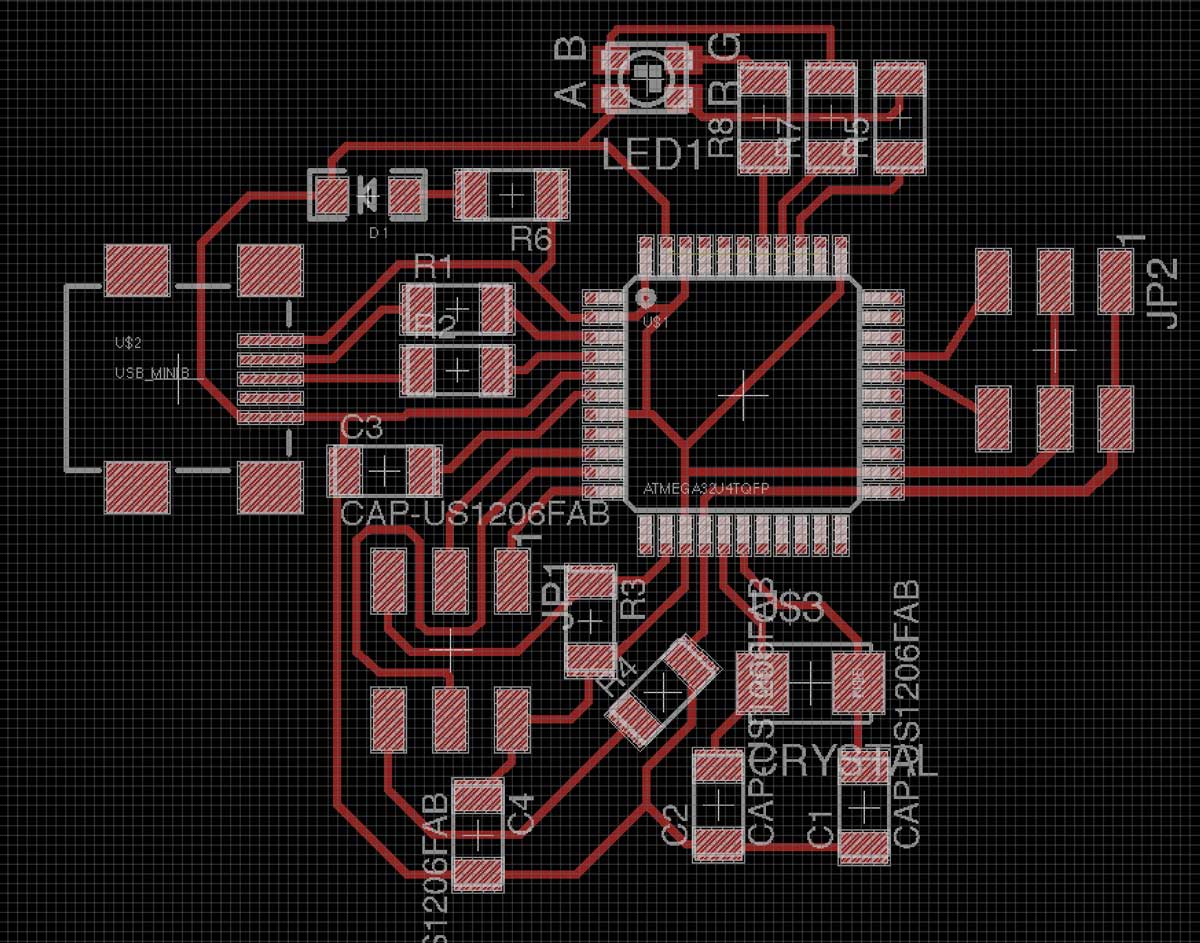
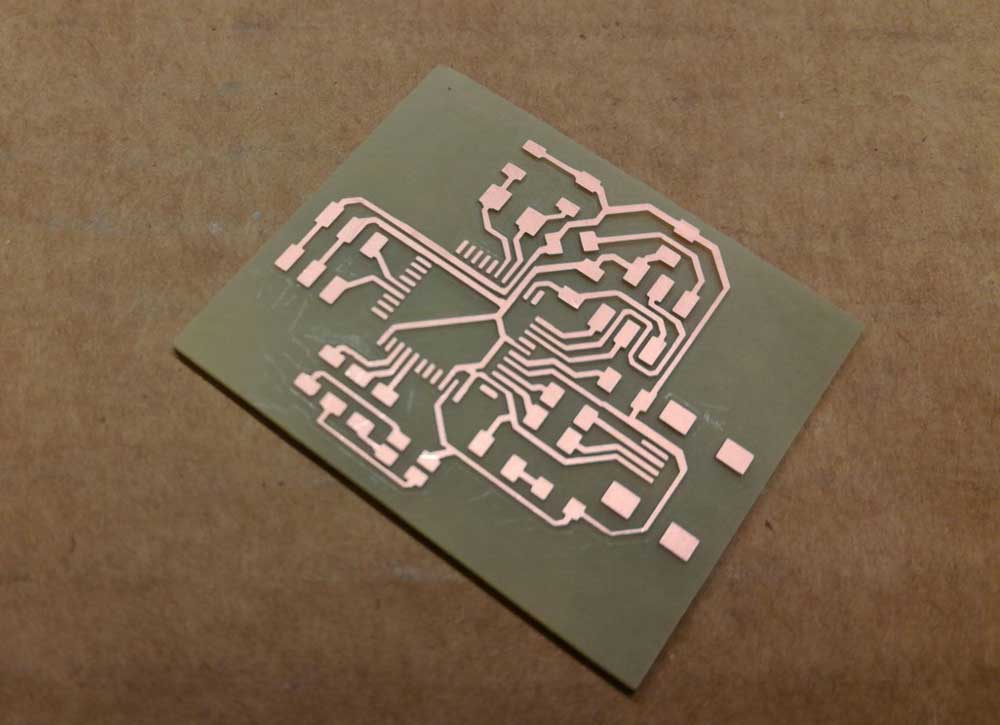
I milled the PCB using a Roland SRM-20 CNC with a 1/64 end mill for the traces and 1/32 for the outline.
Soldering
I had to face some problems due to the components we have in our inventory because the design required 22ohm but we don't have them so i used two 49,9ohm in parallel which resulted in 24,95 ohm resistor, close enough. Same thing for the crystal capacitors i needed 22pF cap but we only have 10pF cap, so again on parallel the resulting cap is 10pF.
The last problem was with the crystal package, we only have through hole one so i had to solder it in the air.
NOTE: At first i used 20Mhz crystal with smd package with 10pF cap but the device did not get recognized by the pc, so i checked on the datasheet and i saw that the DFU bootloader is pre configured for 8 or 16Mhz.
The “capacitor sandwich” and the “flying” crystal
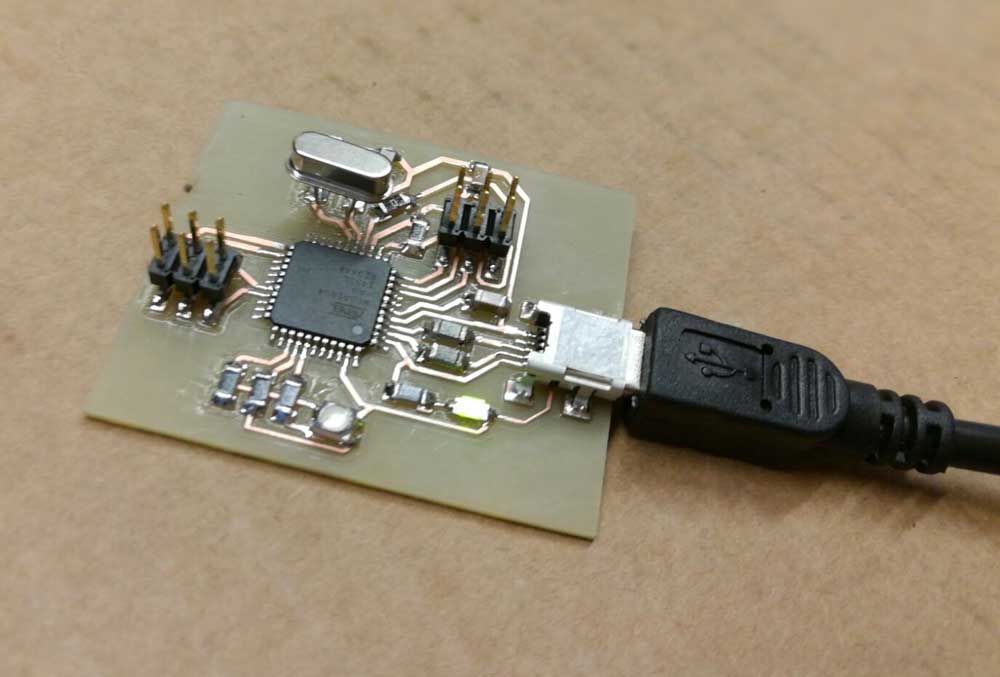
Testing
The board got recognized from the computer as soon as i plugged it, without the need of any driver. I tested with MacOS 10.12.1 and Windows 10.
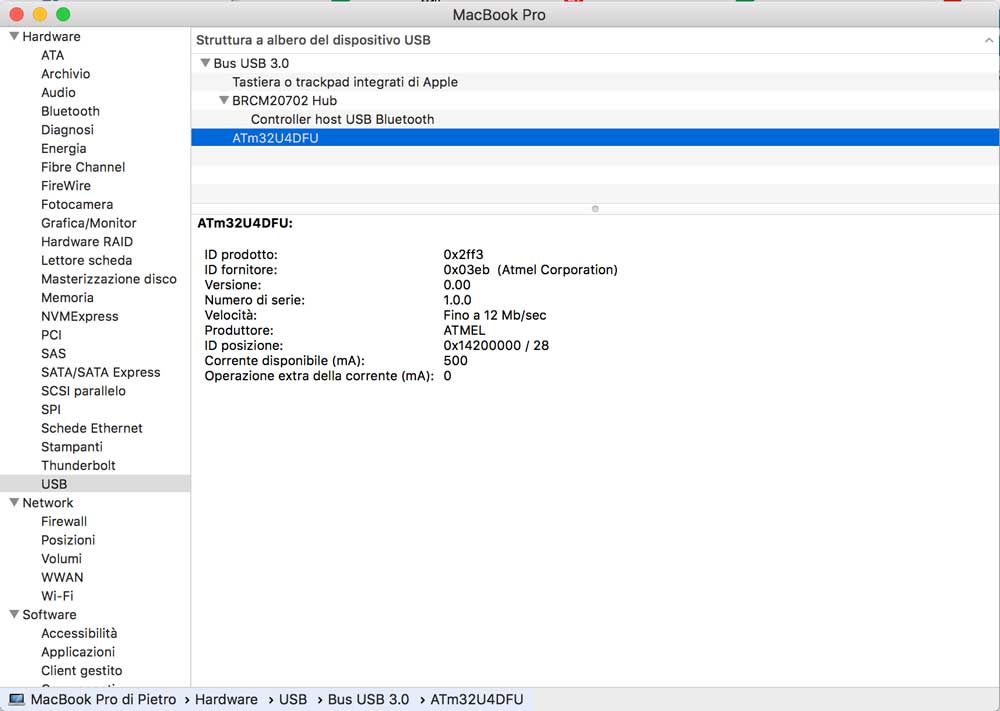 MacOS
MacOS
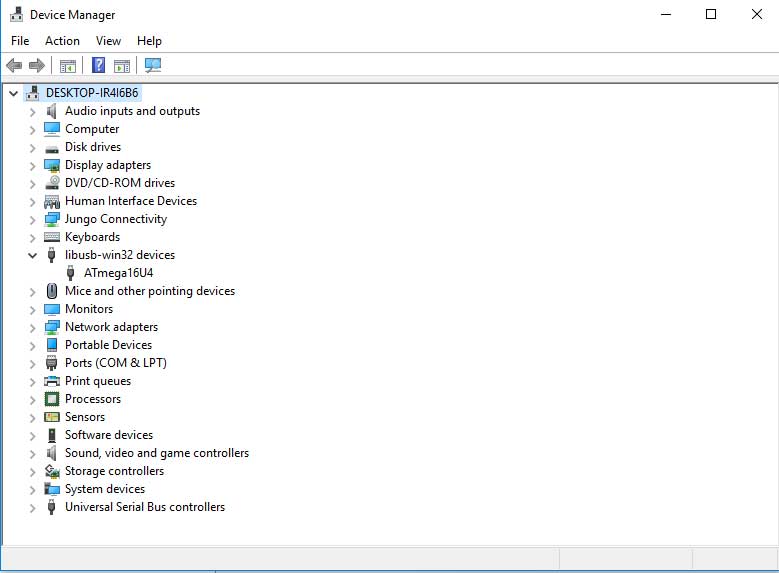 Windows 10
Programming
To program the board via DFU we need an application which in installed on my mac using the package manager called MacPorts. Link to MacPorts Webpage
MacOS:
On MacOS i installed dfu-programmer via MacPorts.
From terminal:
sudo port install dfu-programmerI checked if the board was recognized with the command
sudo dfu-programmer atmega16u4 get product-name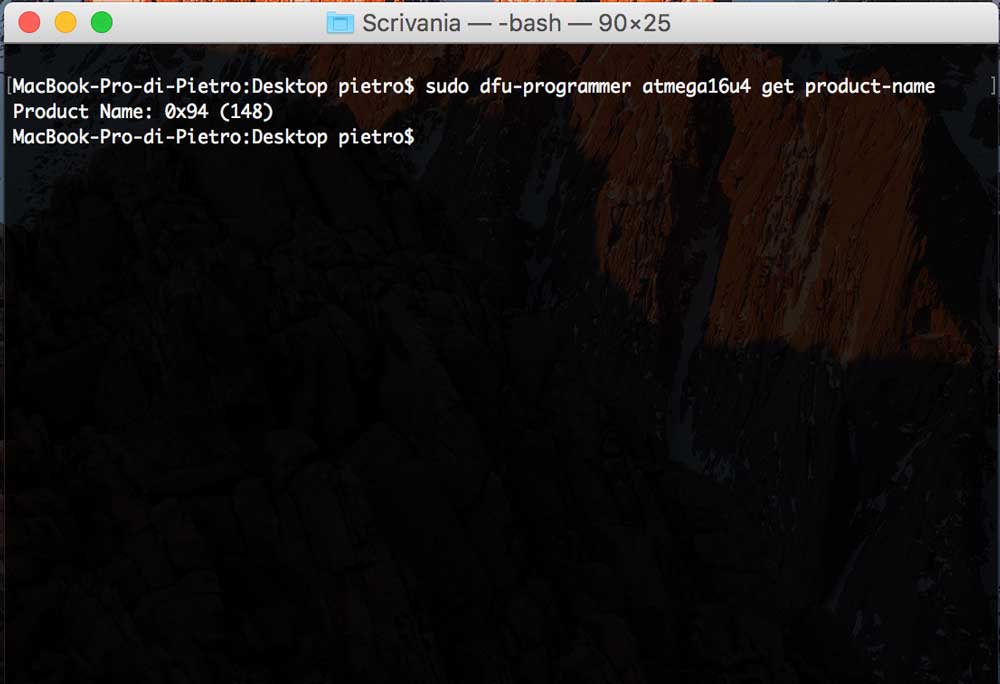
Windows:
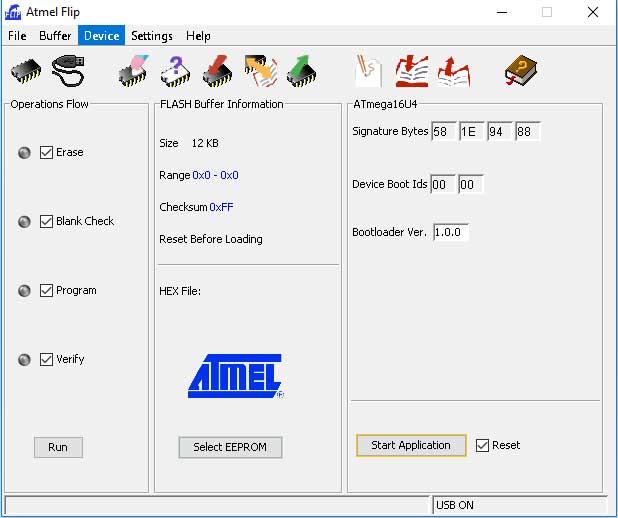
Atmel provide a software, to program the board via DFU, named Atmel Flip.
http://www.atmel.com/tools/flip.aspxI downloaded the .exe and installed it.
The software is very old and not updated anymore so i suggest to avoid using it.
Unfortunately i misunderstood the datasheet and overwrote the USB bootloader so i run out of time and decided to use a board i made for the machine week to test some output device.
You can find the documentation of the board here: LINK
I used the board linked above to move a DC motor which i used for my final project.