
Mechanical Design and Machine Design
This homework should have the next items
- Make a machine, including the end effector
- Build the passive parts and operate it manually
- Automate your machine
- Document the group project and your individual contribution
Document the group project and your individual contribution
Installation frameworks
My contribution was in making software to process the image captures. So this section we describe framework and tools installation. The main aim is created an scanner 3D where we will captured several images with differentes angles of the object. We can create a point cloud from these images. Actually, we know about app with this function that is called Structure from Motion (SFM). We see how the algorithm work in the next video . Then we propose to use a computer vision library with SFM to transform multiples images in a point cloud.
In Computer Vision field exists several libraries which implements SFM in differents languages as C++, Python, Matlab. So we choose the library OpenFSM which is developed in Python . These framework requires some dependencies as:
- OpenCV
- OpenFV
- Numpy
- Ceres Solver
- Boost Python
- Scipy
- cd ~
- git clone git clone https://github.com/opencv/opencv.git
- cd opencv
- git clone https://github.com/opencv/opencv_contrib.git
- cd ~/opencv
- mkdir build && cd build
- cmake -D CMAKE_BUILD_TYPE=RELEASE \ -D CMAKE_INSTALL_PREFIX=/usr/local \ -D OPENCV_EXTRA_MODULES_PATH=~/opencv/opencv_contrib/modules \ -D BUILD_EXAMPLES=OFF ..
- make -j4
- sudo make install
- sudo ldconfig
- $ LD_LIBRARY_PATH=$LD_LIBRARY_PATH:/usr/local/lib
- $ export LD_LIBRARY_PATH
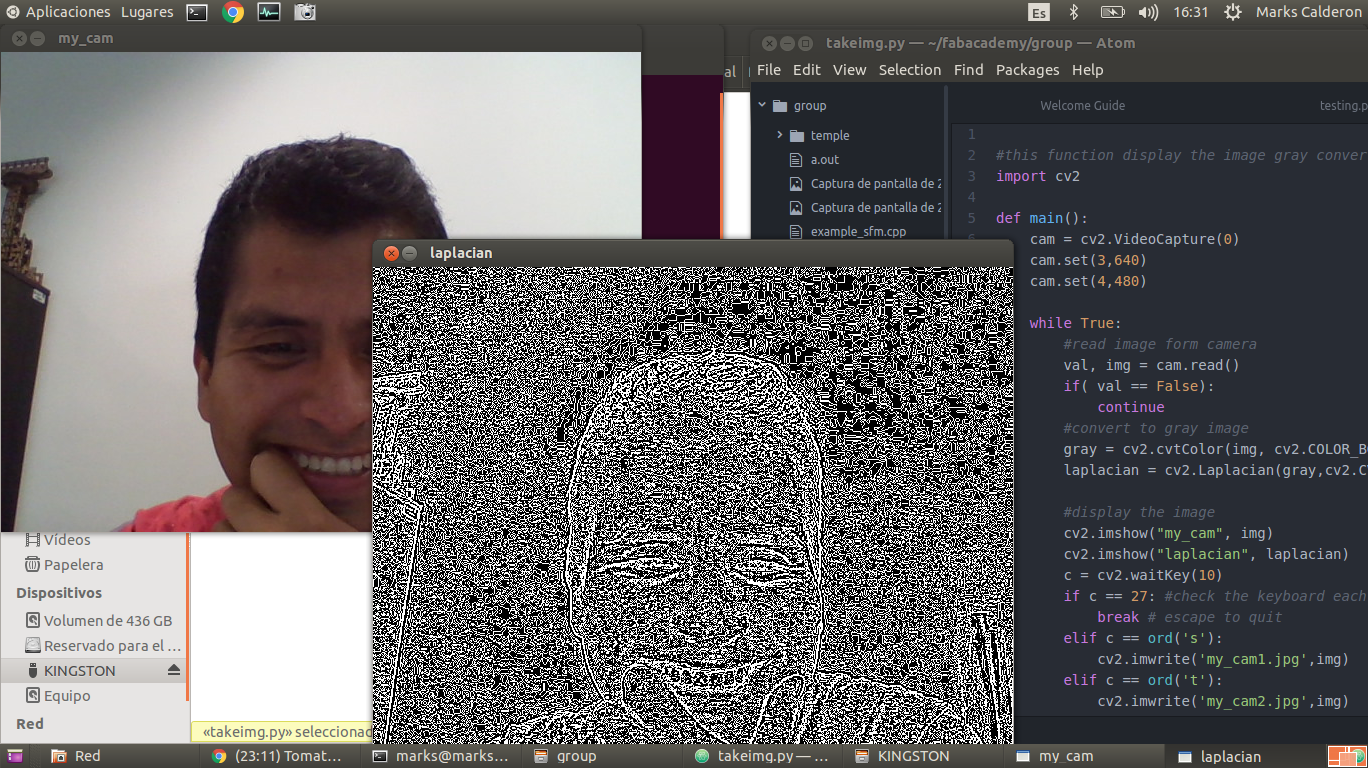
#this function display the image gray converted from cam
import cv2

def main():
    cam = cv2.VideoCapture(0)
    cam.set(3,640)
    cam.set(4,480)

    while True:
        #read image form camera
        val, img = cam.read()
        if( val == False):
            continue
        #convert to gray image
        gray = cv2.cvtColor(img, cv2.COLOR_BGR2GRAY)
        laplacian = cv2.Laplacian(gray,cv2.CV_64F)

        #display the image
        cv2.imshow("my_cam", img)
        cv2.imshow("laplacian", laplacian)
        c = cv2.waitKey(10)
        if c == 27: #check the keyboard each 10 ms
            break # escape to quit
        elif c == ord('s'):
            cv2.imwrite('my_cam1.jpg',img)
        elif c == ord('t'):
            cv2.imwrite('my_cam2.jpg',img)


    cam.release()# release the cam
    cv2.destroyAllWindows() #destroy the windows
if __name__ == '__main__':
    main()
This image got after running the source code:
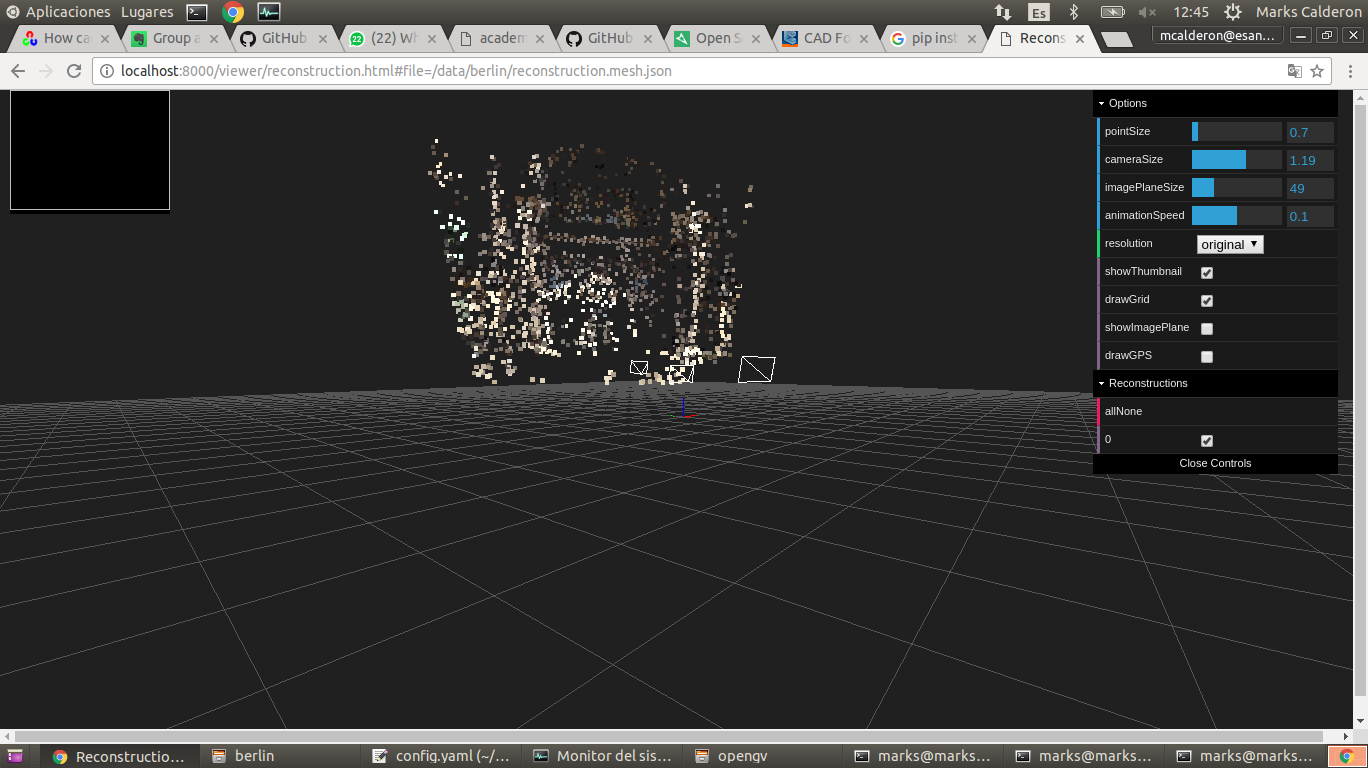
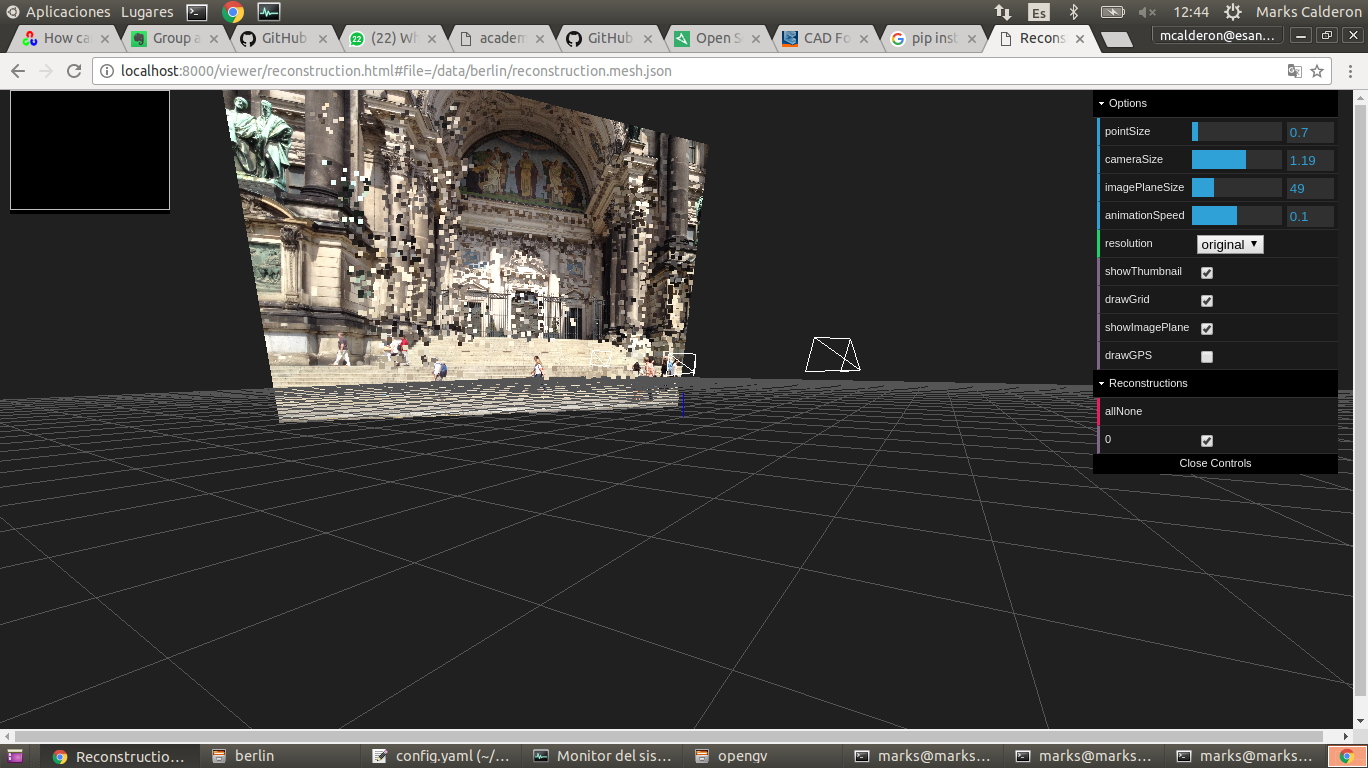
 The other packages OpenGV and OpenSFM are installed according OpenSFM tutorial .
The example of testing OpenSFM is detailed in the following steps:
The other packages OpenGV and OpenSFM are installed according OpenSFM tutorial .
The example of testing OpenSFM is detailed in the following steps:
- Change to OpenSFM directory: cd OpenSFM
- Run in terminal: bin/run_all data/berlin run
- Start an http server in OpenSFM directory with python -m SimpleHTTPServer
- Browse http://localhost:8000/viewer/reconstruction.html#file=/data/berlin/reconstruction.meshed.json
PyQt installation
The idea was installing PyQt for python 2.7 because Gestalts nodes work with this version. So we must compile the source with the following steps:
- Install Qt 5.7 , you can download and install from this link
- Download PyQT 5.6 and sip-4.18 with wget
- wget http://sourceforge.net/projects/pyqt/files/PyQt5/PyQt-5.6/PyQt5_gpl-5.6.tar.gz
- wget http://freefr.dl.sourceforge.net/project/pyqt/sip/sip-4.18/sip-4.18.tar.gz
Install each package
tar -xvf sip-4.18.tar.gz
cd /sip-4.18
python configure.py -d /usr/local/lib/python2.7/site-packages/
make
make install

cd..
tar -xvf PyQt-gpl-5.6.tar.gz
cd PyQt-gpl-5.6
python configure.py -d /usr/local/lib/python2.7/site-packages/ --qmake=/usr/local/Cellar/qt5/5.6.0/bin/qmake --sip=/usr/local/bin/sip --sip-incdir=../sip-4.18/siplib
make
make install
To integrate PyQt with Qt Designer we follow the tutorial. Additionally, I installed Android Studio and apache2 in my Ubuntu 14.04.
Progamming
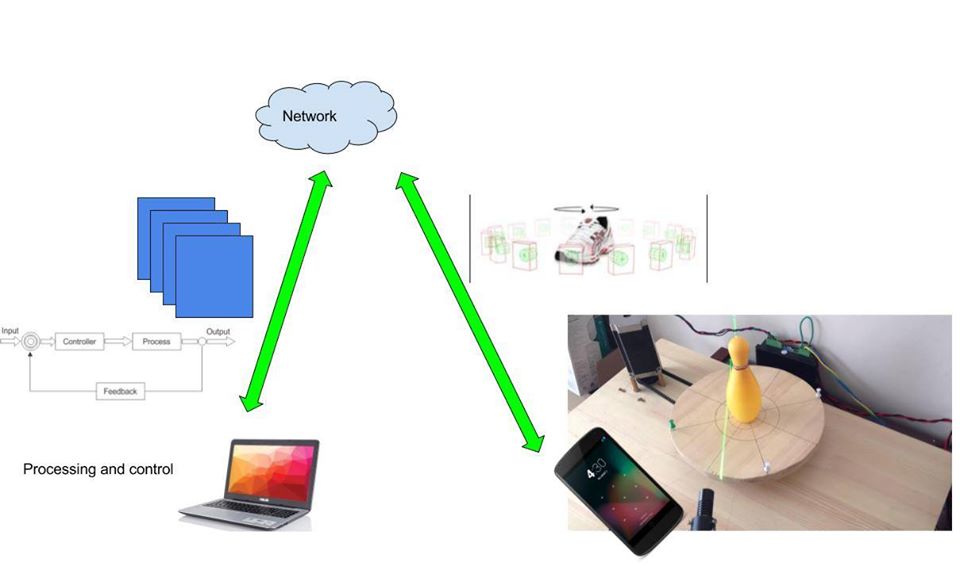
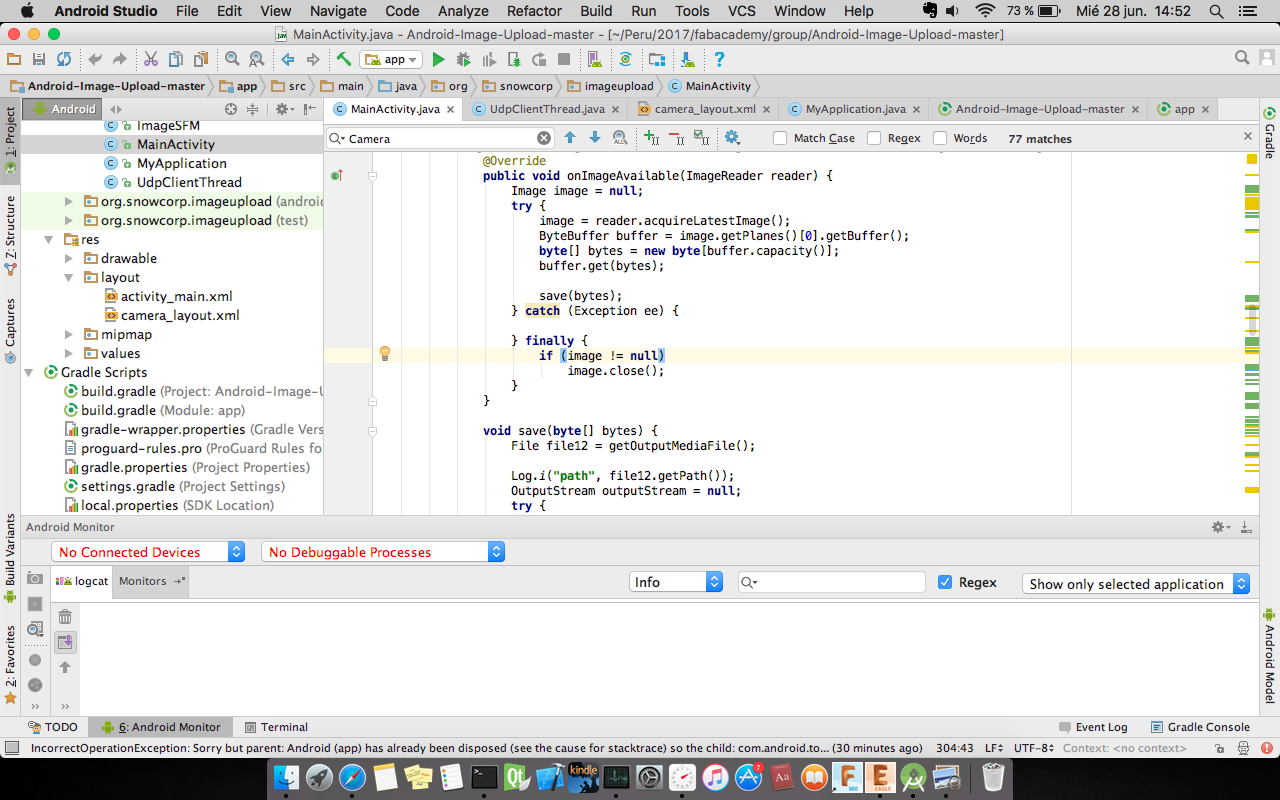
The image belong here shows the software architecture for processing image. The images will acquired by mobile phone through an android app
which takes a photo in a position given by the machine. The image will transfer to the computer via wifi network. In
computer side we run program to process the images. The comunication between phone and computer used UDP socket, the server socket was in computer and the phone was a client.
Sockets communication
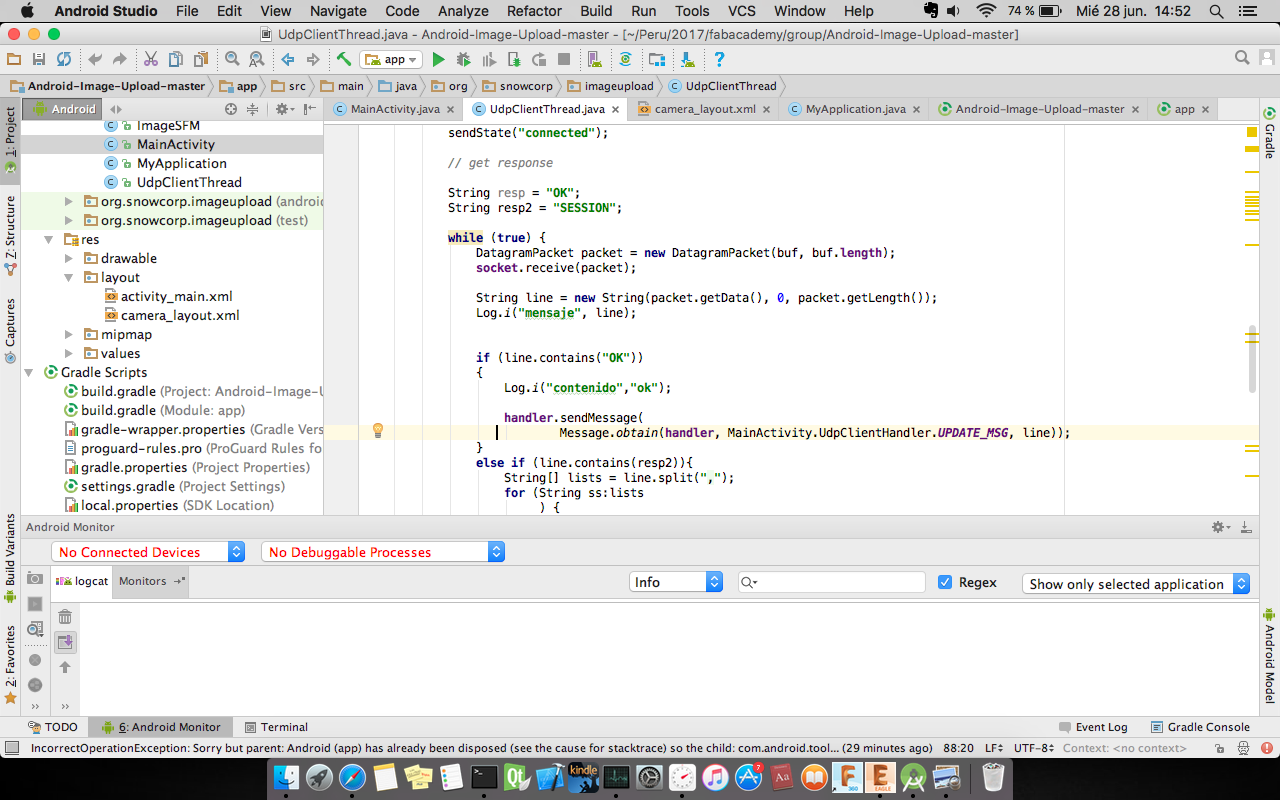
In this case we used a UDP socket in python, the server side recv datagram from phone through client UPD phone.
To achieve the communication line using IP and fixed. The source code for server that uses here.

import socket
import sys
import time

# Create a TCP/IP socket
sock = socket.socket(socket.AF_INET, socket.SOCK_DGRAM)

# Bind the socket to the port
server_address = ("172.43.1.11", 44450)
print >>sys.stderr, 'starting up on %s port %s' % server_address
#sock.bind(server_address)
#sock.setsockopt(socket.SOL_SOCKET, socket.SO_BROADCAST,1)

while True:
    try:
        message = 'This is the message.  It will be repeated.'
        message = raw_input('message: ')
        sent = sock.sendto(message, server_address)
        time.sleep(3)
    except KeyboardInterrupt:
        raise

sock.close()
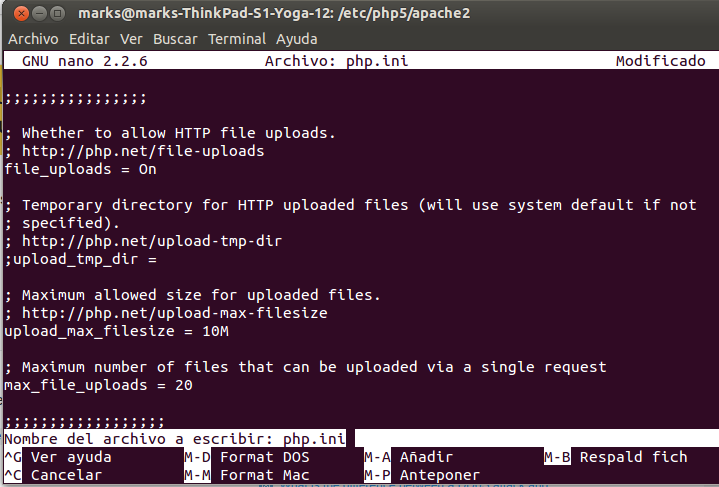
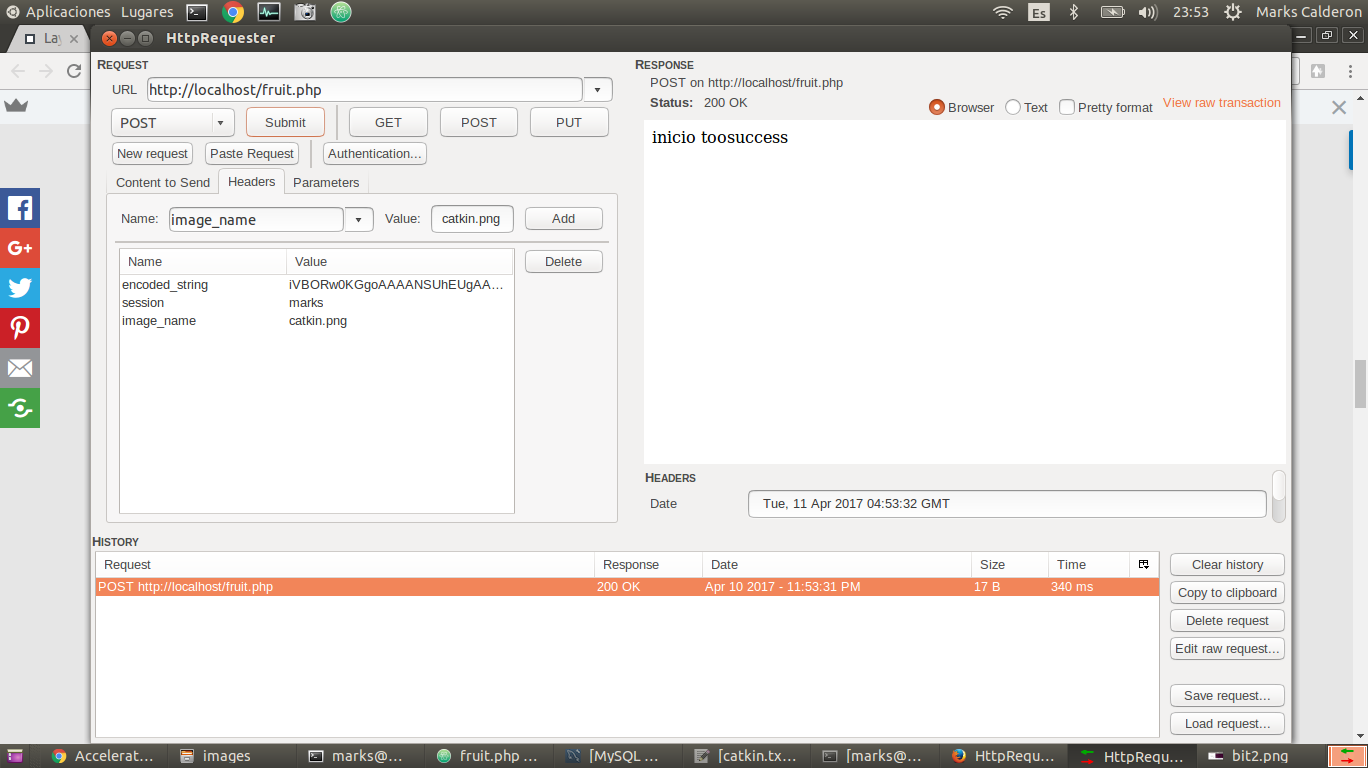
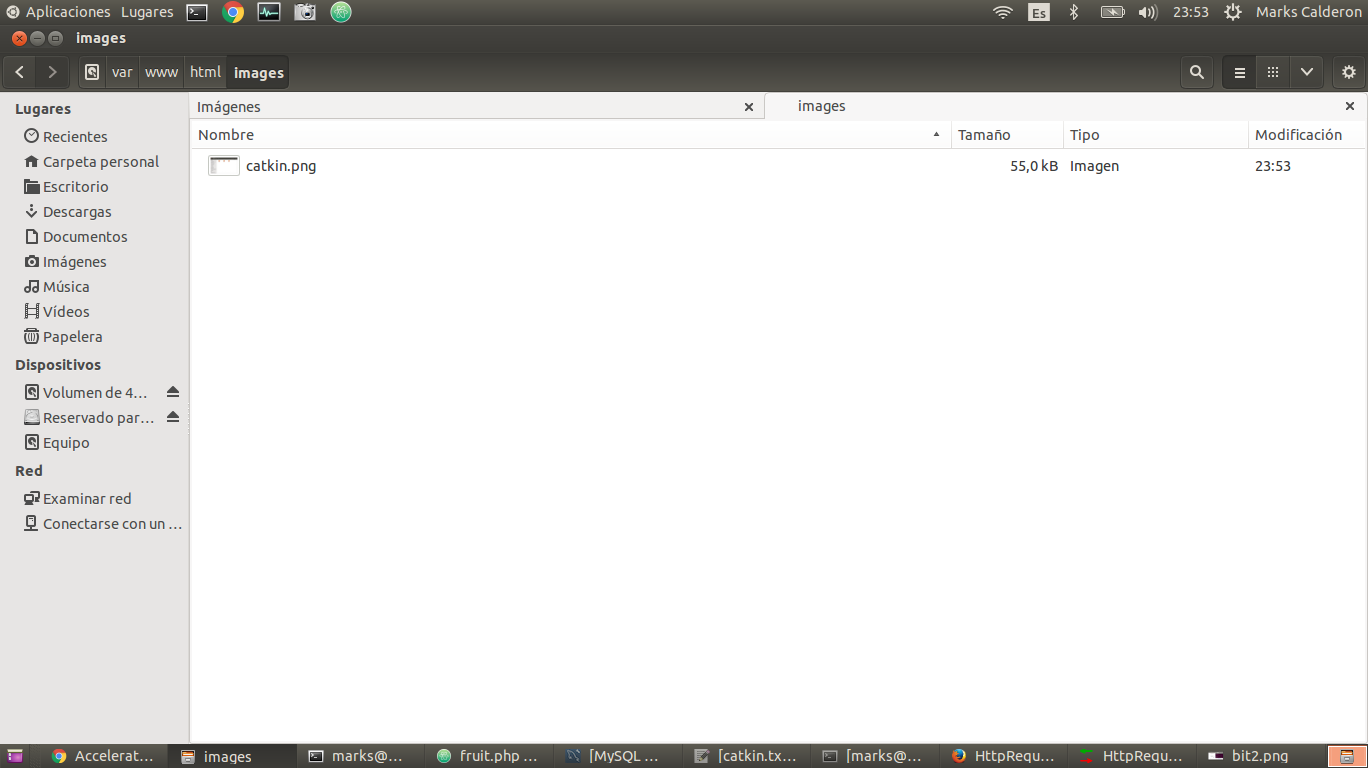
Uploading image php
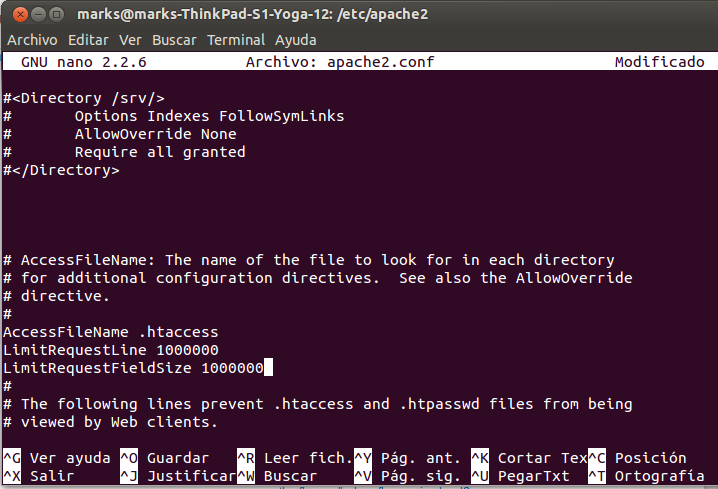
The program did not upload image with more than 2 Mb, so we modified two files: the first one was /etc/apache2/apache2.conf in the line LimitRequesLine 1000000, LimitRequestFieldSize 1000000. Additionaly, we modified /etc/php5/apache2/php.ini the line upload_max_filesize=10M. After restart apache server "sudo service apache2 restart", a firefox plugin "Httprequester" was installed to process the webservice. It can send request, in our case we sent fields with real data as image_name and encoded_string, the last one was compress an image with base64 method. Tutorial of php file uploading.
<?php

// Path to move uploaded files
    $target_path = dirname(__FILE__).'/uploads/';

    if (isset($_FILES['image']['name'])) {
        $target_path = $target_path . basename($_FILES['image']['name']);

        try {
            // Throws exception incase file is not being moved
            if (!move_uploaded_file($_FILES['image']['tmp_name'], $target_path)) {
                // make error flag true
                echo json_encode(array('status'=>'fail', 'message'=>'could not move file'));
            }

            // File successfully uploaded
            echo json_encode(array('status'=>'success', 'message'=>'File Uploaded'));
        } catch (Exception $e) {
            // Exception occurred. Make error flag true
            echo json_encode(array('status'=>'fail', 'message'=>$e->getMessage()));
        }
    } else {
        // File parameter is missing
        echo json_encode(array('status'=>'fail', 'message'=>'Not received any file'));
    }
?>
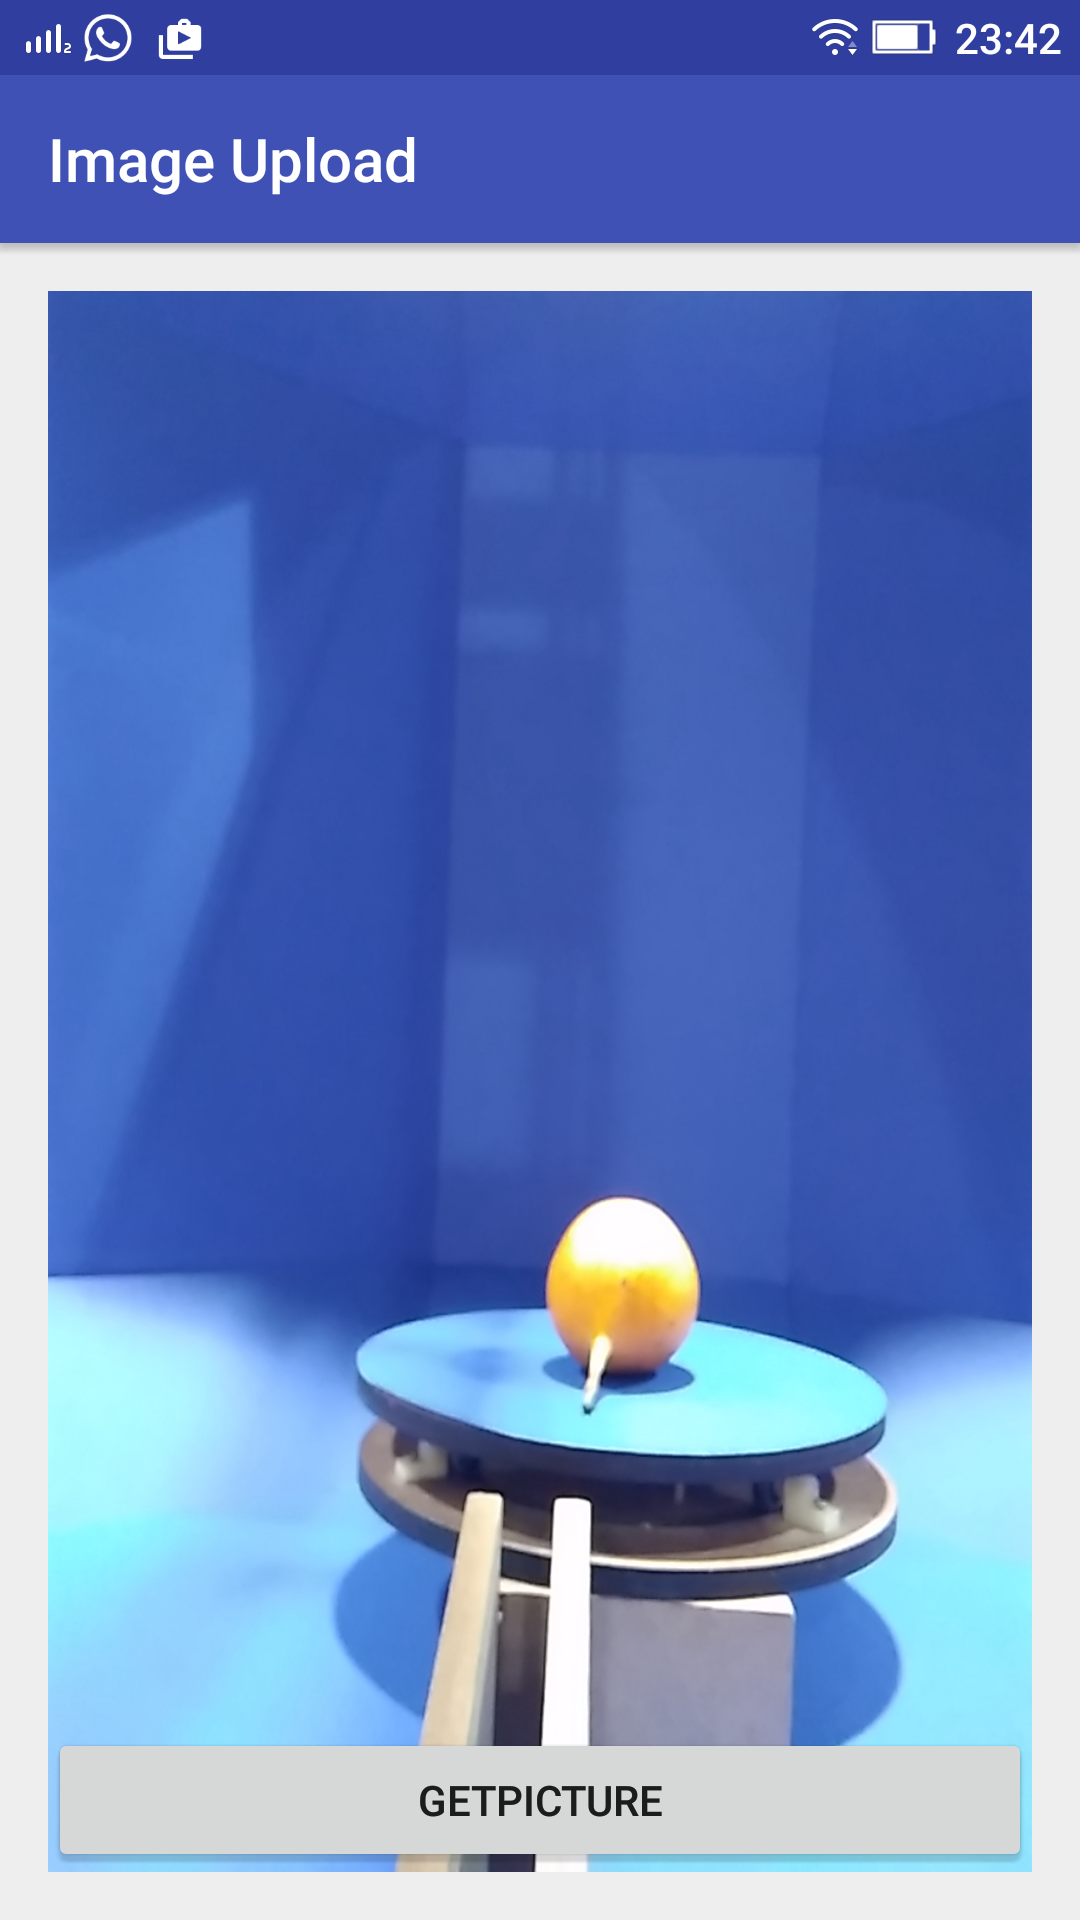
Android Program
The android app have implemented with library Volley plus following the tutorial to upload the files image to the server. The layout app changed to a new GUI which lunchs the camera, to complete this idea we read post. The camera has own classes to interaction with the app. Now, the challenge was to create a VolleyPlus library to sincronize image captured from the app with GUI program in desktop. Additionaly, this app was listening UDP socket. The app wait the message to start taking picture and upload each one. The source can download in this link
Desktop program
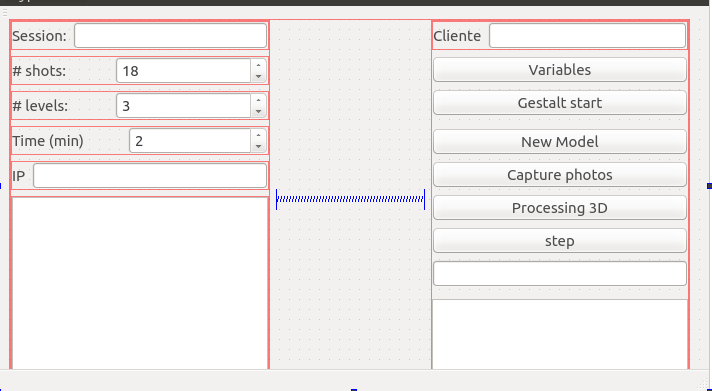
We followed the tutorial to create a GUI with python and Qt to control the machine with gestalt nodes, and communicate with android app to take and upload picture. After that it will run OpenSFM framework. It was the idea but in real we had issues with gestalt code and PyQt because they had different kind of threads. It was impossible to syncronize gestalts and machine, so we use the GUI to send images from phone and manually we write the commands to generate 3D model. The GUI source code can download here. The next images show the GUI and its source
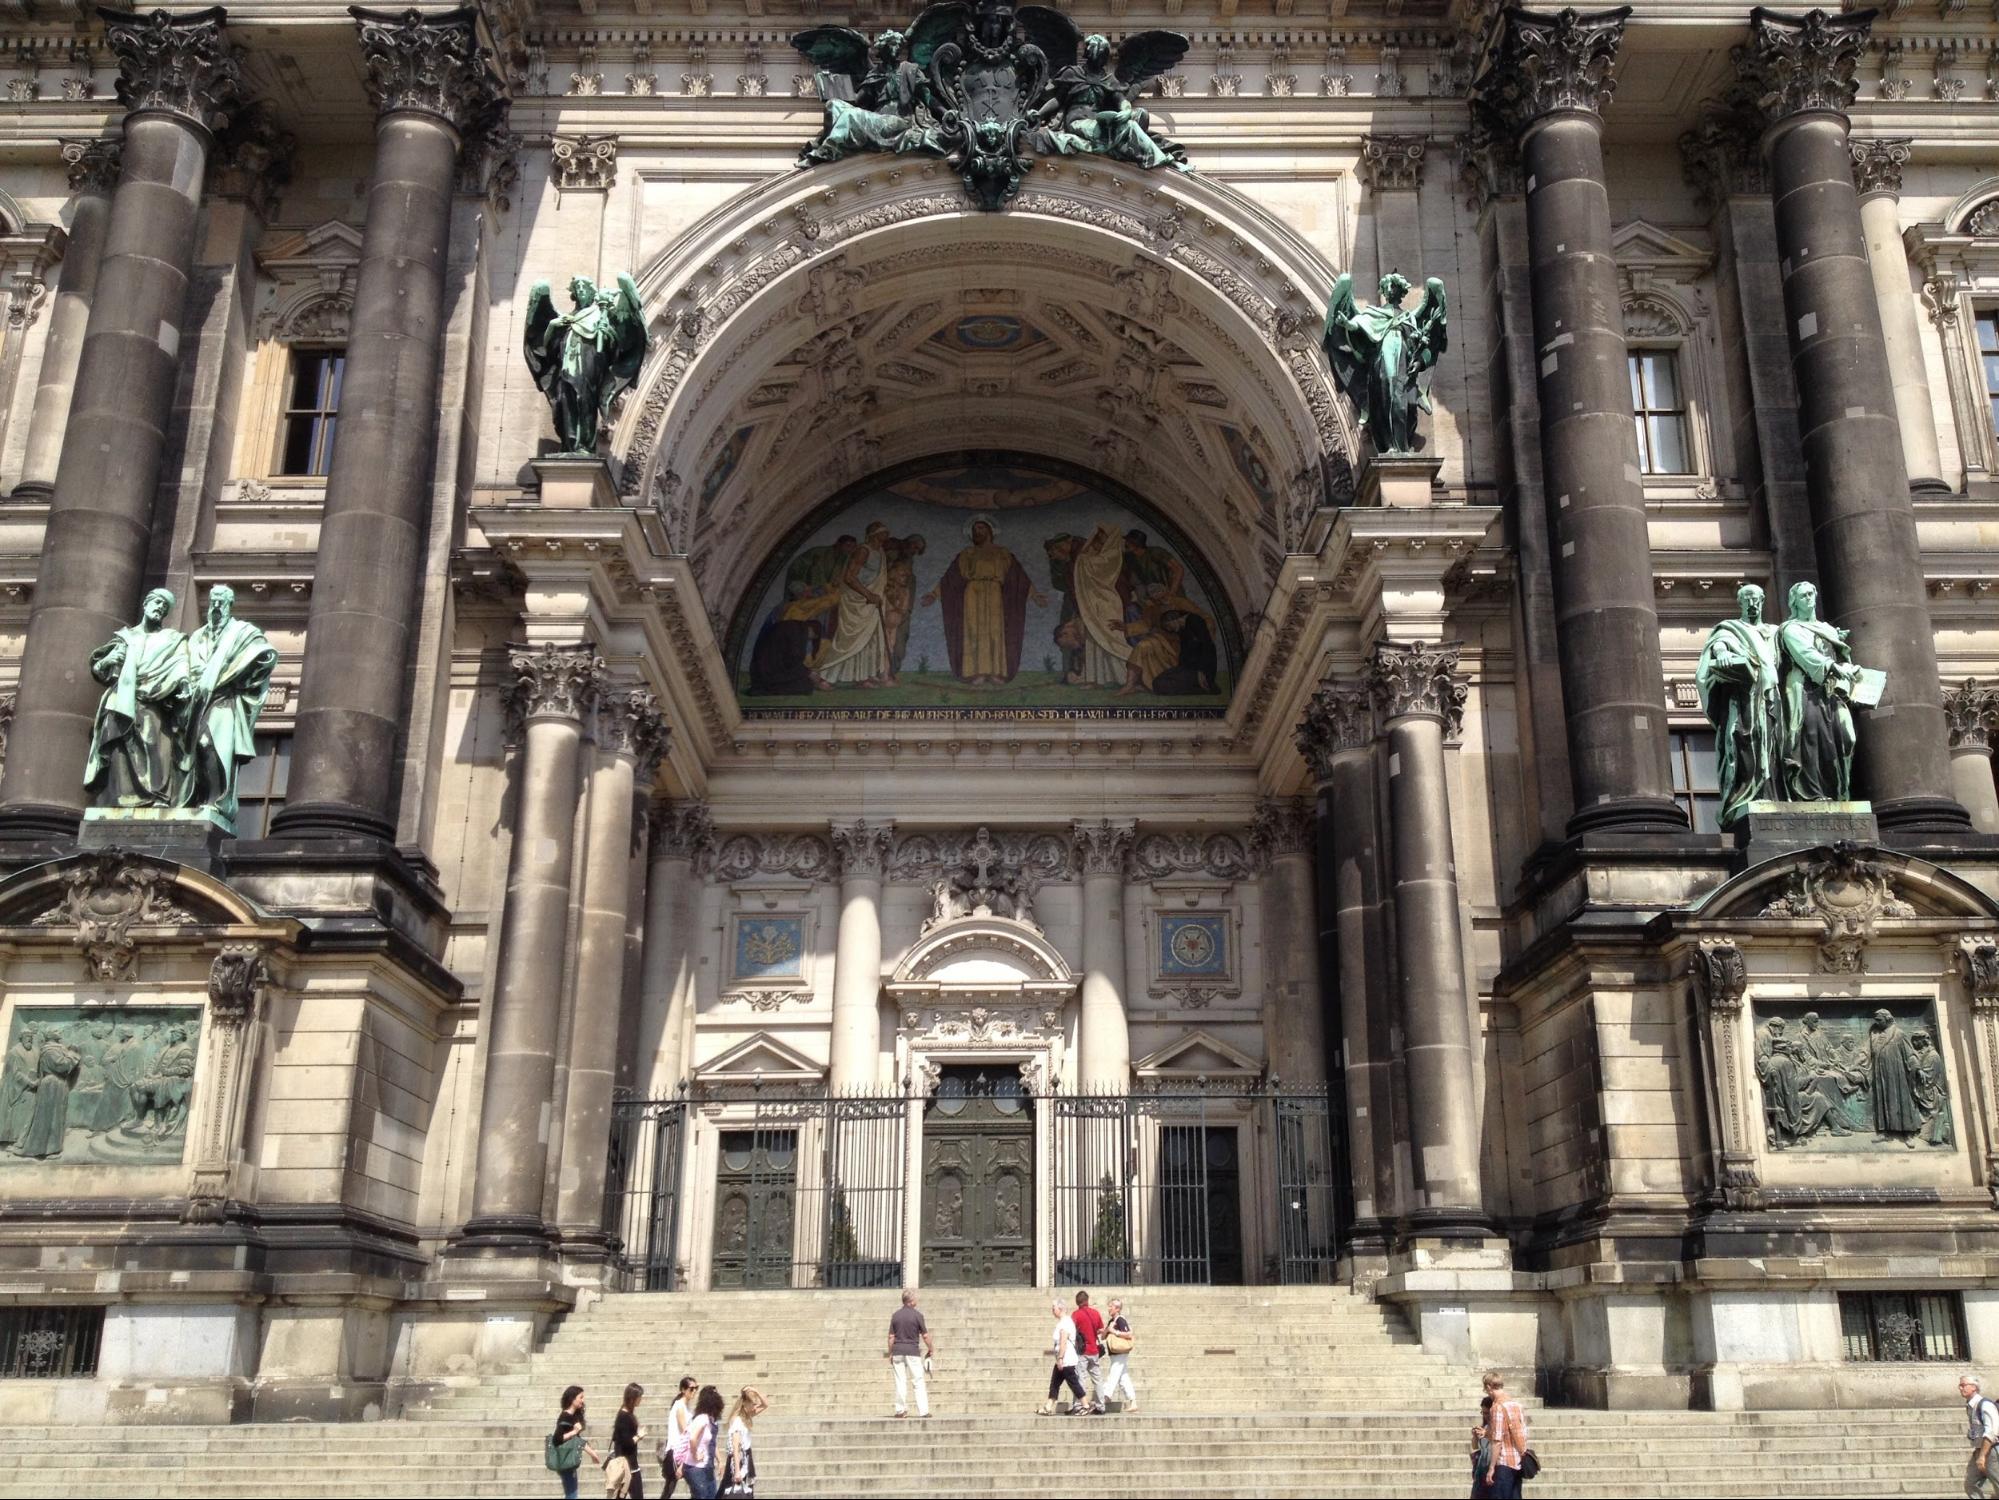
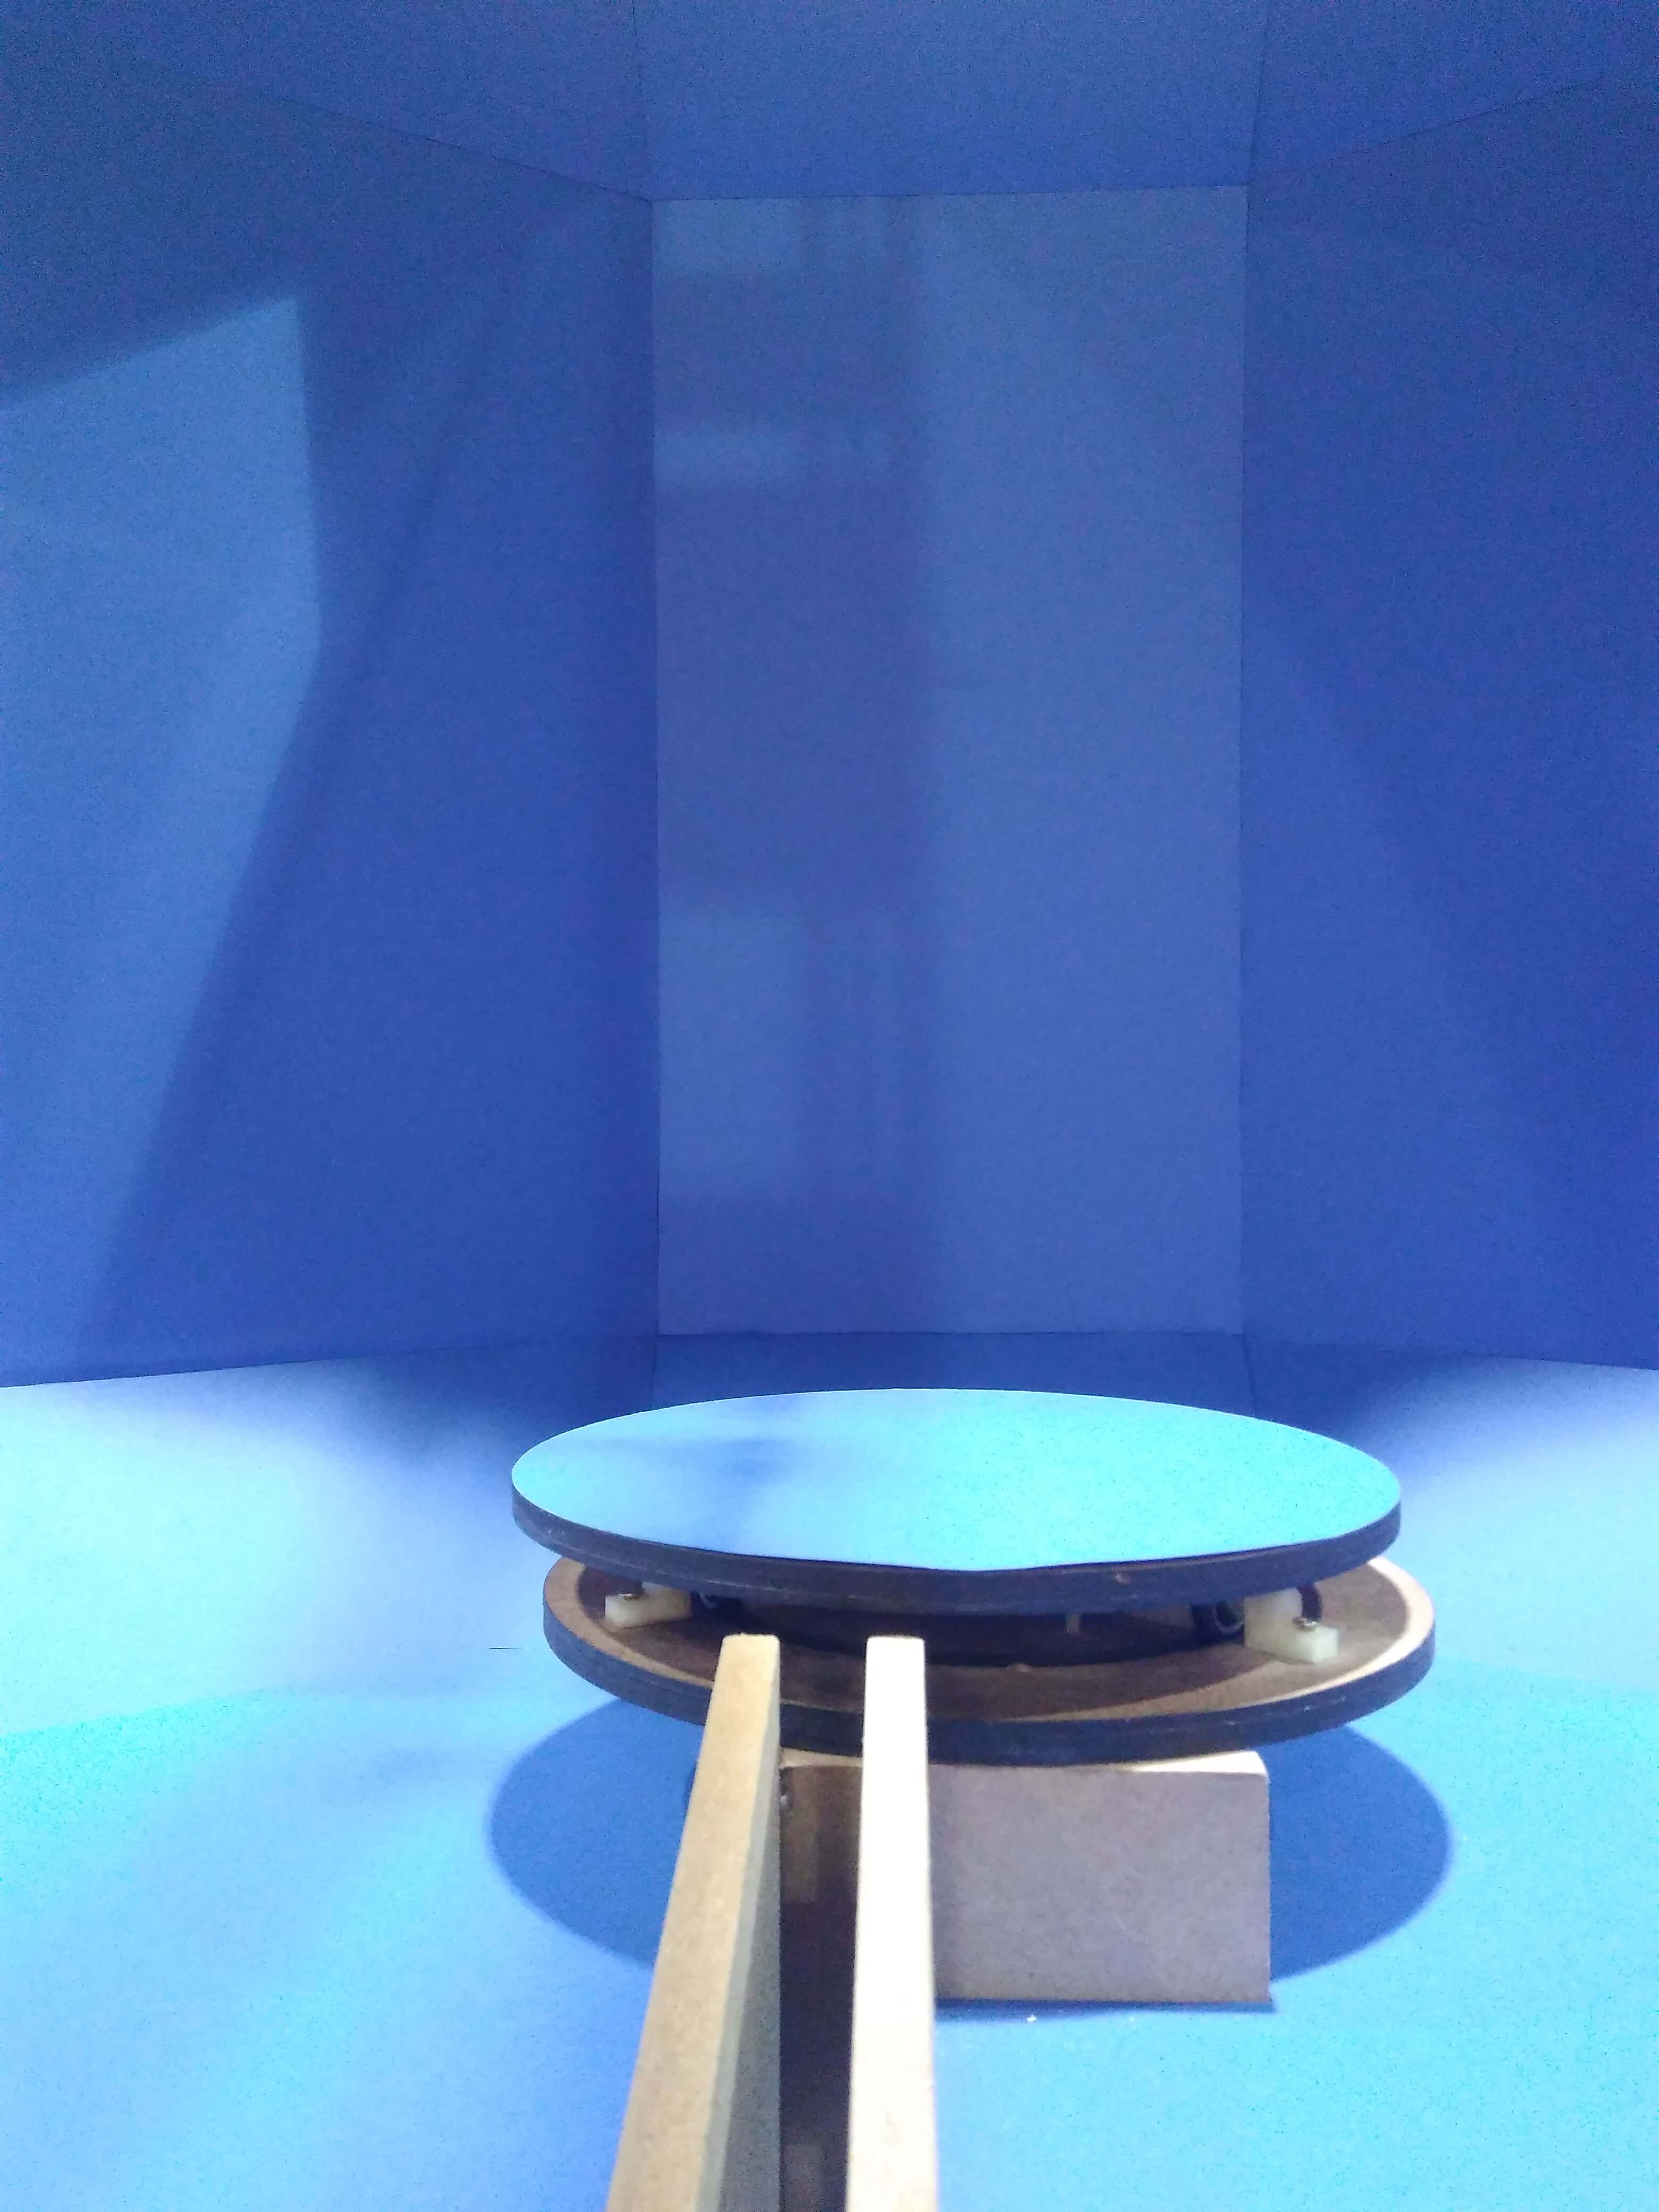
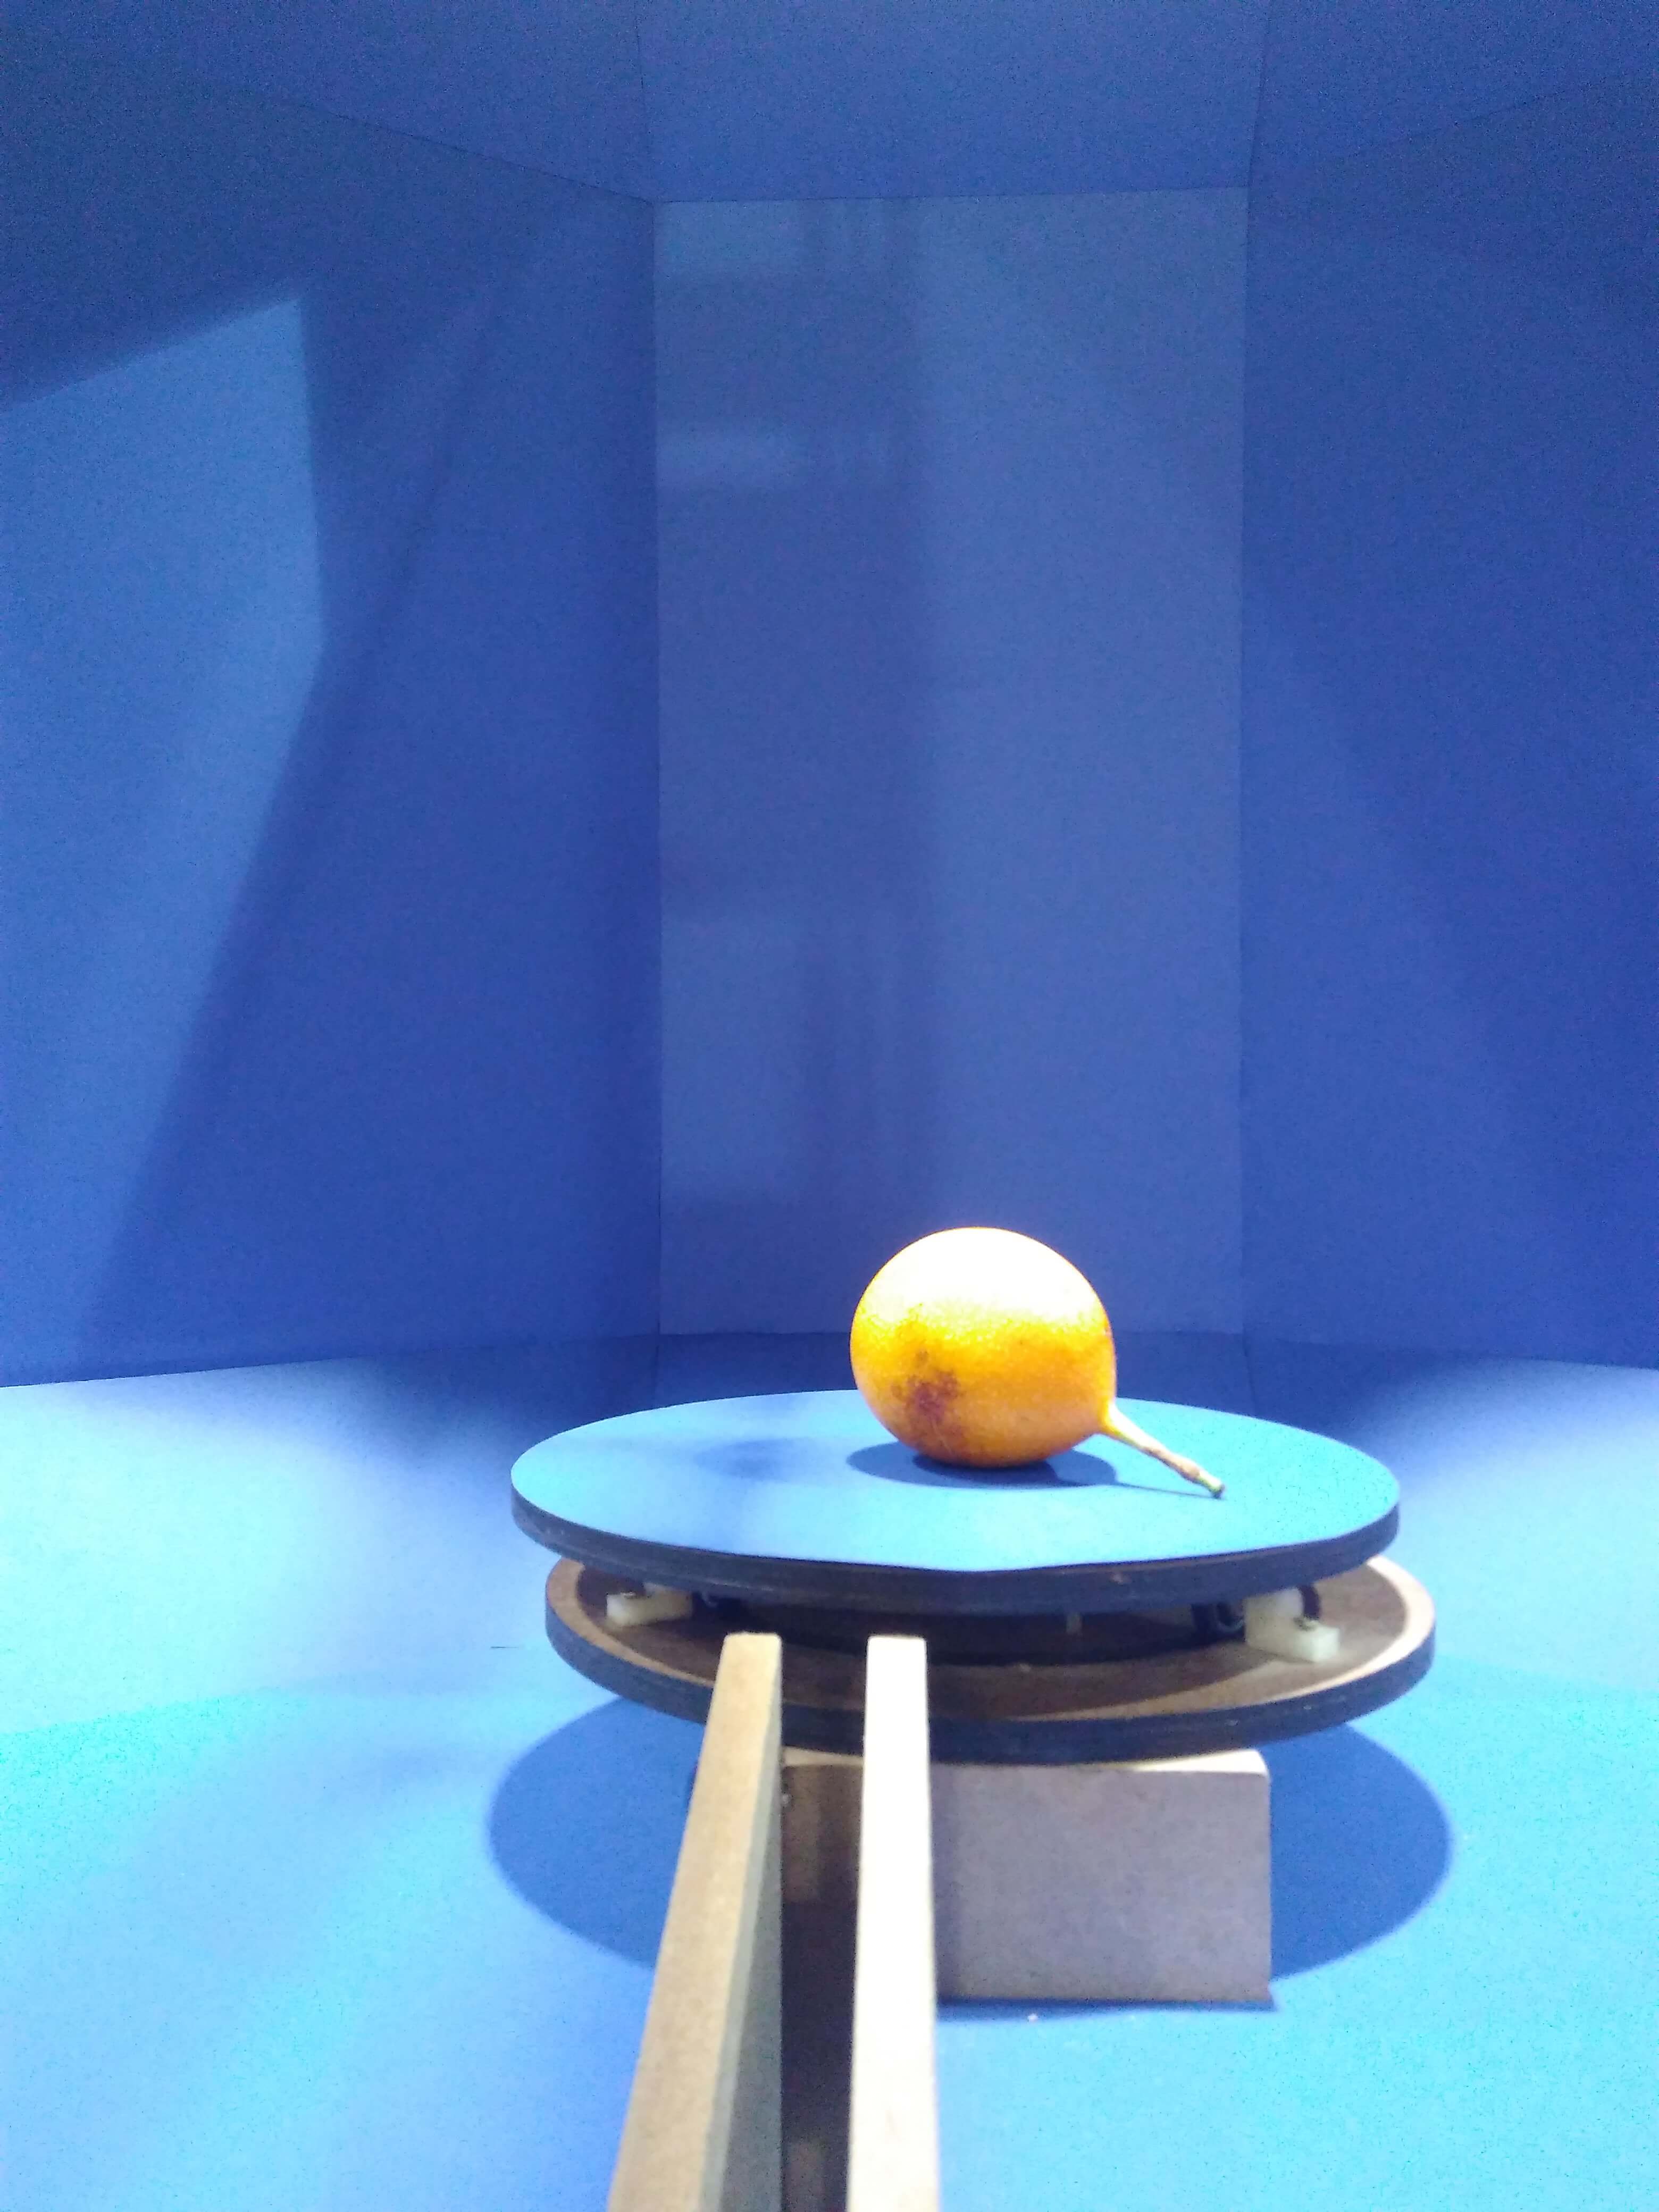
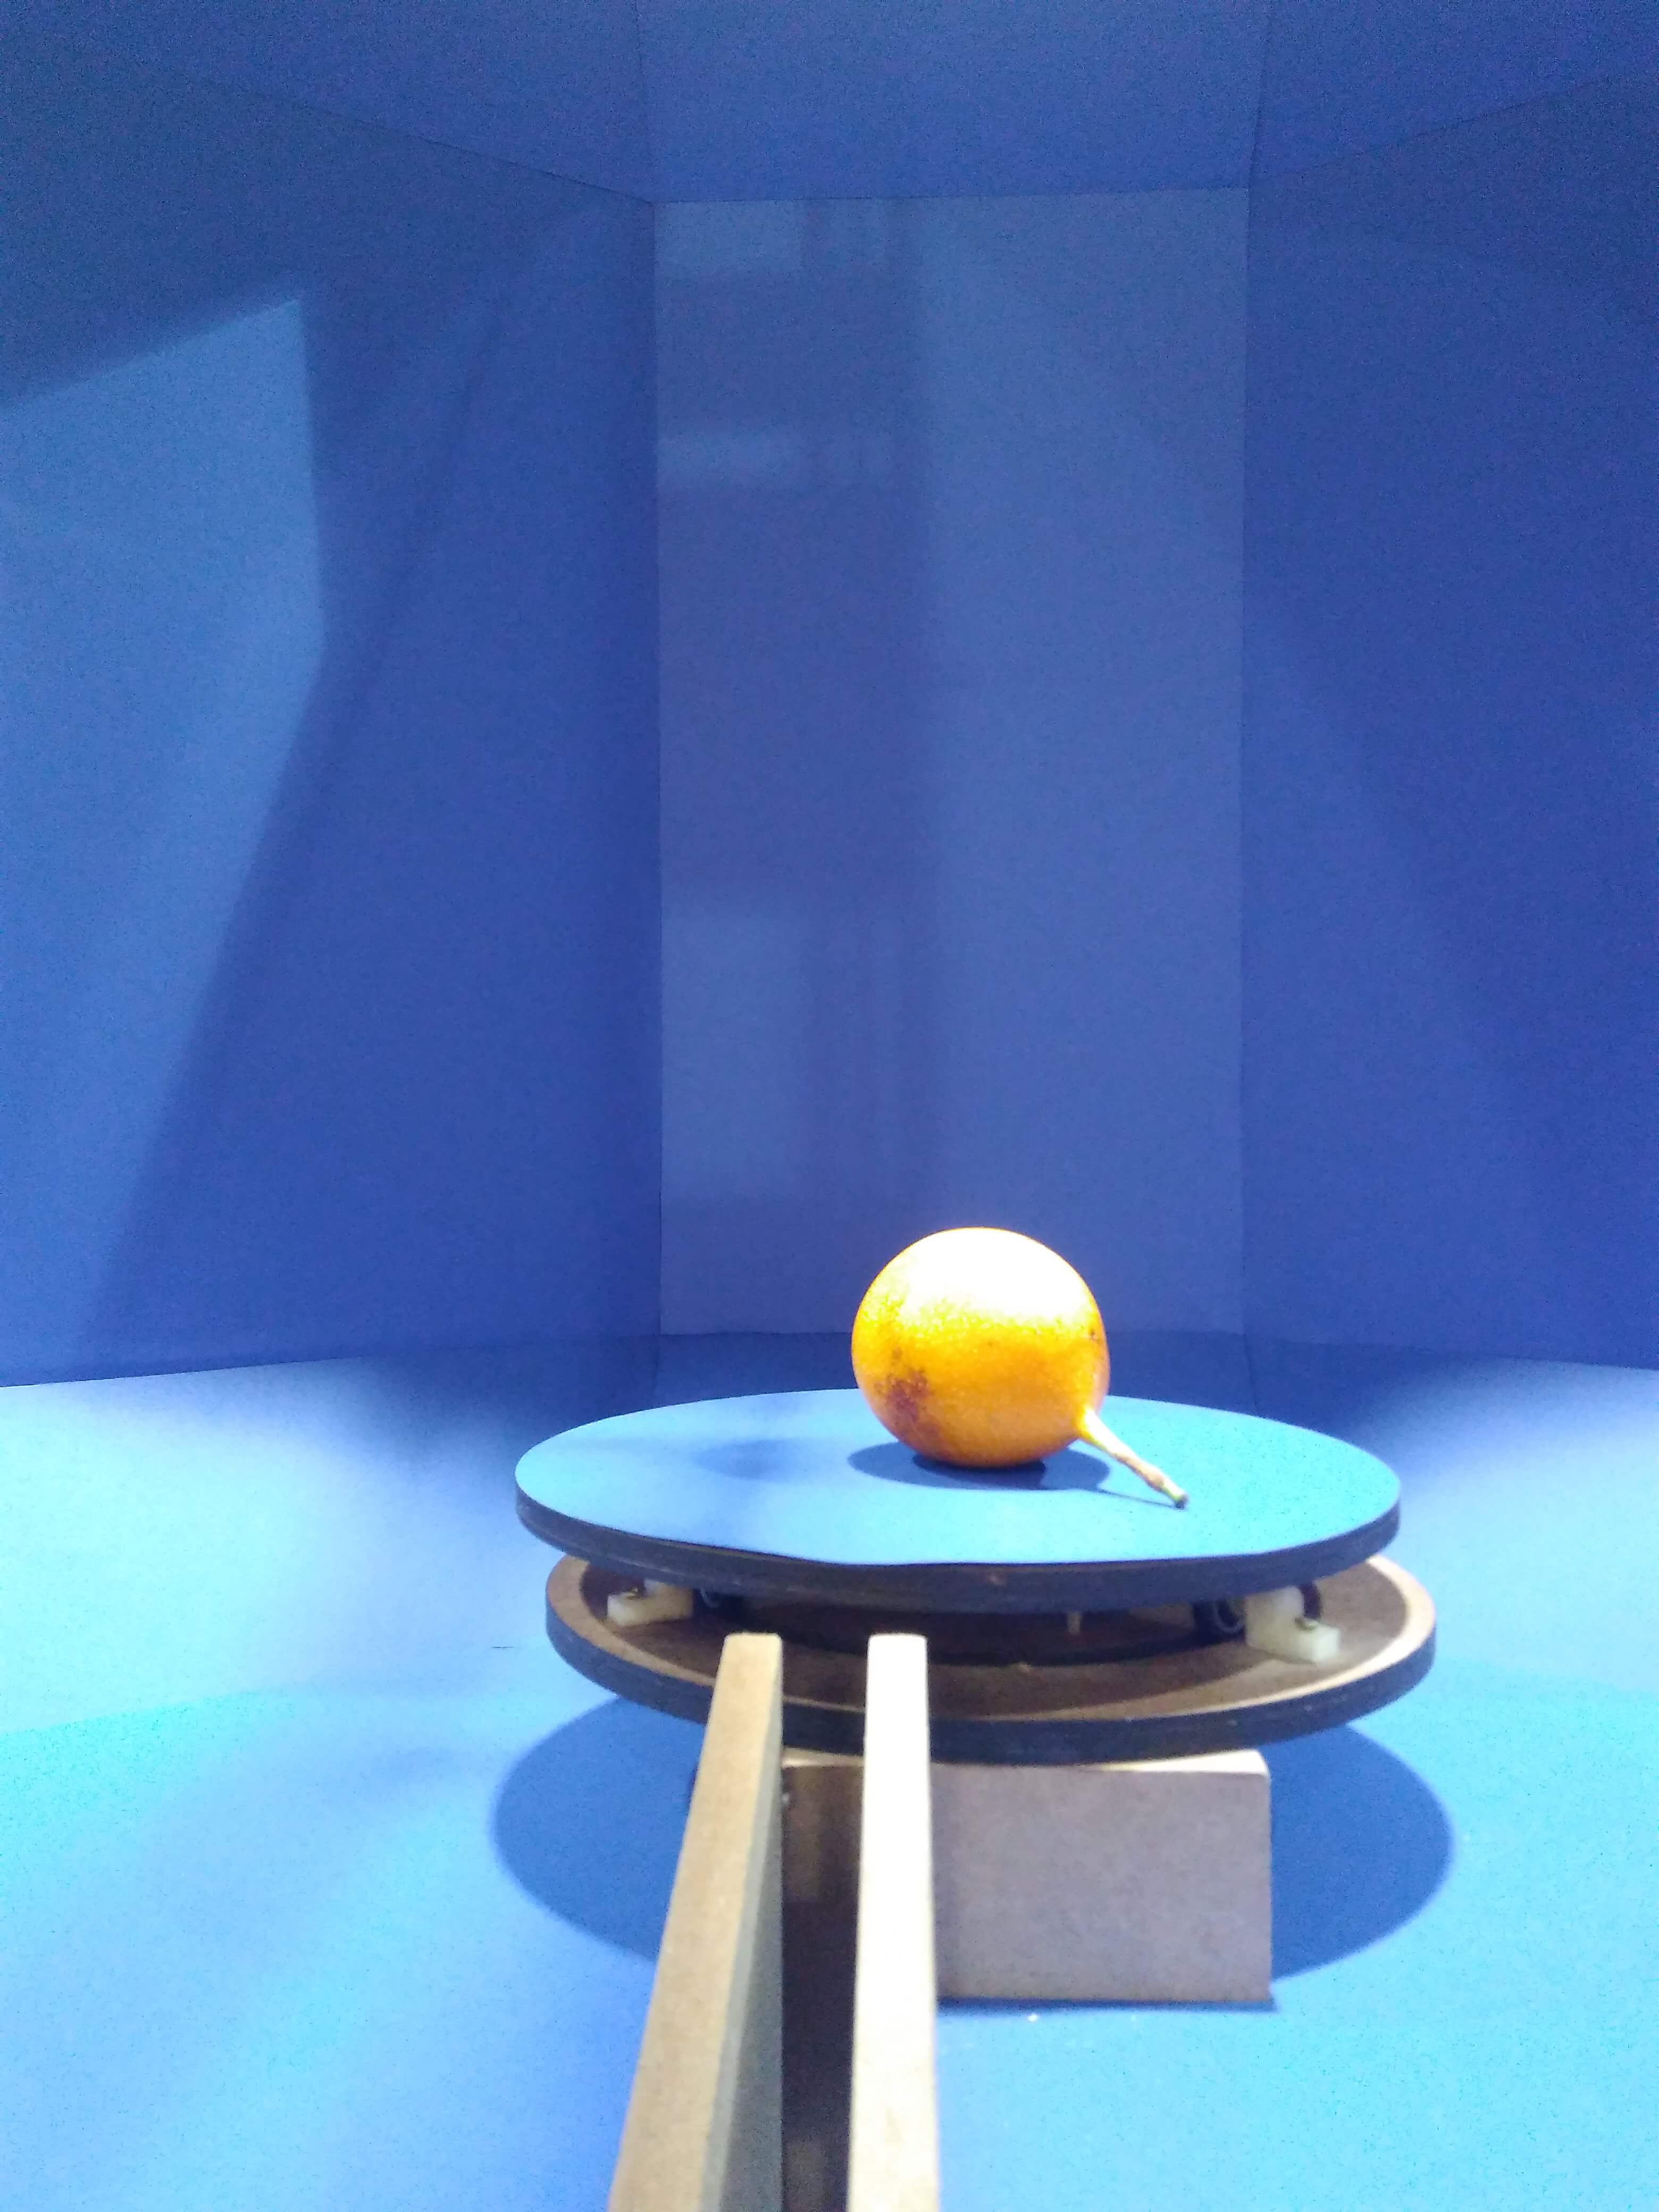
The photos uses to create a 3D model is available on this link. They are one of them.
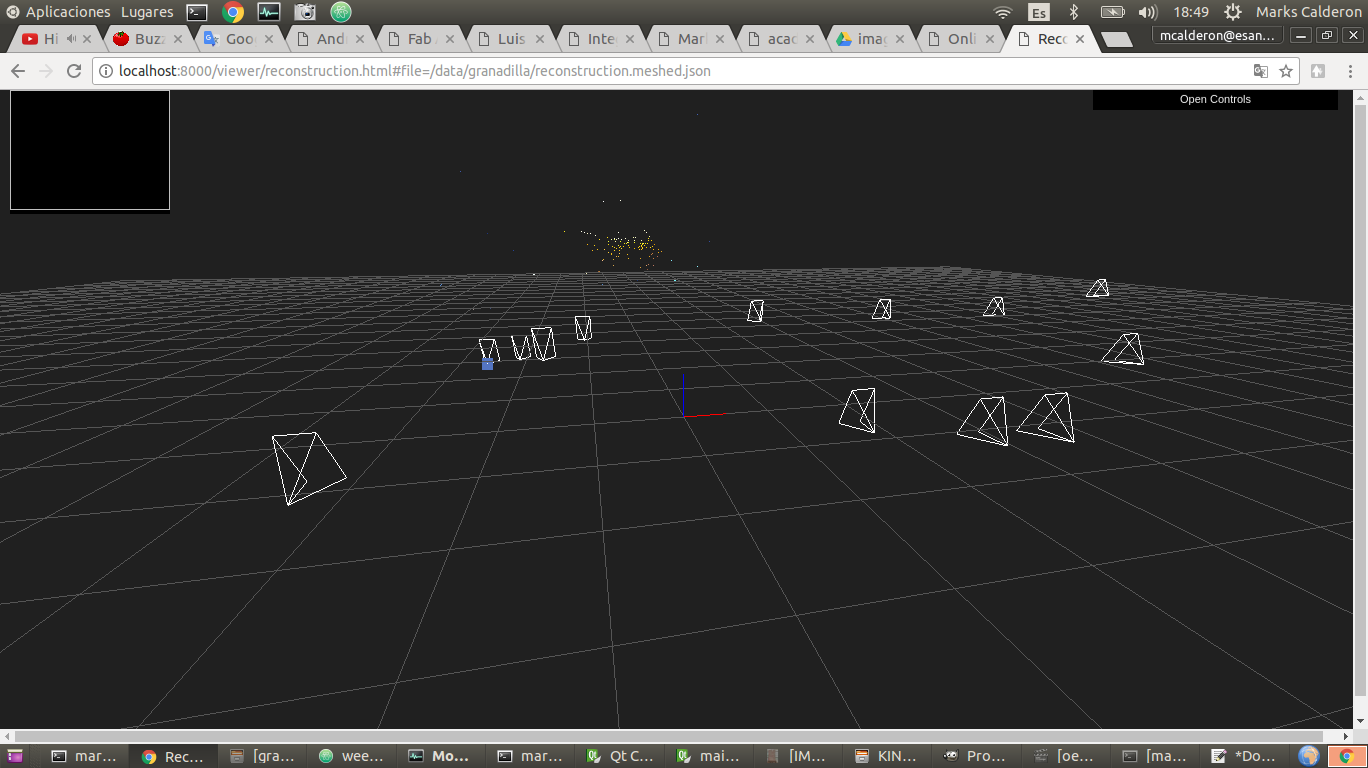
Finally we got the model, but it has some issues respect the camera position.
import sys

from PyQt5.QtWidgets import  QApplication, QMainWindow, QTreeView, QFileSystemModel,   QTextEdit
from PyQt5.QtCore import QDir, Qt

from .gui.mainwindow_ui import Ui_MainWindow

from plotter import virtualMachine

import socket
import threading
import fcntl
import struct
import time
import os
import math


class MainWindow(QMainWindow, Ui_MainWindow):
    def __init__(self):
        super(MainWindow, self).__init__()
        self.setupUi(self)
        self.processingButton.clicked.connect(self.Calculate)
        self.sessionButton.clicked.connect(self.Session)
        self.picturesButton.clicked.connect(self.Pictures)
        self.endButton.clicked.connect(self.End)
        self.gestaltButton.clicked.connect(self.gestalt_init)

        self.cycle = True #cycle of thread recv_message


    def __del__(self):
        print "close all"
        self.s.close()
        self.cycle = False
        self.th.stop()

    def gestalt_init(self):
        ##gestaltInterface init function
        self.stages = virtualMachine(persistenceFile = "test.vmp")
        self.stages.xyNode.setVelocityRequest(4)
        self.stages.xNode.setVelocityRequest(4)
        self.stages.yNode.setVelocityRequest(8)
        print "geslts have just initialized"

        gestalt_define_mov()

    #function to define the movements of gestalts
    def gestalt_define_mov(self):

        # Disk
        self.dangle= math.ceil(360.0/self.nshots)
        self.movi=  range(0,361,dangle)
        self.movesx = []
        for i in self.movi:
            self.movesx.append([i])
        # Phone
        self.arcpoints=[[10],[20],[30],[40],[50],[60],[70],[80],[90],[100]]  # Empirical points selected on the arc
        self.dangle=360/self.nlevels
        self.movi=  range(0,361,self.dangle)
        self.movesy = []
        for i in self.movi:
            self.movesy.append([i])
        print "moves (x,y) are saving"

    ##function to start the movements of robot
    def gestalt_mov_start(self):
        for my in self.movesy: # Phone
            self.stages.move(my,0)
            status = self.stages.xAxisNode.spinStatusRequest()
            # This checks to see if the move is done.
            while status['stepsRemaining'] > 0:
                time.sleep(0.001)
                status = self.stages.xAxisNode.spinStatusRequest()
            for mx in self.movesx: # Disk
                self.stages.move(mx,0)
                status = self.stages.yAxisNode.spinStatusRequest()
                # This checks to see if the move is done.
                while status['stepsRemaining'] > 0:
                    time.sleep(0.001)
                    status = self.stages.yAxisNode.spinStatusRequest()
                #here the scoket moments
    def gestalt_triggerx(self, mx):
        self.stages.move(mx,0)
        status = self.stages.xAxisNode.spinStatusRequest()
        while status['stepsRemaining'] > 0:
            time.sleep(1)
            status = self.stages.xAxisNode.spinStatusRequest()

    def gestalt_triggery(self, my):
        self.stages.move(my,0)
        status = self.stages.yAxisNode.spinStatusRequest()
        while status['stepsRemaining'] > 0:
            time.sleep(1)
            status = self.stages.yAxisNode.spinStatusRequest()

    def socket_init(self):
        self.port = 44450
        self.s = socket.socket(socket.AF_INET, socket.SOCK_DGRAM)
        self.server_address = (self.client, self.port)
        print >>sys.stderr, 'starting up on %s port %s' % self.server_address
        self.s.bind(('',self.port))
        self.ip = self.get_ip_address('wlan0')
        self.ip_line.setText(self.ip)
        #self.s.setsockopt(socket.SOL_SOCKET, socket.SO_BROADCAST,1)

    def get_ip_address(self, ifname):

        return socket.inet_ntoa(fcntl.ioctl( self.s.fileno(),0x8915,  # SIOCGIFADDR
        struct.pack('256s', ifname[:15]))[20:24])

    def send_message(self, text):
        self.s.sendto(text, self.server_address)

    def recv_message(self):

        print >>sys.stderr, 'listen up on %s port %s' % self.server_address
        self.sock = self.s

        self.th = threading.Thread(target = self.recv_message_thread, args=(self.sock,self.server_address))
        self.th.start()

    def recv_message_thread(self, client, address):
        size = 1024
        print "RECV MSG FROM THREAD"
        try:
            while self.cycle:
                data = client.recv(size)
                if data:
                    print "recv from android: " + data
                else:
                    raise error('Client error')

                time.sleep(1)
        except KeyboardInterrupt:
            client.close()
            return False
        client.close()

    def Calculate(self):
        self.sessionT = self.sesion_line.text()
        self.nshots = self.shots.value()
        self.nlevels = self.levels.value()
        self.ntime = self.time.value()
        self.client = self.ip_server.text()
        print self.sessionT
        print self.nshots
        print self.nlevels
        print self.ntime

        self.read_items()
        self.socket_init()
        #self.send_message("SESSION,"+self.sessionT+","+self.ip)
        #self.recv_message()


    def Session(self):
        msg = "SESSION," + self.sessionT+","+self.ip
        print 'start session: '+msg
        self.send_message(msg)

    def Pictures(self):
        for x in range(1):
            msg = "OK," + self.sessionT+","+self.ip
            print 'take Pictures: '+msg
            self.send_message(msg)
            time.sleep(10)

    def End(self):
        msg = "END,"+self.sessionT+","+self.ip
        print 'start session: '+msg
        self.send_message(msg)
        model = QFileSystemModel()
        model.setRootPath(QDir.currentPath())
        self.treeView.setModel(model)
        self.treeView.setDragDropMode(QtGui.QAbstractItemView.InternalMove)


    def read_items(self):
        self.sesion_line.setReadOnly(True)
        self.shots.setReadOnly(True)
        self.levels.setReadOnly(True)
        self.time.setReadOnly(True)

    def write_items(self):
        self.sesion_line.setReadOnly(False)
        self.shots.setReadOnly(False)
        self.levels.setReadOnly(False)
        self.time.setReadOnly(False)


def main():
    app = QApplication(sys.argv)
    main_window = MainWindow()
    main_window.show()
    sys.exit(app.exec_())

if __name__ == "__main__":
    main()