ELECTRONICS PRODUCTION
WEEK 4
- Make an in-circuit programmer by milling the PCB, then optionally trying other processes
IN-CIRCUIT PROGRAMER
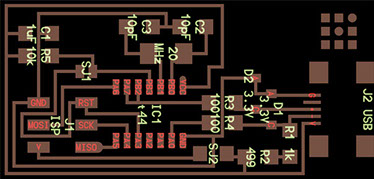
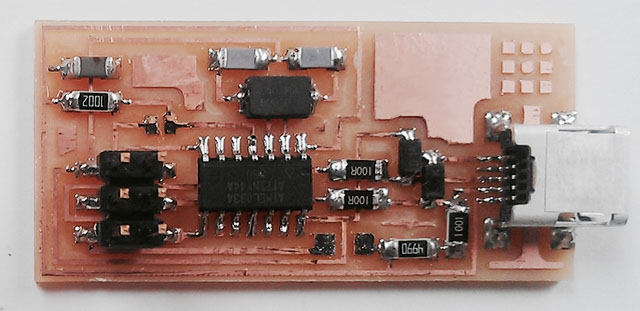
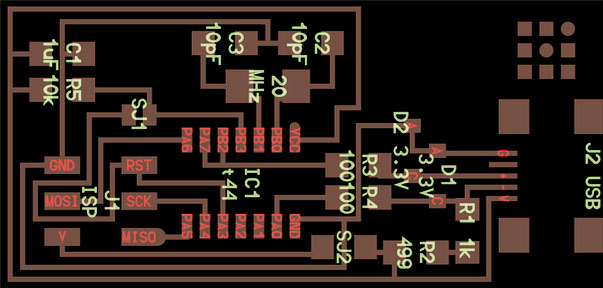
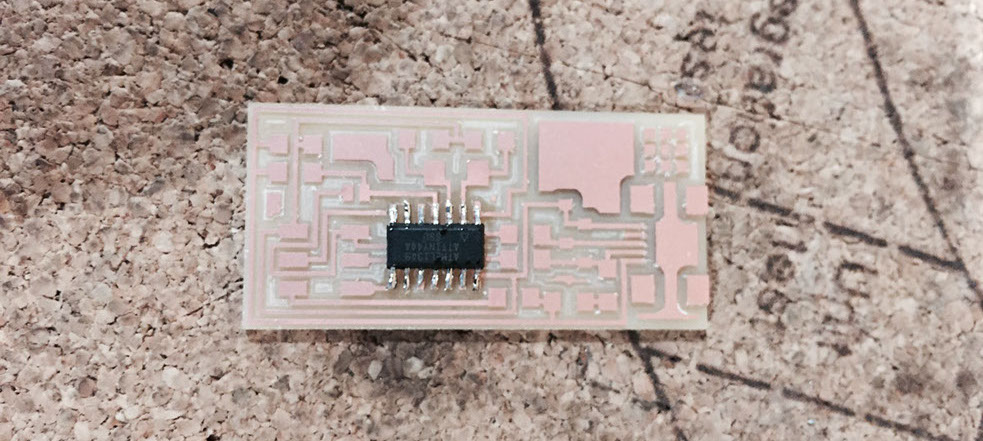
In this assignment we learn how to use the MODELA MDX-20 for milling and cuttig, we also learn how to weld a circuit board. I have chosen the board in the image, but you can also choose some other options.
I started preparing the Copper Clad Board. I puted double-contact tape on the board in the opposite side of the copper coating so it does not move and I placed the plate on the bed of the MODELA MDX-20. Then I adjusted the 1/64 cutter and placed the acrylic lid.
On the PC I opened the terminal emulator (Linux), ran sudofab, placed the key and chose MODELA MDX-20, then loaded the map of the board (black and white .png image) and selected make trace.
When the program was ready, I calibrated the Z axis that defines the milling height. This step is crucial to avoid breaking the cutter. The plate had space for milling, so I decided I would do two more, just in case I ruin any in the future.
I pic "make .rml" button and sent the milling order. The first milling was perfect. When I finished, I changed the 1/64 mill to the 1/32 mill used to cut.
However after following the steps again I was surprised that I had not cut the plate, I repeated the attempt several times and in this first attempt I did not get to cut it, but when lowering more and more the mill only managed to break the path of the card.
The problem was that I had forgotten to select cut out board (1/32) and the program still followed the milling indication (mill traces 1/64). The next cards came out perfect and in order.
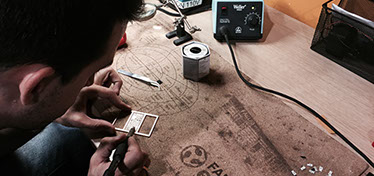
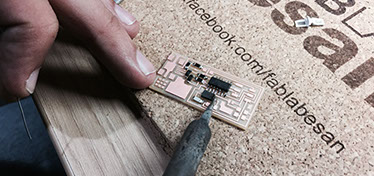
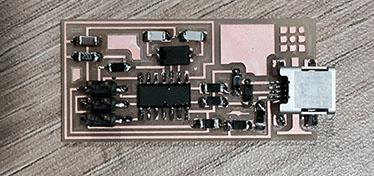
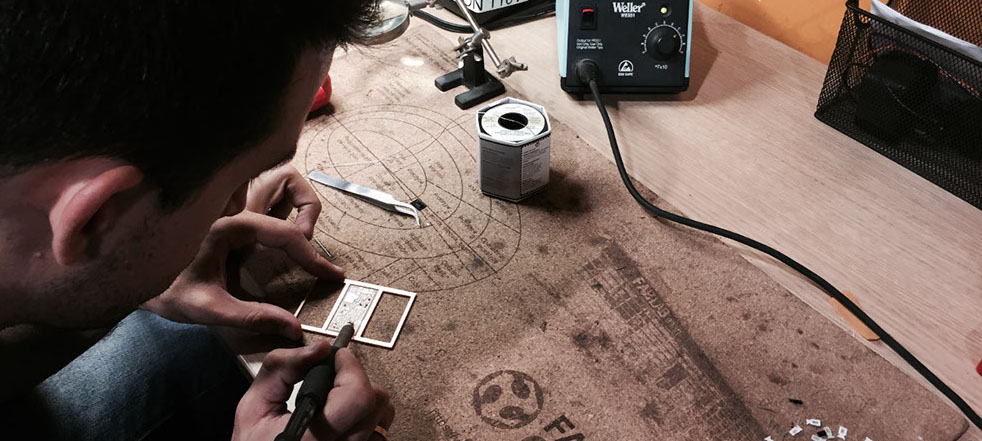
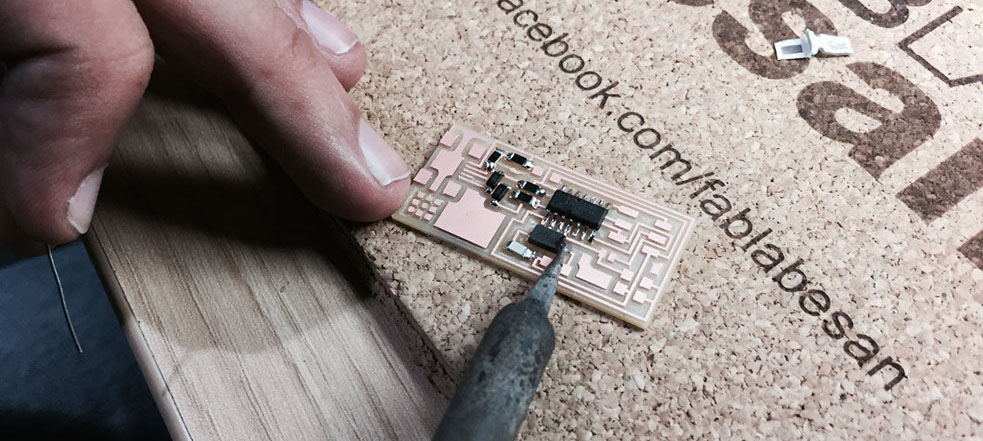
Once the milling and cutting of the plate was finished, they provided me the components according to the instructions for the chosen card and I started to weld them. First as a practice in the damaged card and then in the definitive one. The instructors explained to me that the components are weld in order of difficulty, and inside out.
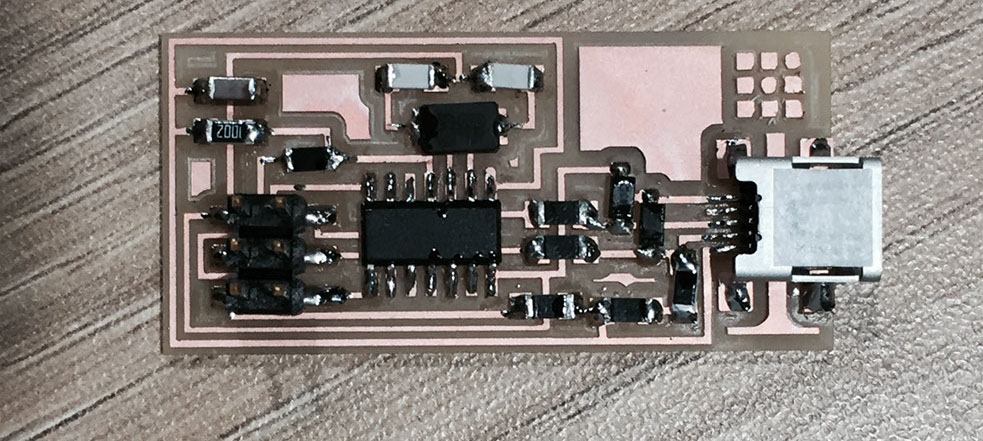
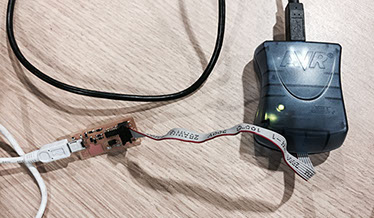
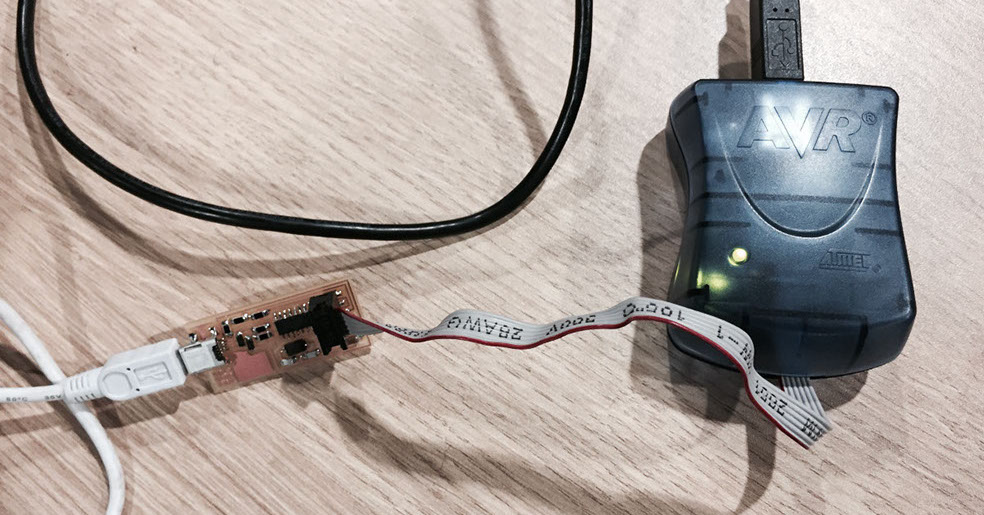
Finally we programmed the ISPboard with a AVRISP MKII, proving that both the milling of the plate and the welding of the components were in order. To be able to program, I studied the following
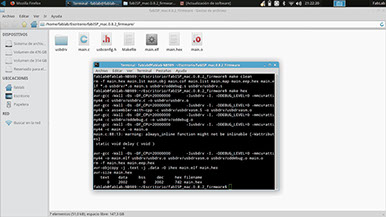
FABISP TUTORIAL
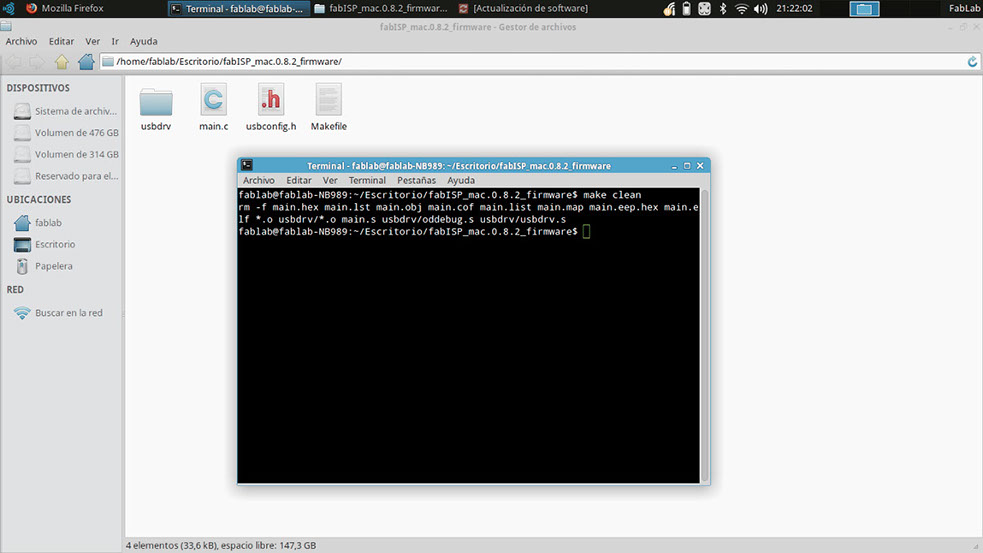
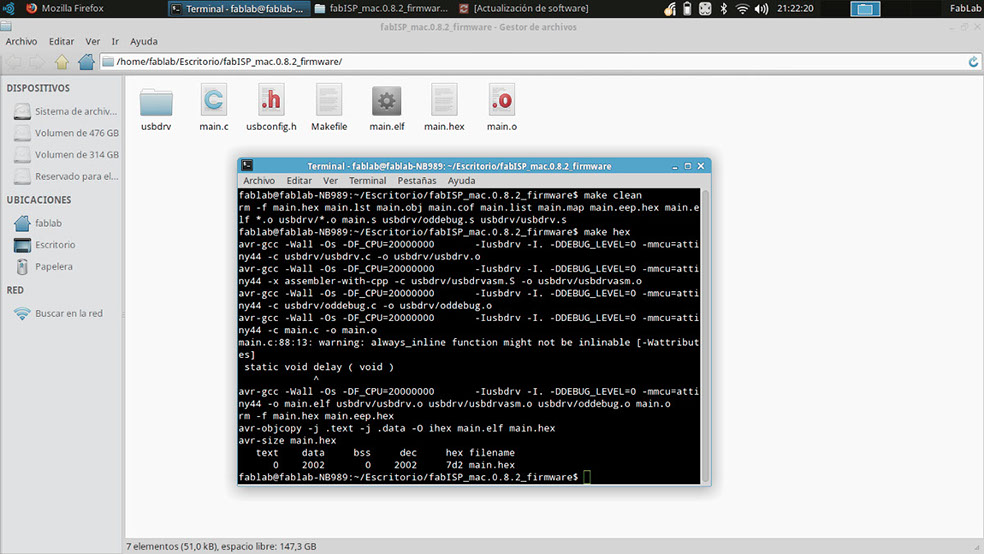
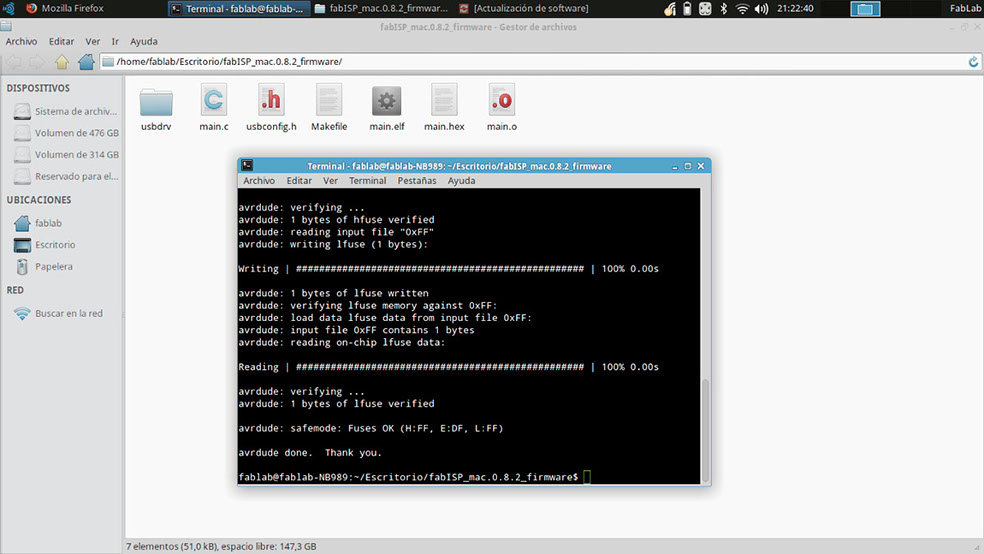
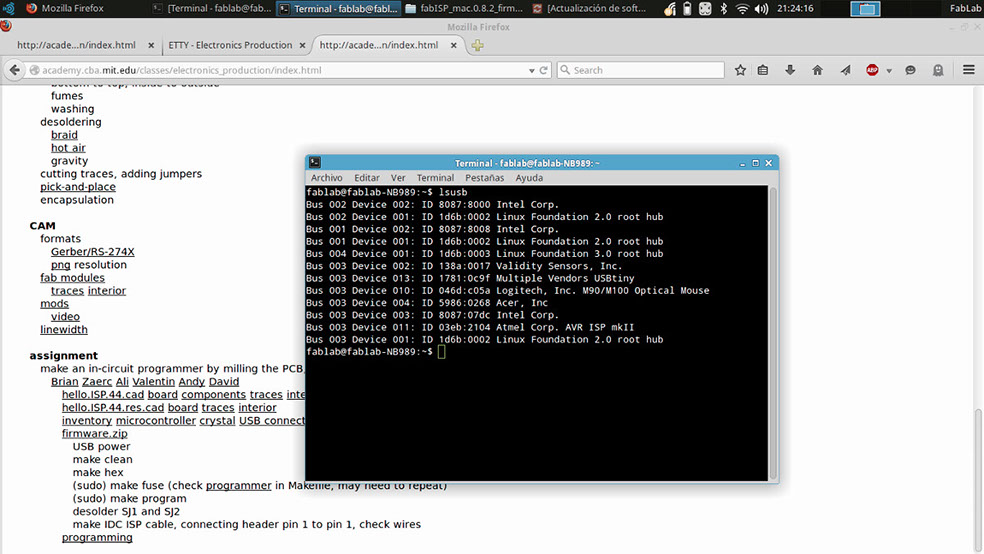
The first thing I had to do was type in the terminal, make clean and make hex to compile the firmware. Then I typed, make fuse, to set the fuses so my board would use the external clock (crystal). Finely to program, I put make program and it was almost ready. To finish I remove the 0 ohm resistor and solder bridge.
xmottex@gmail.com