3D scanning and printing
1. Week assignment
- design and 3D print an object (small, few cm) that could not be made subtractively
- 3D scan an object (and optionally print it)
2. Development Environment
I used SolidWorks, Cura for the Ultimaker2, Autodesk Recap, 123D Catch and Photoscan.
3. 3D Printing
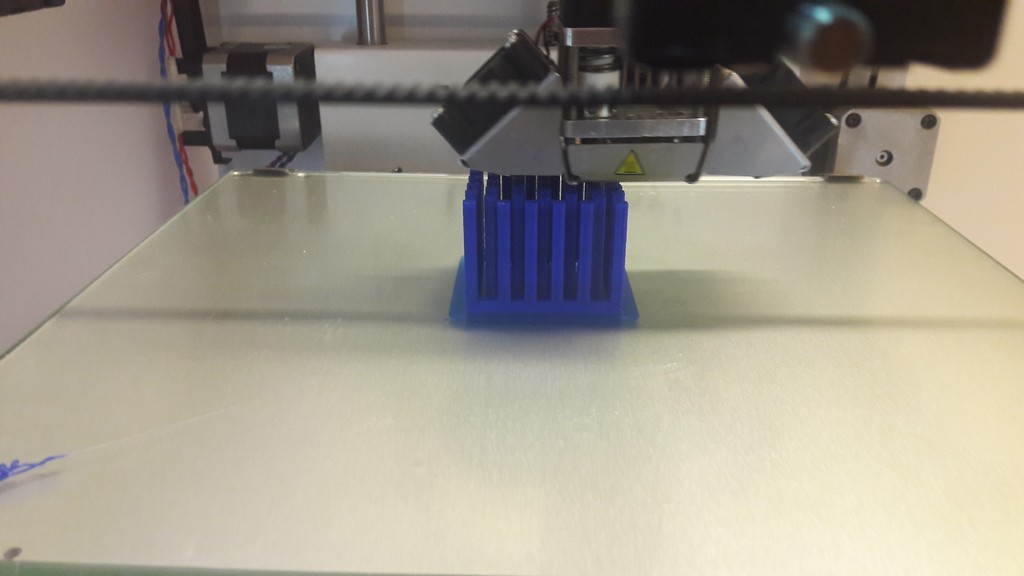
3.1 First try
At first i designed this:
To design this with SolidWorks I used the revolved extrude: it’s not a standard extrusion, as it revolve around something, usually an axis.
For the first time I used the assembly: I modeled a single face, then with the assembly I “built” the object by combining 6 equal faces.
I also used linear repetition of features.
This object can’t be made subtractively because of the revolved extrusion: a mill could never go inside it do to the detail.

I tried to print it, then:
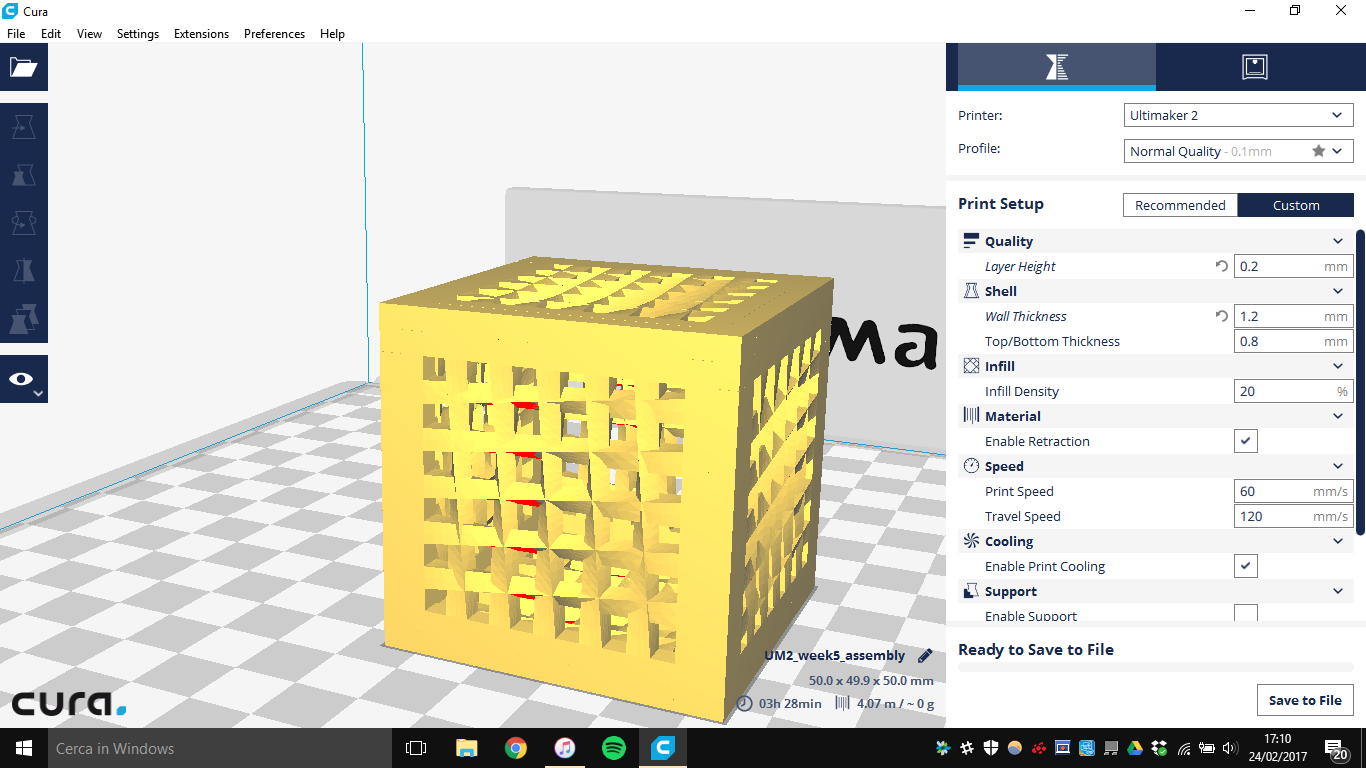
Using Cura i set: (using the group project test result):
- Layer height 0.2mm
- Wall thickness 1.2mm
- Top/Bottom thickness 0.8mm
- Infill density 20%
- Print speed 60mm/s
- Travel speed 120mm/s
- No supports
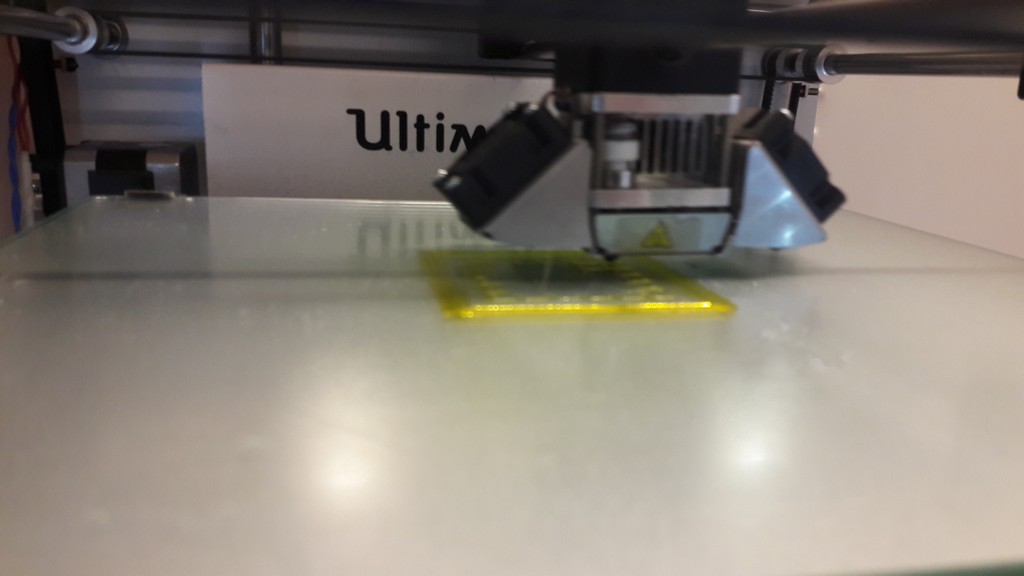
This is the final result: as it’s possible to see the upper face did not get printed, and i did not manage to get the effect I designed: a complete failure.
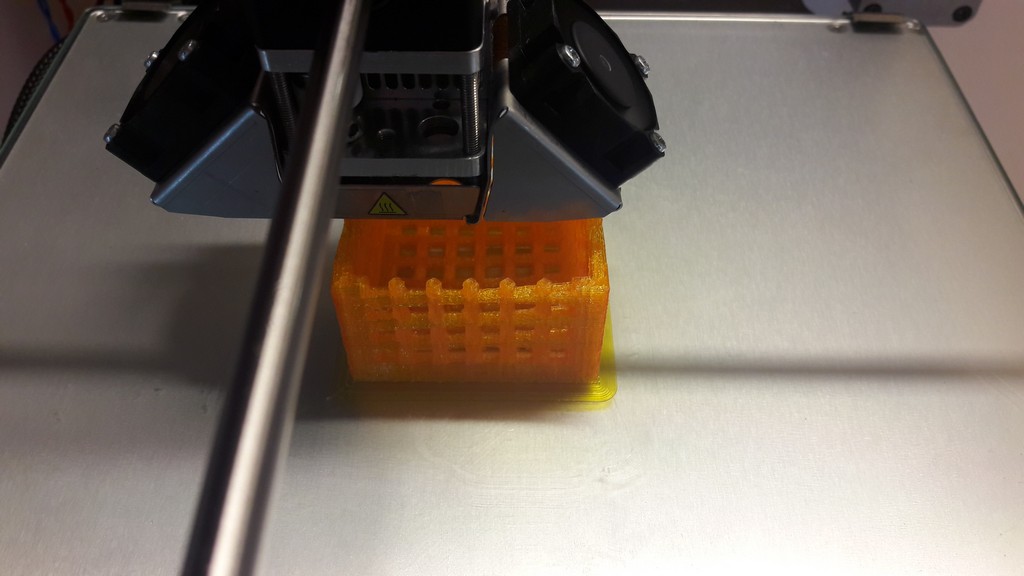
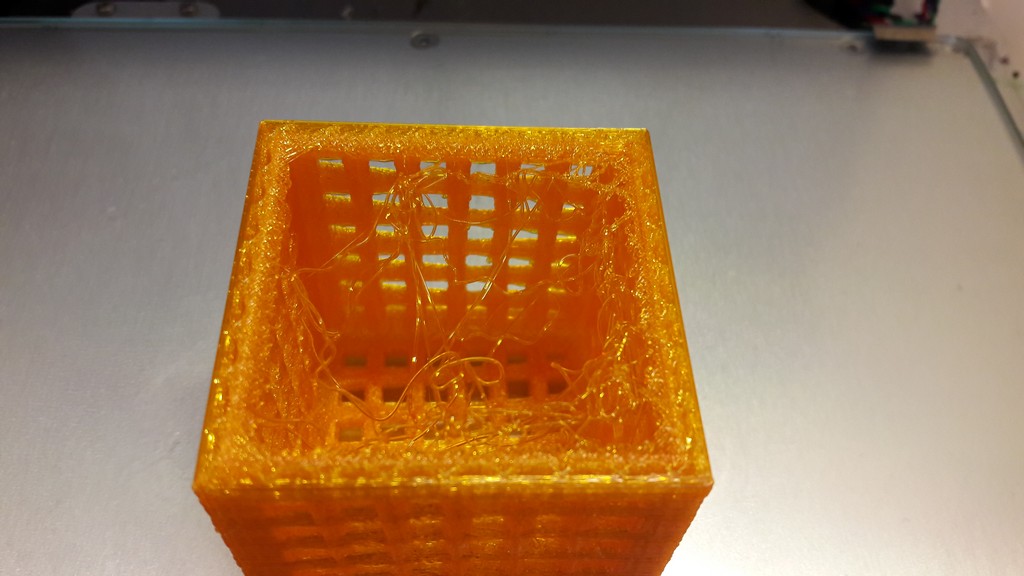
3.2 Second try
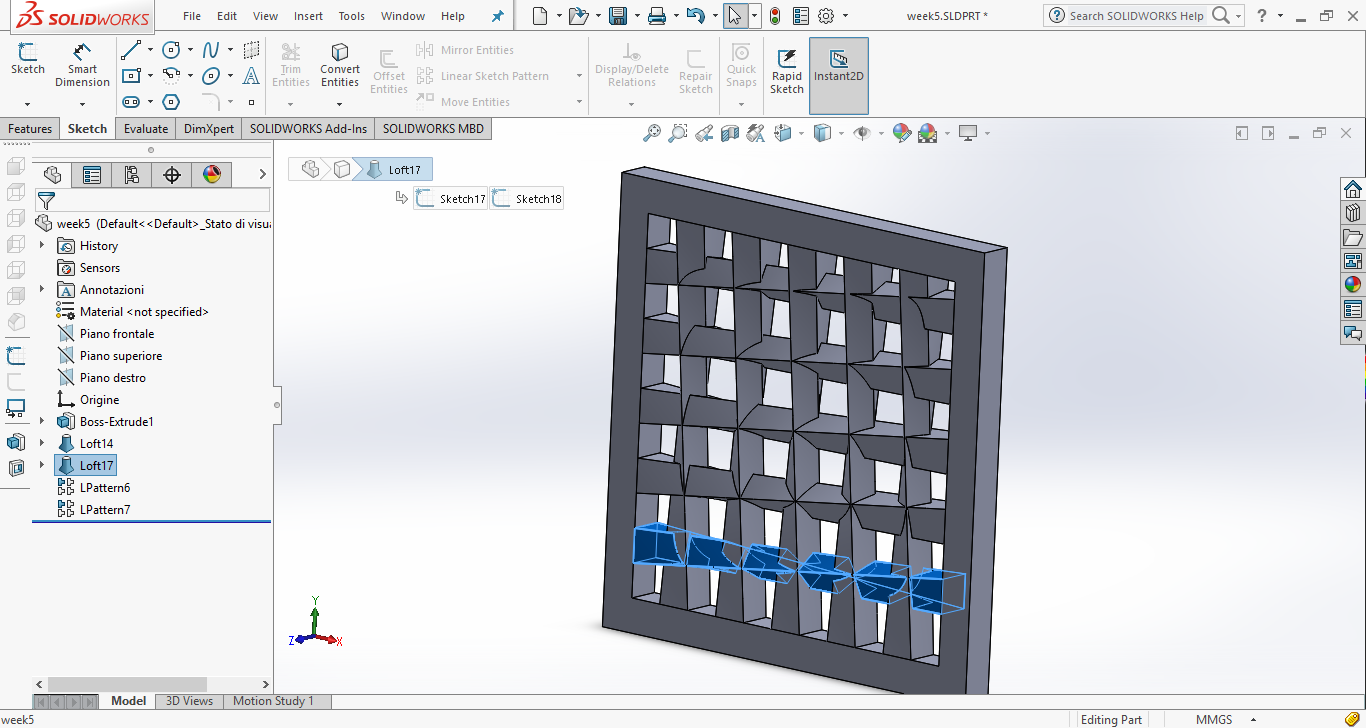
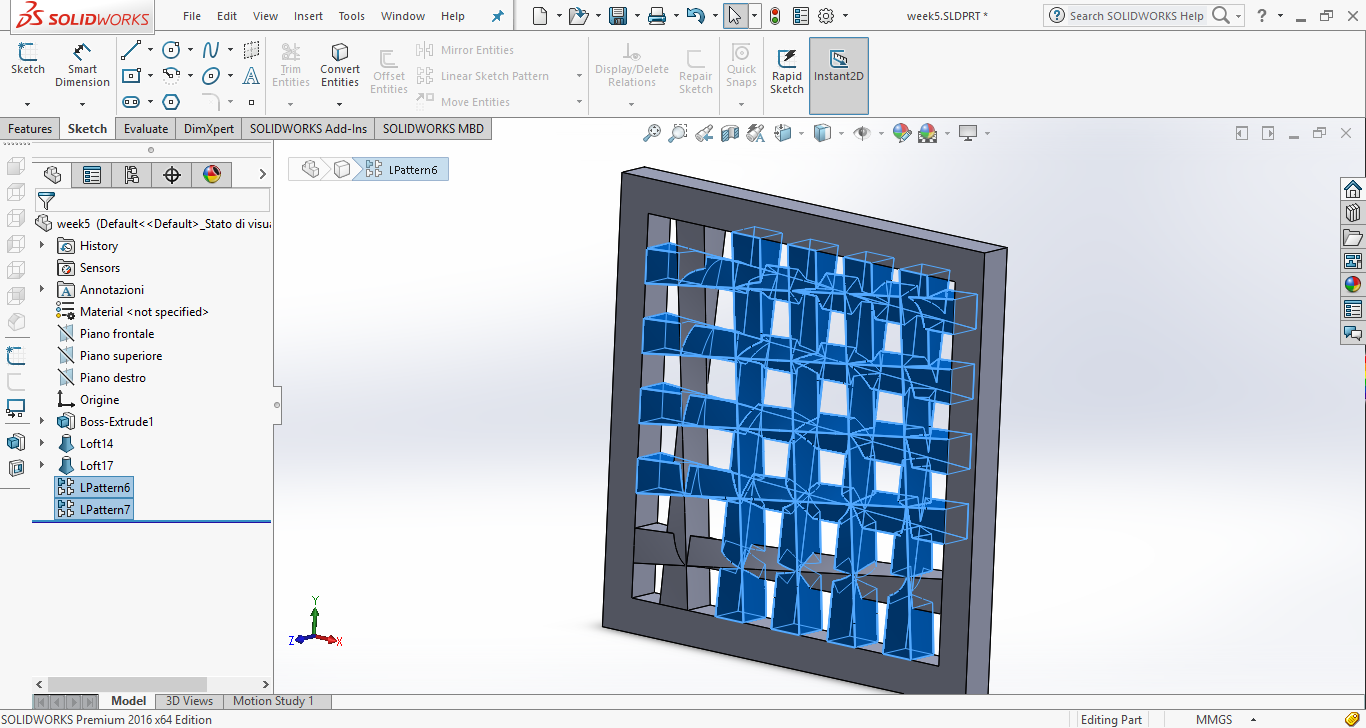
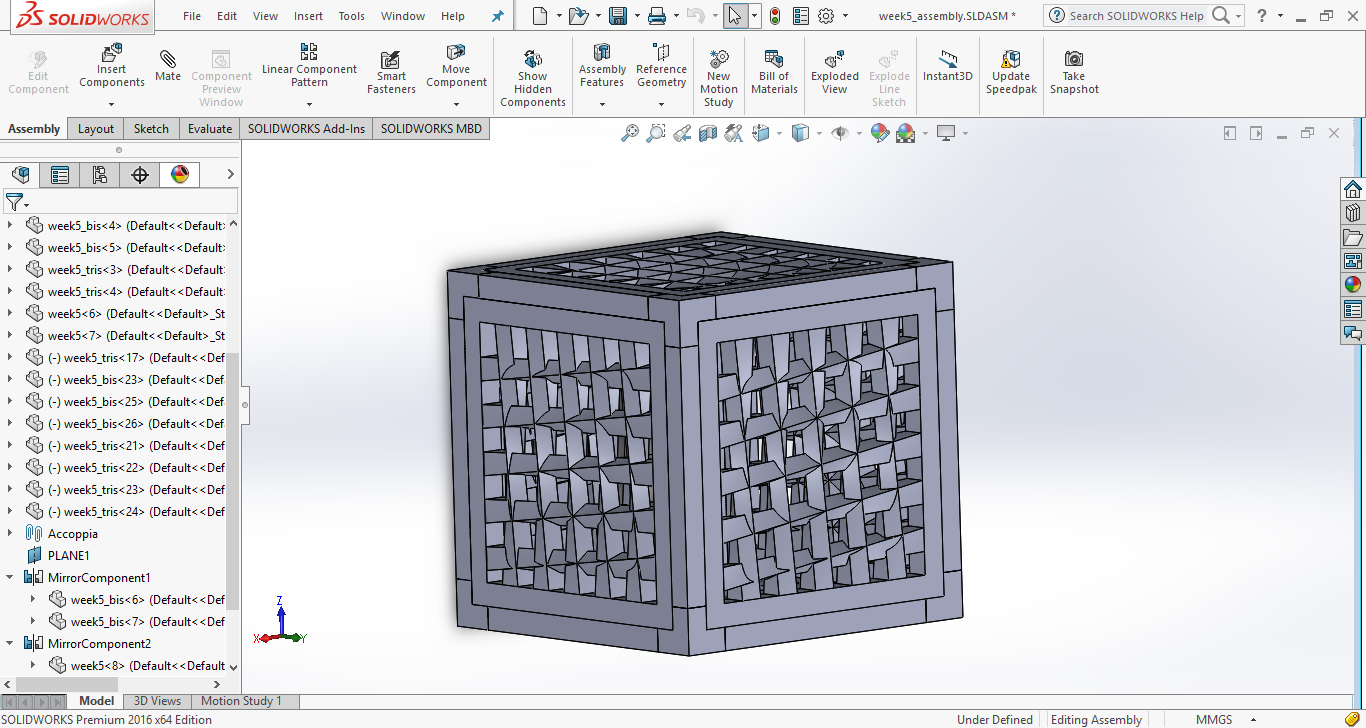
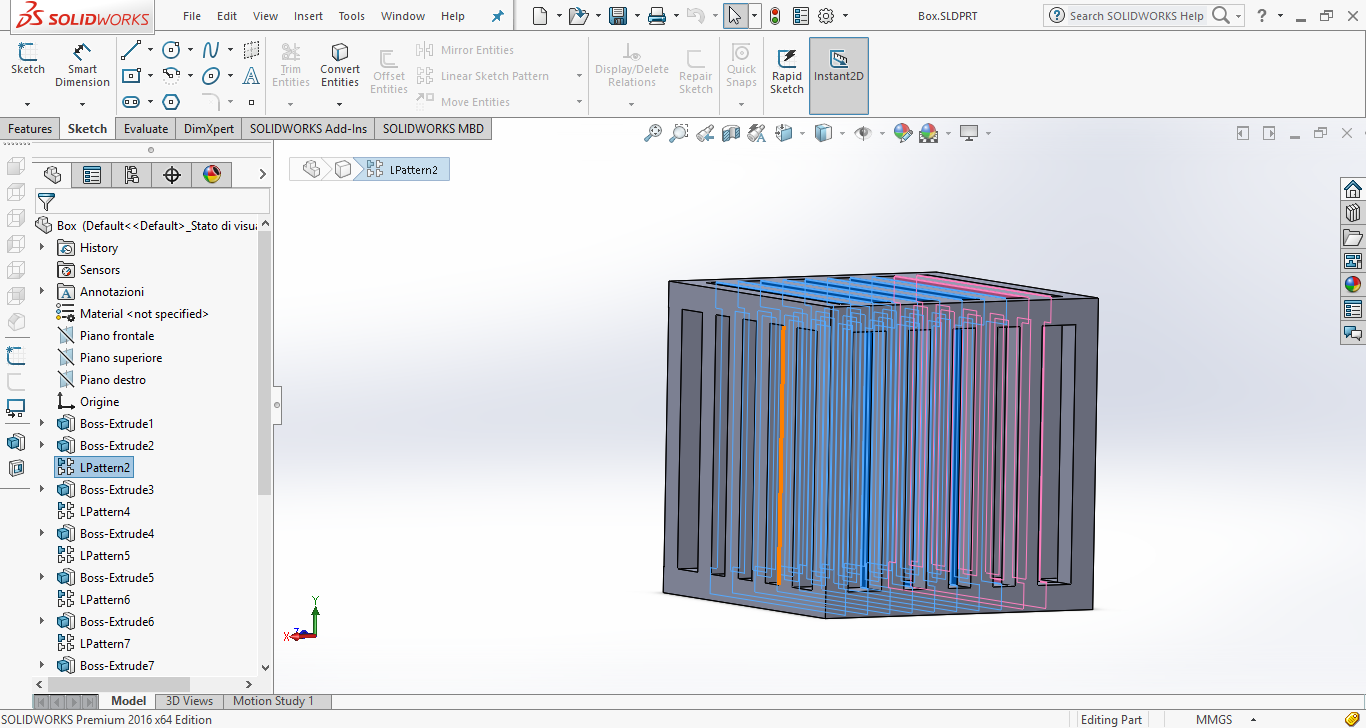
I then tried this design, using Solidworks.
The finished work is good, using the same Cura settings.
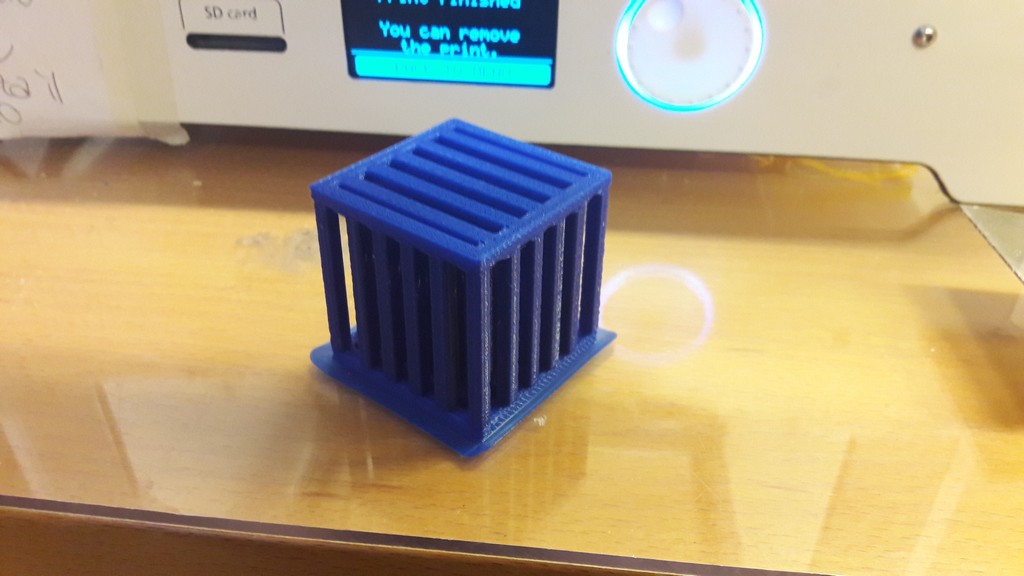
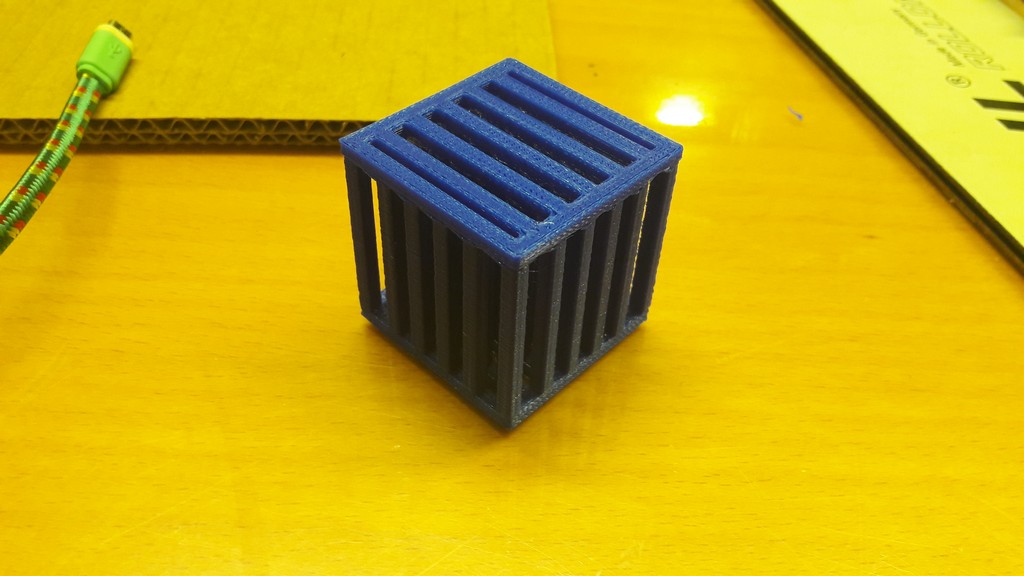
This object can’t be made subtractively because as you can see from sketchfab the inside columns are interleaved, so both a 3 axis or 4 axis mill can’t create this object.
To make this, I used the thing I learned from SolidWorks (like linear repetitions) in Week 3 and by doing the other box.
4. 3D Scanning
I tried several scans of different objects, but most of them did not work.
The idea of photogrammetry is that you take photos of an object by different prospectives and a program from that photos give you a 3D model by extracting relevant features.
You can turn the object or turn yourself around the object you are scanning.
Some tips:
- No moving subject
- No glossy surfaces
- No transparent surfaces
- No flash
- Nice exposition
At first i tried scanning this bike part i had.
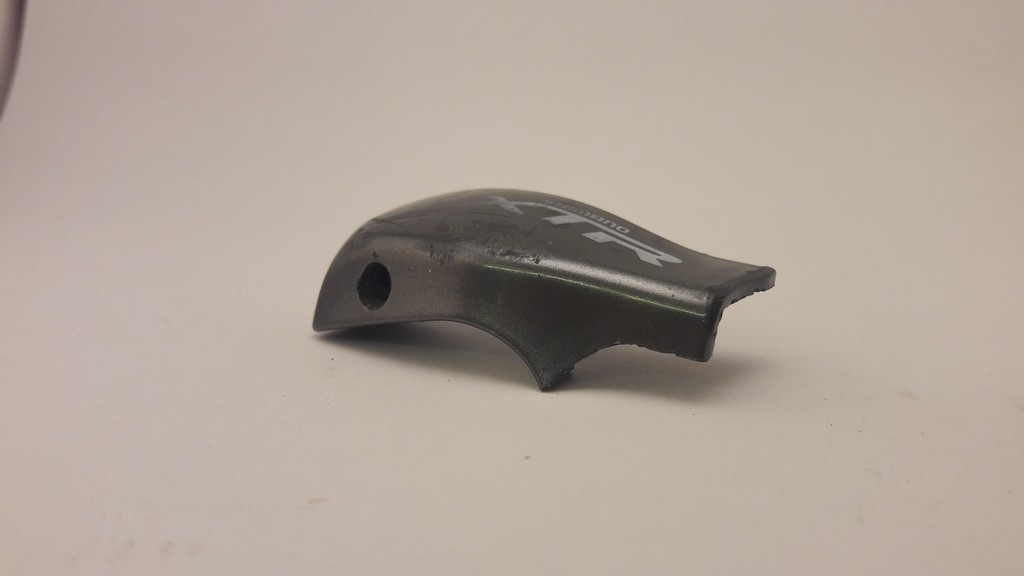
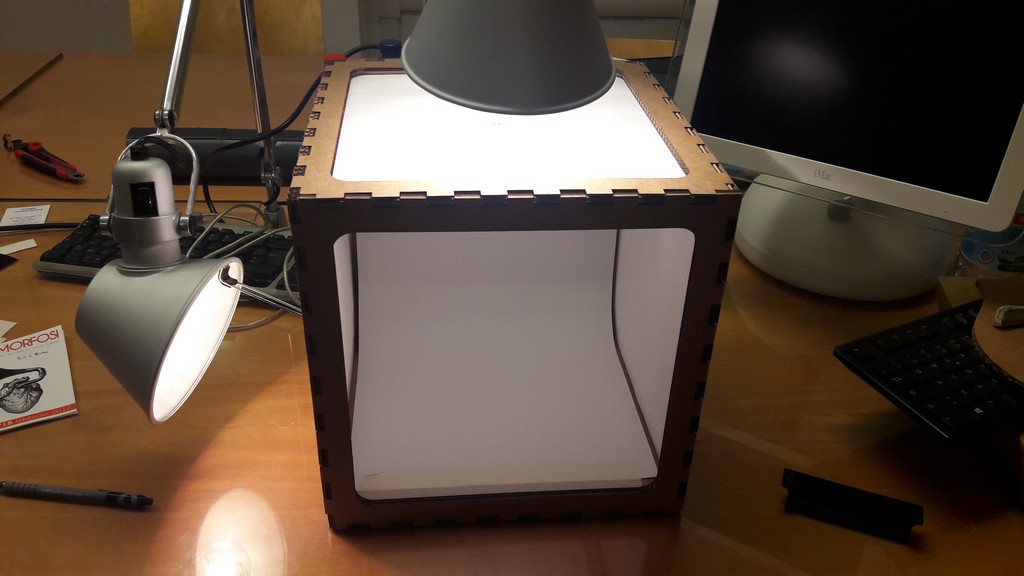
I took photos by rotating the object in a lightbox.
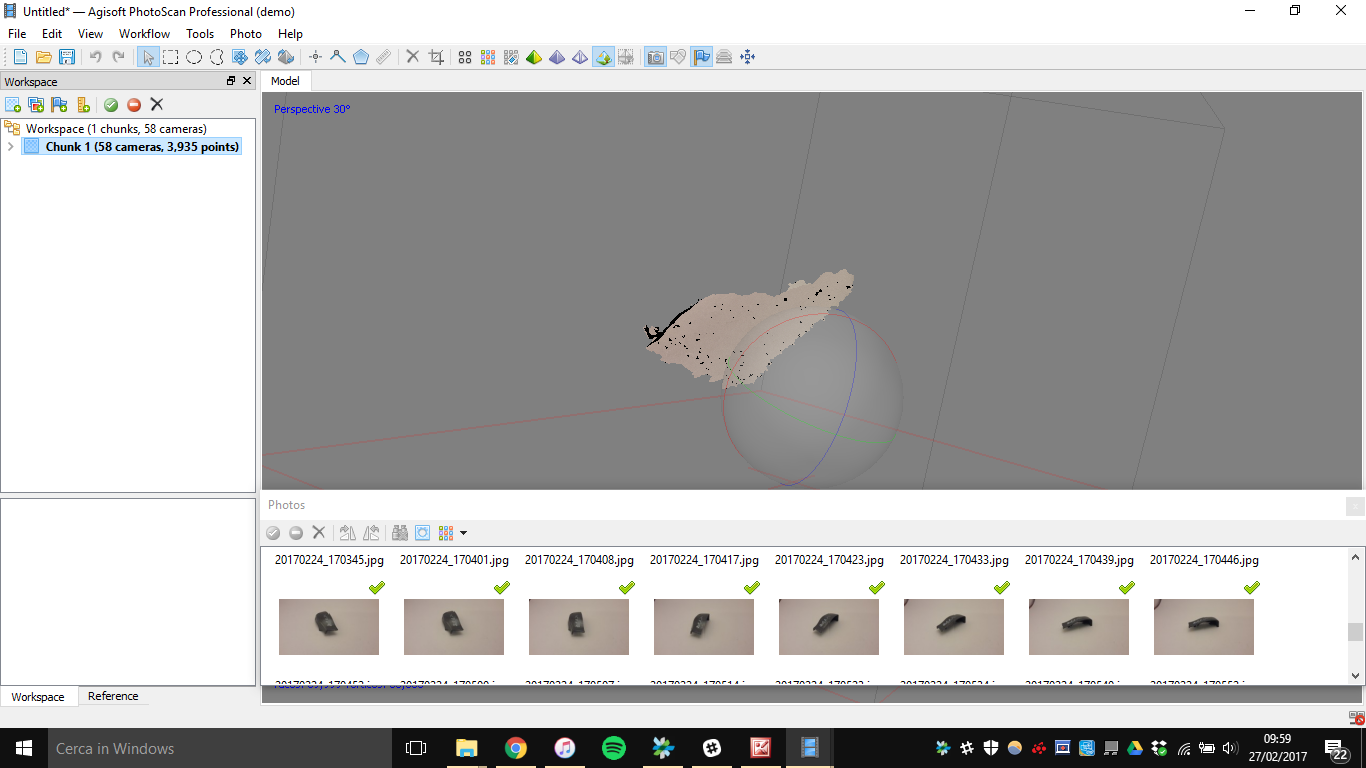
I processed the photos using Autodesk ReCap 360.
Obviously it did not work, maybe due to the complicated geometry of the object.
Tried processing the same photos with PhotoScan, and had the same result.
I then moved to 123D catch app.
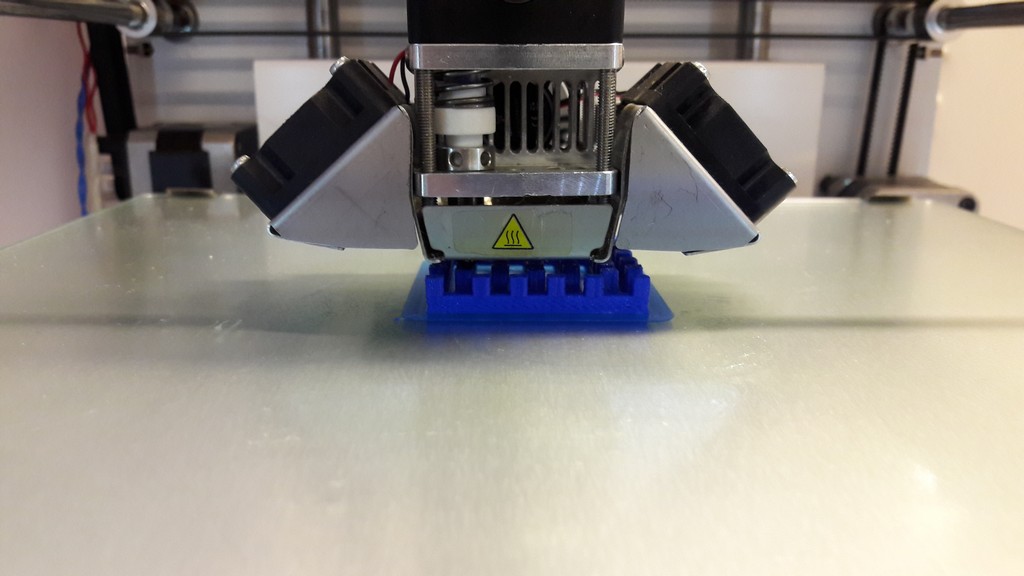
There are several failures: at first I tried scanning the first wrong 3D print.
Then i tried scanning a blackboard marker and a 3D print laying around in the lab, but the app did not even process the photos.
I had better results with this object:
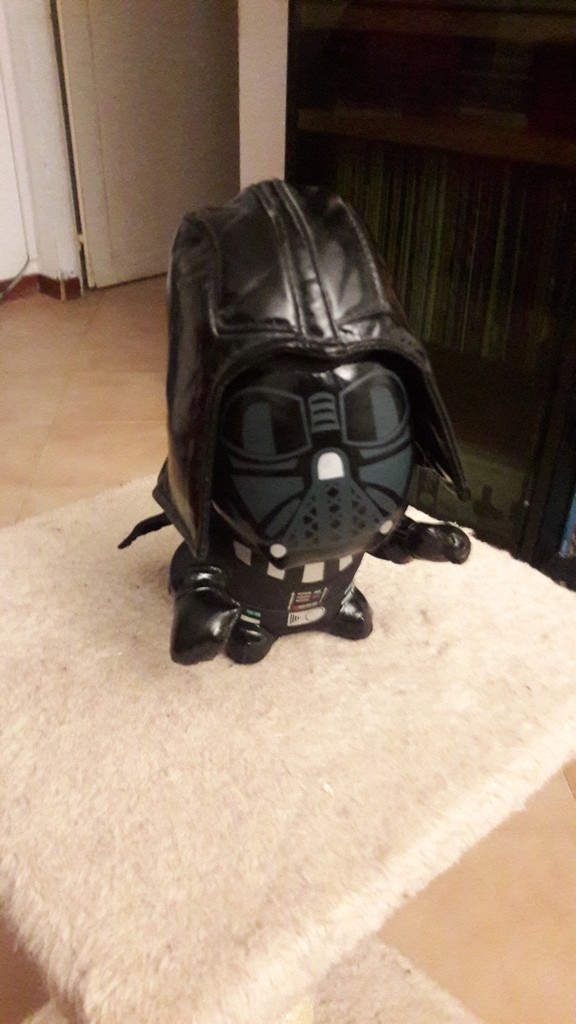
The model came almost complete (a little bit creepy maybe), except for the head due to glossy surface.
5. Files
First 3d print - .stl
Second 3d print - .stl
Solidworks files - .zip
Update
It's possible to find more work about this week on the final project page in the related development section