Assignment:embedded programming
You can download ATtiny24/44/84 data sheet here.
The following is the main features:
I use ATtiny84 microcontroller, it has 8K Flash program memory , 512Bytes of In-system Programmable EEPROM and 512 Bytes Internal SRAM.
Program my Hello-world board
Correct mistakes in my Hello-world board
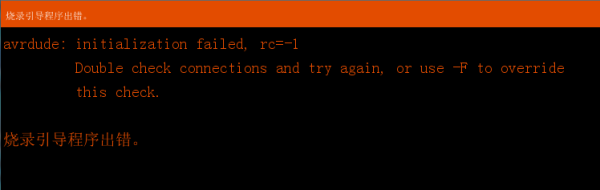
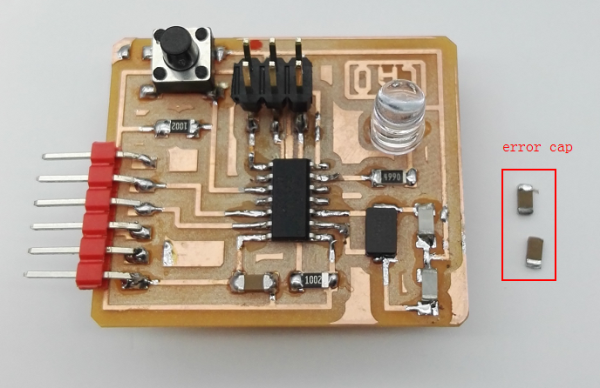
On week six's assigment, I made my hello-world board. After making, I didn't test it. When I tried to program the bootloader to it this week, an error message occours. This error interrupted me for a few days. At last, I found I made a mistake in using the capacitor of crystal, I used 1UF instead of 10pf. When I changed the right capacitor, the hello-world board works.
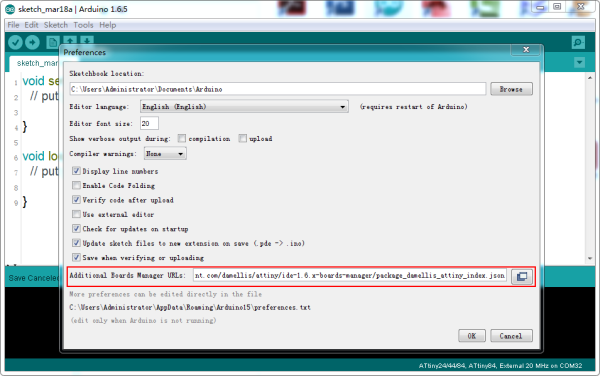
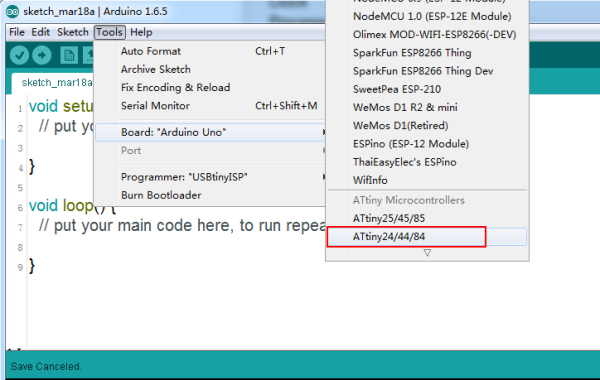
Step1: Config Arduino for ATtiny24/44/84
This section I refer to Ye Xiaohua and highlowtech.org , they give me a lot of help.
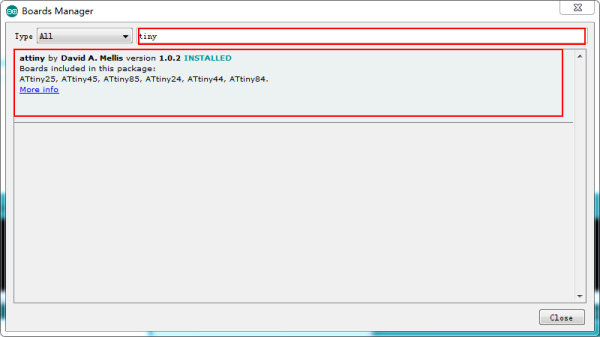
In Arduino, you can install the ATtiny support using the built-in boards manager. If you don't install Arduino, you can download Arduino here.
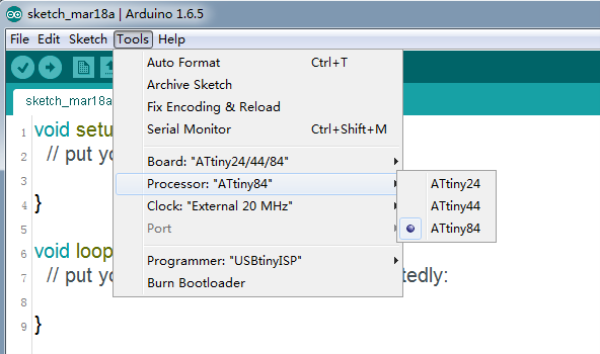
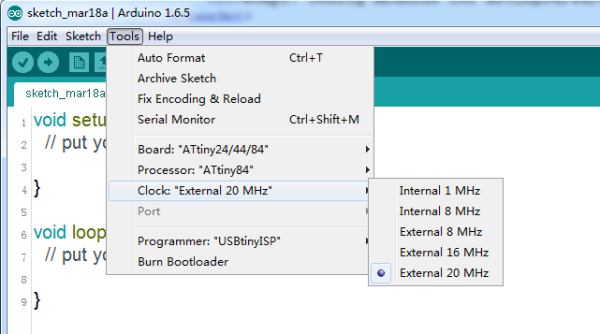
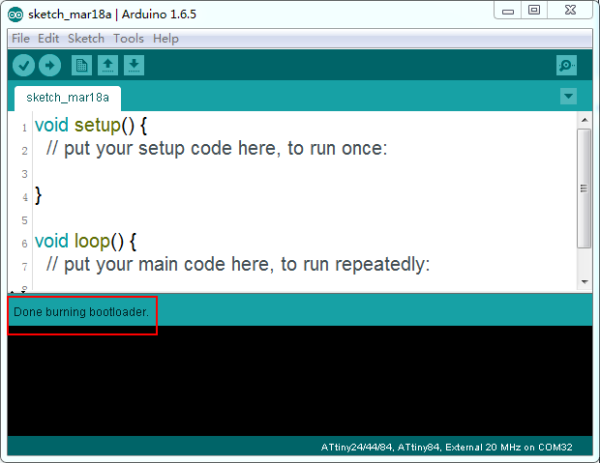
Step2: Burning the Bootloader
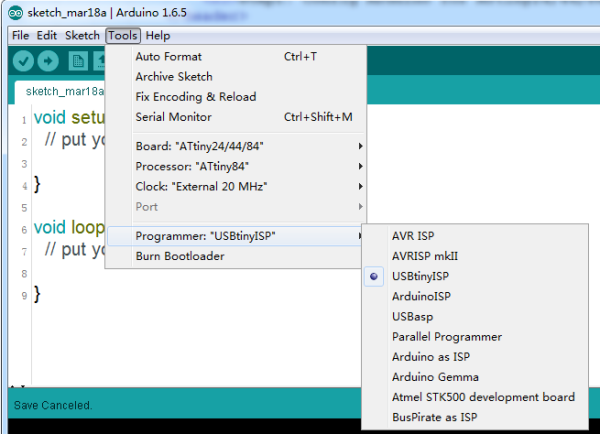
Step3: Uploading program in Arduino with USBTiny
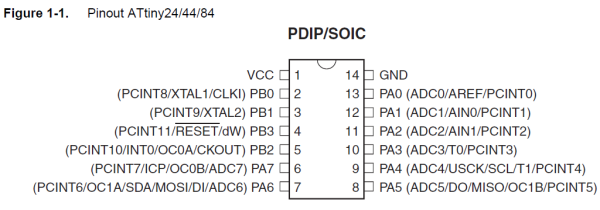
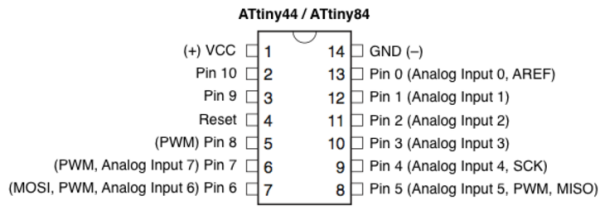
The Pin number of ATtiny84 used in Arduino display following. In the hello-world board, the key was connected to Pin3 and the LED was connect to Pin7.
I made a program, which function is: In normal state,the LED is bright like a breath light, when the key is pressed,the LED flashes. You can download the program here.
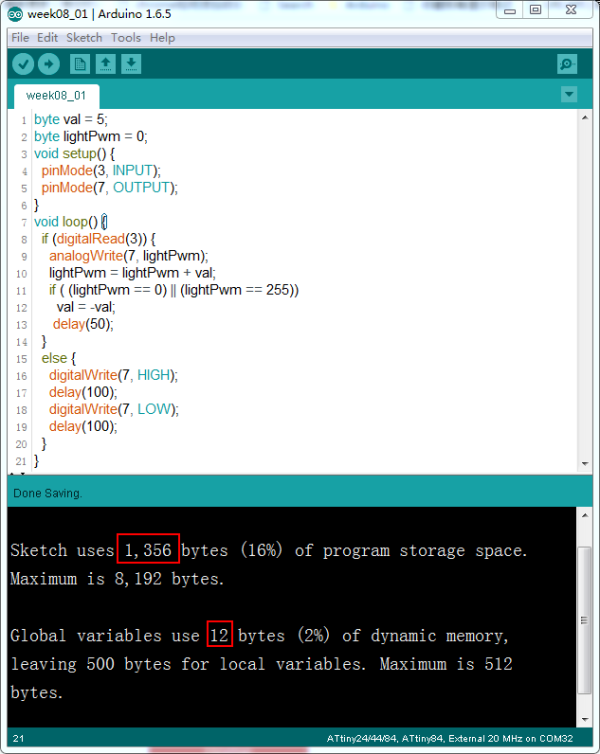
From the above picture, my program used 16% storage memory space and 2% of dynamic memory.
The following is the video example of the hello-world board.

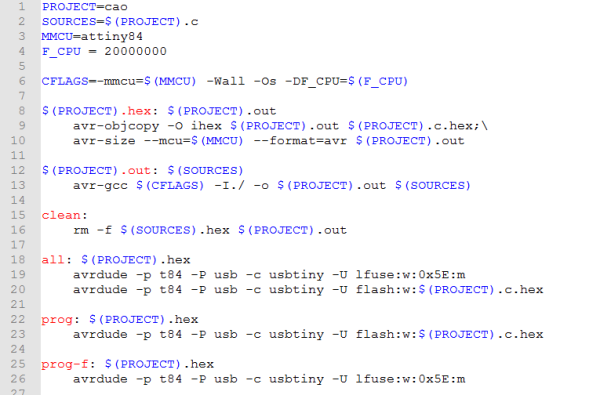
Step4: Create the Makefile and source C file
At first, I create a new source file name cao.c .
You can download the program here
.Then I modify the makefile.
You can download the makefile here.
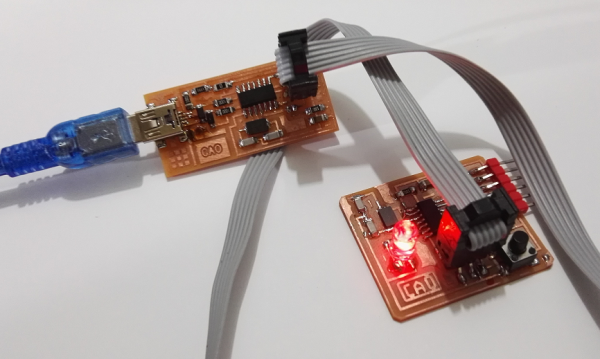
Step5: Uploading program with FabISP
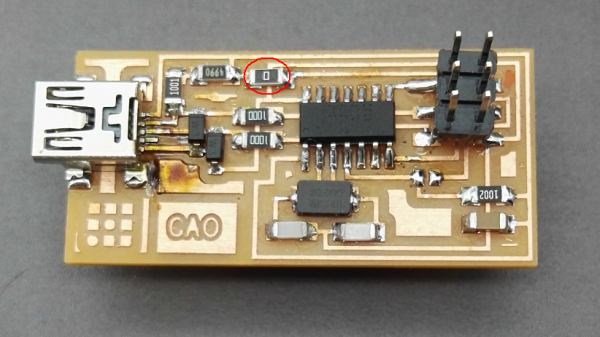
At first,my FabISP doesn't work when hello-world board connects to it, After checking, I find the VCC pin in SPI connector has no power. According the tutorial of week4, the 0ohm resistor is removed. I solder the 0ohm resistor back, it works.
The FabIsp is the same with the USBTiny, so operate is the same.
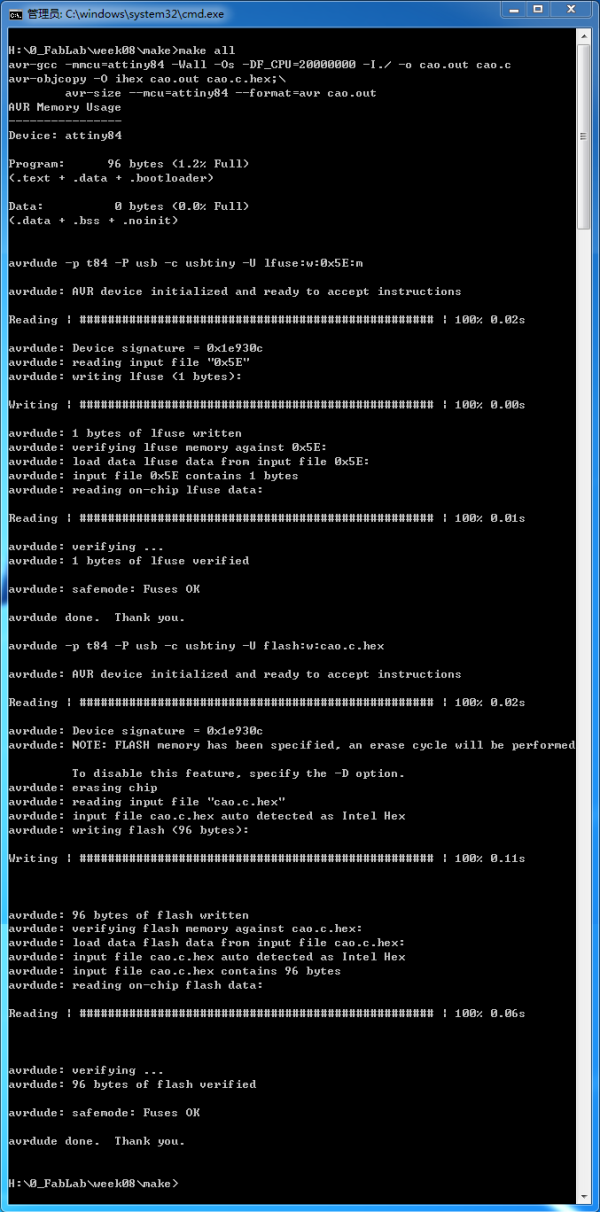
Press make all in the DOS command window to program the fuse and the board with the FabISP with one command.