Assignment: Iutput Devices
First of all, thanks my friend Kun Liu for helping me to design the PCB,he is the expert in PCB designing.
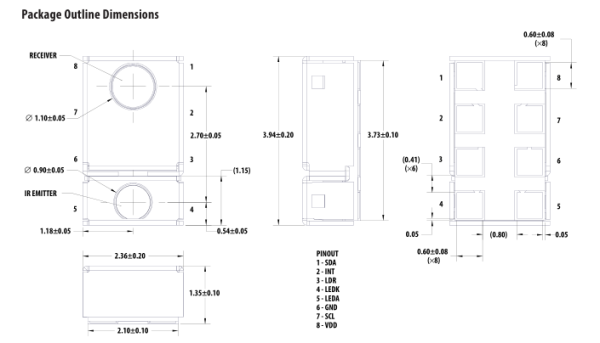
The APDS-9960 device features advanced Gesture detection, Proximity detection, Digital Ambient Light Sense (ALS) and Color Sense (RGBC). The slim modular package, L 3.94 × W 2.36 × H 1.35 mm, incorporates an IR LED and factory calibrated LED driver for drop-in compatibility with existing footprints.
Applications
In Arduino, there is library for APDS-9960 sensor, the communcation mathod is I2C, so it is conventient for using.
Datasheet of APDS-9960
You can download the datasheeet file here.
Pay more attention ,the pin1 is located in the top-right postion,no in the normal top-left position.The pin and the size of APDS-9960 is below:
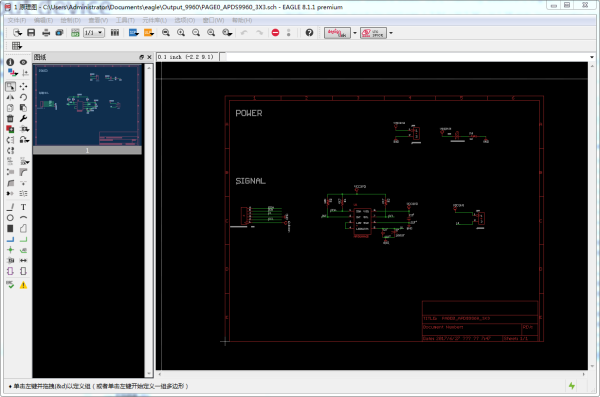
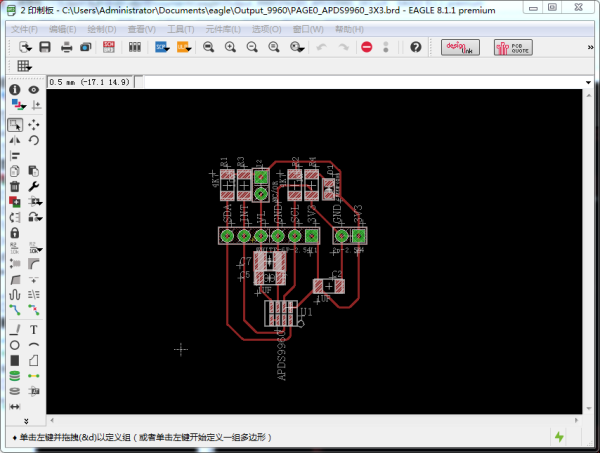
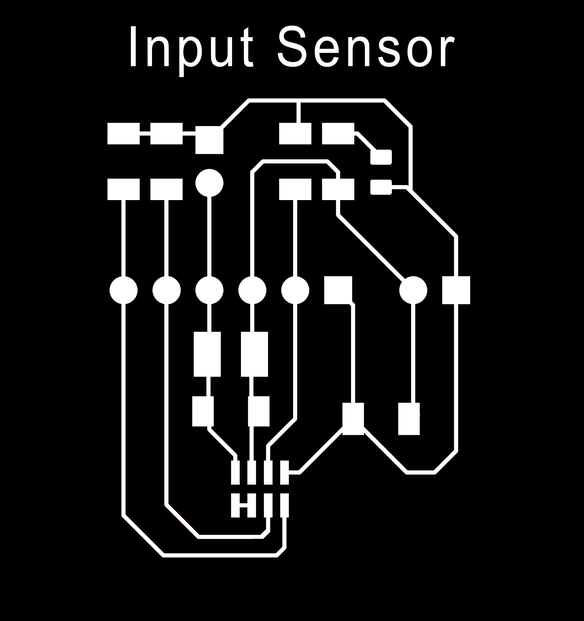
Designing schematic and PCB
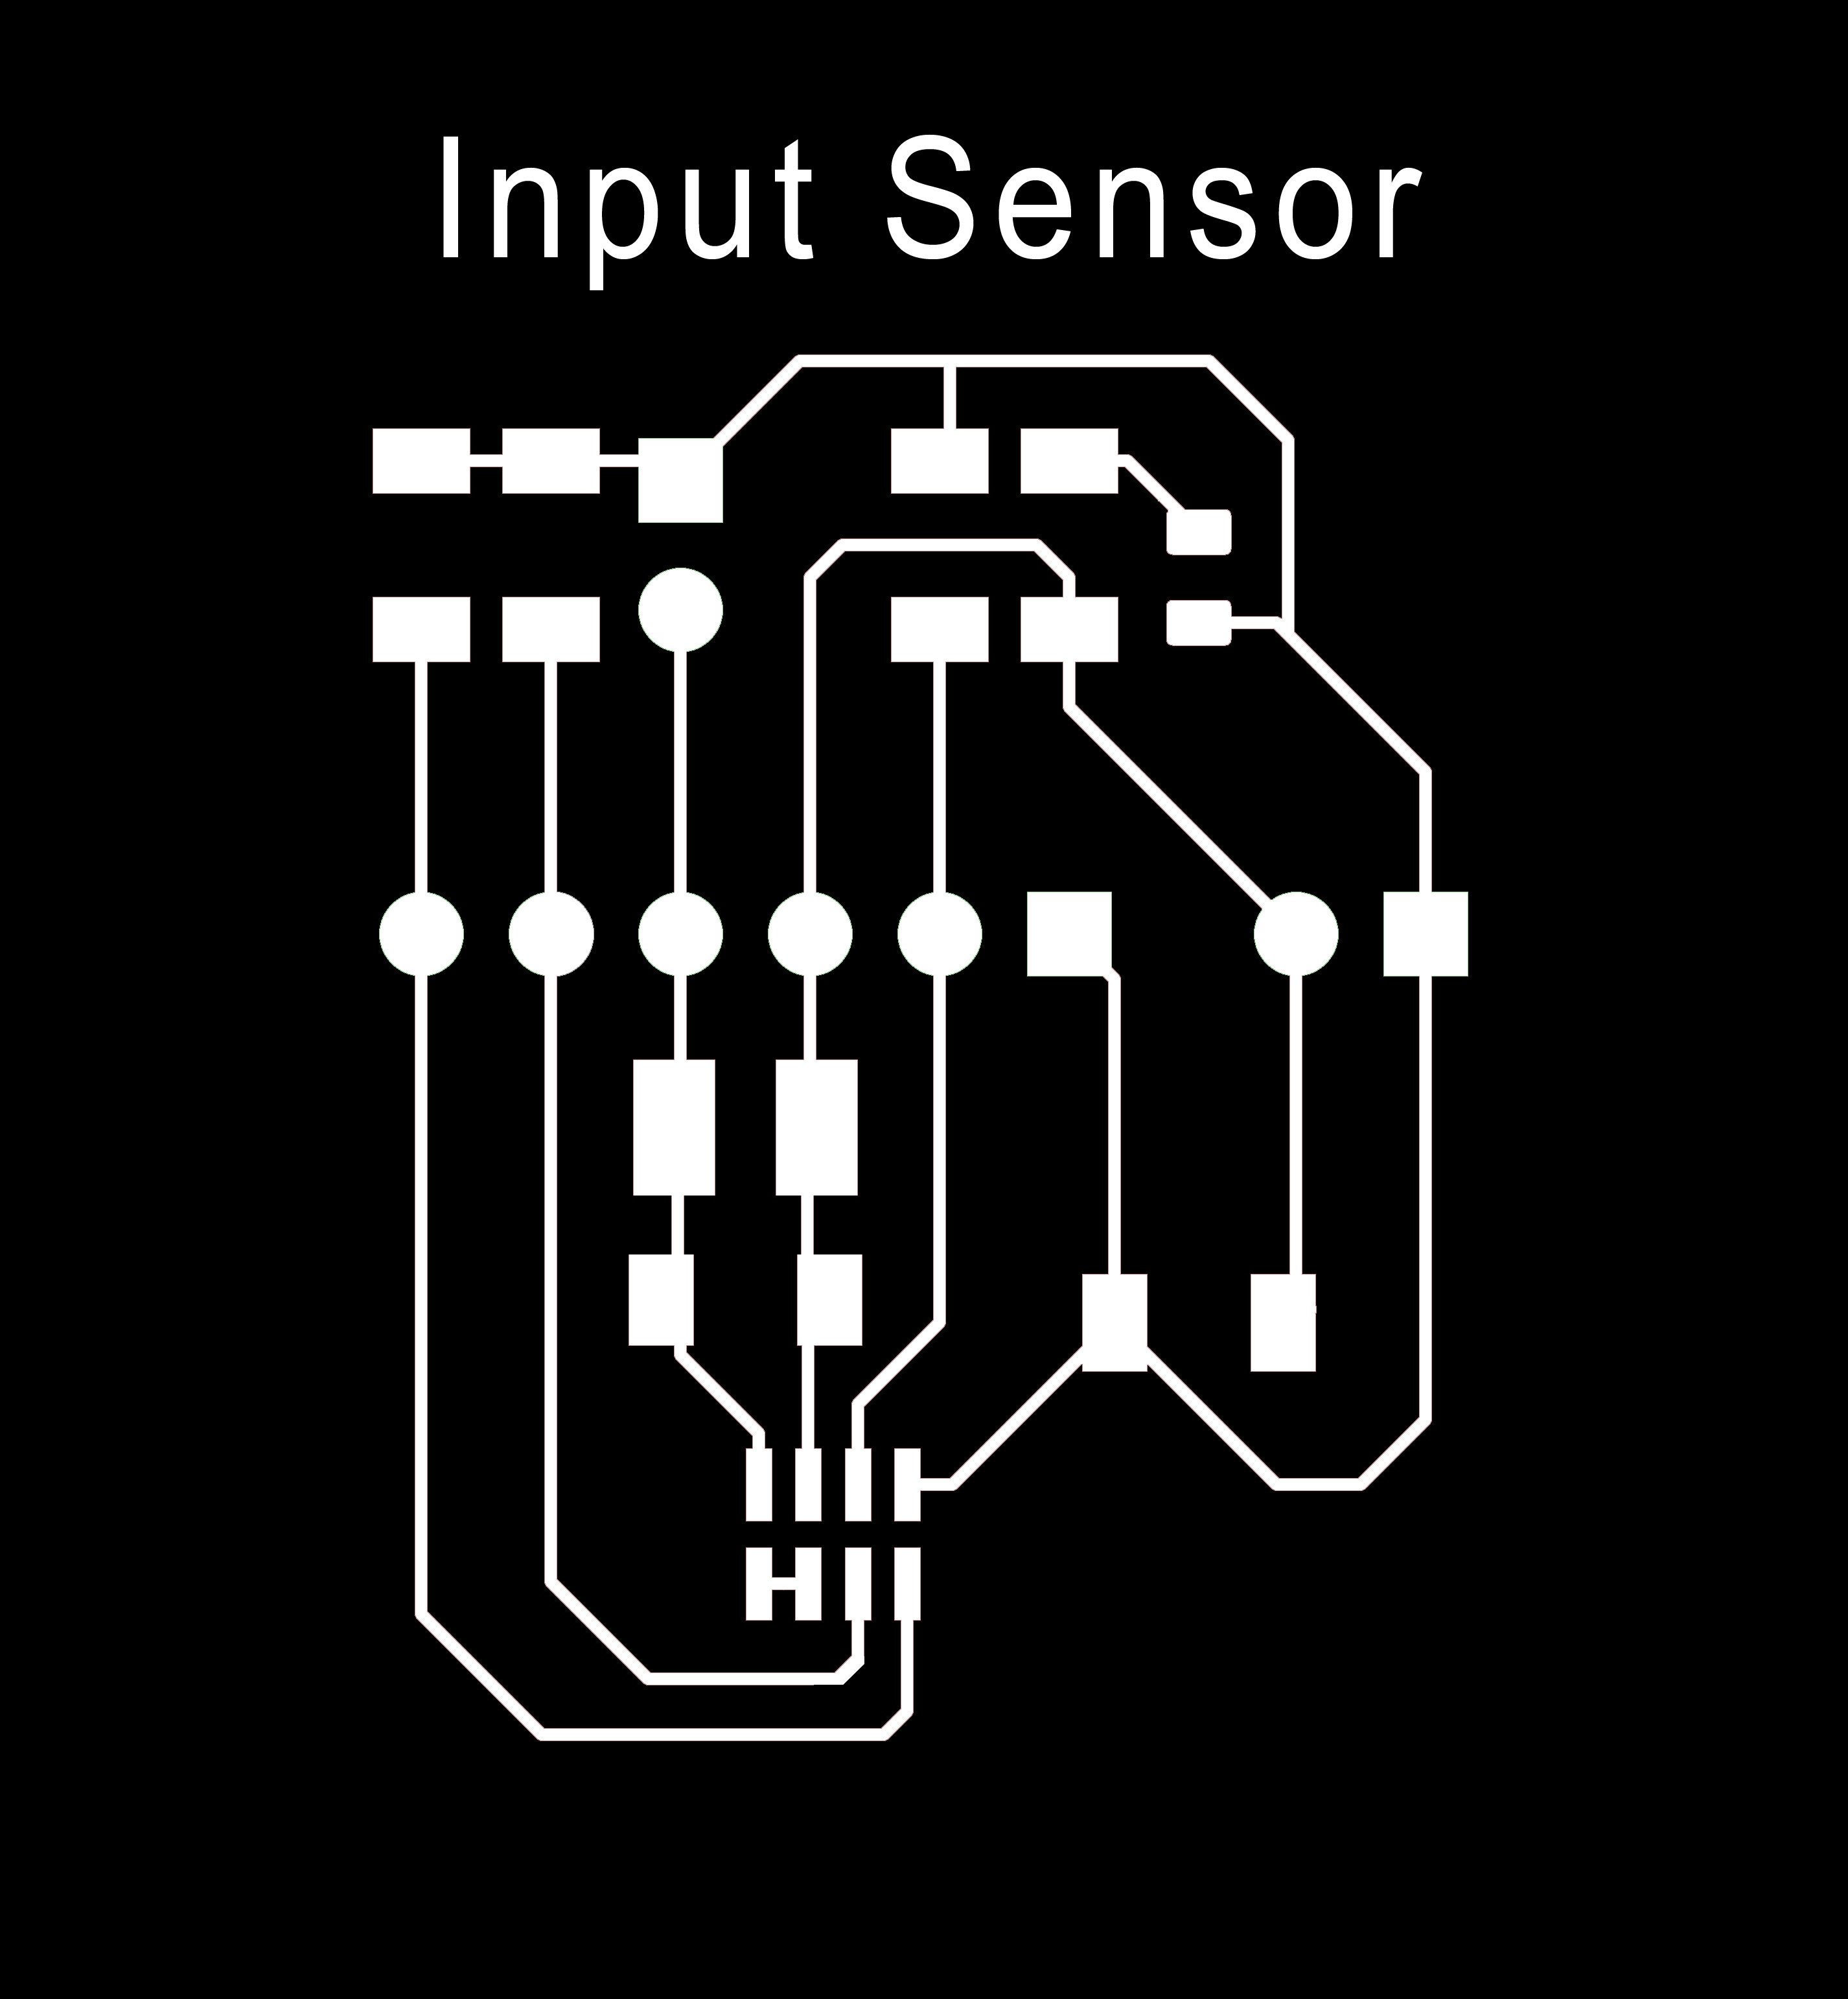
I design the APDS-9960 using Eagle. You can download the design file here. . Becasue the pin of APDS-9960 is too small, so I enlarge the pad in width.
The schematic design is the following.
The pcb border design is the following.
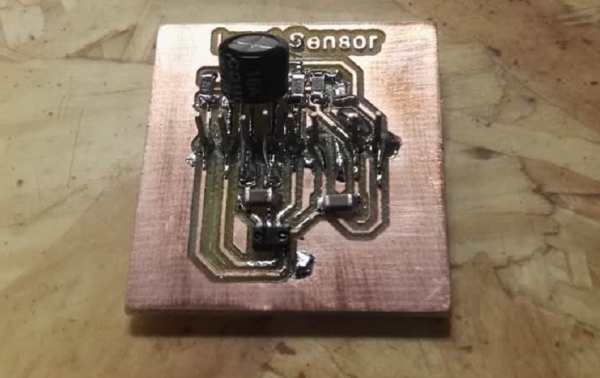
Milling PCB
I use the Fabmodules.org to generate the milling file, and use MDX-40 milling machine to mill the board.
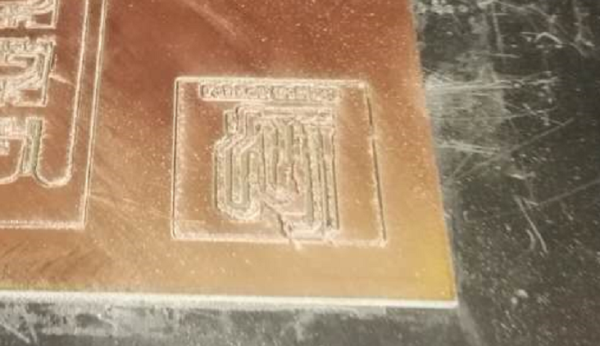
Since the chip's packaging is too small, the pads are joined together during milling, so I changed the size of the pad by Photoshop before milling. The picture is as follows.
You can download the design file here.
Soldering the PCB
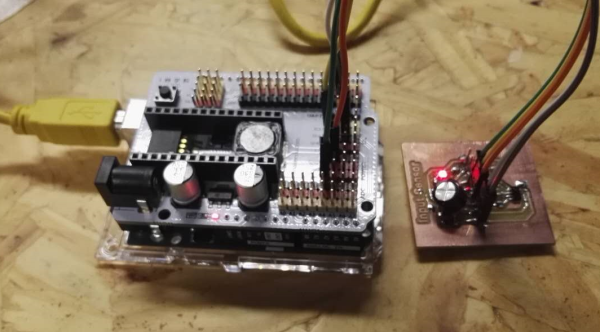
APDS-9960 Sensor operation
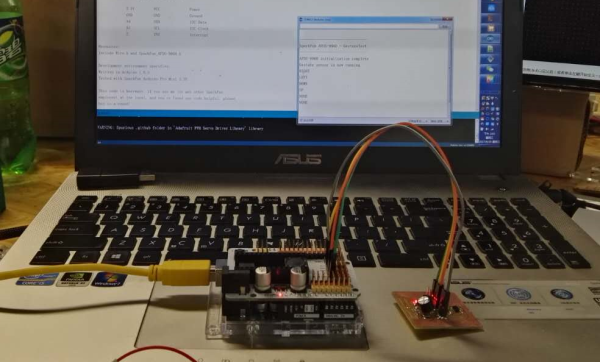
Pay more attention on the voltage is 3.3V. Because my 328P board can not provide 3.3V, so I connect the sensor to Arduino sheild which can provide 3.3V power.
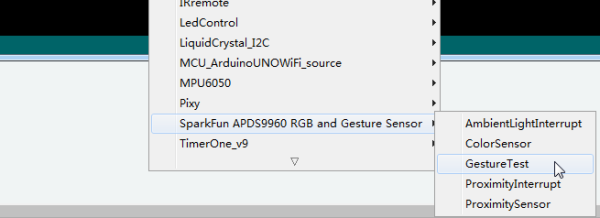
Download and install the Arduino library
You can download the Arduino library here.
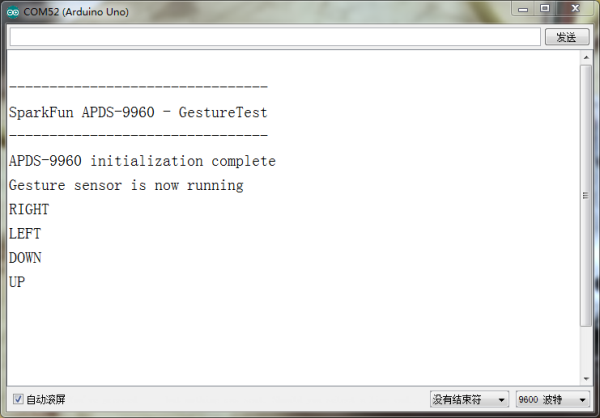
Install library to the Arduino. Open the example program provide in the library, according to the sequence: File->Examples->SparkFun APD9960 RGB and Gesture Sensor->Gesture Test
Connection
Connect the snesor to the Arduino UNO board.

At first, uploading the program , the APDS-9960 Sensor doesn't work, the problem is soldering point between APDS-9960 Sensor and board does not connect well, after re-solder ,the sensor works normally.