Tapan
Betai

2016
week-9-10 Machine Building
You can go to group project presentation from link given below:
http://archive.fabacademy.org/archives/2016/fablabcept/week-9.html
"Machine that Make", Term says a lot.
We all the fablab members sat together for idea brainstorming and machine building and everyone came up with great ideas. We came up with ideas of multi-tool router, gripper, drawing maker on the basis of vinyl cutter, automated 3d scanner compatible our mobile phones, etc. With all these ideas nobody of us was satisfied, because we thought to make something for different usability than already available, and we again started thinking and came up with an idea of decorating candles with melting wax using MTM module and then we started working on it.
Flow of work is as following:
- Making a basic design and structure of machine
- Figuring out the material and components needed
- making a 3D model
- making a working model of machine
- making it automated
- final testing and video making
I have contributed in collecting all the materials needed to make the machine, coding and assembling with that.
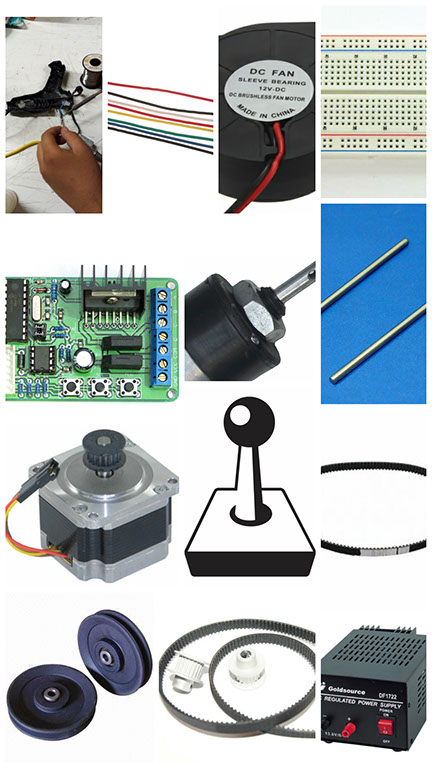
List of components and material needed to build the machine
1) D.C. motor
2) D. C. motor supply
3) Stepper motor
4) Stepper motor driver
5) Counter weight for stepper motor
6) 2 Pulley
7) Belt
8) Extruder
9) Extruder mounting
10) Shaft for Extruder mounting
11) Shaft for mounting pulley
12) Rollers
13) Roller nut, bolt and washer
14) Candle holder
15) Cooling fan
16) Extruder temperature controller
17) Lever(for manual operation)
18) Joy stick(for manual operation)
19) Jumper wires
20) Push buttons (to control material flow)
21) D.C. motor for feeding the material
22) Bread-board to make the circuit
23) MDF/plywood for frame and structure
24) Screws
25) Drill machine
26) Electronic components
27) On/off switches
Coding and side by side Assembly
Coding was a challenge for me as i knew basics of it only.
But for this machine i learned about randomization and how to make a random code for movement in two axis.
Me and Rudra started with assembling and testing the motions of motor and belt at the time of assembly.

Here we tried to make a mounting with which we can change the tension of the belt according to the application.
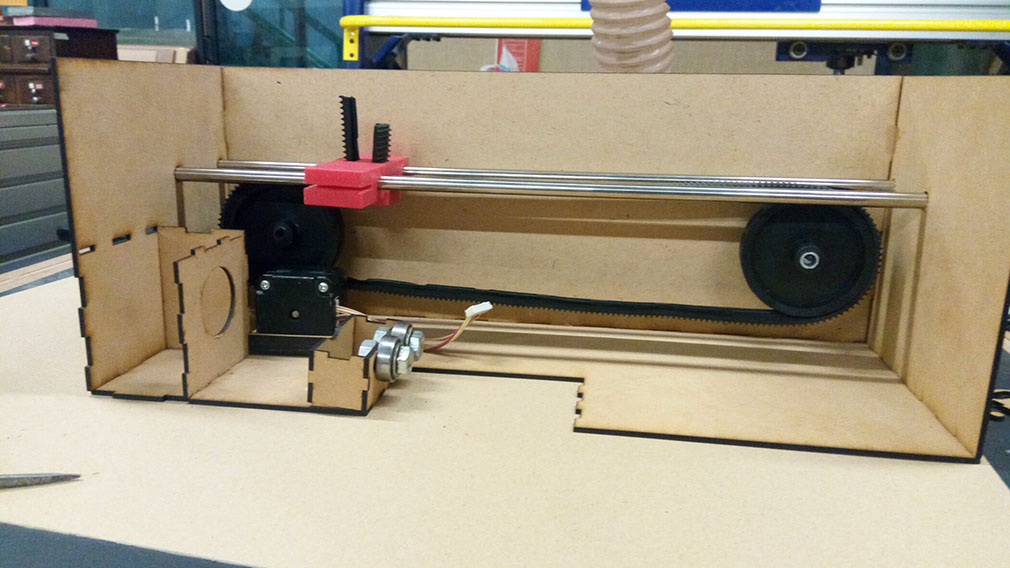
In the following image you can see two pulleys mounted on the main frame, shafts and nozzle mounting on the shaft, DC motor housing.
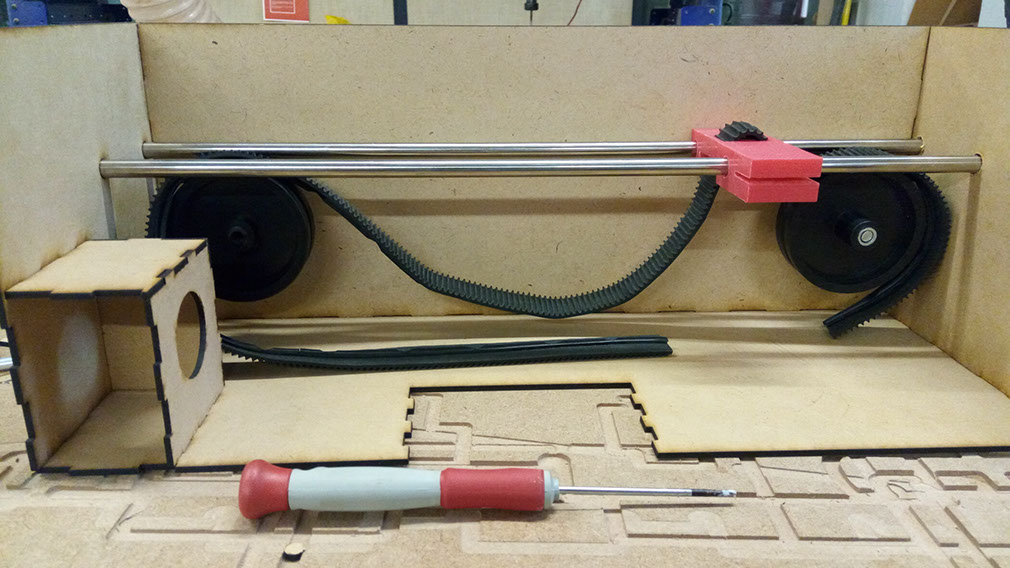
Consider the following image
Belt is tightened by pulling from the nozzle mounting
there is a fitting on the bottom of the part which holds the belt in the required tension with the help of friction
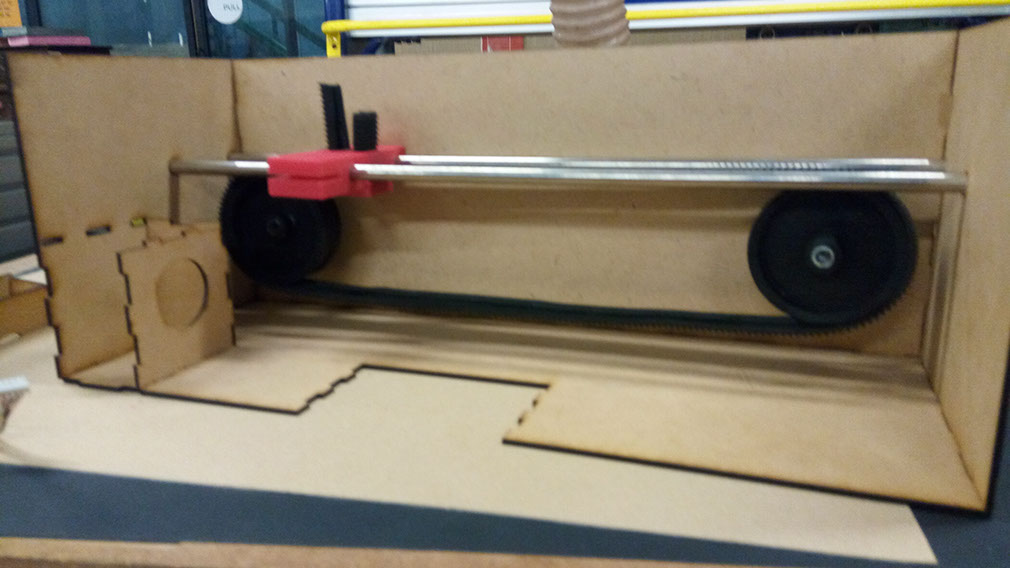
Consider the following image,
You can see stepper motor mounted and connected to the belt is going to drive the pulleys and nozzle.
you can also see two of the rollers in the front side of the machine
which have been fitted to give a smooth rotational motion to the different size candles
you can slide and make changes to these rollers.
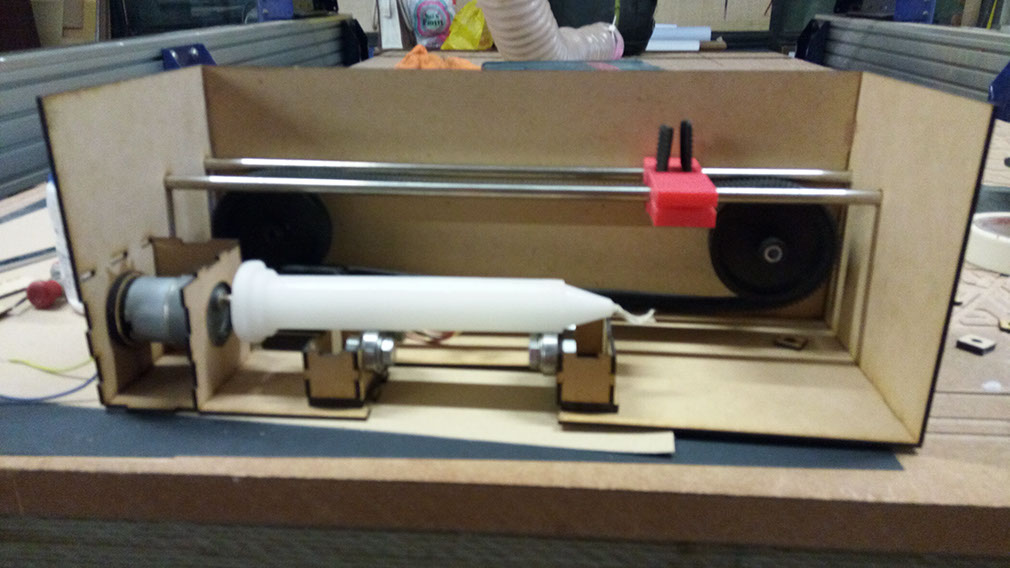
Consider the following image,
We have fitted the DC motor and mounted the candle on it.
here we are checking the alignment of the candle by mounting rollers on front side of the machine.
rollers are adjustable according to the diameter of the candle and the length of the candle also matters for working on this machine
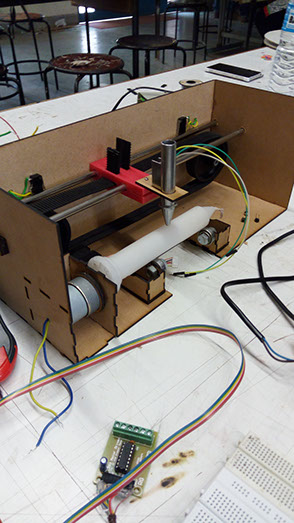
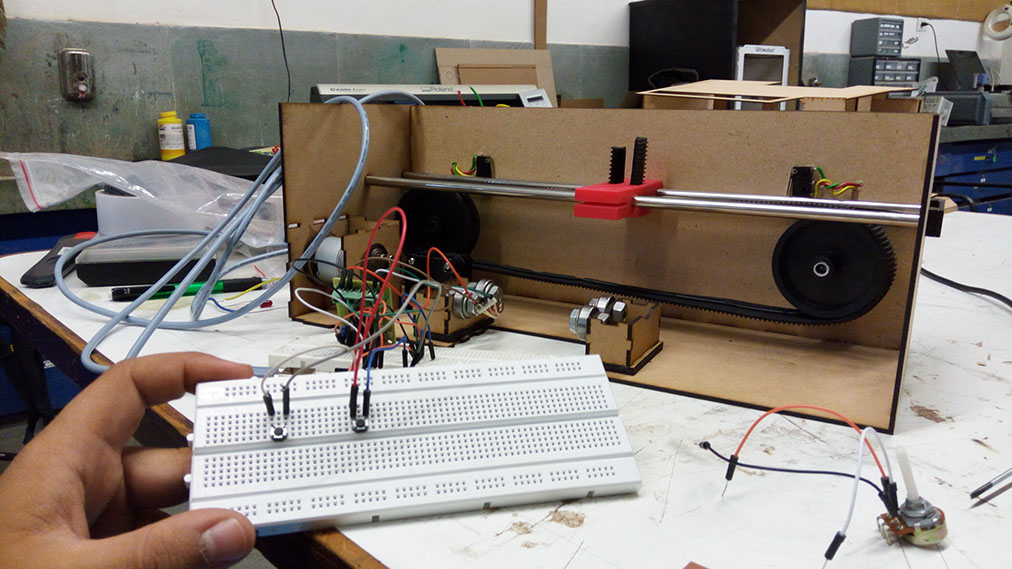
Consider the following image,
Here we have connected motor drivers with the stepper motor and then using the breadboard we are testing the motion of the nozzle, vibrations that occur, working of the end stoppers.
Physical hardware testing is done here with this circuit.
Consider the following video,
I started by making random patterns on the candle, hence i started with testing of code of randomization motion.
It worked well but it was fast and it was in a larger range.
I had to put the randomized numbers between -10 to 10.
Hence i set the mean position manually and then it starts going to random number from -10 to 10.
you can see the motion in the following video.
Consider the following image and video,
we are almost there.
here we are doing final assembly and we are testing final DC motor motion and speed.
We are giving only 7.5 volt to the DC motor for this much motion.
Here we have fitted a marker which draws on the candle.
We have made different tools like. pointing tool for removing the material
markers and pens to draw patterns
nozzle to add the pattern on the top.
We have shown that on the presentation page.
Link is as following:
http://archive.fabacademy.org/archives/2016/fablabcept/week-9.html