
Tapan
Betai

2016
week-12 Molding and Casting
tools and material needed for molding and casting:
- Milling machine(Modela or shopbot in your lab)
- Machineable wax or Wooden block for machining
- Milling tools such as 1/8" roughing and finishing tool
- clamps or double side tape to mount the material
- Liquid Plastic
- Urethane rubber, plastic
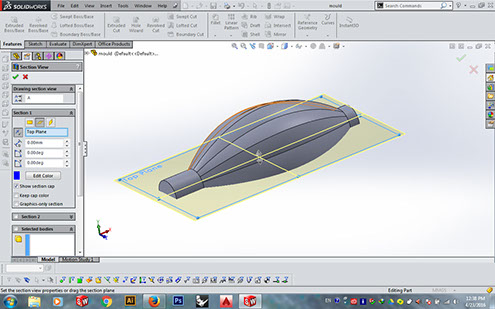
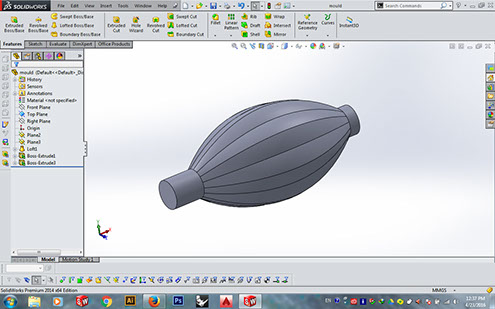
Step-1 Making 3d design

Cutting it in section
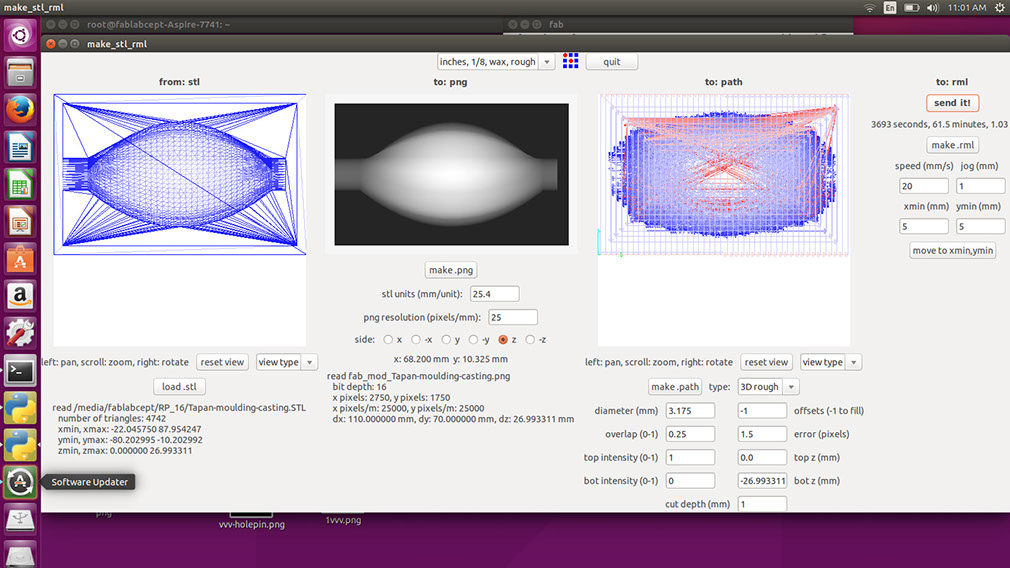
Step-2 Save the File as .stl format
Step-3 Go to Fab modules and select .stl format in input format
Step-4 Load the file and press Make .png button
- Here you will see a black and white image after making a png image.
- Black color indicates cutting depth and white part indicates that it is not getting machined with respect to the depth shown by black color
- Select Roughing in drop down menu on the top with the bit of 1/8" with up-cut.
- Change error to zero and press make path
- select machining in y-direction
Step-5 executing the roughing toolpath

Step-6 Making Finishing toolpath
- Select finishing on drop-dwon menu in the top of the window
- Change the tool, use 1/8" ball nose milling bit
- change overlap to 0.65-0.9 or more than that.
- as Overlap increases accuracy increases, time of machining also increases
- Press make .rml
- press send it!
- and press begin milling

Milling in y-direction

Milling in x-direction
Ready mold:


Step-7 Making Polyurethane mold with liquid components
- Take both the liquids in equal proportion
- stir them in such a way that there isn't any bubble
- pour it in the wax mould and leave it to get dry for almost one day
- you will get a rubber kind of moud for your geometry

Step-8 Casting with liquid plastic
- I made two rubber mold and joined them rigidly with mdf and tapes and then i casted it with liquid plastic
- Take two liquids in same proportions and stir them propery
- let them get thicker a little bit and pour in the rubbler mold
- do not pour it completely, let some space left for plastic as it expands


After sanding the border
Few things that we need to take care about while making the mold:
- Roughing and finishing toolpaths should be in different directions.
- wax should be properly mounted, as it is not possible to hold the wax with hard clamps or we can not screw them with the bed
- do not use bits with more than 2 flutes, as with more flutes it will be difficult for material removal form the sink. which causes sticking of material on the bit.
- Make mold with at least 6 mm thick wall, as i tried with lesser thick wall and i have broken it one time before.
- give tolerance above your design, so that you fill material for making polyurethane mold, otherwise if will be hollow from the top if height of the geometry and outside wall is same, give a difference of 4-6 mm between them
Few things that we need to take care about while making a polyurethane mold out of wax mold:
- Take both the liquid compounds in equal amount, if proportion is changed, it wont settle
- give it a one complete day for proper settling of the mold
- give tolerance on for increase in size, as after filling the mixture of liquid into the wax mold, it expands.