
Tapan
Betai

2016
Week-14 Composite
"Composites"
One more assignment to show our experiments with materials.
Here I have made a shape of pyramid from the wooden block as shown in the image.
Here i am going to make a fiber glass out of this wooden pyramid shape blocks.
Fiber glass here we are going to make is a strong composite material which can be withstand to tensions and forces in more better way then plastics with same thickness or same geometry.
Composite is something which have multiple properties from the materials used.
We use fibers in the composite to bind the molecules, it helps in binding the whole part in single geometry.
Here you can see the procedure of making a glass fiber composite with epoxy resin.

Setting up the two parts of the mold on the sheet of plywood.
We have divided it into two parts because it is very hard to remove the mold once it is casted by this procedure, that is why we have divided it into two parts

applying wax on the top surface of the mold for easy removal of the final product when we will be done doing the casting

applying mixture of epoxy and silicon powder on the wax coated mold
setting time 1.5 to 3 minutes Proportion of the content defines the thickness and color of this layer as shown it is milky white due to silicon powder

glass fibers are then randomly putted on this first coat as shown which is going to be our binder for the resin , these fiber gives strength to the whole shape.
these are flexible fibers but you can use any of the fibers which are

applying coat of epoxy for flattening the glass fibers and pushing them into their position with the brush into the shape of the mold
we do this process to remove the air bubbles forming inside.

trimming the improper corners and hanging glass fibers and separating the mold and final product
Sanding the corners and here we are our final product is ready.
here as you can see you get a complete shape when you join both the parts.
There are other options and ratios with which we can make composite materials using different components.
fibers are used as binder in them and in some cased other flexible materials are also used to give strength to the structure.


"Composites"
One more assignment to show our experiments with materials.
for this assignment, I want to show the strength of plaster of paris.
When we hear that we don't think it is a strong material to use and make composites, but the fact is we can make rock like solid things with POP by adding few things.
advantage of using POP is that we can any shape that we want to POP and it do not take very long time of settling.
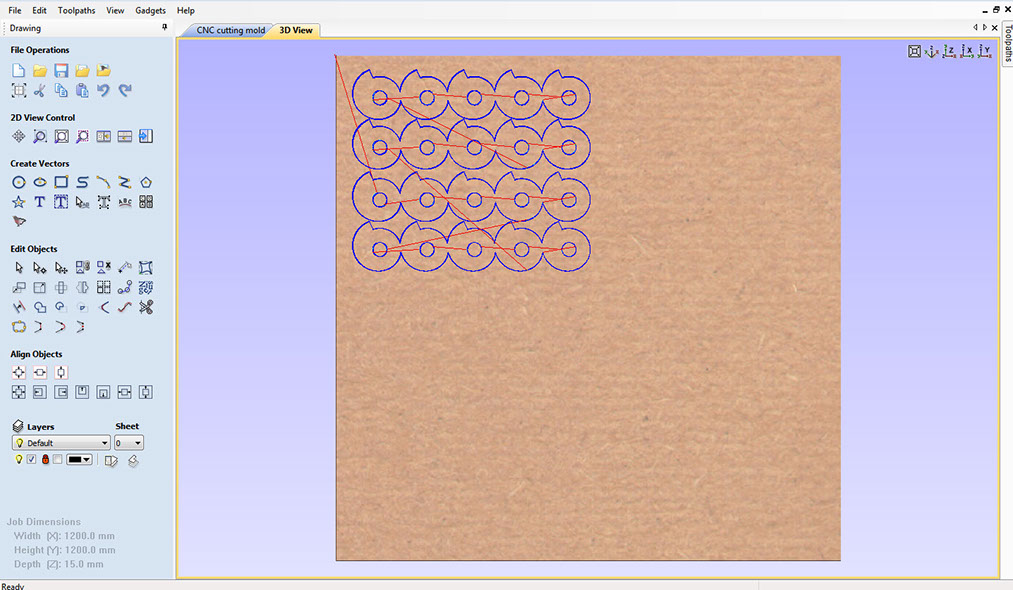
I started with a shape that i want to make. I thought to make a shape of English "6" so i made a design and then i put them for CNC cutting. It is a one feet long mold hence i had t do it in layers.
I could get material with 50 mm thickness but economically i found waste MDF sheets for milling with 18 mm thickness.
I made file in partworks with the cutting parameters shown in the following images


Consider the following image
It shows the cutting toolpath
Consider the following images
Post processing of the pieces
I have made a center wooden block for allignment
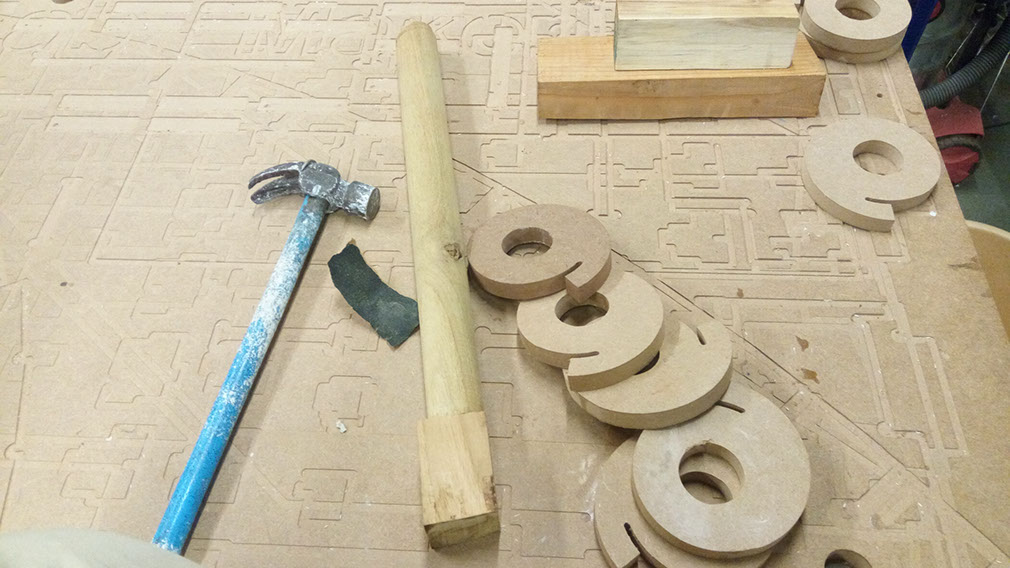
you can see the shape of the mold that i wanted to make but the groove was not as i assumed to be
you can see all the pieces


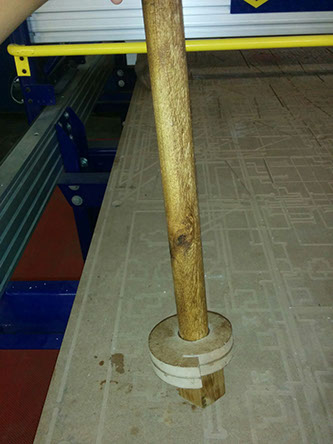
Removing all the taps with wood file
Oiled the wooden rod and then with the hammer i started inserting and gluing all the layers

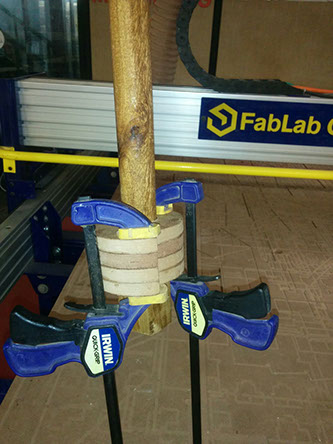
Gluing and clamping the layers
Started with POP only with thin layer.
I wrapped a packaging plastic around the mold so that i could remove the solid piece easily
It didn't work well as it was a very thin layer
I also used acrylic tubers to connect and strengthen them together


After a failure experience i started with another one
As shown in the image, after preparing the mold with warping plastic.
This time i am using 3D printing filament for binding them together as shown in the figure


as shown in the image, first experiment did not work well, proportion of adhesive was good enough
BUT
I though i has been dried out but when i opened the plastic i realized it was dry from only upper surface and that's why it got cracked.


Removing the plastic for removing the POP casting carefully


Now after cracking the second casting. i did the same things again, wrapping the mold and 3D printer filament for binding POP
This time i gave 45 minutes to dry it out and now it feels like rock solid.
After getting a little bit dry i made design with my figures !!!!!!


Consider last two images:
in which it feels solid
additionally you can make such shpes with hollow geometries as shown in the figure.
And this POP Casting i used to made a lamp type thing.
we can make any other shape with this much strength, design and color
Table top using RCC and few other additional components
We needed a table on which we can work on anything.
So here it is.
A table on which you can work with your laptop or you can work with electronics or as drawing table, or even with hammer and other tools; but nothing will happen to the table.
Process:
- Preparing a mold of fiber glass for casting RCC.
- checking alignments and leveling
- putting everything on smooth surface
- Putting inside metal mesh
- starting to fill the mold with RCC
- Filling the gaps using vibrator
- Smoothening the surface
- grinding
- mounting the top on metal frame
For this kind of work you will need 4-5 people as helping hand and you need specified tools, people and machines such as vibrator.
Hence everything was taken to a facility for above stated requirements.
Preparing fiber glass border as mold and putting wire-frame inside for structural strength of the table.
It has been putted on a smooth surface, it's a laminate with smooth surface.
Consider following images,
After setting the wire-frame it has been layered with grease as the material won't get stuck with fiber glass and for easy removal of the product after.
And after that all the four sides were joined together and all the alignments were checked for desired casting


Consider following images,
as it is general purpose table so we wanted to put some objects which relates everything.
It was a try which did not went as we want.


Consider following images,
After putting little objects we started with putting the RCC
Ratio of cement, sand, rock is approximately 40:35:25.
Water amount was added to get specific density.


Consider following images,
Here we started vibrator to fill the gaps. We putted additional pressure on wire-frame so that it does not change it's shape due to vibrations


Consider following images,
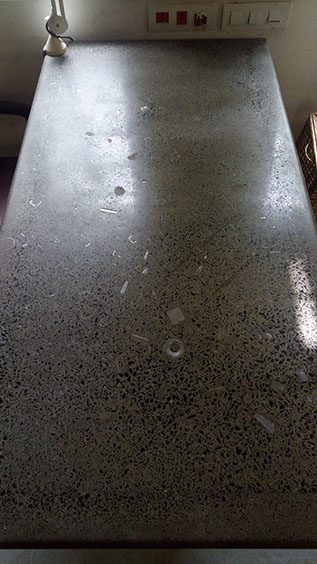
It was left for setting the RCC for few days and then it's upper surface was grind for smooth surface.
Following photograph shows the object on top which did not come out well but for the usability that we needed has been fulfilled with this table top.