8.Embedded Programming
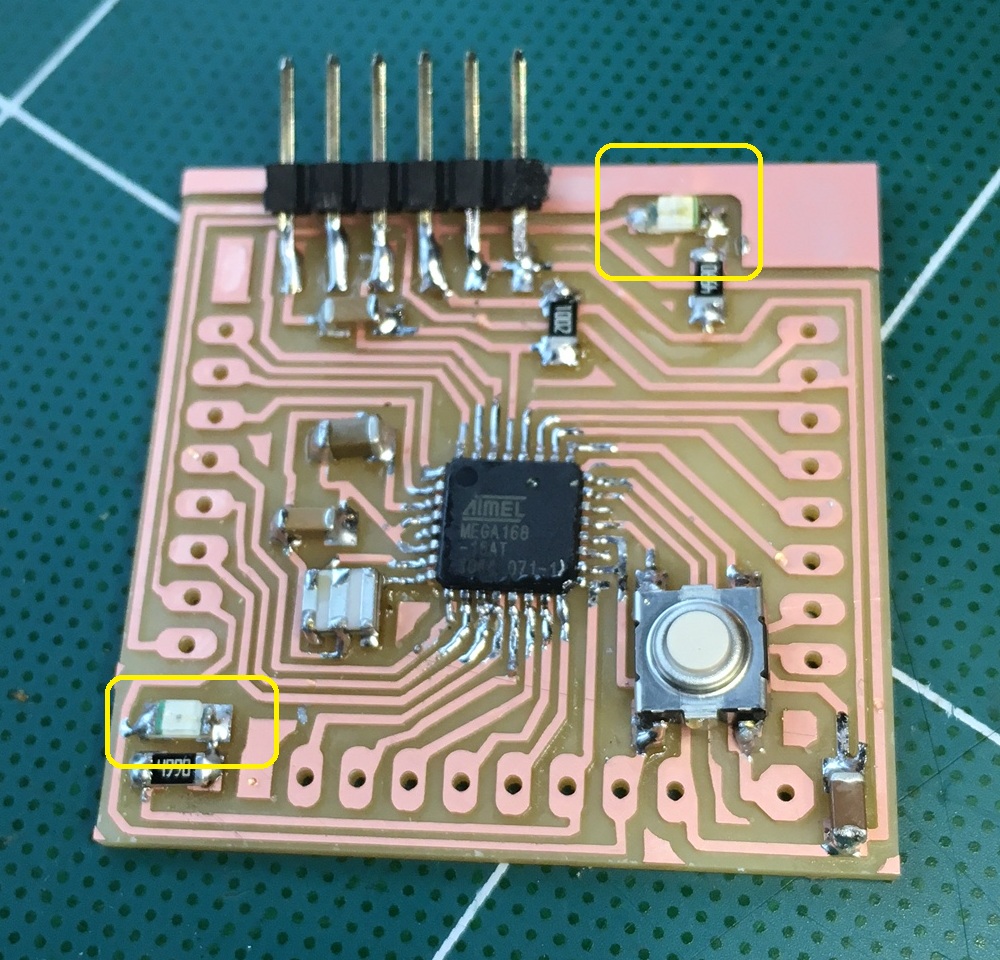
Programming "Yeah board"
In last class, I designed my own board called yeah board. ( click to see)
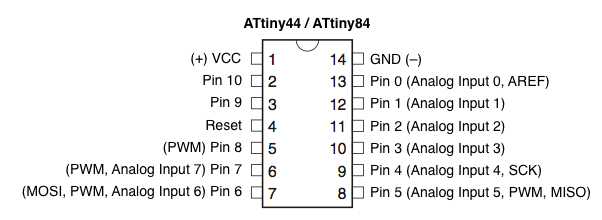
Before starting programming, I had to check the datasheet of microcontroller that I used on my board. It's ATtiny44.
On the data sheet, there are pinout and pin discriptions. They show pin numbers which are the names of each pin, so that you can program on the right pins. Also, they tell you which pins are available for input or output devices and digital or analog device.
Among various ways to program microcontroller, I use Arduino IDE because I thought it is easier than other ways since it has lots of libraries and examples.
IDE stands for Interactive Development Environment and it consists of source code editor, build automation tools and a debugger.
My instructor recommend me to follow the instruction on “highlowtech” but it didn’t work to me.
With my mac, the url given by highlowtech does not work.
The boardmanager does not detect attiny board.
I couldn’t find students who are having the same problem so I looked up 2014 and 2015 fab academy pages to find attiny board.txt file because older version of Arduino doesn’t have board manager function.
Attiny-ide-1.6.x.zip (download)
Here it is! If you are the one who has the similar download this file.
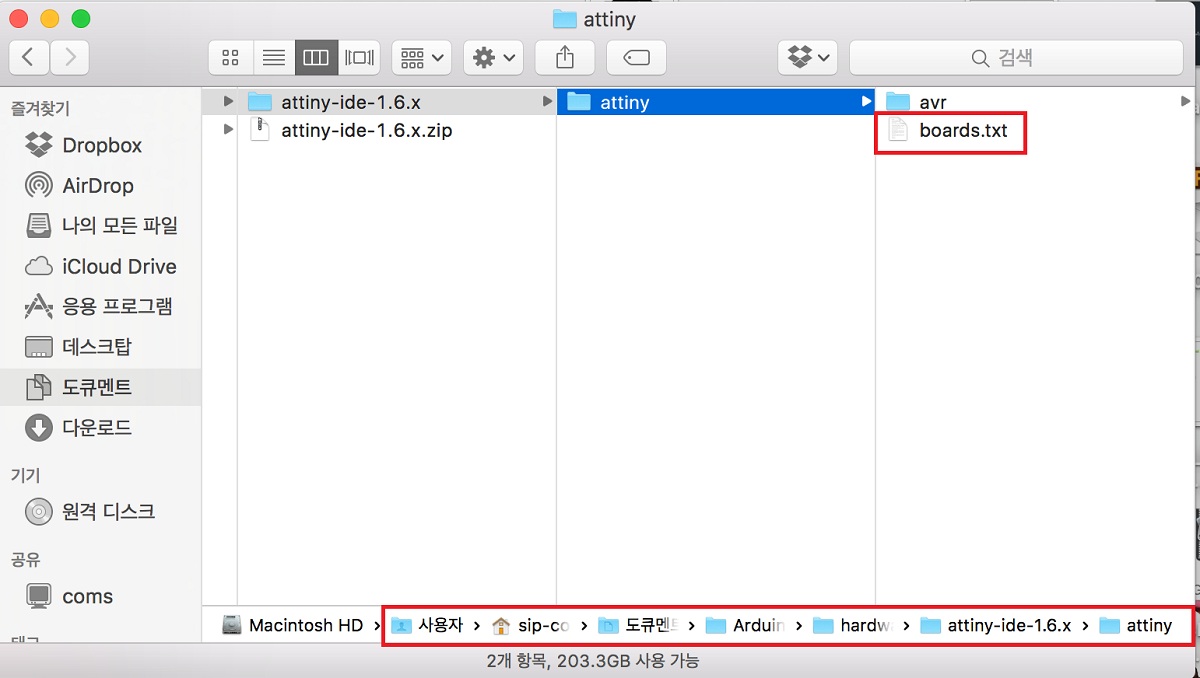
After downloading, go to Documents/Arduino folder and create a folder “hardware”.
Then, copy the zip file into “hardware” folder and unzip it.
Then, restart Arduino.
If it’s still not working, move the board.txt file to attiny folder.
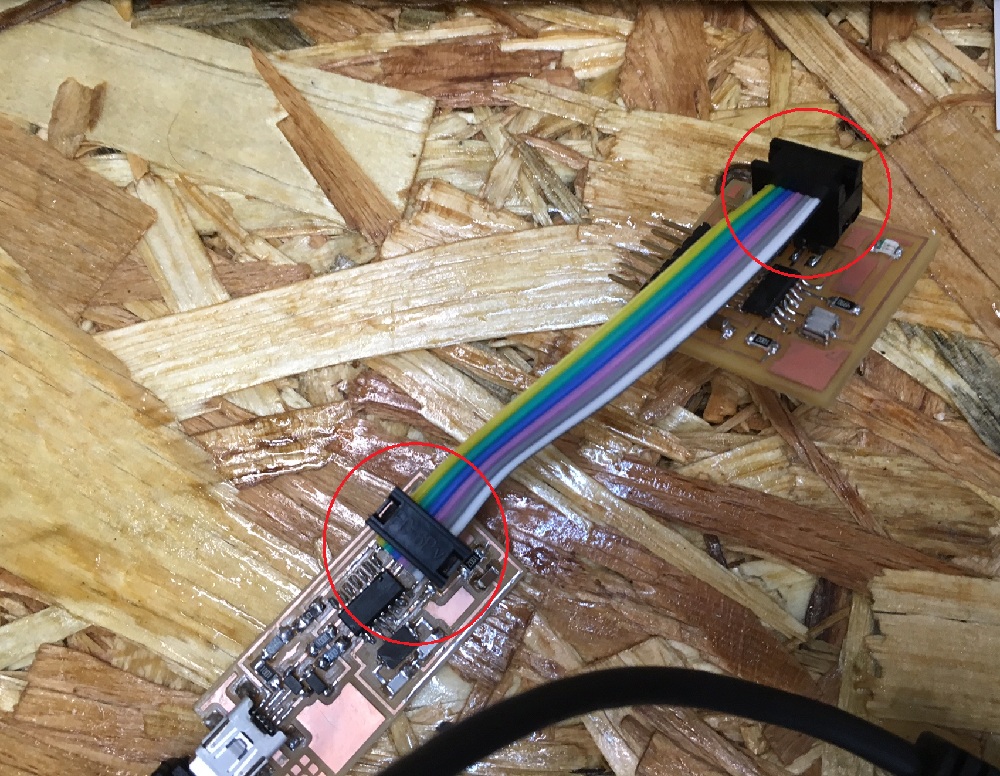
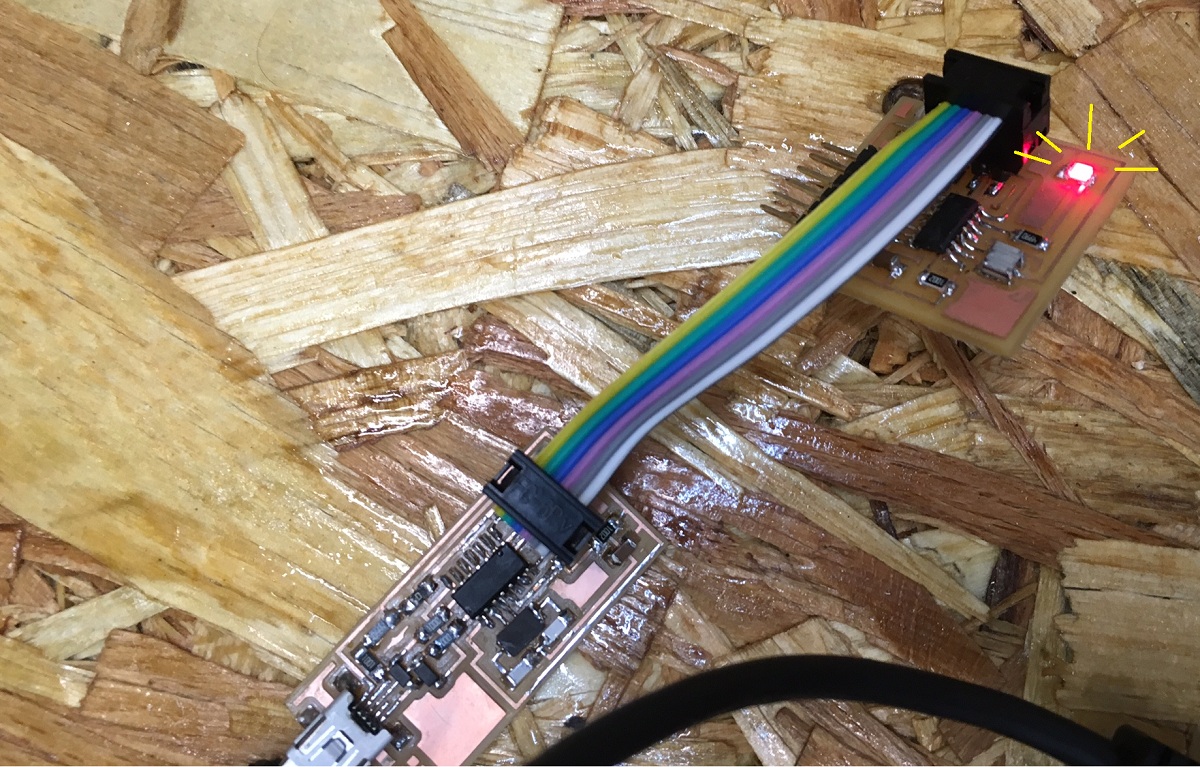
Before connecting to computer, I had to make sure if the board is connected on the proper side with Fab ISP.
Check the Eagle again if you are not sure.
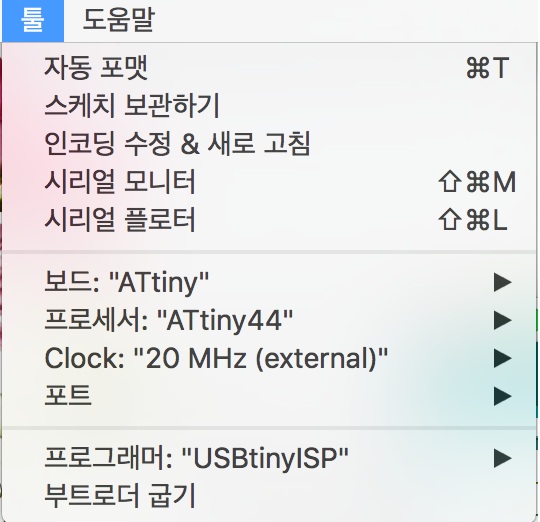
Tool settings
Board : Attiny
Processor : Attiny44
Clock : 20Mhz
Programmer : USBtinyISP
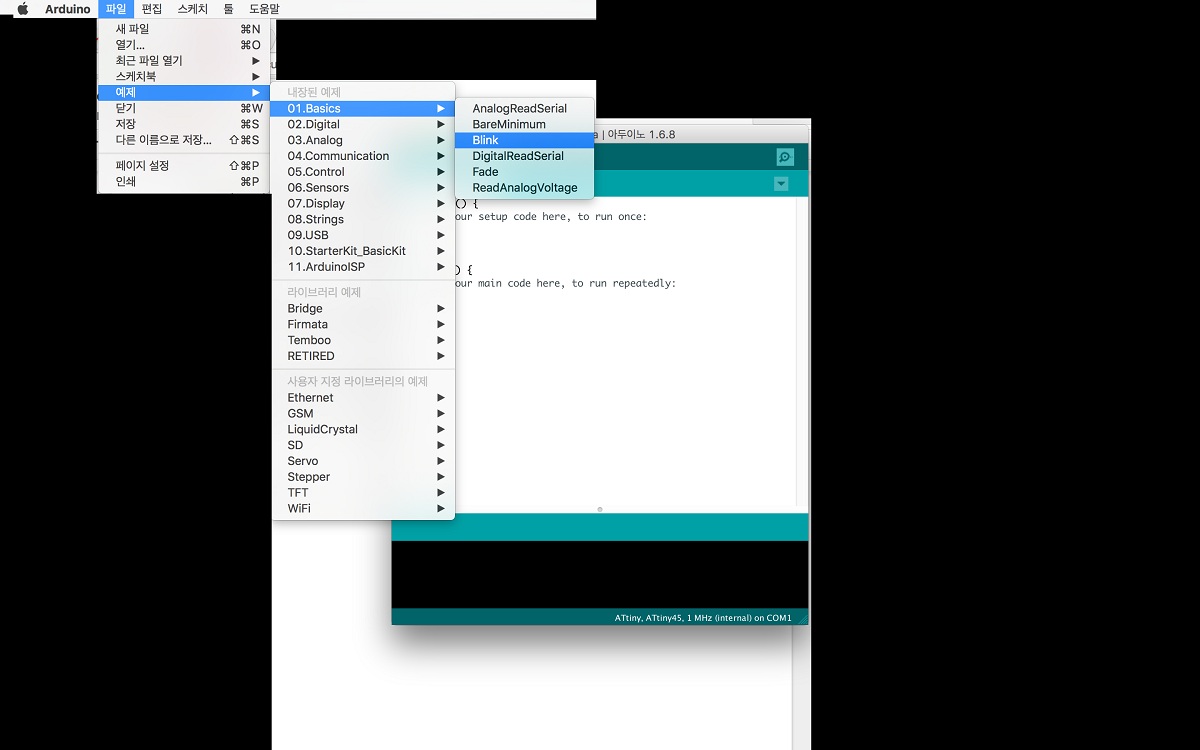
Confirm and upload the board by clicking the check mark and arrow mark.
Blink
Include input. For my board it’s a switch on pin number 3.
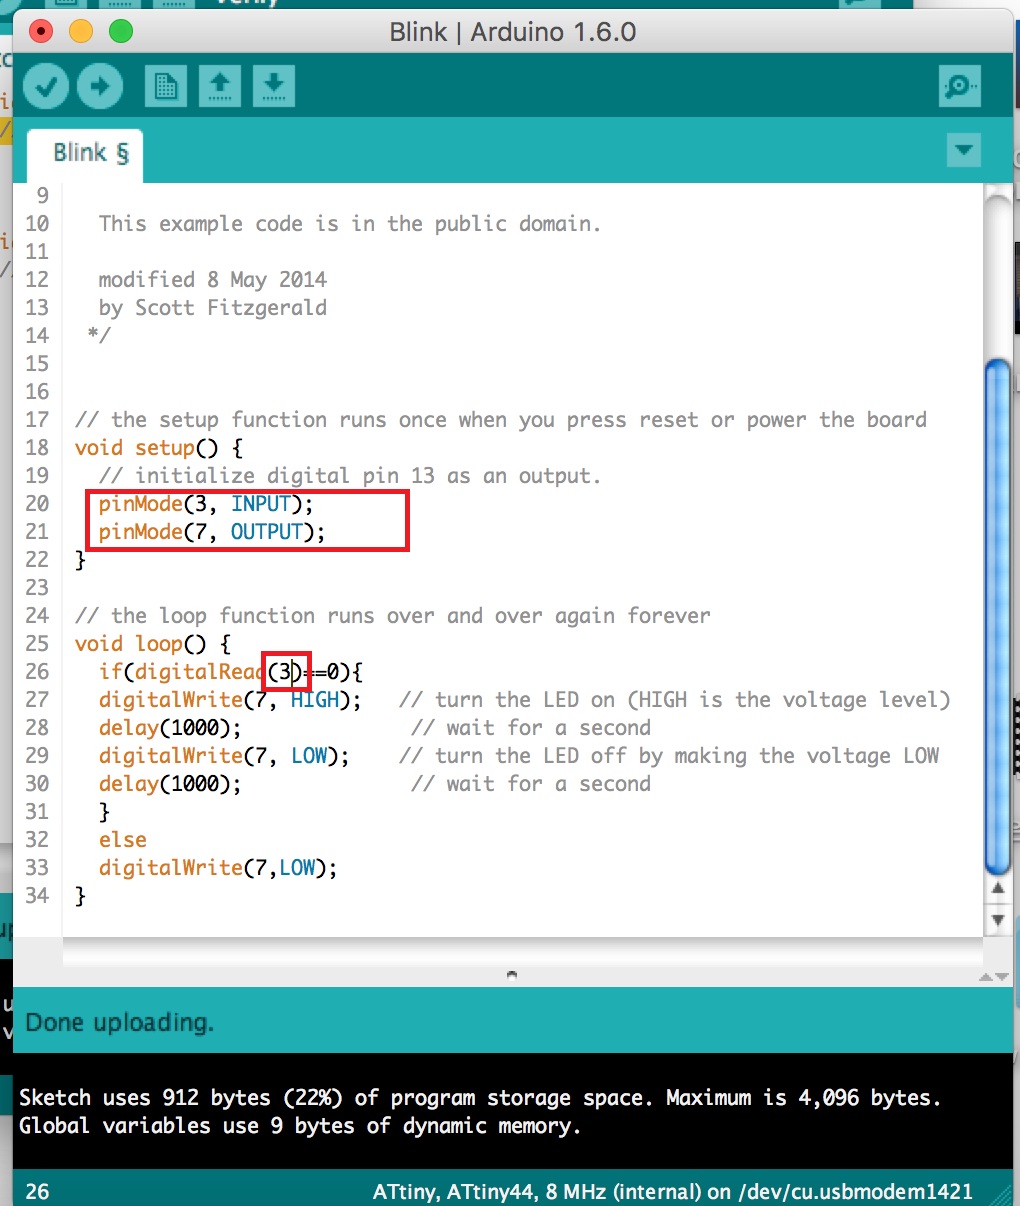
Done!
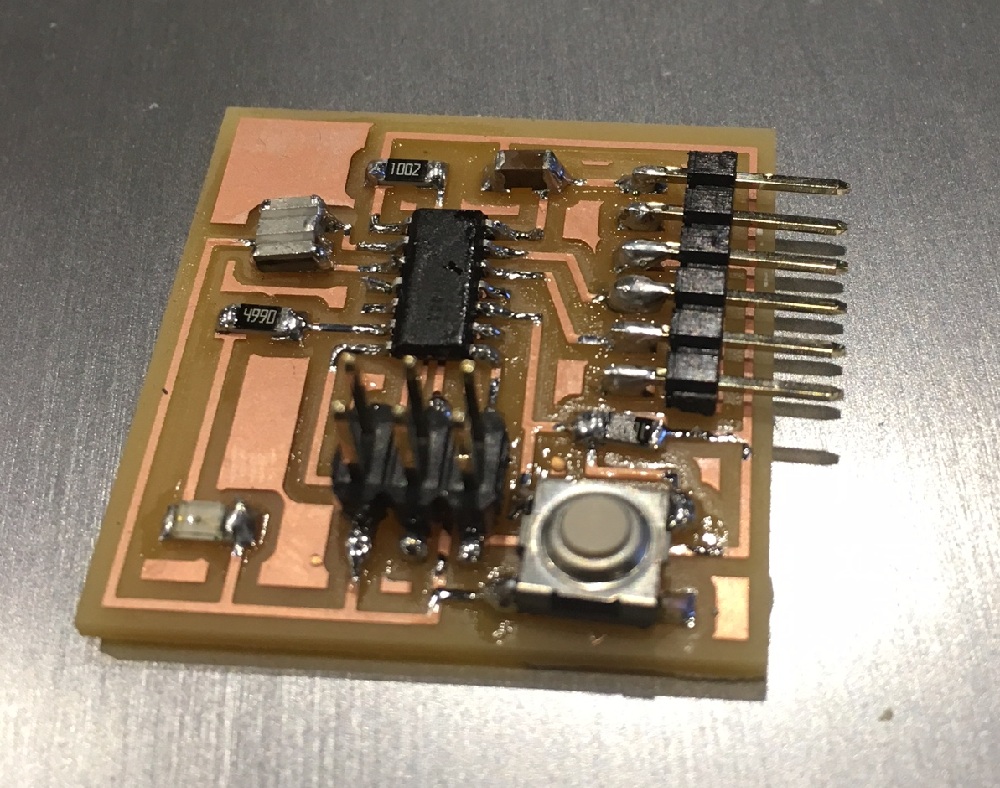
Bonus-FabKit Production
I made a fabkit version2 but with two LEDs.