13.Output device
Electronics design
Related to my final project, I decided to make a servo motor electronic board.
I am planning to attach 8 buttons, 8 servo motors and one LCD, it would take a large space of wires and boards.
To make the machine smaller, I tried to make a board that has both input and output device.
I made designed my own board with Eagle CAD.
Neil's servo motor board design was a good reference.
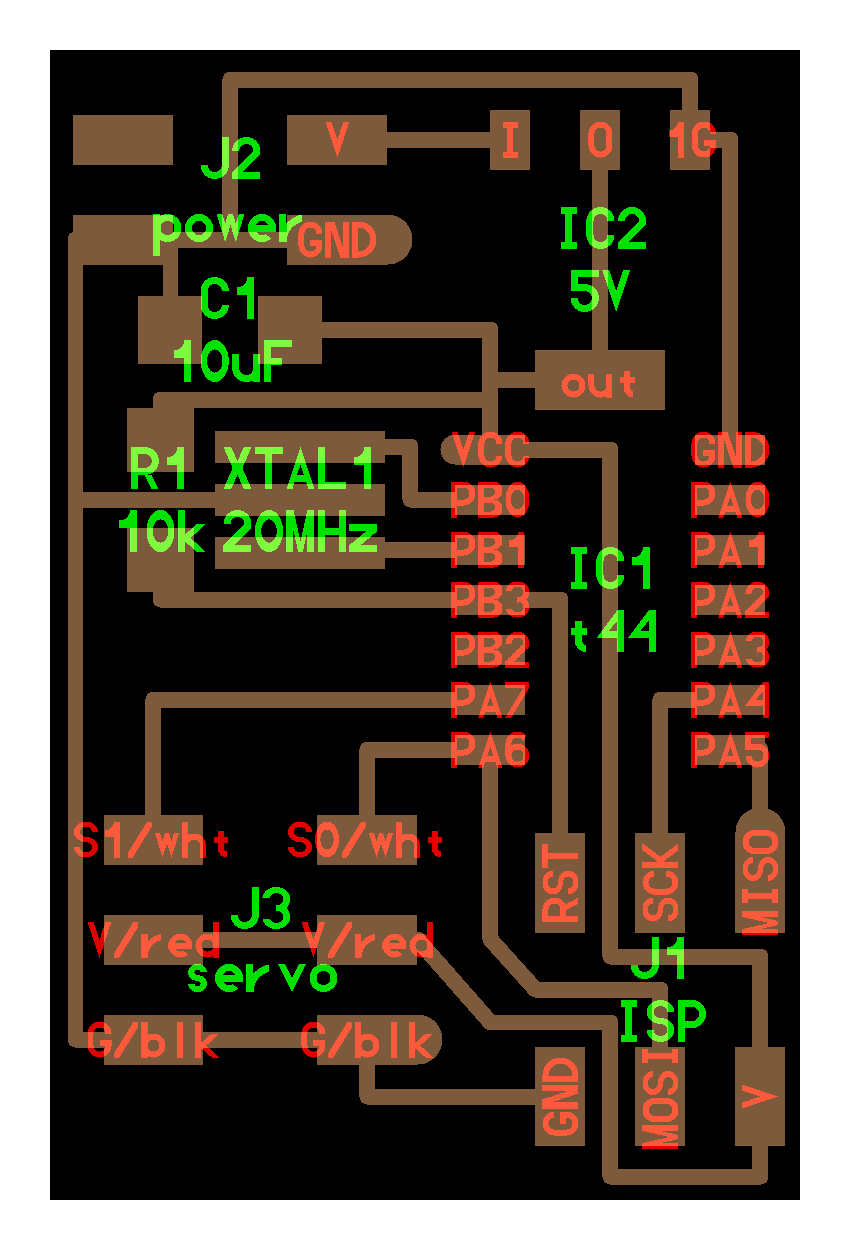
These are the first schematic and board design of my "Venkit". (Venkit for Vending machine kit)
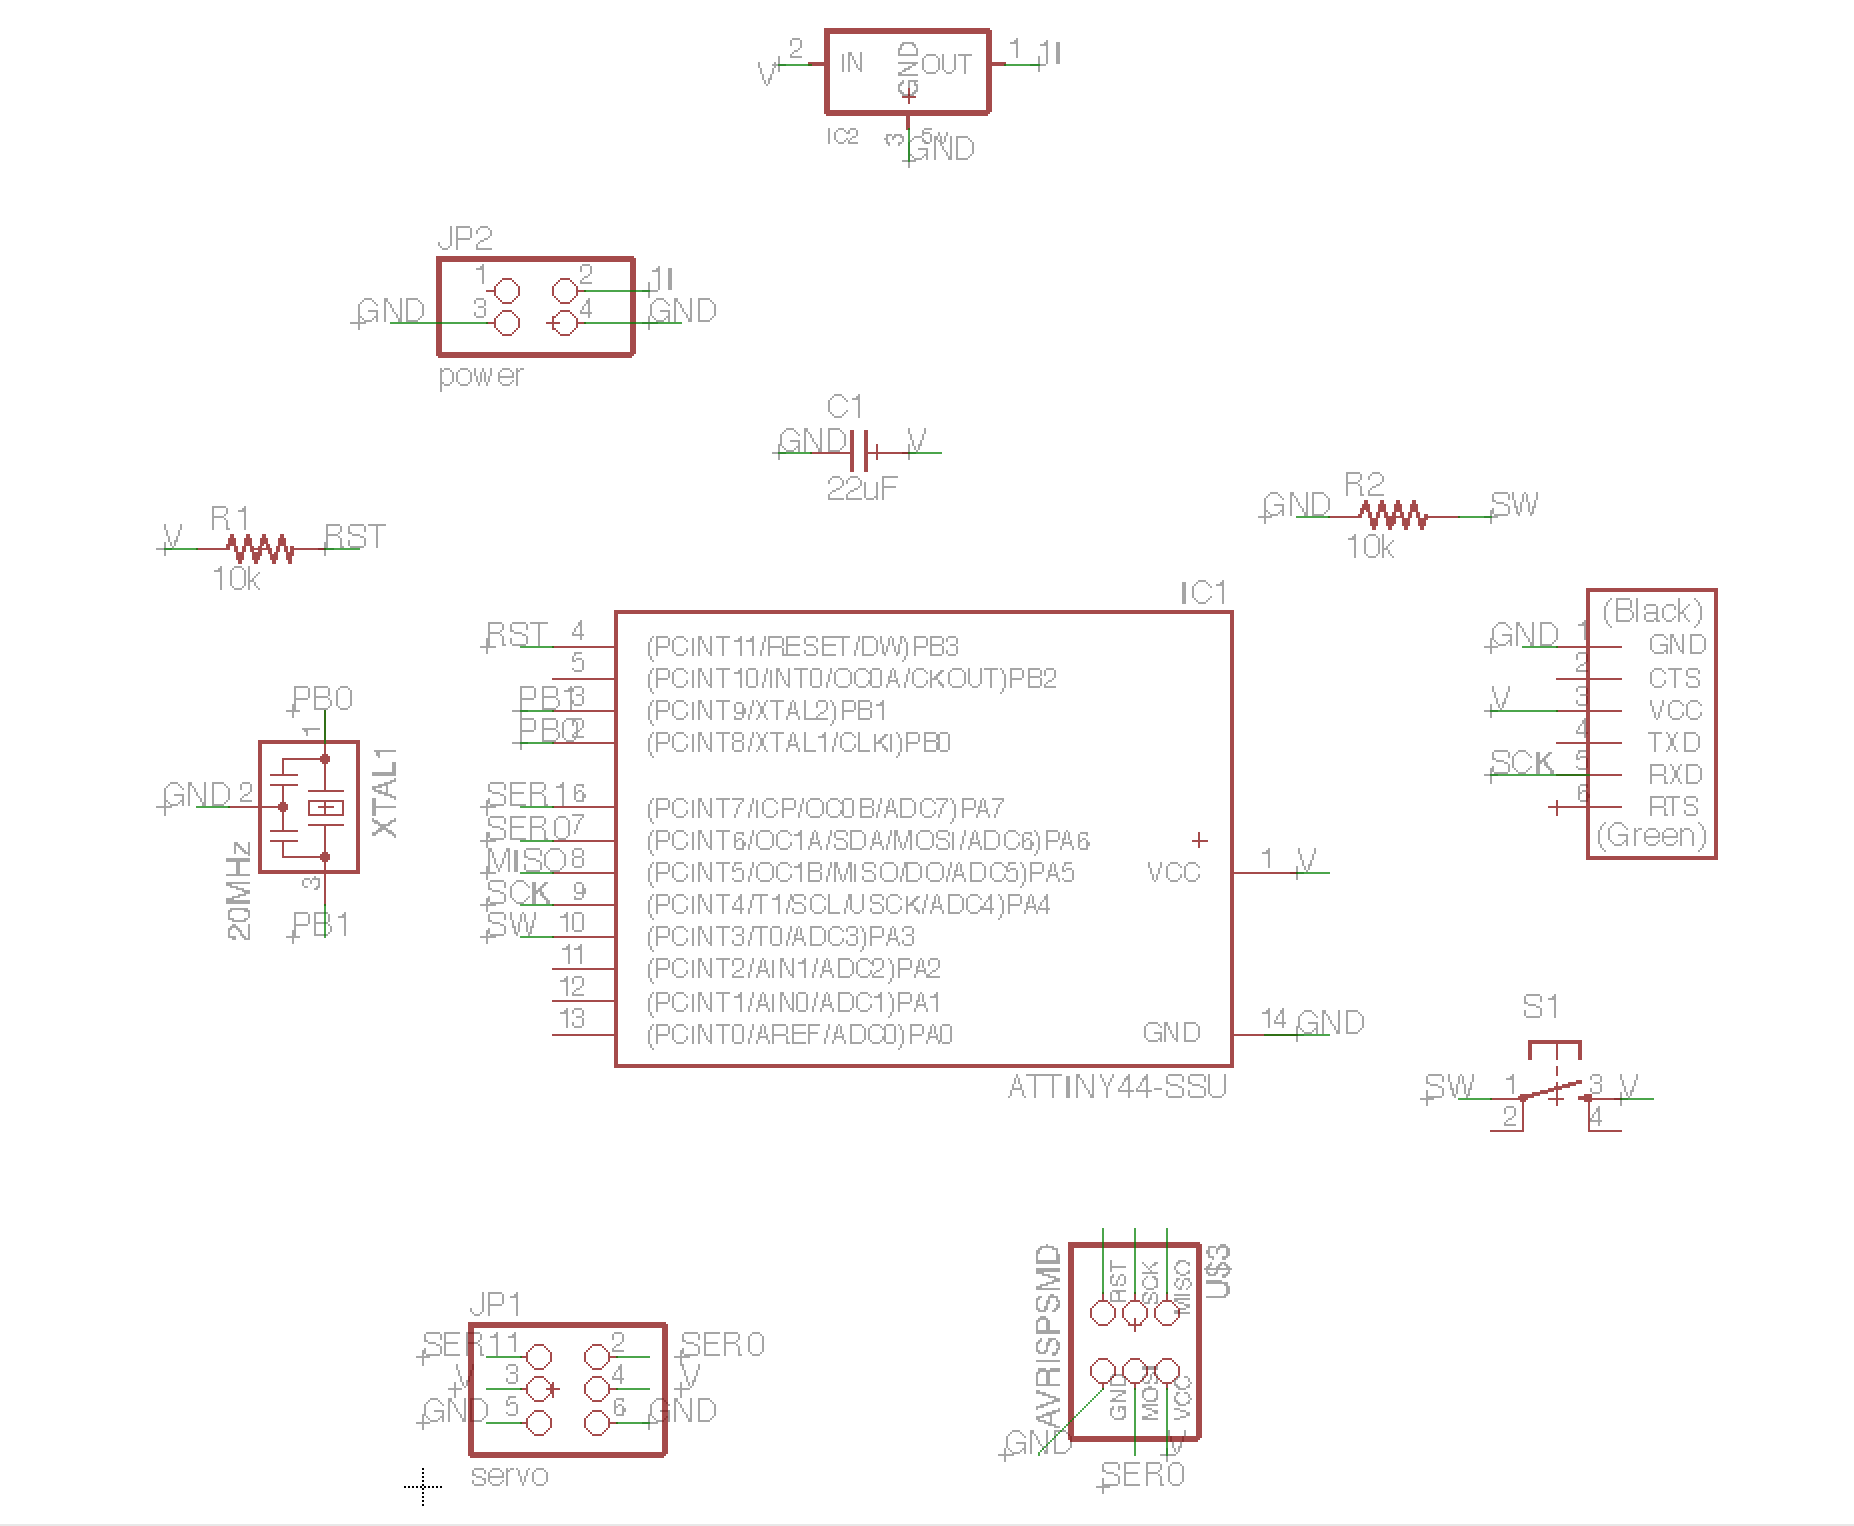
Components were followings
The first Venkit failed in programming because of a connection problem.
Since my goal was to make the size of the board smaller as possible, I made to tiny gaps between the copper lines.
When I powered the board on, I smelled something burning and it had short-circuited.
Instead of making the board again, I started from designing the board again.
In this time, I didn't try to make it small, but I tried to simplify the components and make the wires clearly separated.
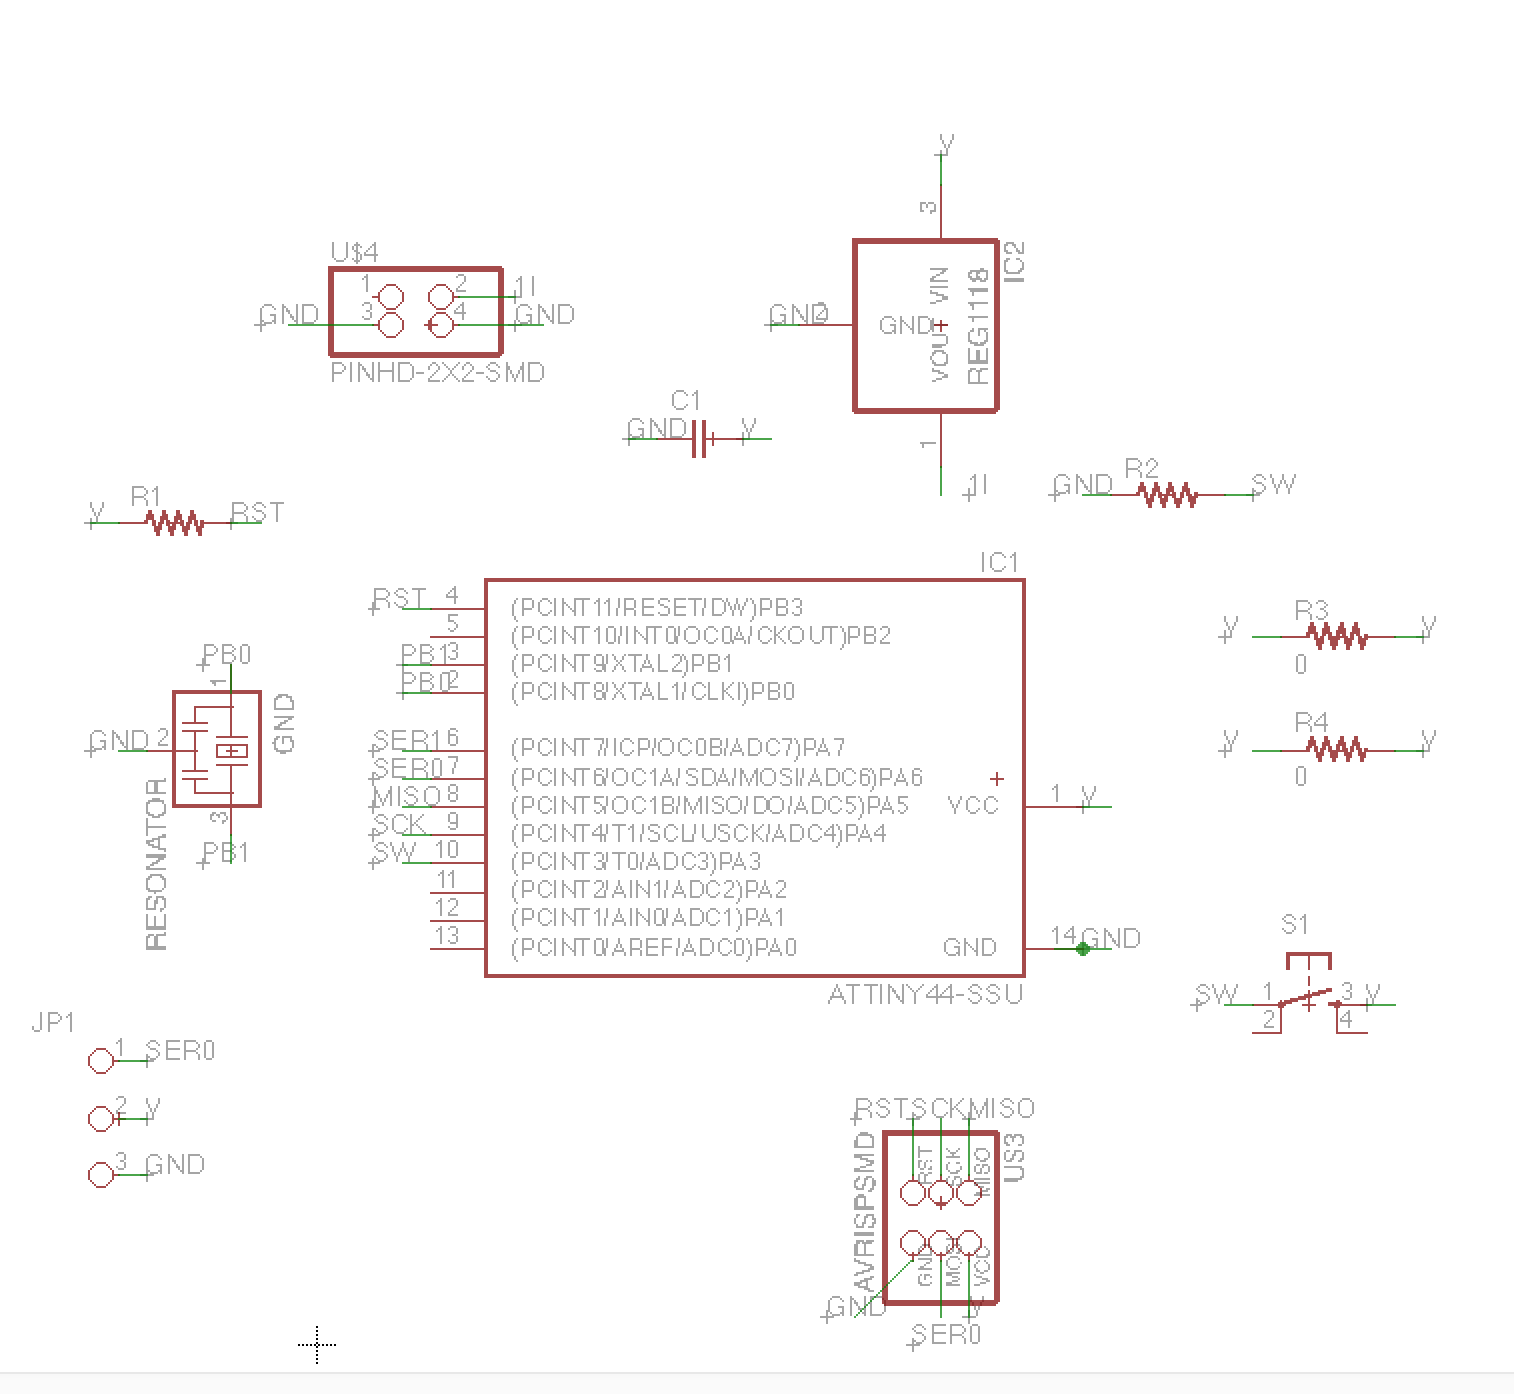
I got rid of 6-pin connector for FTDI, which is not necessary, and I reduced one servo motor connection.
I thought it's better to have one door for each slot.
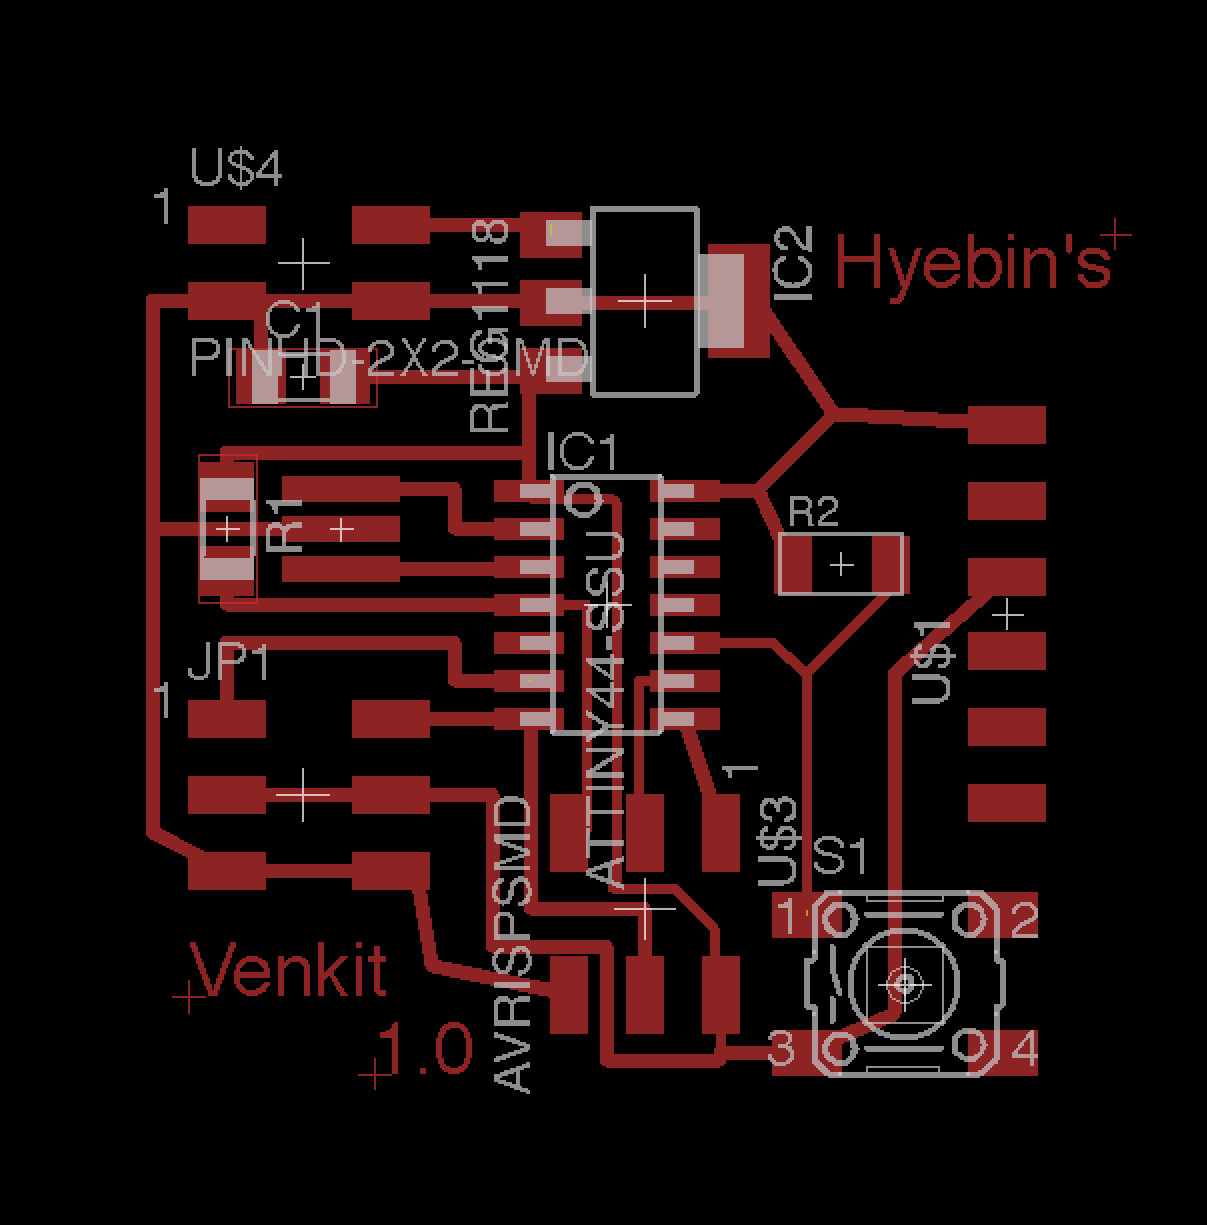
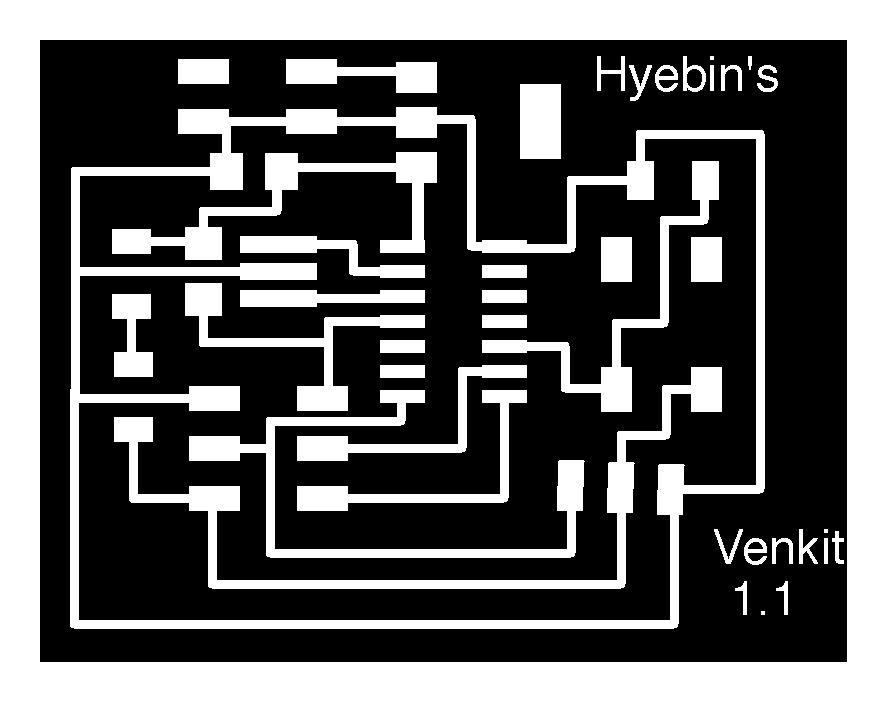
The final board design
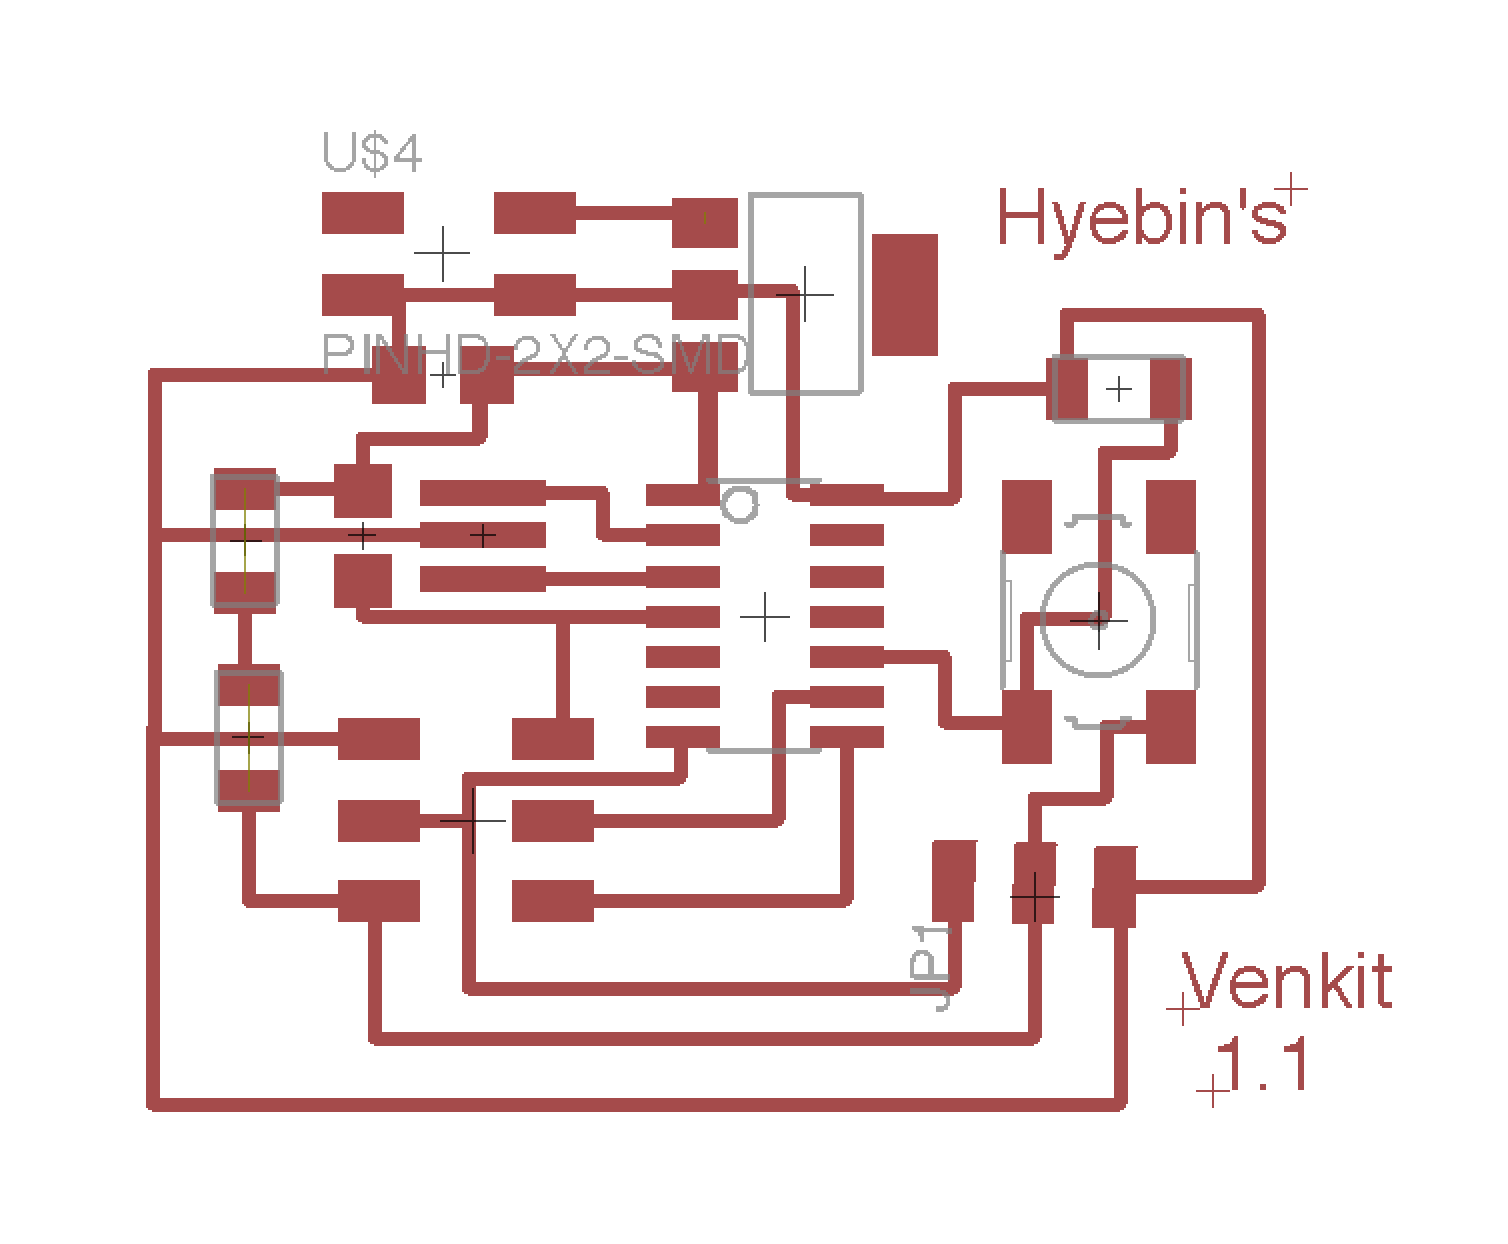
Result of the board making

Components of Venkit
Programming
In the 'input device' assignment, I used the example C and python code of Neil's.
This time, I tried to make my own code for Venkit.
My goal for programming was to make the servo motor moves and back only once, when I press the button
I used Arduino IDE.
I did some trials with arduino kit first to test some codes.
I found software servo library in highlowtech.org. Since the libraries in Arduino IDE is for ATmega 168 or 326, it is set to be use in 16 bit hardware. Therefore, I downloaded 8bit library for servo motor.
Hereis the software servo library.
The first code I made was to make the servo motor move when I press the button.
I suceed it to move but they moved constantly as I press the button.

I increased global variables to 3, which are val, preVal, and toggle, so that it moves and come back to 0 degree again as I click.
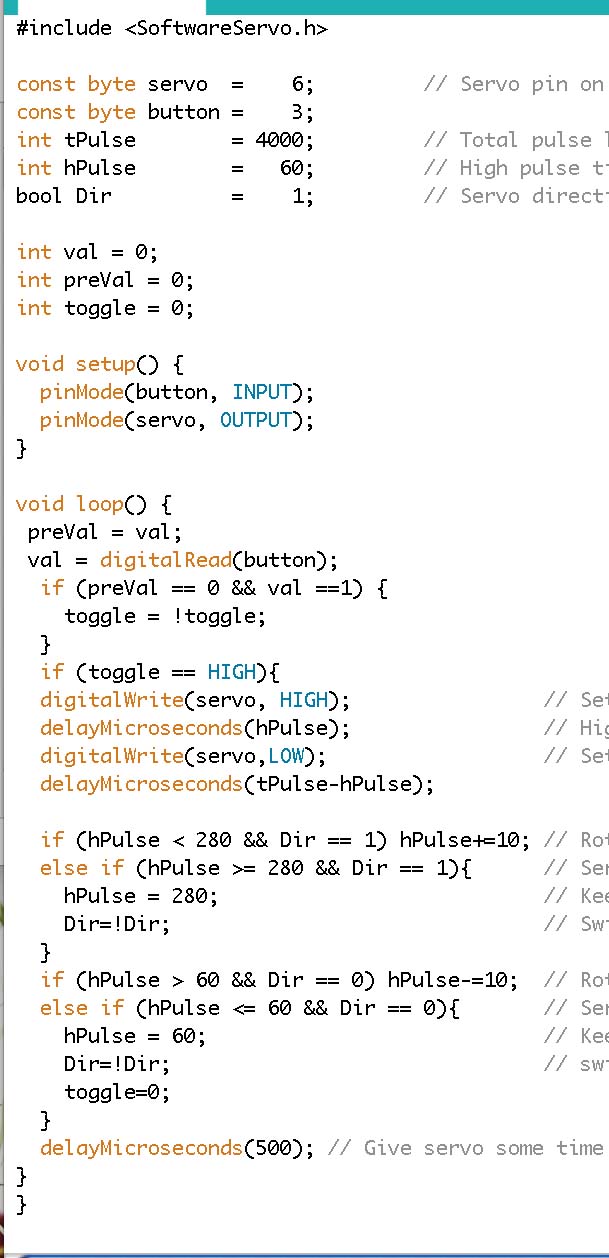
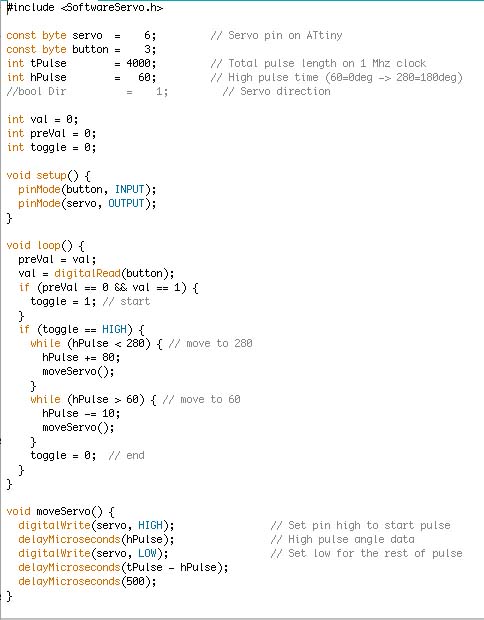
Further more, I tried to decrease the time between moving 90degree and getting back to 0 degree. The best I could do was the final coding in the picture. I could slightly change the delays by increasing and decreasing the hPulse, but still I could make the gap shorter.
Result
Video