7. Computer-Controlled Machining
File Design
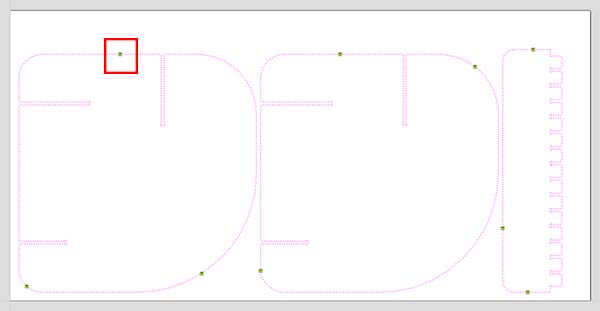
This is the file that I made for the assignment.
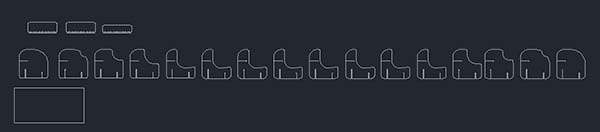
I measured the bed size of CNC machine and tried to draw something that is nearly fit to the size so that I could make ‘something big’.
I drew a rectangle which is the same size as the CNC bed and tried to fit my design in to the bed.
The concept of the design is to make an armchair which has horizontal design.
Most of CNC chairs that I saw had #pattern because it is stable.
However, a sofa chair that I wanted to make was only to have vertical lines when you see the font side of it.
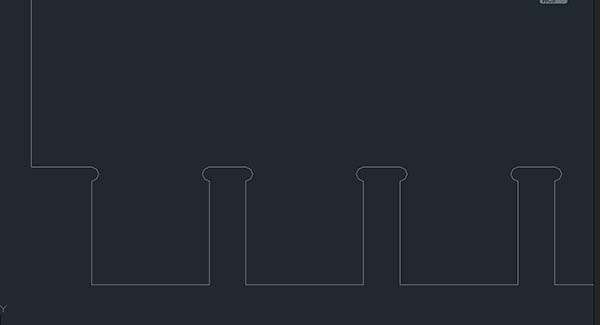
After finishing my design, I used "Fillet" command to make dogbone on the joinary part
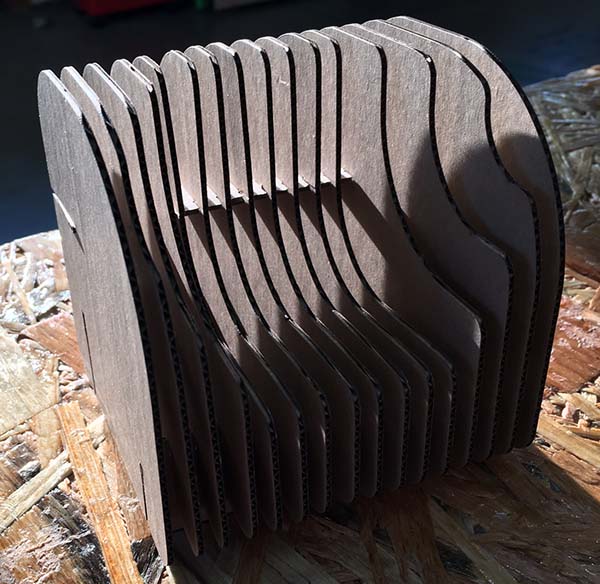
Before machining the CNC router, I downsized the sofa modeling and tried it with cardboard.
I thought my modeling would be fine to cut, but I found a mistake through the result of laser cutting.
The third horizontal joinary was calculated wrong.
I fixed the file and send it to CNC machine computer.
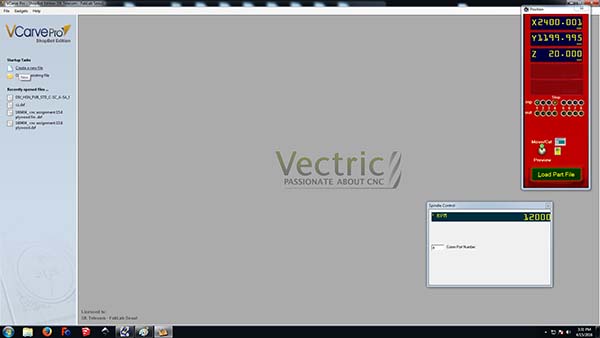
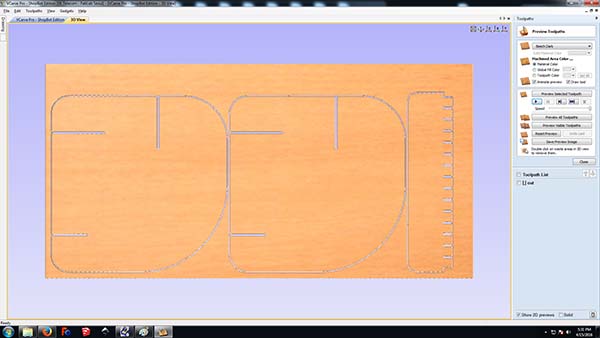
VCarvePro
Before using a shopbot, I made my dxf modelling file to CNC files.
I used VCavePro Shopbot edition. I opened VcarvePro and clicked "Create a new file"
It is possible to make simple vectors or edit objects, including making fillets or dogbones.
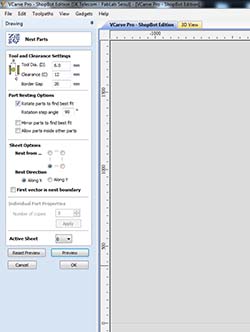
“Nest Part” is useful if original file is not arrayed in to the bed. This function makes to use materials efficiently.
After editing the original file, I went to “Toolpaths-Profile Toolpath
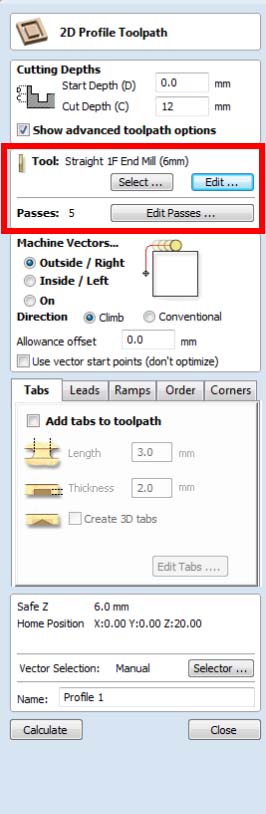
I used straight 1F end mill(6mm)
Feed Rate***
Chip load= feed rate/(RPM X # of flute)
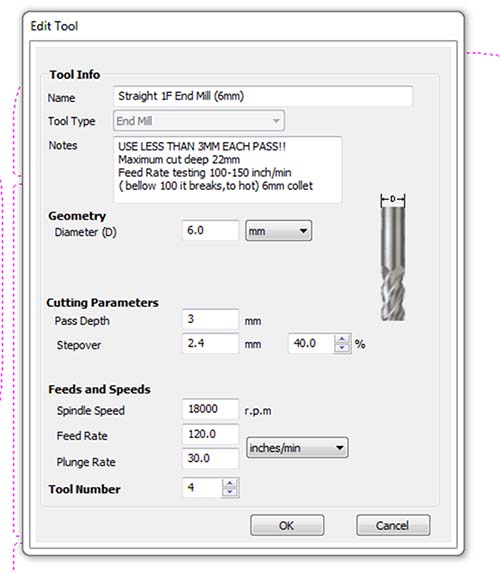
Next to "Tool select", there's "Edit" icon which can add or edit end mill options.
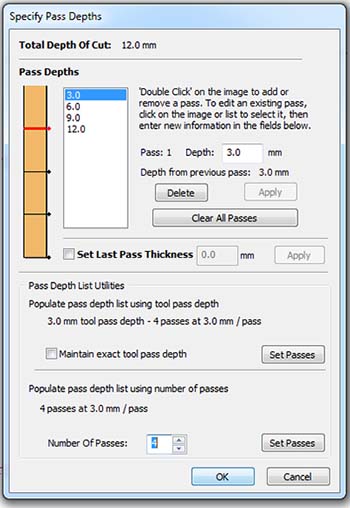
Then I made the depth of cut like this.
I had to put "Tabs" because I cut a big size and it might shake or move while cutting it. When editing tab, it automatically put tabs in it but some of them were put in between small space like joinary parts. I moved each of them manually.
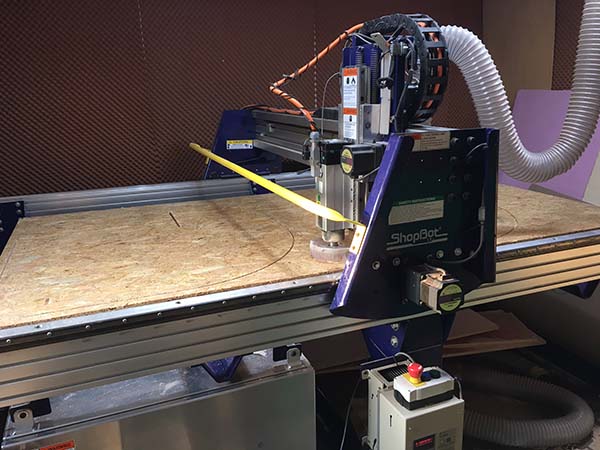
Shopbot
Dust collector is not mandatory but is recommended to use.
Before turning it on, check the inside of the fan and be careful not to put your hands in to it.
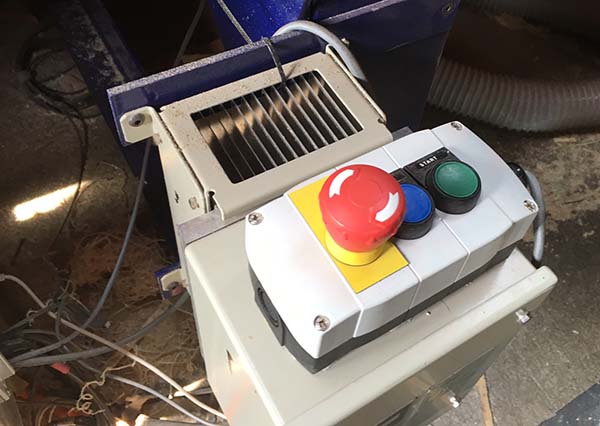
This red button is an emergency button.
There are three emergency buttons.
If you press this, it turns whole machine off.
Be careful not to confuse with “pause”. “Pause” only works with computer.
When you start the CNC work, turn on the machine first, then computer.
When turning it off, computer first, then machine off.
The blue botton is for resetting all the data and reconnecting the motor.
Before turning the machine on, check all the emergency buttons and make sure they are all off.
On/Off button for the machine is on the left corner.
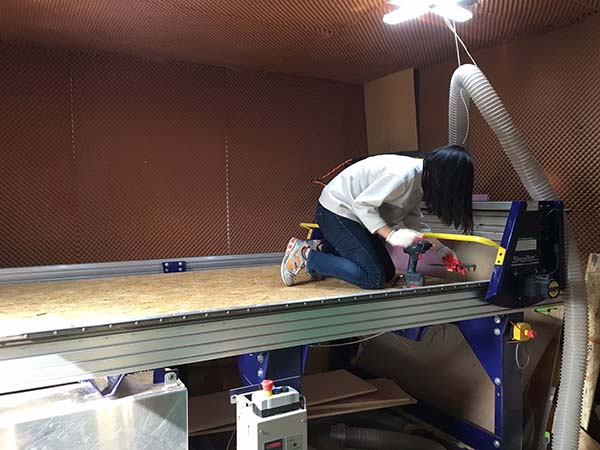
I used OSB. The size was exactly the same as the bed so I had to put properly and screw them.
When I screw the material on the board, I had to check the files and be sure that mill is not going through the screws.
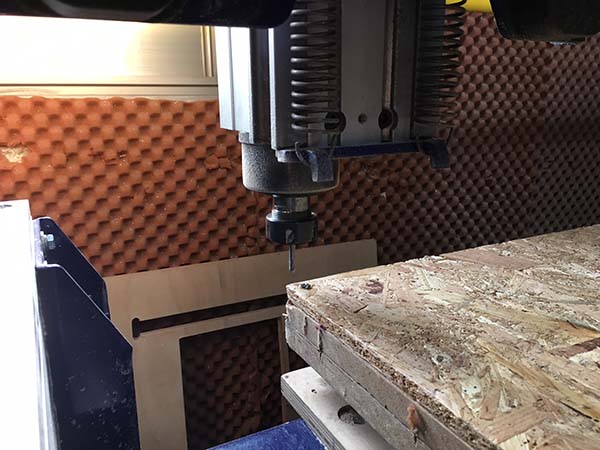
With computer control, I moved the end mill to zero point.
Firstly, I moved the spindle in the center and made Z axis zero because OSB had slightly different thicknesses.
Then I moved the mill to X and Y to zero axis.
It was hard to make X and Y zeros because it was hard to see the mill moving while controlling with computer.
When the machine is not used for a while, it has to be warmed up with "Spindle Warmup Routine".

Cut!
Hero shot
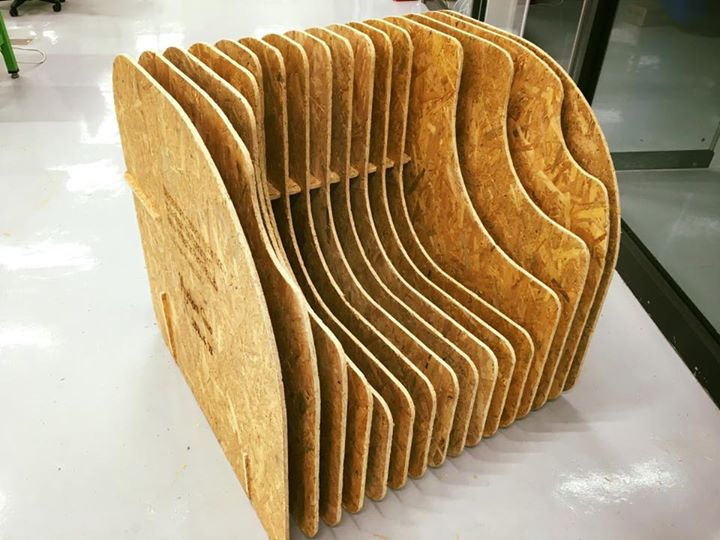

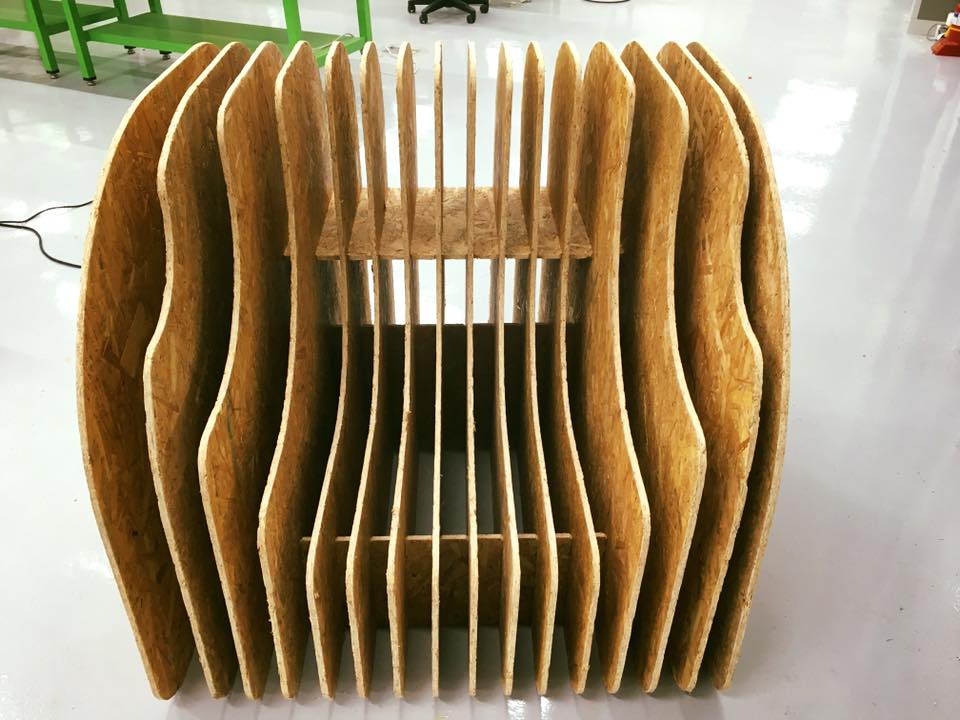
It's more comfortable than you think. As the concept of the design, it breaks a stereotype of horizontal lines.
Download Files