Molding and Casting
Assignment
- Design a 3D mold
- Machine it
- Cast parts from it
For this week project I wanted to try to cast buttons for my Slide Guitar. It would be buttons for Tone and Volume potentiometer and would need to fit the shaft coming out from the pot.
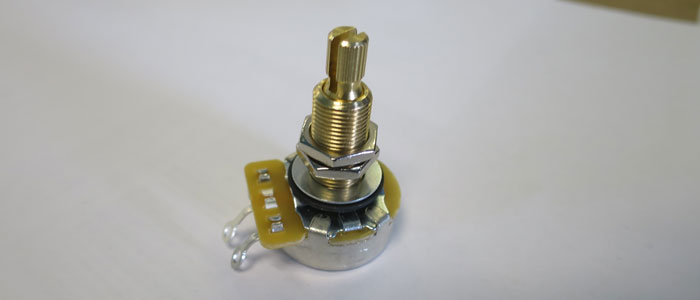
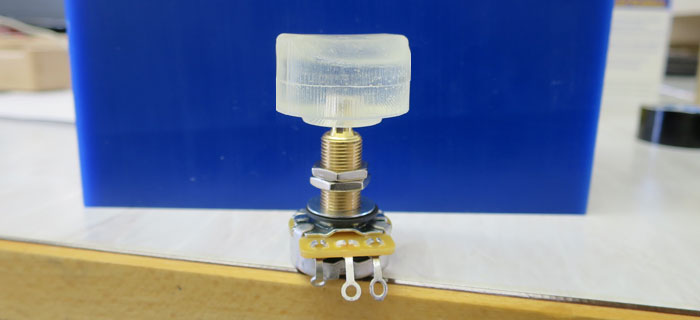
This is the potentiometer, it will of course turn the volume up and down when needed in the out-put signal of the guitar. I measured the shaft and it gave the this measurements: 5.93mm width and 6mm height.
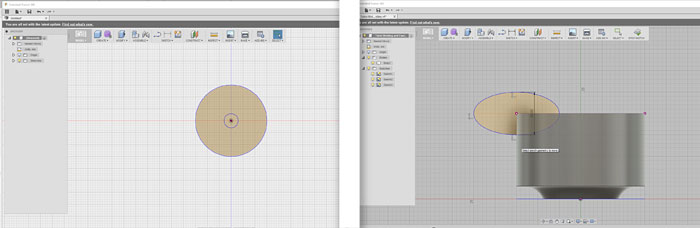
In Fusion 360 I started to design the button and then later I would think about the design of the mold. I started to make circles and work from that basic form.
The shape of the button came quickly, it´s easy do design in Fusion. I just needed to round the edges a little.
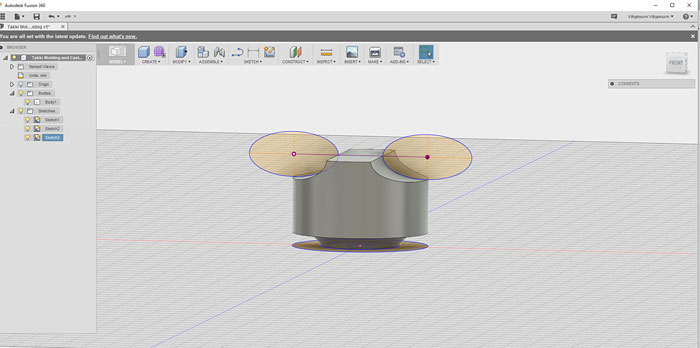
When I had finished to design the button I started to work on the part that will be milled into the wax. It´s not easy to design and shape a form that will form another shape. My first move was to split the button in half and work on the surfaces that will connect each other. One of the connecting surfaces would have buttons but the other would have holes. On this screenshot I had buttons on both forms. I fixed that later in the process.
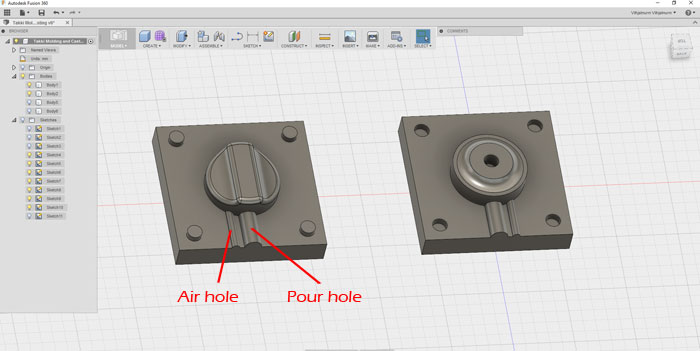
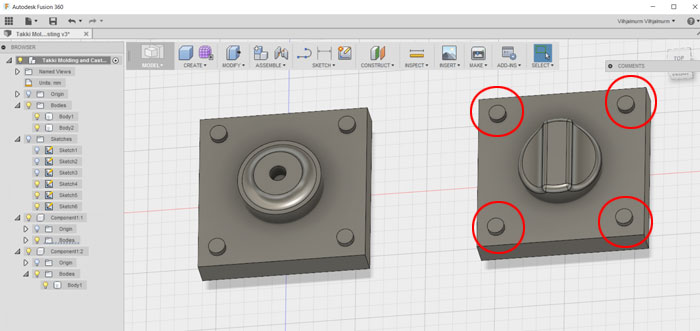
Next thing to do was to make one hole to pour the casting material into the mold and another hole to let air flow out of the mold, when casting. I tried to scan for other project to see how big the holes needed to be. I decided to make the pour hole 7mm and the Air hole 3mm. Now I was getting ready to save this out as an STL file and go to Part-Works 3D with little stop in Rhino in between.
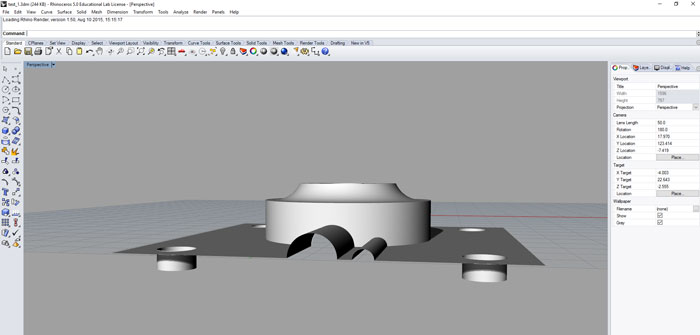
What I did in Rhino was just to tear off the bottom part of the drawing. That part would give me trouble in Part-Works 3D. I did this with both parts and saved them side by side as STL out of Rhino.

In Part-Works 3D I started to fill in the seven steps. This project is one-side milling and the drawing is 13mm deep. I was worried because I did not have long 1/8 inch End Mills for the job.
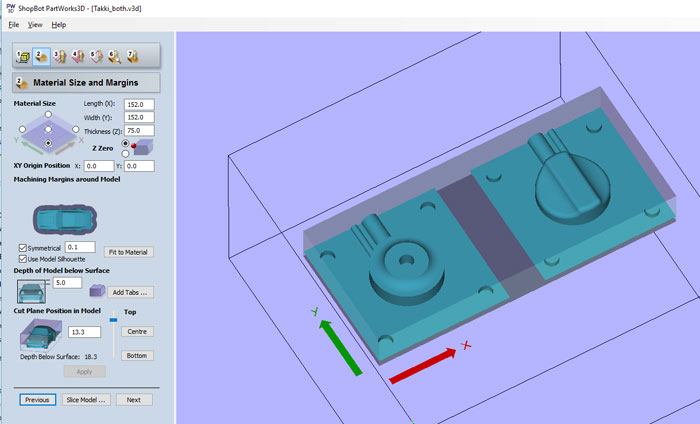
The size of the machinable wax was 152mmx152mmx75mm. I put 5mm in "Depth of Model Below Surface". I did not have long milling bit as I said before so I had to measure the whole depth of the milling. Drawing was 13mm plus 5mm below surface that is 18mm (deepest part).
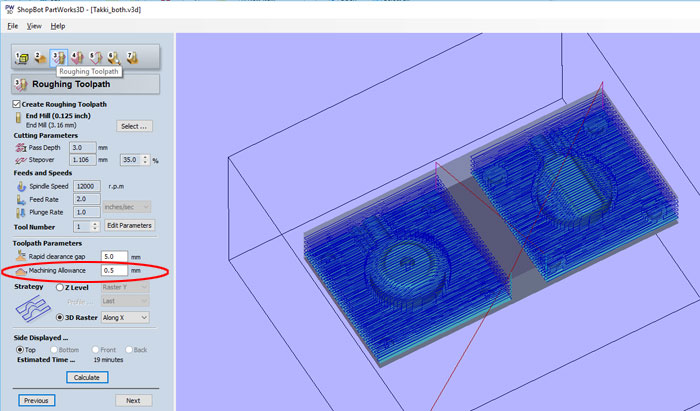
In "Roughing Toolpath" I picked End Mill (0.125 inch /3.16mm) size. Pass Depth 3mm and 35% Stepover. In Spindle Speed 1200, Feed Rate 2.0 and Plunge Rate 1.0. I got an error message about the "Machining Allowance", it was to high so I lower it from 1mm to 0.5mm. Too much "Machining Allowance" will extend the milling time and can cause strange toolpaths that can hurt your milling bit.
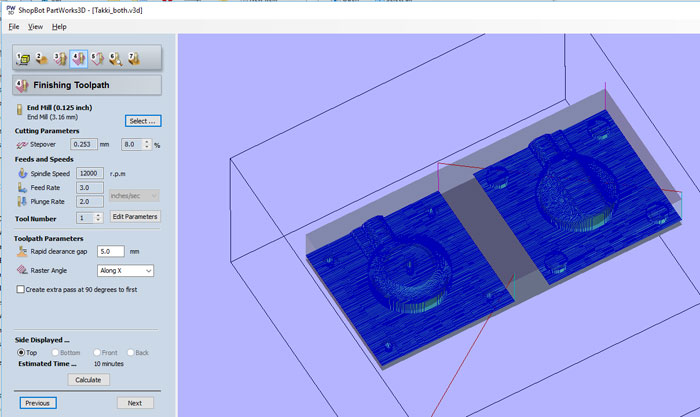
For "Finishing Toolpaths" I was going to use a Ball Nose (0.125 inch) but that did give me curve edges at the bottom of the Buttons joints. So I just used the same End Mill as in the Roughing Toolpath.
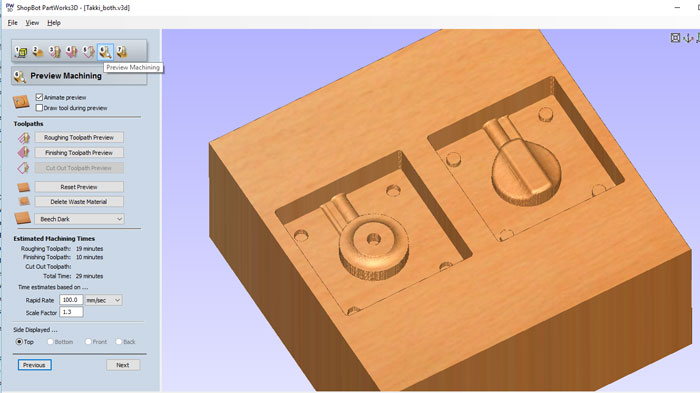
In the preview everything looked great and I could save the PartWorks 3D file and import it into V-Carve Pro.
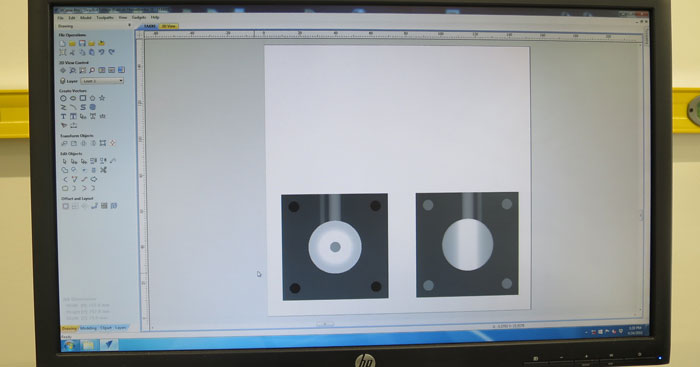
I made a V-Carve Pro document, and made the document size the same as the wax cube size: 152mmx152mmx75mm. I imported the PartWorks 3D file with the Roughing- and the Finishing Toolpaths.
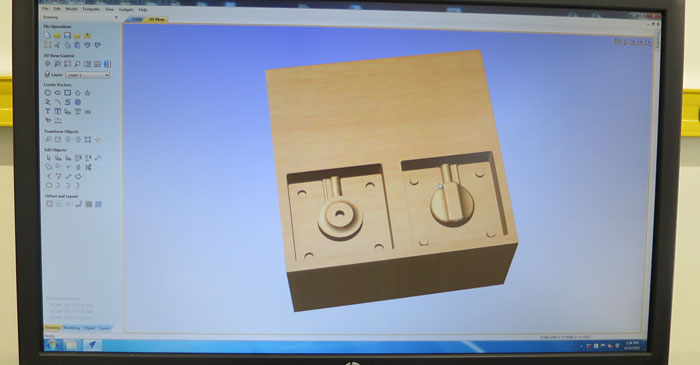
I located the toolpaths so I could mill again if I did some mistake in the design. The preview was looking good in V-Carve Pro as is PartWorks 3D. I was almost ready to mill.
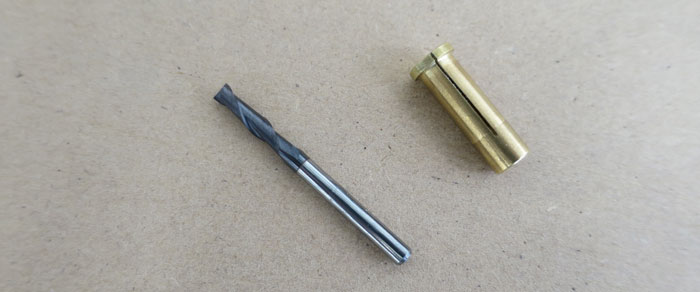
Since I did not have a 1/8 collet for our Shop Bot I used a small sub collet that would fit into the 1/4 collet in the Shop Bot. This is the End Mill that would do the milling (0.125 inches). The End Mill is not long I only had 3 extra mm if I did not put the End Mill all the way into the sub collect.
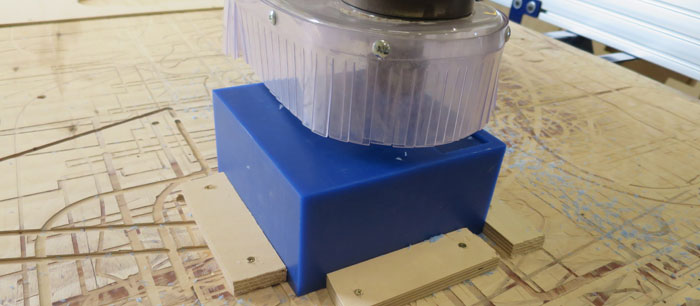
Shop Bot started to mill the machinable wax everything was looking good.
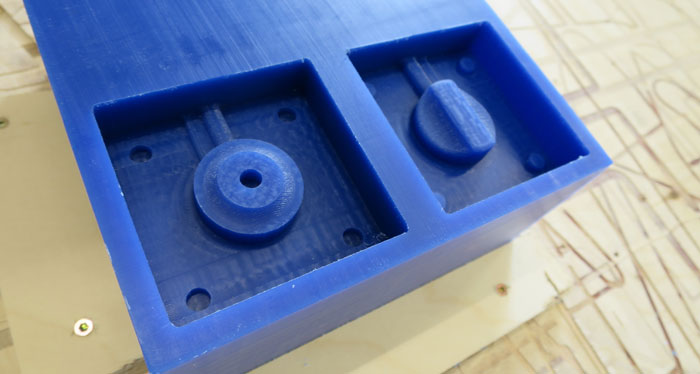
When the Shop Bot had finished the job I cleaned the wax and it was looking sharp. I was quite happy with the result.
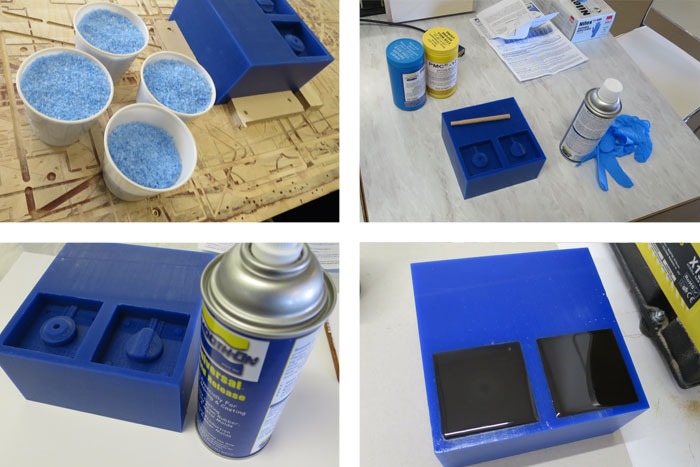
I could pick up most of the wax leavings from the milling and put it into cups. Later I will re heat it and use it again. After that I went through the process of making the mold using the PMC 121/30 product from Smooth-On. I went carefully through instructions on the back of the packaging. I used Mold Release in a spray can so the mold would not be stuck on the wax when dried. When I had carefully stir the mixture I placed the cube on a table right beside a band-saw. I poured the fluid in the mold and started the band-saw and the wax cube vibrated on the table. Because of that most of the air bubbles in the mixture came up to the surface.
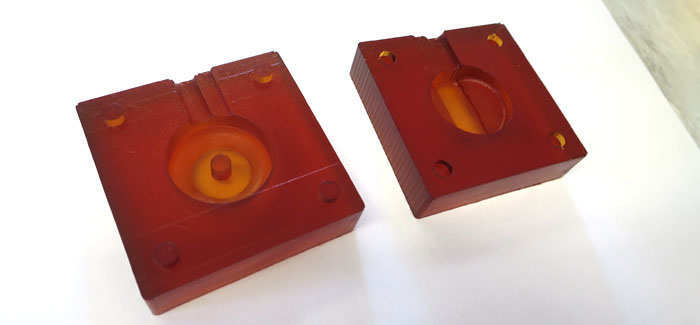
It was very exciting to draw the mold out of the wax and see the result. It was looking great and I could take the next step.
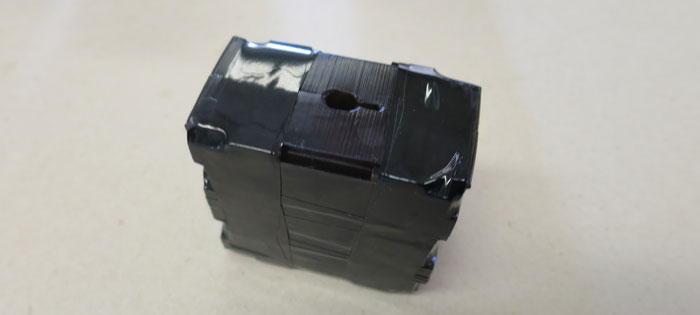
I found an acrylic leftovers and taped it to the mold for support. I must have taped it little too tight because the final outcome came out little skewed. After the taping I poured the mixture into the mold. I used the same vibration method with the band-saw as before.
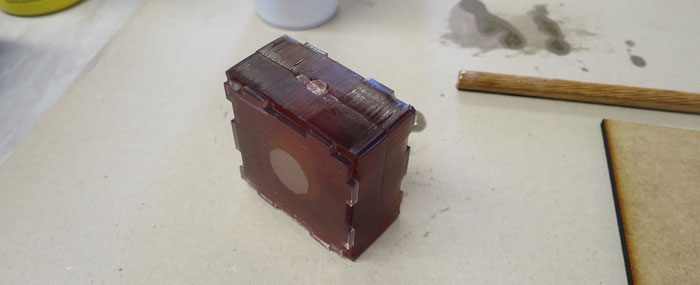
After one hour I took the tape off and opened the mold. Here you can see the acrylic leftovers I used for support.
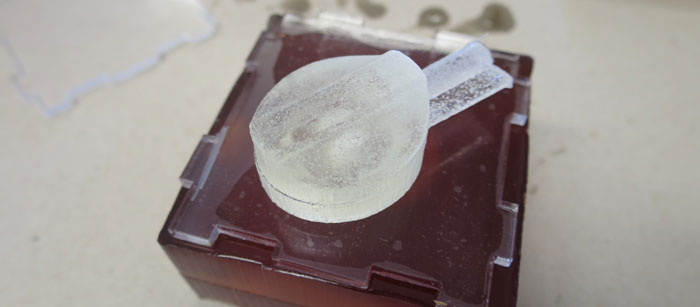
Here is the final outcome, a skewed button with plenty of air bubbles inside. I realize I need to master this little bit better and find a way to get rid of the air bubbles.
I casted the button again with a better result. I did not shake the two cans with the casting material before use like I did before. I stirred it really carefully with a small stick and I had less air bubbles in the material. I am happy with the result. I will need to get me something from Smooth-On to color the button. Over and out!