The assignments fot this week are:
The assignment related to the Vinyl cutter is make anything we want, just to learn how to use it and how to properly transfer the design cut to the place you want to stick it on.
Therefore, first, I had to decide what to cut, then I remembered of a draw that I made last year using Photoshop. At first, this Design was made as a tattoo idea that I still want to make. So using this draw, I want to make a stick to my laptop. Therefore, the steps that I did to make it was:
1) Rasterize the JPG image in Inkscape. You can do it going to "Path>Trace Bitmap". I kept the default options. After this process, you will have a vector above your image. You can now delete the image and keep just the vector. That is the one you will need to cut.
2) Simplify the paths and number of points. The process of Transform your image in a vector tries to keep your final vector as the image is, so it makes many nodes that can be unnecessary. To simplify the paths and number of nodes you can make it automatically by going in "Path>Simplify" or make it manually. I did mine manually because the results on automated simplify made some of my shapes looks weird. To make it manually use the Edit paths by nodes (F2), select the nodes you think it is not necessary and just delete them. Hint: If your design is complex, you can break it apart by going to "Path>Break apart" simplify some of the details, change other manually and them combine all them again by going to "Path>Combine". This process can make you save a good amount of time and work.
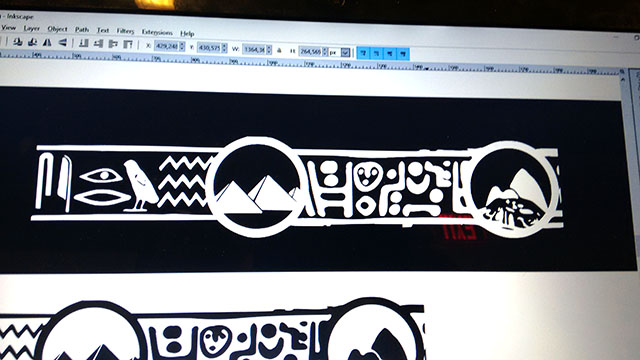
3) Keep just the outline of your vector, so you can see what the traces to be cut are. To do it on the colors bar on the bottom of Inkscape, left click in the first square with an X (none). To fill the outline, hold "Shift" and click left on the color you want for the outline. You also need to set the stroke to 0.01in width, otherwise it will not cut properly.
4) Make a rectangle around your design as a path to cut, so it will be easier to take the parts you do not want of after cutting.
5) Your design should be ready to cut now. However, you will need to check if the page size is adjusted properly to your machine. In Inkscape go to "File>Document Properties..." to adjust them. In "Page Size”, choose one which fits to your paper width. If you are using a vinyl roll you will want to have a "Portrait" orientation, otherwise when cutting, the software will automatically rotate your design in 90 degrees.
6) Turn on the machine, and supply it with the material to be cut. Remember to position the small wheels on the white parts to make it works you need to move them from the backside of the machine.
7) After properly put the material in the machine, the small screen on the right will ask you if you are using a sheet or a roll of material. Chose the one you are using. Usually the machine saves the last settings used. Check if it cuts your material properly using the button "Test". If not, adjust the force and the speed, or check if the blade still good to use or if you need to change it.
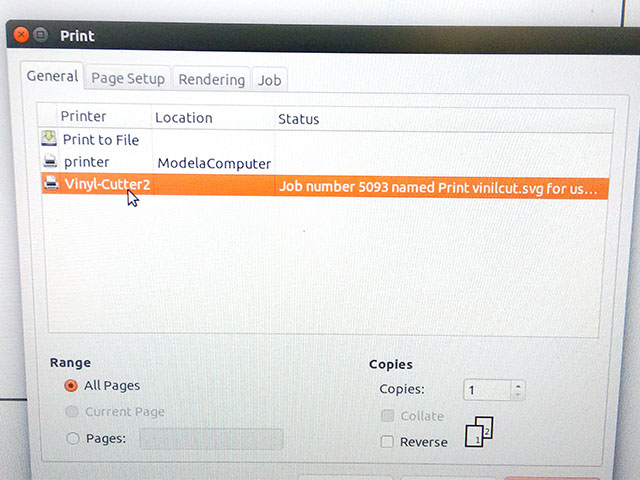
8) Go back to the software and choose "File>Print". A window will open so you need to choose the Vinyl cutter and click as Printer and then click Print. If everything goes well, the machine will start to cut, but you can barely see its cutting lines.
9) After finished, move the paper pressing "down" on the Vinyl cutter panel and with a scissors cut of the area where your design was cut by the machine. Be careful on not cut among your design.
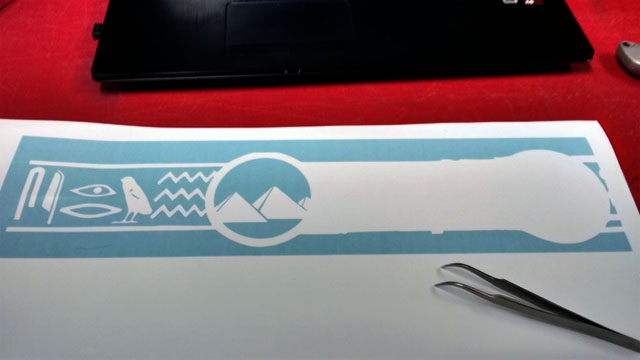
10) Take a utility knife and tweezers, and start to take off the parts of the cuts that you do not need. So check the parts on your computer screen. As the vinyl that I cut are white, I made a black rectangle on the back of the design to see it better while taking it off.
11) Using the utility knife cut some lines to facilitate removal of wasted vinyl in parts. Do not try to take it all in once, or you can end taking the wanted parts as well. For the small parts, use the tweezers.
12) After finishing the removal of the unwanted parts, apply the mask tape and magically the vinyl will stick on it.
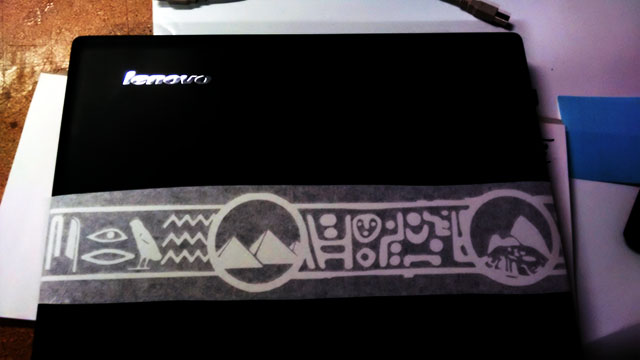
13) Clean the desired surface and apply it carefully on the wanted positon. The vinyl will stick better on the surface if you make some pressure on it, so use something a bit harder. I used a piece of plywood.
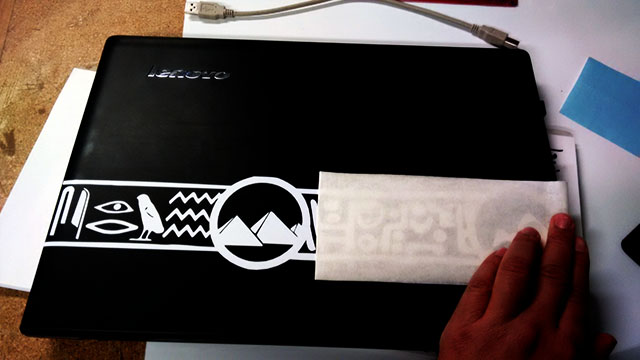
14) Take the mask off carefully, always checking if the vinyl really got stick it on the surface. For better results do not take the mask off by pulling it up, pull it on tangent to the surface like this pic.
You can find the source file here: vinylcut.svg
For the laser cutter, the assignment of this week is to make a press-fit construction kit. At the class and the tutorials, we was advised about the importance of the kerf on making press-fit kits.
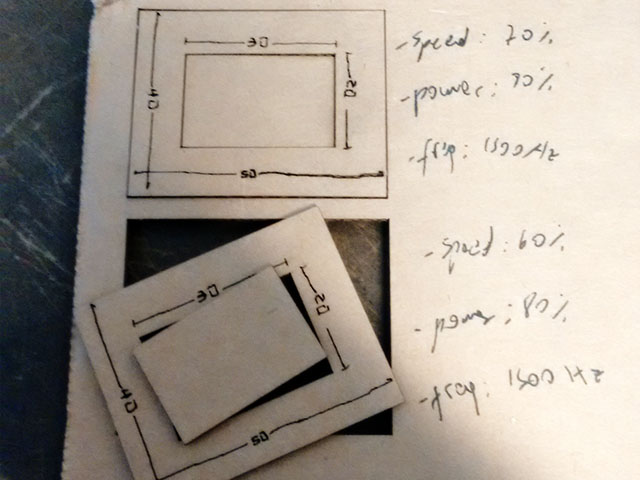
I designed two small rectangles on inkscape just to cut and then measure the kerf. For each cut would have then four measurements of kerf and that I think is a good number to calculate an average kerf for this material.
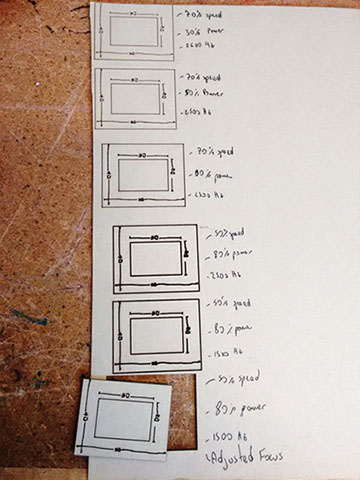
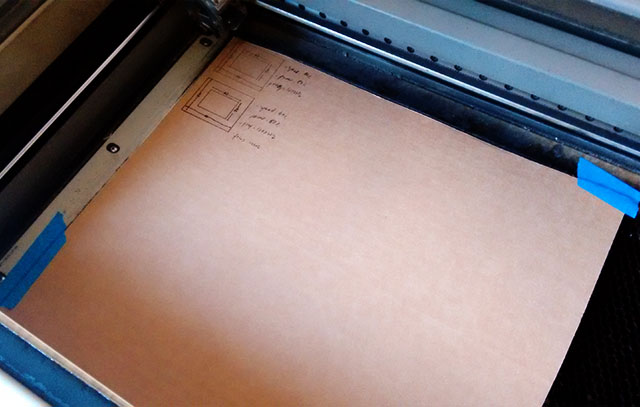
First, I decided do measure what is the kerf for different types of cardboards. I used 3 types of different thickness: 1,2mm 1,6mm and 4mm. For each type of cardboard, I need to find the correct settings of cutting and trying to make it as fast as possible.
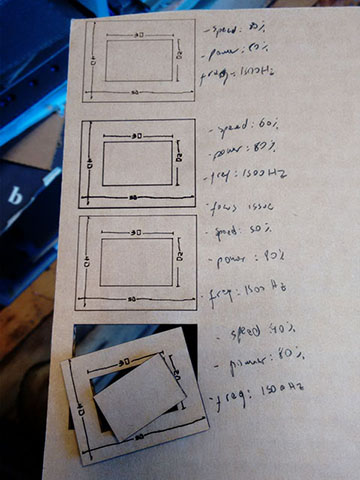
I first started with the 1,2mm cardboard and the first tests I was not successful on cutting it. The picture below shows the settings I used in each try. After five attempts then I realized that maybe it was not an issue of power and speed, and then I adjusted the focus again and got it cut! So finally, I used 80% power, 50% speed and 1500Hz. I thought that these cutting settings are quite high for this material, but then I realized that this was a quite dense cardboard.
After, I tried to cut the 1,6mm cardboard using the same design and it was easier to find the cutting settings, with only two attempts, cutting it using 80% power, 60% speed and 1500Hz.
Then for the 4 mm cardboard, I had to make more attempts because of focus issue again. On the second attempt I noticed that one of the corners were burned more than other, even not cutting the material, this happened because the cardboard that I was using was a bit warped. So I fixed it with some blue tape and tried again. In the fourth attempt I got it cut using 80% power, 40% speed and 1500Hz.
After cut it all, I measured each of the sides for each material. I followed the instructions at this tutorial on measuring the kerf. To facilitate the calculus I did this very simple excel to put all the data and get a average for the kerf.
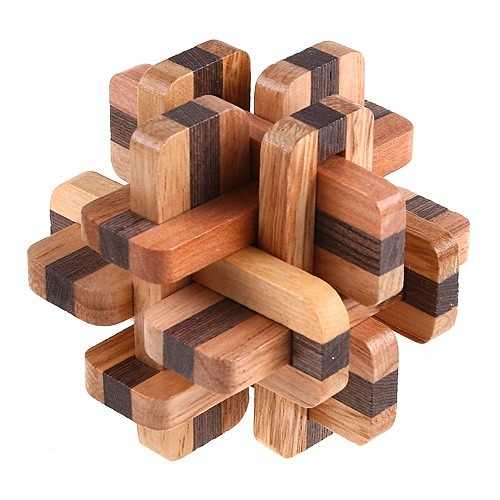
As a project for Laser Cutter, I tried to make a puzzle using wood, like this below, that I found in this website:
First, I got a plywood to measure it thickness, which is a key factor for the construction. I found one of ¼ inch, but that actually has 0.225 in. So this thickness is used as width in the inner holes on the pieces. I guessed some other measures and calculations for the pieces and decided to make it, based on this picture:
I made the draw based on the inner hole. I used the clone tool so the changes that I make on this, will change on the other as well. To the model works, I guessed some points about the measures of the pieces. Consider t thickness of the material:
a = 3 * t + 2(mm)
b = c + 2*f
c = 2 * a + t
d = a + f
e = t
f = t + 1(mm)
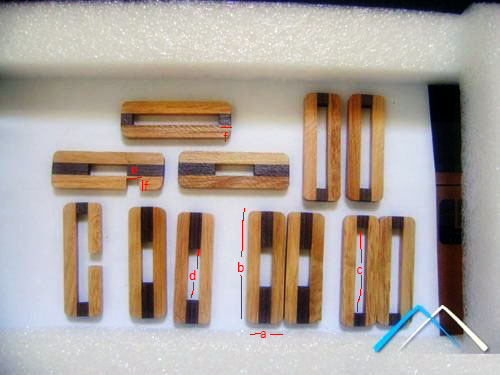
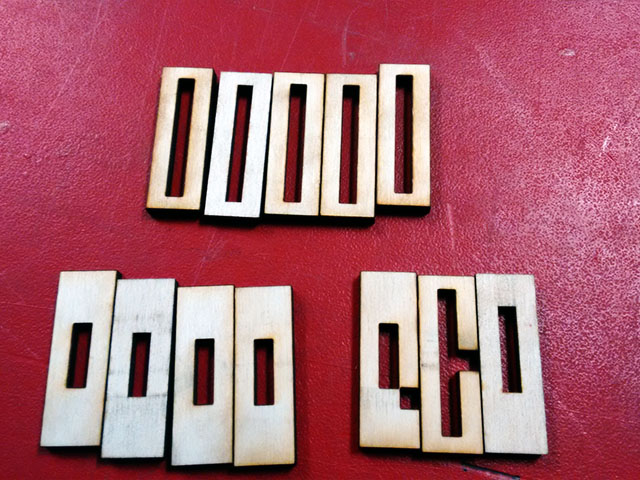
I cutted them using a pre-set for ¼ plywood cutting (100% power, 5% speed and 500Hz). Then Get the pieces ready! Here how they looks like in pieces and assembled.
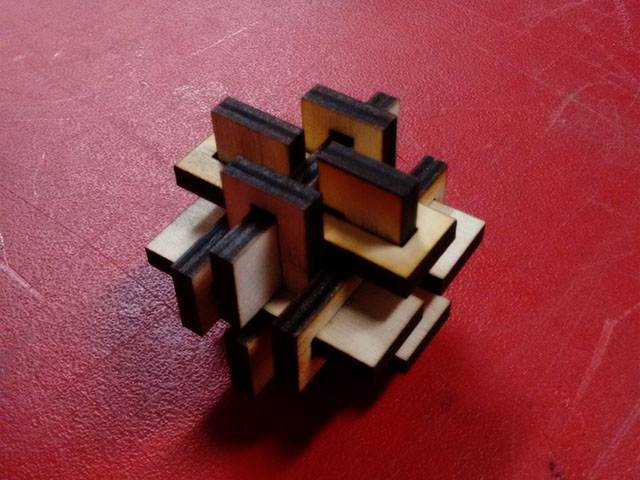
I still need to adjust the model because there was some gaps in the pieces. I think it happened because of the kerf and the 1mm added to my guess measures. I also wanto to make rounded corners to make it easier of assembling.
The file of the puzzle can be found here: puzzle.svg
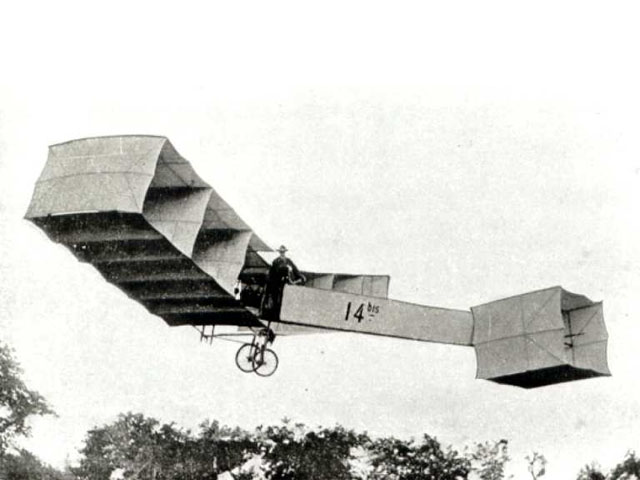
Even making this puzzle, I feel like cheating because it’s not a real press fit construction kit. So I decided to make another project using that. So I remembered that when I was younger, I constructed in school a small model of paper, of one of the first documented airplanes to fly the 14-BIS, from Santos Dumont.
I searched on google this paper model just to get the main design, and try to change it as a press-fit construction kit. So I found this website with a good paper model.
As it was made as a print design I needed to change everything to make sure that, the laser cutter cut on the right paths, and also needed to change the entire model to make the joints for press-fit. I got the pdf, imported to Inkscape and started to delete everything that I would not need for the laser cutter.
I noticed that many parts of the airplane are similar, so I started changing just some of the parts to test. For the joints, I had to consider the thickness of the material and the width that I want. I didn’t want large joints so I made the width around 5mm. I had to figure out how the joints would fits and which parts should have be united to the joints and which had to be male or female joints.
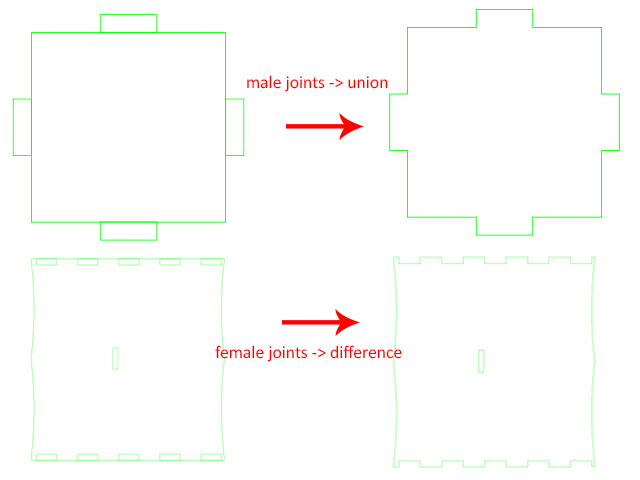
If male, you will need to union them to the base drawing, if female, you can just let them to be cut, or difference from the draw.
I made the joints using the clone tool for each part, so they are somehow parametric. You will need to adjust the kerf, by increasing the width of the male parts, or decreasing the female. I had to keep one file with the original files, without “union” or “difference”, and then, before cut, I unlinked the clones and made the appropriate unions or difference in the copied file. A good practice is to keep the masters of the clones outside the page layout, and write on their sides to indicate which part they are masters.
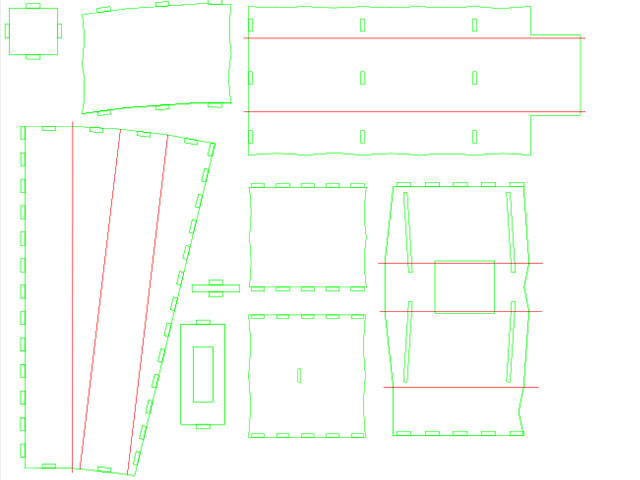
Lastly, here how has the final drawing prepared to cut, and how was the original one. I simplified the original draw only to the cutting parts. The green lines will be set to cut, and the red set to cut not thought the material, but as half of it, which will allow to bend the cardboard.
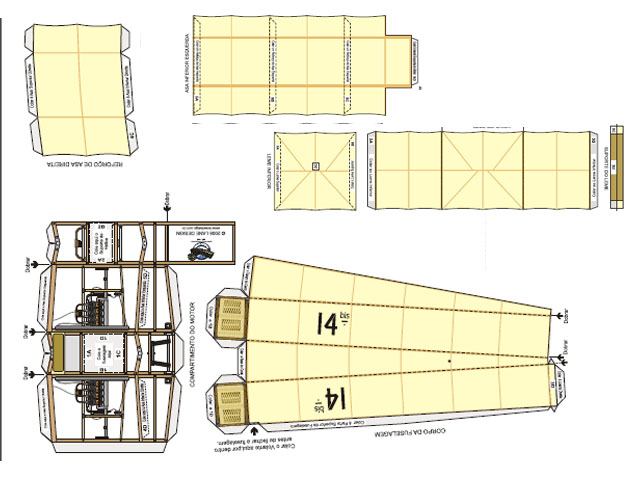
At the Epilog preferences before printing I choose “Color Mapping” and set the parameters of Green at 80% power, 60% speed and 1500Hz, and for the red lines at 50% power, 75% speed and 1500Hz.
I still need to make some kerf adjustments in some of the parts, but the wings and the rudder are already well adjusted for the material I used (1,6mm cardboard).
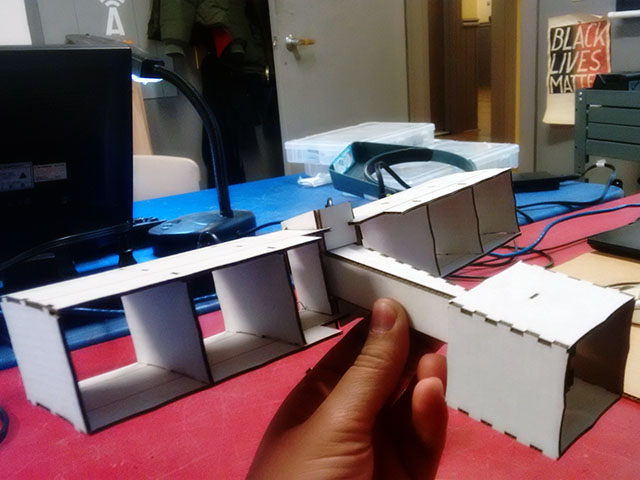
Here how the original plane is and how my model looks like. Close enough.
And here is the file for download without union and difference joints: 14bis.svg