
W16 - INTERFACE APPLICATION PROGRAMMING
This week assignment was: write an application that interfaces with an input &/or output device that you made, comparing as many tool options as possible.
As we are running out of time and I already started the final project development, I decided to focus in one learning one new programming language that could be useful. I have worked before with C, C++, C#, Arduino, LabVIEW and Simulink.
Checking the other language options presented in class, I decided try to learn and use the Processing, firstly because it is free and secondly because it allow you to create a nice visual interface. It seems to be very user friendly, and useful.
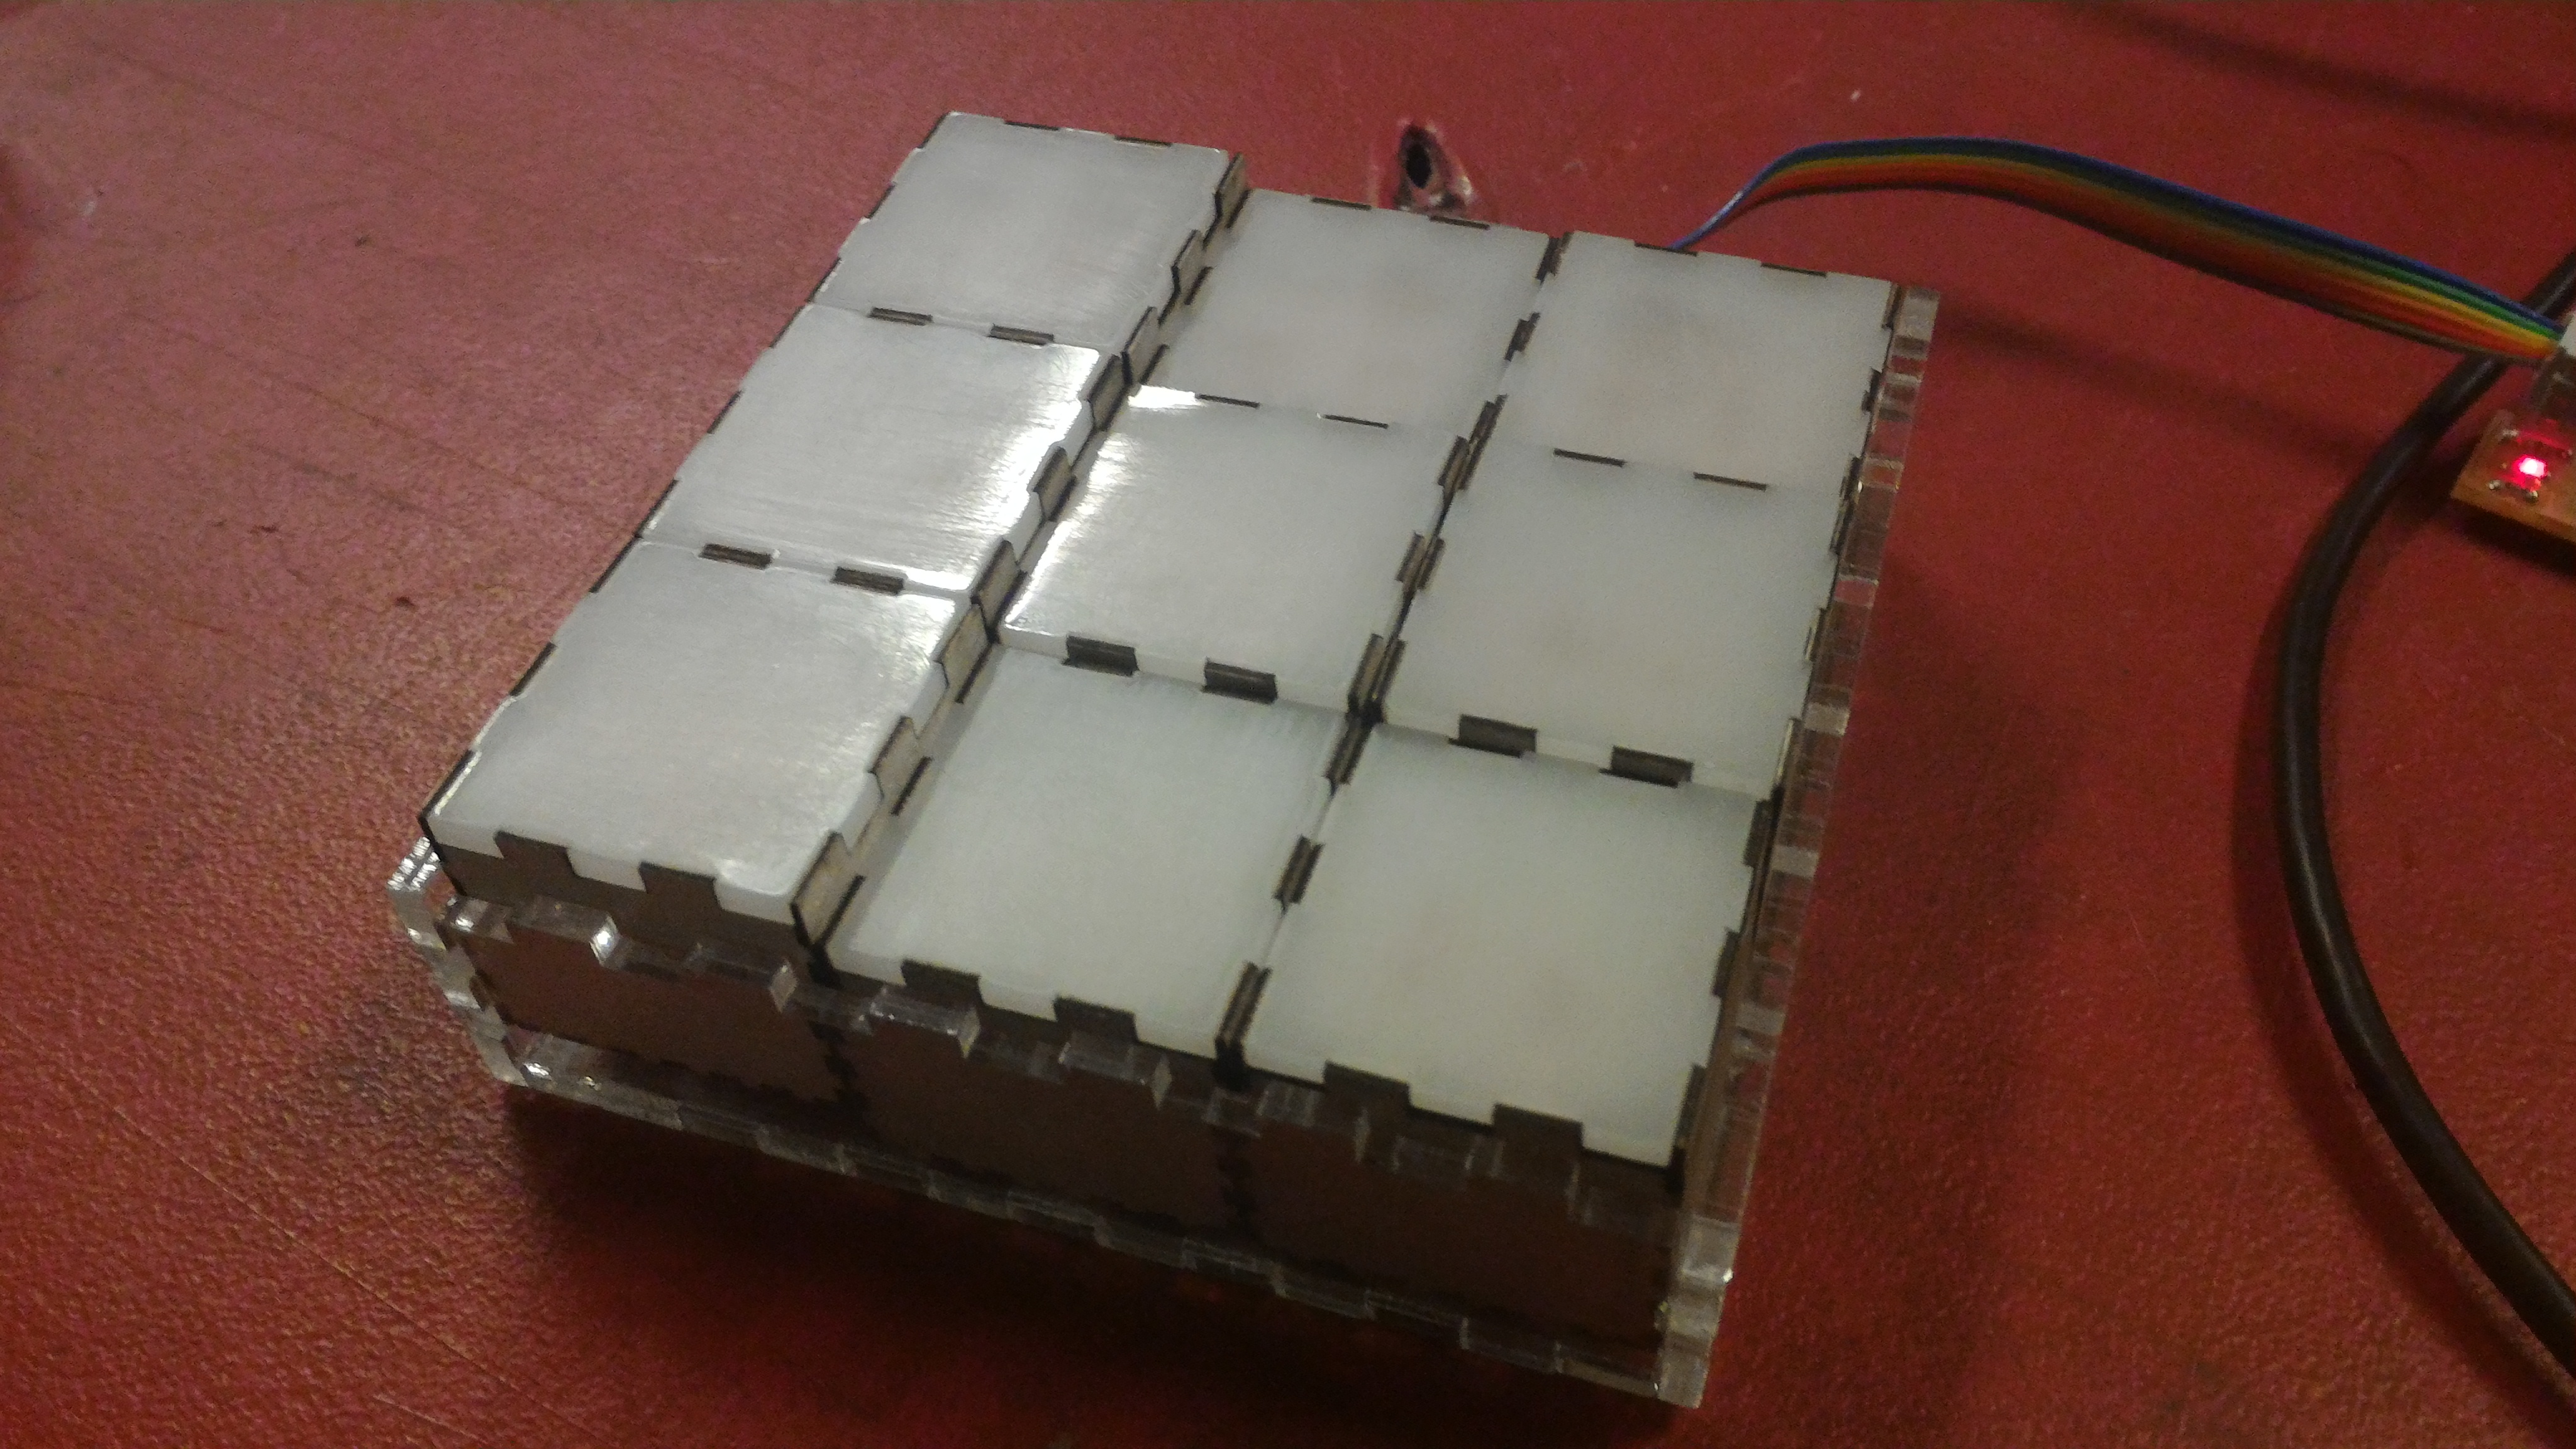
To make it works in the way I wanted, I needed to make more LED nodes to have a screen big enough to make some simple drawn using the laser pointer on it.
I made 9 nodes (3x3) and as shown before, I connected them together. The electronic design was the same, but in order to make it works properly I had to make some changes on the microcontroller programming and in my communication protocol.

As mentioned before, to light up the LEDs using serial communication, I was sending the data composed in two bytes, It tells then ode basically which LED should be on (1) or off (0).

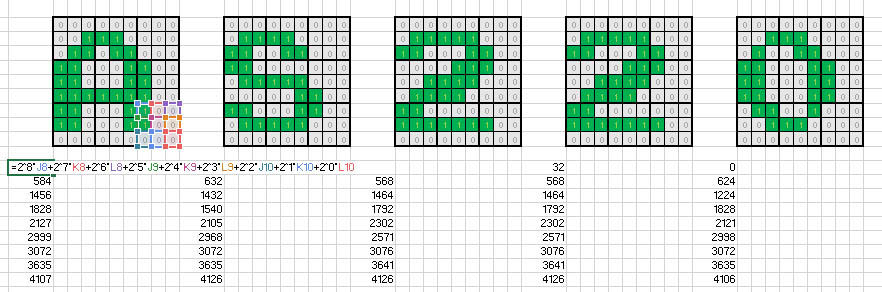
If you translate those binary numbers to a decimal number, you can find the actual information sent through the serial port, so in the case shown above is:
101011011 = 1*2^8 + 0*2^7 + 1*2^6 + 0*2^5 + 1*2^4 + 1*2^3 + 0*2^2 +1*2^1 +1*2^0 = 347
In this case, if I want to light on the LEDs marked as "1", and turn OFF the ones as "0" then I should send the number 347 through the serial port, and that is what I do in the program.
The same, if I want all LEDs OFF, I need to send 000000000 = 0, or if I want all of them ON then I need to send 111111111=511.
As I am sending two bytes of information (16 bits), but, in fact, I use only 9 bits to set the LEDs, I have 7 extra bits that I could use as an "address" for each node, this way I would be able to have 127 (7 bits) different nodes that I could connect and send data individually.
As I have made 9 nodes, I set the following "address" for each one of them:
Node 1 = 0000
Node 2 = 0001
Node 3 = 0010
Node 4 = 0011
Node 5 = 0100
Node 6 = 0101
Node 7 = 0110
Node 8 = 0111
Node 9 = 1000
What I do then, is to add the "address" to the LED settings I want for each node. It means that the information that I will send through the serial port are:
Node 1 = from 0 to 511
Node 2 = from 512 to 1023
Node 3 = from 1024 to 1535
Node 4 = from 1536 to 2047
Node 5 = from 2048 to 2559
Node 6 = from 2560 to 3071
Node 7 = from 3072 to 3583
Node 8 = from 3584 to 4095
Node 9 = from 4096 to 4607
Having this set, the only change that I had to make on the microcontroller programming was to define the range of information between those ranges for each node. This is defined by the variable scoded2 in the programming.
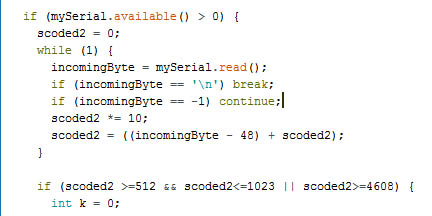
This variable is the one that storage the information received through the serial port, if the information is not in the correct node range, it means that that data was no addressed to this specifically node, so you do not need to make any changes on the LEDs. Making this will allow me to light up each node differently.
Then I started to make some research to learn processing. First I tried the video Tutorials available on processing.org but I realized that watching all those videos would take me too much time. So I started searching directly what I needed to do that was basically: send and receive serial information through processing, load an image into processing, work with image processing using processing.
I found all those information easily and started to work right the way. My main sources was:
Serial communication: https://learn.sparkfun.com/tutorials/connecting-arduino-to-processing
Serial communication: https://www.processing.org/reference/libraries/serial/
Load image into processing: https://processing.org/examples/loaddisplayimage.html
Load image into processing: https://processing.org/reference/loadImage_.html
Load image into processing: https://forum.processing.org/one/topic/load-image-from-computer.html
Image processing with processing: https://processing.org/tutorials/pixels/
Adding text: https://processing.org/reference/text_.html
I started learning how all those functions works, by making my programming, step by step. First, I got the serial communication to work, just by sending some images numbers through the serial port if I press the mouse.
I made a spreadsheet on excel to calculate the numbers that I needed to send to "write" something on the LEDs.
In this program, I just send those numbers in sequence, and add some delay so you can see each letter per one second, and then it change to the next one. Check the video:
After that I started to work on how load images into processing. I basically followed the tutorials on the links I showed before and it worked.
Then the challenges begun! I had to make some image processing to transform a user loaded image to a 9x9 pixelate image (because my small screen is 9 x 9 LEDs right). First, I followed the example "Brightness Threshold" on the processin.org page. It was exactly what I needed to do at first.
After doing it, I kind of repeated the process, adding some calculations to split the whole image in 81 small squares (9x9 = 81 LEDs). Then I calculate an average (avg variable) for each square, and based in another threshold, I set it to black or white.
After much thinking I solved all the problems and got the image processed the way I wanted. This image shows the original image, and it after processed with my program.

As the LED screen resolution is to low, you cannot really get all images very good, but depending on the image you can tell better that is the same.

Then, all I needed to do waa to get those average values, and translate it into the numbers I need to send through serial port. I Used some other for routines to do that and learned to use pow() function too. After having the calculated numbers, just send them to Serial and that’s it, got the drawing on the LED screen.
Ok, at this point I kind of got what I wanted, but the user interface itself was not very clear, and also if you want to change the image, then you need to stop the program, change the source file in the code, and then run the program again. That was so annoying.
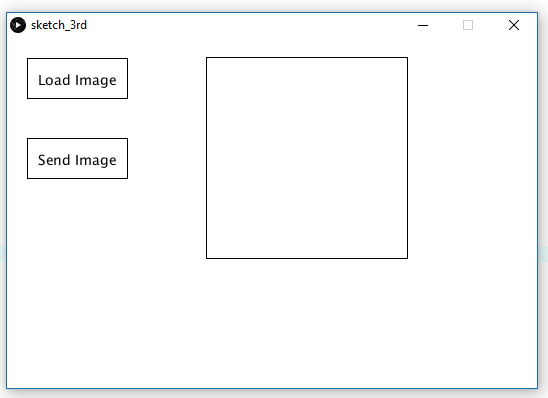
Then I decided to try to make the user load the image when press a button, and then press another button to send it to the serial port. I just needed to add some more lines of code to do that. The main learning here was how to make the user load the image, without changing the programming.
Then I found a similar code in one of the forums of processing.org, and made some changes on it. Also had to figure out how to make the buttons and write on processing. I ended up with a very simple program but that was much more user friendly. Here how the screen looks like:
I still found some bugs that I could not fix. At first time, you need to click directly on the button "Load Image", otherwise the program crash! Here is the video:
So that’s it!
Here are my main files for this assignment:
Nodes programming (boards): nodes.ino
Serial communication: just_serial.pde
Image processing: image_processing.pde
User interface:user_interface.pde