The assignment for this week was: design and fabricate a 3D mold (~ft2), and produce a fiber composite part in it.
At first I didn't know what to do, but then I decided to make a skateboard. I'm not a big fan of skate, but i thought it would be a good project to try.
So, first thing I did was to do some research on its size. I didn't want a very big one, just standard size. Then I found a interesting 3D design at thingiverse (http://www.thingiverse.com/thing:1515204) and decided to use it as my model.
The way I wanted to do it is to make a internal frame of cardboard and then make the composite using burlap and epoxi.
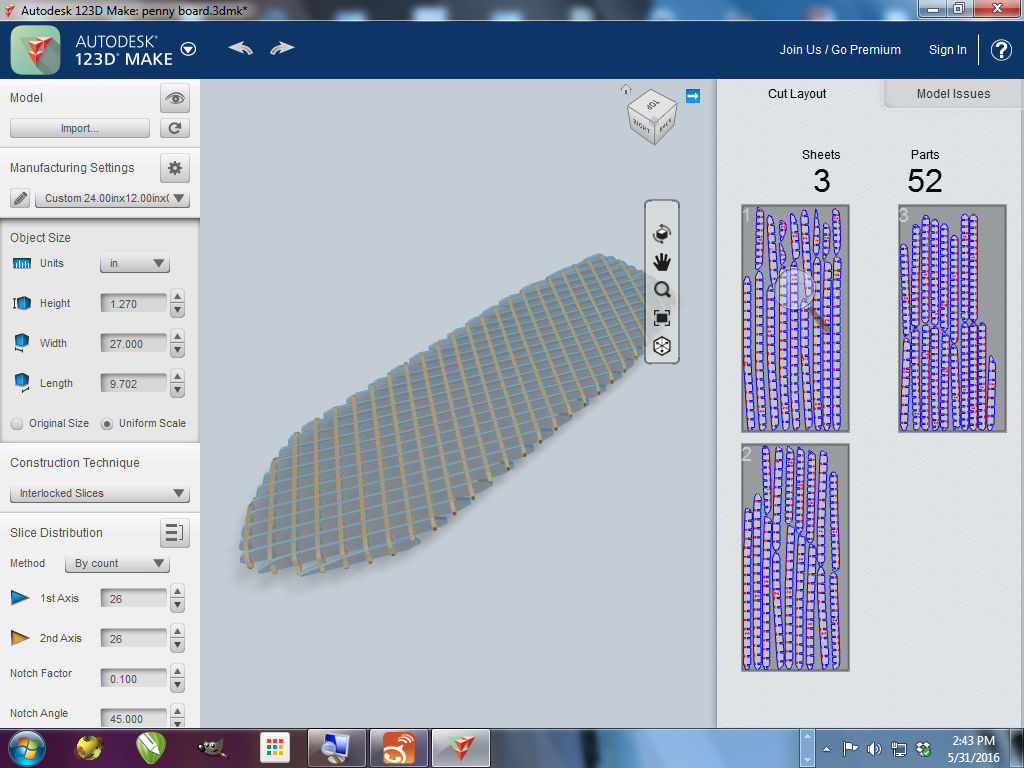
So first thing I did was to adjust my model using MeshLab and after that I imported the file into the 123D Make. At the 123D Make the first thing is to adjust the setings to your material. In my case I used the standard Uline cardboard, but set each sheet to 12x24 in (the size of the laser cutter).
I adjusted the model to the following size:
- Height: 1.27 in
- Widht: 27 in
- Lenght: 9.702 in
After that I set the construction technique to Interlocked Slices, and then adjusted the angles of the parts as shown at te image.
For the slices distributions, I used the following parameters:
- Method: By count
- 1st axis: 26
- 2nd axis: 26
- Notch Factor: 0.100
- Notch Angle: 45
I ended up with 3 sheets of cardboard, with 52 parts which I exported to pdf.
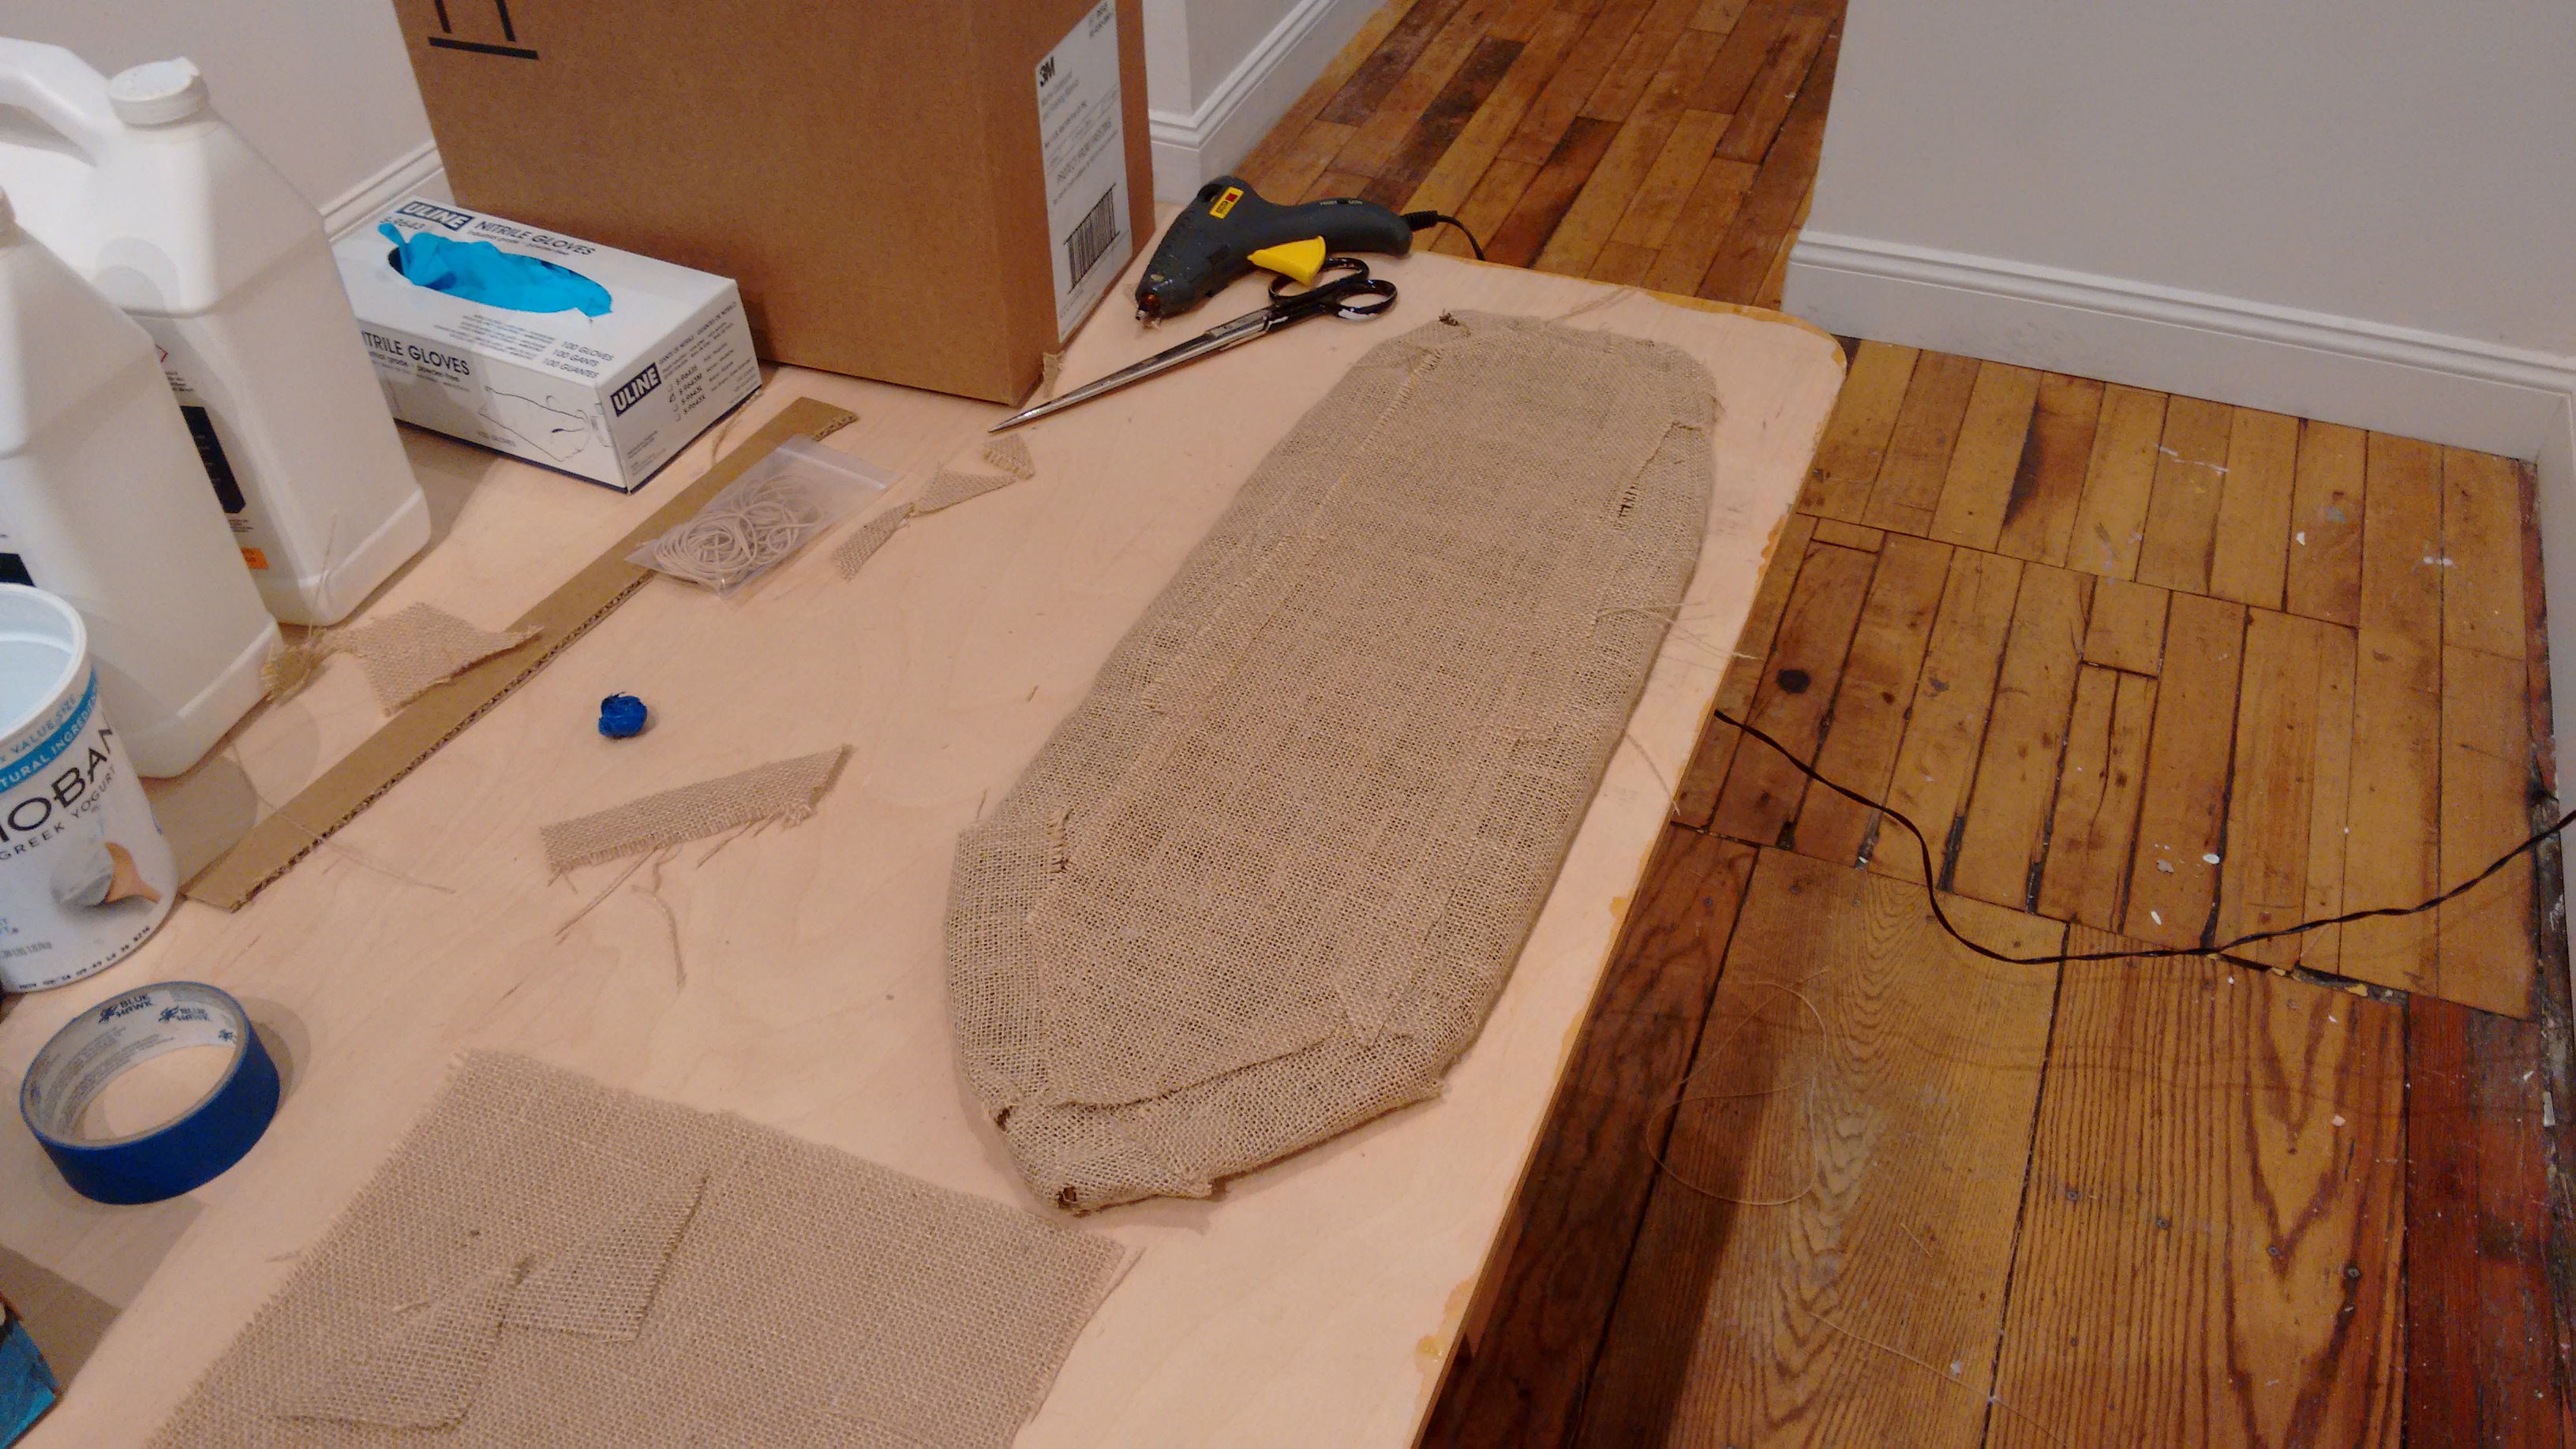
I cutted the parts at the laser cutter and assembled them to make the internal frame of the skateboard.
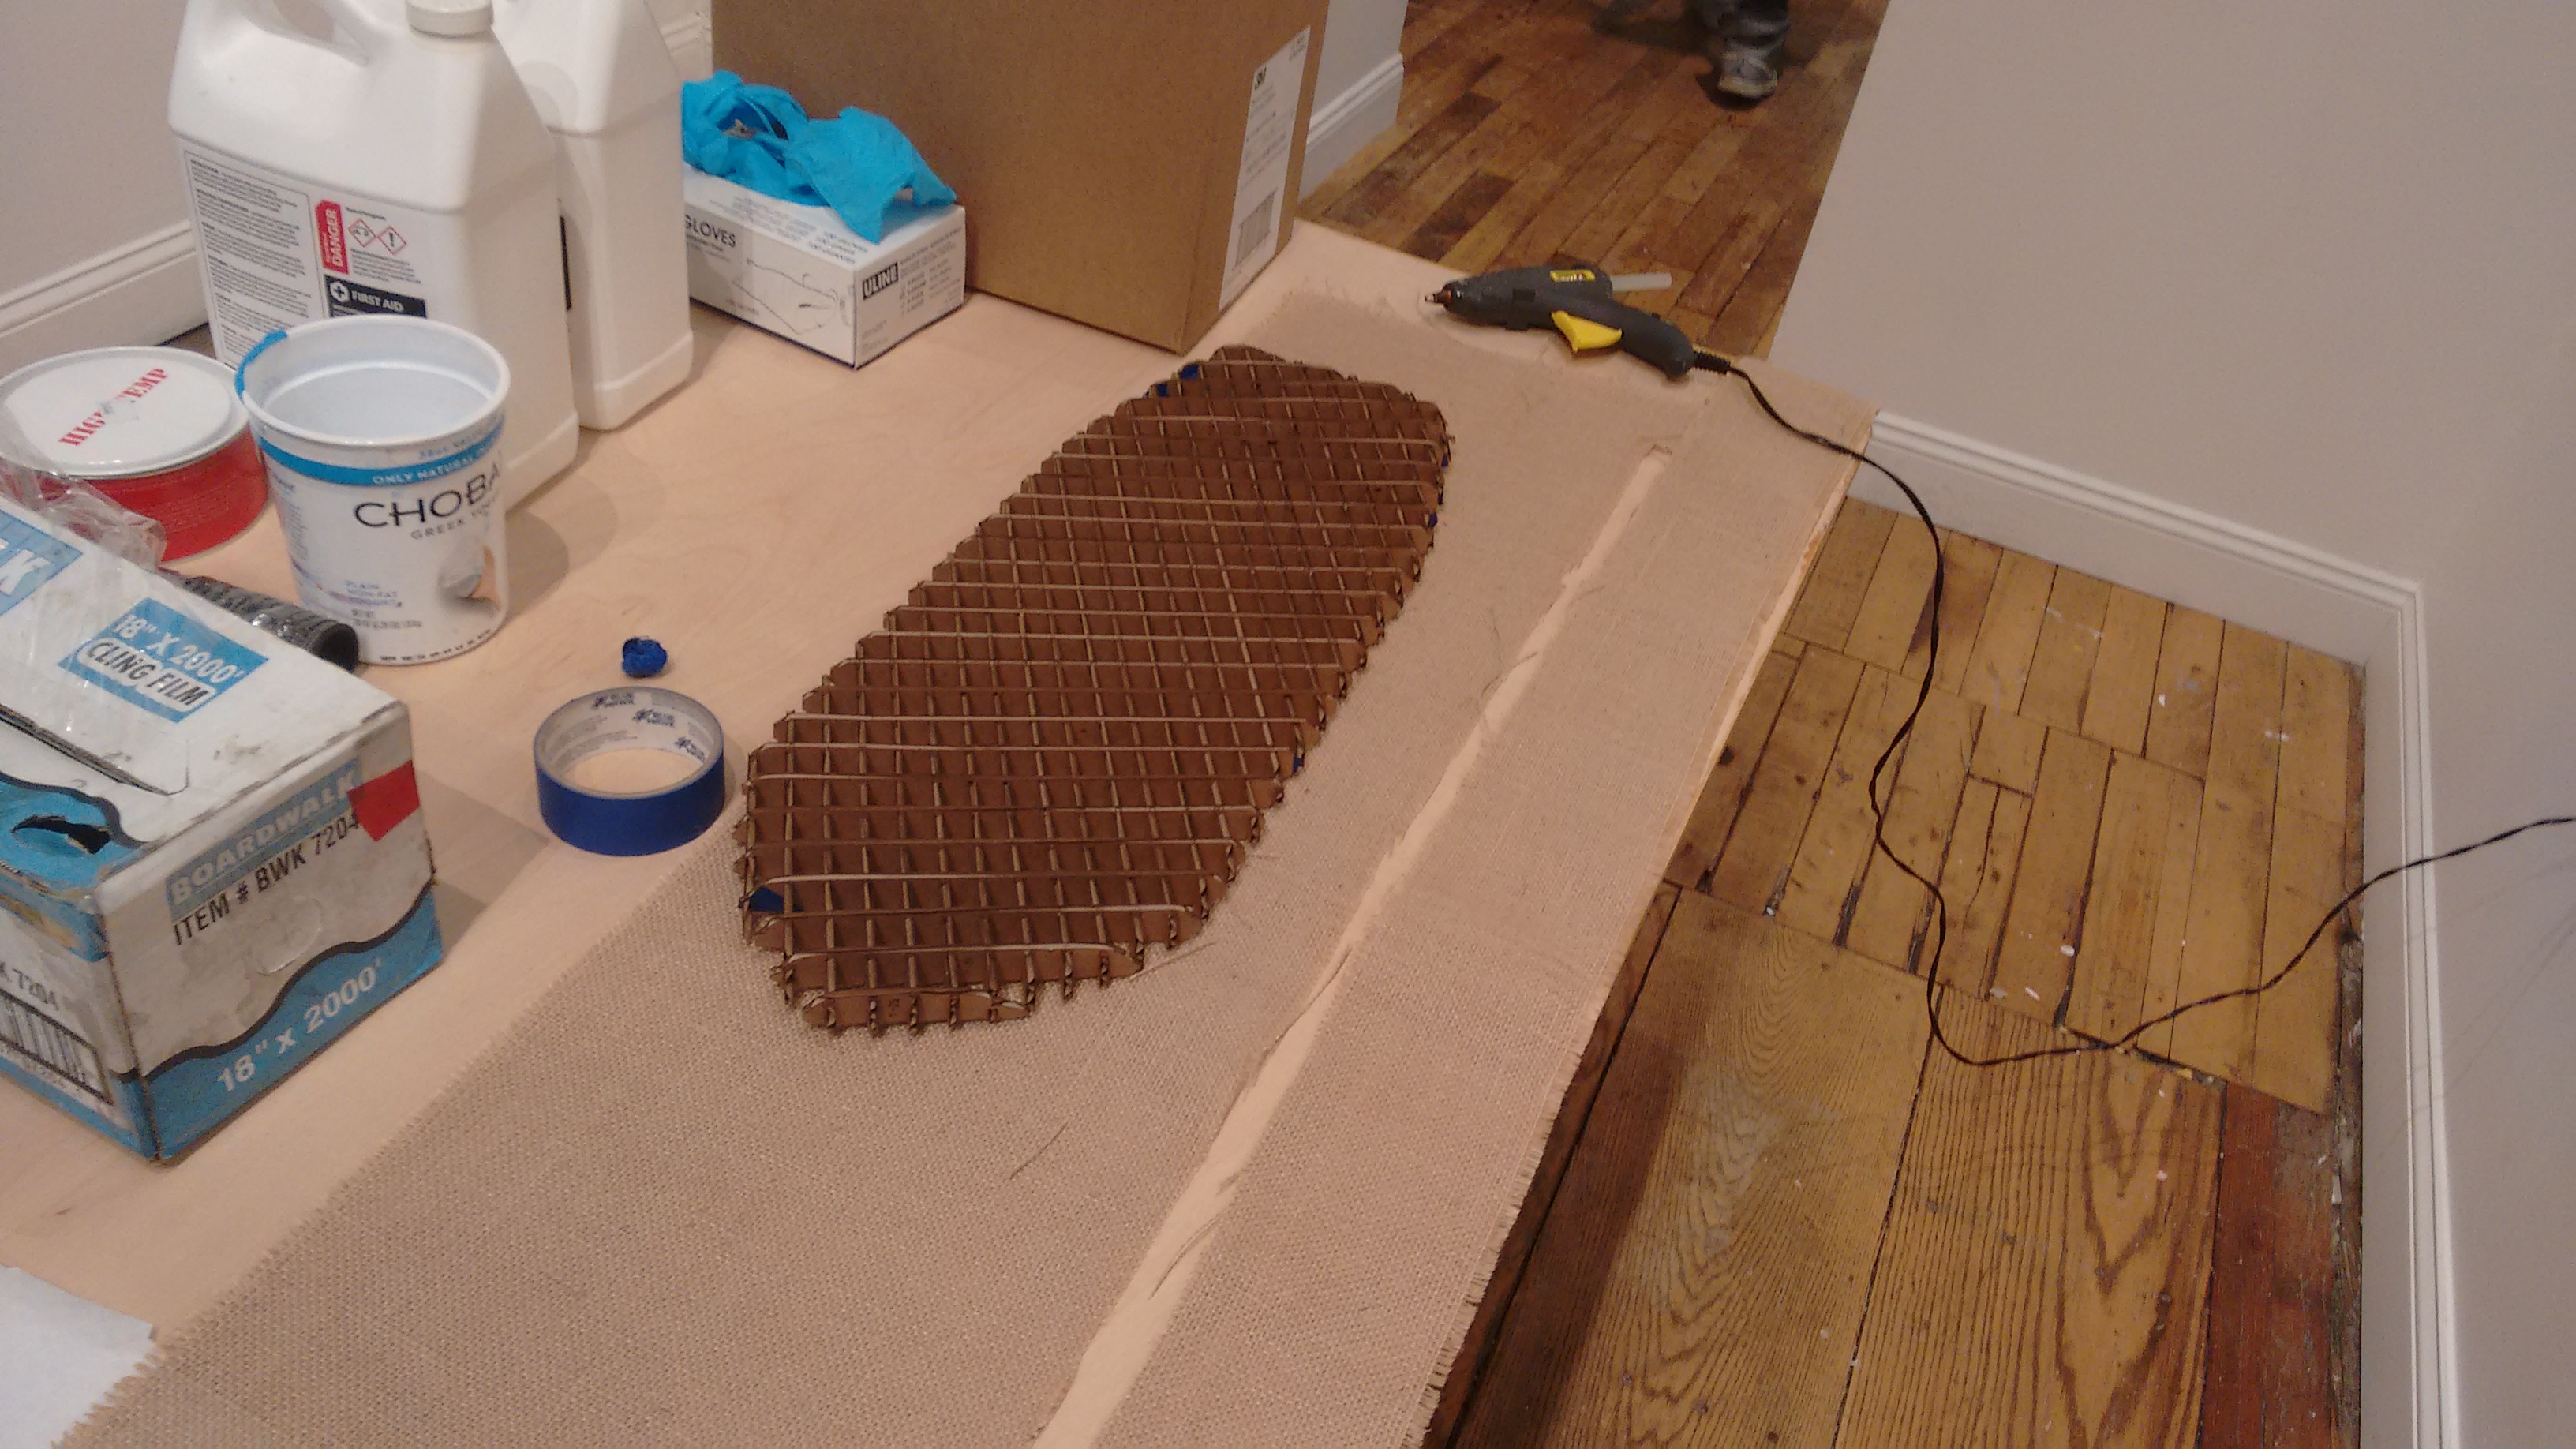
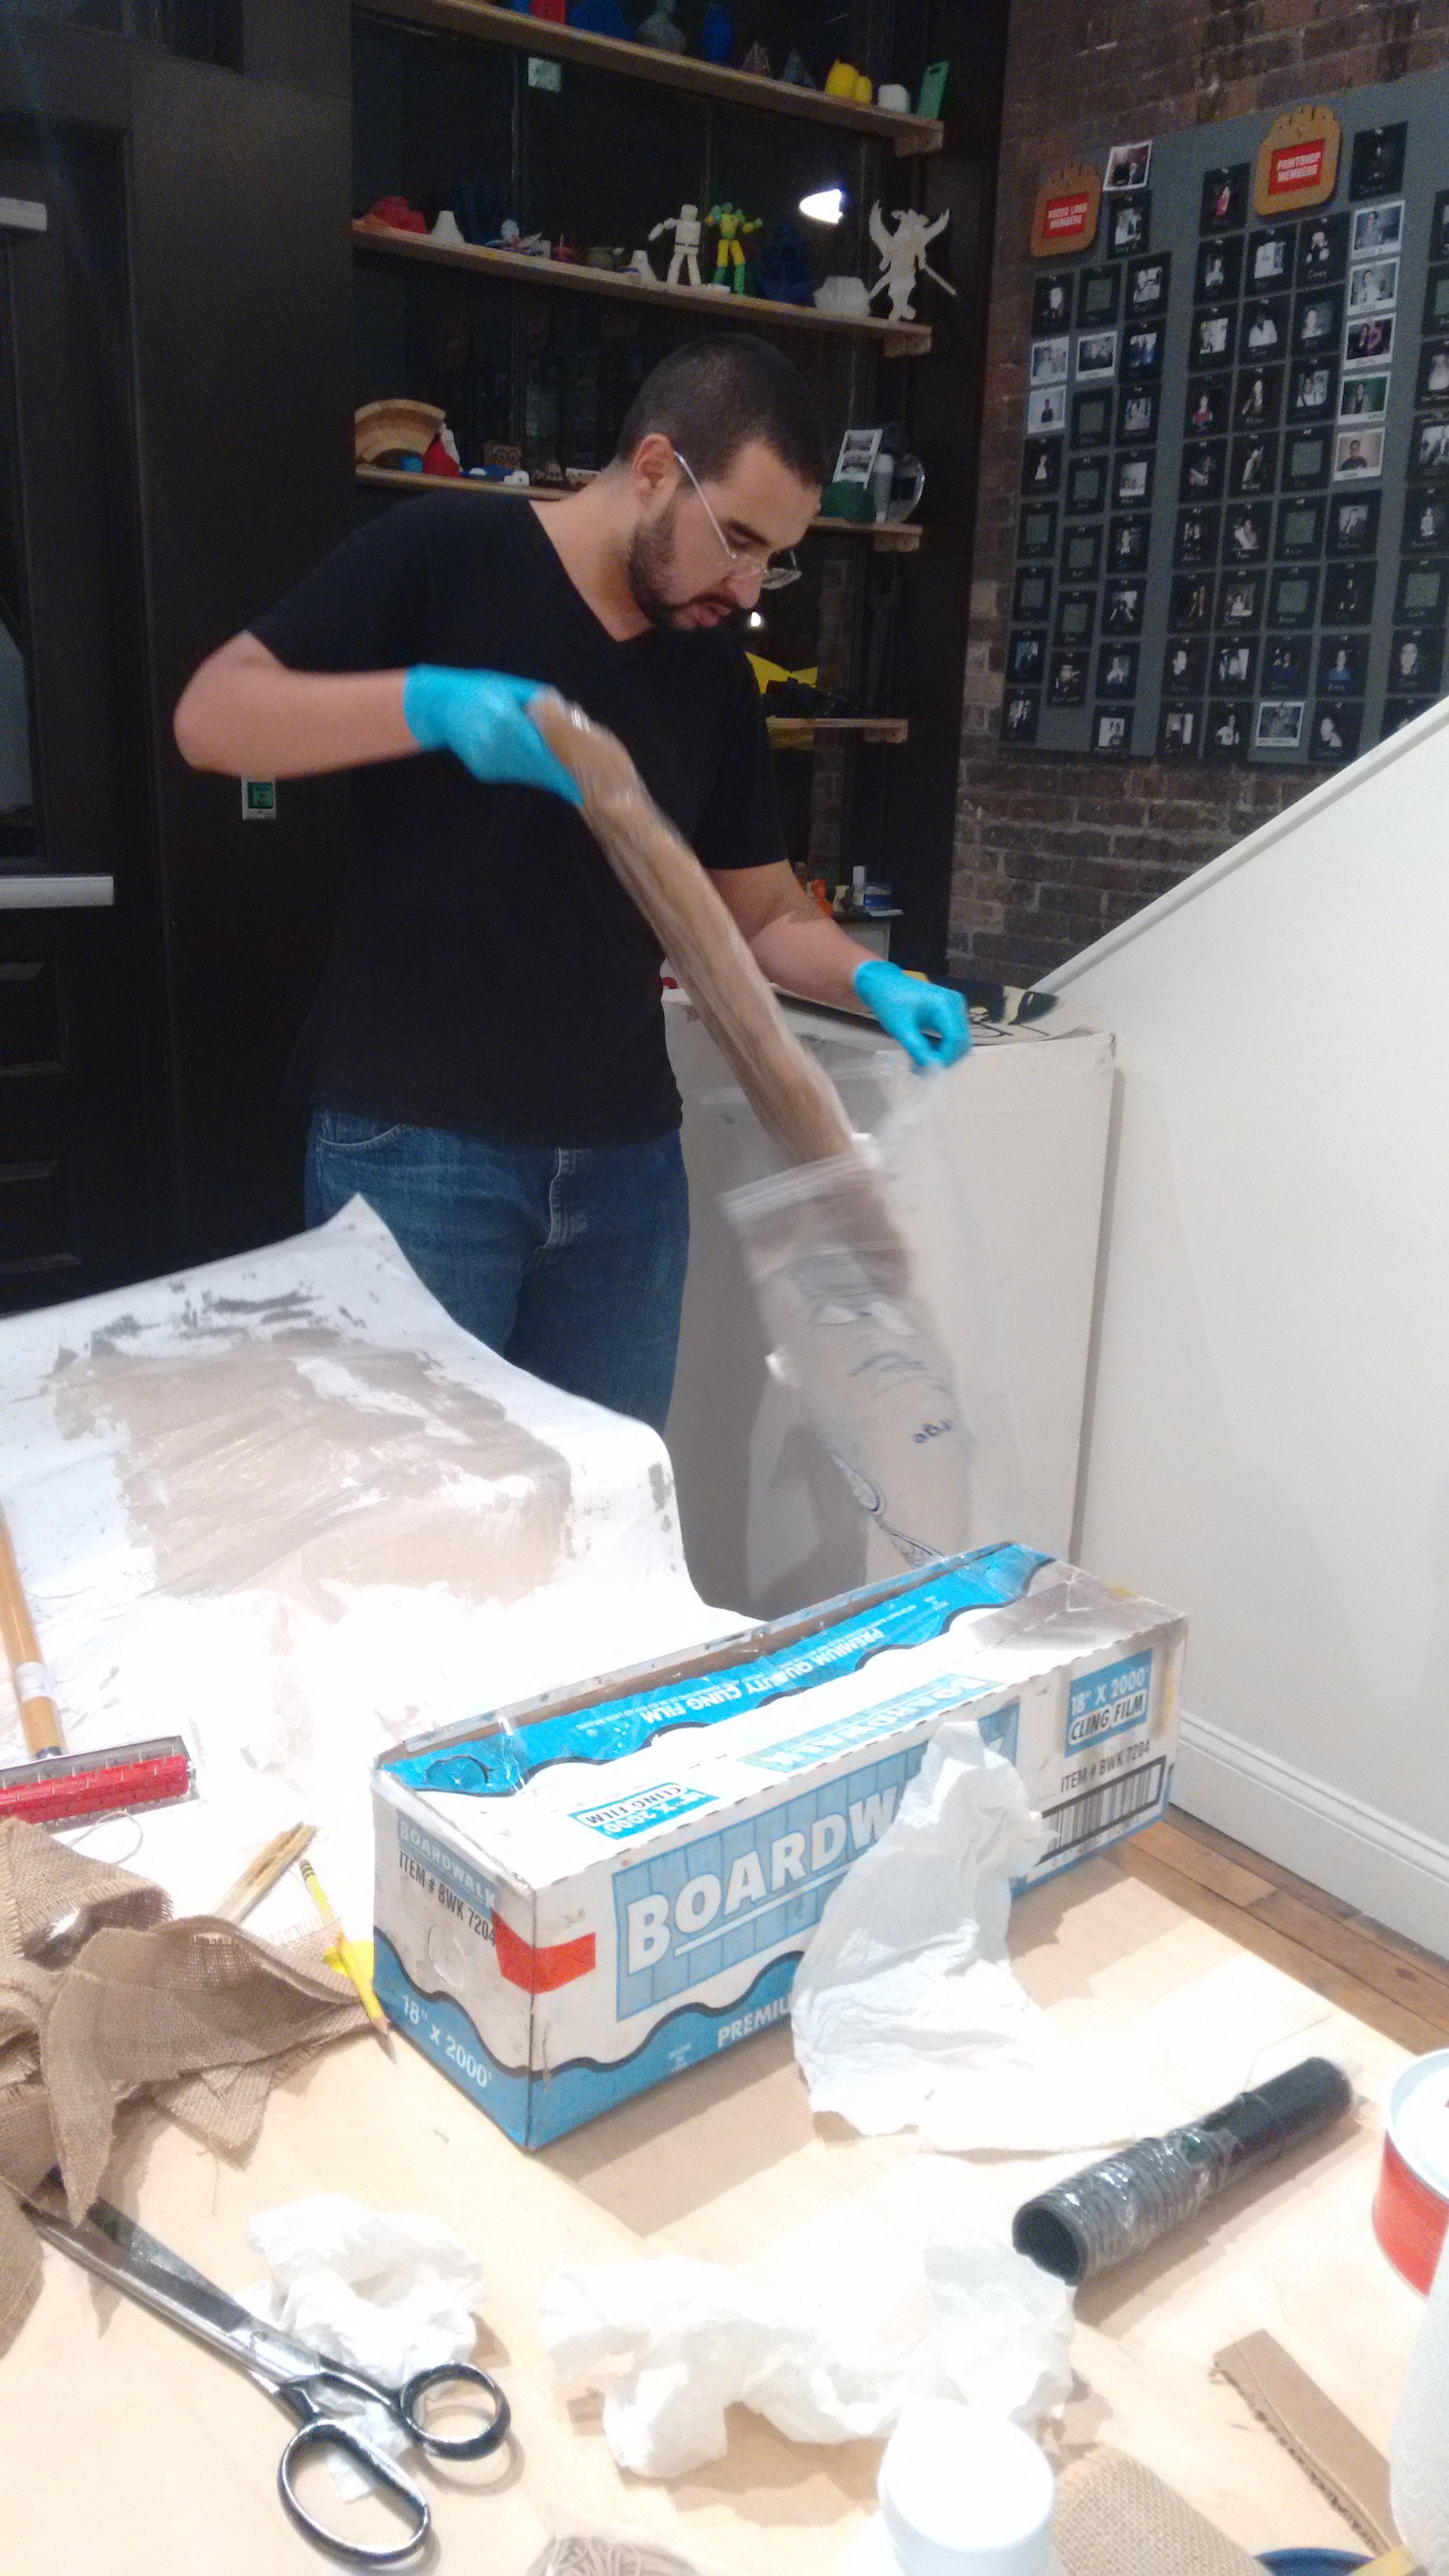
At the nex day I started then to prepare everything to make the composites. I wanted to use burlap and epoxi resin to make it.
So first thing I did was to cut the burlap. I started by cutting a strip to put on the sides/edges of the board. and then I cut other parts to put on the top and botton of it.
I realized that would not be easy to fix the side stripe on the frame, so first I glued it using some hot glue.
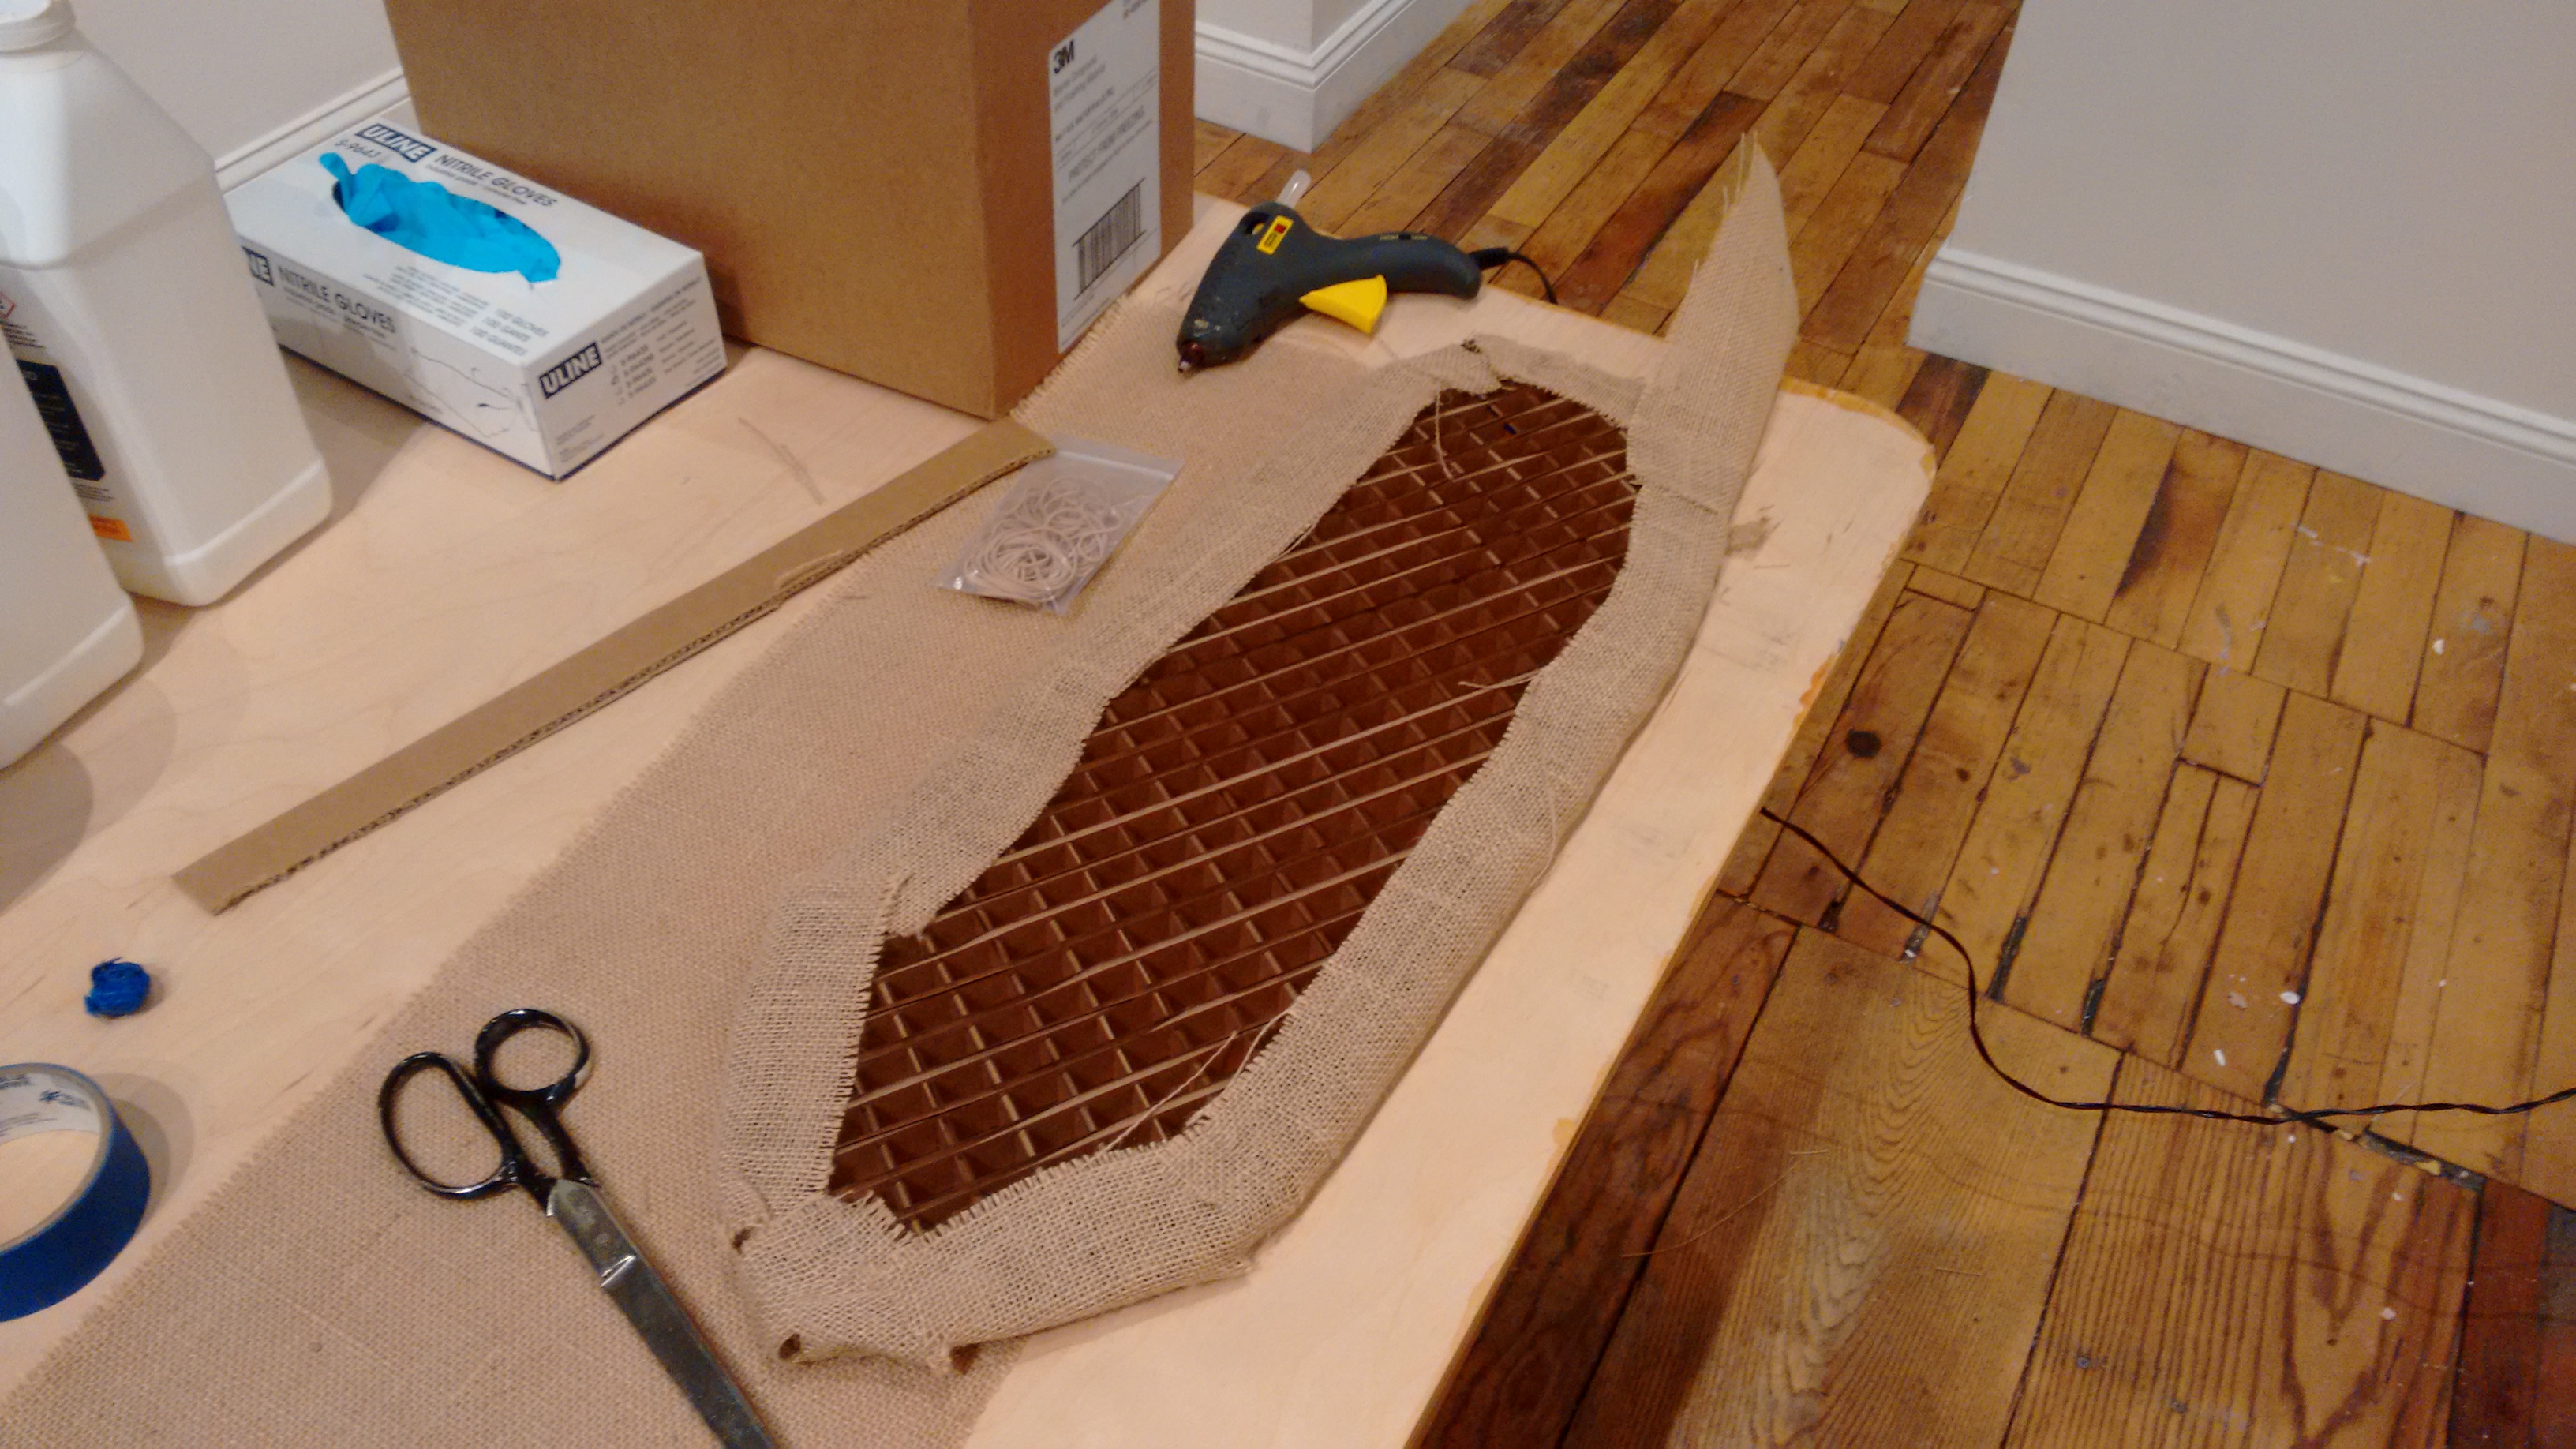
Then I started to mix the epoxi to apply at the burlap and really start making the composite. I used the CLR Epoxy (A) and thhe CLS Hardener (B). The proportions of it is 2 parts of A to 1 of B. As I didnt know exactly how much I would use, I started by making only 750g (500g A and 250g B).
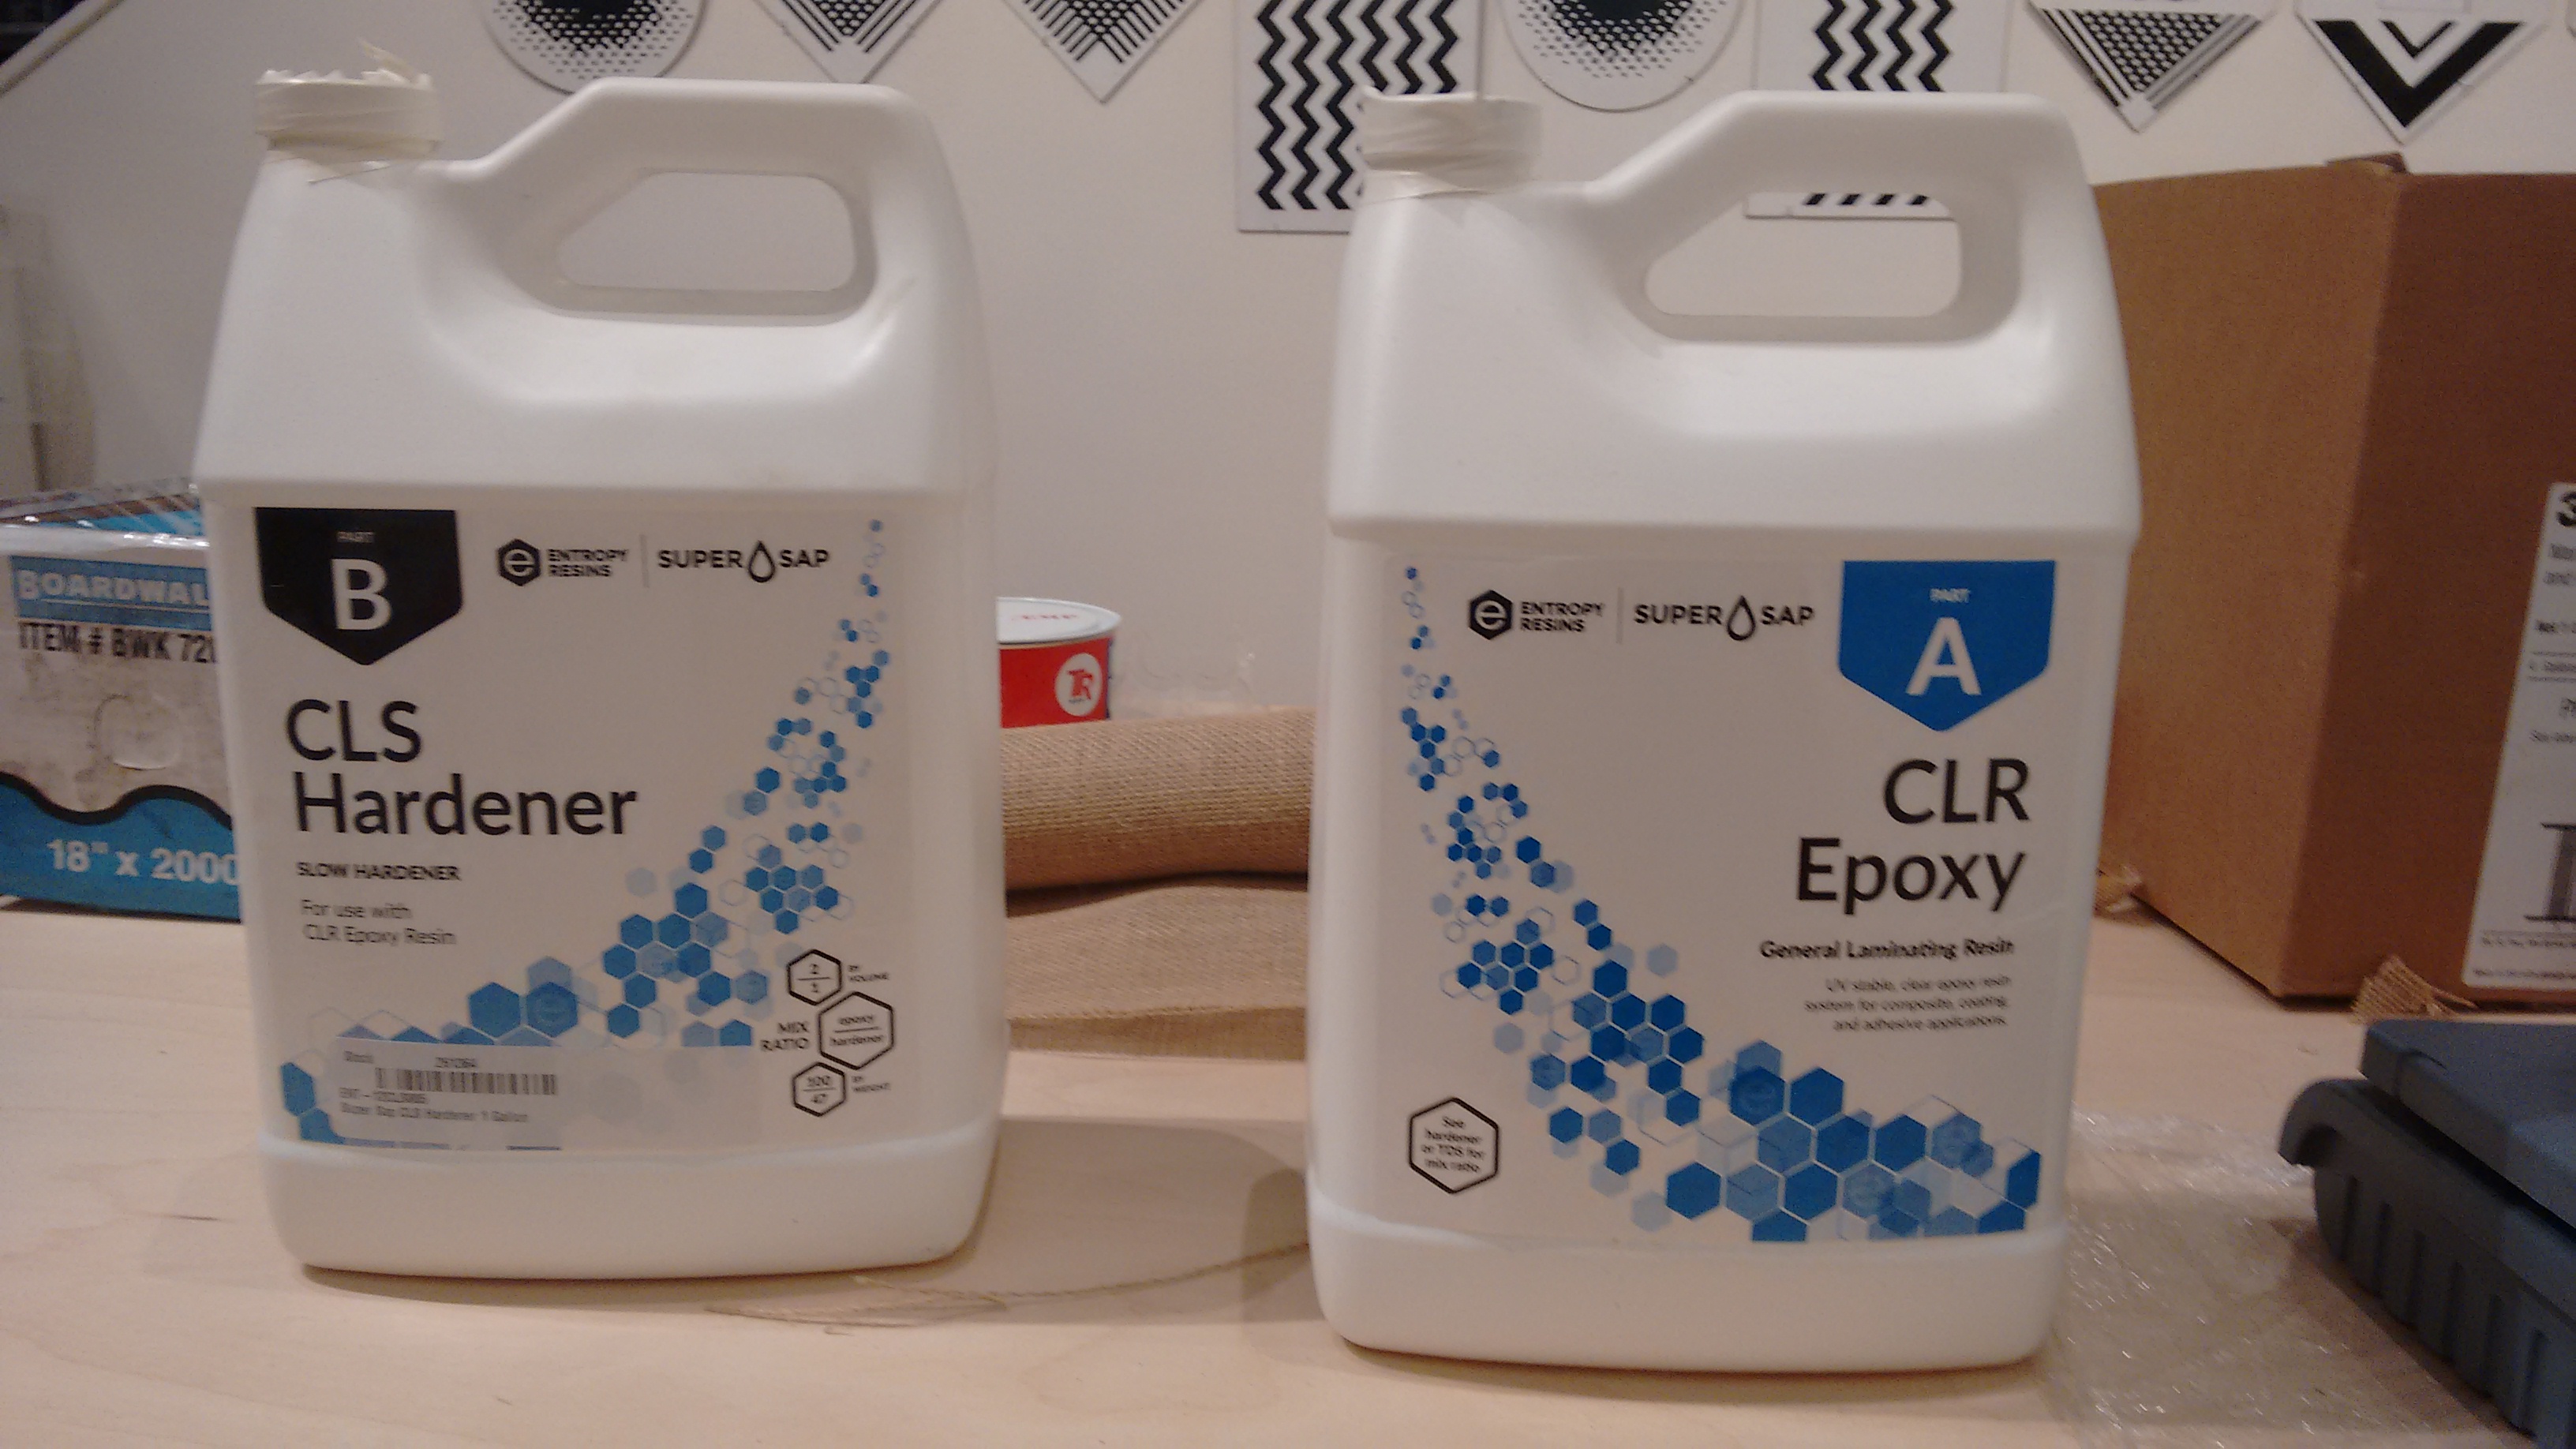
The first thing to remind is: "USE GLOVES". It is not good for your health to have skin contact to this kind of epoxy.
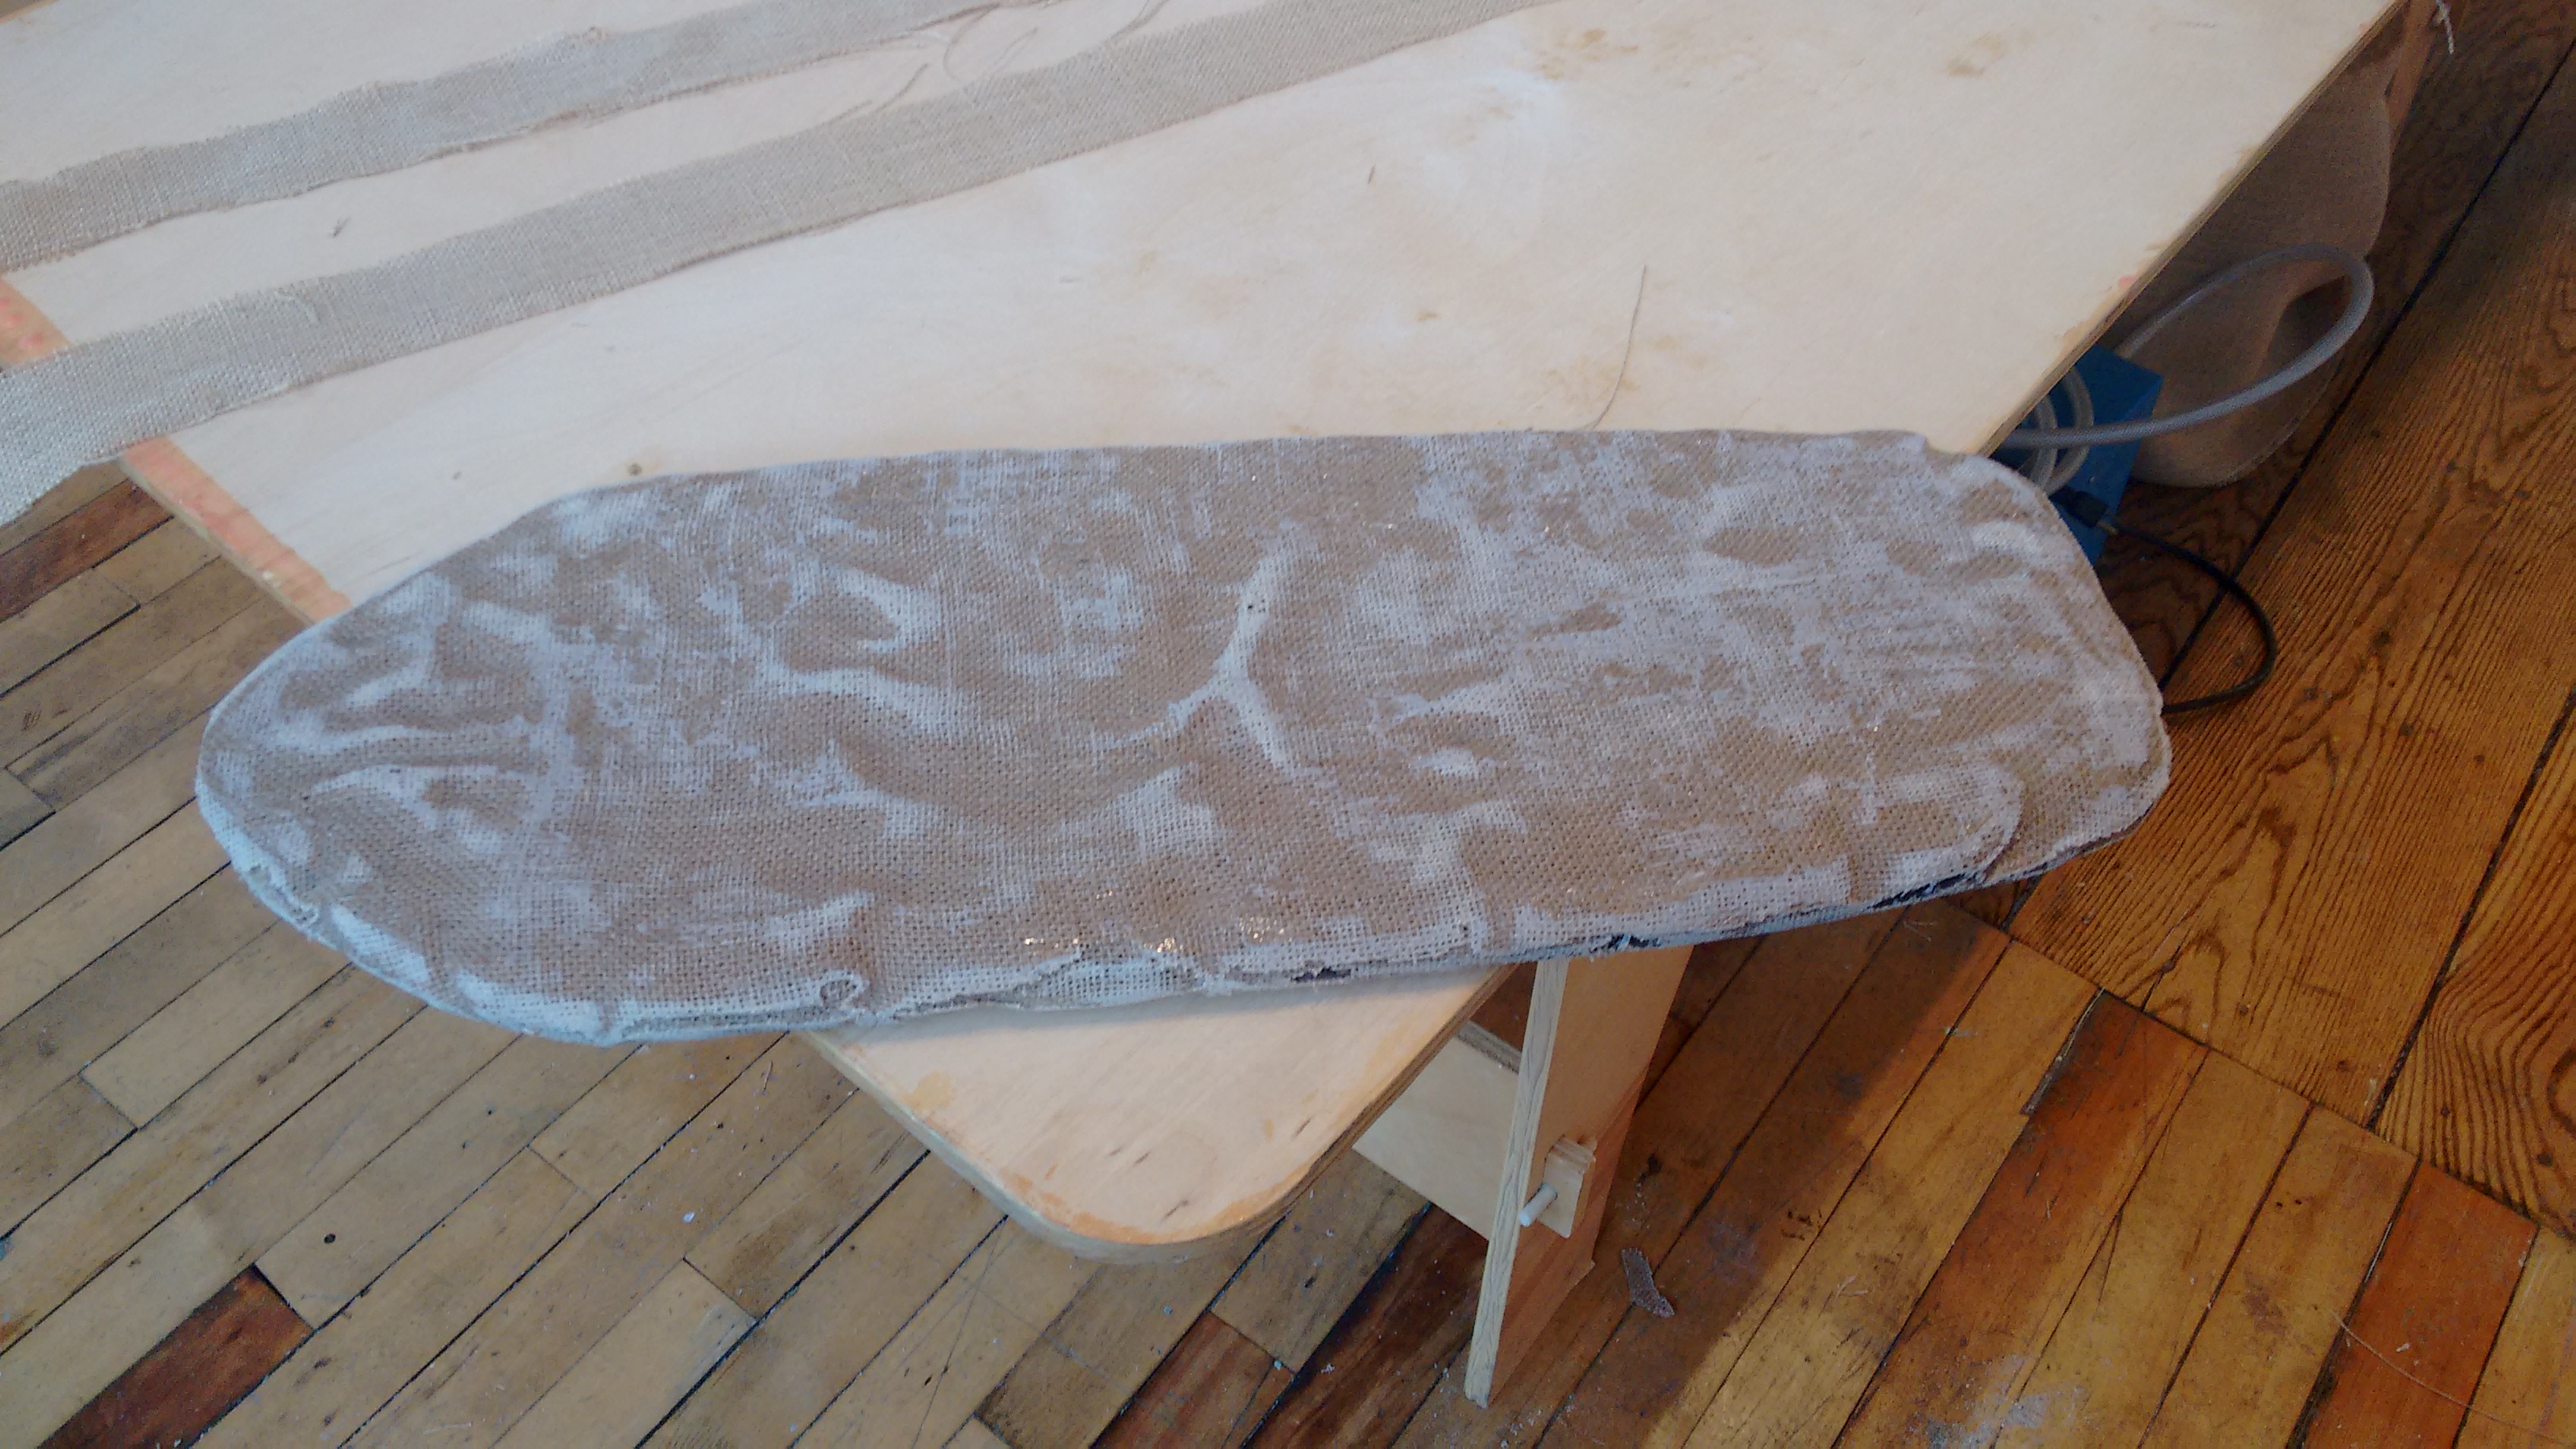
Using a weight scale I put the resin components in a plastic cup and mixed them using a wood stick. Then I applyed at the burlap and covered the cardboard frame in it all. I wanted to put another layer of burlap to make it stronger, so I just cutted some square pieces and applied it again, hoping that would be easy to cut if after dry (that was my first mistake).
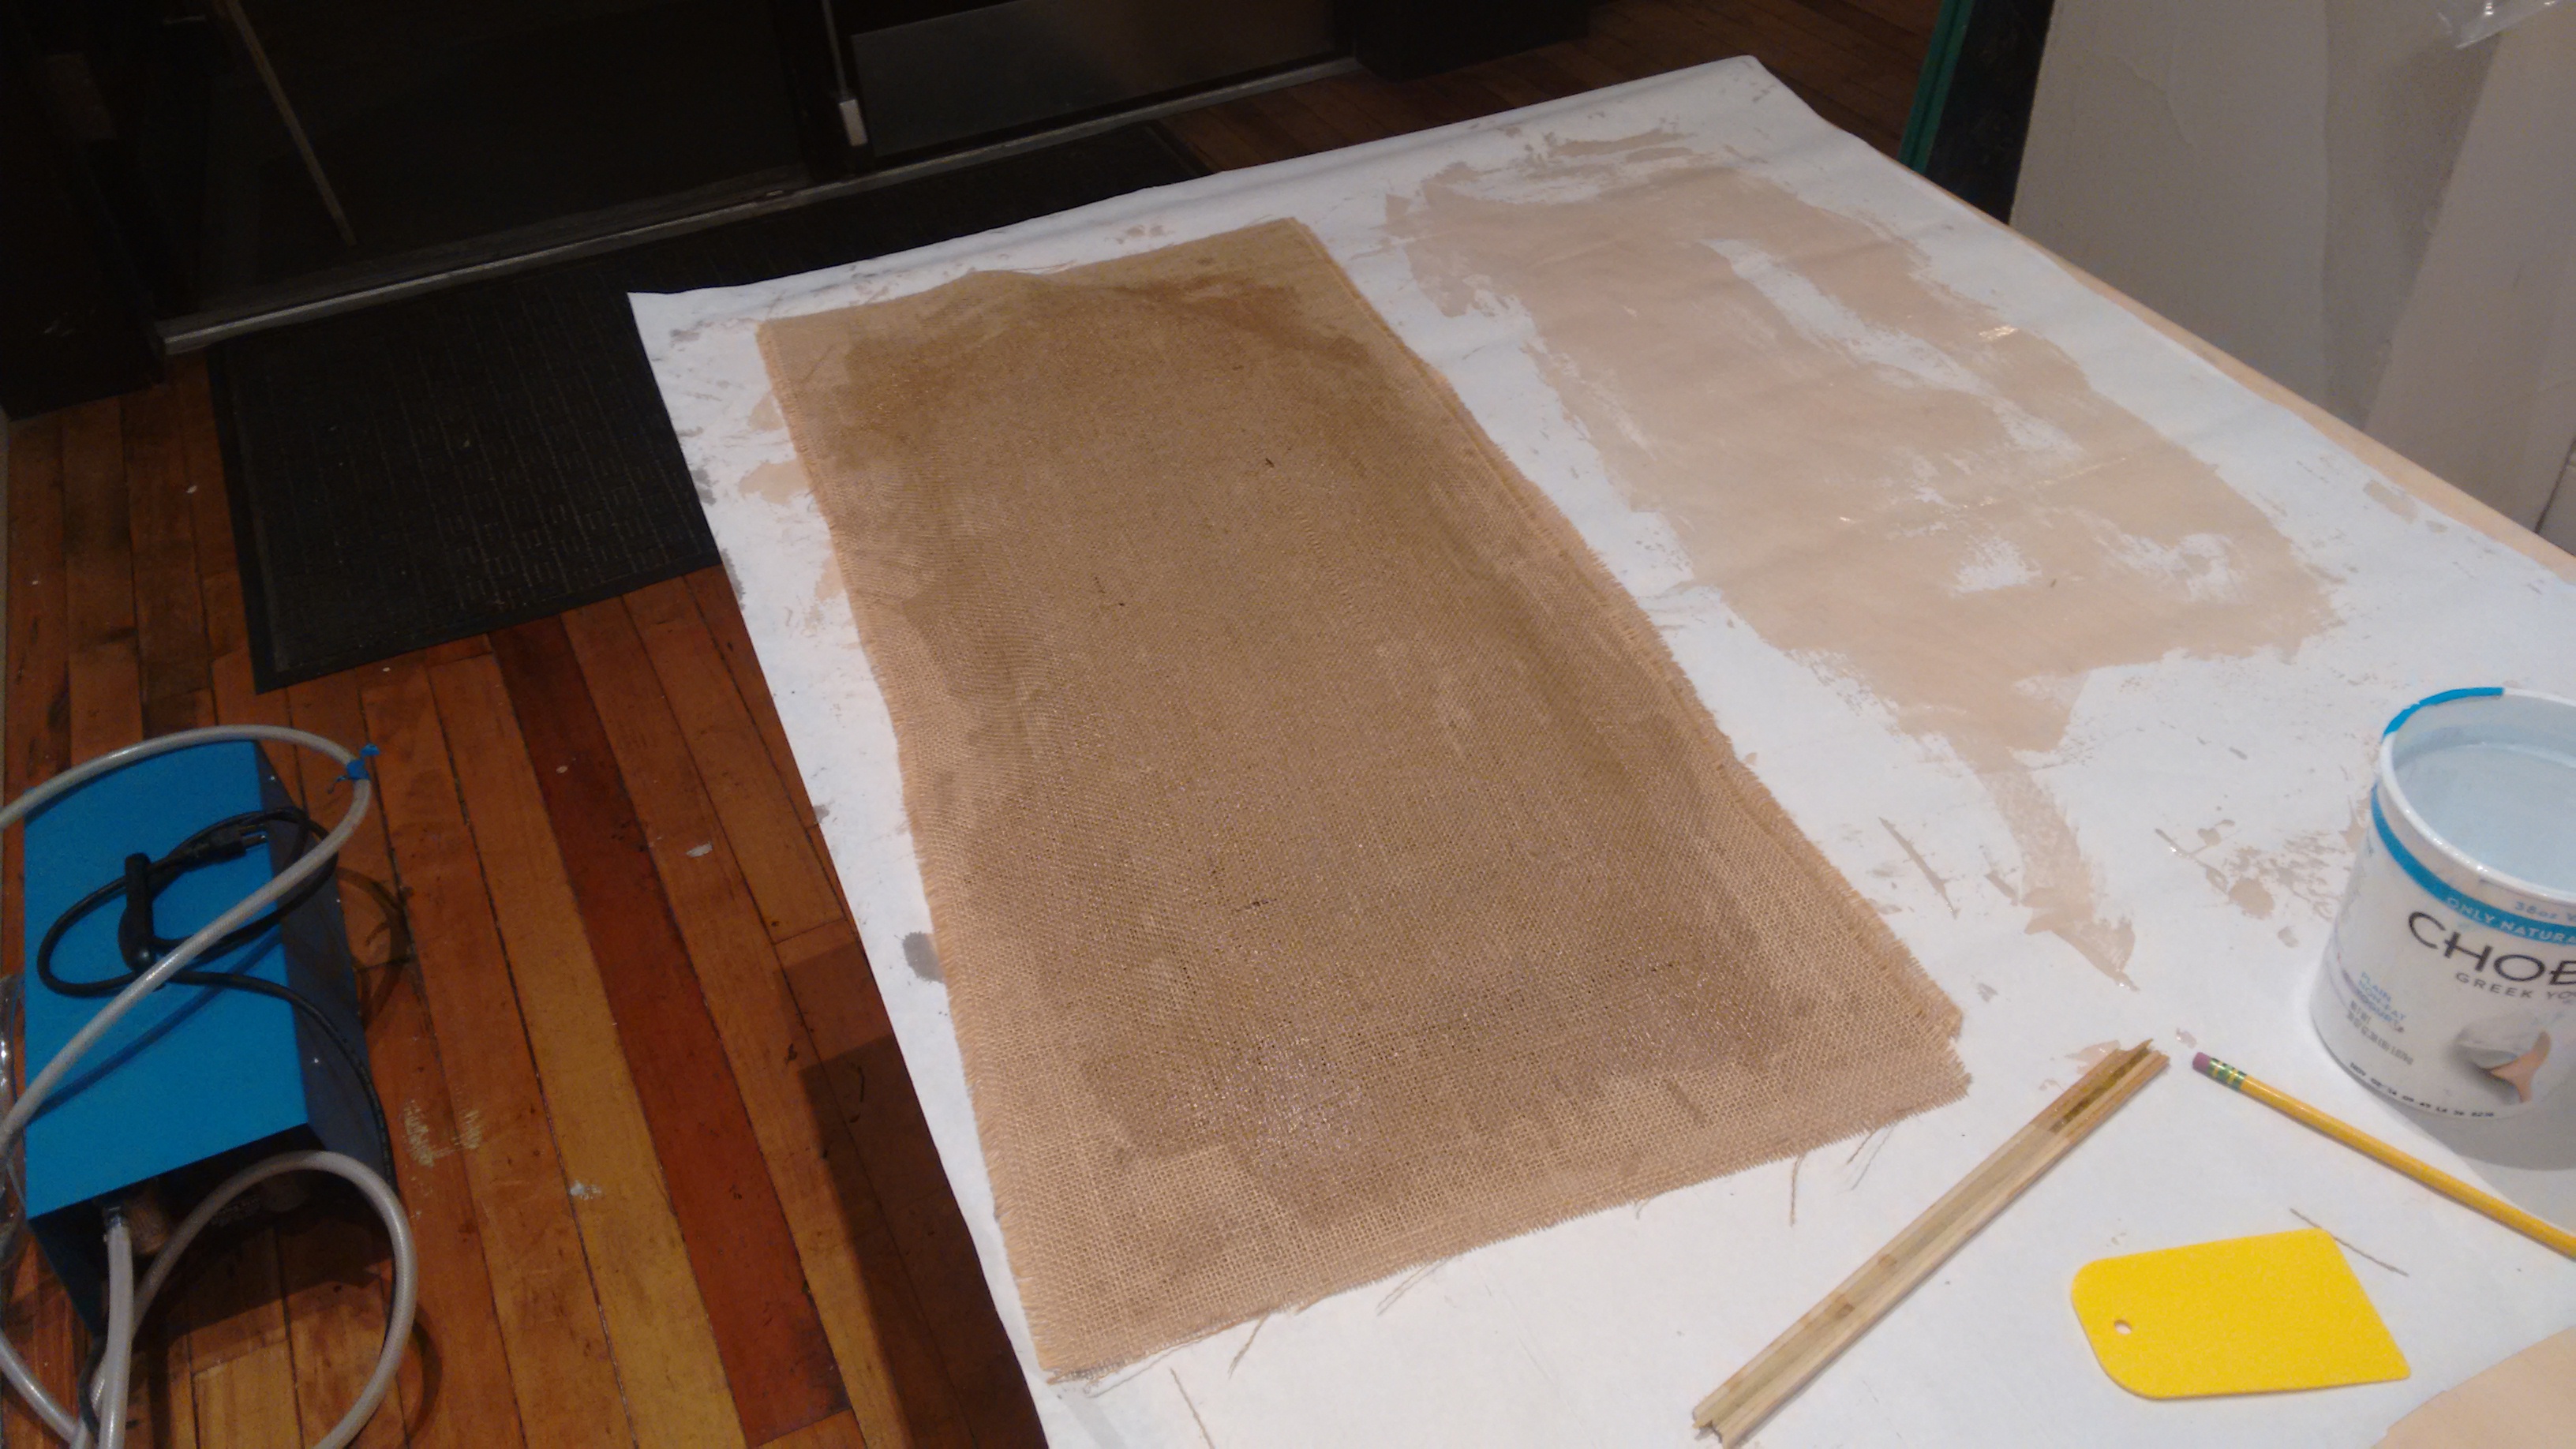
After applying the burlap, just to make sure all the burlap would stay in its place, I put also some rubber band around it.
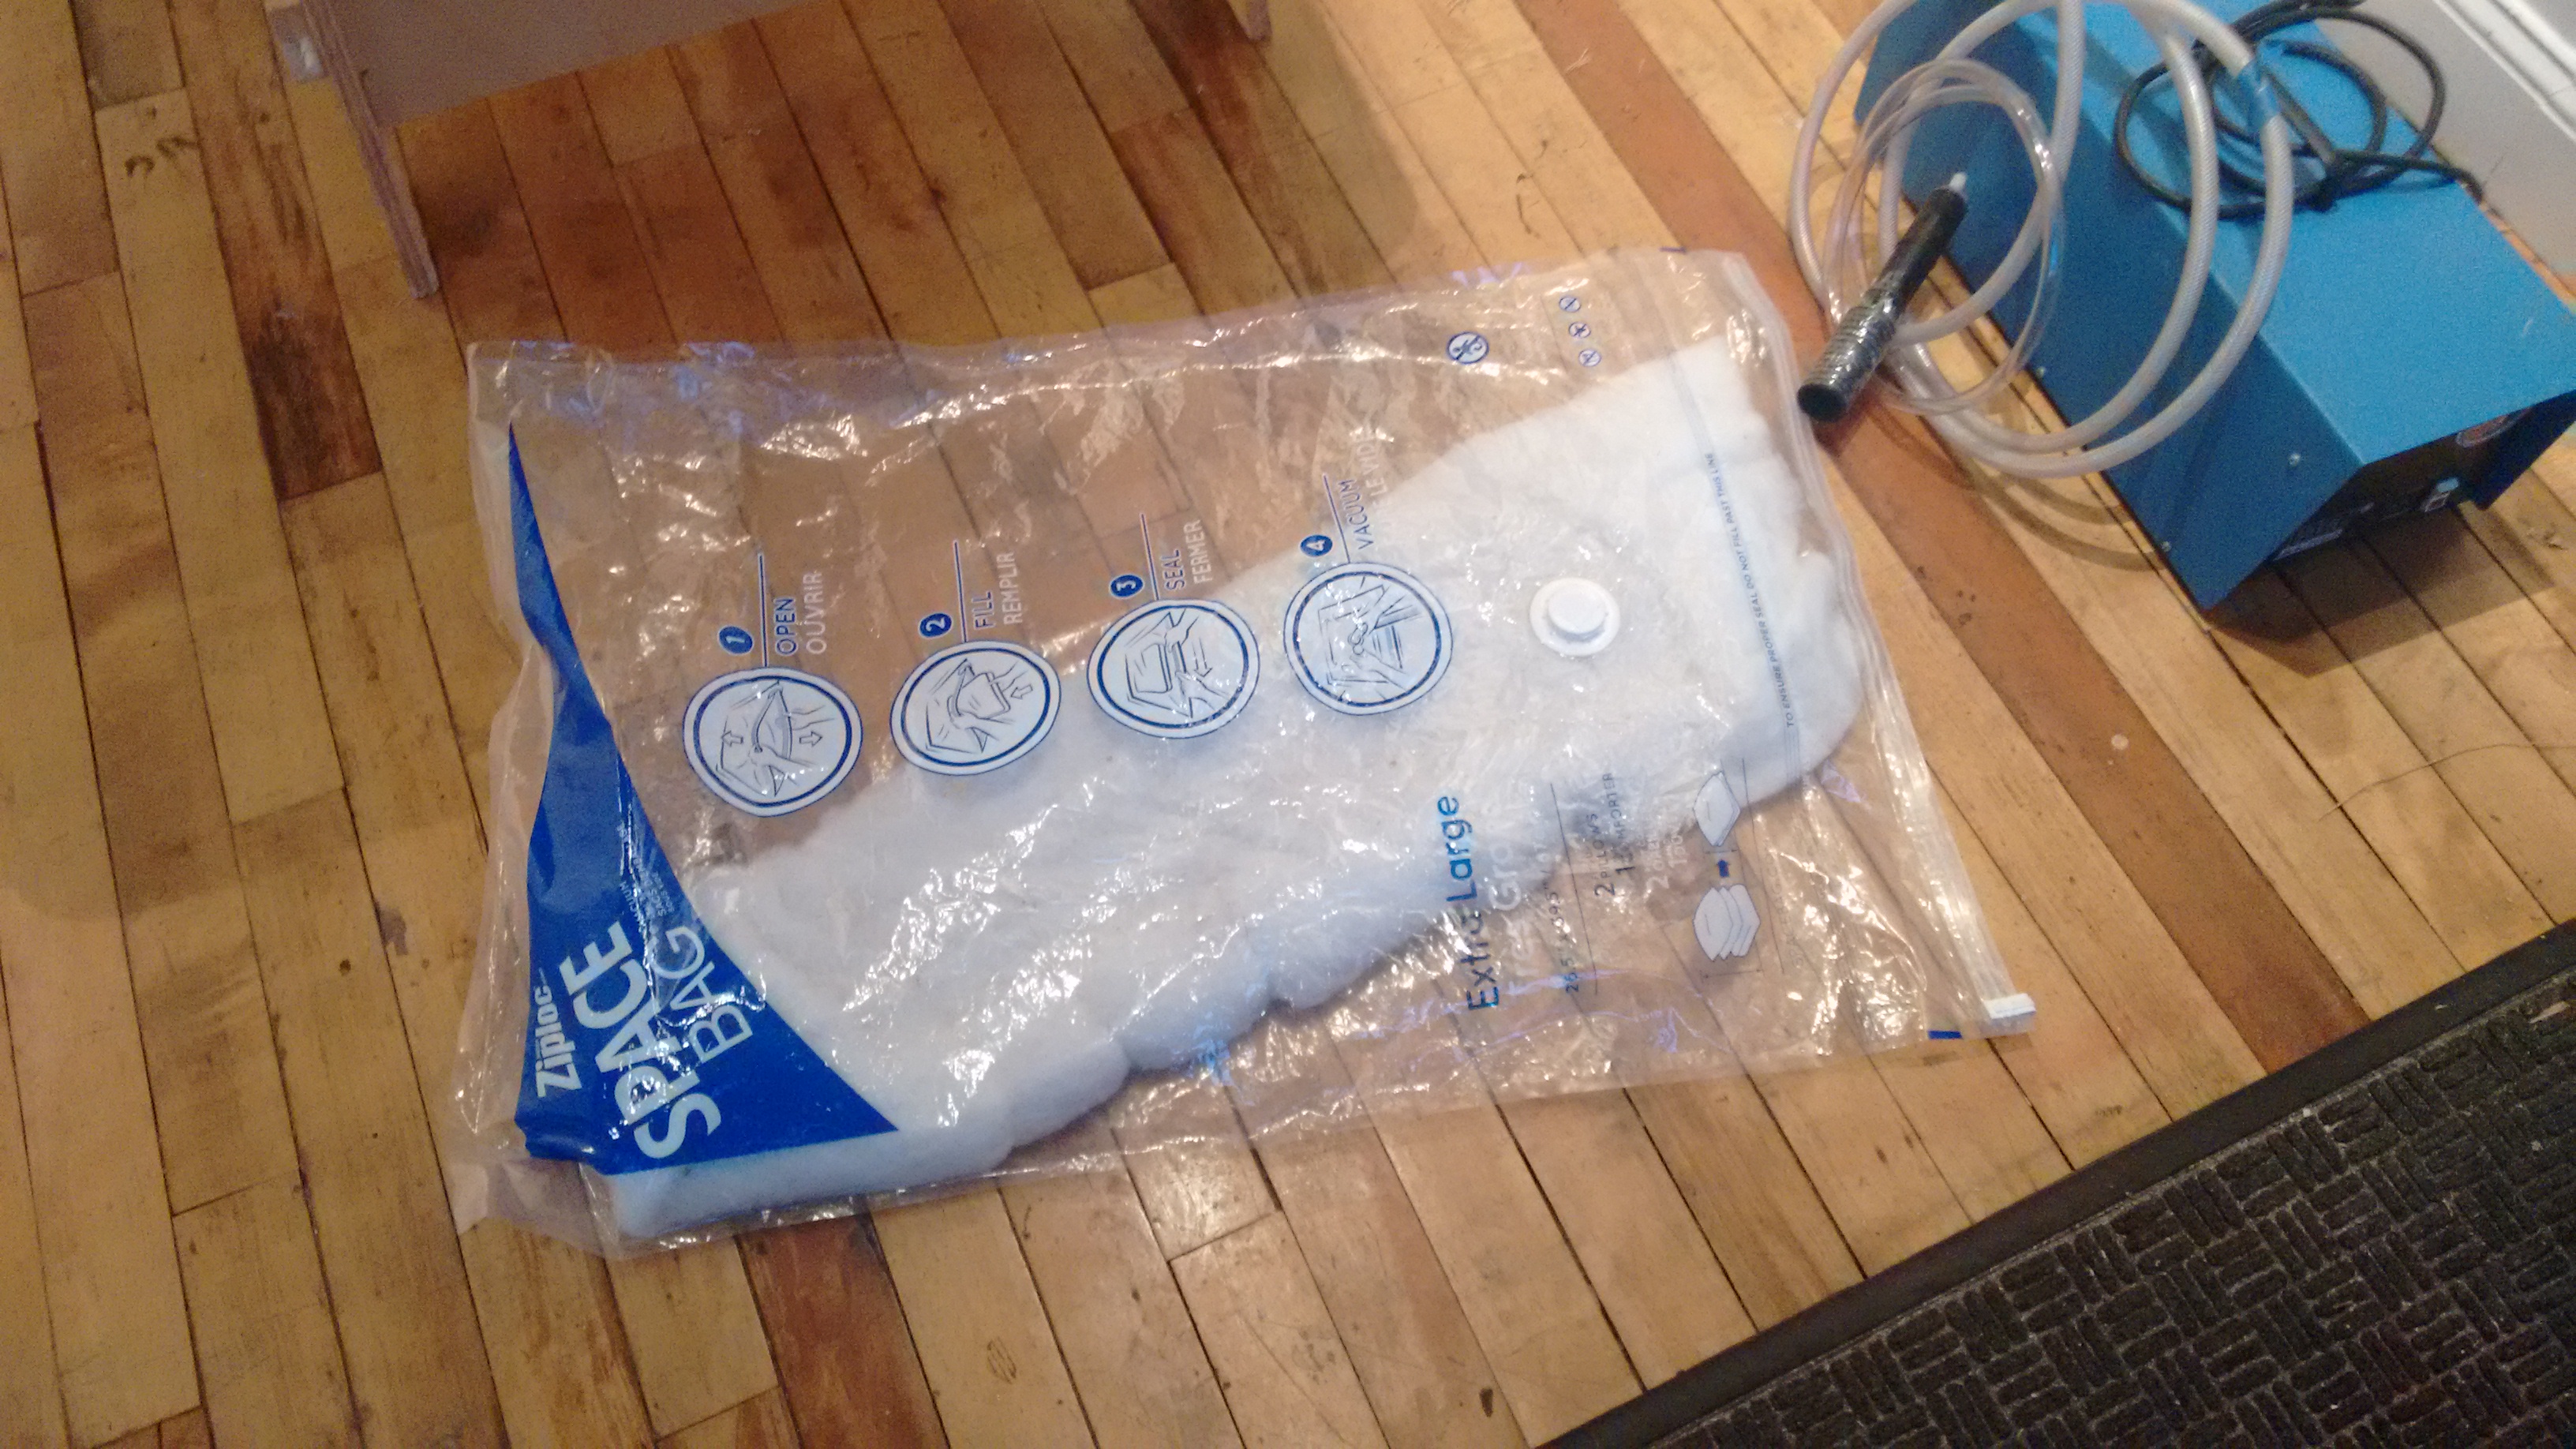
After that I used a plastic film to cover it tall and made some holes on in using the Wall covering Perforator. This step is important because allow the Excess resin to comes out when you vacuum form it.
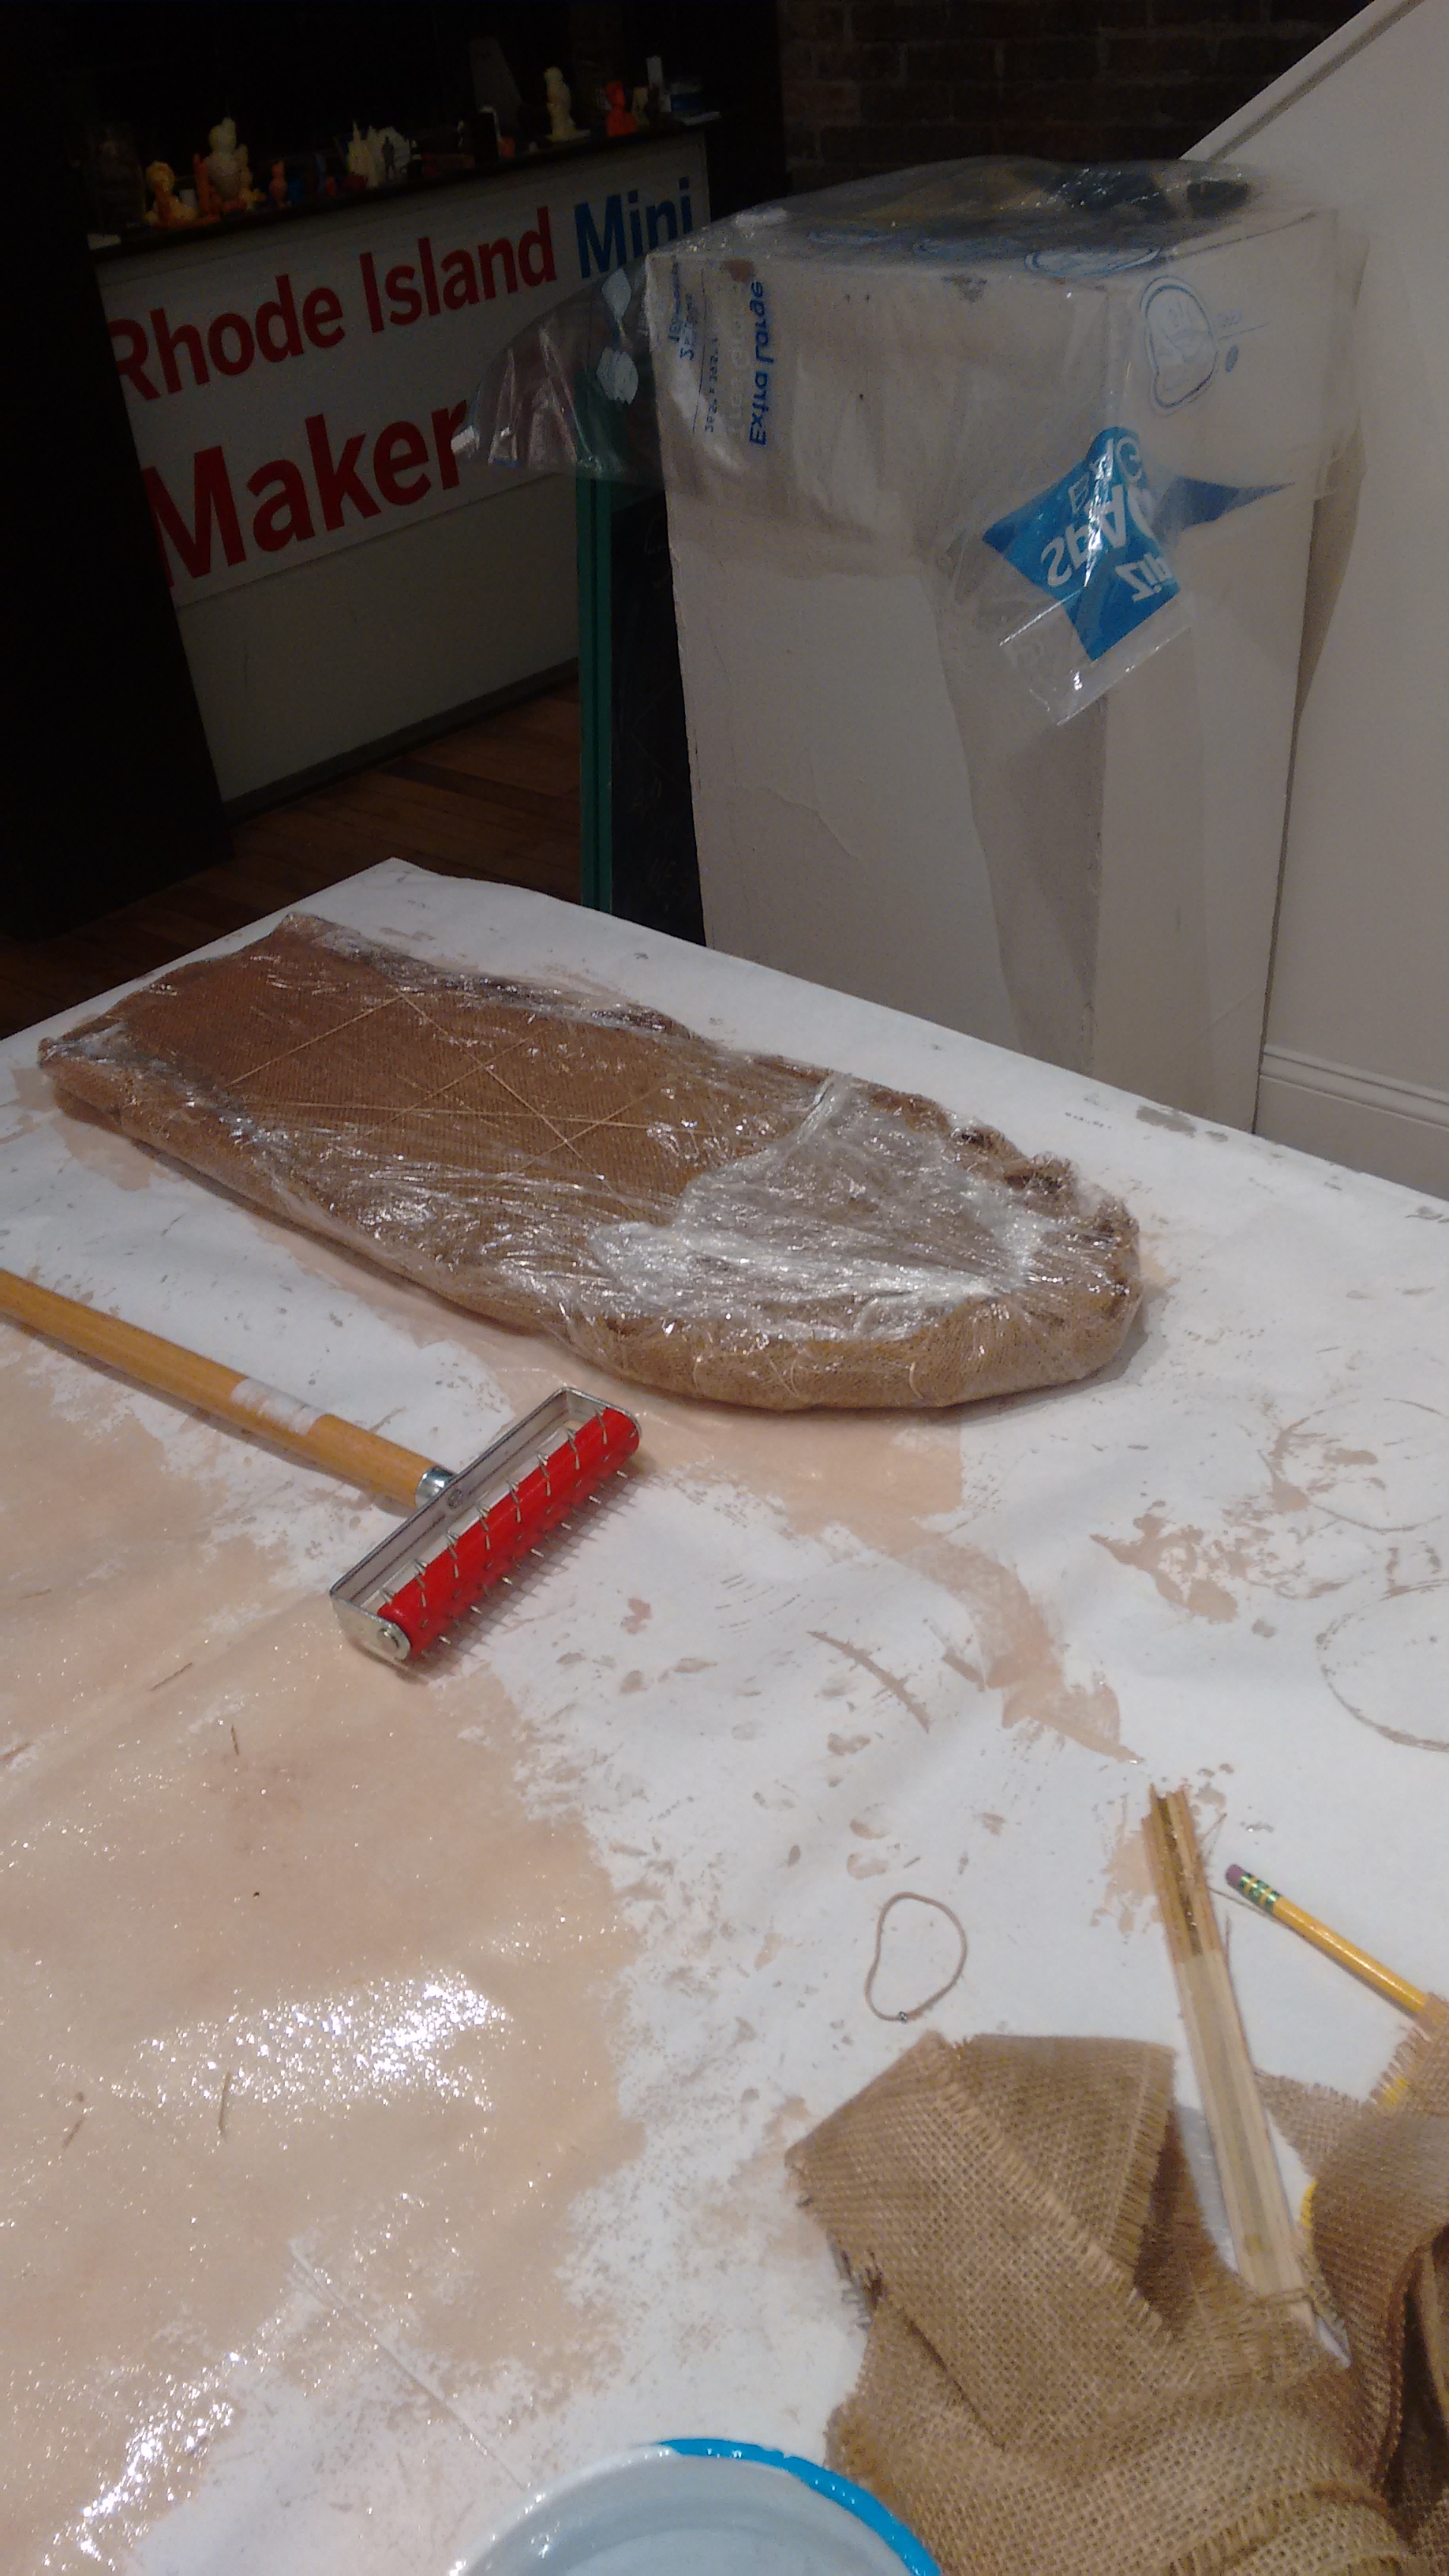
Then I made my second mistake. I forgot to put the breather before vacuum bagging. I just put it in the bag jus with the bleeder, bu not the breather, so I ended up with a very disformed board an the resin was also disform,where some parts was with a thick layer, and in others not that much.
Because of my two previous mistakes I had to make a lot of finishsing work on my board, so I have a good amount of work sanding it.
Then I cut and applyed two more layers of burlap to make it stronger, did the same process with the plastic film as a bleeder and added also the breather before vacuum baggin it.
The result was pretty good and the board came out really stronger. I event tested it by putting two pieces of wood underneath it and it got my weight (210 pounds).
By now I do not have the wheels, but I will try to install it later when I get it.
I still think I need to make some finishing on it to looks better. Another thing I learned is that maybe it would be better if I put the border stripe after the top and bottom layers, so would be better to finish it.
The files I used to this assignment are here:
3D Model: fullboard.stl
123D Make file: board.3dmk
PDF cutting file: board.pdf