
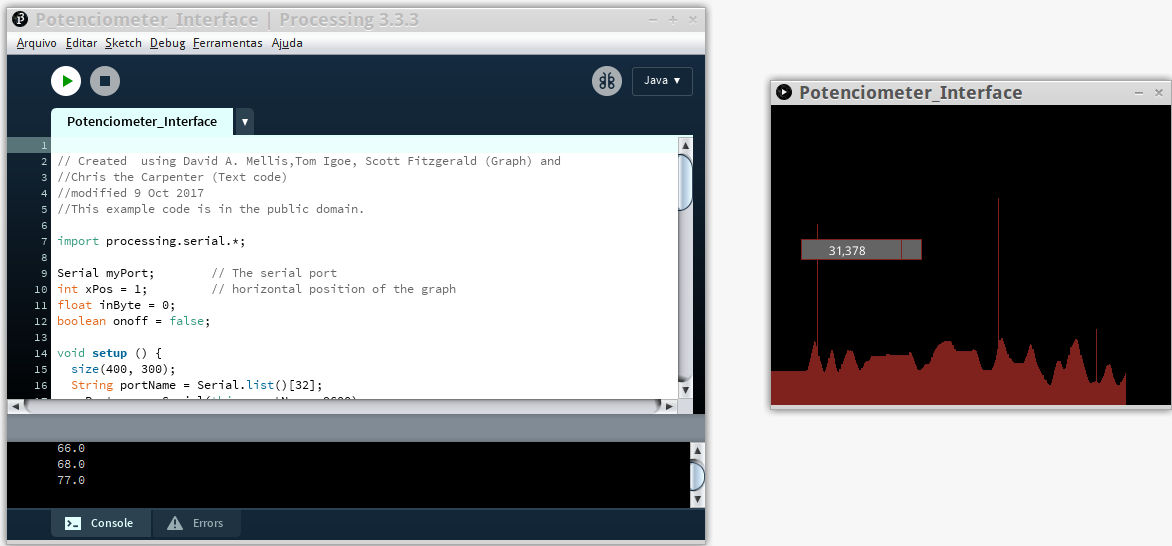
There is many potenciometer processing's interfaces in academy students as Marta Verde and Fab Lab Esan student, interacting with geometric forms, but I wanted to do a dynamic bar to see the input-potentiometer and my motor-output velocity control.
My first test with my Aduino IDE and Processing was the "busy port" that was a problem that we can't "have the serial monitor and the Processing code running at the same time. The COM can only work for one at a time."" Well close the Arduino motor serial to use Processing. More info see this Arduino forum.
My second problem that made me to search a lot for a solution, was the "Nah" input Processing problem.
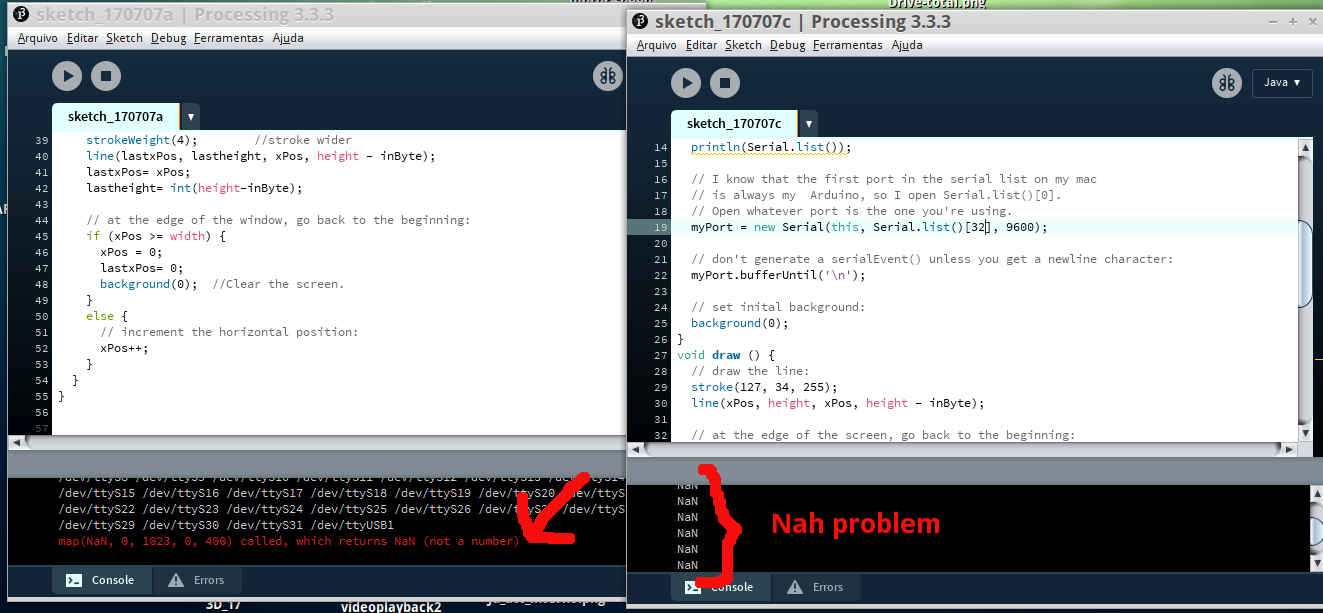
Seeing the arduino motor serial was no problem with the data.

But, I realized that the problem was the printing in the data sending by the Arduino IDE. The "sensorValue" and "outputValue" words could "confuse" the input Processing. Then I erased this code part leaving only the numbers that I wanted to send to Processing, and it runned!
This is the Arduino code uploaded to my microcontroller Attiny board and modified to interface Processing.
/* created 29 Dec. 2008 modified 9 Apr 2012 by Tom Igoe modified October 2017 by Alex Gacia And Kenzo Abiko This example code is in the public domain. */ #includeSoftwareSerial mySerial(0,1); // RX, TX const int analogInPin = A3; // Academy driver potentiometer is attached to const int analogOutPin = 8; // Attiny Board output pin that the motor is attached to int sensorValue = 0; // value read from the pot int outputValue = 0; // value output to the PWM (analog out) void setup() { // initialize serial communications at 9600 bps: mySerial.begin(9600); } void loop() { // read the analog in value: sensorValue = analogRead(analogInPin); // map it to the range of the analog out: outputValue = map(sensorValue, 0, 1023, 0, 255); // change the analog out value: analogWrite(analogOutPin, outputValue); // print the results to the serial monitor: mySerial.println(outputValue); delay(100); }
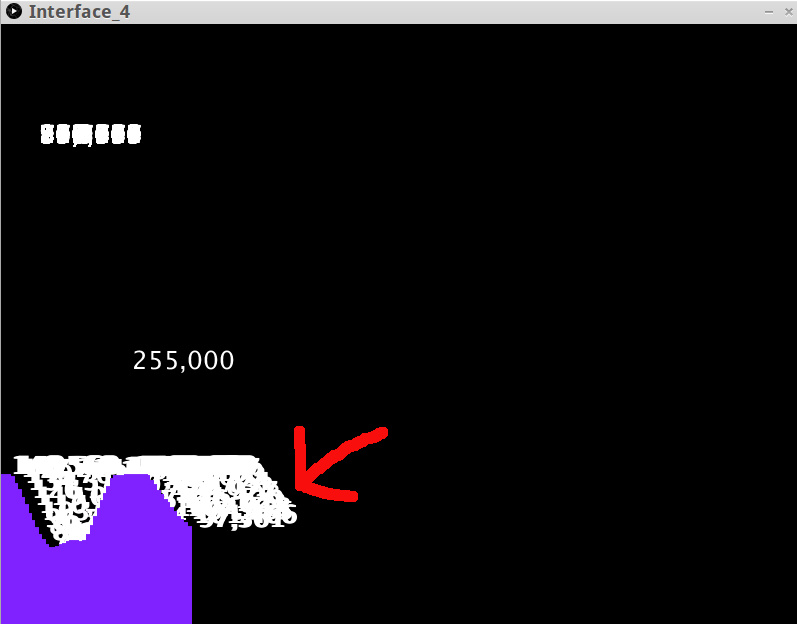
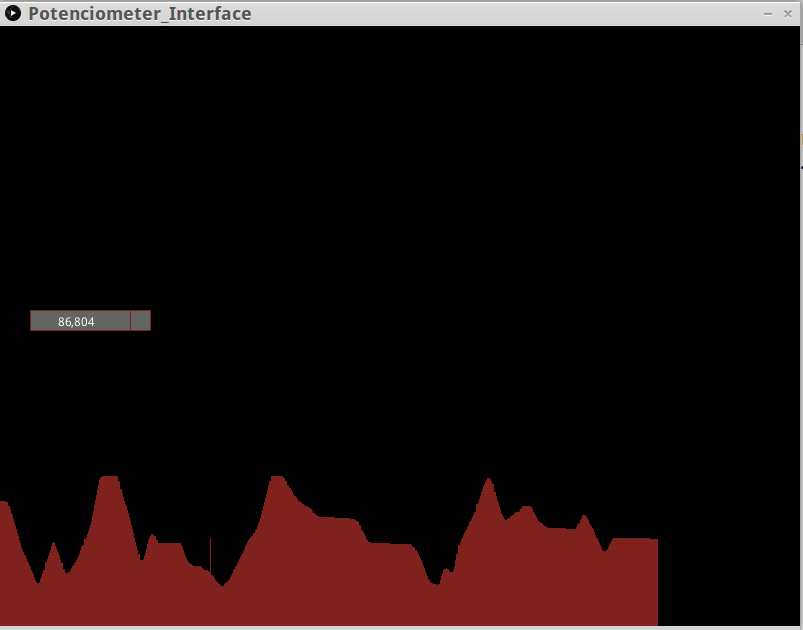
I begin to change the Processing code from Arduino examples tutorial graph.. I wanted to improve it printing on screen the values.Searching codes to do it, I realized that is not easy as I thought it would be. I tried putting the values near the graph, and the bad result:
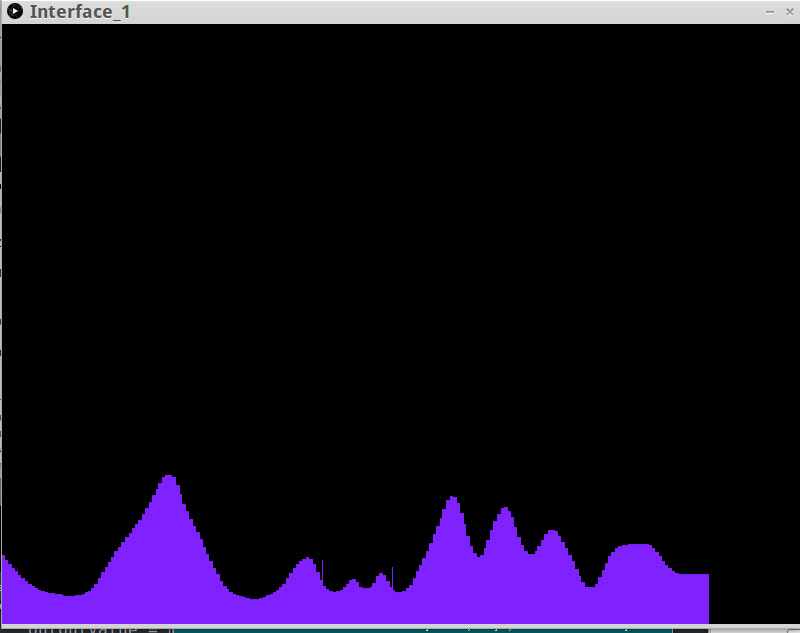
Then I get this code show text or image for 2 seconds then remove, that was the best to do what I wanted, that is to show the potenciometer values at the screen.I put in the graph code and the result:
This is the final Processing code:
// Created  using David A. Mellis,Tom Igoe, Scott Fitzgerald (Graph) and
//Chris the Carpenter (Text code)
//modified by Alex Garcia 9 Oct 2017
//This example code is in the public domain.

import processing.serial.*;

Serial myPort;        // The serial port
int xPos = 1;         // horizontal position of the graph
float inByte = 0;
boolean onoff = false;

void setup () {
	size(800, 600);
	String portName = Serial.list()[32];
	myPort = new Serial(this, portName, 9600);
	background(0);
      	}
  void draw () {
// draw the line:
  stroke(127, 34, 30);
  line(xPos, height, xPos, height - inByte);
  if (xPos >= width) {
  xPos = 0;
  background(0);
      } else {

    	xPos++;
          	}
        	  {
      fill (100);
      rect (30,height/2-16,100,20);
      if (onoff){
      fill(255);
      text( inByte ,55,height/2);
      onoff=false;
      } else {
      fill (100);
      rect (50,height/2-16,100,20);
      onoff=true;
      		}
      delay (50);
      		}
      	  }
      void serialEvent (Serial myPort) {
// get the ASCII string:
    String inString = myPort.readStringUntil('\n');

      if (inString != null) {
// trim off any whitespace:
      inString = trim(inString);
// convert to an int and map to the screen height:
      inByte = float(inString);
      println(inByte);
      inByte = map(inByte, 0, 1023, 0, height);

            }
            }
Interface from Alex Angelo on Vimeo.