I started this week my re-visiting different terminologies covered by Neil in his lecture.
Von Neumann Architecture
Harvard Architecture
RISC
CISC
Microprocessor
Microcontrollers
Families
I will be comparing 5 IC families known to me :
- 8051
- Developed by Intel in the year 1981.
- 8 bit microcontroller with 8 bit standard core
- Very low cost and known for its standard.
- PIC - Reripheral Interface Controller
- Developed by Microchip.
- 8/16/32 bit core
- Has less community support and its IDE is not freely available
- MSP
- It is a Mixed signal microcontroller family from TI.
- 16 bit core
- Used in ultra low power application like in case of battery operated devices.
- AVR - It derives its name from its developers Alf-Egil Bogen and Vegard Wollan RISC microcontroller
- Developed by Atmel Corporation in 1996
- 8/32 bit core
- Widely used in robotics. Has good community support and its simply to implement
- ARM - Advanced RISC Machines
- ARM is basically an architecture developed by an UK base company which is now used by many big companies
- 32/64 bit core.
- Used in heavy applications with high end communication protocol, large memory requirement with fast processing.
Packages
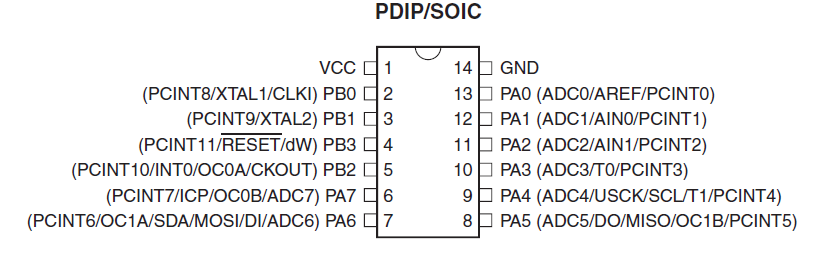
Studying datasheet of 8 bit AVR microcontroller ATtiny
This week for testing we will be using ATtiny44 which has 4KB of flash, 256 Bytes of EEPROM and SRAM.
In our lab we are using SOIC package of ATtiny 44 its pin out is as below:
Another important diagram to go through is ICs internal block diagram. It lets us about different hardware modules available in the IC.
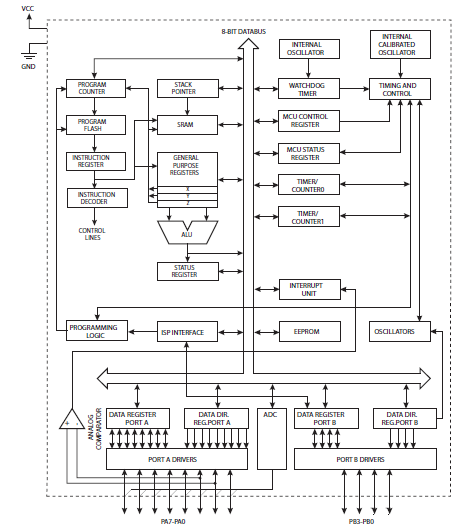
You can refer it at page 4 of the datasheet. Below is the link to download datasheet
DatasheetI will be using Arduino board for programming my board.
Arduino IDE can be download from https://www.arduino.cc/en/main/software and depending on your OS select file to be downloaded.

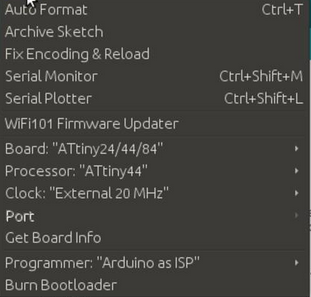
For using Arduino board for programming first we have to make it as ISP. For doing same follow below mention steps:
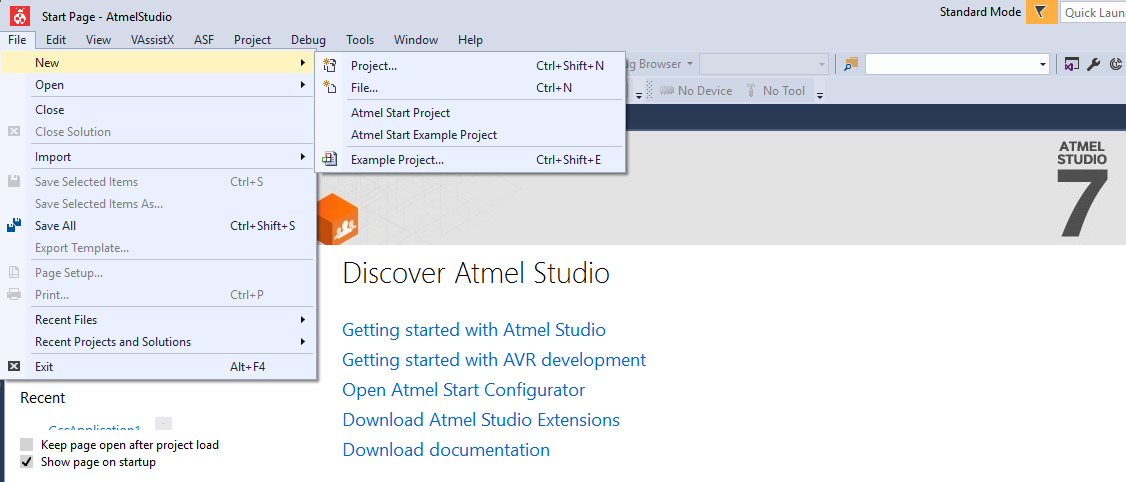
For writing C code I will be using Atmel Studio 7. Same can be downloaded using below link
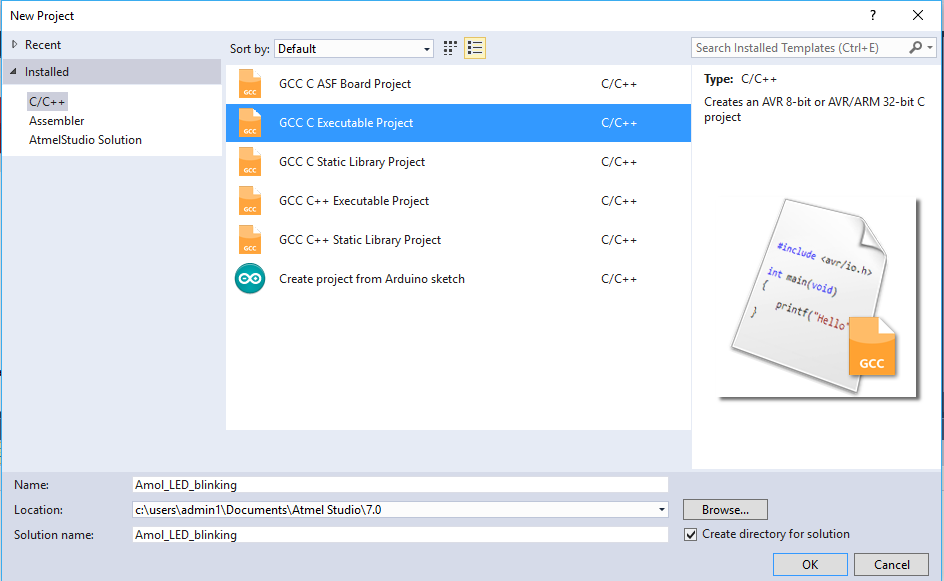
Atmel Studio 7 - Click to downloadOpen Atmel studio and create new project.
Select GCC C Executable and give name to the project.
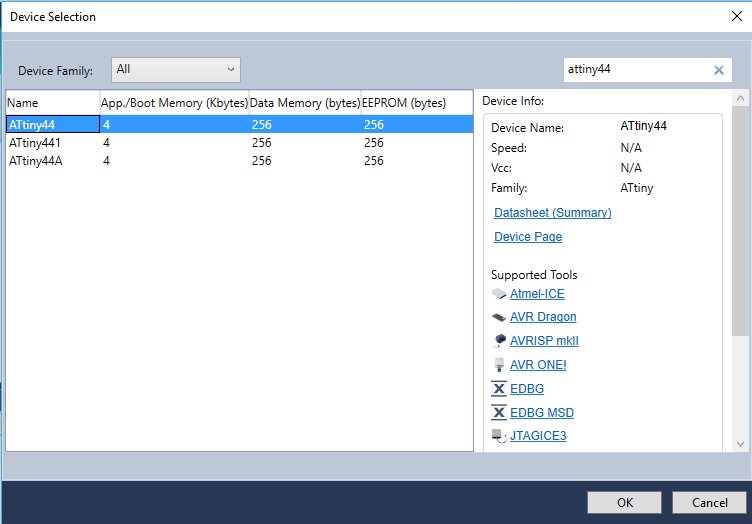
Then select microcontroller as Attiny44
Next step is to write the c code and save it
/*
 * Amol_LED_blinking.c
 *
 * Created: 13-April-17 2:24:24 AM
 * Author : Amol Wadkar
 */

//#defines
#define F_CPU 1000000  //Define clock speed as 1Mhz


//Include Header
#include     //Import header file required for AVR microcontroller
#include   //Import header file required for delay function


int main(void)
{
	DDRA = 0b10000000;  //set PA7as output & all other pins as input
	while (1) //Repeat the below actions continuously
	{
		if((PINA & (1<<3))==0b00000000) //When button is press this condition will be true
		PORTA |= (1<<7);// Set PA7 high (Make LED ON)
		else
		PORTA &= ~(1<<7);// Set PA7 low (Make LED OFF)
	}
}
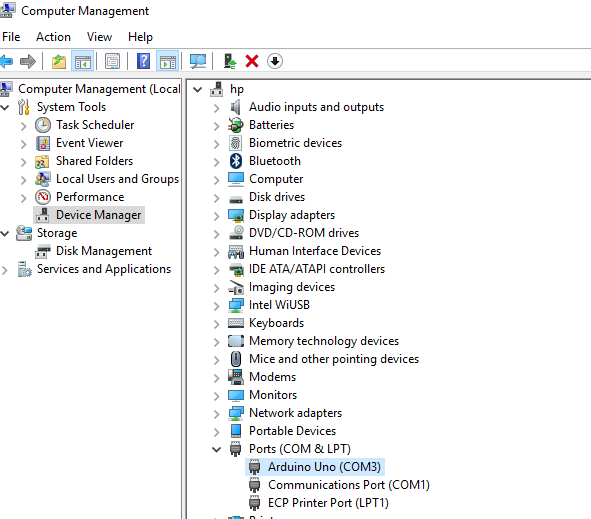
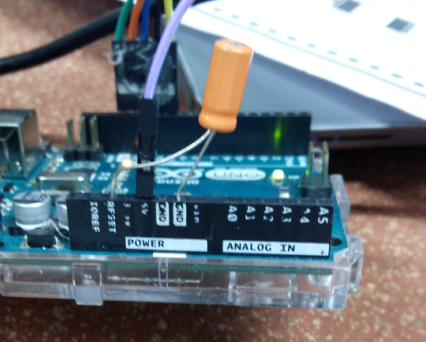
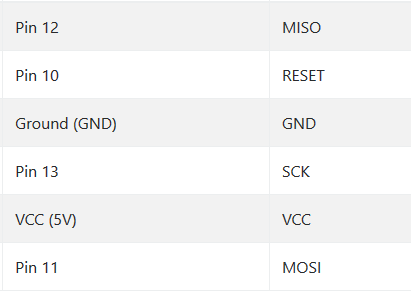
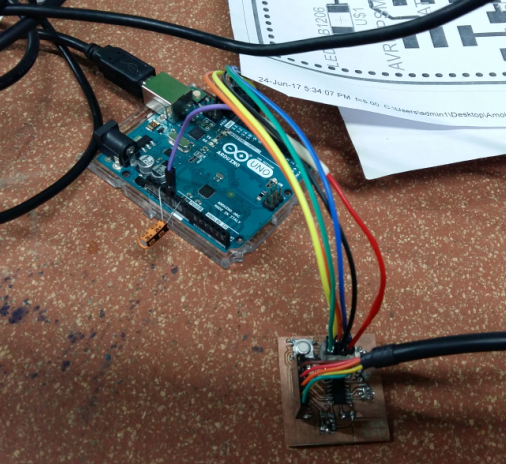
Now plug back Arduino to PC connecting the capacitor between reset and ground
Connect the Arduino to the board. Follow below sequence
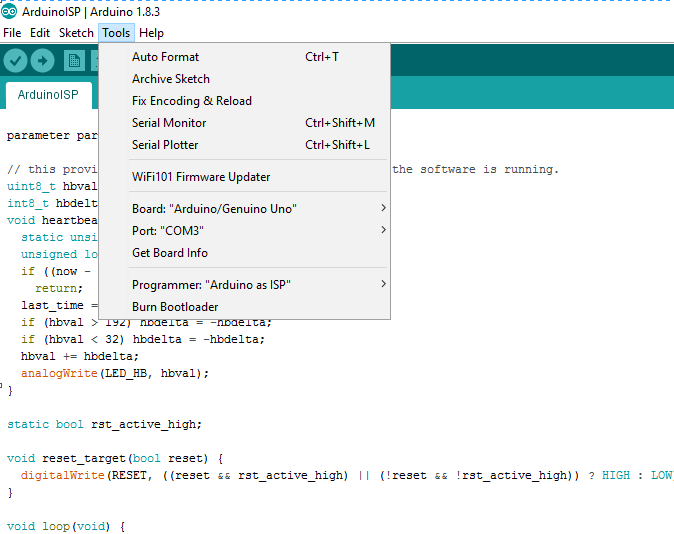
Burn the bootloader using Arduino IDE
Open the C code , compile the code and upload it to board.
Its done - LED blinks on pressing the button.
Modified the code to blink the LED slow and fast on button press
/*
 * Amol_Input_device
 *
 * Created: 27-April-17 8:28:27 AM
 * Author : Amol Wadkar
 */

//#defines
#define F_CPU 1000000  //Define clock speed as 1Mhz


//Include Header
#include     //Import header file required for AVR microcontroller
#include   //Import header file required for delay function


int main(void)
{
	unsigned long i, j ;
	DDRA = 0b10000000;  //set PA7as output & all other pins as input
	while (1) //Repeat the below actions continuously
	{
		if((PINA & (1<<3))==0b00000000) //When magnetic sensor is in NC
		{
			PORTA |= (1<<7);// Set PA7 high (Make LED ON)
				for( i = 0;	i < 1 ; i++ )
				{
					for(j = 0; j < 90000; j++)
					{
					}
				}
			PORTA &= ~(1<<7);
				for( i = 0;	i < 1 ; i++ )
				{
					for(j = 0; j < 90000; j++)
					{
					}
				}
		}
		else
		PORTA &= ~(1<<7);// Set PA7 low (Make LED OFF)
	}
}
/*
 * Amol_Input_device
 *
 * Created: 27-April-17 8:28:27 AM
 * Author : Amol Wadkar
 */

//#defines
#define F_CPU 1000000  //Define clock speed as 1Mhz


//Include Header
#include     //Import header file required for AVR microcontroller
#include   //Import header file required for delay function


int main(void)
{
	unsigned long i,j;
	DDRA = 0b10000000;  //set PA7as output & all other pins as input
	while (1) //Repeat the below actions continuously
	{
		if((PINA & (1<<3))==0b00000000) //When magnetic sensor is in NC
		{
			PORTA &= ~(1<<7);// Set PA7 low (Make LED OFF)
				for( i = 0;	i < 5 ; i++ )
				{
					for(j = 0; j < 90000; j++)
					{
					}
				}
			PORTA |= (1<<7);// Set PA7 high (Make LED ON)
				for( i = 0;	i < 5 ; i++ )
				{
					for(j = 0; j < 90000; j++)
					{
					}
				}
		}
		else
		PORTA |= (1<<7);// Set PA7 high (Make LED ON)
	}
}