WEEK 14
COMPOSITES
ASSIGNMENT
- Read the material safety data sheet (MSDS) and technical data sheet (TDS) for the resins that you're using
- Design and make a 3D mould (~ft2 /30x30cm), and produce a fibre composite part in it.
Preperation
This week i am planning to make a small dust pan or shovel. After neil's lecture on composites, gone through the details about the epoxy resigns and its properties and started the design.
What is Composites?
Composites are made by combining two or more natural or artificial materials to maximize their useful properties and minimize their weaknesses. One of the oldest and best-known composites, glass-fiber reinforced plastic (GRP), combines glass fibers (which are strong but brittle) with plastic (which is flexible) to make a composite material that is tough but not brittle. Composites are typically used in place of metals because they are equally strong but much lighter. Most composites consist of fibers of one material tightly bound into another material called a matrix. The matrix binds the fibers together somewhat like an adhesive and makes them more resistant to external damage, whereas the fibers make the matrix stronger and stiffer and help it resist cracks and fractures. Fibers and matrix are usually (but not always) made from different types of materials. The fibers are typically glass, carbon, silicon carbide, or asbestos, while the matrix is usually plastic, metal, or a ceramic material. , Here we are using epoxy as the matrix material, burlap and cotton lint cloth as fibres material. I have done a study on different composite materias and briefing about each here.
- Natural composites
- Polymer matrix composites (PMCs)
- Metal-matrix composites (MMCs)
- Ceramic-matrix composites (CMCs)
Natural composites exist in both animals and plants. Wood is a composite – it is made from long cellulose fibres (a polymer) held together by a much weaker substance called lignin. Cellulose is also found in cotton, but without the lignin to bind it together it is much weaker. The two weak substances – lignin and cellulose – together form a much stronger one. The bone in your body is also a composite. It is made from a hard but brittle material called hydroxyapatite (which is mainly calcium phosphate) and a soft and flexible material called collagen (which is a protein). Collagen is also found in hair and finger nails.
A polymer matrix composite (PMC) is a composite material composed of a variety of short or continuous fibers bound together by an organic polymer matrix. PMCs are designed to transfer loads between fibers through the matrix. Some of the advantages with PMCs include their lightweight, high stiffness and their high strength along the direction of their reinforcements. Other advantages are good abrasion resistance and good corrosion resistance.
ypically use silicon carbide fibers embedded in a matrix made from an alloy of aluminum and magnesium, but other matrix materials such as titanium, copper, and iron are increasingly being used. Typical applications of MMCs include bicycles, golf clubs, and missile guidance systems; an MMC made from silicon-carbide fibers in a titanium matrix is currently being developed for use as the skin (fuselage material) of the US National Aerospace Plane.
This is the major type and examples include silicon carbide fibers fixed in a matrix made from a borosilicate glass. The ceramic matrix makes them particularly suitable for use in lightweight, high-temperature components, such as parts for airplane jet engines.
Dust pan Design
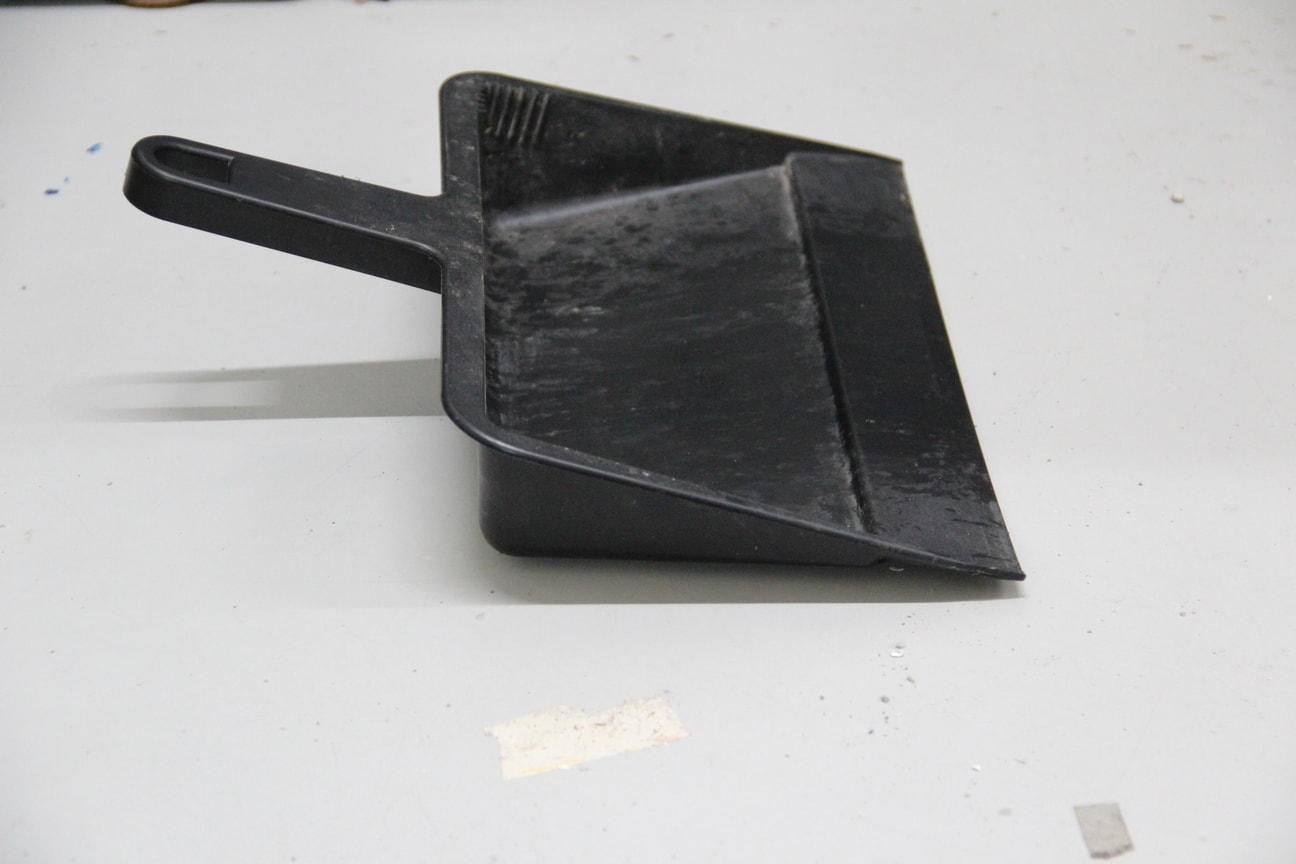
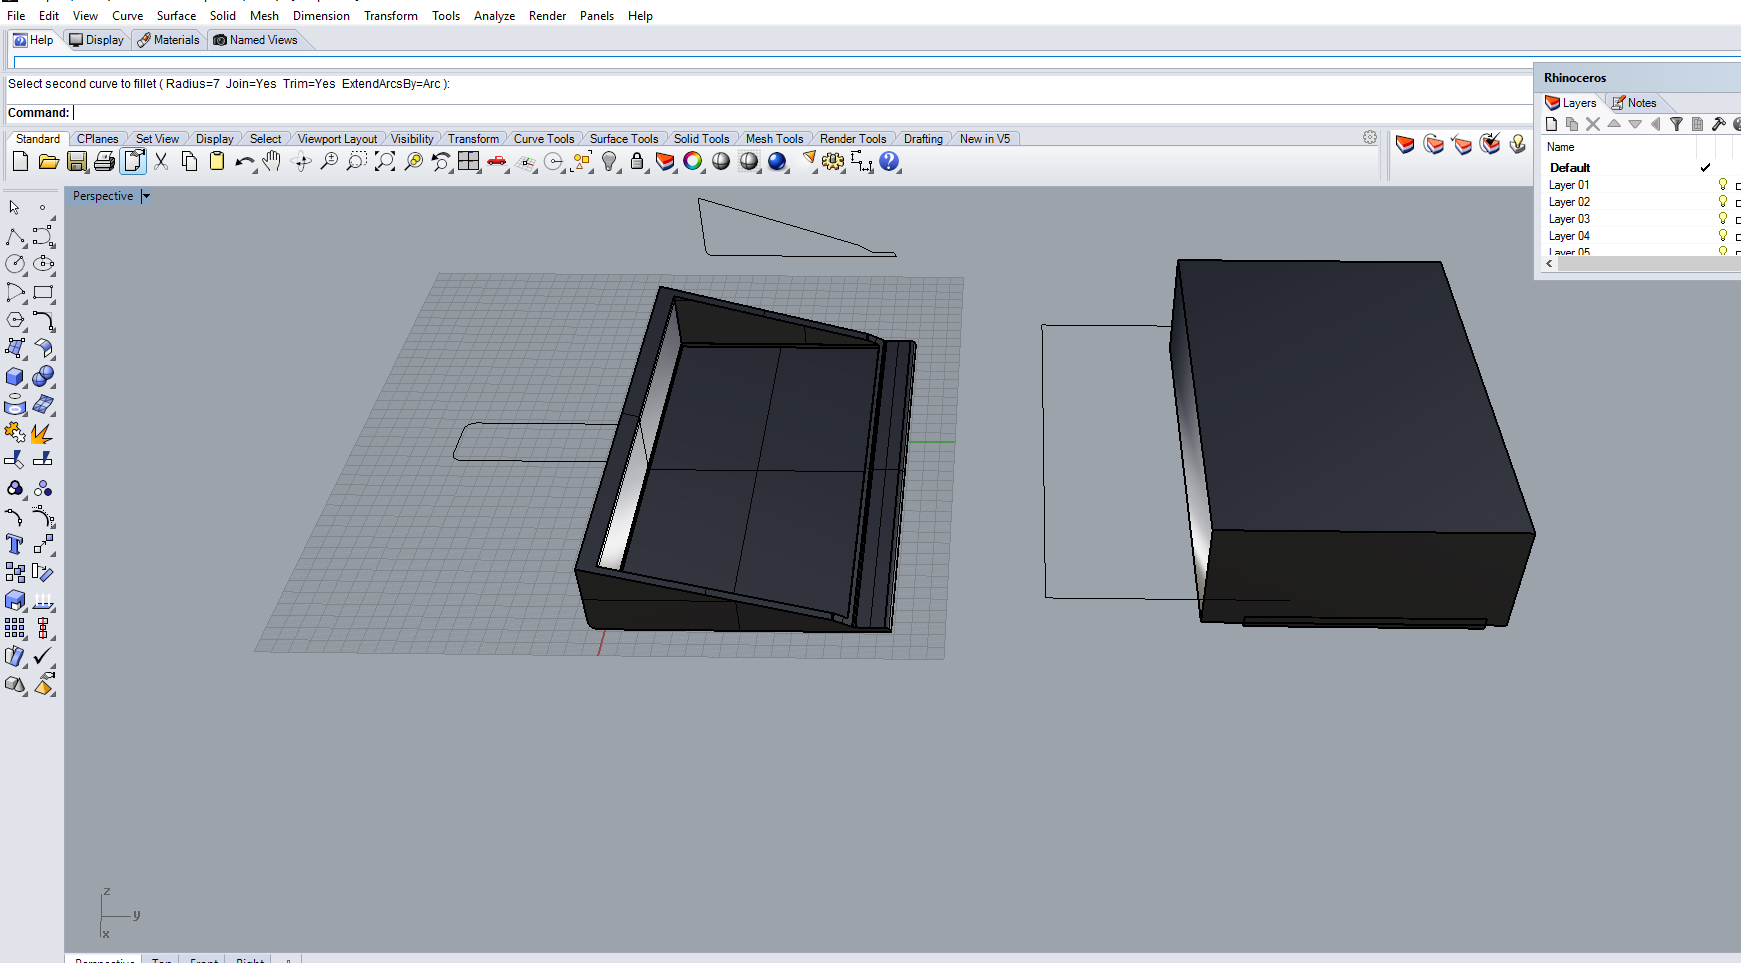
There is one dustpan is available in our lab for cleaning purpose, ispired from that i started design similar dust pan in rhinoceros. The original model of dust pan and the designed part is shown in the below picture. The actual dimension of the original part is around 300mm length and 190mm height and 40mm thickenss.
First I started design the positive single part mold of it and the design part is shown below.
Later i noticed that if i made the composite on this, inside of the mold i have to fill the plylayers to make the composite. The inside surface needs finish If it is a negative mold it will give better finish inside the mold, So i changed my design to make negative mold of dust pan. My dust pan dimesions are shown below.
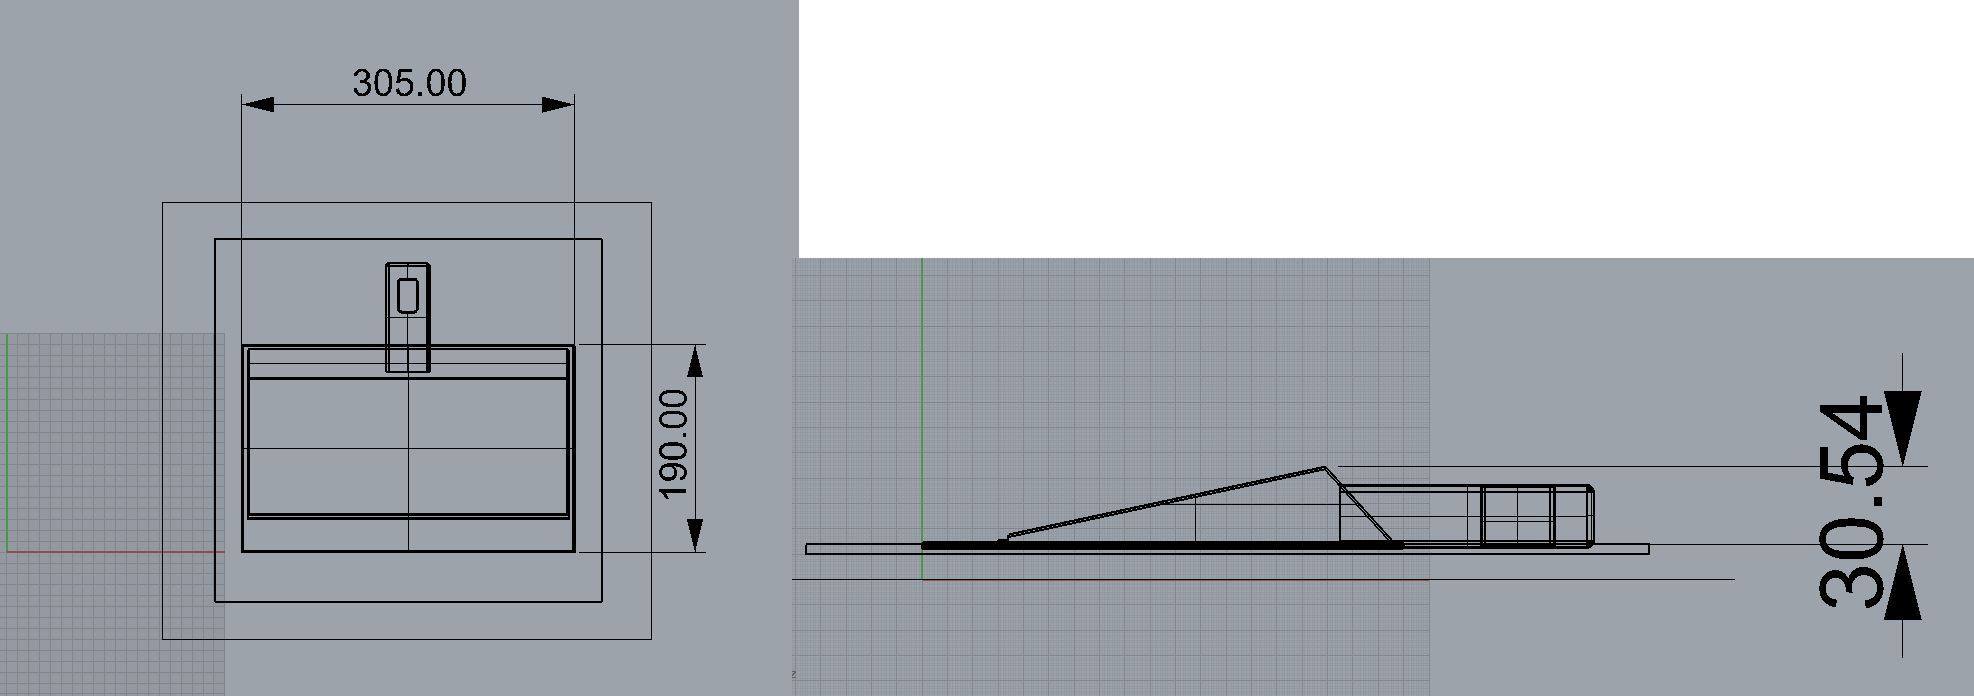
I completed the design of the dust pan as shown below and given a clearense base for holding the mold. The total dimesion of my dust pan is 305X190X30.54mm.

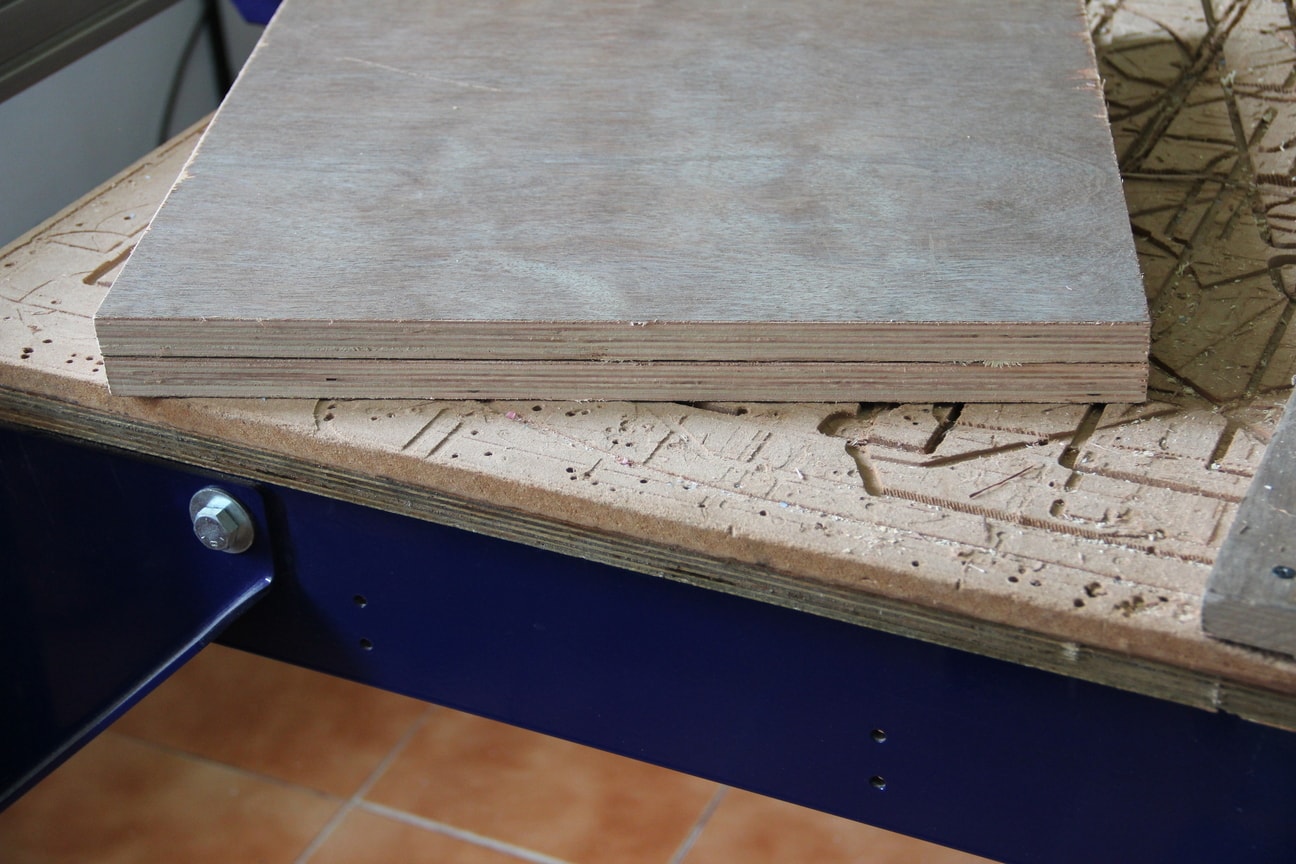
Stacking the plywood
The dust pan is having a height of 30.5mm and we had 19mm plywoods available in our lab, so i thought to stack two plywoods so that i will get a mzximum of 38mm thicker material two pieces of 19mm plywoods were cut from the plywood using shopbot. I made a 2D drawing of the pieces with a dimension of 448X400mm in rhino and cut out it using shopbot.
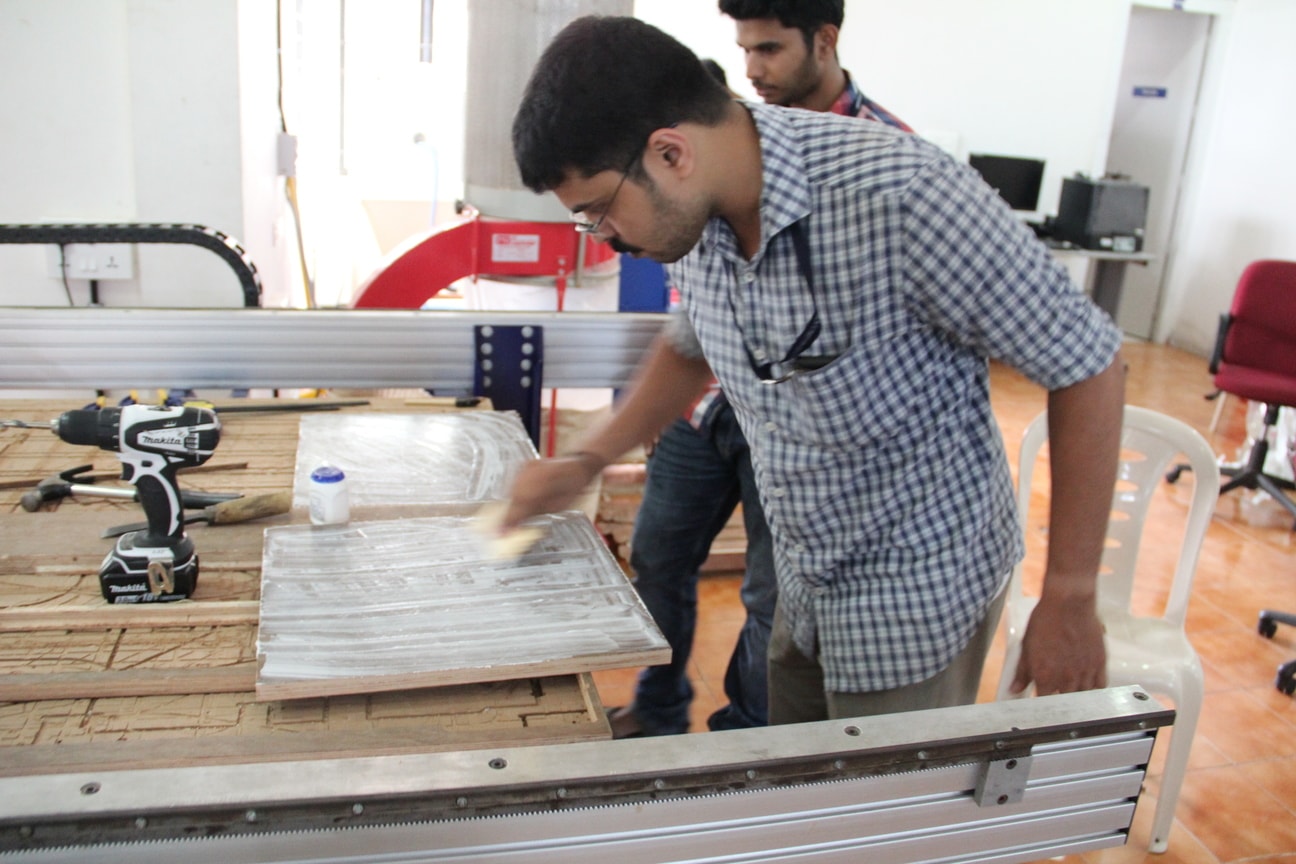
Next is the challenging part; planned to stack the two plywood pieces, for that i have identified a synthetic adhessive and wooden reepers from the hardware shop. Used Fevicol as synthetic resin adhessive and wooden reeper which i purchased from local hardware shop. My plan was to first glue the two pieces using fevicol and then insert the wooden reepers as nails in different positions. First i cleaned the surface of the plywood using sandpaper then put some random marks using chisel to firmly stick the two surfaces.
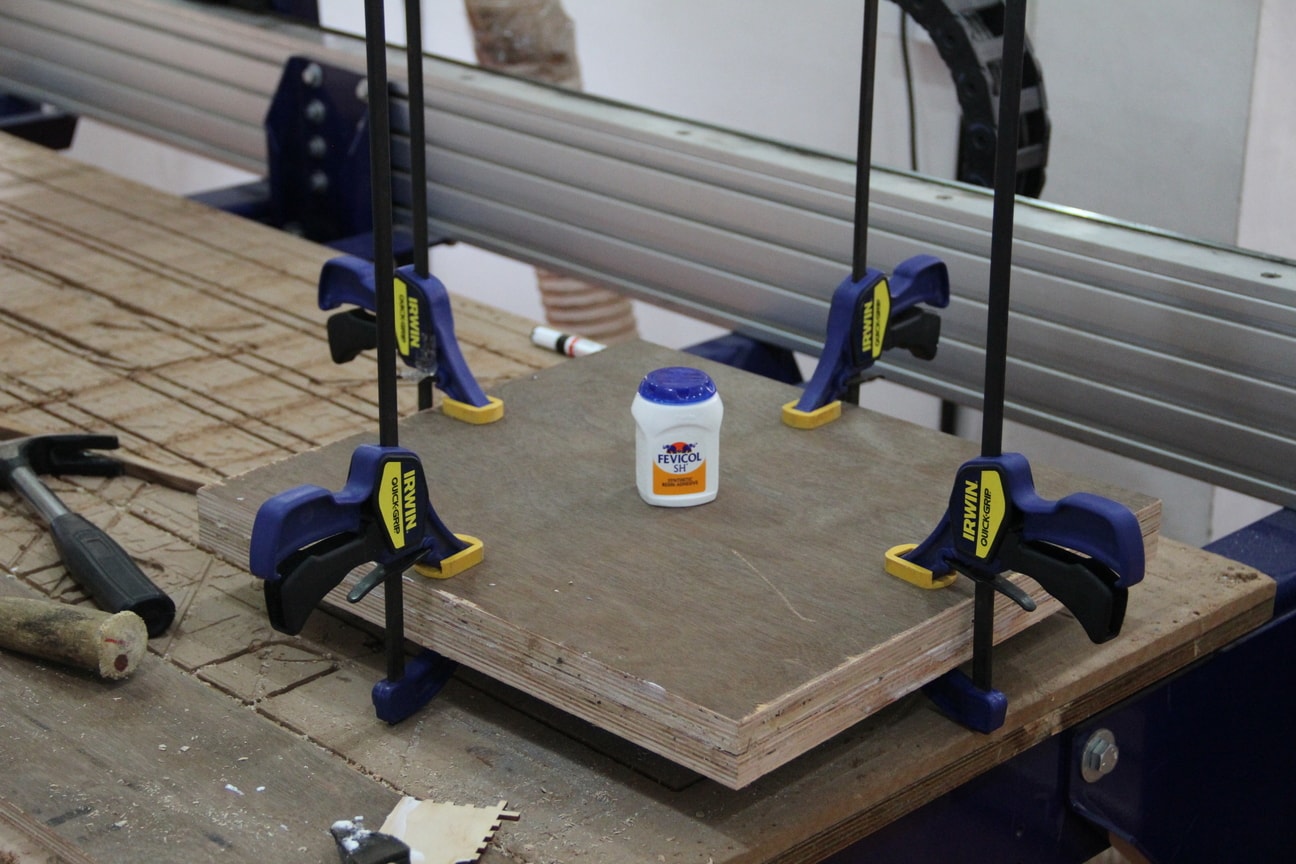
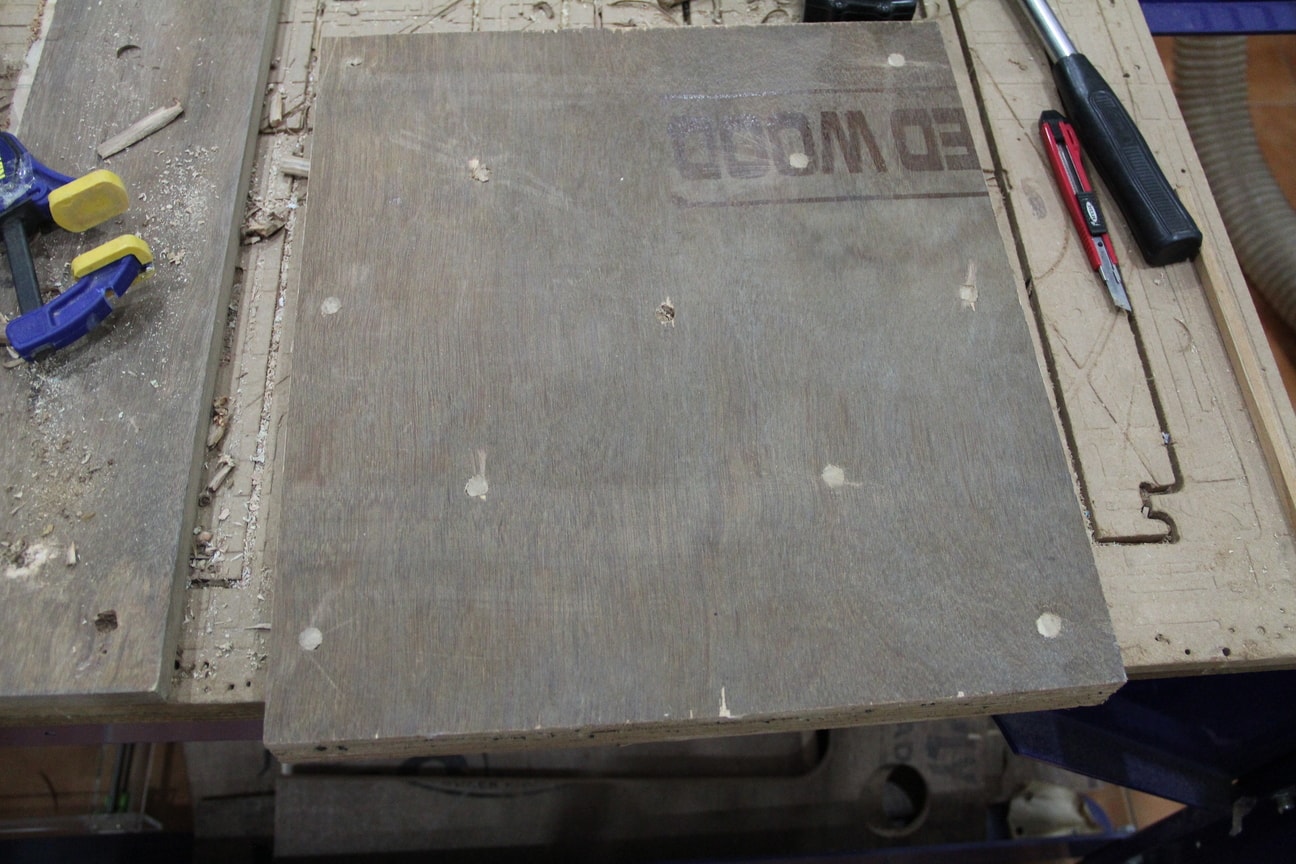
After applying the Fevicol the two pieces were stacked in right alignment and pressed it t with bar clamps, the entire stack is kept on shopbot bed for four hours to set it perfectly. The picture shown below is the stacked plywood piece over the shopbot.
Aftert four hours of waiting, i removed the barclamps and checked the piece and there was no issues in stacking. Next i need to put the wooden reepers into it as a redundancy, because in any displacement change while machining will lead to chnage/damage in the dimensions of the mold. Drilled holes of 10mm diameter uisng the hand driller , shaped the wooden reepers in round shape and inserted the reepers inside the holes, actually the reepers are used to fix the glass in windows here and will be of squre shape using knief i shaped it to round. You have to ensure the tightness of the wooden nails, if it is loose then during machining it will come out.
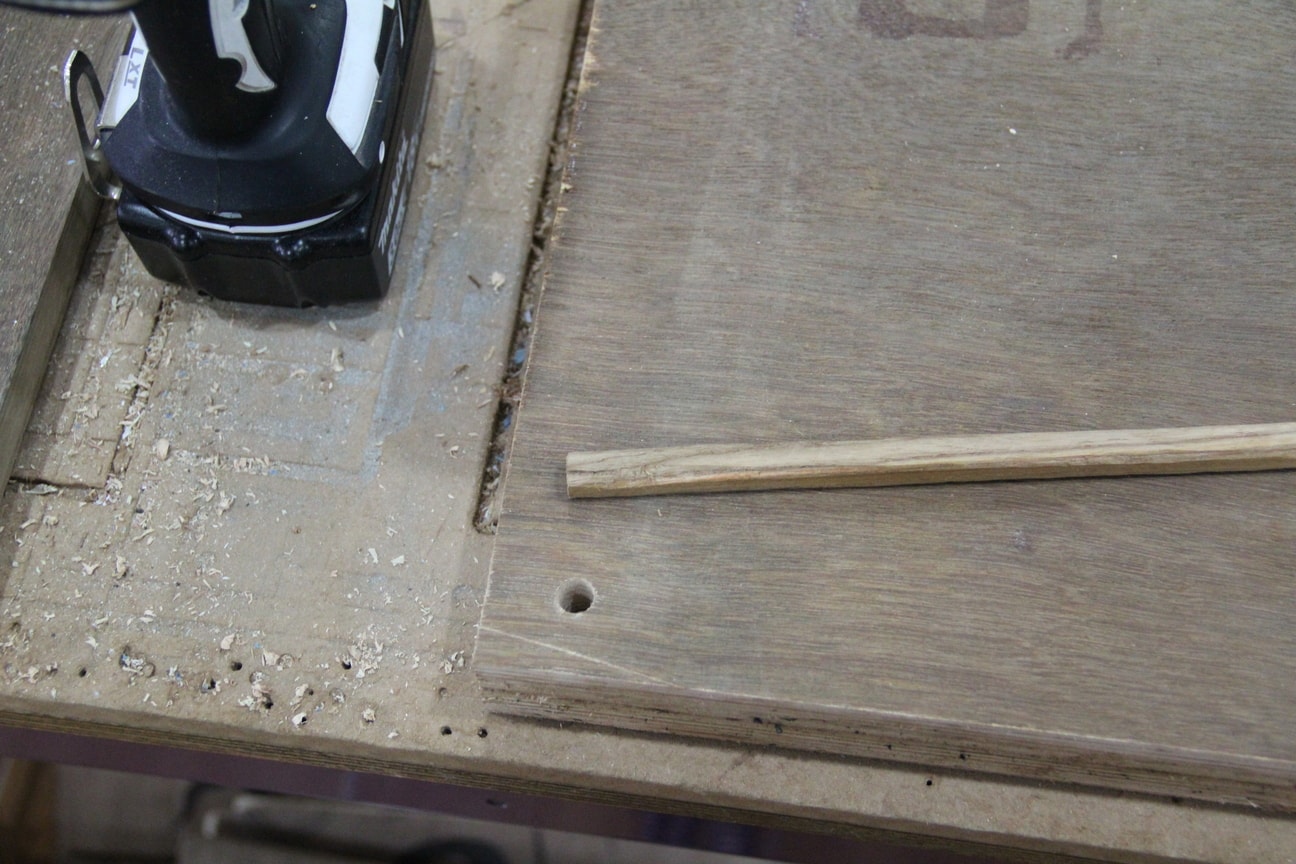
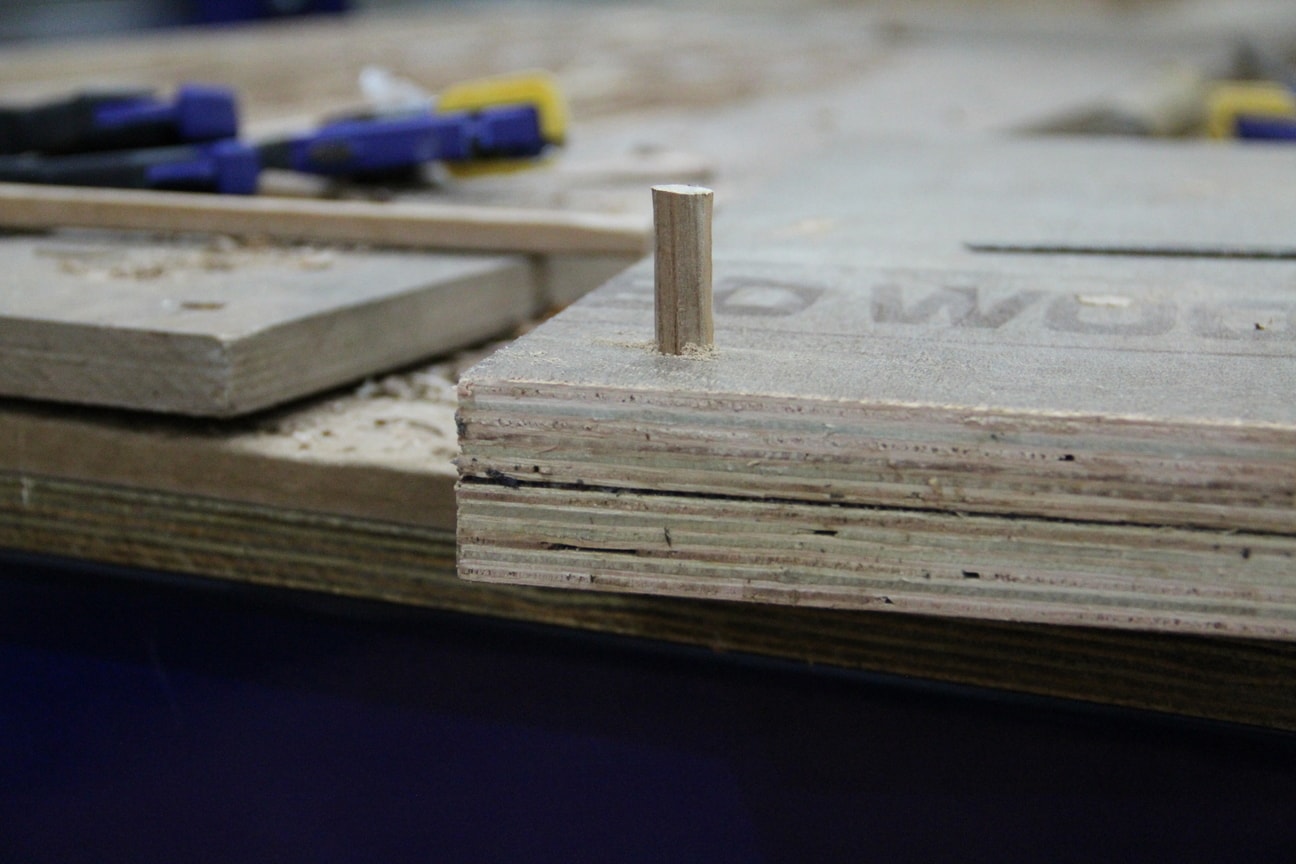
Like this i made several holes and inserted the wooden reepers and the extensions were cutout using the hacksaw blade.The final stacked part is shown below. You have to give sufficient wooden nails to the model area than outer surface this will keep the model aligned in both the pieces.
Machining of Dust pan
The stacked part is fixed to the shopbot bed using 2.5inch drywall screws in the corner. The first part of machining is to make the profile path of the model. The design file was exported into .STL format and saved. In week7 (computer controlled machining) we used Vcarve pro for cutting the 2D designs, since this is a 3D design we cannot use V carve. The particular software used to process the 3D designs is Partworks3D software. All you need to open the saved stl file in partworks3d. The setup is shown in the below pictures.
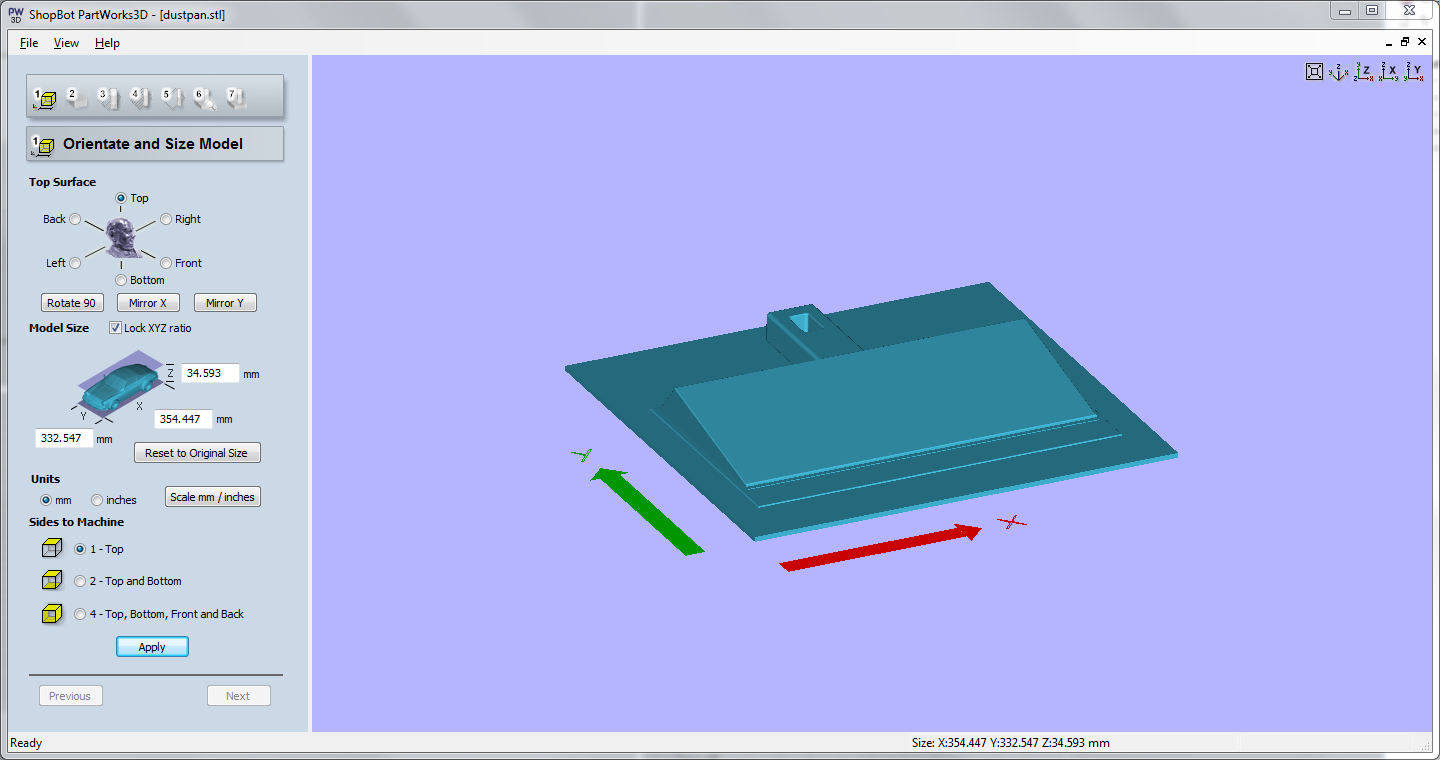
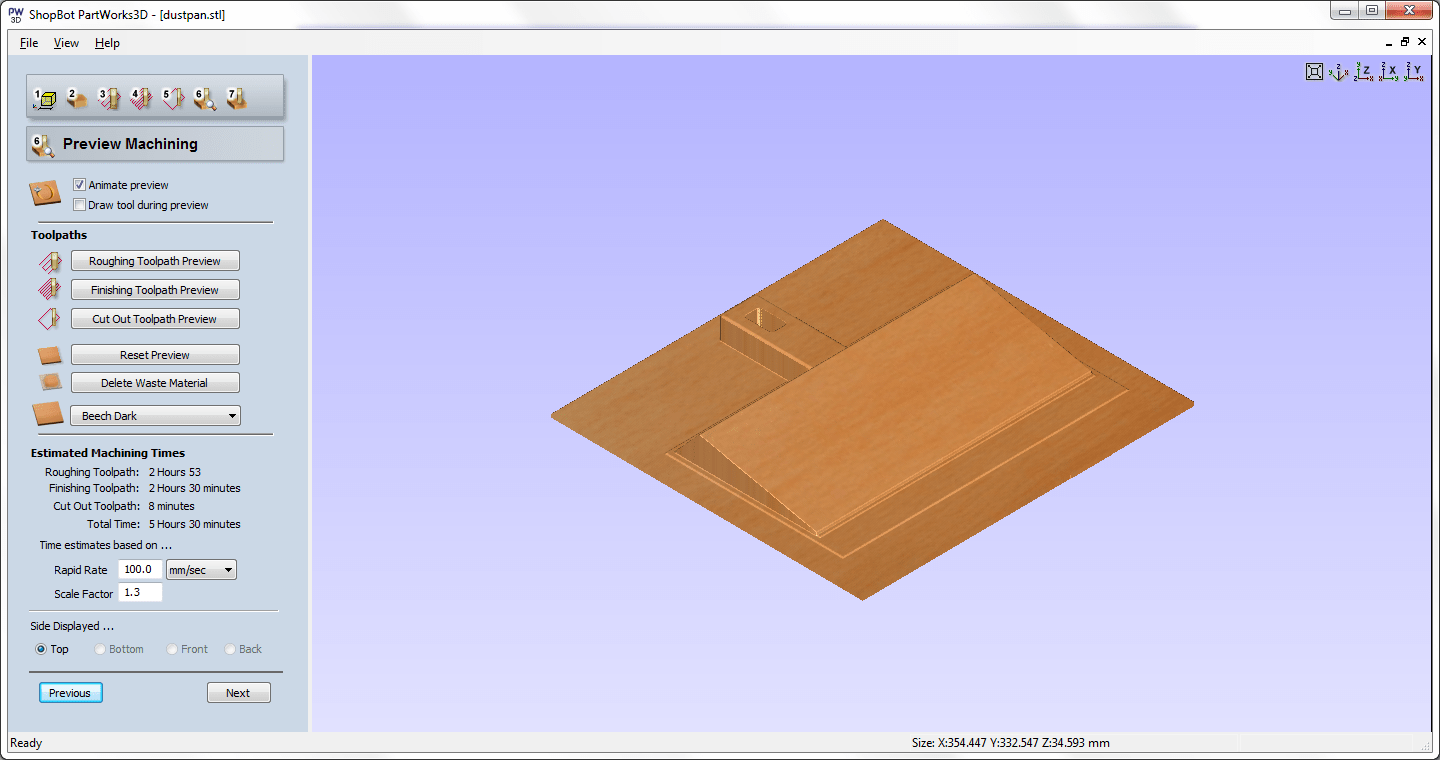
Step1: The below showed image is the first step and in this you can see the dimensions of our model and we can change the orientations of the model for machining.
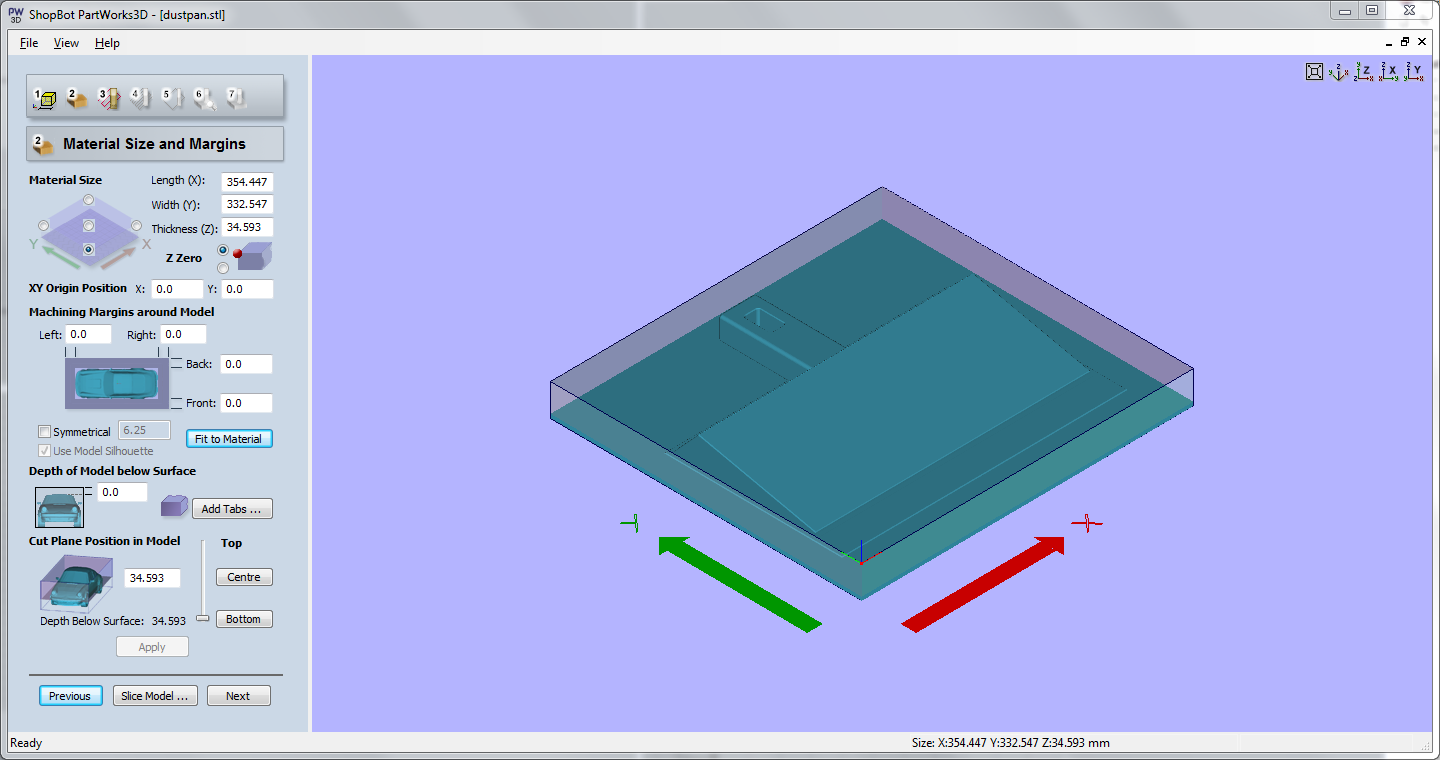
Step2: In this step you can set the material sizes ,margins and set the xy origins and the Z zero positions etc.
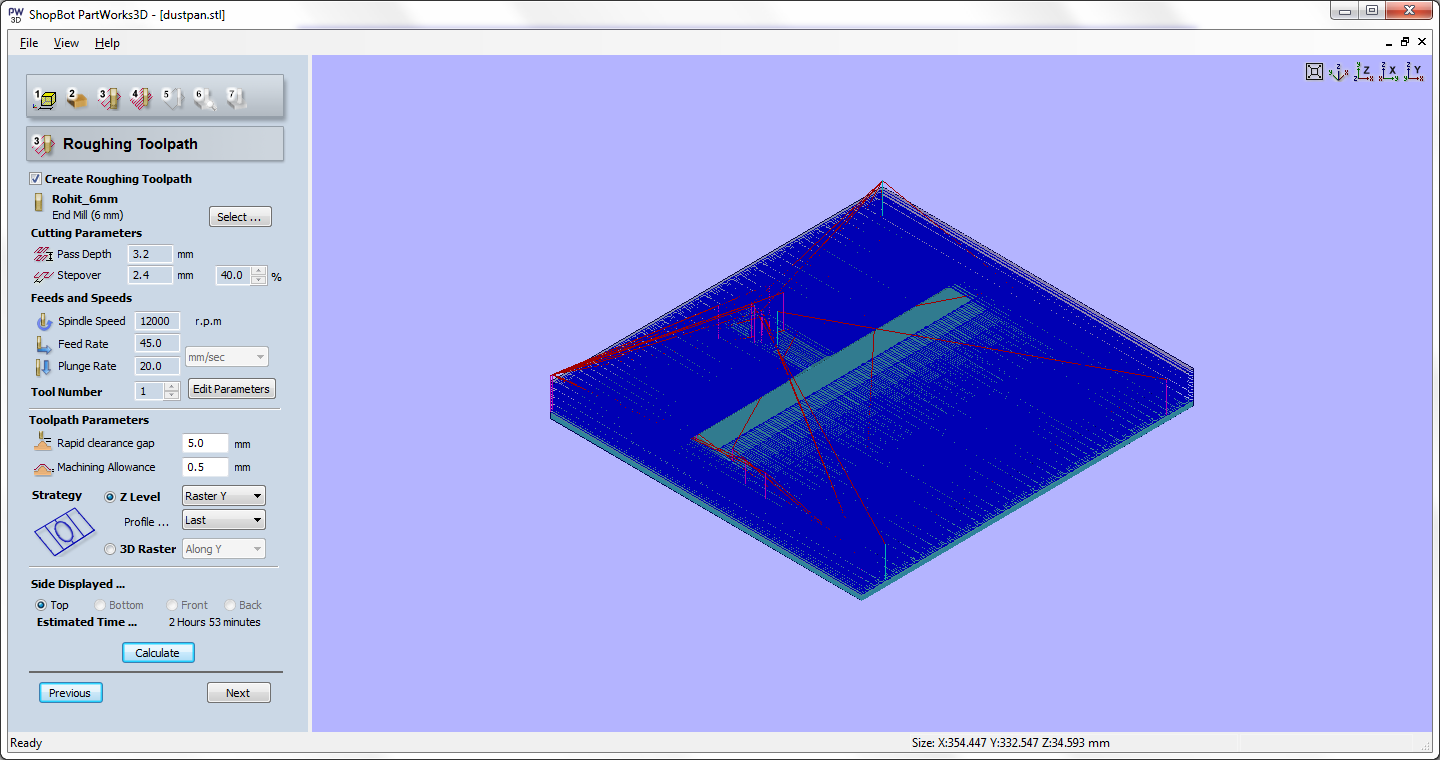
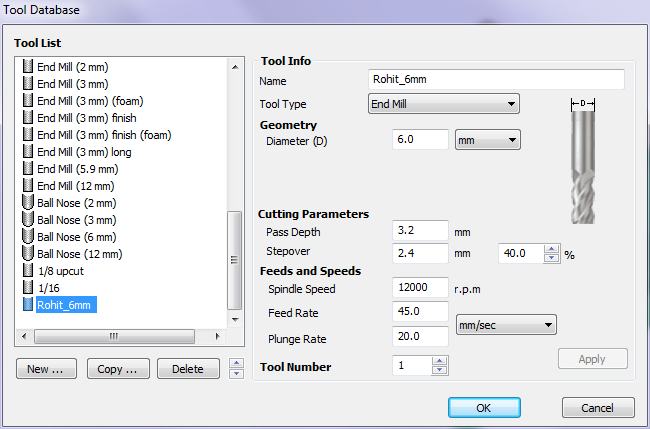
Step3: Next is the roughing toolpath creation, In this step we can select the bits we are going to use in my case i have selected a 6mm flat end mill for doing roughing. we can directly change the tool parameters and other stratergies from this window. After setting the parameters we can simulate the profile to know about the time estimate. It showed 2.53 hours for me. We can jump to the next step by just clicking the next button also we can go back to a previous step by pressing the previous button. The parameters given for 6mm bit is showed in the next image.
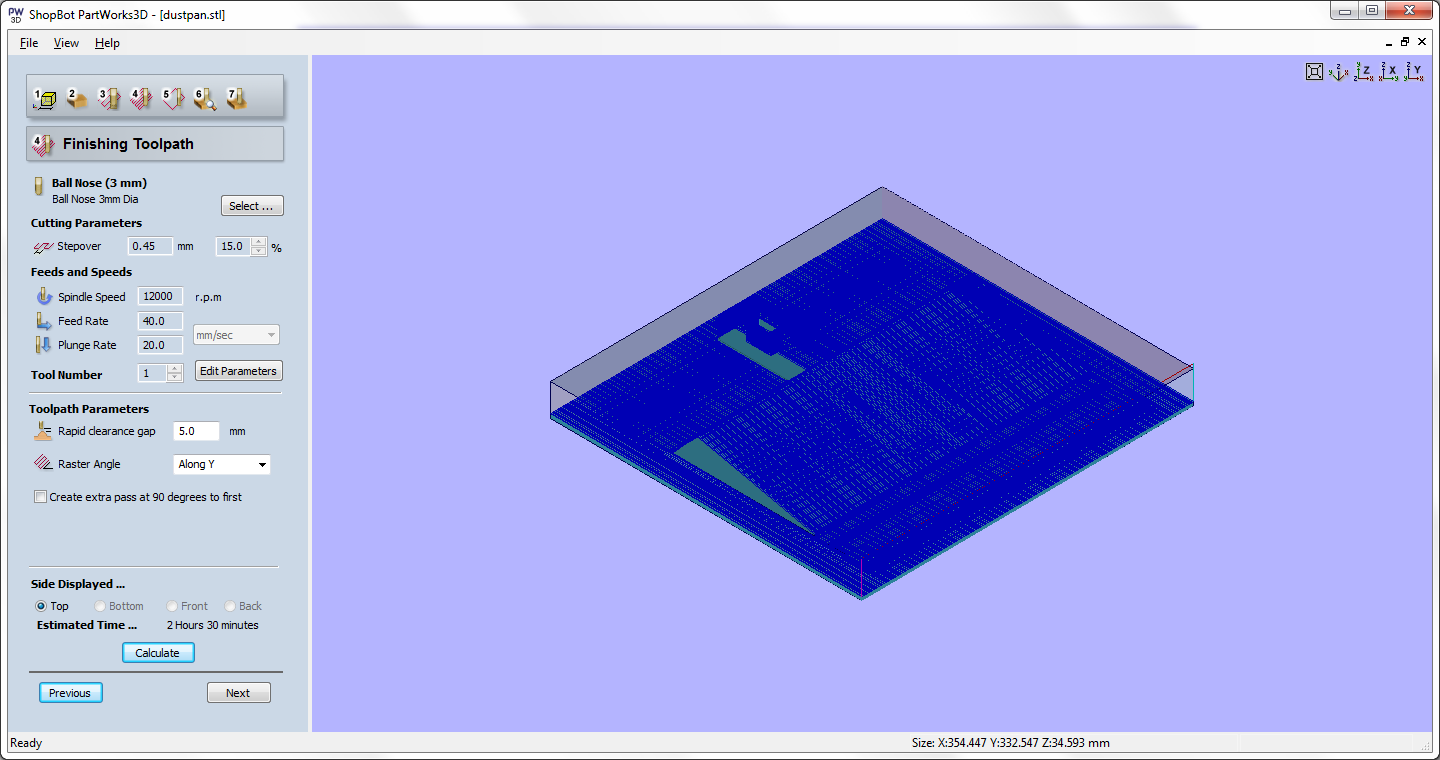
Step4: This is the finishing toolpath of the model, In this also we can select the bits and other parameters for finishing the part. I have selected 3mm ballnose endmill bit for finishing purpose. Simulated the toolpath and showed 2:30hours of finishing tool path.
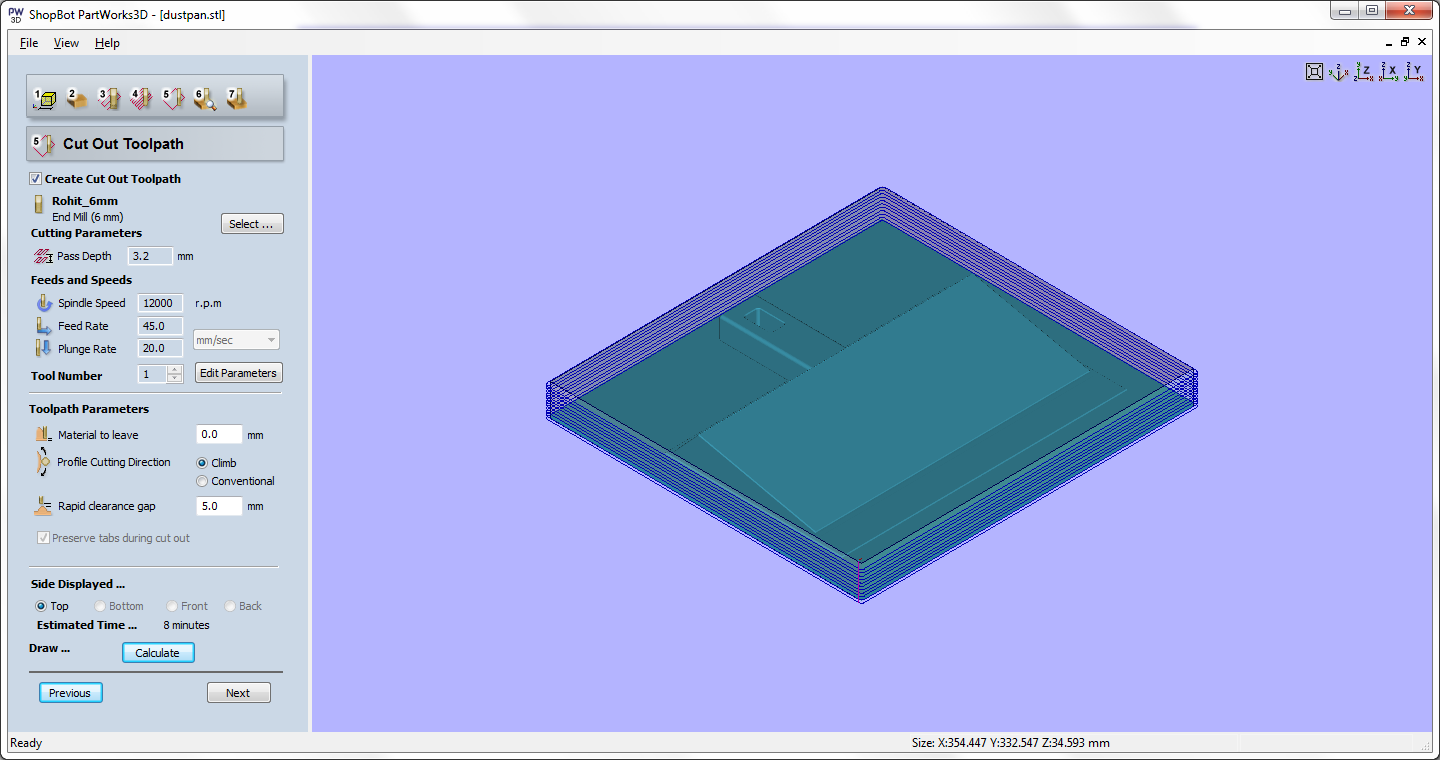
Step5: This is the final profile path, if you want to cut out the model from the piece we can give the cut out toolpath. In my design i added some extra dimensions to fix the part on the shopbot, So i selected the 6mm bit for cut out the part. It showed aroung 8minutes to cut the part.
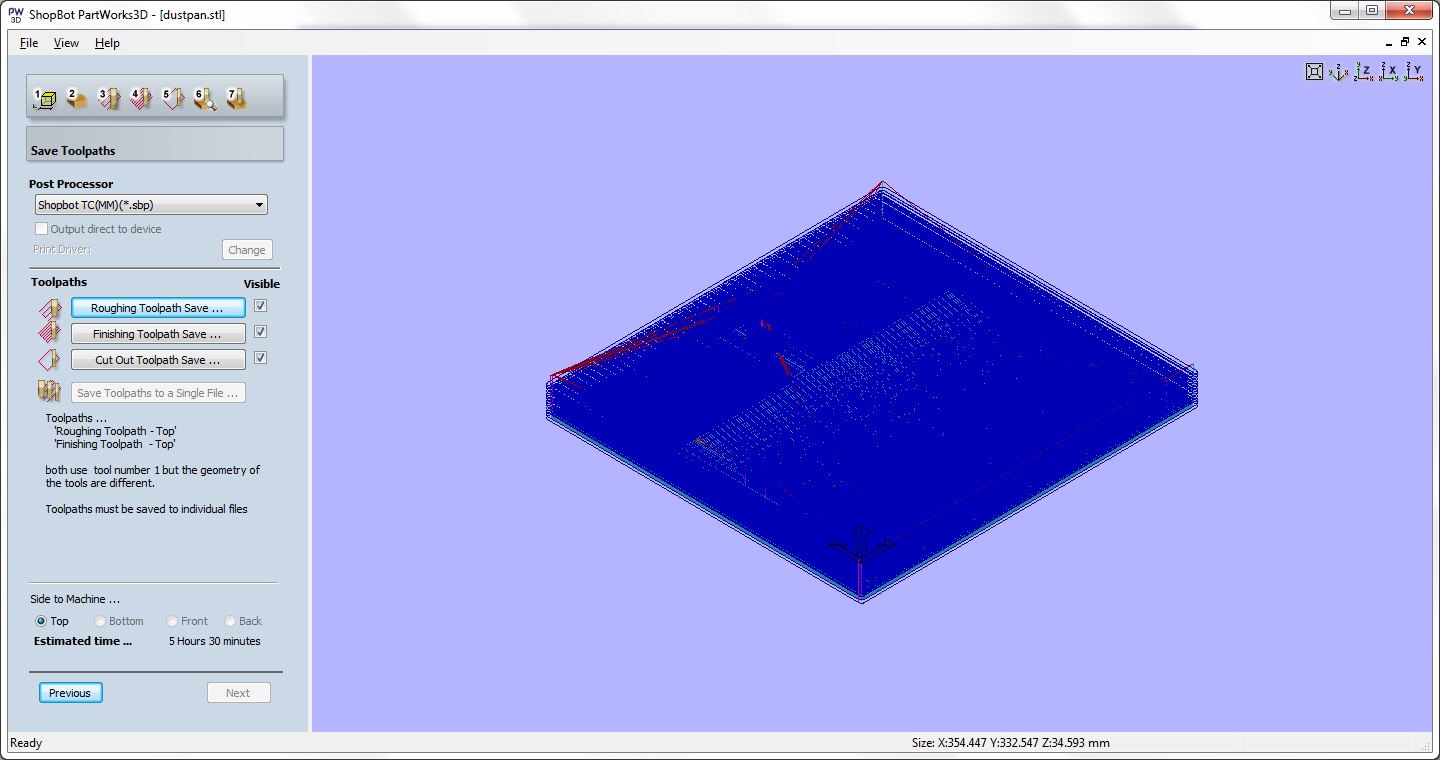
Step6: In this window we can see the simulations of each profiles, we can check and if necessary we can go back and do the modifications in each profiles. After the check you can click next so that the final window will appear and from that we can save the individual shopbot files in .sbp format so that we can process in shopbot.
Dust pan machining in Shopbot
You can follow the procedures i had done in my week7 documentation regarding the settingup of shopbot, i followed the same. First set the 6mm flat end mill and started the machining process.

The image below is the completed roughing and finishing stage of dust pan.
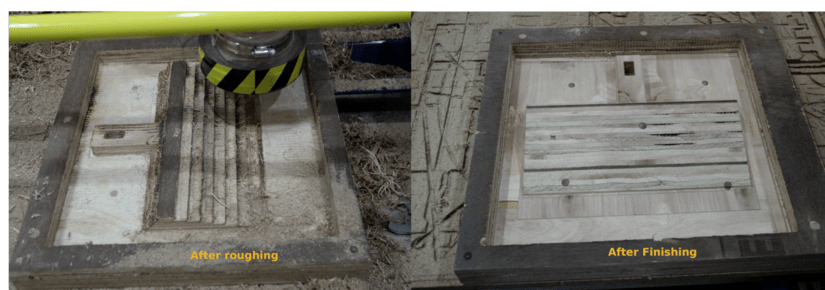
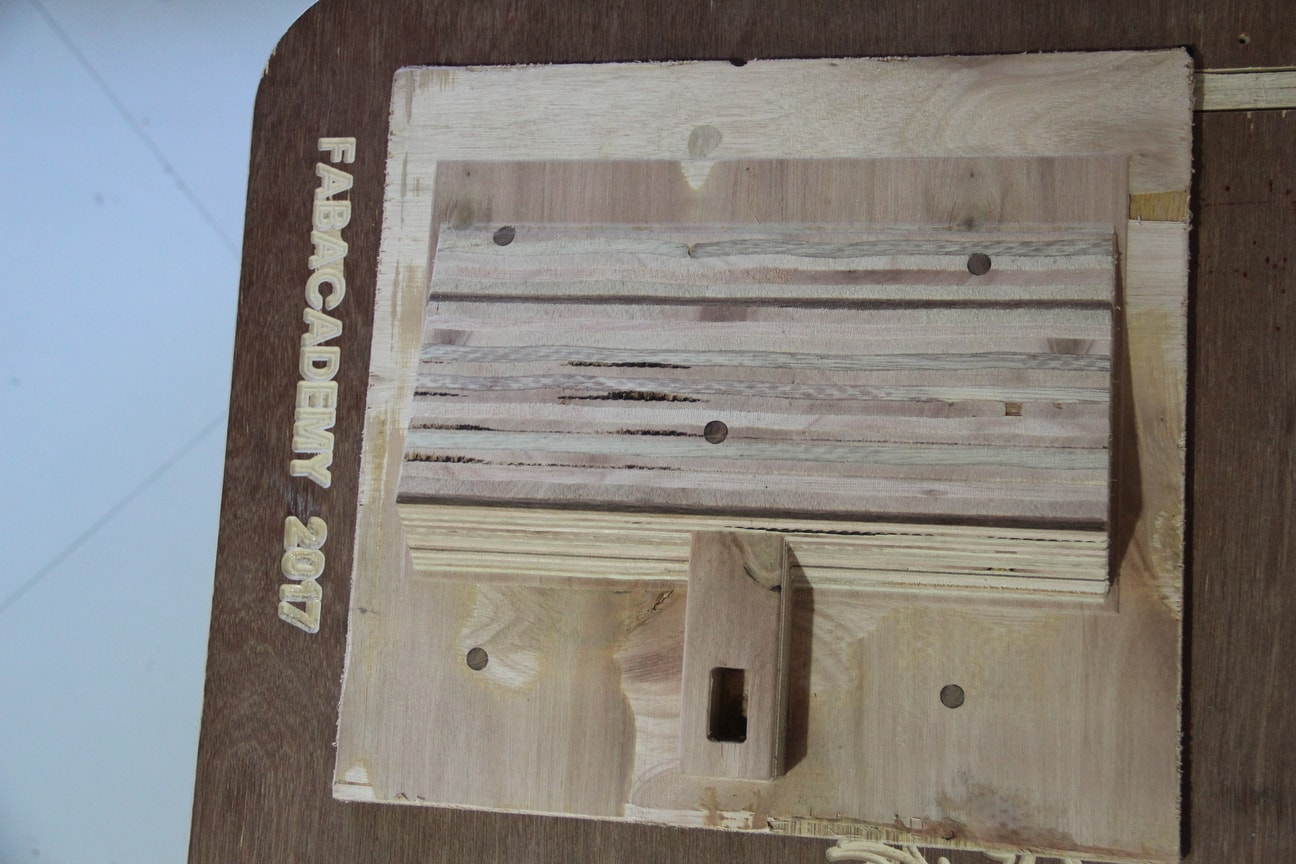
Finally it came like this, next i had given the cutout path in shopbot and cutted out the model from the whole stacked part. The final mold of my dust pan is showned in the next image. In both images the wooden nails are clearly visible, Redundant stacking of the plywood pieces gave good results, I didn't get any deviations in the mold.
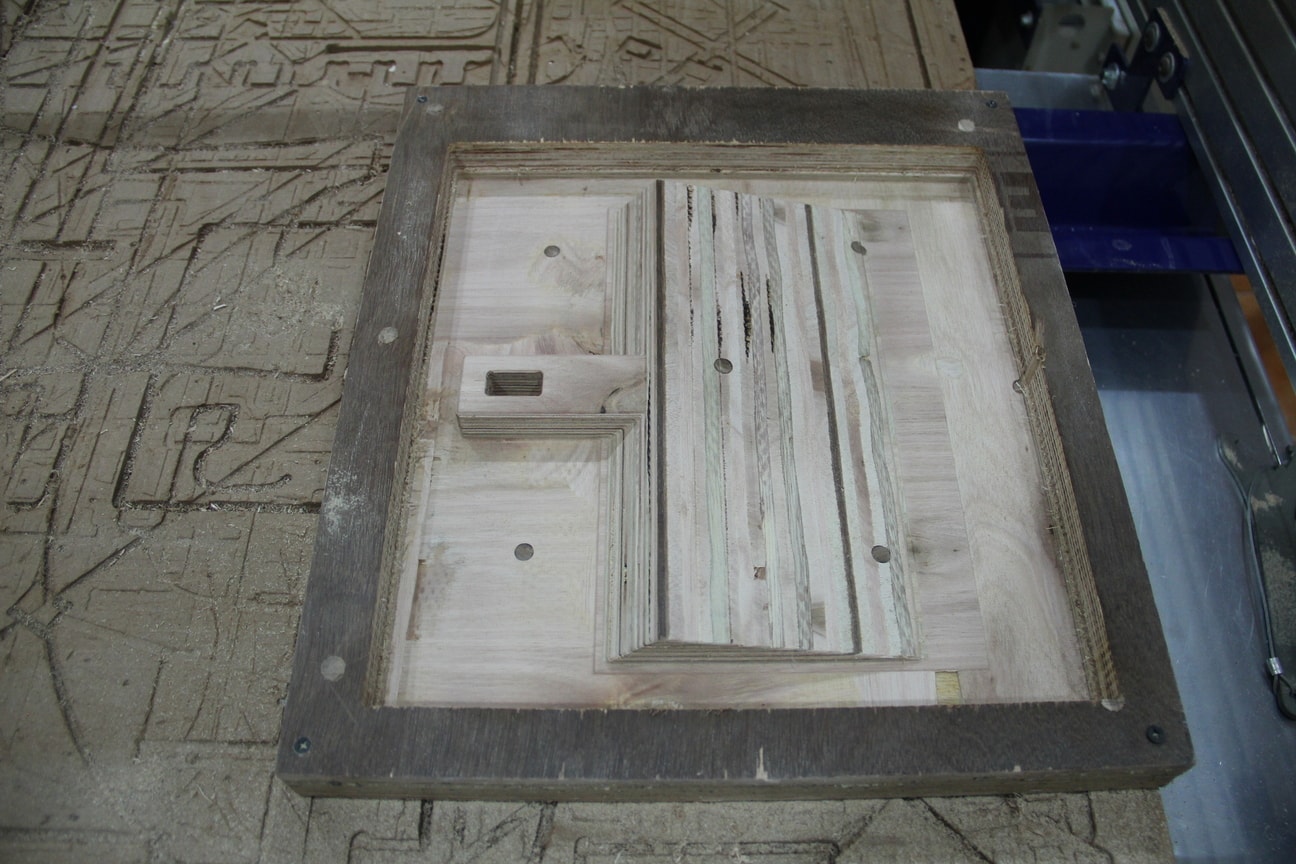
My dust pan part is ready for making the coposite.
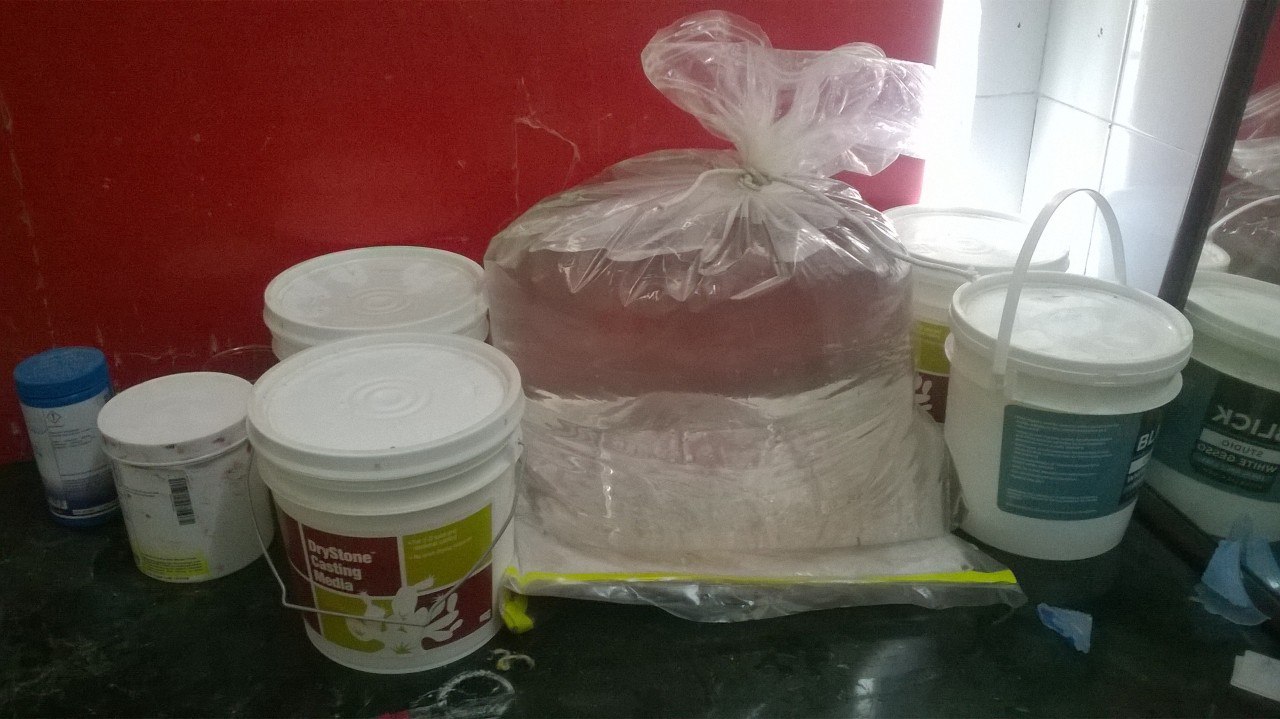
Materials preperation for composite
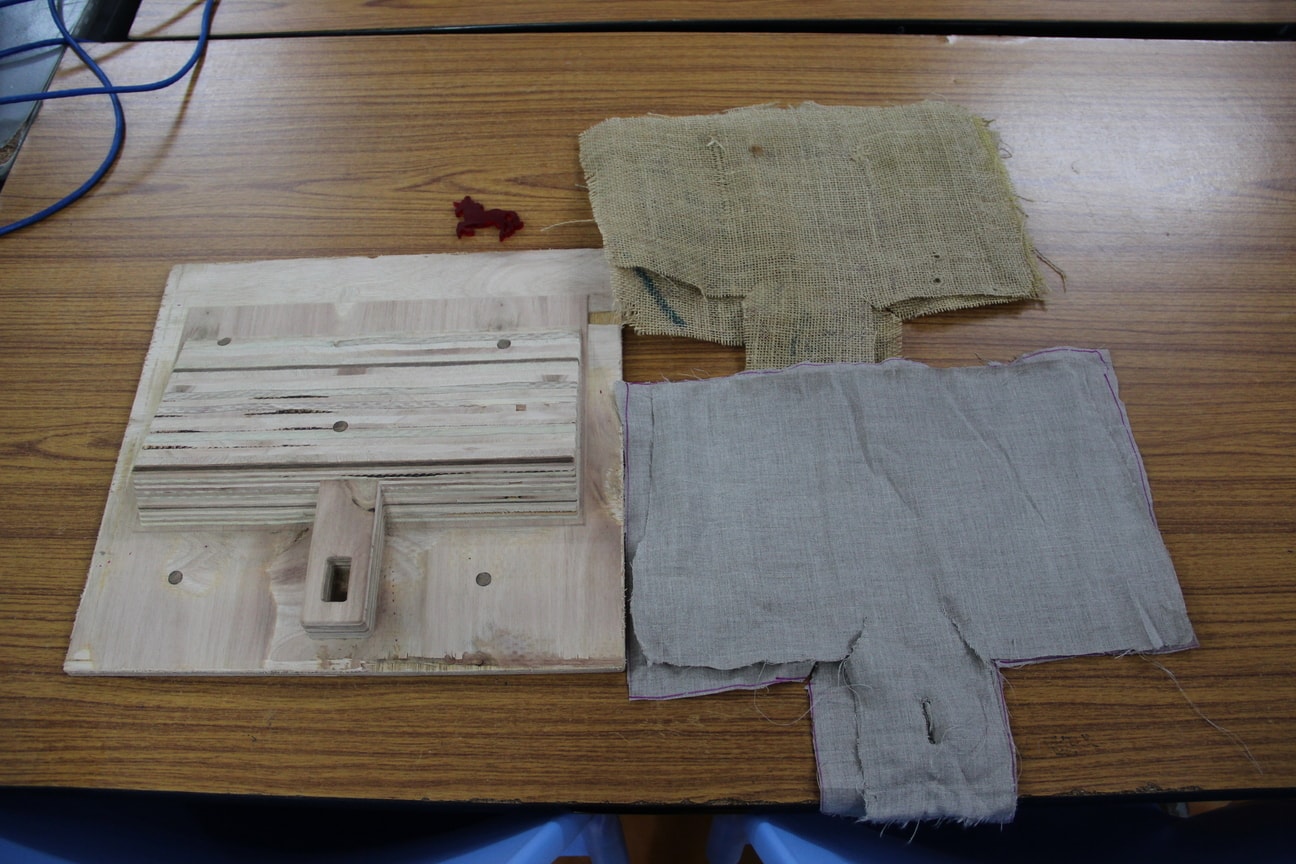
Next is preparing the fibre materials for making the composite. I purchased some burlaps and we had cotton lint cloths available in our lab as fabinventory. I am planning 5 layers of composite so that it will give approaximately 8mm thickness to the walls. Shaped the cloths and burlaps in the required shape as shown below using the knief.
Vaccum bag preperation
Vaccum bagging uses a vaccum pump to extract air from inside of the polythene bag where the casted composite mold is placed and compress the part under atmospheric pressure inorder for the compacting and hardening process to takes place. We can use the vaccum sealed storage bags with seals, Some bags are available here from the last academy but it was leaky. I planned to make a vaccum bag with polythene bleeder release bag and vaccum sealing tape. Required dimension of bag sheet are cut using scissors and made the bag by sticked the sides using vaccum seal.
Next is making a seal for the bag, i got a design of the seal from thingiverse and printed it in ultimaker 3D printer. Later the seal was fixed on the center of the bag and additional vaccum seal has applied to the sides of the seal to avoid leaks. The complete setup is shown below.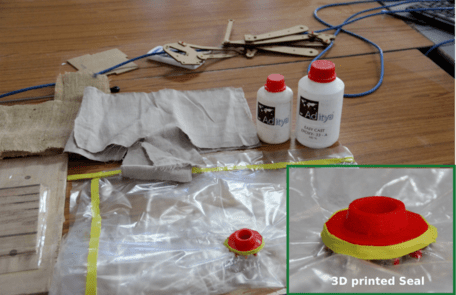
Matrix
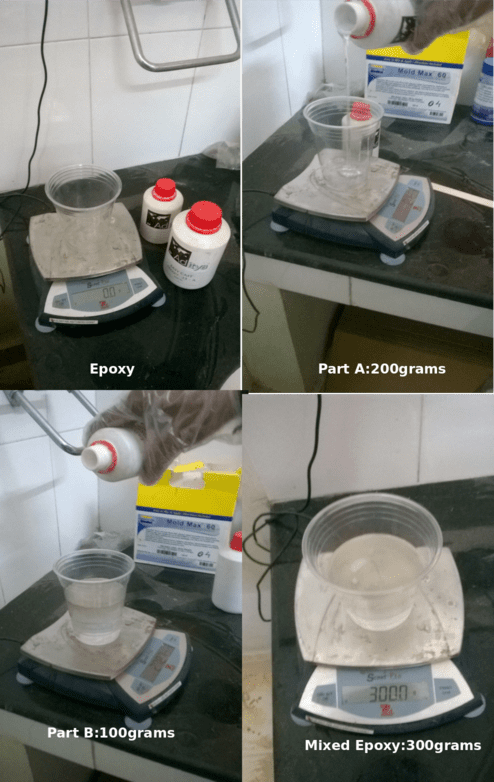
In our lab we had Easy cast epoxy 33 a epoxy resin purchased locally is available. It is a two part transparent epoxy resin, gone through some of the specifications of it from the product website, and understand the use of it and its technical specifications. The mixing ration of the resin is 100 : 50 (Part A:Part B) some features i found from the technical document is listed below.
- Very less viscosity like water
- Will cure at room temp in 24 hours
- Can Cure in 30 minutes if heated at 65 degree centigrade and poured
- Resting time:2hours
- Shore hardness: ~ 80 shore
- Safety: wash the area with soap under plain water.
Preparing Matrix
The mixing proportion of the material is 100:50, I had taken 200 grams of epoxy A part and 100 grams of epoxyB part in a plastic glass and mixed it very well with the wooden stirrers. Don't forget to take the safety precausions while using the epoxy. You have to wear apron sheets, eye glasses, gloves etc.
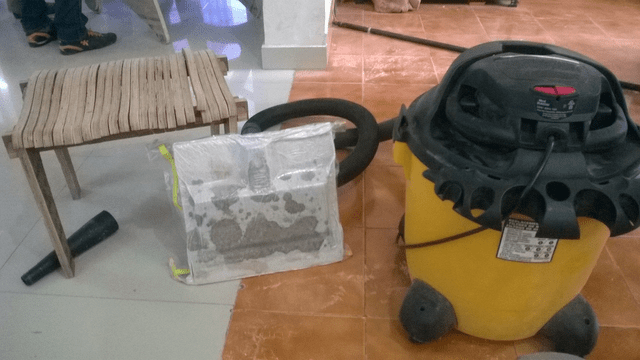
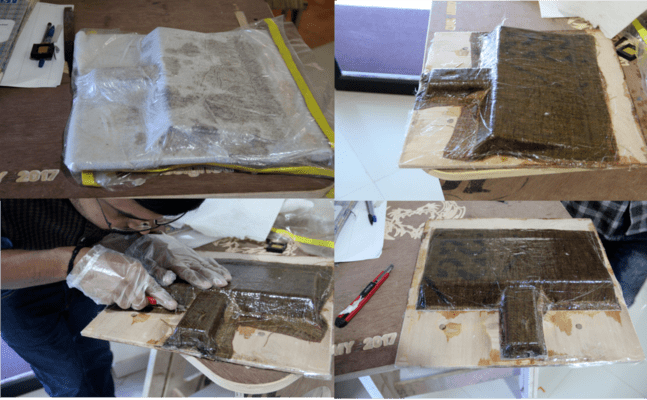
Before making the composite, We have to first cover our mold using adhessive tape/polytheen sheets , otherwise the resin may stick to the wooden mold. I used single side transparent tape to cover my mold. After that, shaped cotton lint was dipped in the mixture and placed in the mold as first layer then in the next layer burlap was put. Like this four layers i made and in the final layer one more cotton swap was layered using my hands i spreaded the resin throughout. Next the entire part is covered with polythene sheet and over that i covered with the breather fabric , the breather fabric will absorb the extra resins from the mold. The entire part is kept inside the vaccum bag i made earlier and used Shopvac 6.5HP vaccum cleaner and is shown below.
Issues Faced
The 3D printed vaccum seal was not perfect and while inserting the mold into the bag some resin material leaked into the bag so the vaccum seal didn't sticked well. When i stopped the vaccum cleaner the bag is immediately filled with air. Inorder to over come this in between i repated the vaccuming operation at intervals and the matrix slowly started setting. After that i placed the mold under a waterfilled bag for applying constant pressure on all the sides, kept it like this for 24 hours for setting the composite.
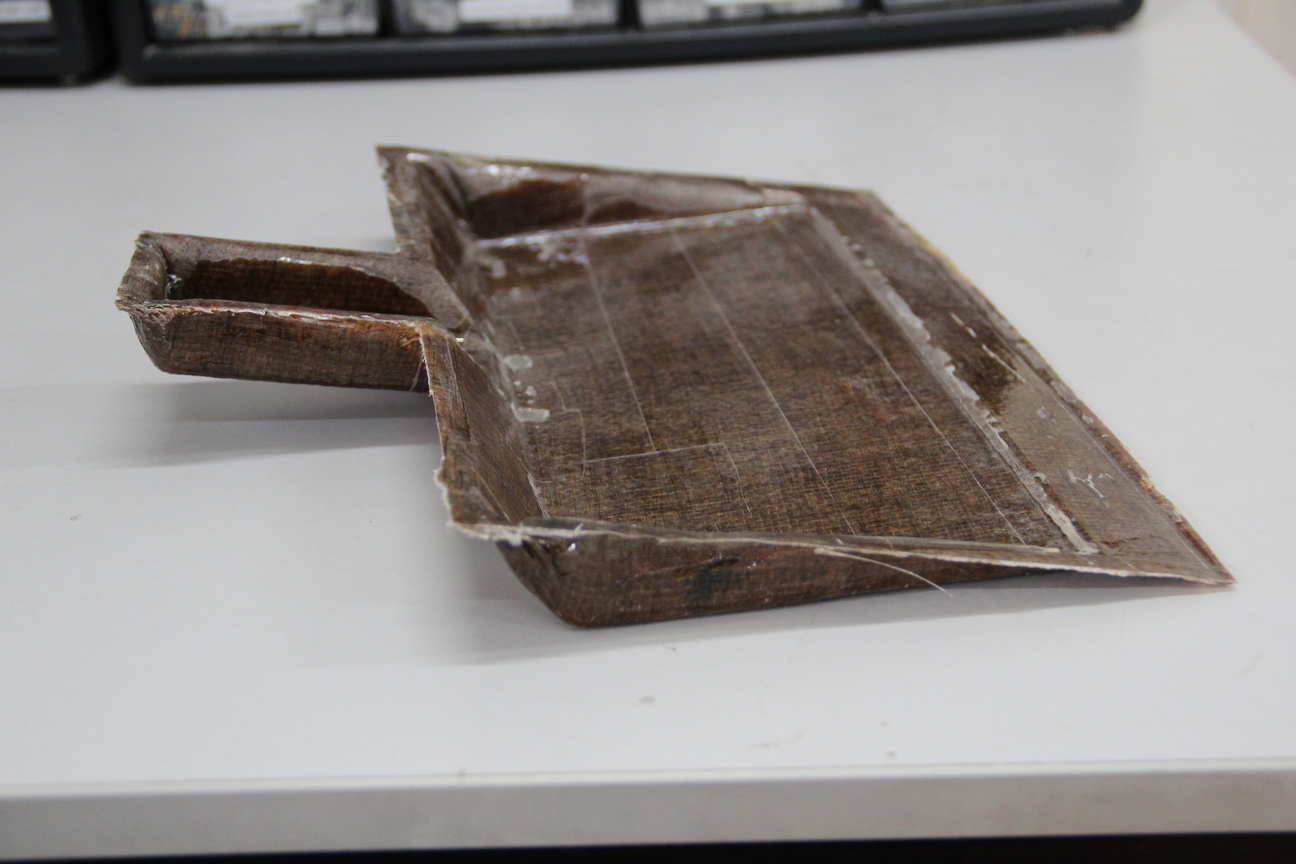
Next day the part was carefully removed from the vaccum bag and removed the breather fabric you can see in the below image how it came , the sides of the composite were cutted out using a knief and then i got a neat shiny dust pan.
The below shoed is the composite of the dust pan, everything i got correctly except the handle portion it came like a cavity , i know it was a design issue but still i am happy that it looks good.
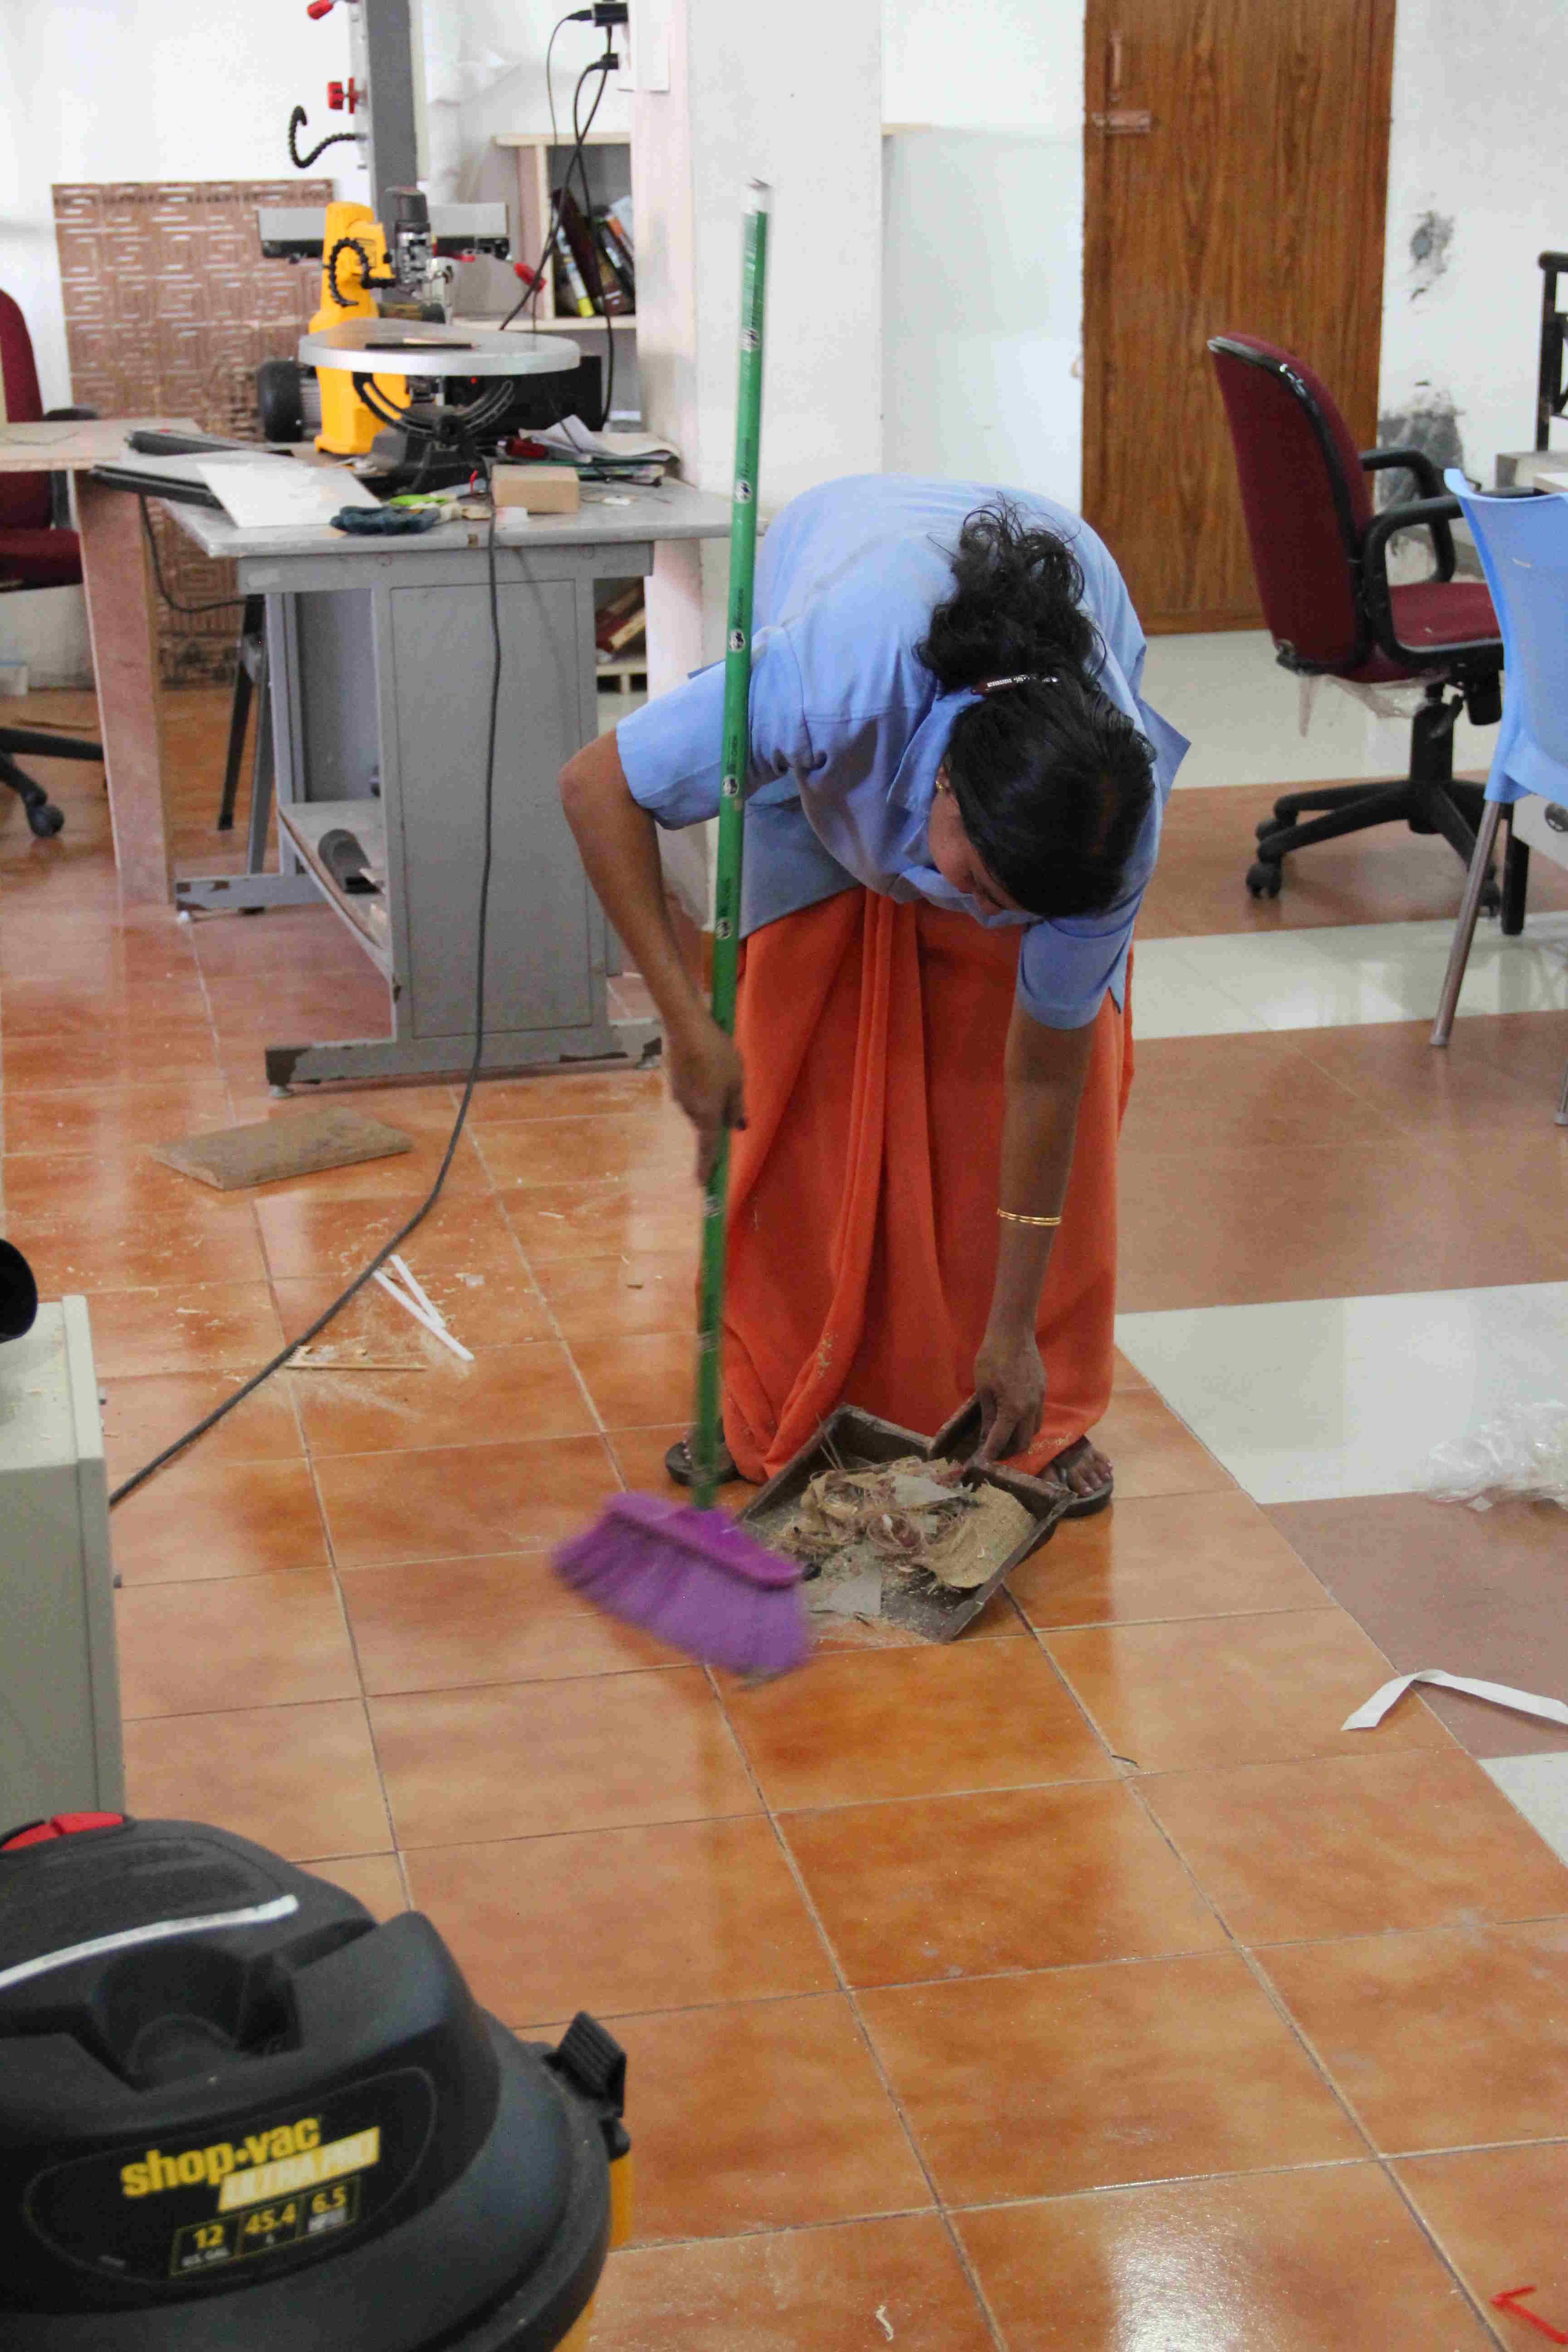
Demonstartion of Dust pan
I had given this to our cleaning staff while she was cleaning the wooden dust near shopbot area. She was very happy and used it and i am adding it as a heroshot of my assignment.