WEEK 12
MOLDING AND CASTING
ASSIGNMENT
- Design a 3D mould, machine it, and cast parts from it.
Preperation
This week i have gone through some documentations regarding Molding and casting , Some of them are listed below.
Molding and Casting
After going through the above documentation, I came to know more detailed about molding and casting. Molding is a manufacturing process by shaping the materials like waxes,wood,clays etc and casted with plastics, metals and rubbers etc. Casting is the counter part of molding. Molding and castings is used to make multiple copies of products within a short time and is widely used in the manufacturing industries. There are different types of molding and casting methods available and for this week i am selected a twopart mold and a single part mold. I made a process steps in draw.io for making two part mold is shown below.
I. Key Chain(Two part mold)
I started designing a keychain with map of our state, for that i downloaded the map of our state "Kerala" from internet , opened it and traced bit map of it in Inkscape. The file is saved as .dxf format and imported into Rhinoceros software. Some of the paths were not closed and some unnecessary lines were deleted from the design and scaled the map. Extruded the map as solid. Later i thought to make a two part mold , Given Kerala Startup Mission and Fab Lab Kerala logo in one side where in the other part designed with the map of kerala with a graphics which contains the name of our state in local language "Malayalam".

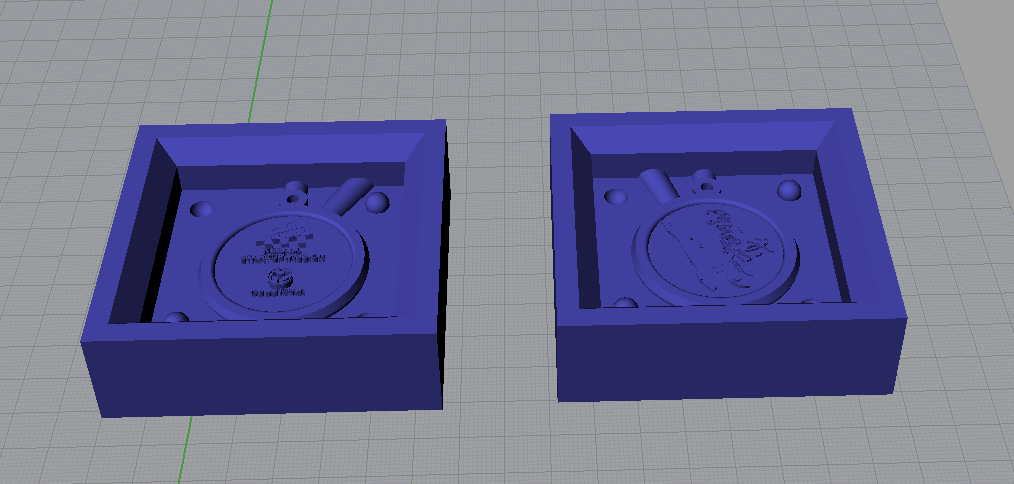
Next i made the other part of the mold by placing Kerala startup missions and Fab lab kerala logo and extruded like above, the completed design is placed in a rectangualr cavity. Inlet gate is given for pouring the material and added an extra gate as cooling channel for the mold. The design is completed and exported in .stl format to process it with modela. The screen shot of the design is shown below
Machining Keychain in Modela
Rough cut
The first step of making mold in modela starts with rough cutting. Rough cutting will remove large amount of materials, We can use different end mills for this. I have used a 1/16inch end mill for this. The raw material used is blue industrial grade wax, these are special purpose wax blocks for making molds for prototypes. Some specifications of the wax used is shown below.
- Hardness: 53 (Shore "D" Scale)
- Melt Point (Ring & Ball Method): 240 degrees F (116C)
- Viscosity 270 degrees F = 1790cP
- Volumetric Shrinkage (for recycling, from melting point to room temp): 5% typical
- Coefficient of Thermal Expansion (in./in. ºF): 9.5 x 10⁻⁵
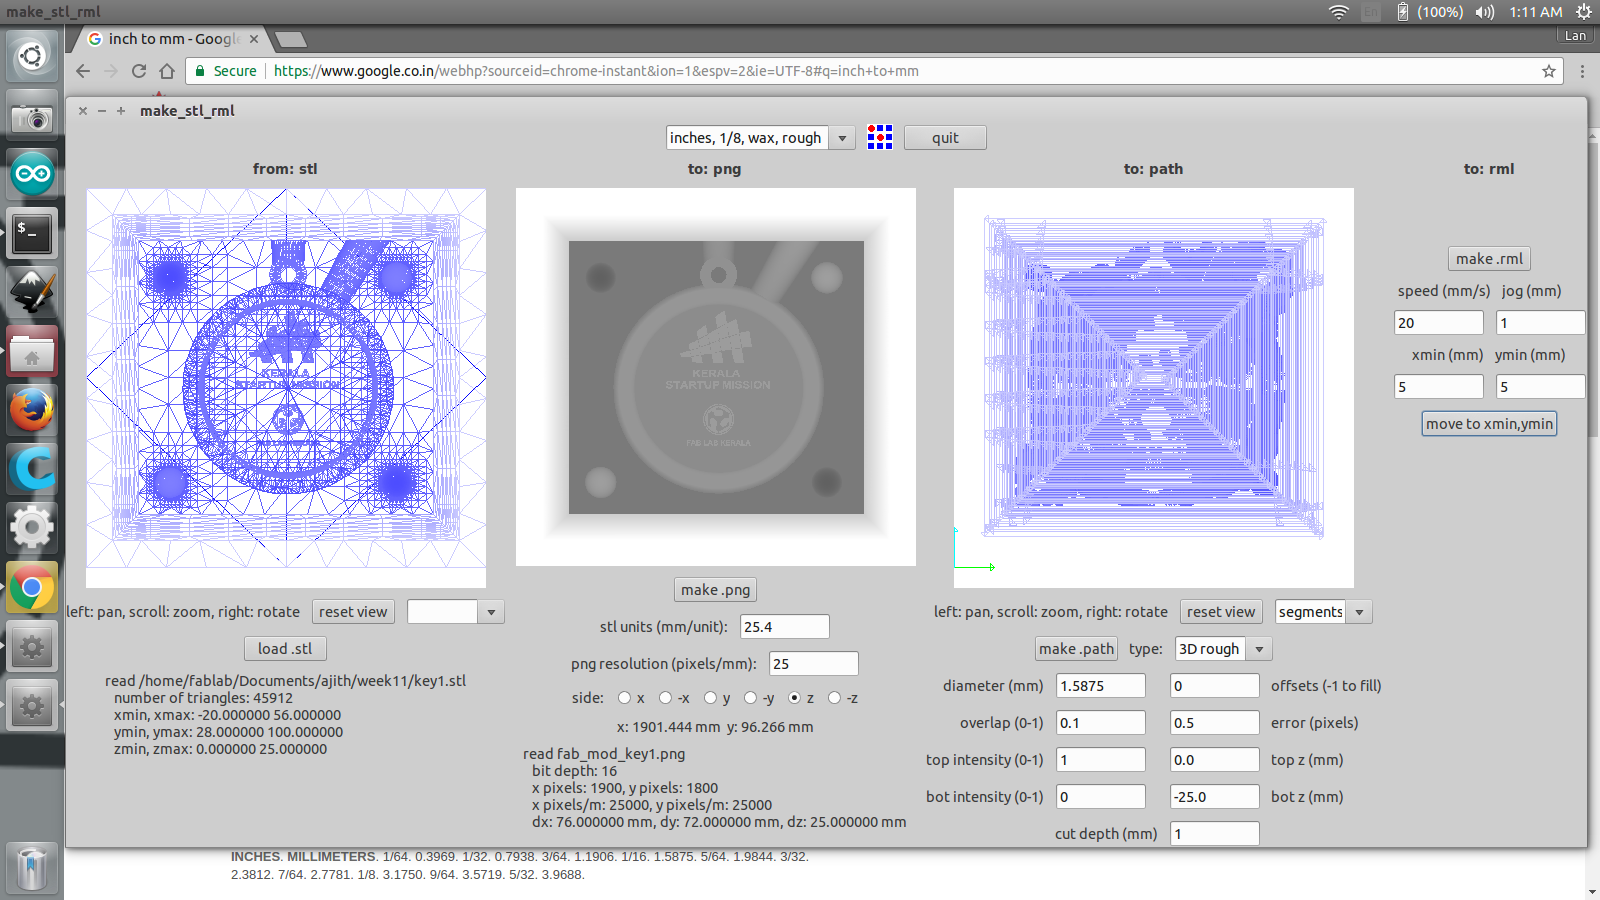
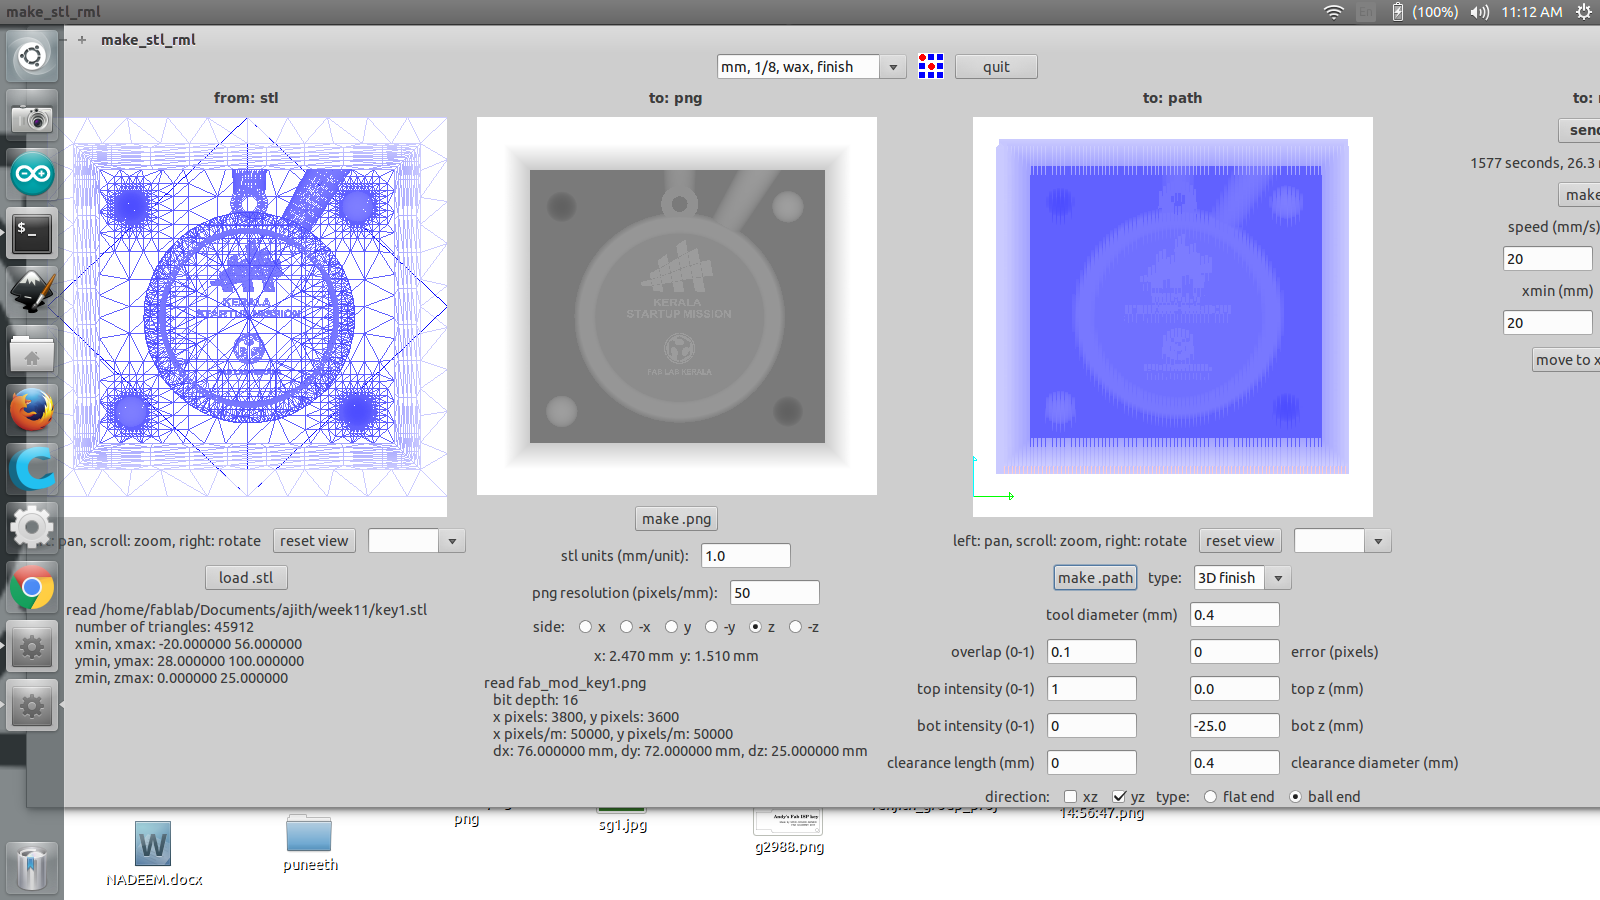
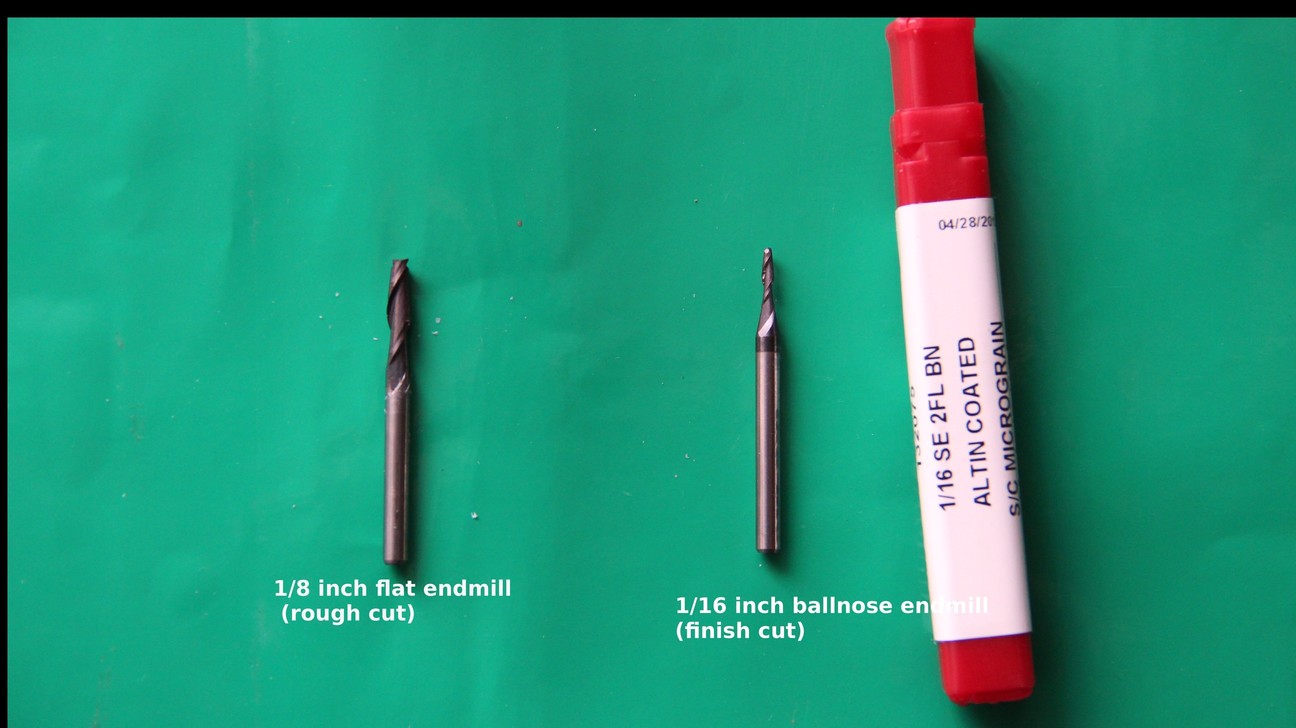
The wax is to be mounted over the base plate and rest of the settings are same like my electronics production week documentation. You can check the settings i have given in the image shown below. Here we are loading an stl file so first we may need to convert it to png from fab modules itself. The text and design in my design is small , so i selected 1/16 inch flat end mill for doing rough cut. The bits used for roughening and finishing is shown below.
I have done all the settings and loaded the end mill properly and set the origin. Next generated the rml file and send to modela, and it started machining my keychain and the screen shots are shown below.
Finish cut
The second processing step of mold making is finish cutting. This will give a better surface and other details perfectly. In my key chain the logos,text are small in dimension inorder to get those minor designs i have opted 1/64inch ballnose end mill. The processing steps and the parameters given are shown below.
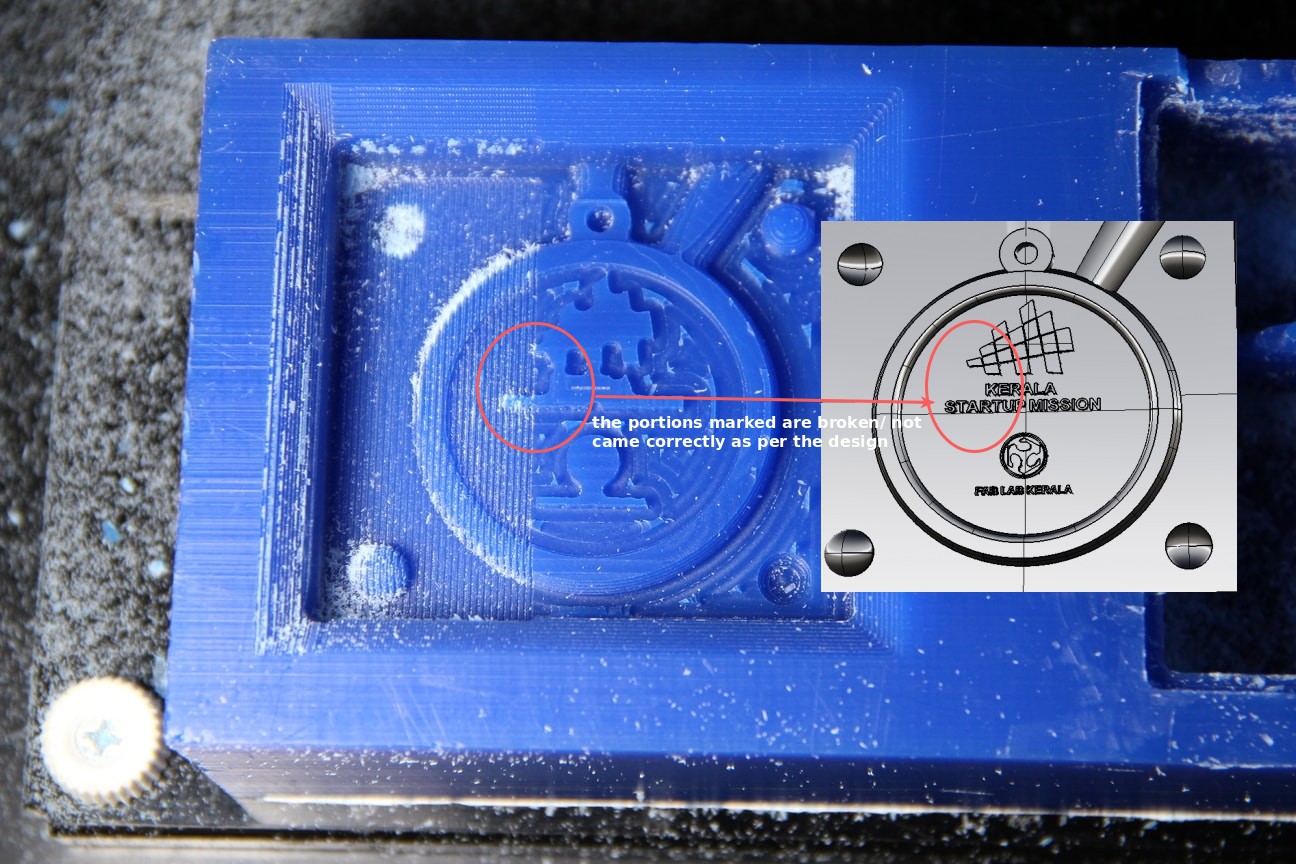
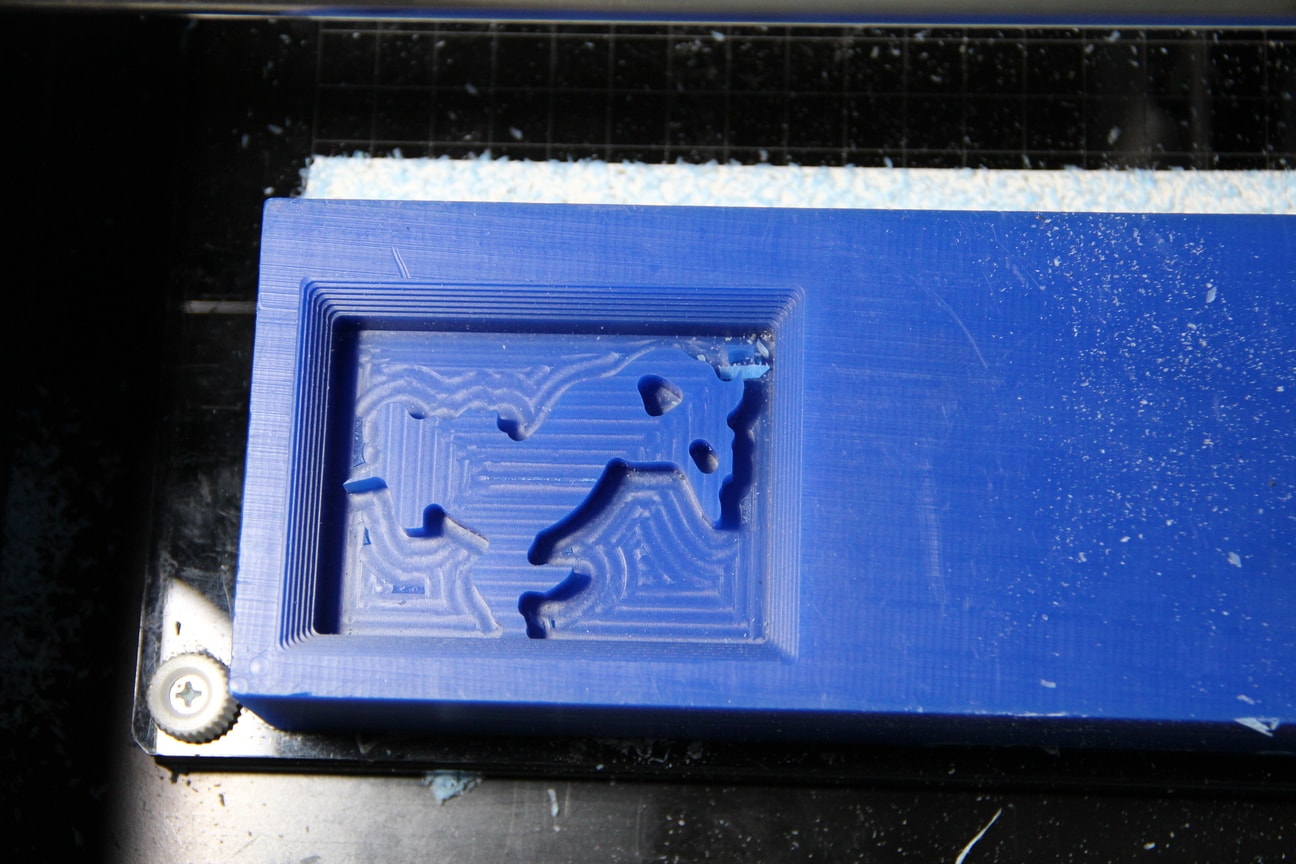
While continuing the machining, I had noticed that my text in the part is not comming correctly and some parts are being broken, So i stopped the machining. On further analysis i found that my design text and other designs are very small so while doing machining the parts are being brokened it is shown in the picture.
Processing the job in fabmodules showed aroung 26 minutes but actually it was taking more time , when i finished at this level it takes aroung 1:00 hour which got broken also. I was not sure about the successful completion of the mold. So i stopped the machining and planned to make something else.
Download Keychain design files(.zip)
II. Unicorn mold (Single part mold)
I searched and inspired from a Unicorn model from google, so planned to make a keychain with it as my second tryout. First i tried drawing the model of it in rhino and it didn't worked out , later i downloaded the Unicorn image file and imported it to inkscape and converted to .dxf.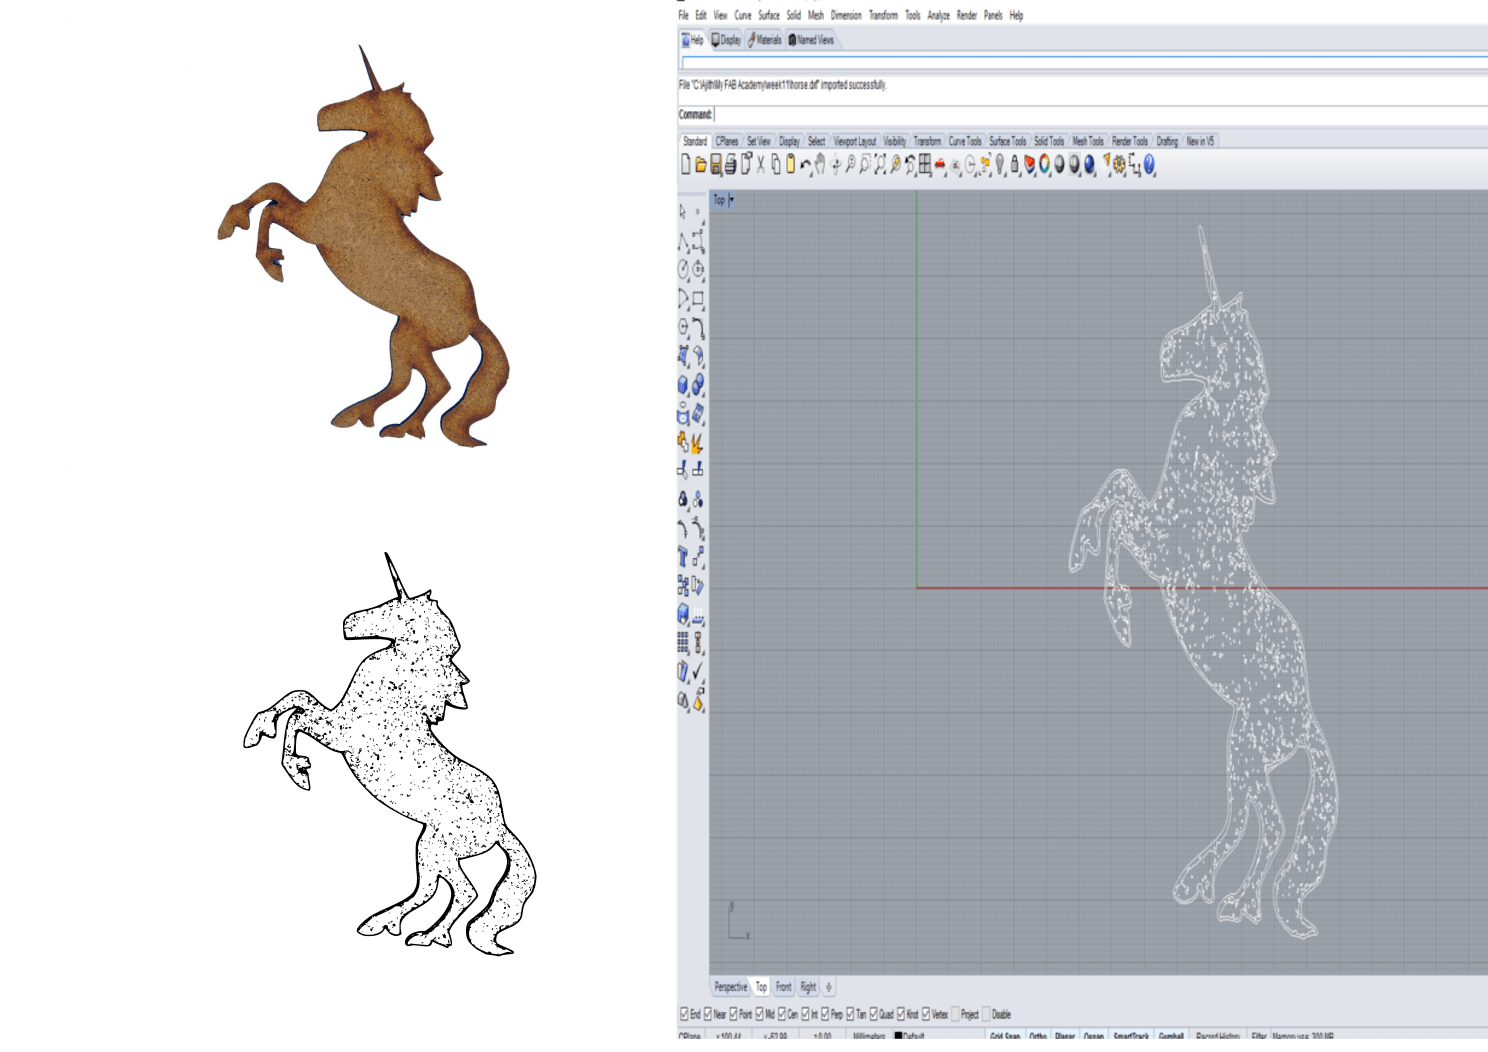
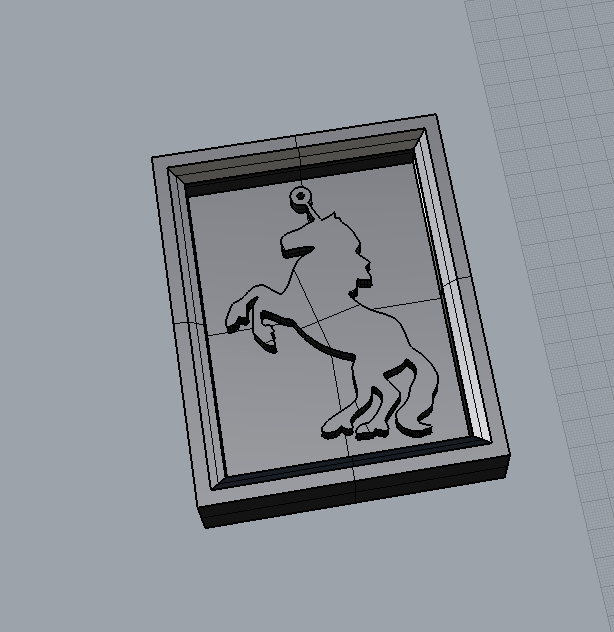
The file was imported to rhino, extra lines were deleted and extruded the design files added holes for the keychain and housed in the cavity mold. The image of my completed mold is shown below.
Machinig the industrial grade wax in modela
Rough cut
Followed the same procedures i have done for my keychain machining. Selected 1/8 inch flat end mill rest of the settings are shown below.

It taken around 30minutes to process the job in modela, I didn't get any problems during the machining and after 30 minutes of machinig in modela, it was over and i got the rough cut of my mold.
Finish cut
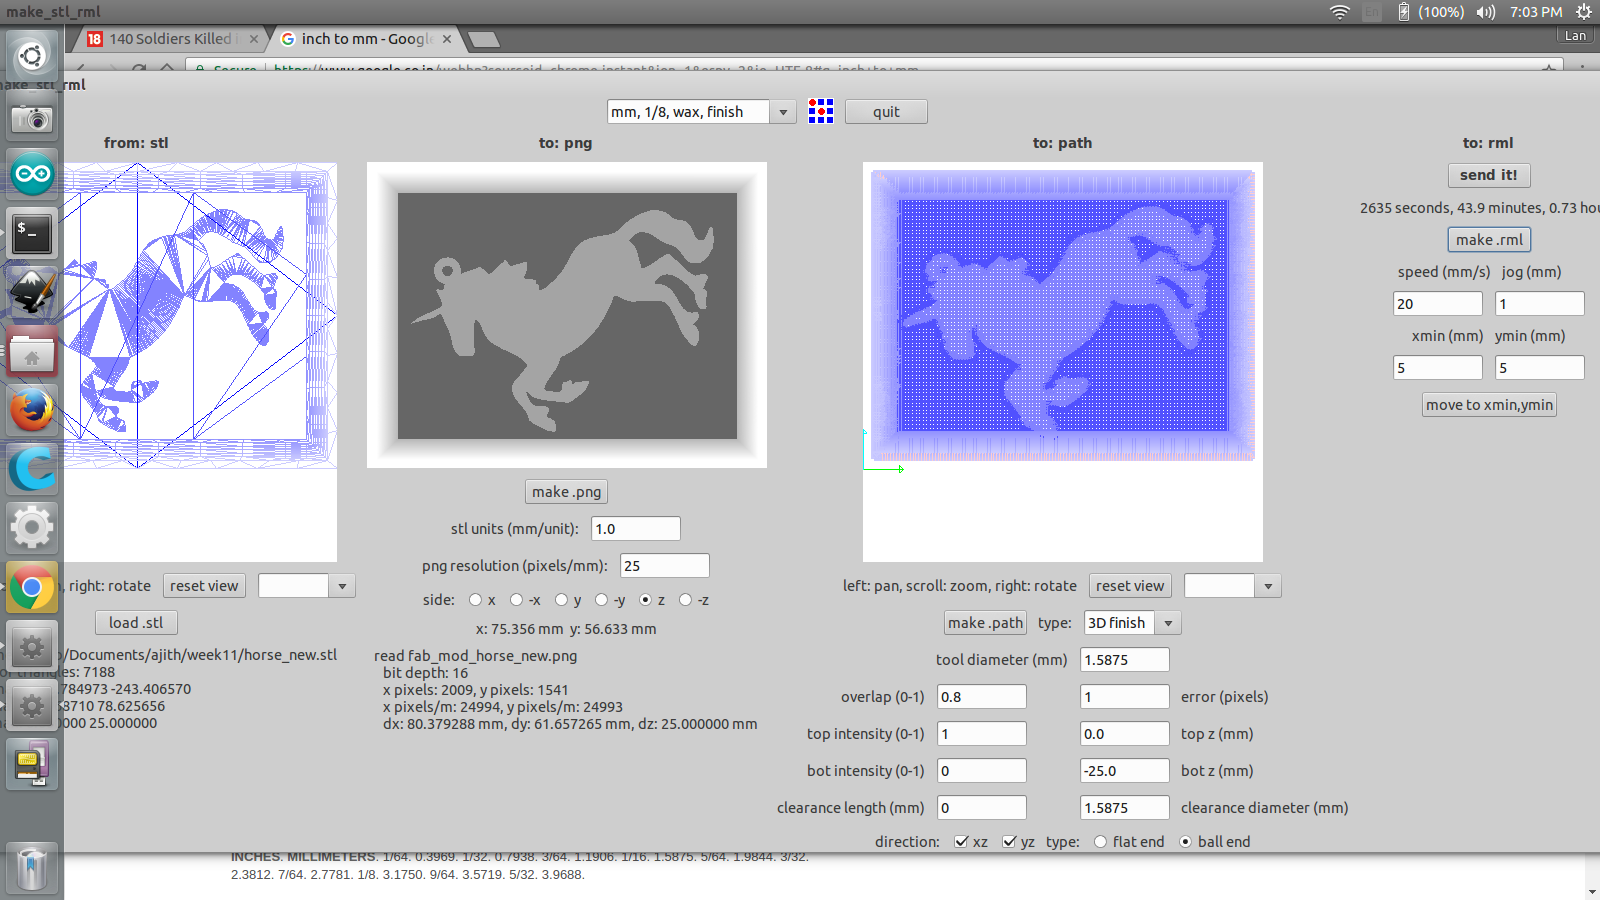
For finish cut i have selected 1/16 inch ball nose end mill, In fab modules there is no 1/16th inch bit available but we can select the 1/8th inch finish cut and change the tool diameter from 3.175mm to 1.5875mm (for 1/16th inch). Next important setting in this step is overlap, you have to give sufficient overlap otherwise the mold won't give a perfect finishcuts in my case i have given 0.8 as overlap. You can refer the settings given from the below screenshot.
The bits i used are showed below
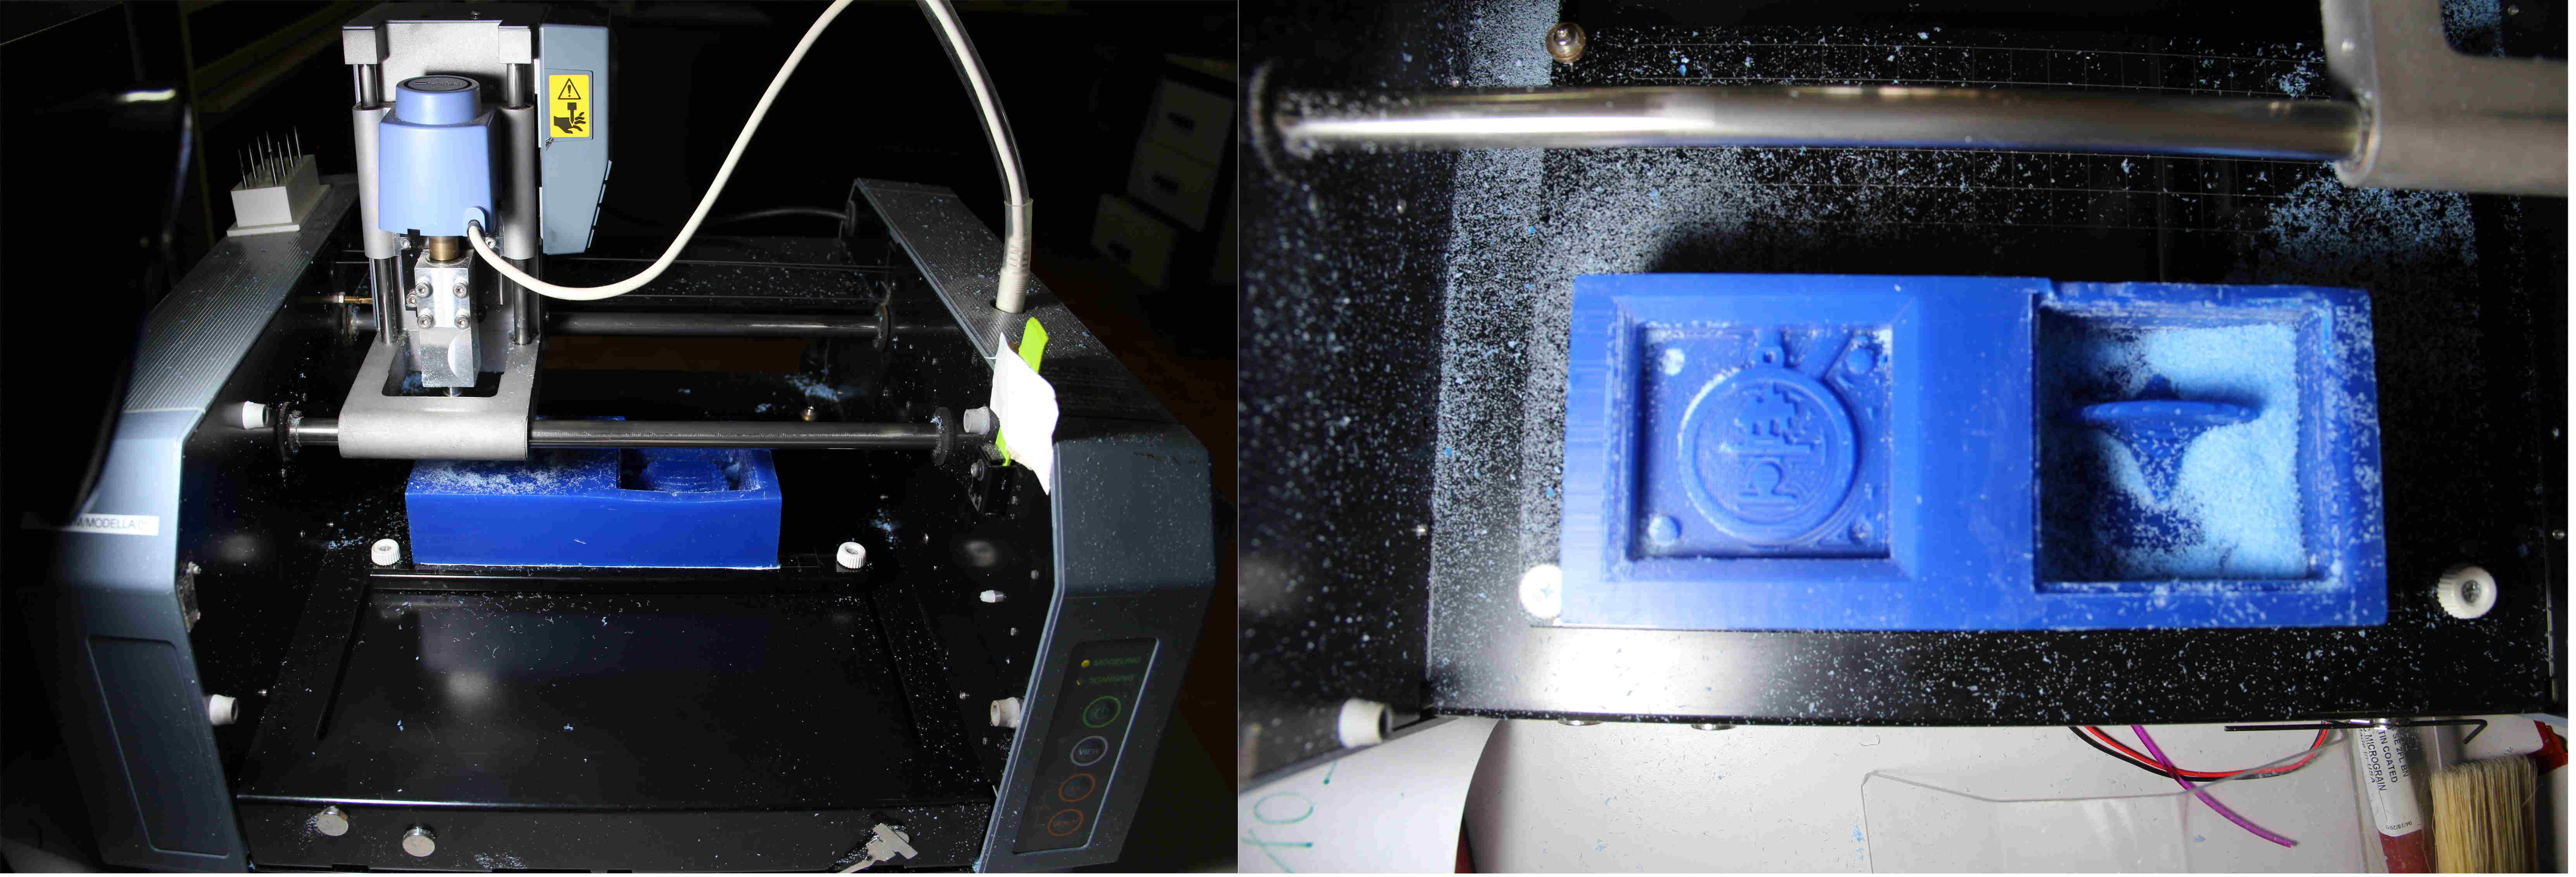
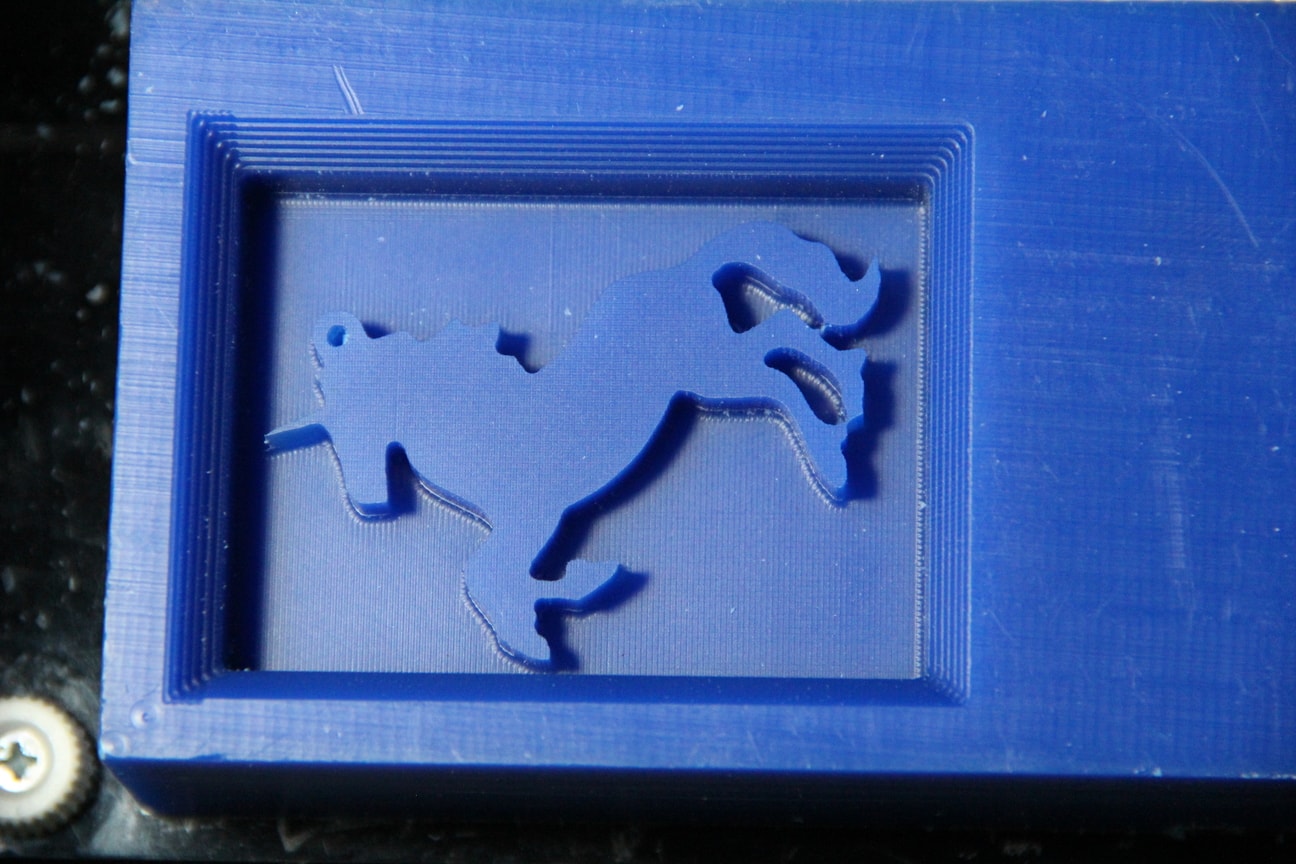
It taken one hour to complete the finish cut and the mold came correctly. You can see the image of my mold after the finish cut .
Casting
Casting is a process in which a liquid material is poured into the mold and allowing it to harden. In our lab we have different materials available for casting and are listed below.
- OOMO-25 - Liquid Silicone rubber
- SORTA clear-37 - Translucent silicone rubbers
- Smooth cast305- liquid plastics
- Mold max-60- Heat resistant silicone rubber
- Liquid Silicone Rubber1 (LSR1)- locally procured
- High gloss transparent epoxy resign- Liquid plastic locally procured
First we may need to make the negative mold of unicorn, So liquid silicone rubber can be used for this purpose. Here we are going to use two part system, In two part system Part A & Part B will be there, One is a curing agent and other one is a resin. There are different casting techniques available and some of the intersting documentation sites i found useful are listed below.
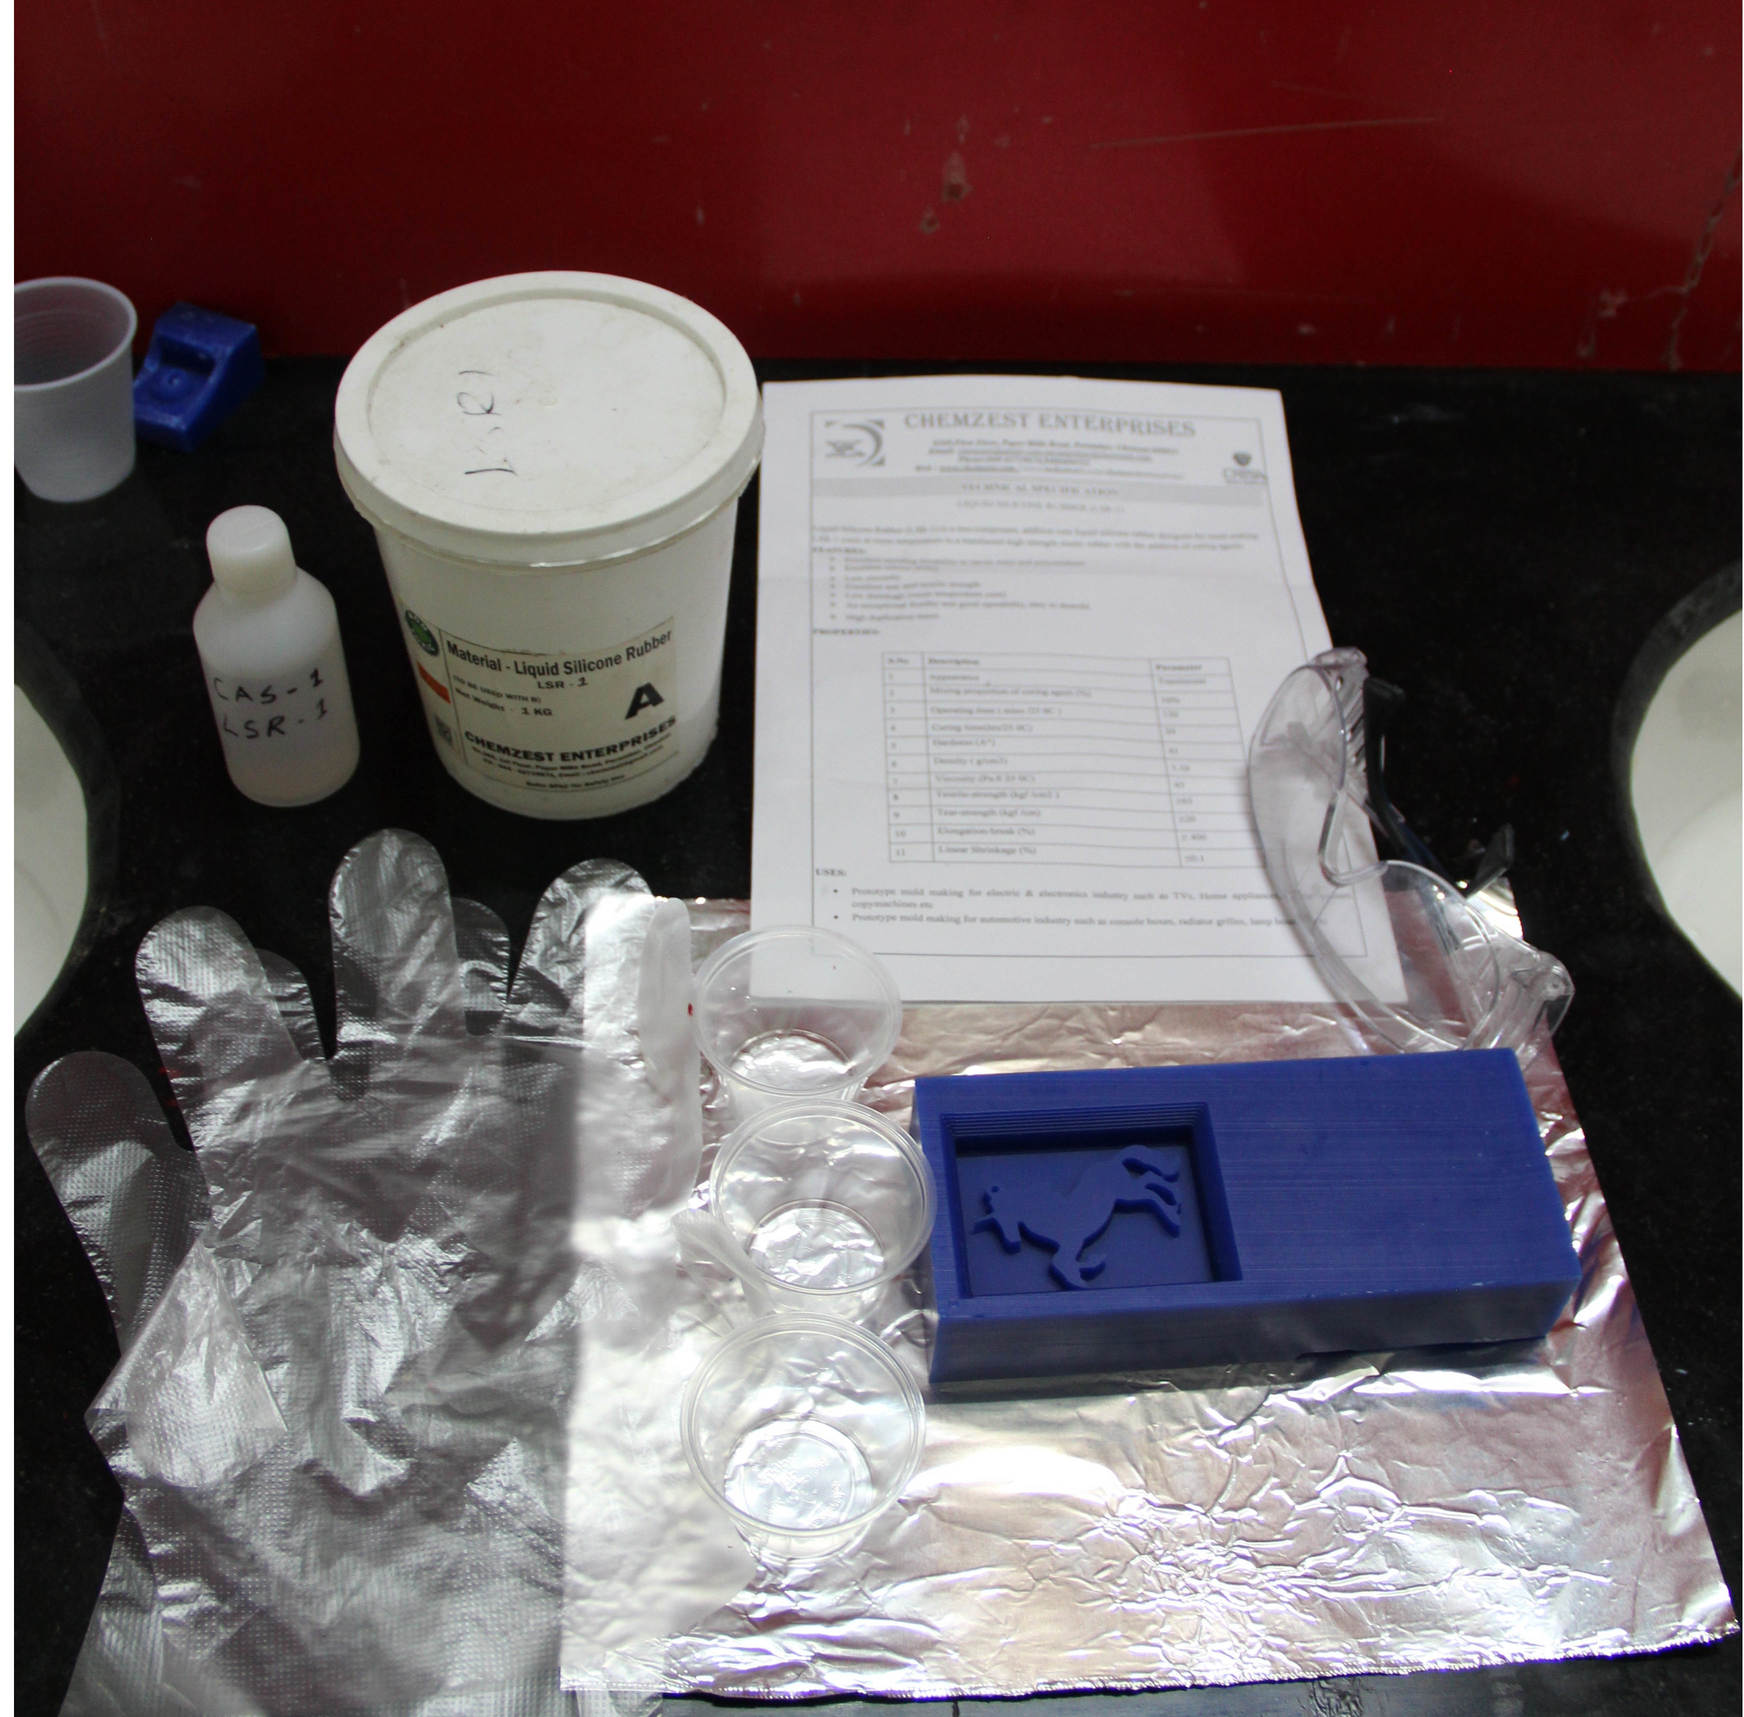
I have used Liquid silicone rubber for casting, Which we procured locally its name is Liquid silicone rubber (LSR1) the technical document is also provided here. The main parameters are highlighted in the image. Mixing ratio of it is 100% Part A: 10% Part B, with a curing time of 24 hours.

Download the Technical document(LSR1)
Liquid Silicon Rubber casting
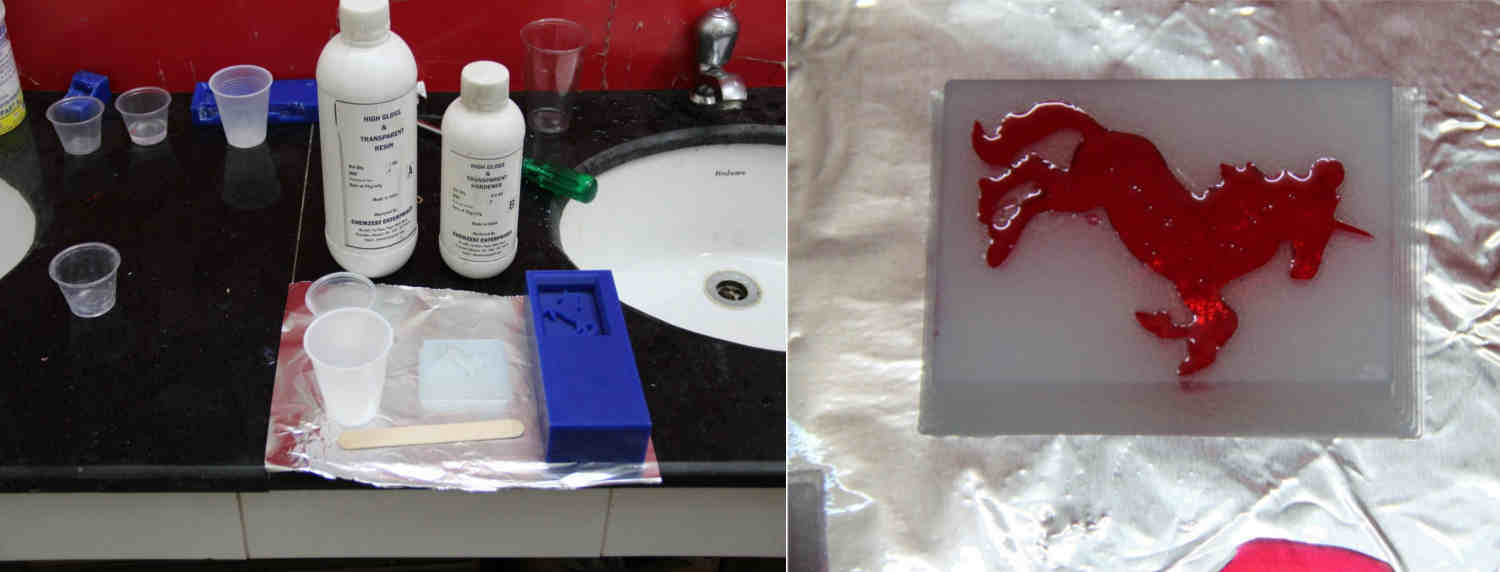
We have to be ready with plastic cups, gloves, wooden stirrer sticks, Aluminium foils etc for casting. The very important step before doing casting is reading the technical document in detail, Once all the materials are ready we can start casting. The image shown below is my casting setup. Some materials will cause some helath issues, So must take the safety precautions.
Casting Steps
Here i will explain the steps i followed for casting the silicon rubber into my unicorn mold.
Step:1
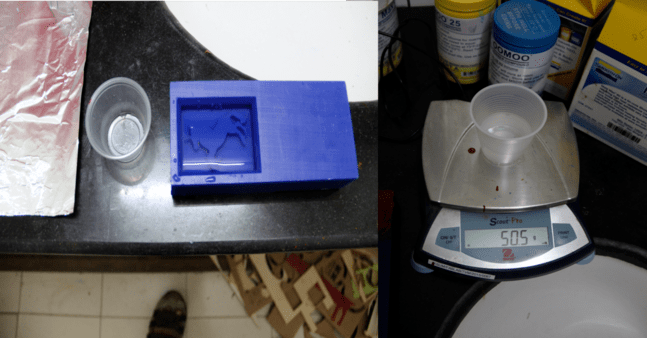
First i cleaned the mold and filled the mold cavity with water to know approximate quantity required for casting. This is just an approaximate value because the density of water and the casting material won't be equal, but we will get an approaximate value. The water is weighted using a digital weight scale it showed 50.5 grams weight.
Step:2
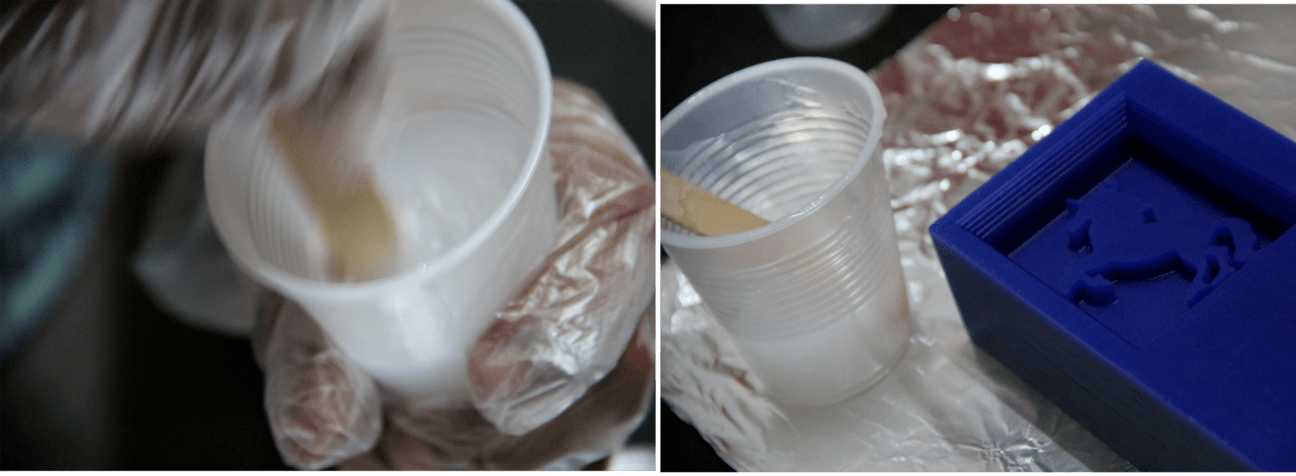
Now we can mix the material, for that taken 50 grams of Part A LSR1 material in a dry plastic glass from the LSR1 container. Next we have to take 10% of Part B, 10% of part A is 5 grams, either we can take in a seperate glass or we can add to the Part A material glass itself. Adding LSR material steps are shown below.

Step:3
In this step we have to mix the two materials very well using the wooden stirrers, both Part A and Part B needs to be mixed correctly.
Step:4
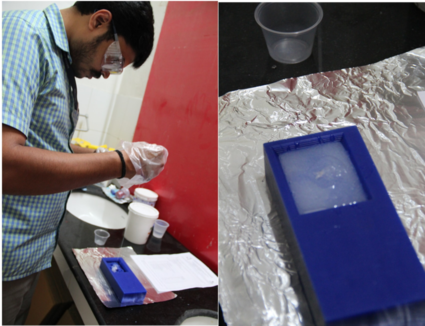
In this step pour the mixed material in to the mold, here you have to be more careful that chances of airbubbles trapping is more in this stage. Pouring from small height is good method to avoid the air traps. After pouring shake it carefully so that trapped air bubbles will come out of the mold or you can hit the entire mold on a flat surface slowly.
Step:5
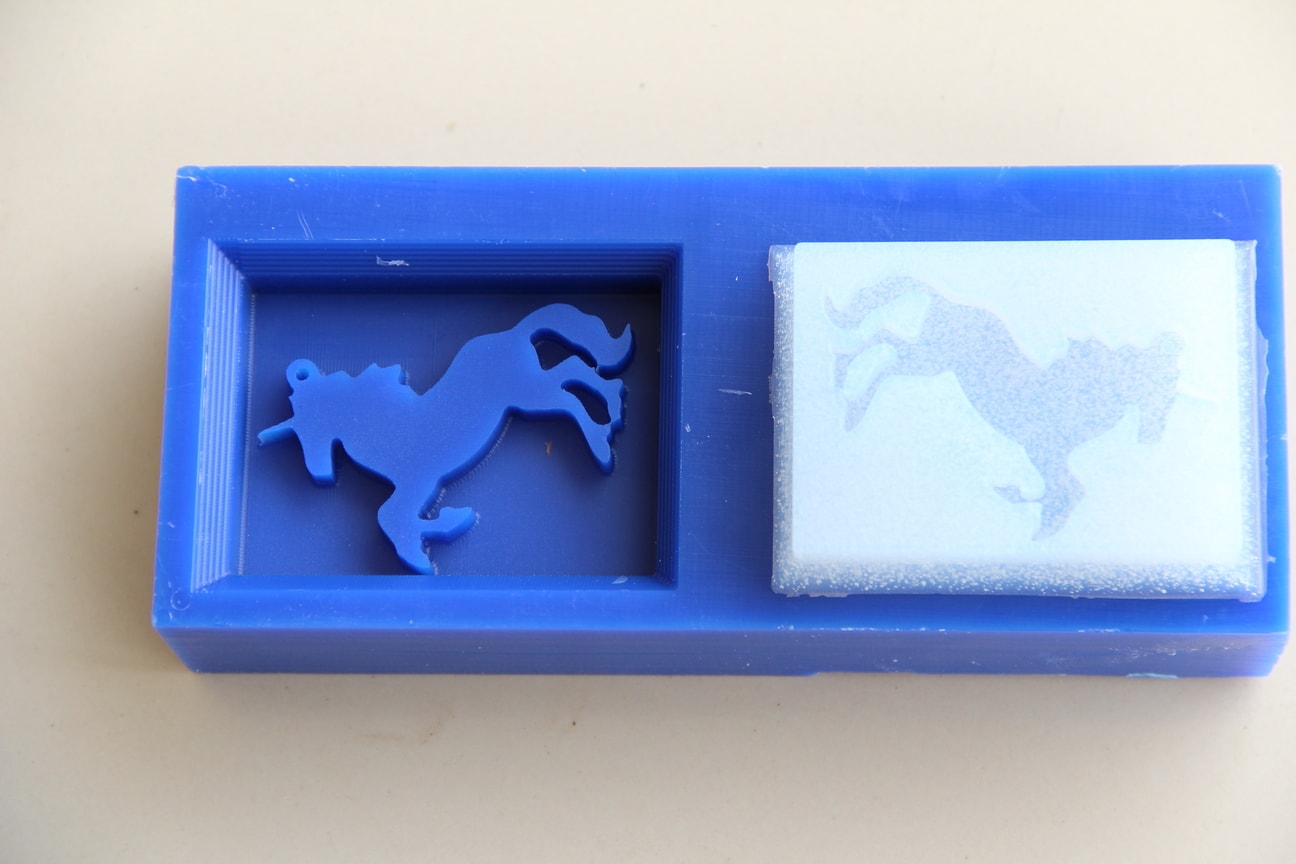
After pouring the material we have to wait for 24 hours which is the setting time of the material, after that we can remove the negative mold from the wax mold and after a long waiting i got my negative mold as shown below.
Metal Casting
First i planned to make a metal unicorn part in my mold. We have Low Melt Fusible Bismuth Based Alloy in our fab lab inventory and it can be melted using the furnace. We had a vulcan furnace in our lab as shown below.
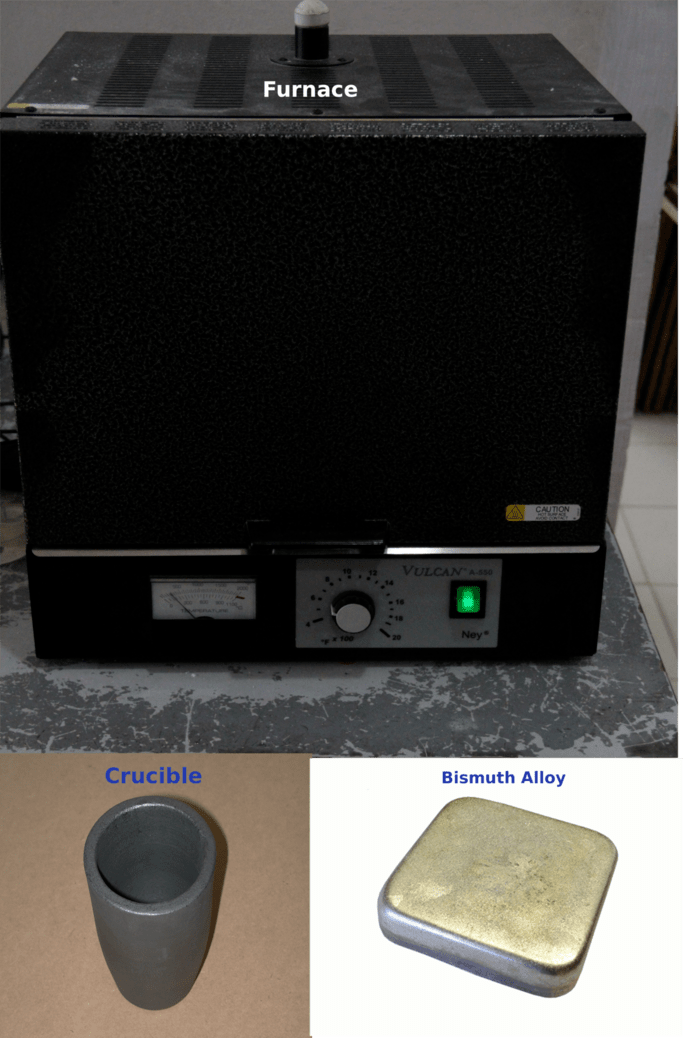
Breake the ignots using hammer and put it on the crucible, turn ON the furnace and keep the crucible inside of it and set the temperature around 400 degree celsius. Actually its melting point
is 138.33 degree celsius or 281 Farad and if we melt the metal in higher temperature than the melting point then the viscosity may decrease and is good for casting thats why i put it to 400 degrees. After reaching the
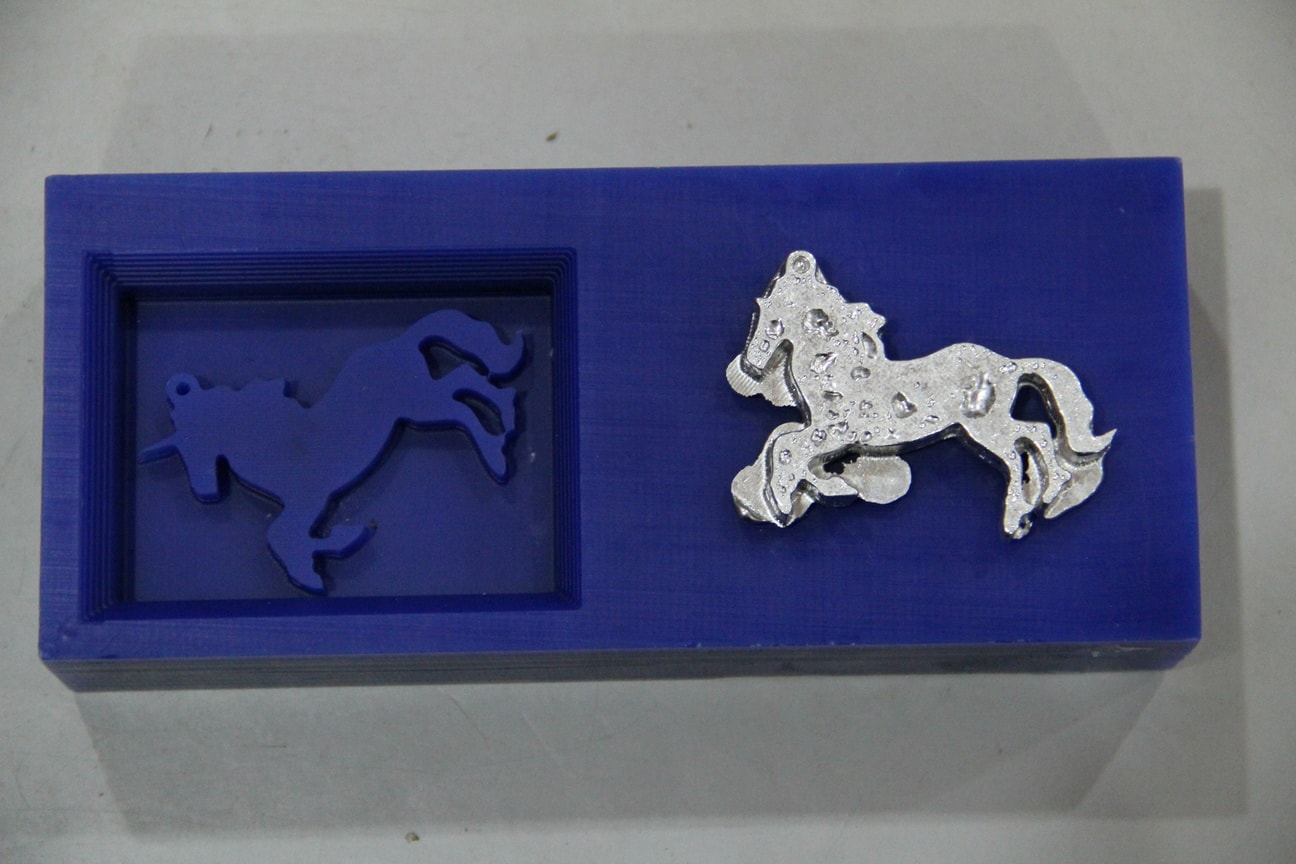
temperature we can carefully take the crucible using the heat resistant gloves and tongs, then pour directly into the mold, the metal will get solid within few minutes. After sometimes when i removed the mold i got my
metal unicorn part but it is having lots of pores due to air trap.
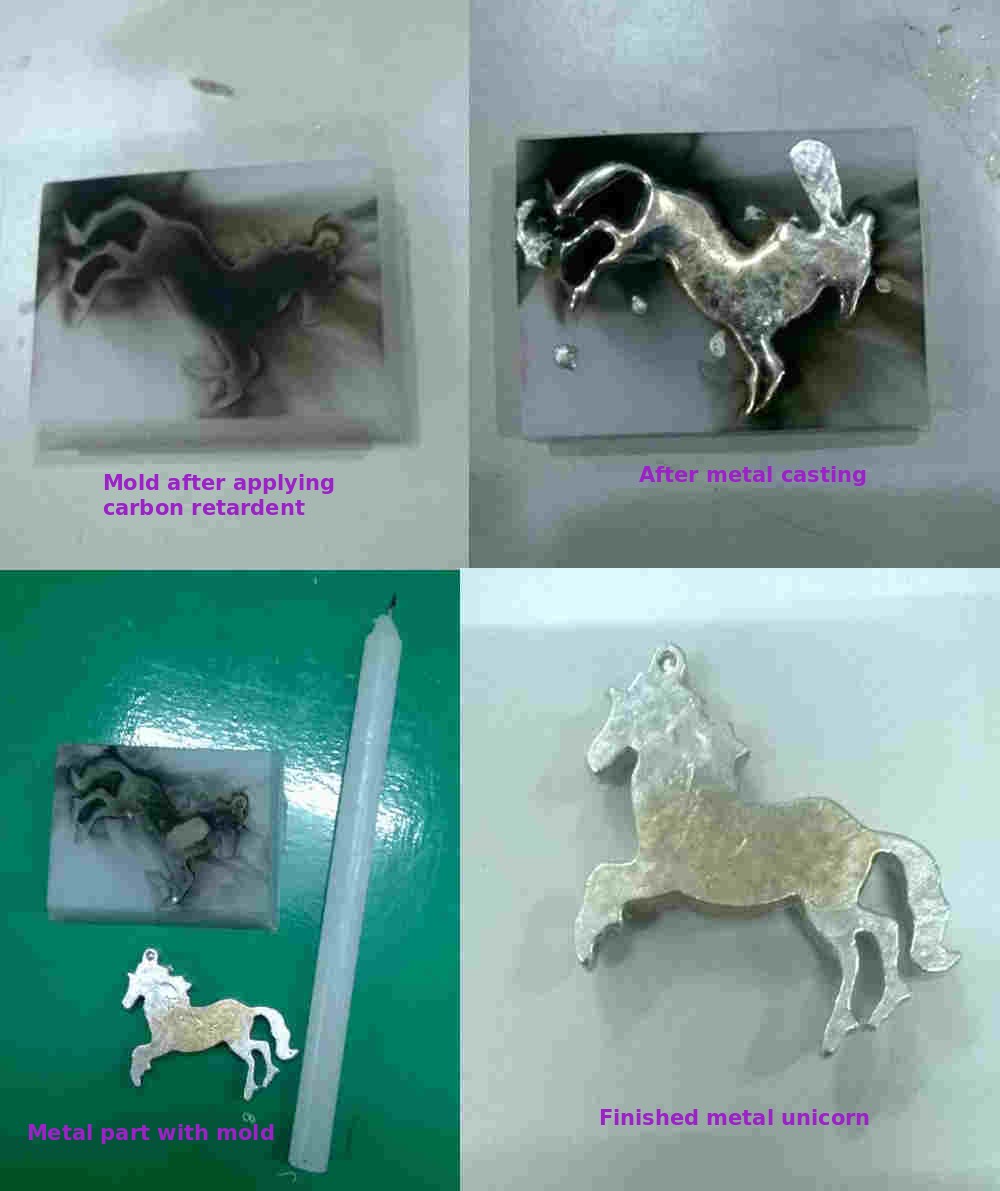
Our instructor told to use any retardents for avoiding the air porus. Then i used carbon soot from a candle fire , you can use some other flame retardents like talcome powders, but you have to be very carefull because it may produce some poisonous byproducts while casting the metal; carbon soot from the candle is safe. After applying the soot , again i melted the babit metal and poured into the mold. This time it came very perfectly.
Plastic Casting
Next i tried Plastic casting, Used high glossy epoxy resin we procured locally, the technical document is shown below. It is also a two part system with a mixing ratio of 100:60, having agel time of 10min and setting time of 30minutes.
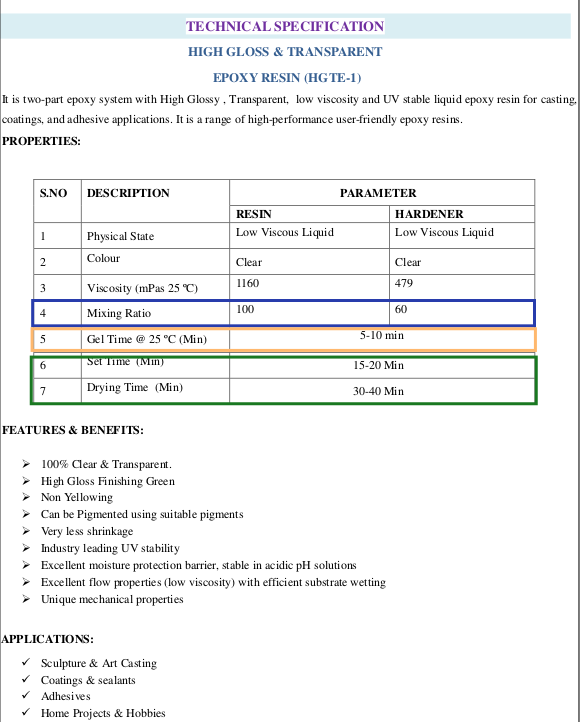
Download the Technical document(High gloss & Transparent epoxy resin)
The steps i followed are same as for the silicone rubber except the mixing ratio, take the two materials in appropriate proportion added one drop of red color sampler to it and mixed it well. After that the gel was poured into my mold. this time i carefully done the pouring and after few hours i got my plastic part of unicorn.
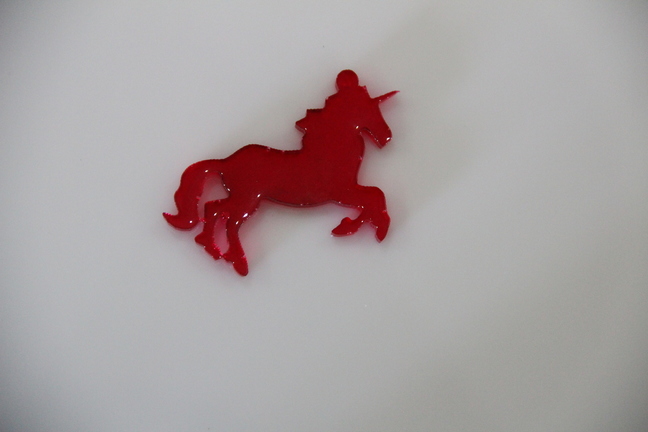
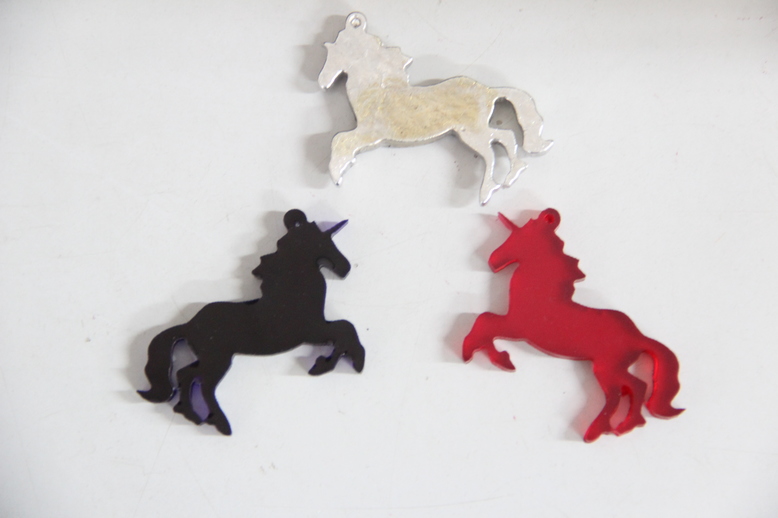
Hero shots of my unicorn parts are shown below, the dark blue colored unicorn is casted in plastic with blue color pigments.