

Week 6 - Electronics Design
![]()
![]()
Assignment
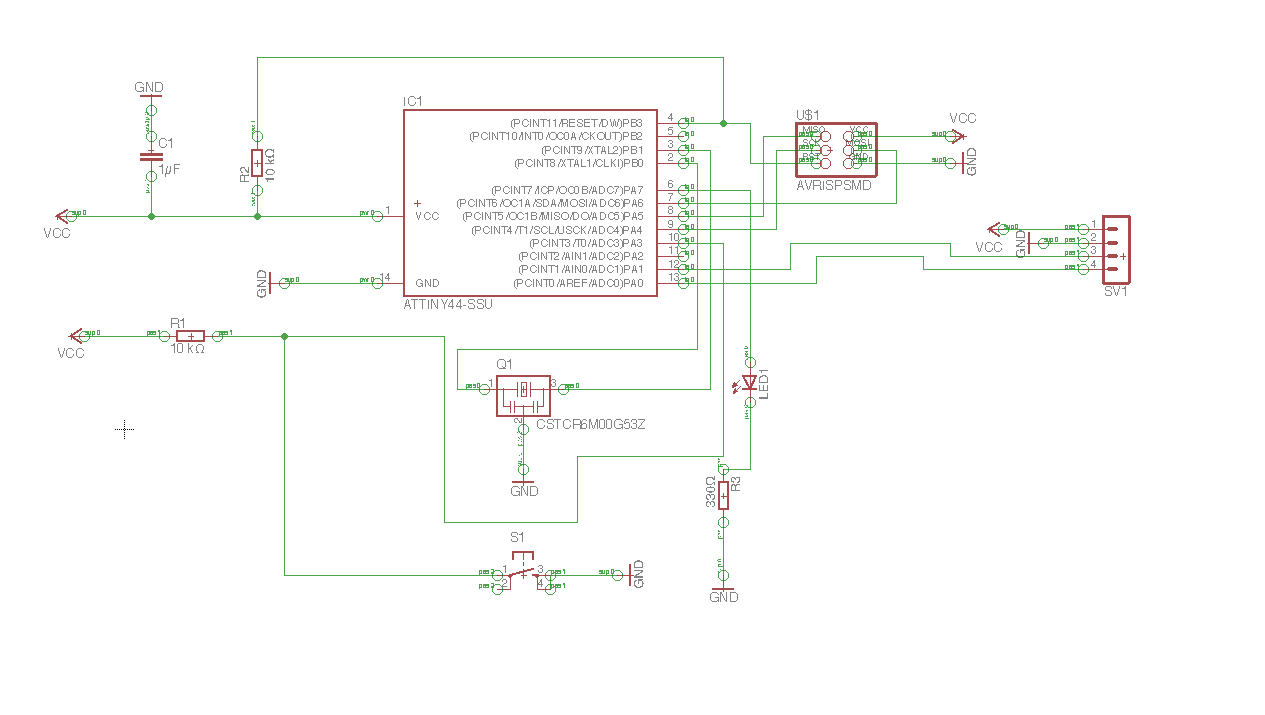
Redraw the echo hello-world board, add (at least) a button and LED (with current-limiting resistor)
check the design rules, make it, and test it extra credit: simulate its operation extra credit: measure
its operation
![]()
First of all I would like to point out the electronic production week, in which we also designed our fabisp based on the work of Brian's programmers, based on Zaercs programmers.
In the 4th week we have therefore already insights in the design of elektonic with eagle received and it was easier for us in this week to design the hello board
![]()
Why I use Eagle?
The software eagle was first recommended by my instructor. Eagle is the standartool in our fablab when it comes to the design of pcbs. In the lesson of technical computer science it is used by the students to make their first experiences with the design of pcbs.
Since I also use the software of autodesk (fusion360) for the 3d-design, I decided to test eagle. After the first tests with eagle, it was for me directly a good expirience to work with it. I also like that Autodesk is in planing to integrate eagle in fusion360. In addition, the ERC function is very useful for me as a beginner. A further reason is that my instructor Tobias could give me a good introduction into the software eagle.
![]()
1. First I had to add the fab library to the program Eagle:
![]()
Fablab component library: Copy the library into the install directory of eagle into a folder called "lbr"
![]()

![]()
![]()
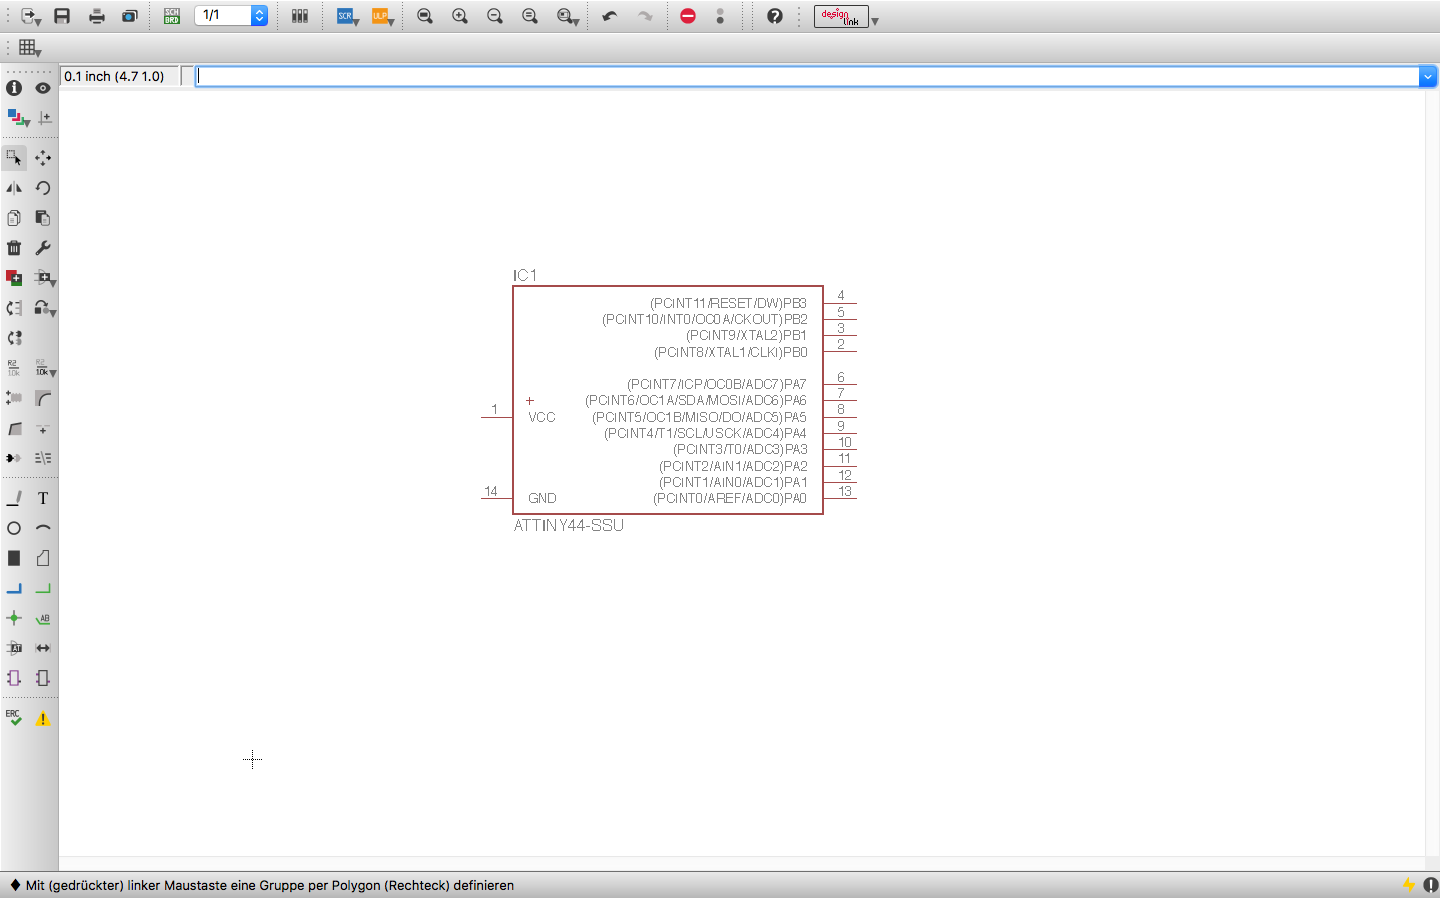
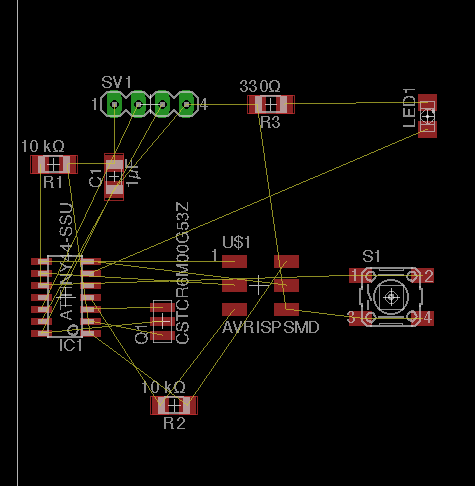
2. Start to design the Schematic in Autodesk Eagle:
![]()
I have kept myself for this assignment to the tutorial given to us by the fabacademy. You can find the tutorial at the following link: Fabacademy Tutorial website
![]()
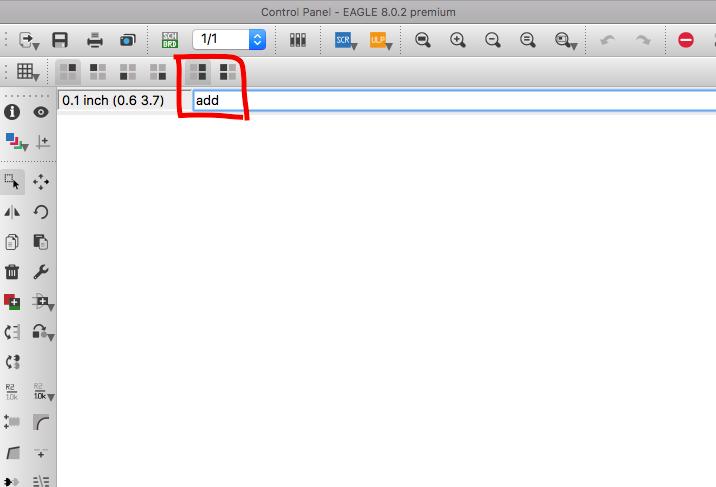
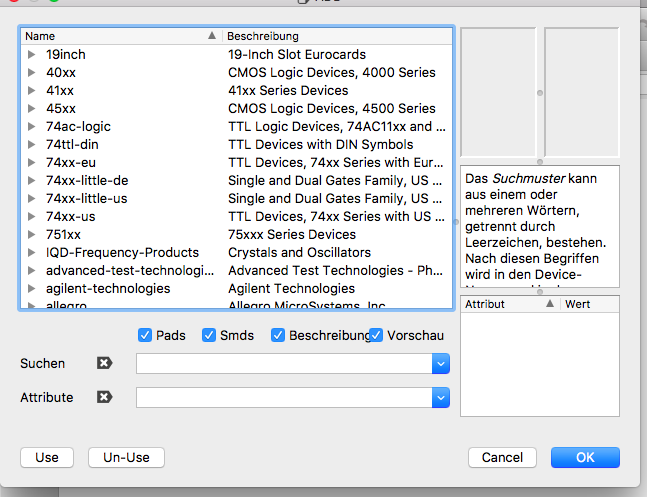
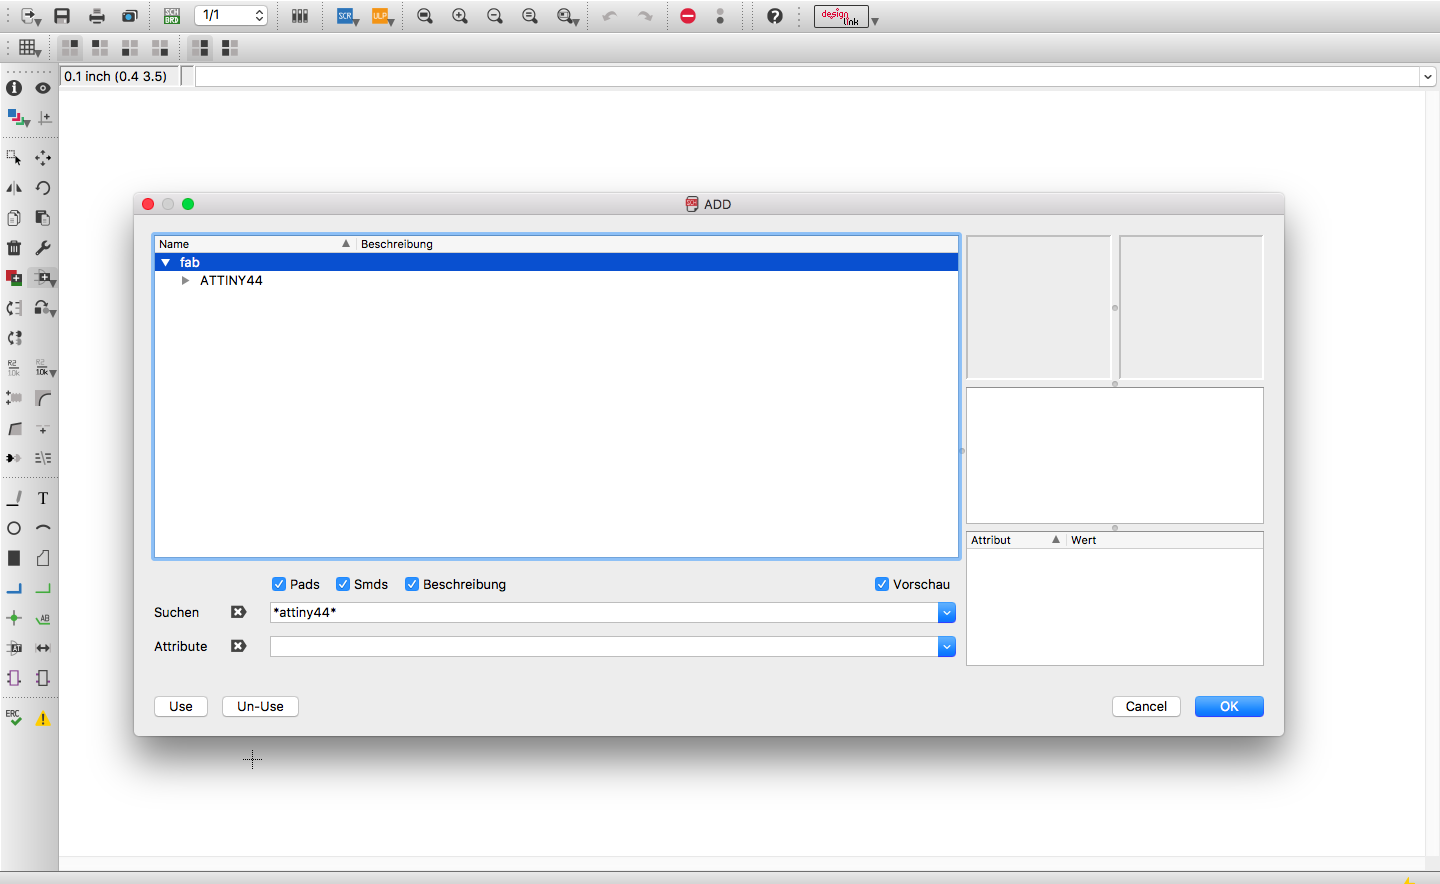
After the libary has been downloaded in the program eagle still everything is to be updated and you have to click on the menu "use library". Then you can enter the word "add" in the command line and it will open a window, where you can find the various libraries:
![]()
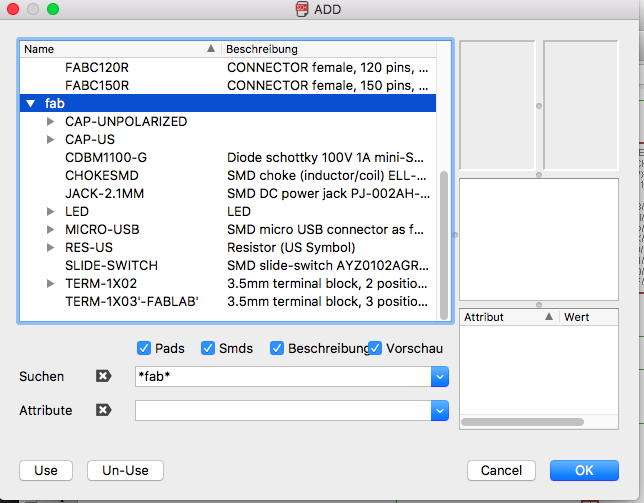
To find the fab-libary type *fab*
![]()
![]()
![]()
![]()
Further down on this page you can download the complete part-list of eagle, as well as the whole board designs.
![]()
![]()
Now it is important that you arrange all the components in a poligon sequentially prepared in the field:
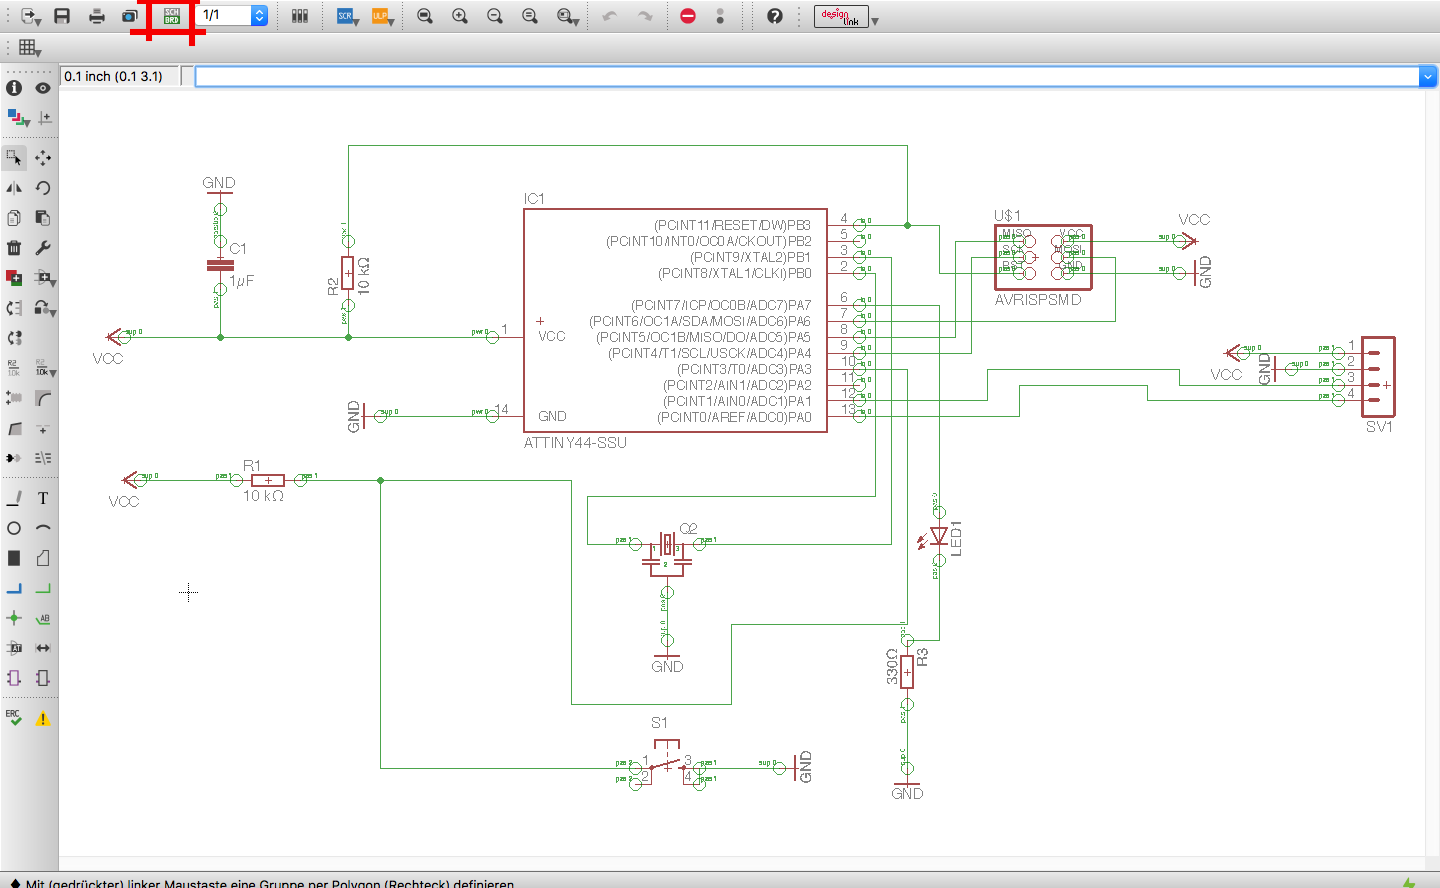
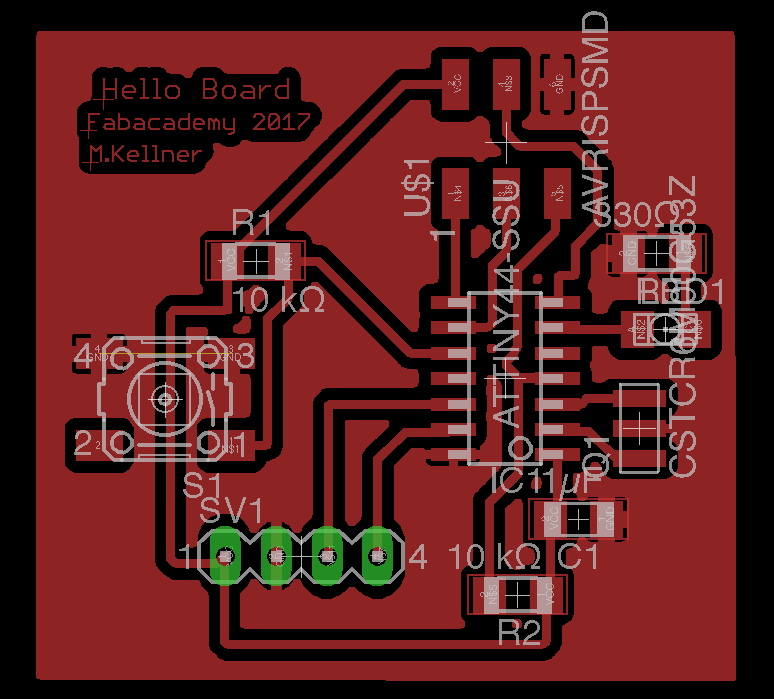
On the following photo you can see that you can switch to the red marked area in the board layout view to start now the board layout:![]()
![]()
![]()
My instructor Tobias told me about the rastnest function. (A function in the circuit board layout, with the possibility to connect a signal to the entire copper area, which is located between all parts on the board).
It is a really good technique to use the GND signal Over the entire layout, set the 'name' of the rect to GND, and press the rastnest button
![]()
![]()
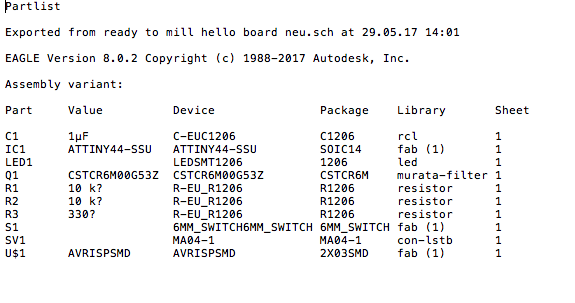
Partlist exportet from Eagle:
![]()
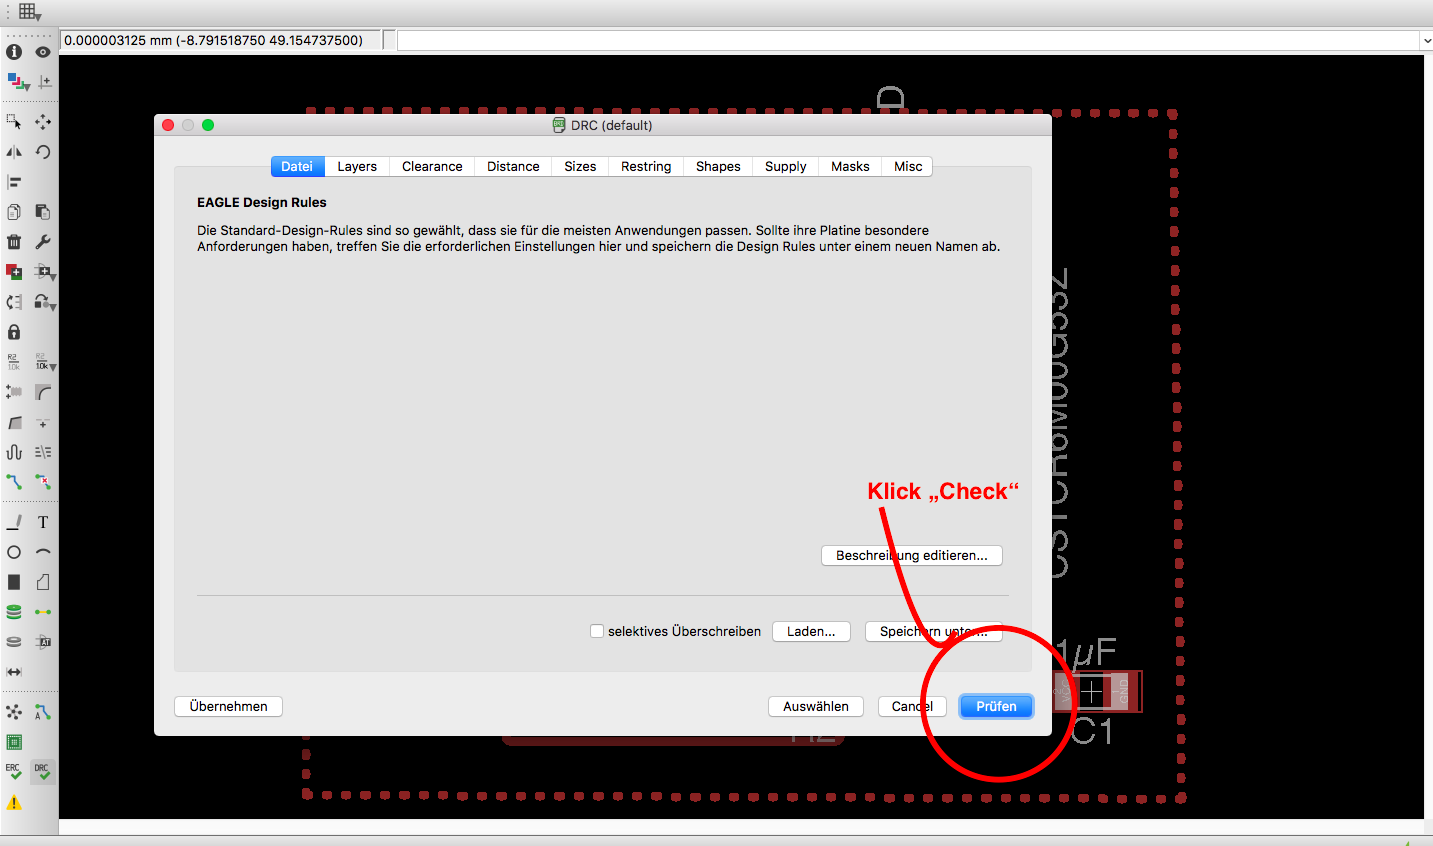
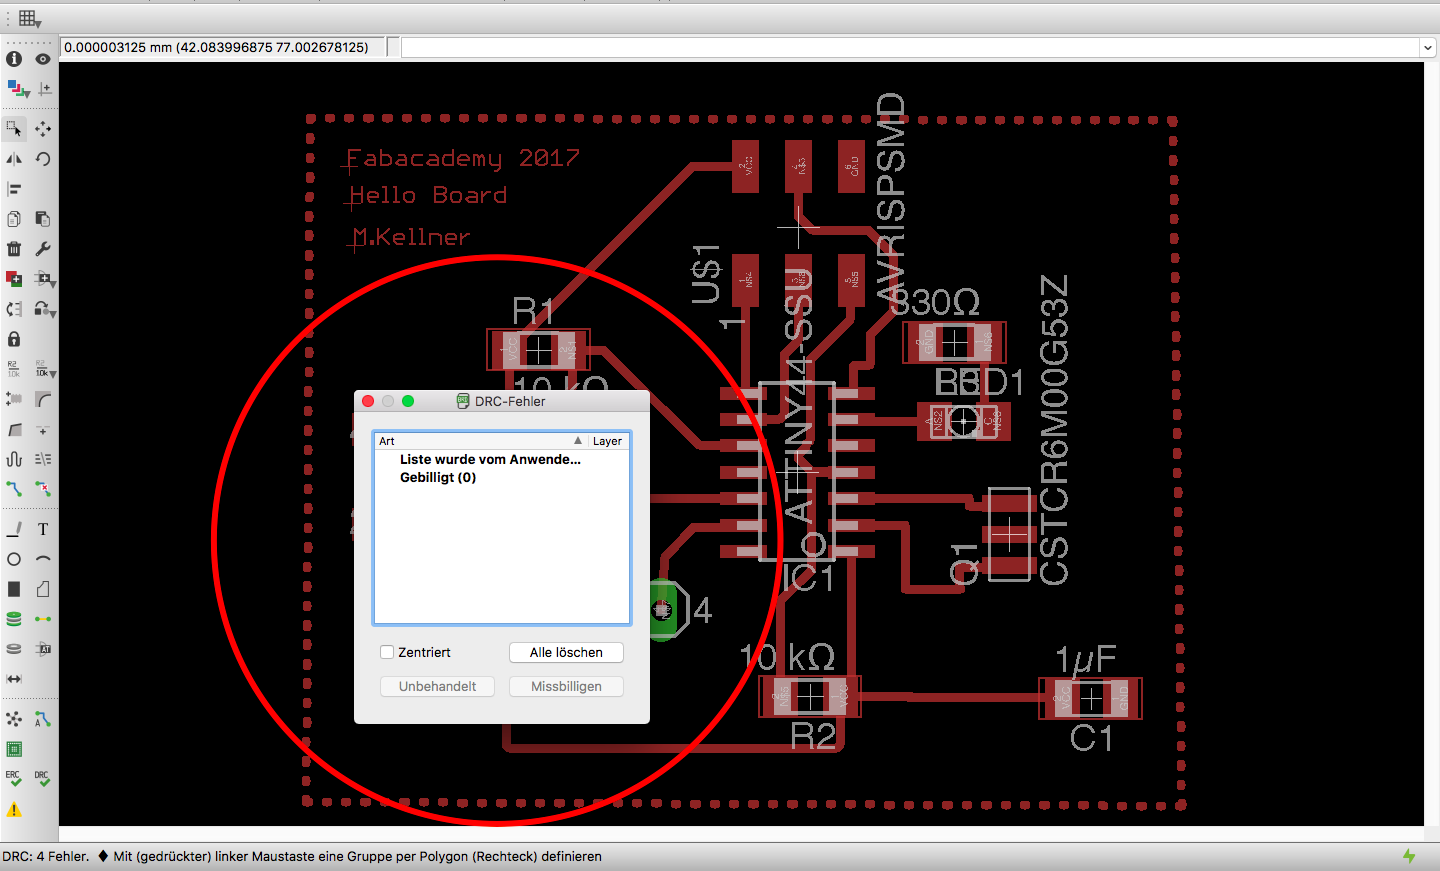
Checks design rules.
The command DRC checks a board against the current set of Design Rules.
Only those signal layers that are currently active will be checked, so in order to make sure everything is ok all used signal layers should be active when running the DRC (at least for the final check before manufacturing).

![]()
![]()
At the design rule check, among other things, still existing air lines are displayed, which one could have forgotten to route. In my case, the check was successful and I had nothing to edit in the design:
![]()
If for example one or more airwires has forgotten to route, you will see the following at DRC (If you klick on the error message it is displayed directly):
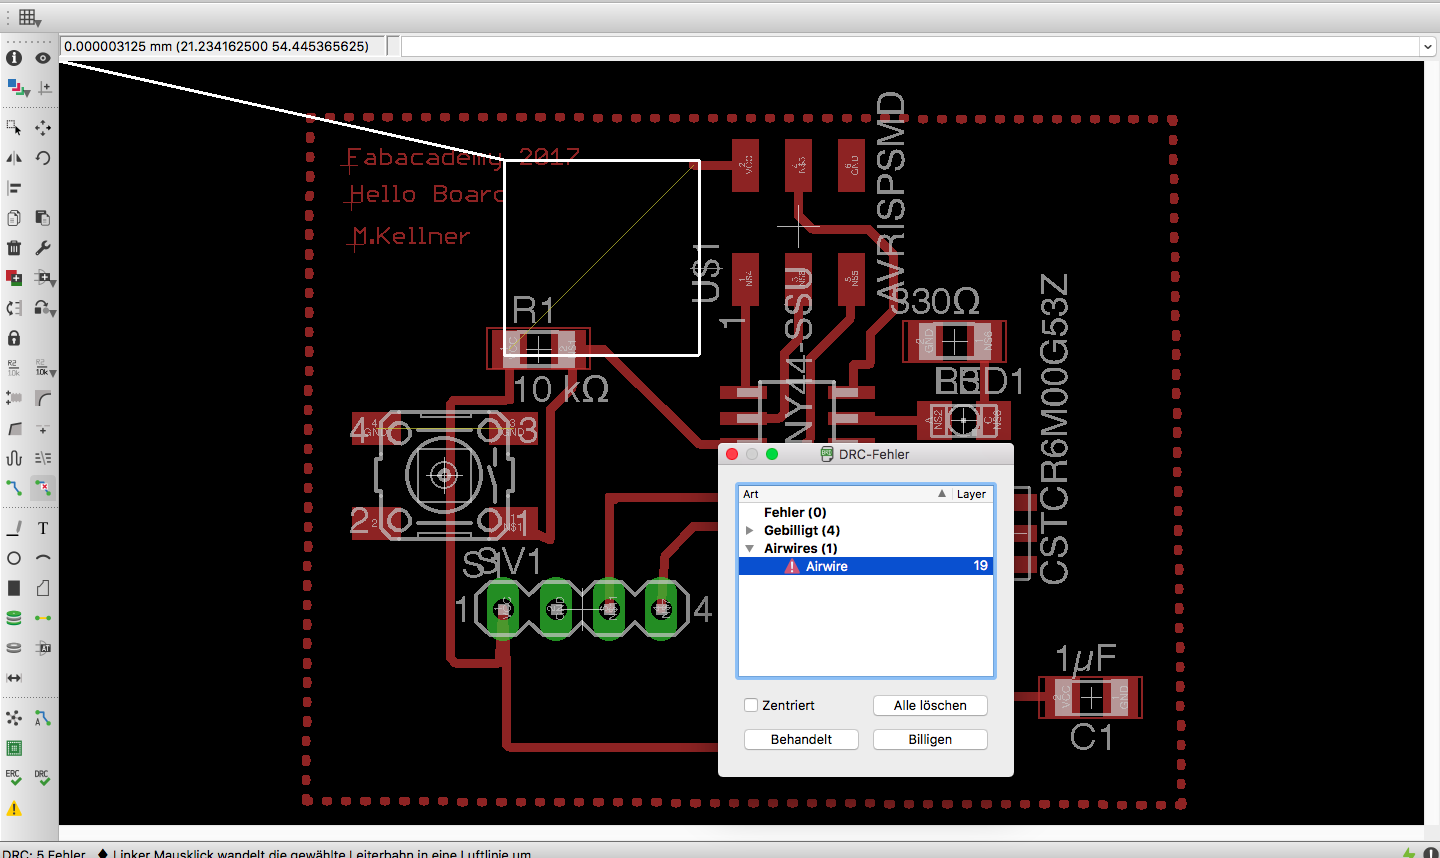
![]()
![]()
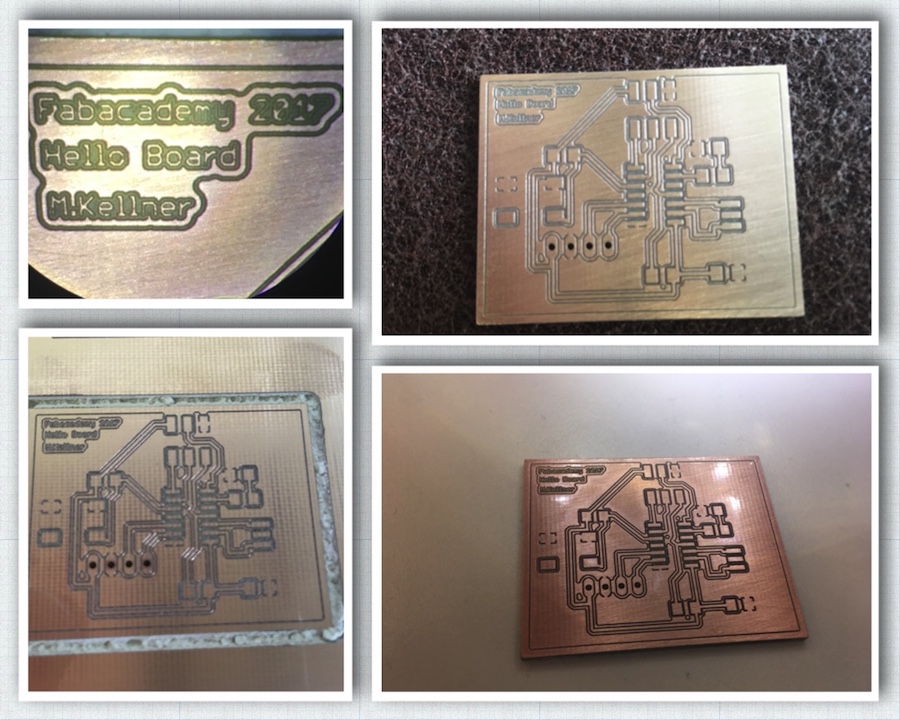
3. Mill, equip and heat the Board:
![]()
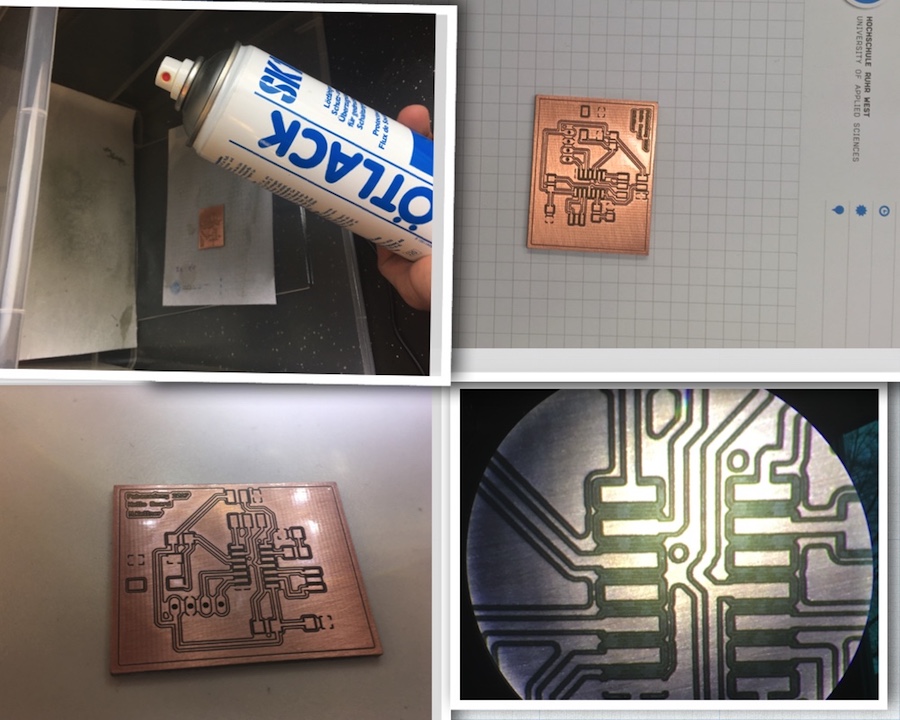
At the next 2 following Pictures you can see the ready milled pcb board. Before I could equip the board now with components I had to sand it and paint a thin layer of so-called solder varnish, which hardened very quickly. For the solder paint I have used This stuff
![]()
![]()
![]()
![]()
For stats bigger pads we took an intervall of 0.6 seconds and for narrow pads
(eg the pads for the attiny44) we used intervals of 0.3 seconds. For the assembly of the board, the protoplacer was converted into an assembly machine. The cannula from which the solder paste came before was unscrewed and a clean cannula was inserted. The smd components were so deposited that we could easily reach them with the cannula. By suction, the smd components were now captured by the cannula and I could bring this into position.
Please finde here the Partlist exportet from Eagle: Download the Partlist from Eagle
![]()

![]()
![]()
![]()
![]()
![]()
![]()
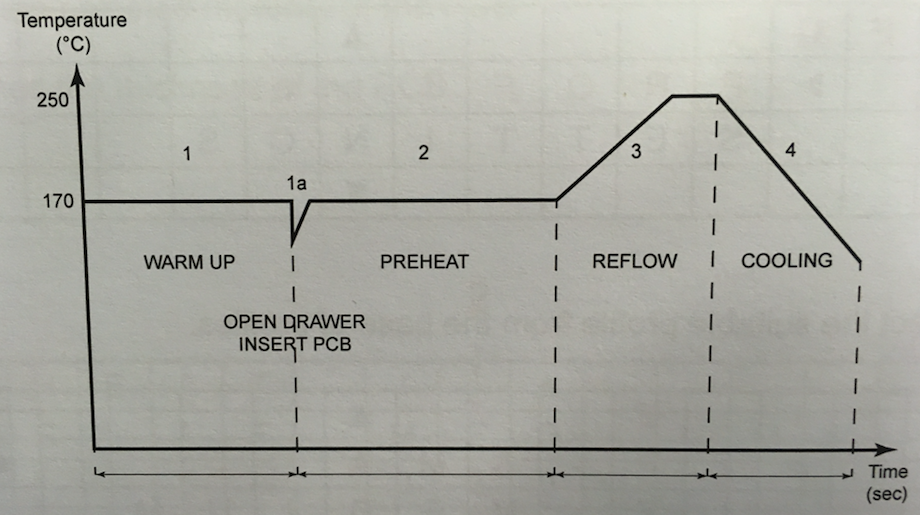
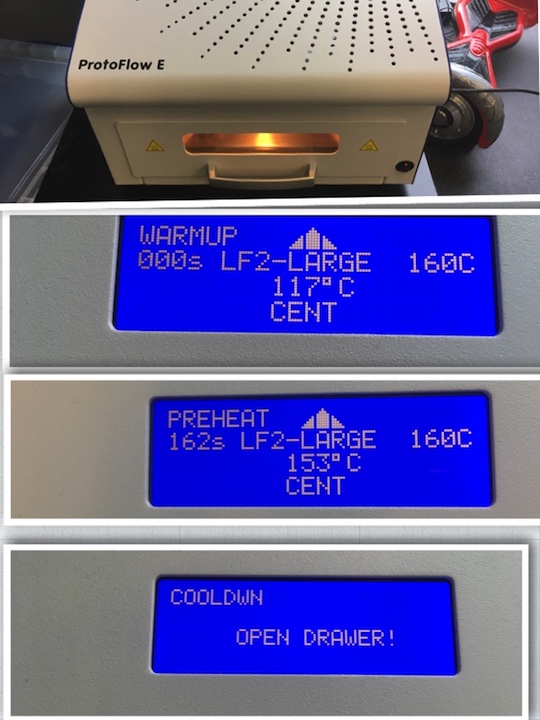
PCB off into the oven
The finished stocked pcb gets into the reflow-ofen done
![]()
![]()

![]()
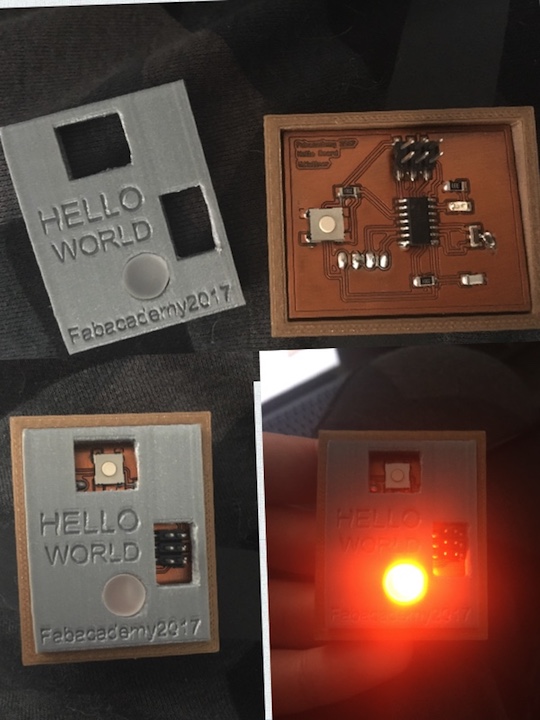
The "eye" in the case is with the laser cutter made of satinated acrylic. The top of the box and the cover is designed in Fusion 360:
![]()
![]()
![]()
Download-Section:
Marcels_Hello_Board.BRD
Marcels_Hello_Board.SCH
Housing_for_Hello-Board
Partlist from Eagle
![]()
![]()
![]()
![]()
![]()