7th Week, Computer-controlled machining
The subject of this week was large format CNC milling, and the objective to make something big. I decided to work on my final project, for which I had been only experimenting with small laser-cut models. My idea for the final project is to make a large-scale opening roof that is balanced with spring forces, to maximise the efficiency of the movement and minimise the energy requirements and the reliance upon actuators. More information about my final project you can find here. This week’s assignment was my chance to finally go big.
Rhino and RhinoCam
I started with the model I had from the small experimentations, and tried to adjust it to a bigger scale, drawing knowledge from the experience acquired from the small models. Also, I decided to add a “back” on each arm, so that I can later attach surfaces on the back and test the capacity of the mechanism to carry something other than itself. Here’s the evolution and the final model.

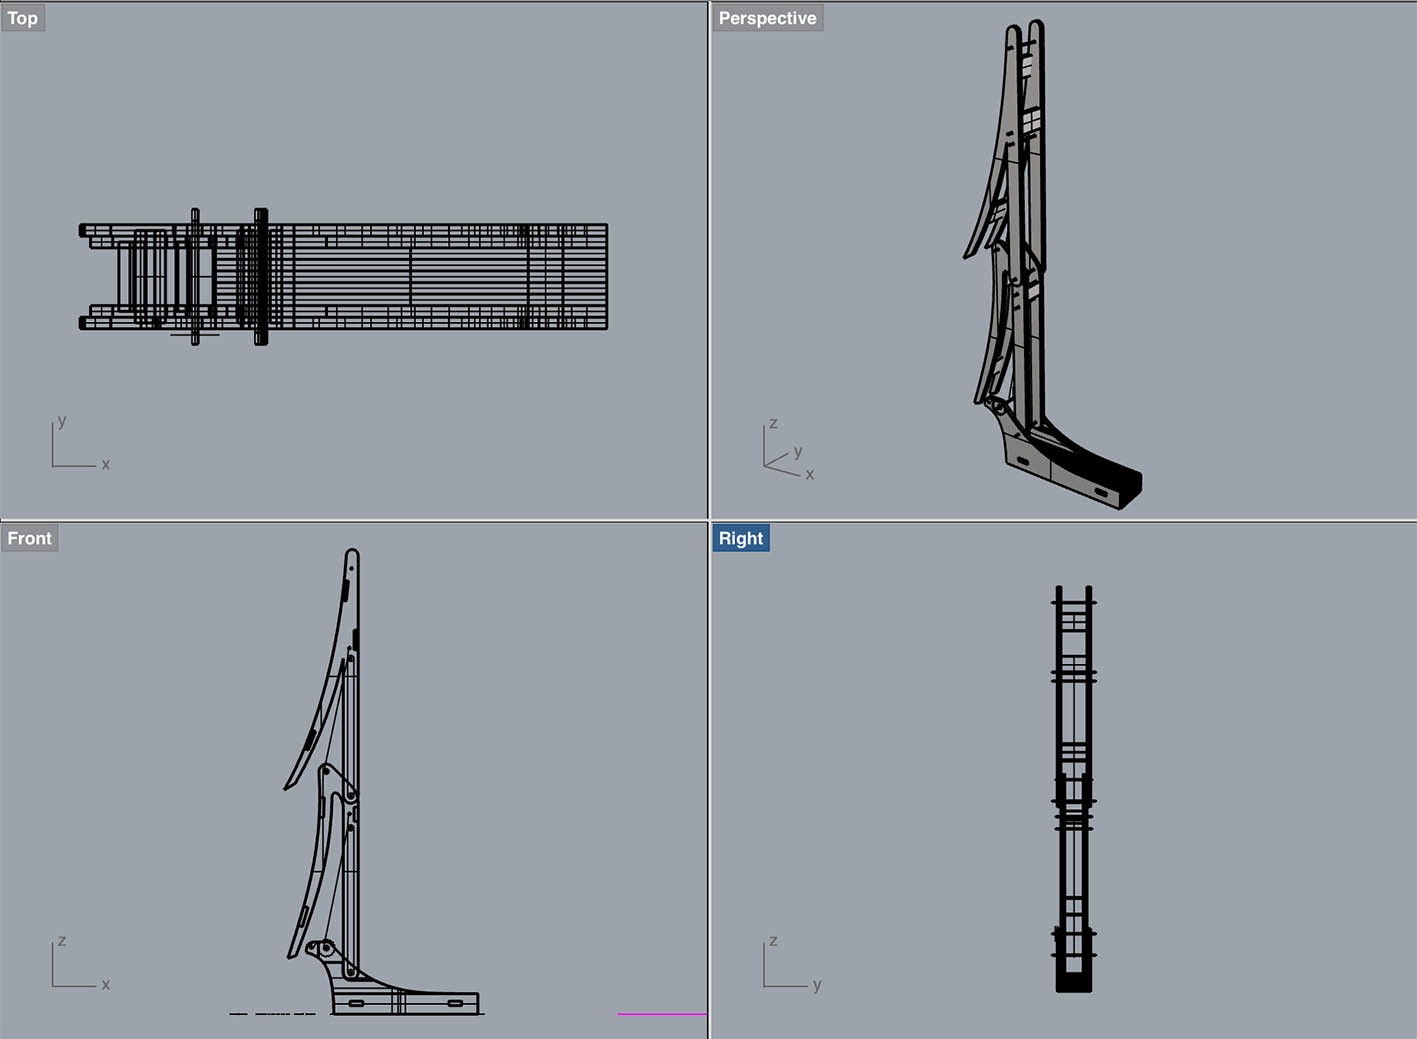
I then put all the pieces in a plane, nested them and separated them in the proper layers so that I could use the RhinoCam to plan the machine’s path for the CNC.

Before the FabAcademy I did an internship in the FabLab of IAAC, so I was already very familiar with RhinoCam and its tricks. Thanks to the separation in layers, the RhinoCam was an easy process. Here are the most important steps in RhinoCam.
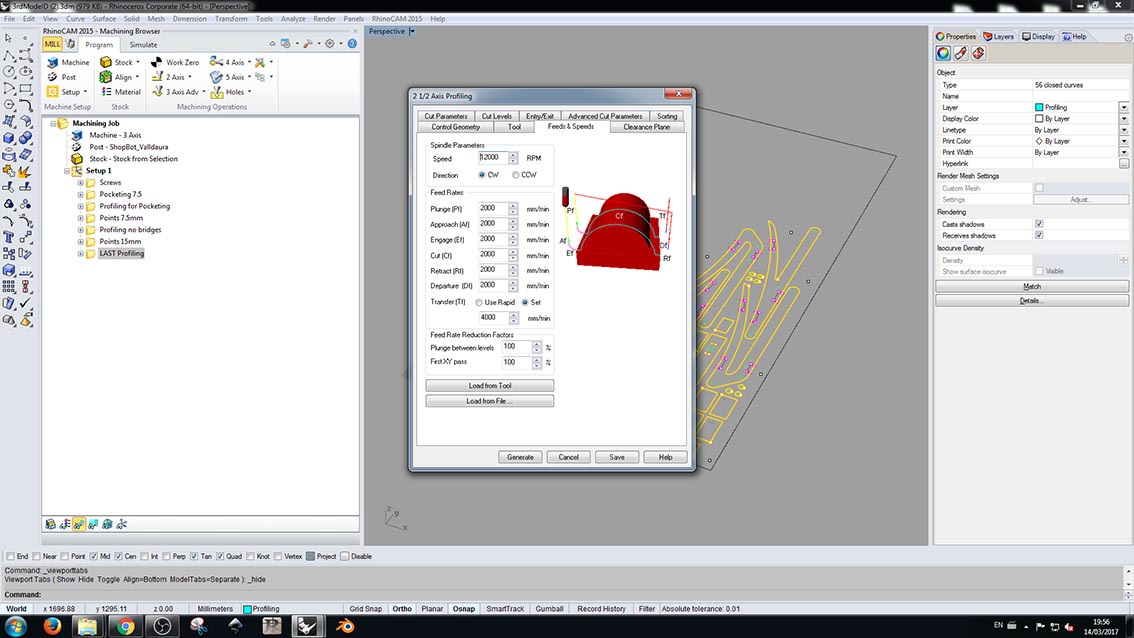
Feeds and Speeds
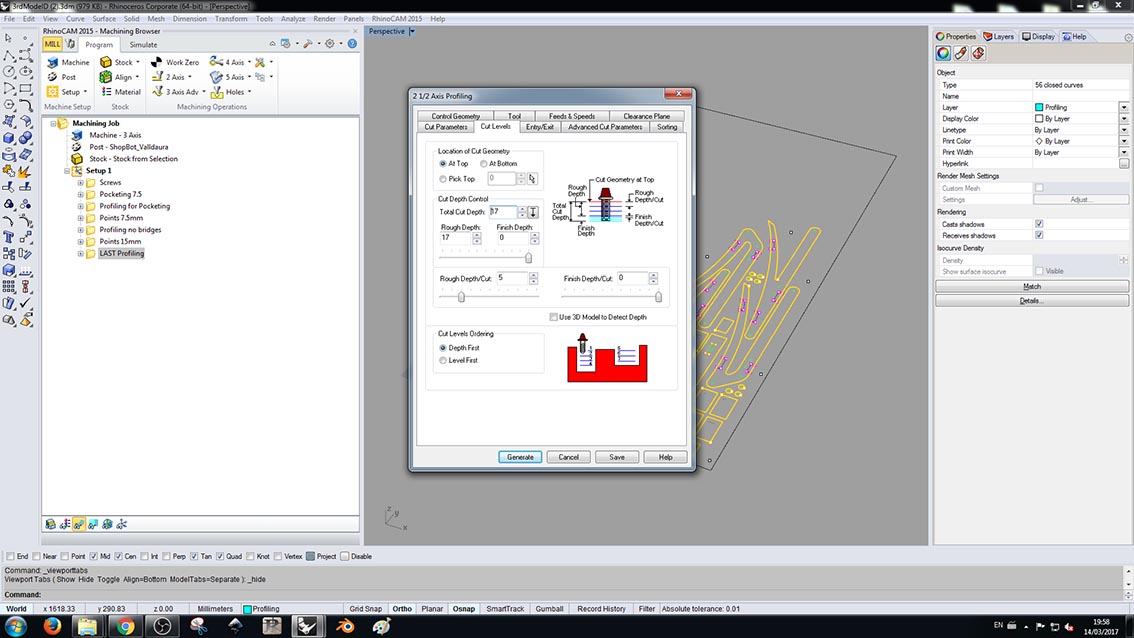
Cut Levels
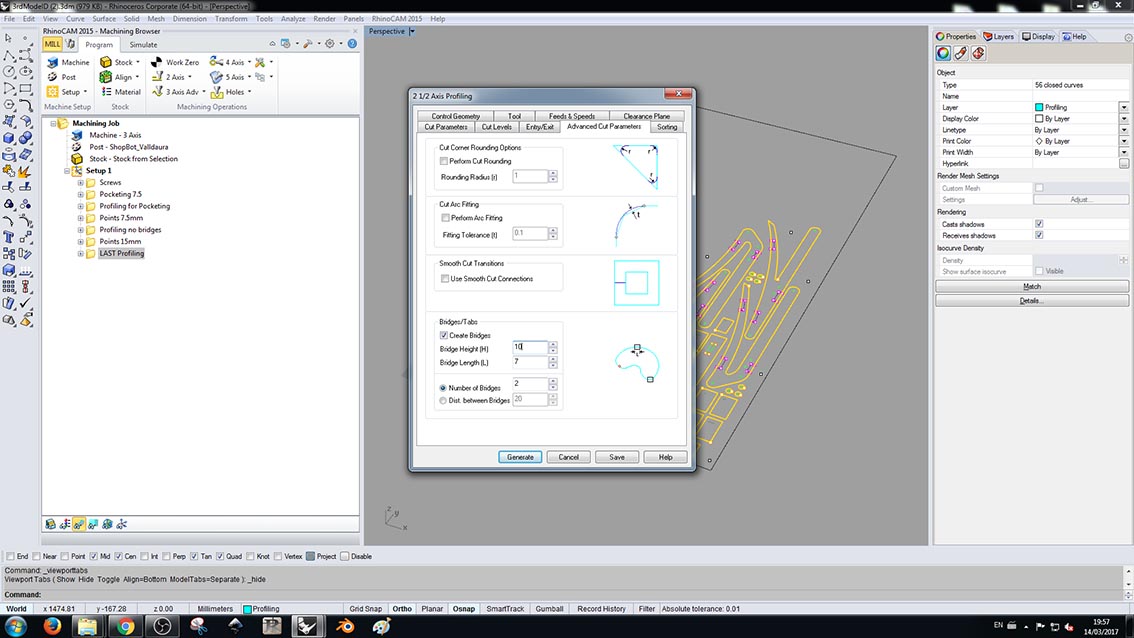
Advanced Cut Parameters
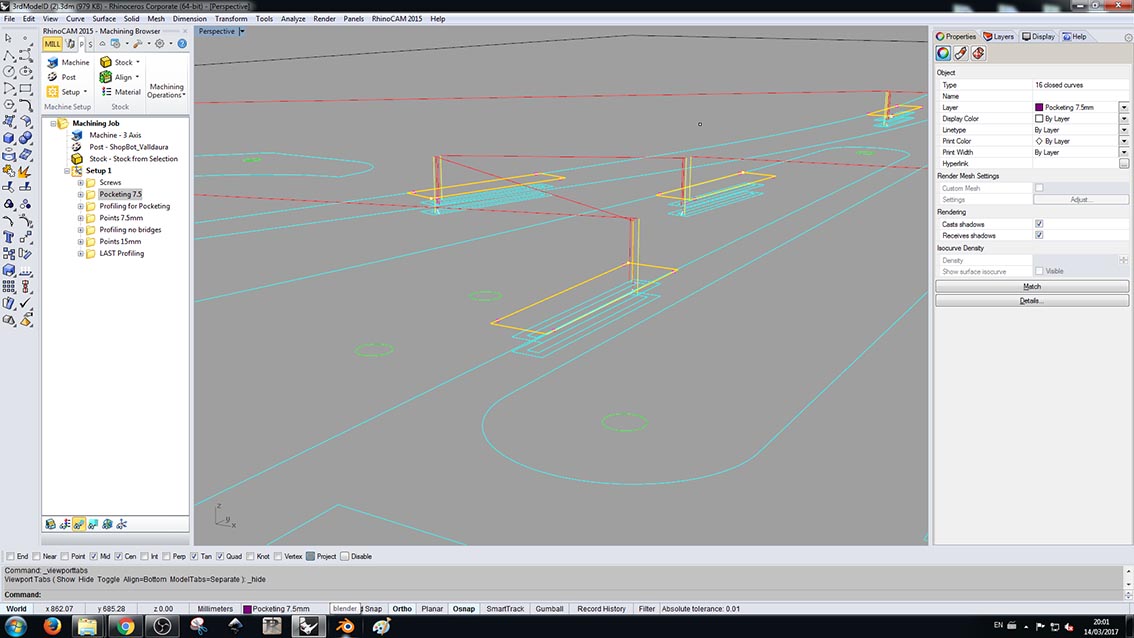
Pocketing
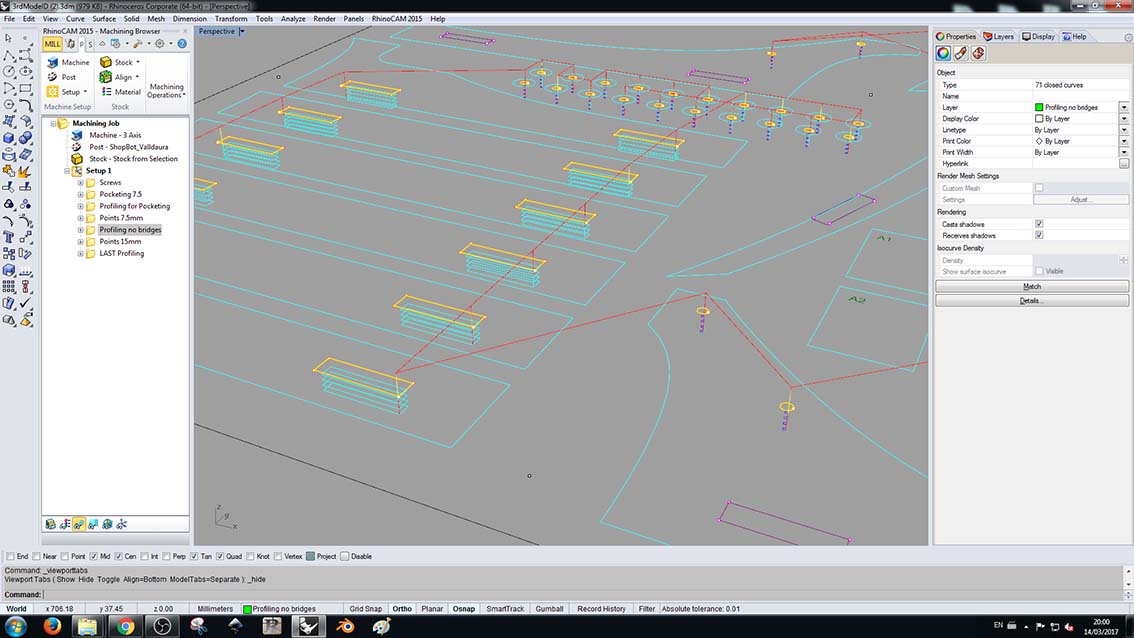
Profiling without bridges

Final Profiling with bridges

Simulation

Posting
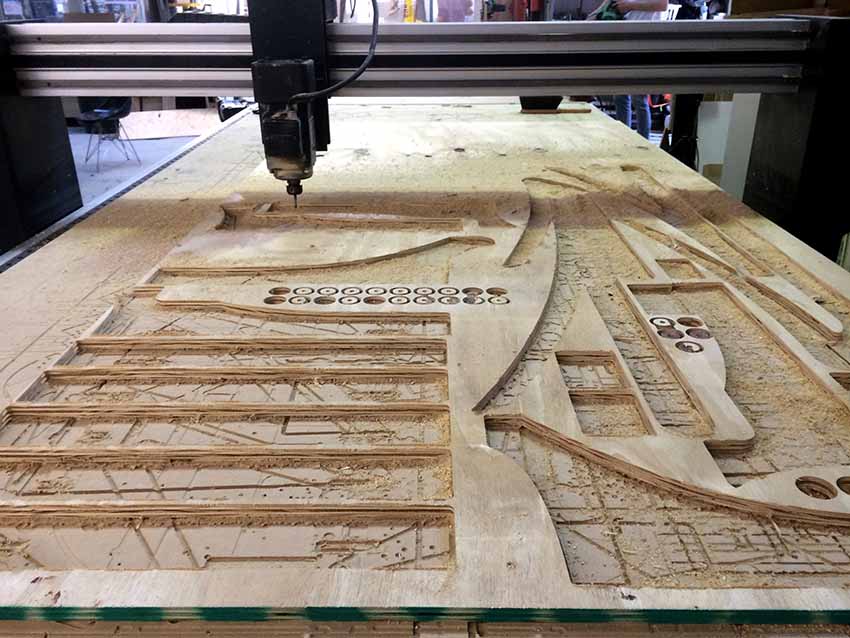
CNC milling
With the GCode from the RhinoCam in the one hand, and my piece of wood on the other, I was ready for the milling. The CNC I used was the Precix 11100, and the tool was a flat 6mm upcut mill.

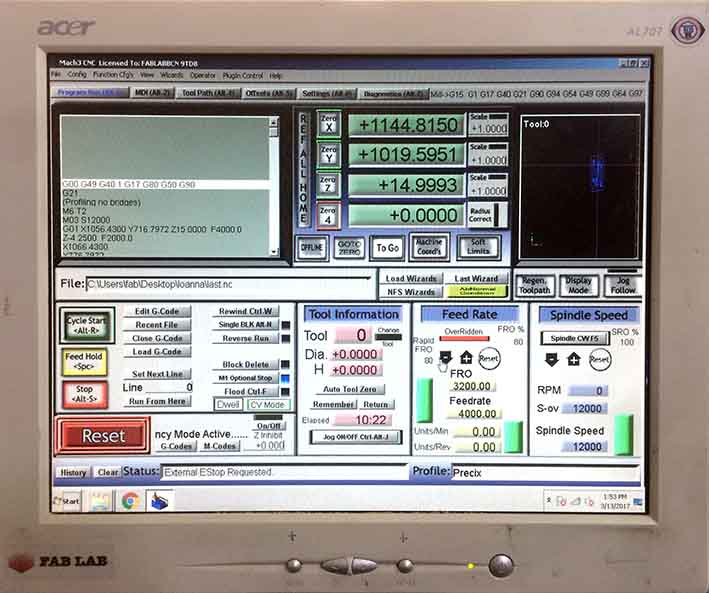
First the machine must be zeroed in the x-y axis, and the the z must be set either automatically or manually. Then the x-y is zeroed again on the corner of the material, and the position of the new zero must be written down, because if something happens during the process and it stops, you need those numbers in order to be able to restart it without losing the material. The bridges I had used were too small, and the plywood was not of the best quality, so most of them broke during the process, even though I reduced the speed to 80% in an effort to decrease vibration. As a result the little pieces I wanted to use as spacers didn’t survive, but everything else was alright.
Construction
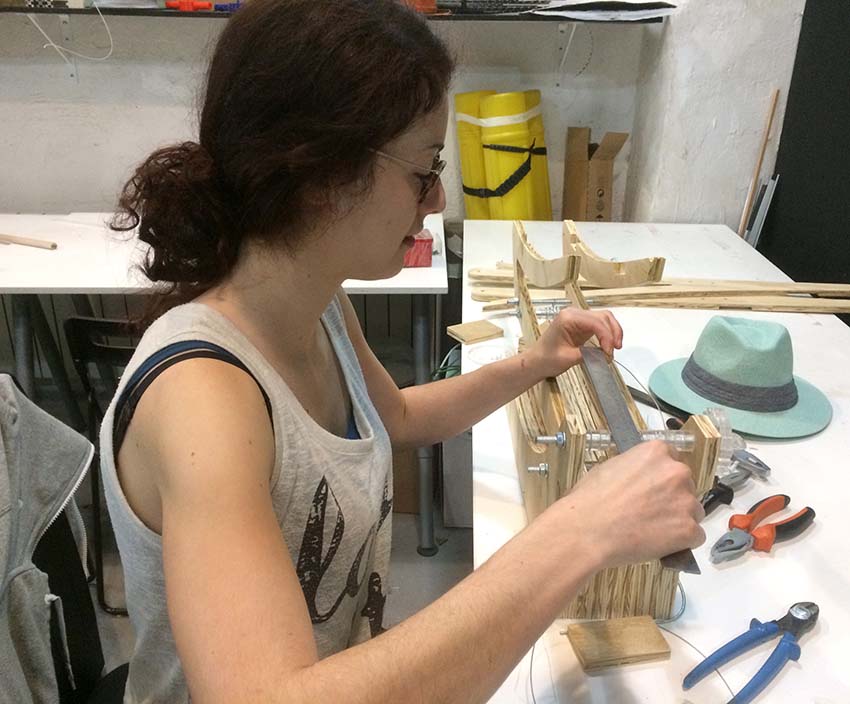
As always, construction begins with the sanding. A long repetitive process that calls for good music, otherwise it is very very boring. And I believe that a happy “sander” sands better!
After the sanding, the first thing I put together was the base.

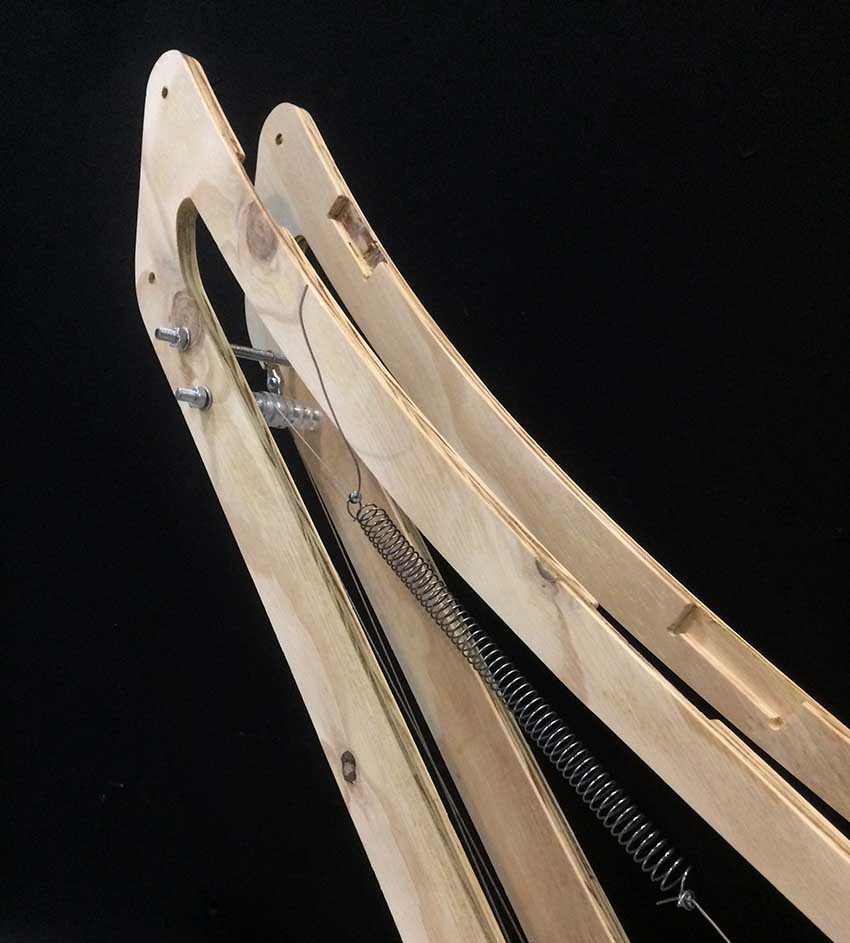
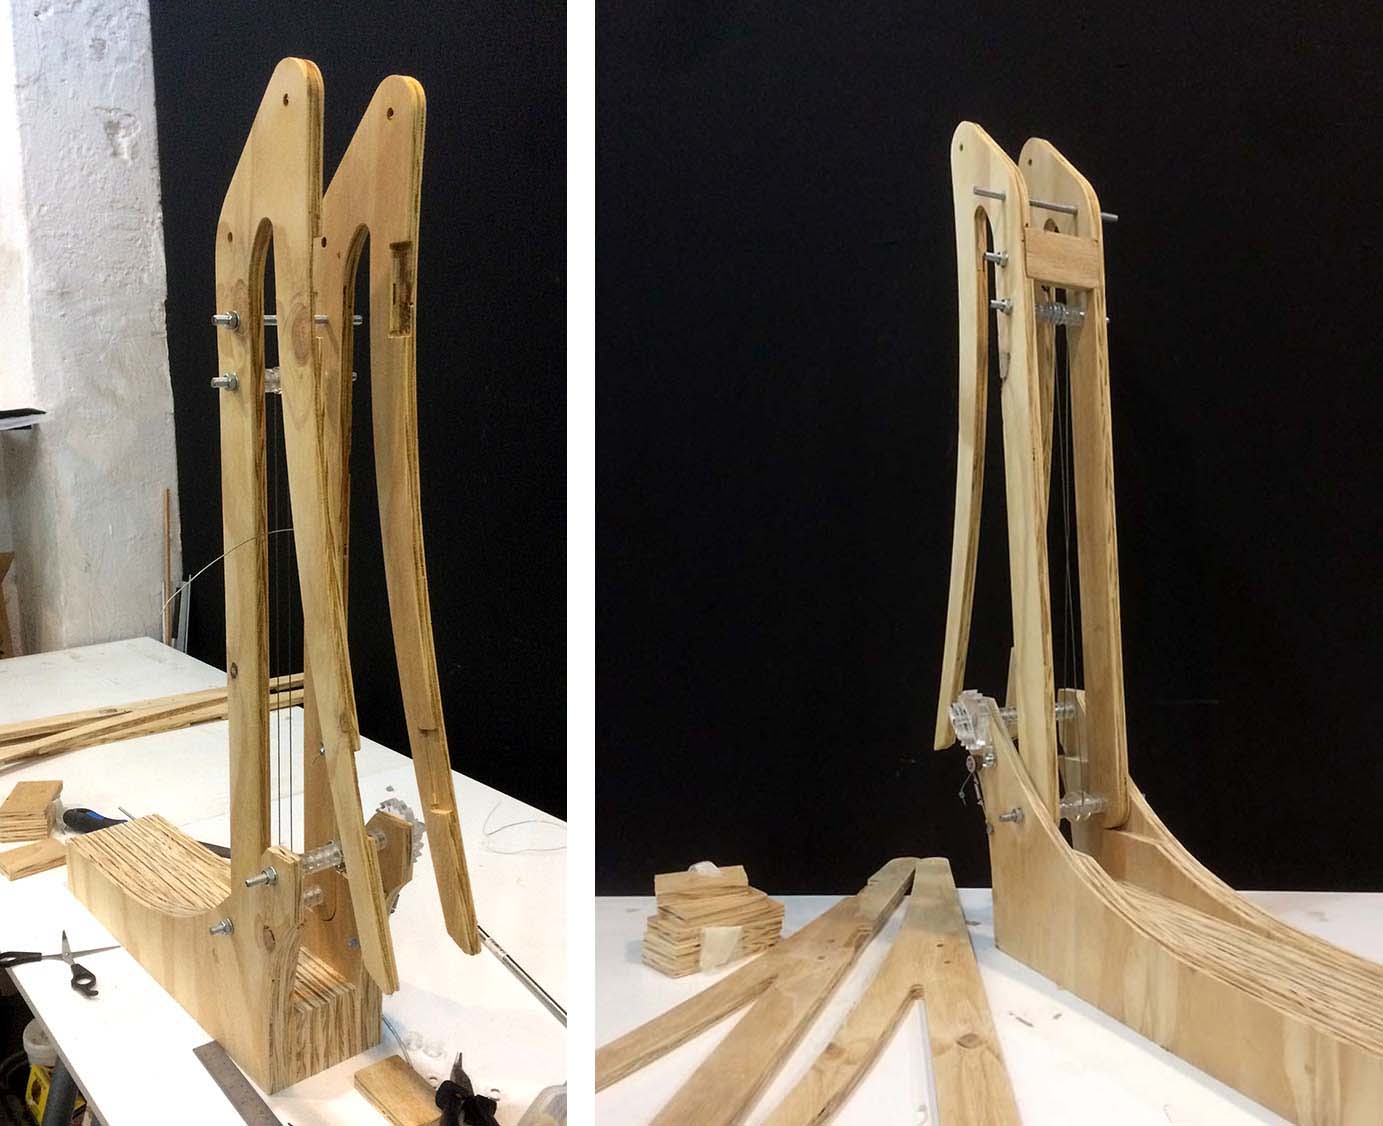
I then started assembling the model. So far I’ve only put together the lower arm.

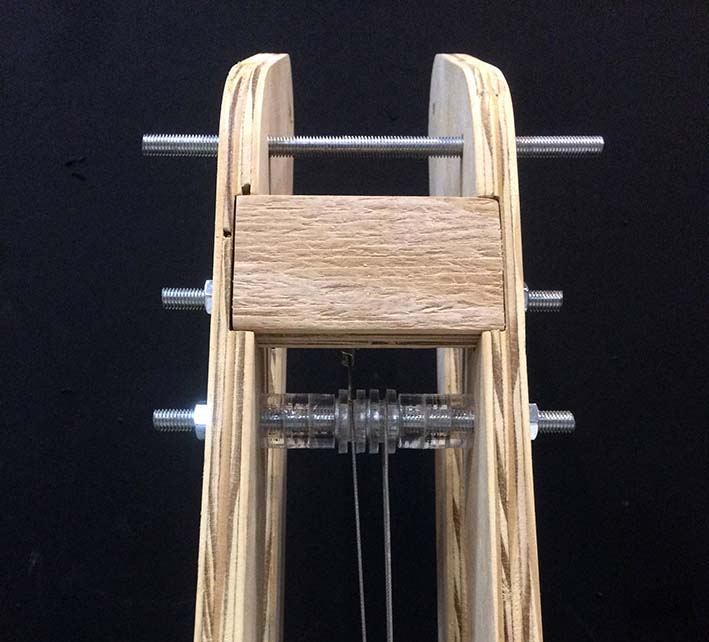


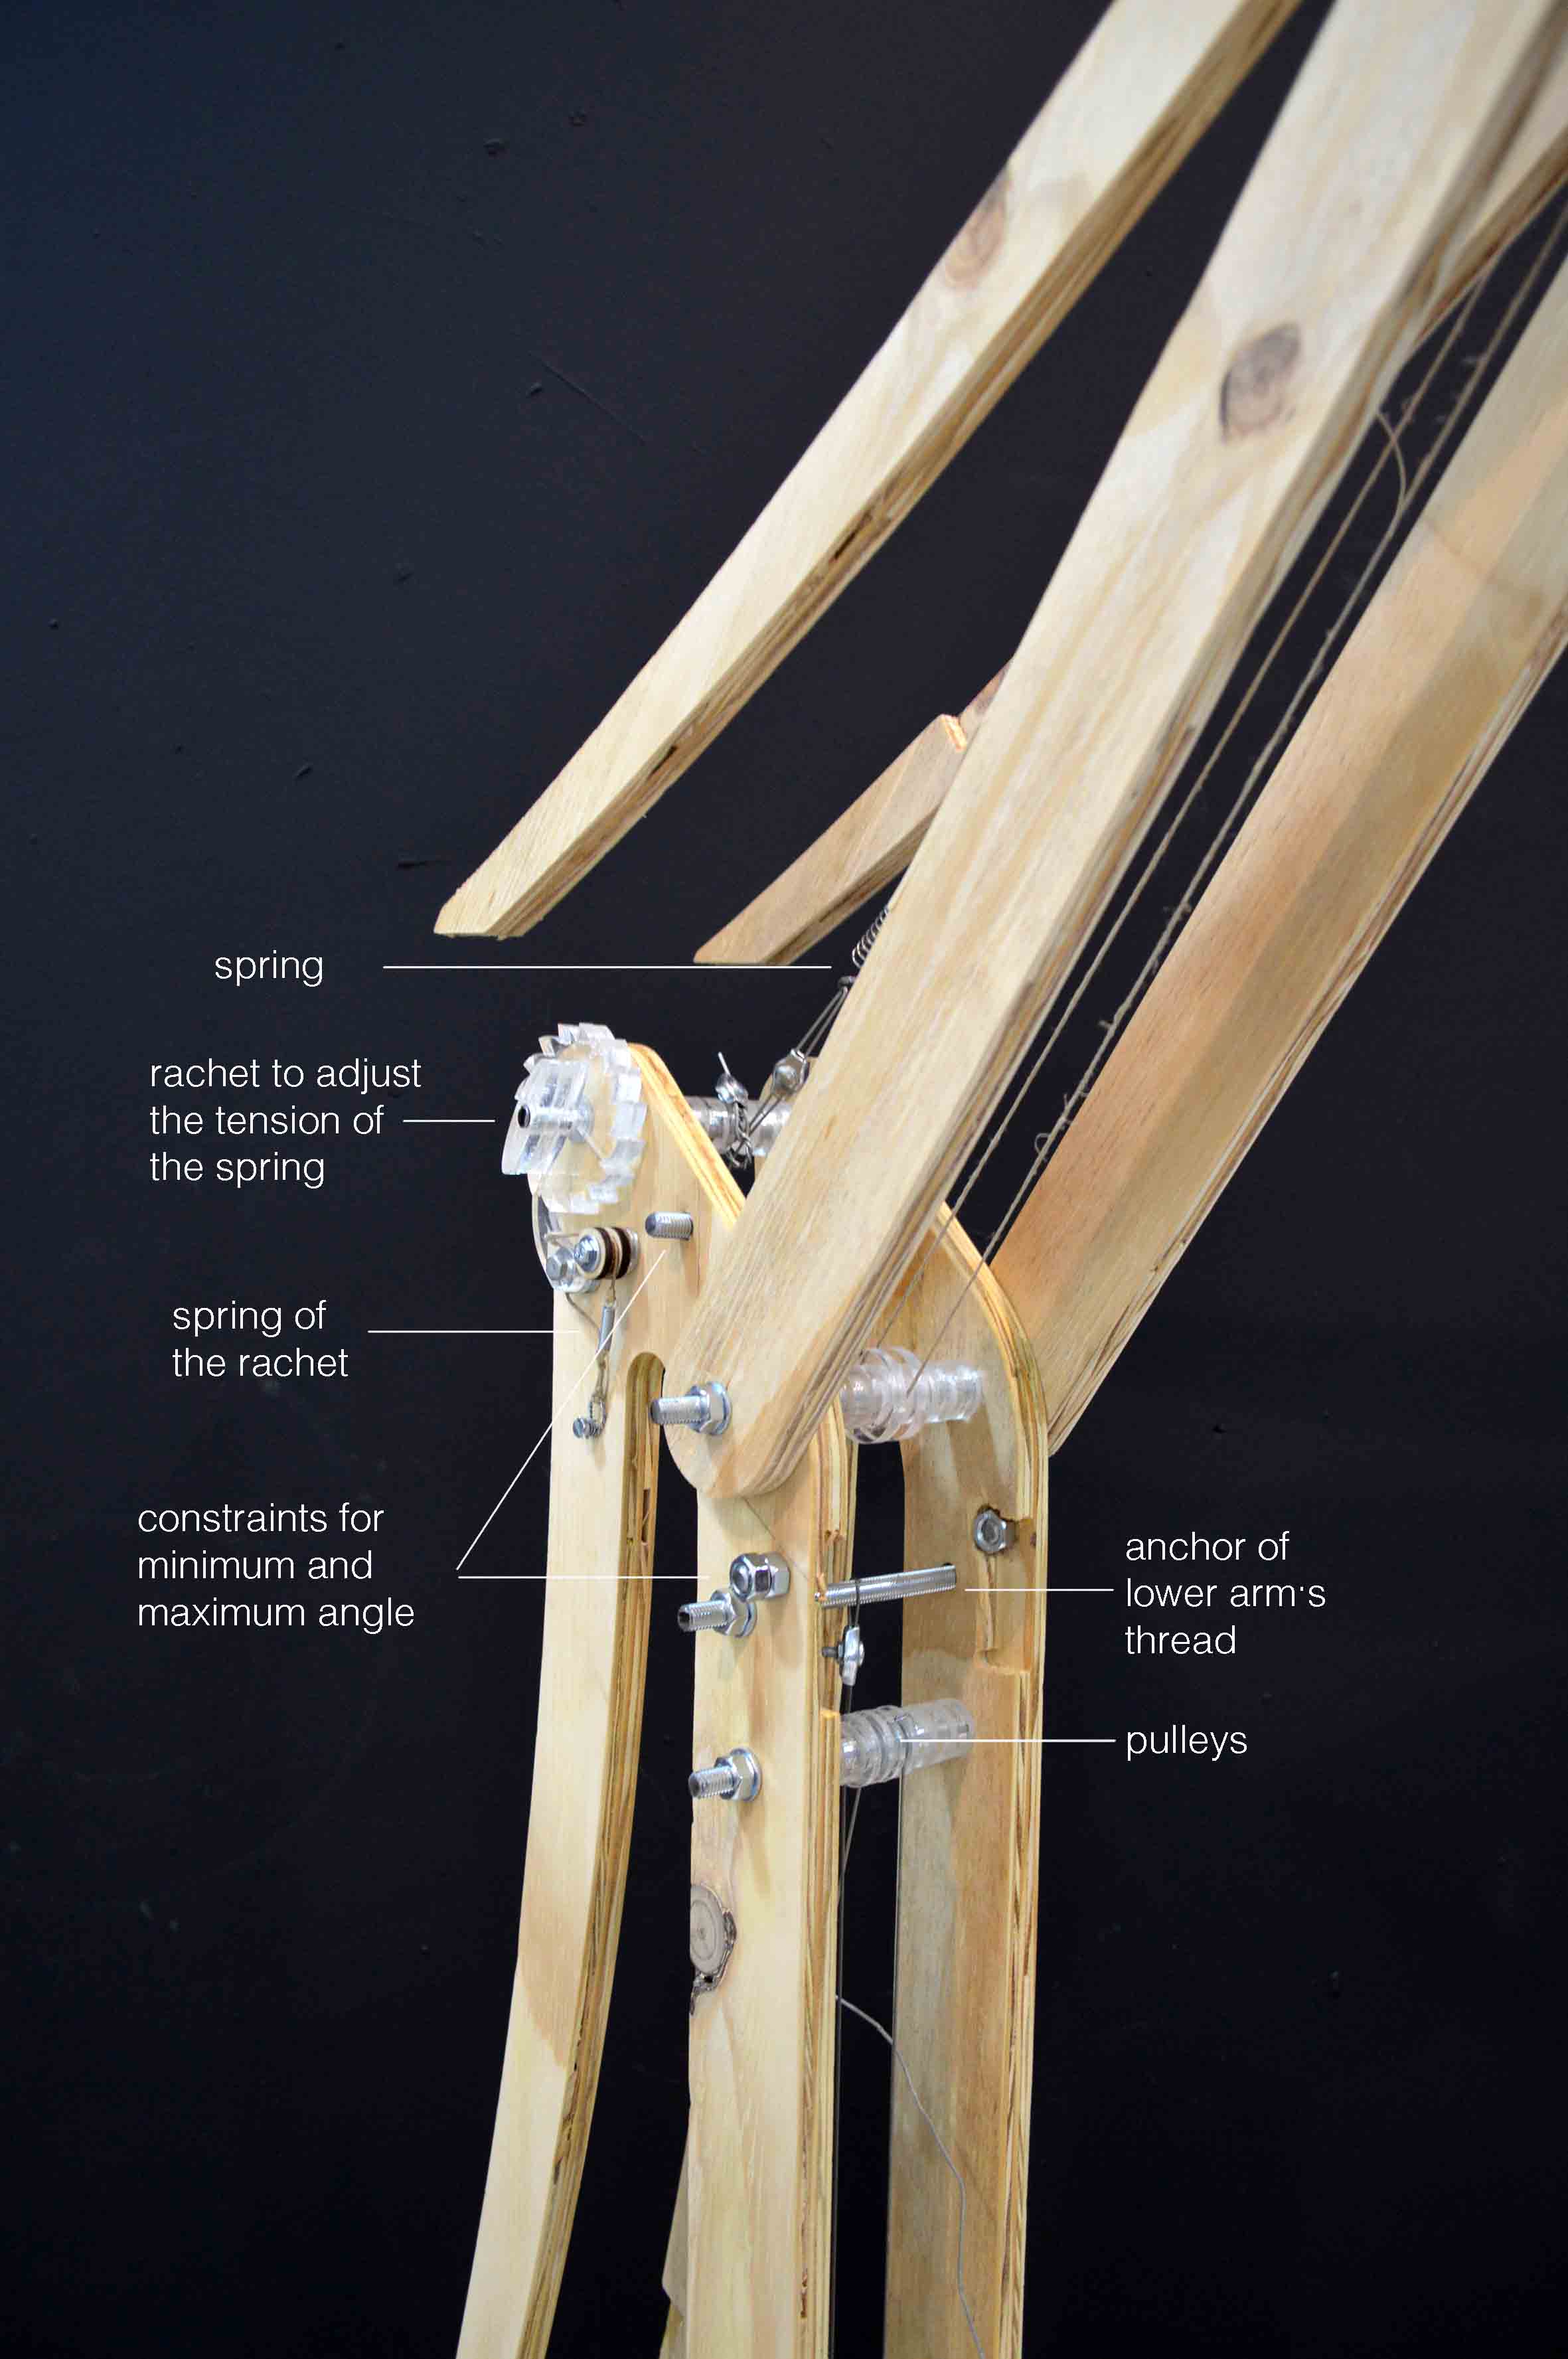
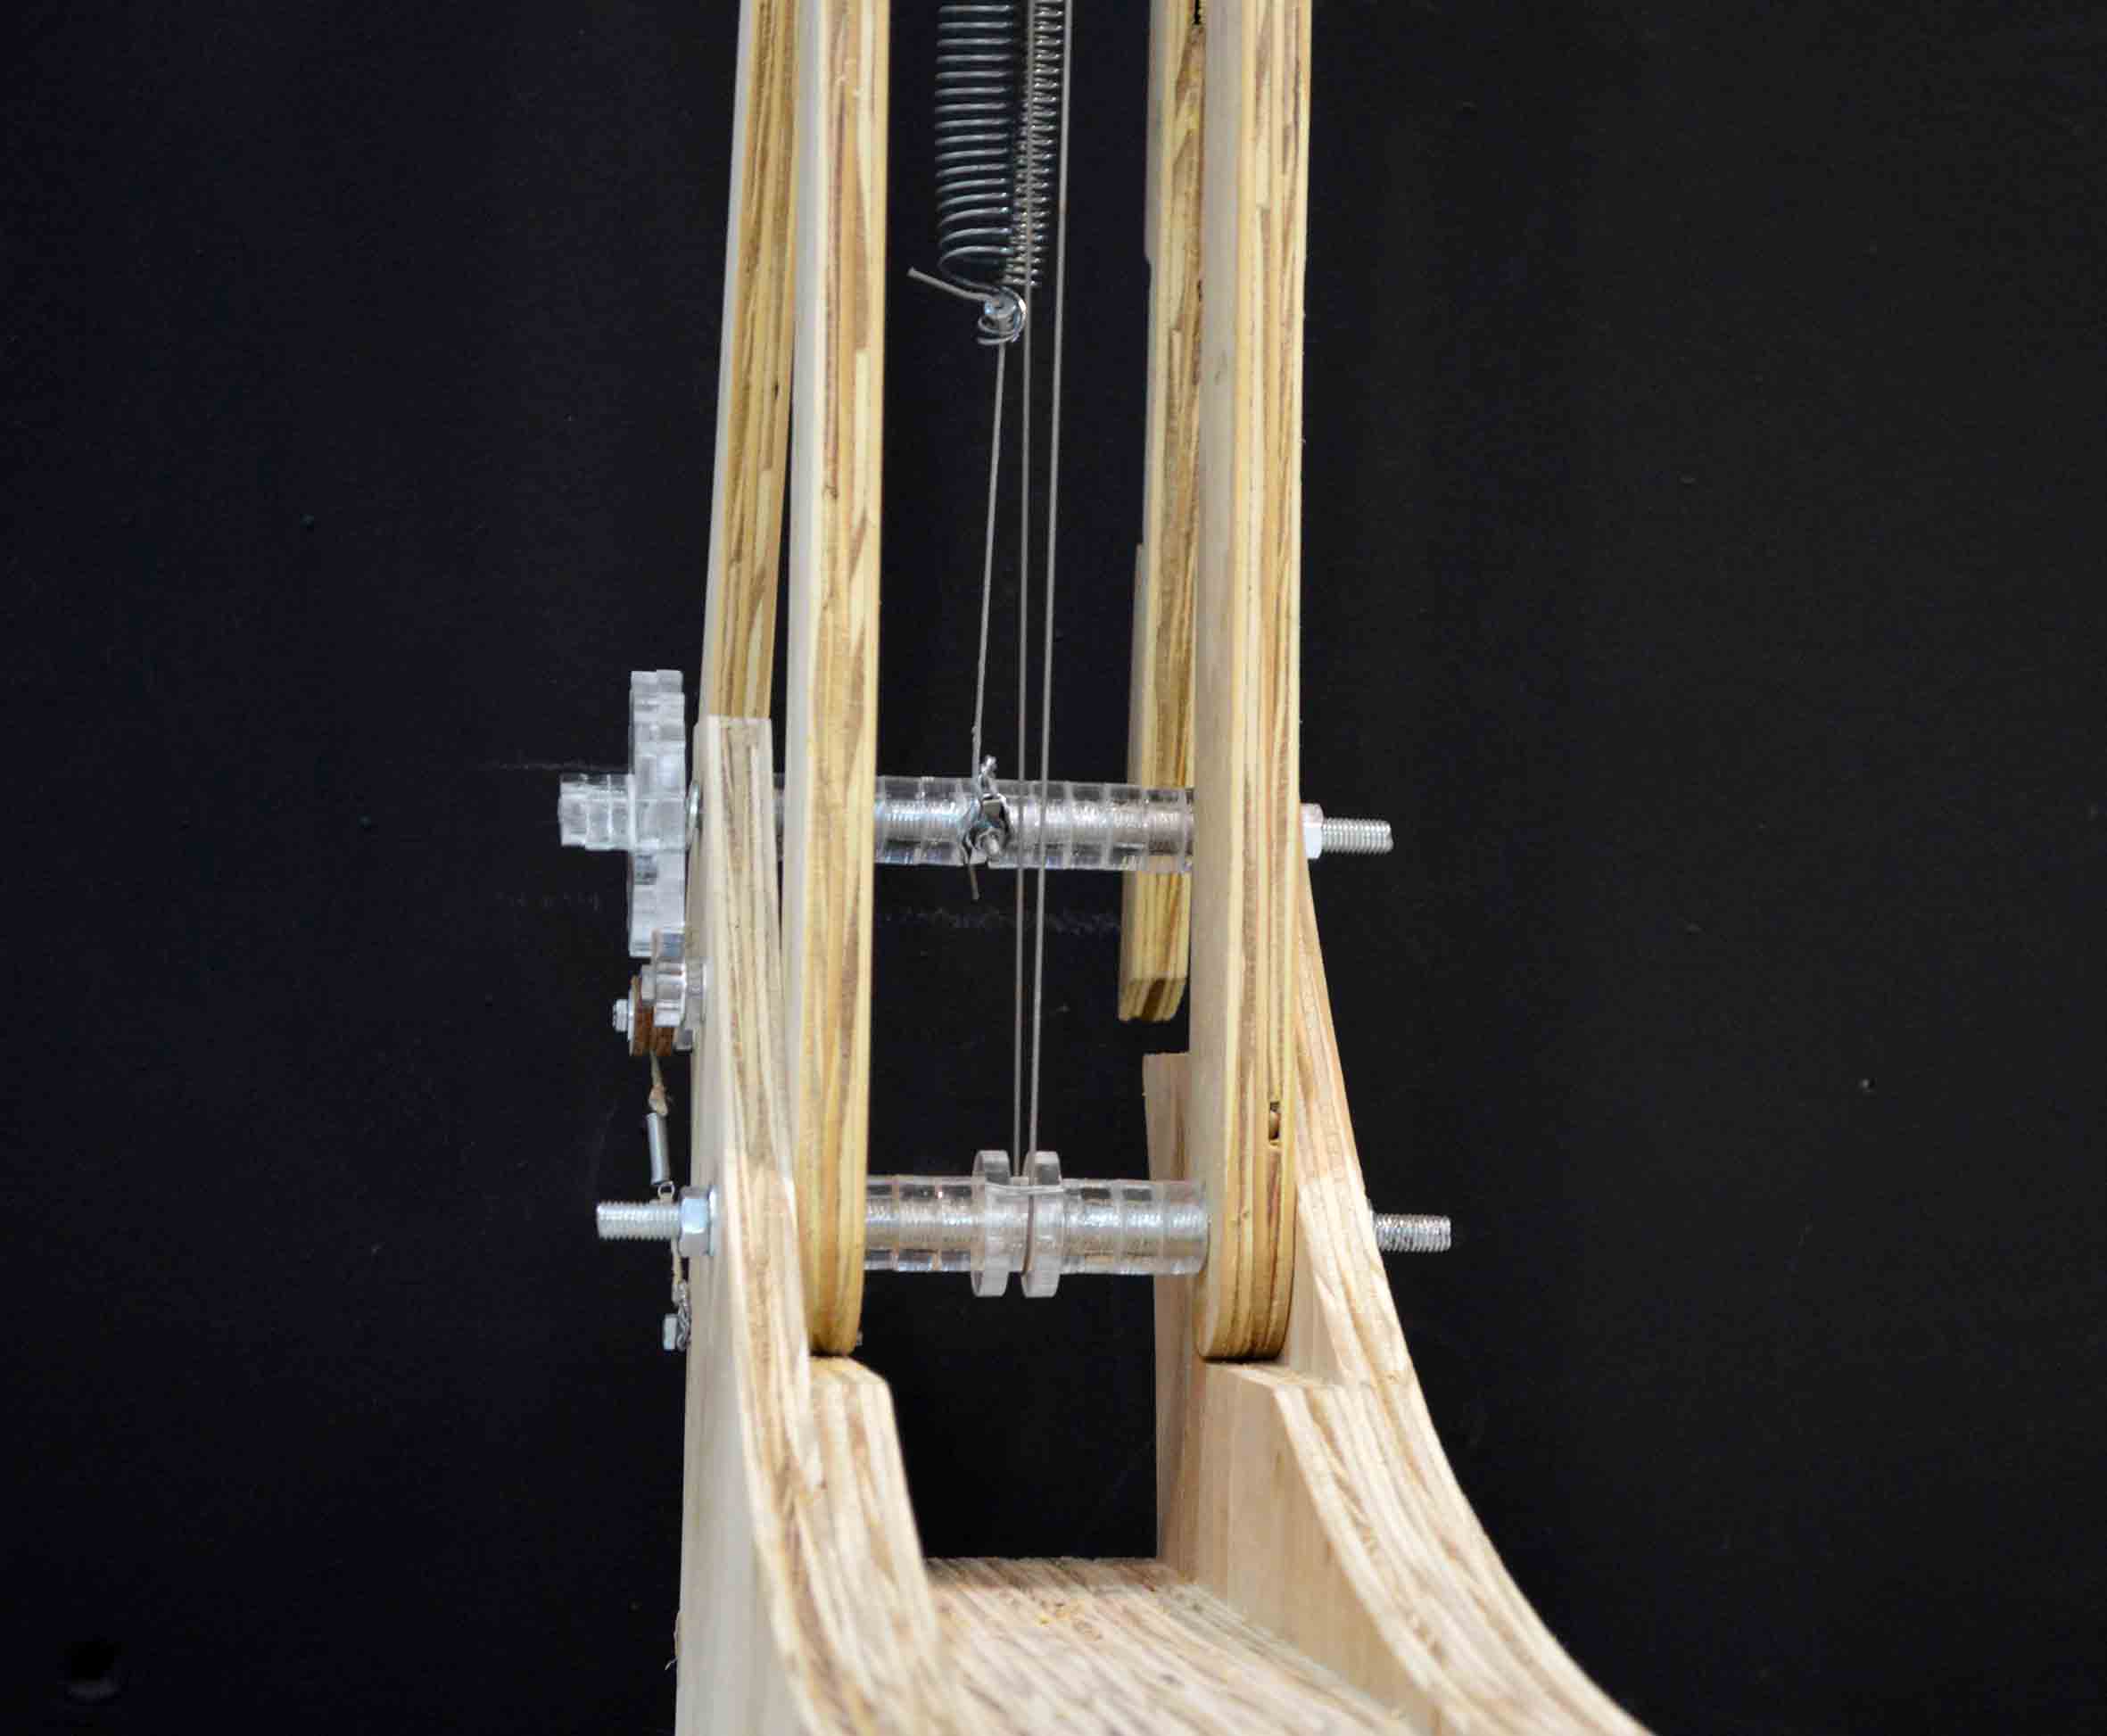
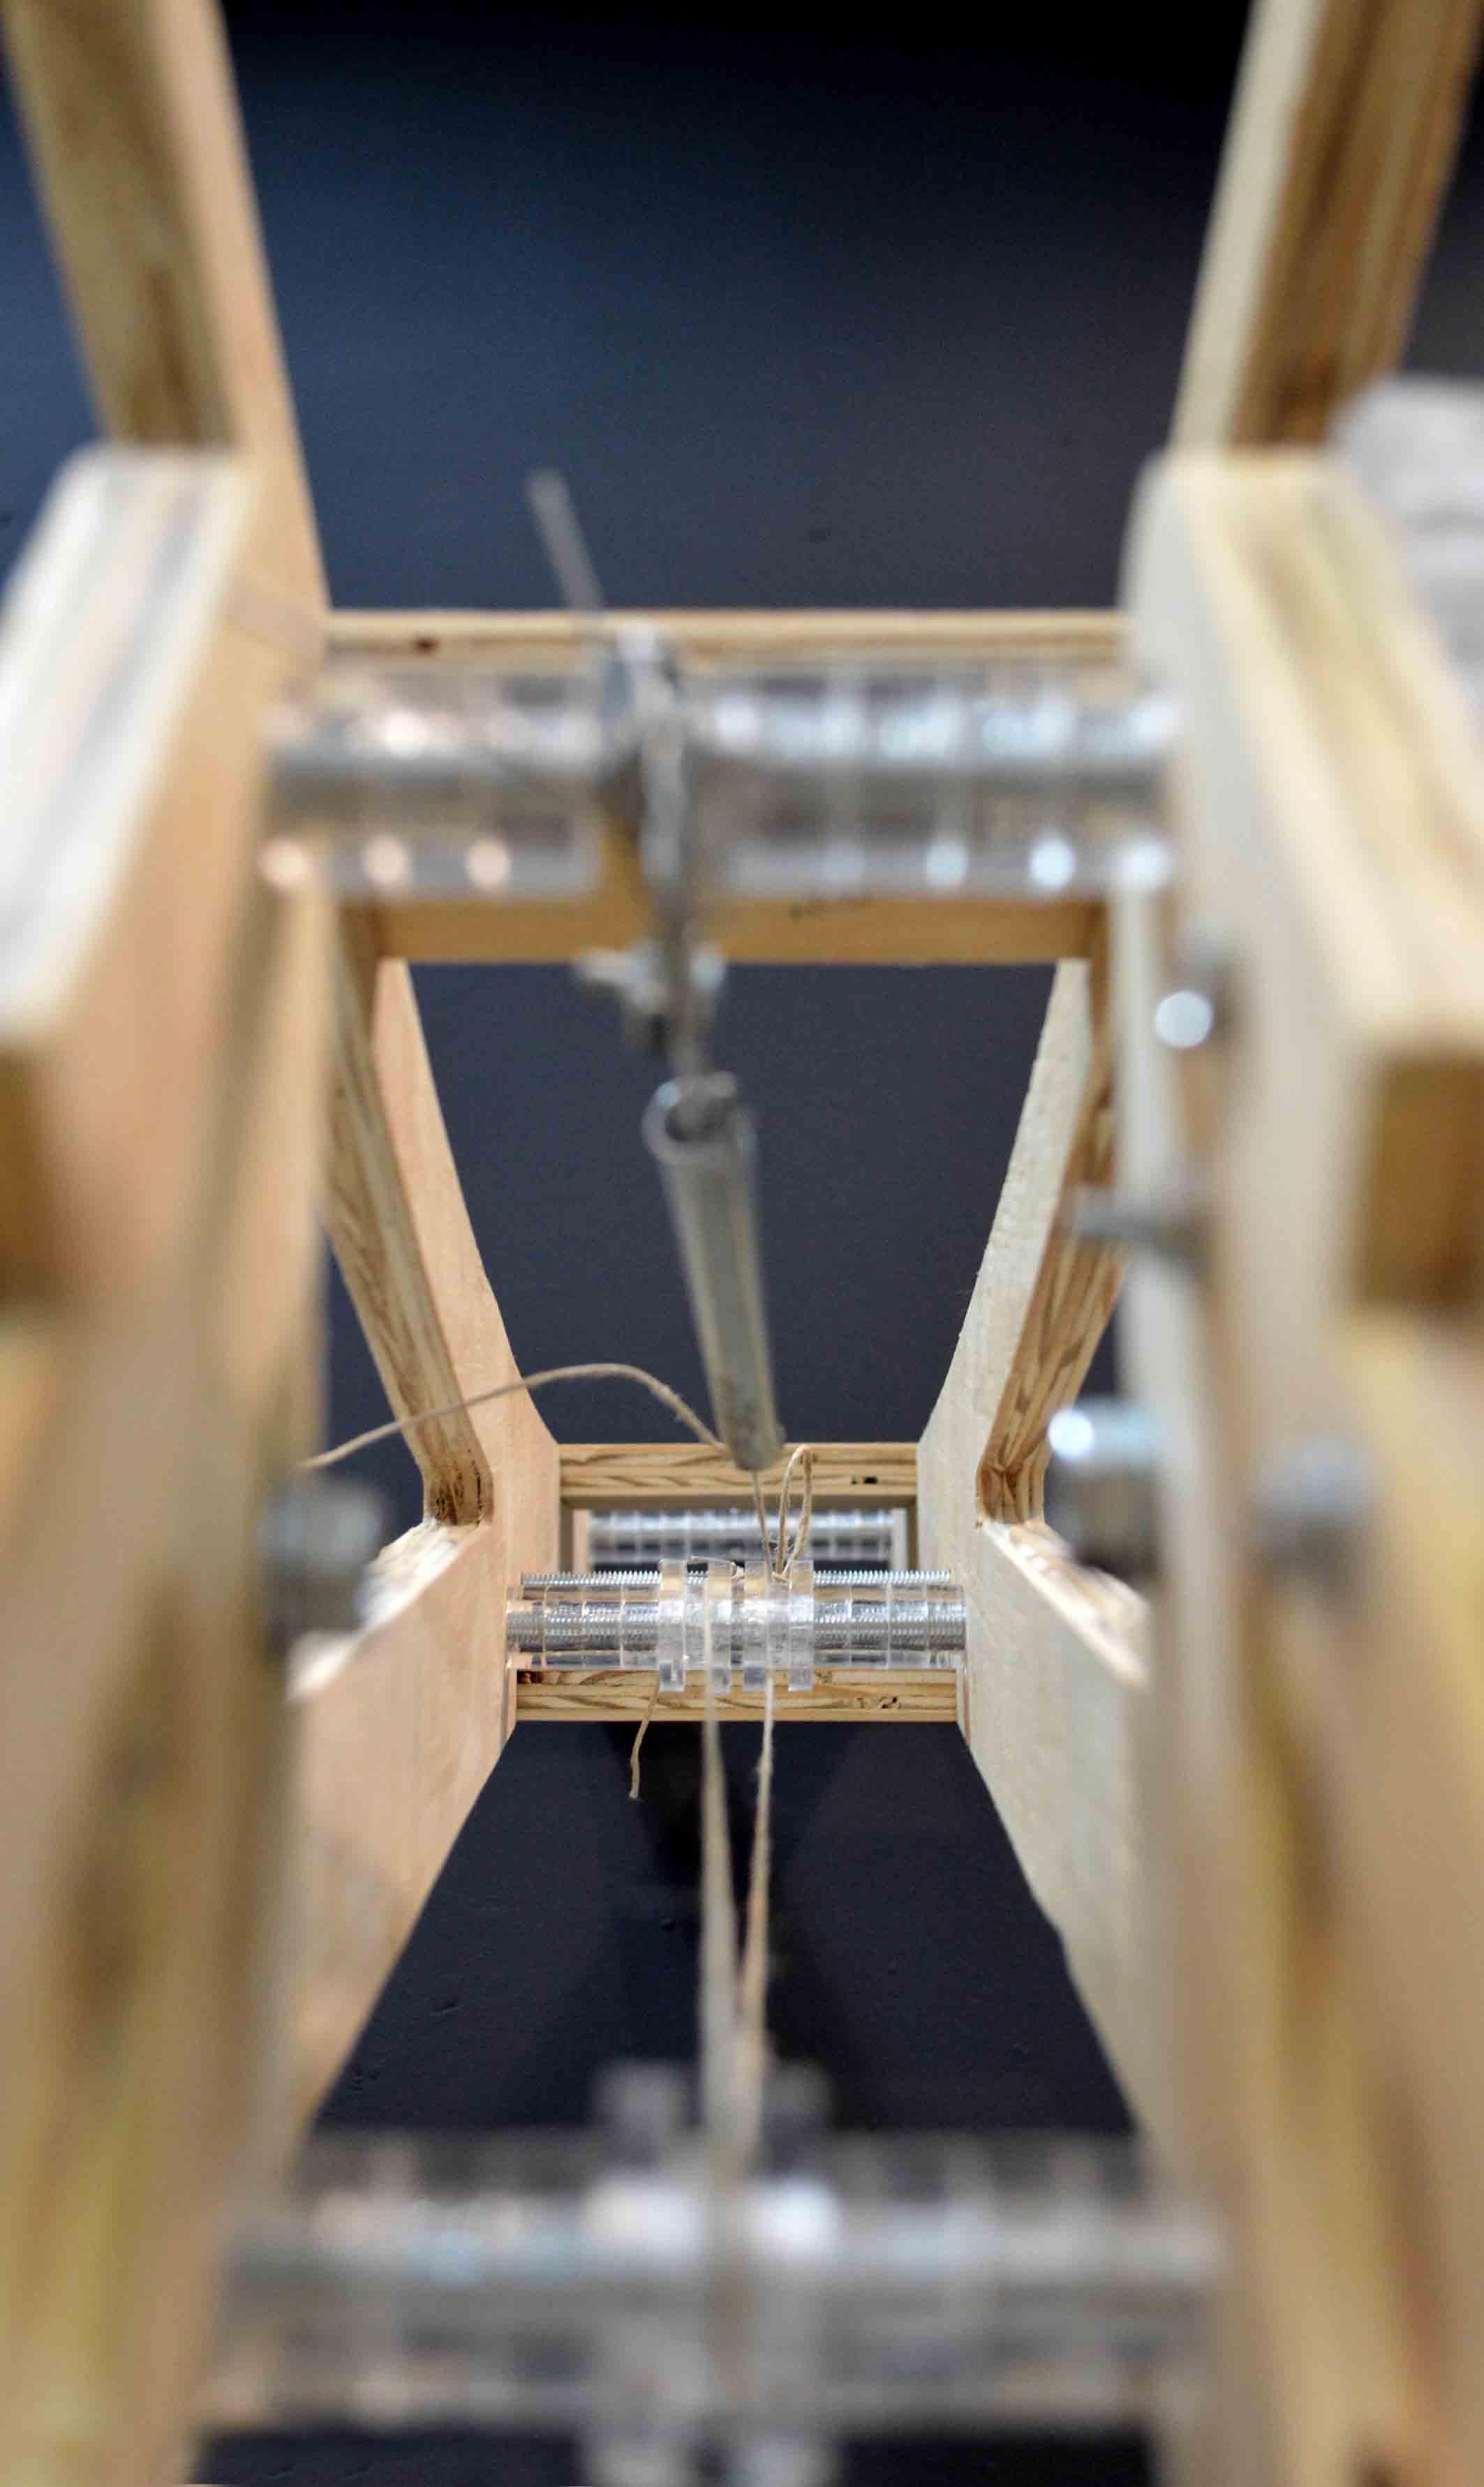
The problem I’ve encountered is that I haven’t still managed to balance it perfectly. I believe that it is because I’ve not found the right spring yet, with the correct elasticity and stiffness. I experimented with many different springs and combinations of them (attached in parallel).
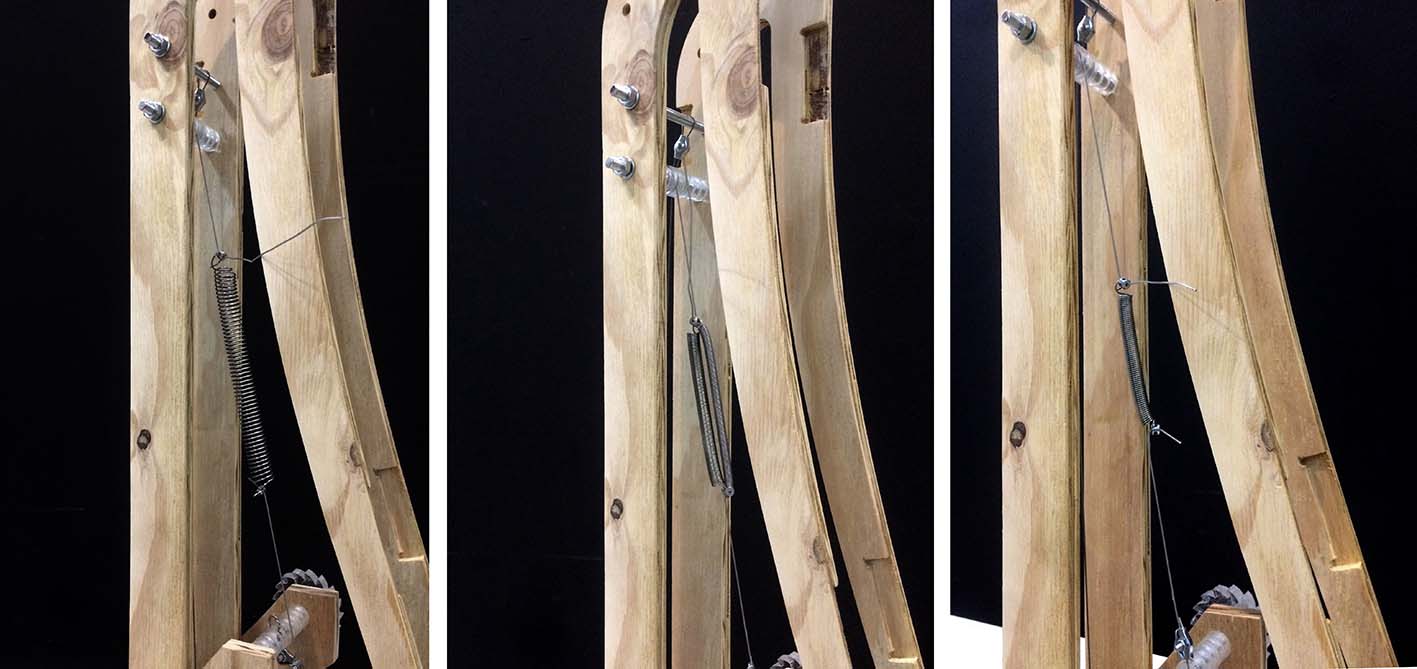
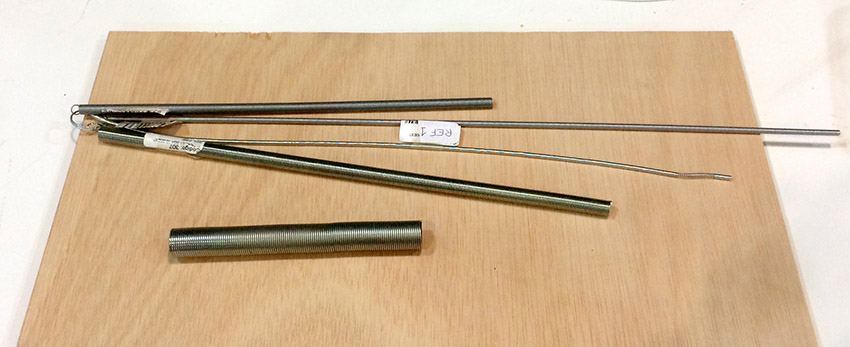
My collection of springs
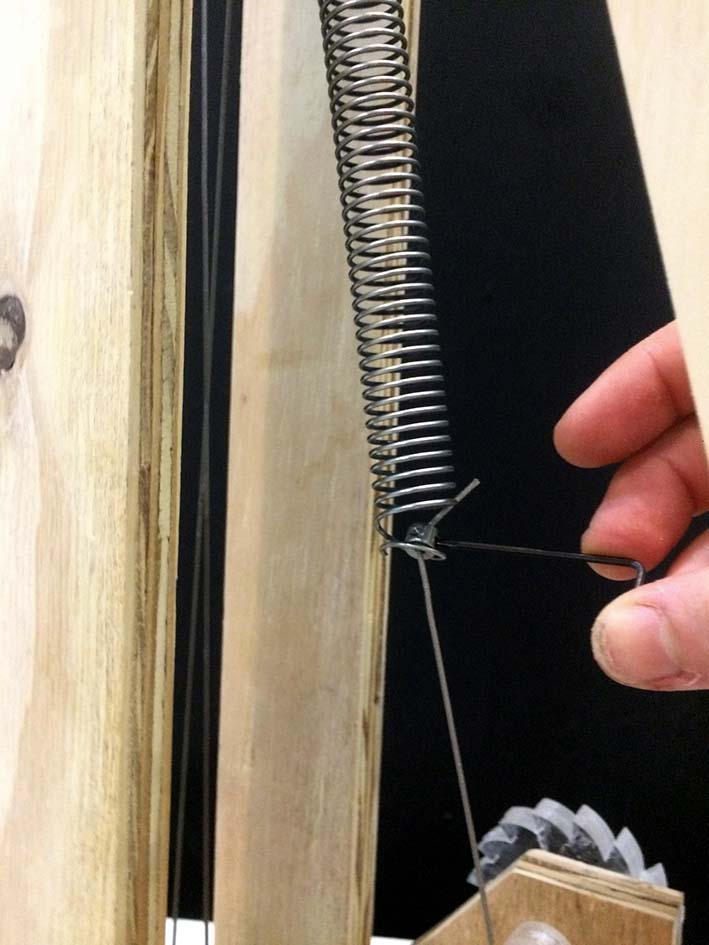
Attaching the spring
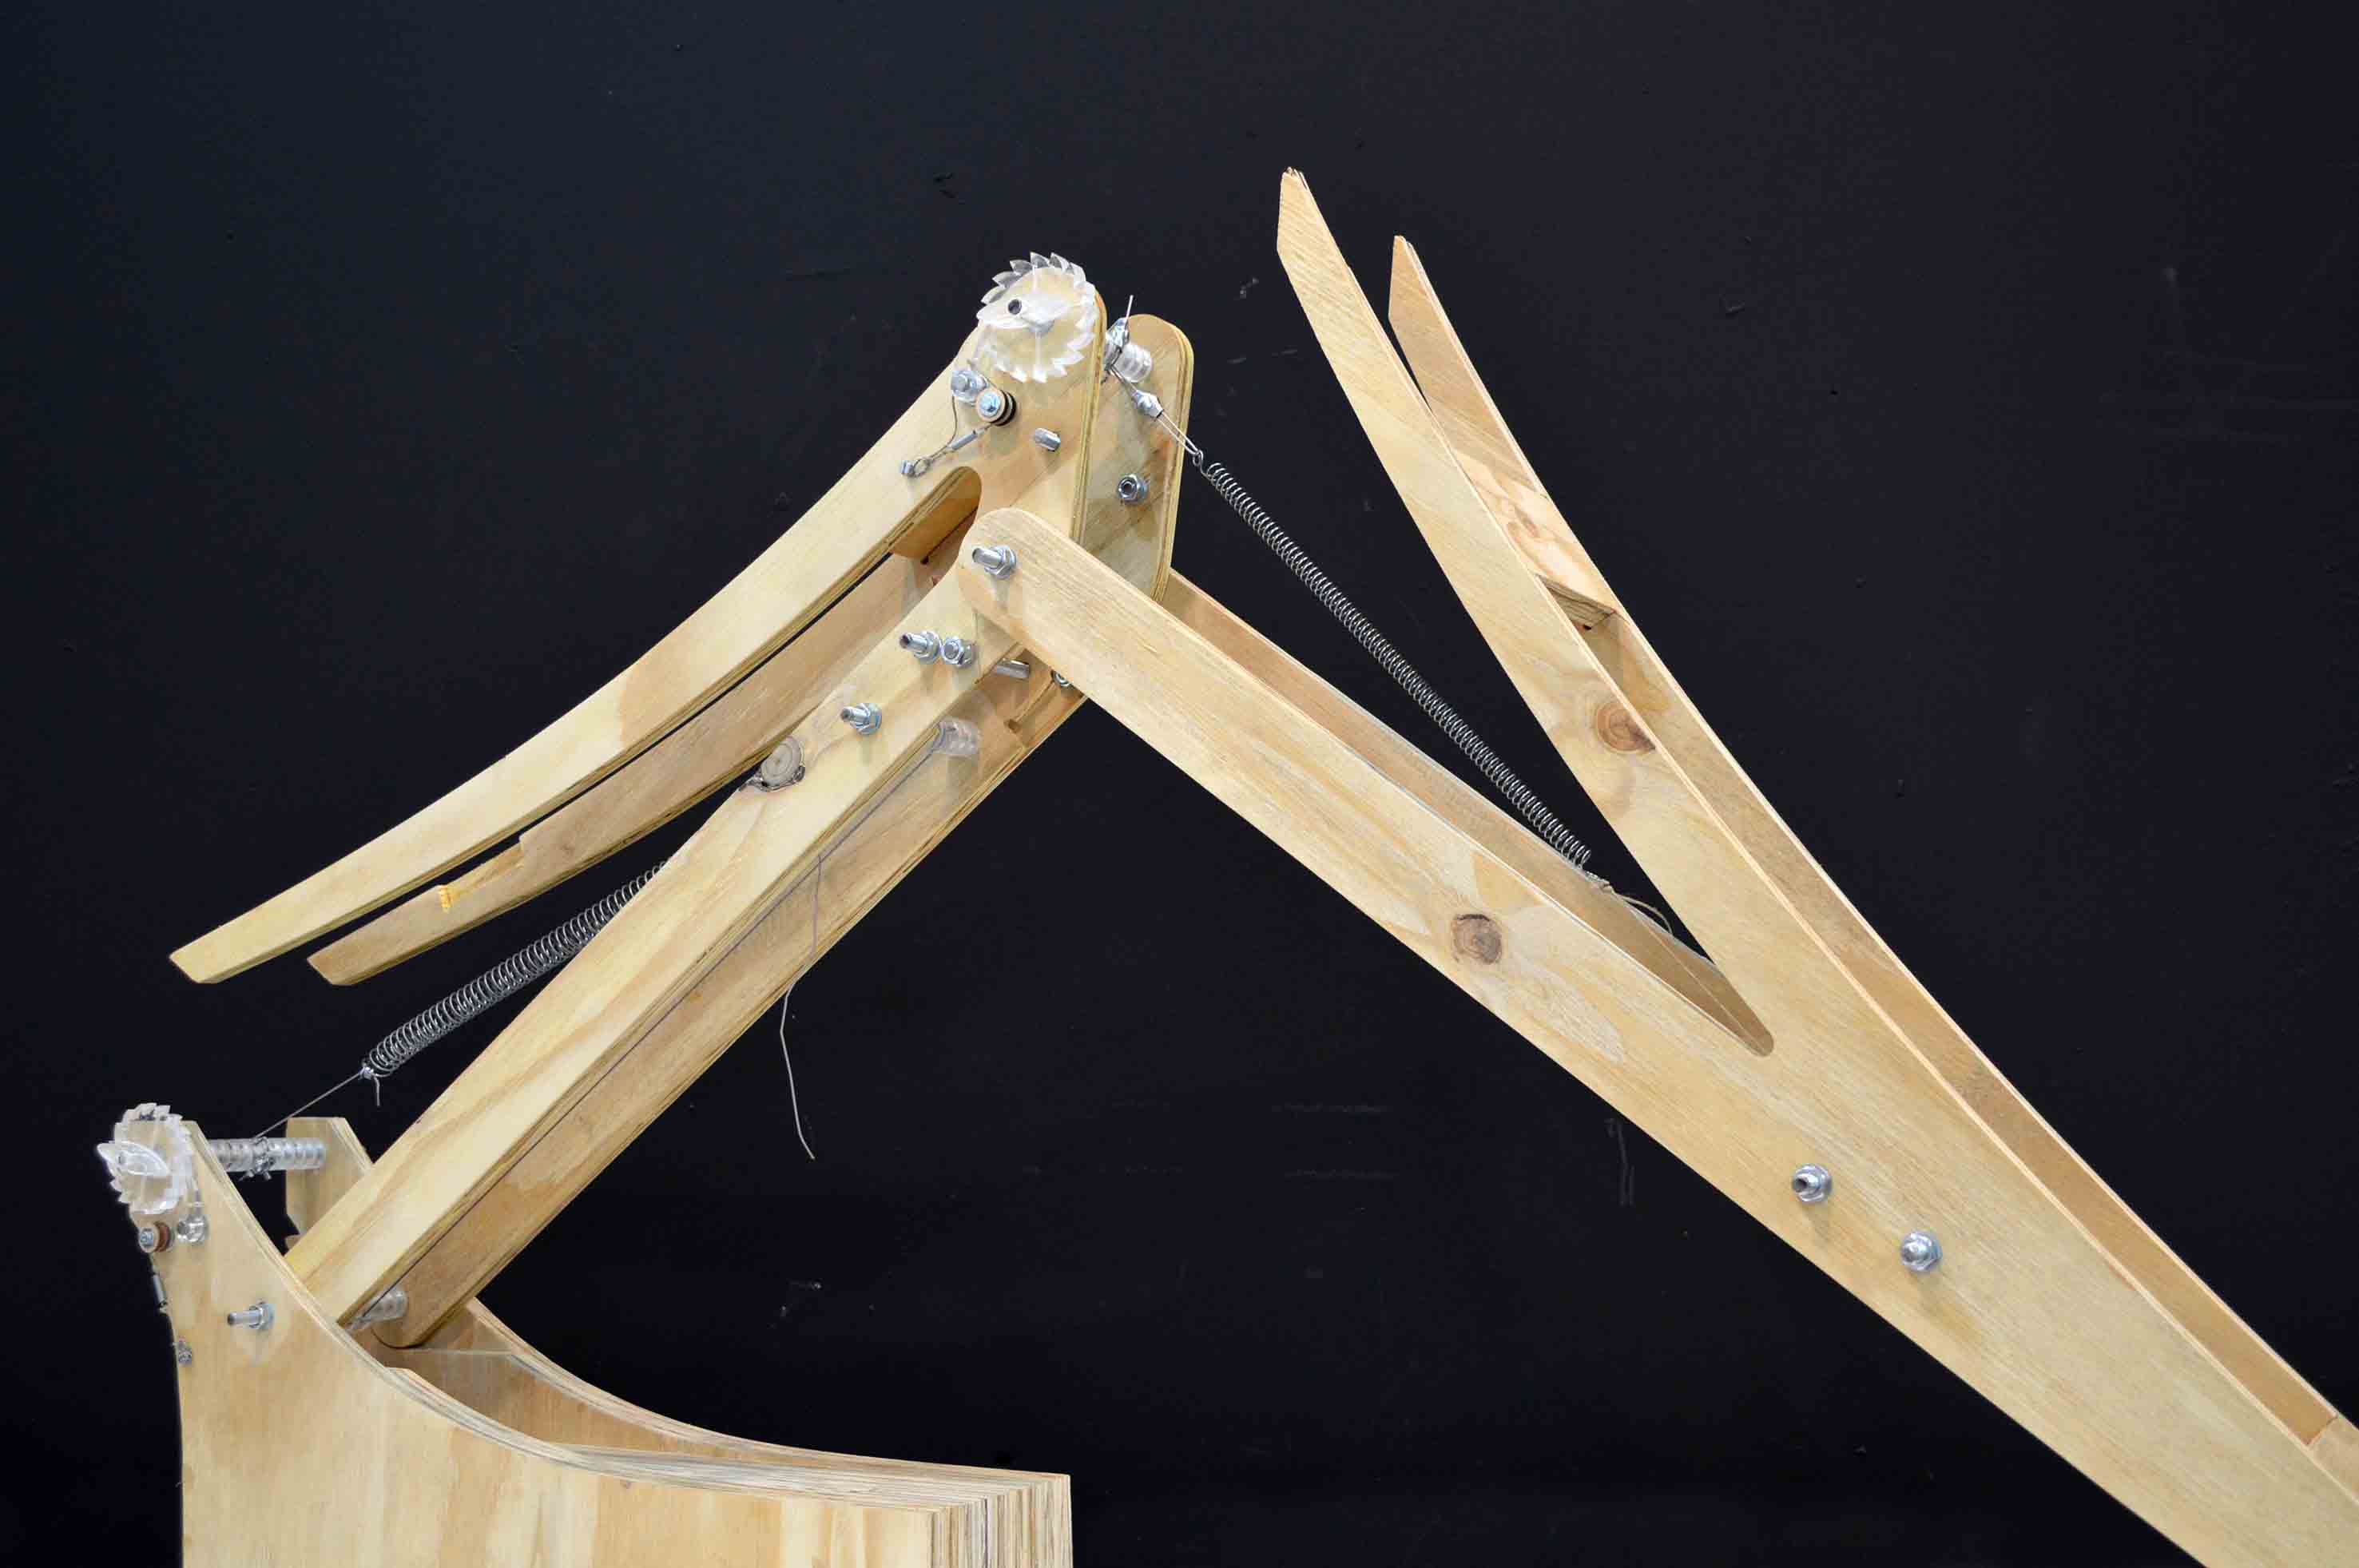
Overall though everyone points out that it already looks pretty cool.
One week later..
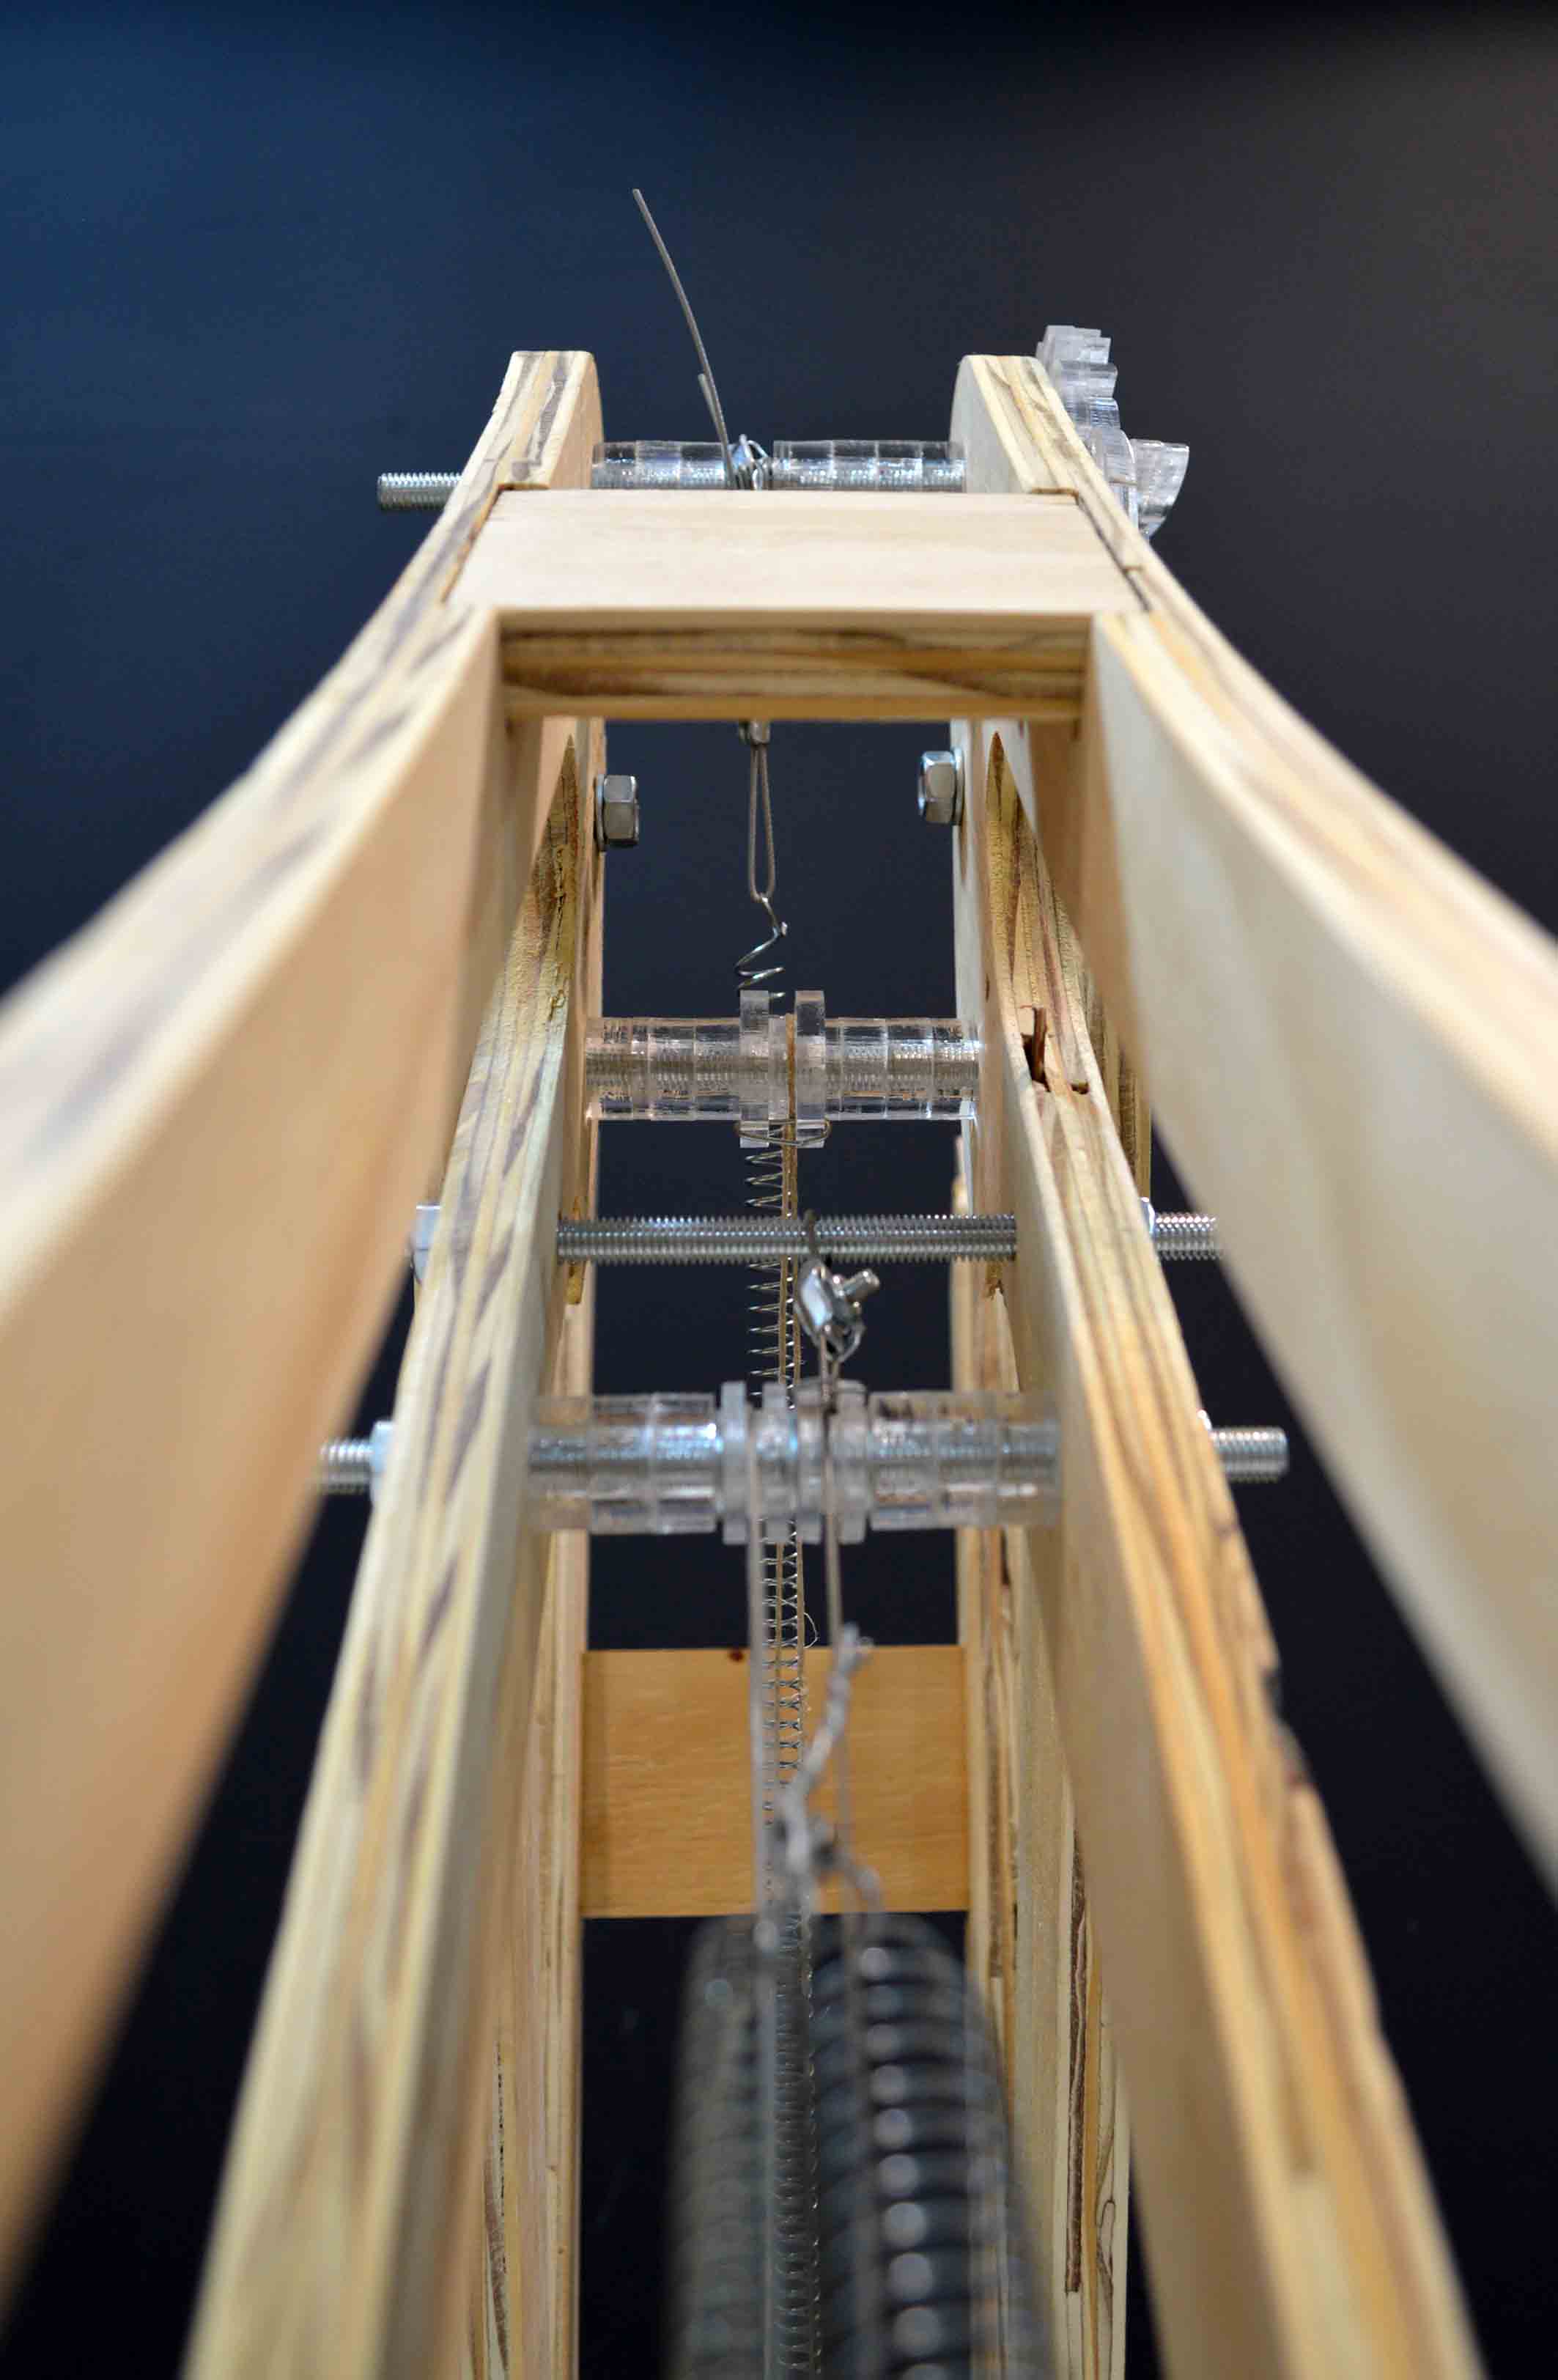
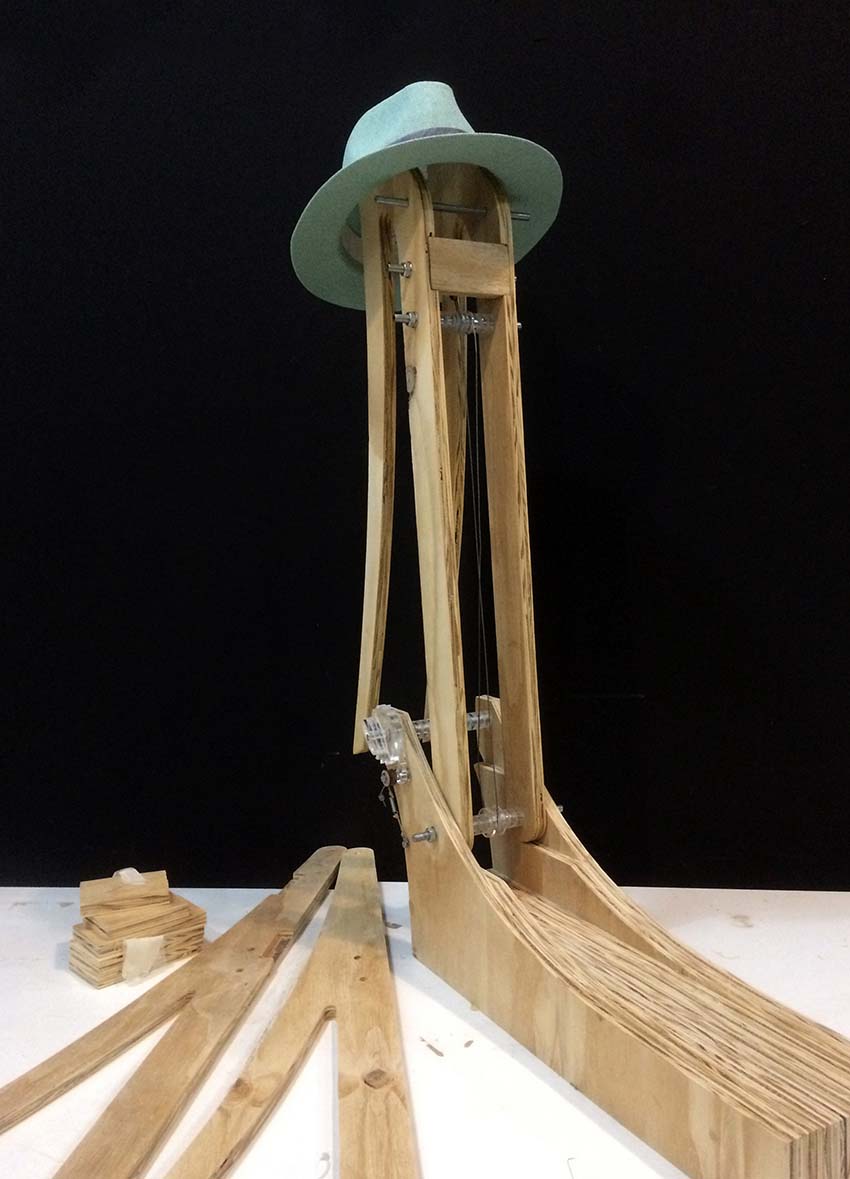
It took a little longer than expected, but I finally completed the model. Well, "completed" is too big a word to use, as I have a lot of future additions in mind, but the part concerning the CNC seems to be over. The total height is 1.60 m and the weight is (----) kg. Plywood of 15mm thickness is the basic material (cut on the CNC), but I'm also using metal wire, acrylic (cut in the laser), metallic springs -obviously-, metallic bars, and very few screws.
Overall, the springs work to balance the mechanism, but it is not balanced in all the positions I expected it to. I'm still working on finding the correct springs, but I believe it is also a problem of the overall geometry. I am investigating what is the problem with the lower positions where it is not balanced, even though the smaller models were perfectly balanced in those positions.
Nevertheless, I'm very content with the result given the fact that it was my first model of this scale. The future additions concern mostly the surfaces that will be applied in the "back" of the arms, improvement of the rachet mechanism to make it easier to open at will, and a mechanism that is able to lock it on specific positions.


Here you can download the Rhino file, with the RhinoCam strategy.