Embedded programming

This week has been a long week as we have double time with the Spring break. More days for research and try to get up to date all the previous work undone of past lessons. I have encounter another arch-nemesis for adding to my foes in this Fab Academy, the stubborn Eclipse IDE, but well it as been an interesting week, with lot of learning in one field of study very important for me.
Lesson
Academany Fab-2016.03.16D Lesson 08: Embedded Programming from Fab Academy on Vimeo.
Review
Again I'm in the volunteer time explaining all the things I discovered for programming microcontrollers in mac
Academany Fab-2016.03.30B Review 08: Embedded Programming from Fab Academy on Vimeo.
The PCB board
My soldering skills are getting a little better, but still always something happen and catastrophes start rolling. The pcb board that after so many tries had finally milled and soldered, had some flaws in the soldering. Even it worked, it stopped of receiving data.
I tested the connections and after so much workarounds It seems that have a little problem with the 3 paths of the external clock. Also the button seemed to didn't work so well. When I was desoldering with the heat gun I learn another lessons, the plastic that joins the pins of the ftdi, don't resist the heat so well. The closest one to the button melted and when I removed the strip, the cooper of the paths get with them so another pcb for my kill count.
I'm seriously thinking in mark my kills with vinyl stickers in the body of the Modela. Lucky me that I have my personal angel guard and with the help of the my instructor Nuria Robles, I have another copy working. Also I took one copy that she made for testing a design of my classmate Marta Verde.
With my Fab ISP zaerc model, that surprisingly works nice, and resist my clumsy hands and a usb-ftdi cable I have the tools to make this assignment
Information about the Attiny 44
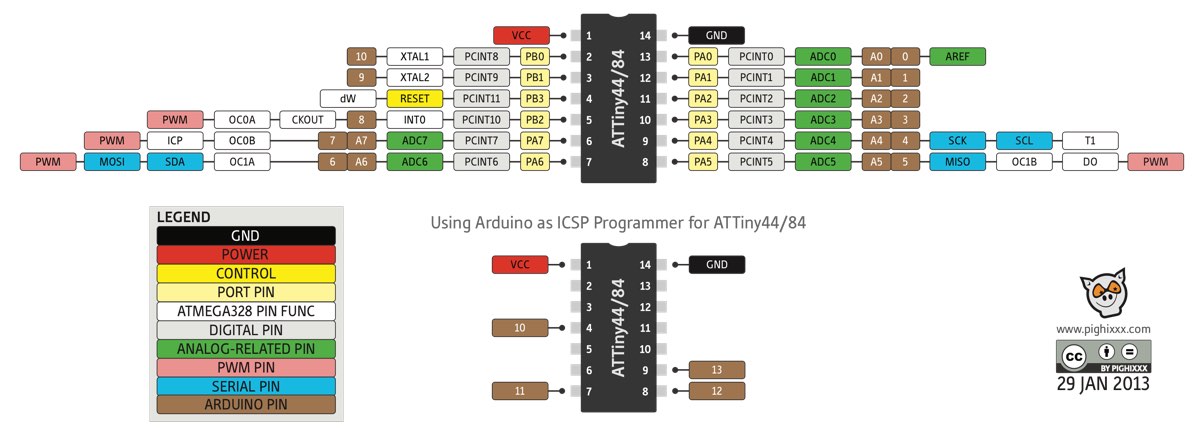
As we are going to work so much with micro controllers is good that we get used to know about their specifications so a perfect start is the Attiny44 datasheet. where we can found lot details and how the pins are connected.
This diagram of the series of the unofficial arduino/attiny pin out is very useful to understand how are named the difference pins and more if you are used to classic Arduino IDE
Another must have for this practice is the Make: AVR Programming book , is from 2014 so is very actual and covers lot of topics. Again I'm lucky as Fablab León has a copy of it. You still can download the code examples of the book for free and study them.
Programming with Arduino
As used Arduino IDE since many years, this was the first and more natural way to start, even now I understand that maybe is not the best to work with AVR is a good solution to start programming
Setup Arduino for working with Attinys
Like the majority of my classmates I started with the Highlowtech tutorial. As is well explained and has clear screenshots.
I tested with the latest version that is a nightly version 1.6.9. This newest versions are a pure pleasure as they make extremely easy to install and have updated new boards and libraries that in previous versions were very time consuming.
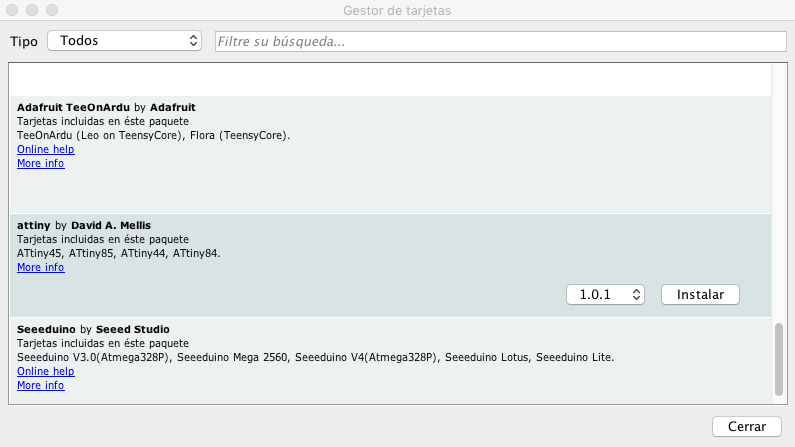
The specifications for the Attiny are in the web https://raw.githubusercontent.com/damellis/attiny/ide-1.6.x-boards-manager/package_damellis_attiny_index.json that you have to add in the board manager panel.
When you add this site you can select the attiny boards for installing them.
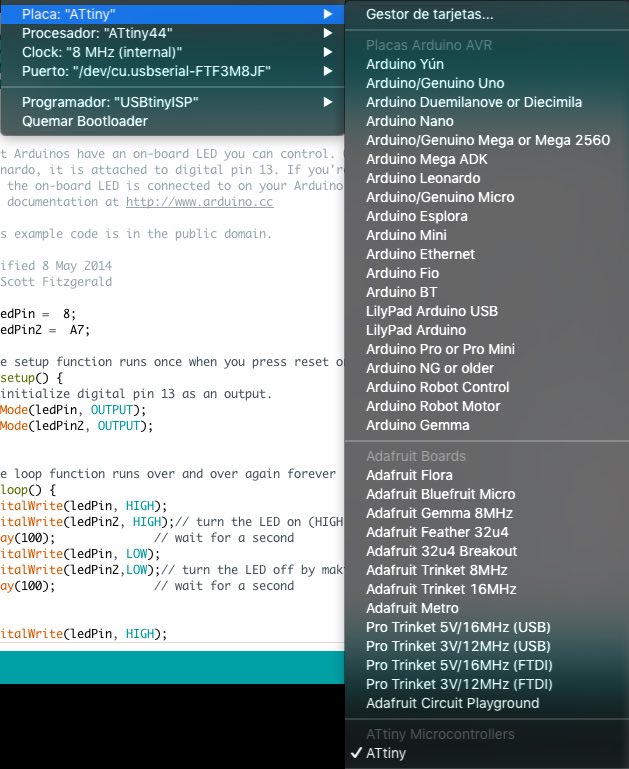
After you install them you can select them as your board, also which micro controller and its clock speed, in my case as my board didn't have external I choose 8 MHz. In our case our programmer is USBtinyISP.
Be careful as the port that appear in my example /dev/cu.usbserial-FTF3M8JFis the FTDI usb serial that power on the board and allow serial communication not the ISP programmer.
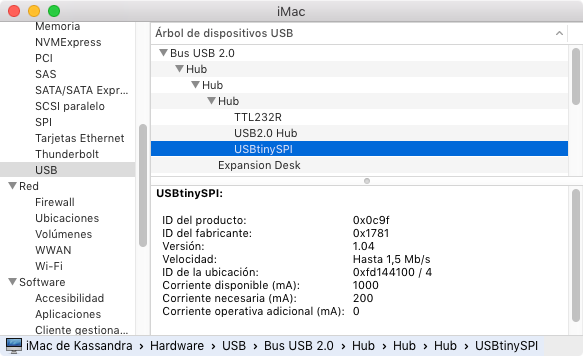
You have to check that your ISP programmer is connected in your system preferences, in OSX is in system profile. Another advice is that you connect your ISP to a usb hub with its own power supply, as if by some error ISP start to drain a lot of power the OS will disable usb ports and is a little troubleshooting to enable them, you have to shutdown and power on for restarting SMC system.
Arduino sketches
After checking that everything is connected in the correct way, that the cable of the ISP with the board is fine and the same pins connected and the board is fine and you have the correct settings you can start coding
In my case I just made the basics ones, plus also I checked the code of Marta Verde as I had a copy of her board
Just the blink example modified for 2 leds that in this case are in the pins A7 and 8.
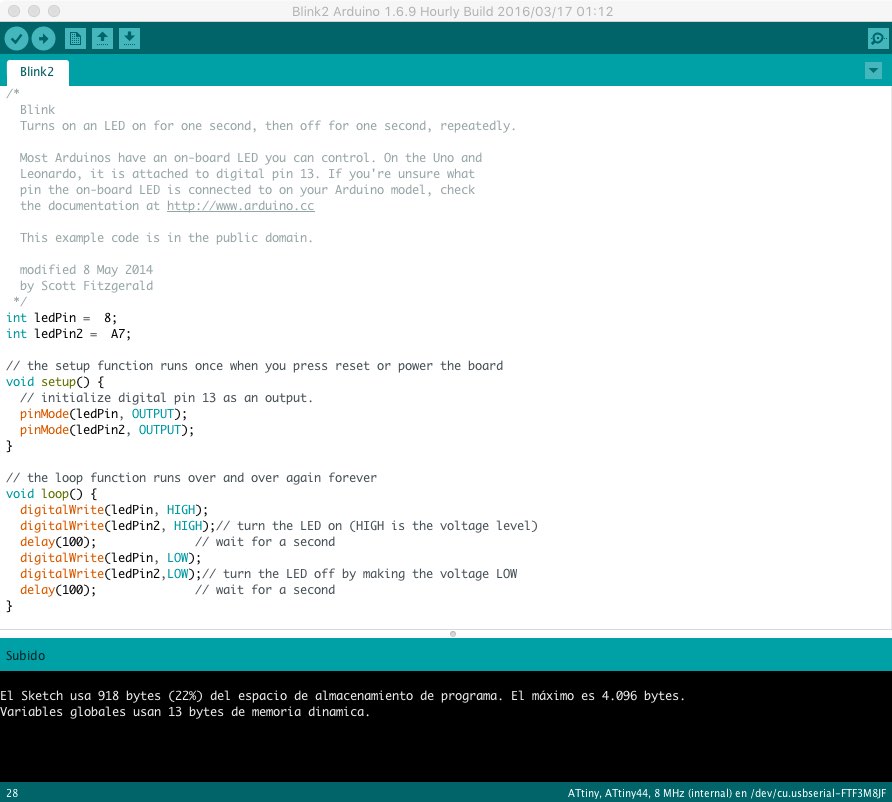
In the video we can see the FabISP connected and the 2 leds board, also the dust of my usb hub.
FabAcademy - Week 8 - PCB Programming from BjLanza on Vimeo.
Second variation of the code as the blue led is so bright that you could not see in the photos the both blinking. In this case just they blink alternatively.
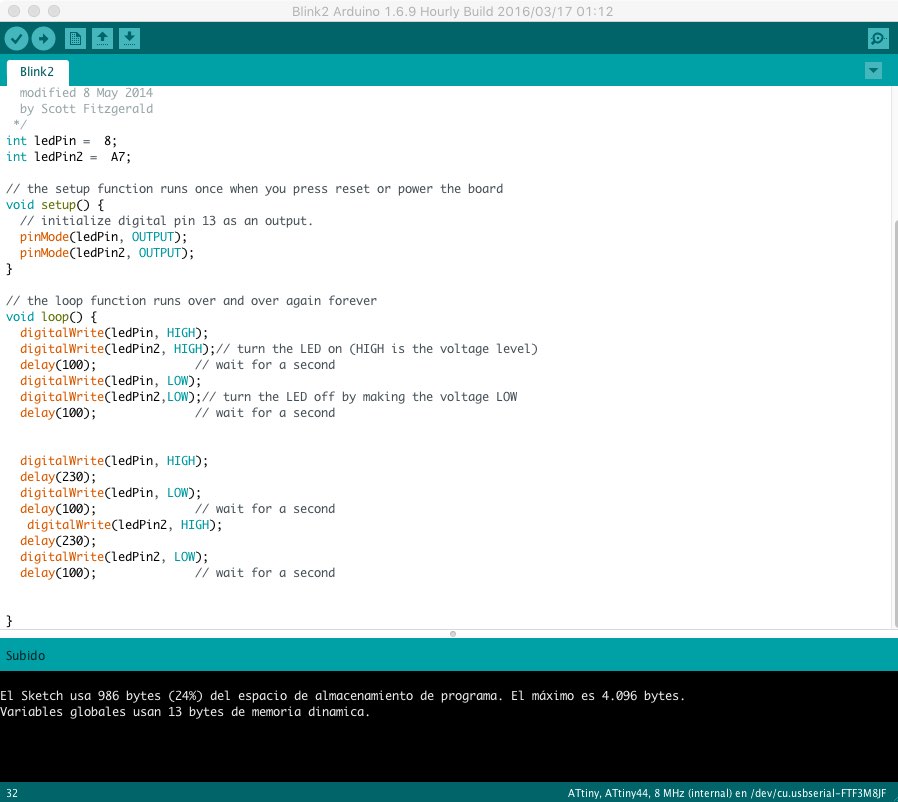
Here we can see 2 loops of this simply program.
FabAcademy - Week 8 - Led Blinking from BjLanza on Vimeo.
Programming with C and AVR-Dude
The next step was to upload C code to the board using the terminal commands with the avr-gcc toolchain. You have a wonderful tutorial here and is very recent (06-2015).
If you want the easy way is just install the package of CrossPack for AVR Development , I found that if you are going to make the terminal way is better to avoid as you will have different paths and later is a little messy.
Now Homebrew is more popular than Macports to install software like the unix package managements systems and it works nice, so is better to install things with just one program to don't have problems with PATHs
So if you didn't have installed in your Mac you can do it with ruby -e "$(curl -fsSL https://raw.githubusercontent.com/Homebrew/install/master/install)"
Then you just have to install the rest of packages with brew tap osx-cross/avr
brew install avr-libc
brew install avrdude --with-usb
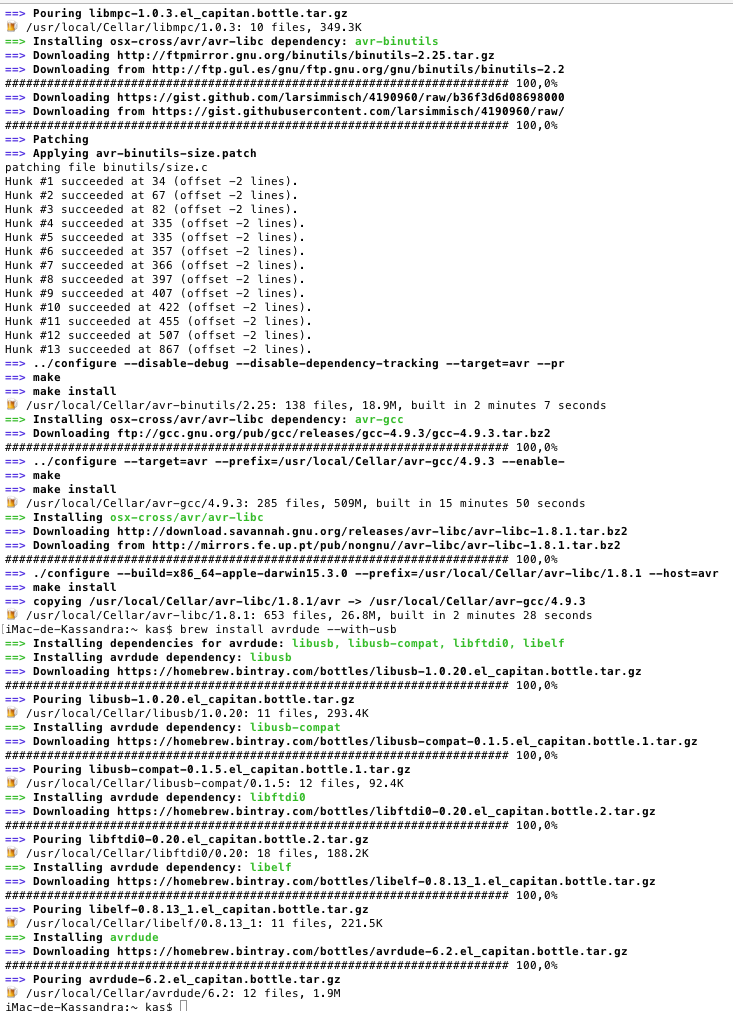
In the screenshot you can see that some steps can take a little time and take a little space, so don't worry if terminal take some time thinking, enjoy some coffee and cookies time
Ubuntu virtual machine
During the research of the assignment I have run into several problems so I decide to try to make a VM of ubuntu, with everything fresh installed and with settings done, that I could work in any machine and if needed shared with my classmates
You can install the same toolchain with sudo apt-get install gcc-avr binutils-avr gdb-avr avr-libc avrdude

Again with everything installed and with the board connected we can follow the Hello Echo Tutorial to flash our board with the terminal and C hexadecimals files.
Getting info of the device with Avrdude
A nice first step is just to see that avrdude connects with our USBtiny and that we have an Attiny 44 connected
 iMac-de-Kassandra:C2 kas$ sudo avrdude -c usbtiny -p t44


avrdude: AVR device initialized and ready to accept instructions


Reading | ################################################## | 100% 0.01s


avrdude: Device signature = 0x1e9207 (probably t44)


avrdude: safemode: Fuses OK (E:FF, H:DF, L:62)


avrdude done.  Thank you.
Flashing
Then we can start flashing the code into it, this is the output of the mac terminal
iMac-de-Kassandra:~ kas$ cd /Volumes/Katalina/Cursos/FabAcademy/Week8/C2

iMac-de-Kassandra:C2 kas$ sudo make -f hello.ftdi.44.echo.c.make program-usbtiny

Password:

avr-gcc -mmcu=attiny44 -Wall -Os -DF_CPU=20000000 -I./

 -o hello.ftdi.44.echo.out hello.ftdi.44.echo.c

avr-objcopy -O ihex hello.ftdi.44.echo.out hello.ftdi.44.echo.c.hex;\

	avr-size --mcu=attiny44 --format=avr hello.ftdi.44.echo.out

AVR Memory Usage

----------------

Device: attiny44


Program:     760 bytes (18.6% Full)

(.text + .data + .bootloader)


Data:         64 bytes (25.0% Full)

(.data + .bss + .noinit)


avrdude -p t44 -P usb -c usbtiny -U flash:w:hello.ftdi.44.echo.c.hex


avrdude: AVR device initialized and ready to accept instructions


Reading | ################################################## | 100% 0.01s


avrdude: Device signature = 0x1e9207 (probably t44)

avrdude: NOTE: "flash" memory has been specified, an erase cycle will be performed

         To disable this feature, specify the -D option.

avrdude: erasing chip

avrdude: reading input file "hello.ftdi.44.echo.c.hex"

avrdude: input file hello.ftdi.44.echo.c.hex auto detected as Intel Hex

avrdude: writing flash (760 bytes):


Writing | ################################################## | 100% 1.95s


avrdude: 760 bytes of flash written

avrdude: verifying flash memory against hello.ftdi.44.echo.c.hex:

avrdude: load data flash data from input file hello.ftdi.44.echo.c.hex:

avrdude: input file hello.ftdi.44.echo.c.hex auto detected as Intel Hex

avrdude: input file hello.ftdi.44.echo.c.hex contains 760 bytes

avrdude: reading on-chip flash data:


Reading | ################################################## | 100% 2.11s


avrdude: verifying ...

avrdude: 760 bytes of flash verified


avrdude: safemode: Fuses OK (E:FF, H:DF, L:62)


avrdude done.  Thank you.


iMac-de-Kassandra:C2 kas$
It's also works in Ubuntu with Marta code for her board.
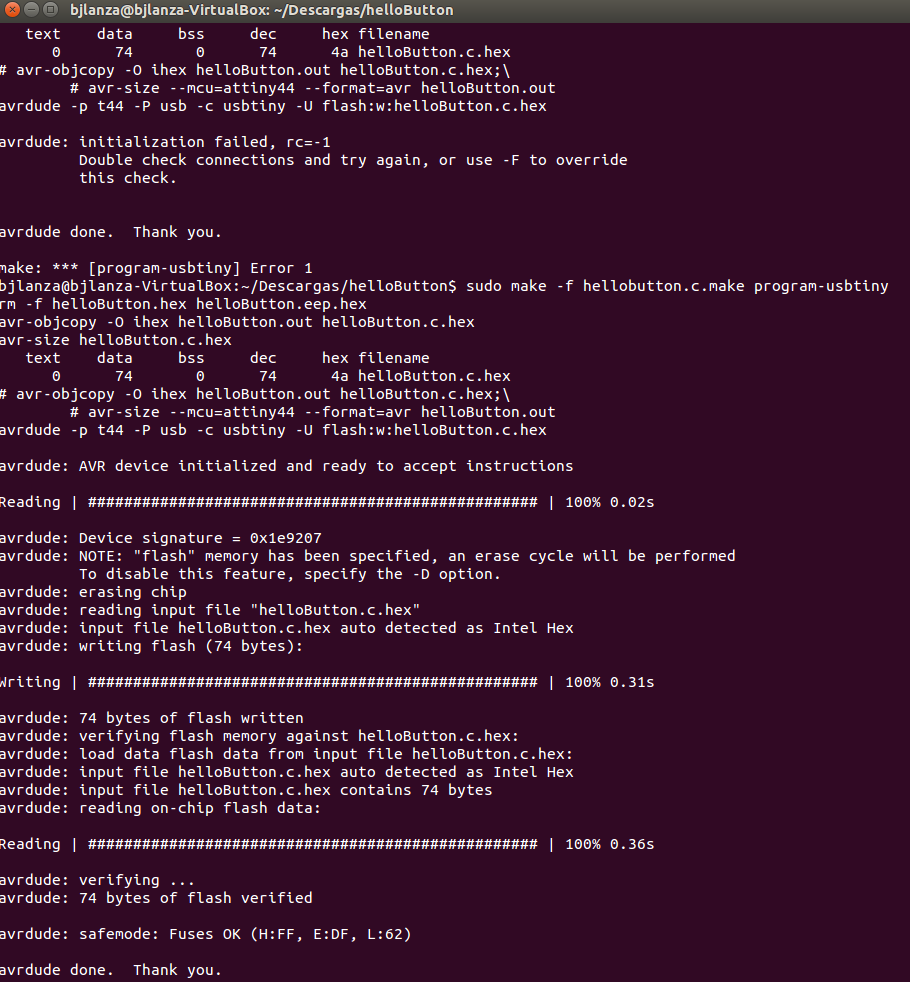
Xcode and AVR
Well this part is more recent as I do lot of work trying with do with Eclipse IDE, but this works as a charm, and I regret didn't search before, even the author wasn't full happy with Eclipse details.
X-AVR can be found in here and you have this wonderful tutorial that is pretty straightforward and clear.
As easy to clone or download the zip, uncompress and run a python script that create the template for Xcode.
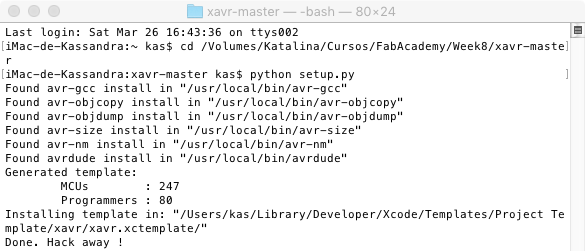
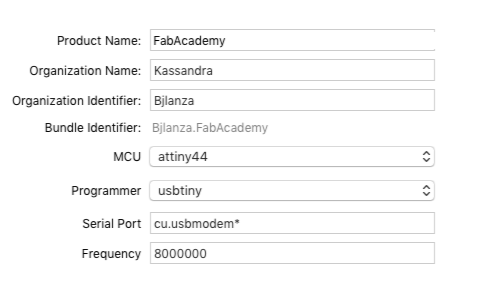
The Xavr template has lot of MCU and also many programmers, including our Attiny44 and USBtiny. The port you see that choose cu.usbmodem*, that we have to change, as remember that our ISP didn't get a /dev/ port and we have to say that it uses the general usb.
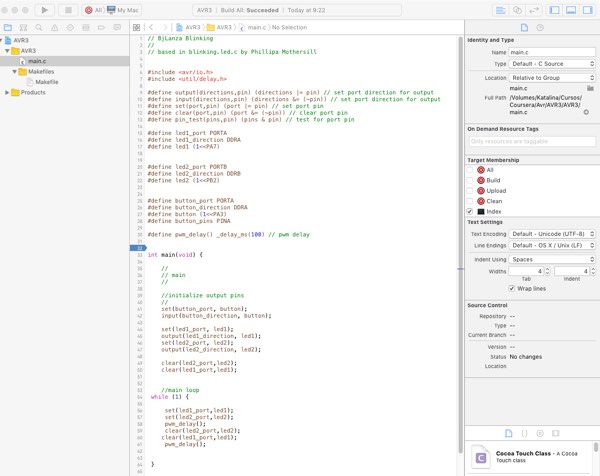
The template creates both a main.c file and a not so simple makerfile. You have to be sure that your makefile has the correct AVRDUDE port that is you remember by previous commands is usb. so it will be similar like this one. Of course the frequency of the CPU depends on your clock.
F_CPU = 8000000


			 AVRDUDE_PROGRAMMER = usbtiny


			 # com1 = serial port. Use lpt1 to connect to parallel port.

			 AVRDUDE_PORT = usb    # programmer connected to serial device
Now you have in Xcode IDE ready to program in C for AVR, with color coding and auto completion including the pinouts of the MCU selected.
EmbedXcode
Similar approach but for the plenty of boards that are now in the market is EmbedXcode . In its website you can found lot of information about the different IDEs of many boards like Arduino/Genuino, BeagleBone, Intel Edison or Adrafruit models.
The EmbedXcode that also is iBooks format is useful for its information. As you download a package is easy to just install the normal version.
Again it will install different Xcode templates depending of the different IDE that are installed in our Applications folder
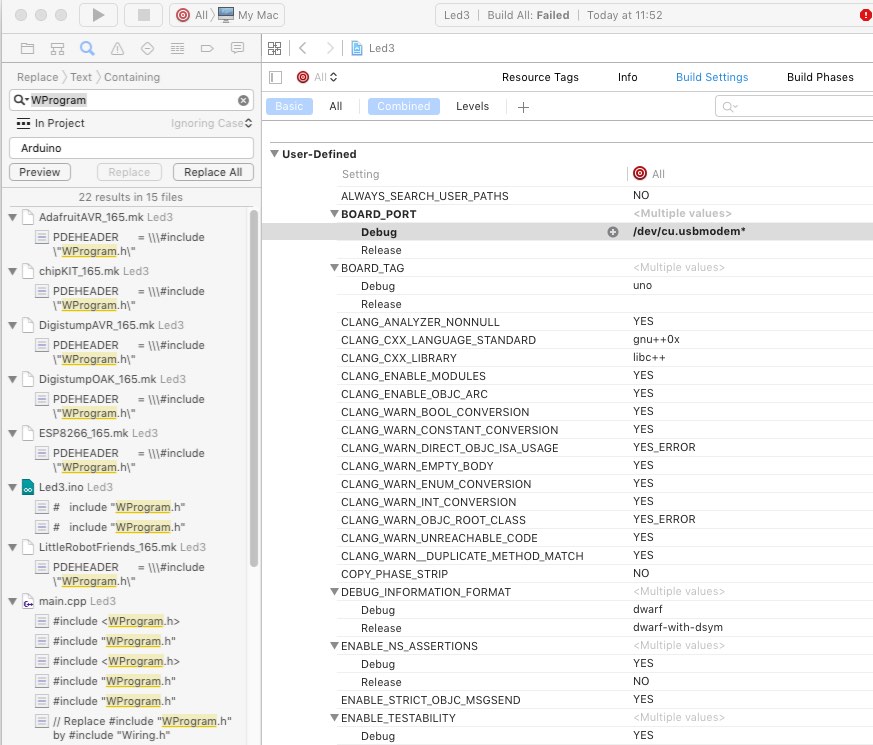
But also has a tricky setting for compiling at least in my system, and again is also related to the new names of the ports of the arduino boards. Usually we work with tty.usbmodem, when now is cu.usbmodem*
If you get problems with WProgram.h you have to make a Find/Find and Replace,to Arduino.h, as is a problem of outdated includes as the library changed of name. It's strange that is not corrected by the template. And is a little boring do it for each project I guess is fixed editing the main template.
So be sure about correct ports and not get any #include problems, it also don't have code formatting like colors but is a nice test. Also it will open you after uploading a terminal window.
Eclipse IDE
Before Xcode I tried to have an IDE for programming and see that Eclipse may be a good choice but it has been a more hard bone to bite. Mostly in access to the ISP and some code problems.
The installation of the IDE is easy, you have to good tutorials Here (2012) and Here (2010)
You have to download the C/C++ version and again install a plugin for AVRs
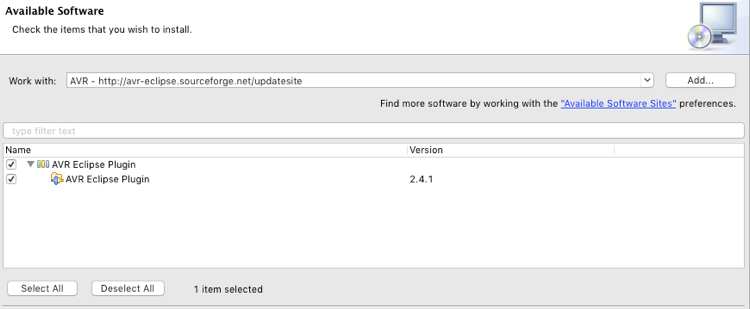
"Operation not permitted" error
The main problem is that you need a little fixing and creating rules in /udev/ as In Ubuntu if you receive the error message: avrdude: usb_open(): cannot read serial number "error sending control message: Operation not permitted"
This means that your permission settings to access the programmer are probably wrong. Setup a new rule in by typing:
sudo gedit /etc/udev/rules.d/41-atmega.rules
and entering the following into the new text file ...
In Ubuntu Lucid (10.04) or later as (14.10) udev rules file format has changed. File should look like that:
# Please test and place config for other programmers here
As is normal the important is the USBTiny line, but you may use others programmers in FabAcademy as the ICE or AVRIPS as better have full code.
# JTAGICE mkII
ATTR{idVendor}=="03eb", ATTR{idProduct}=="2103", GROUP="users", MODE="0666"
# AVRISP mkII
ATTR{idVendor}=="03eb", ATTR{idProduct}=="2104", GROUP="users", MODE="0666"
# Dragon
ATTR{idVendor}=="03eb", ATTR{idProduct}=="2107", GROUP="users", MODE="0666"
# USBTiny
ATTR{idVendor}=="1781", ATTR{idProduct}=="0c9f", GROUP="users", MODE="0666"
... either changing "users" to your own users group or adding yourself to the "users" group:
sudo usermod -a -G users your_username
Thereafter reload udev
sudo reload udev
and reconnect your programmer.
This should get rid of the "operation not permitted" error.
Also the new Ubuntu deprecated some commands so is easy made in 14.10 than in 15.10. I have to reinstall the VM by this, but well I'm not an advance ubuntu user.
Eclipse unresolved symbols
Another big problem is that Eclipse try to be smarter but he can't. So even your code is perfect it start to mess up and don't build as you have to clearly include the headers of your avr mcu, if not, you can't compile as all the defines are "out of scope"
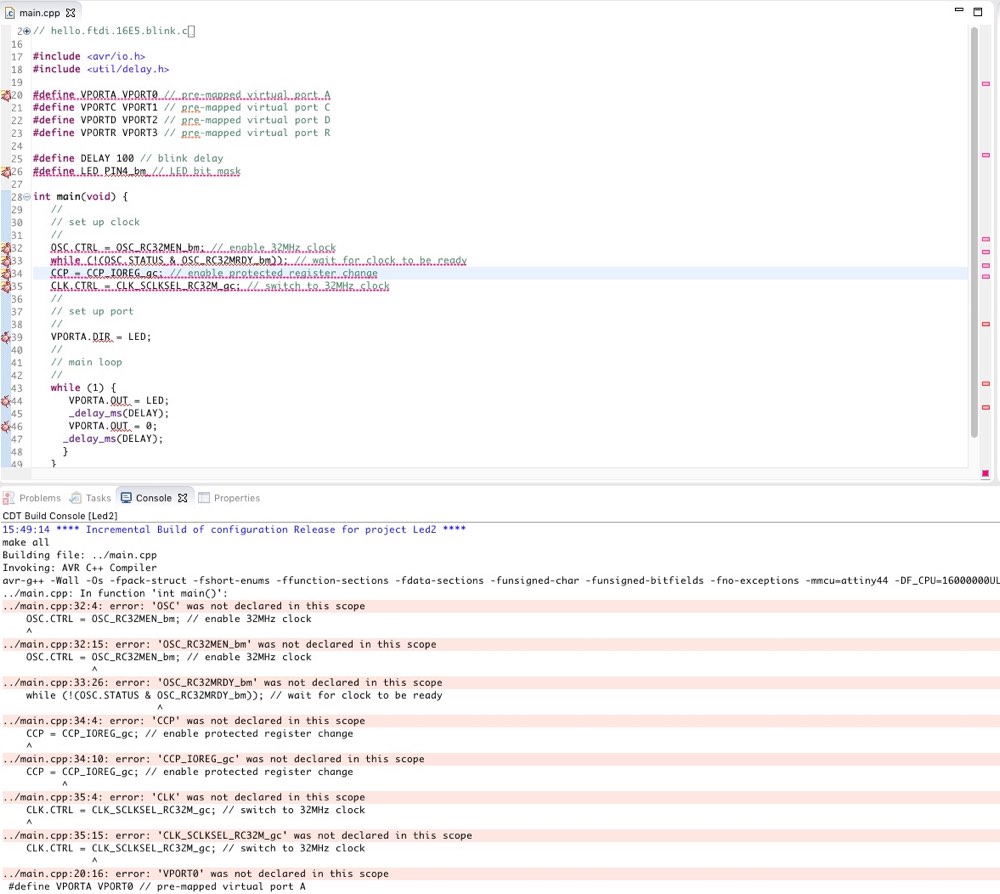
After the lessons learn with the Xcode installation I could flash with Eclipse the board but still it makes strange things. But was a little victory after so much time fighting with it
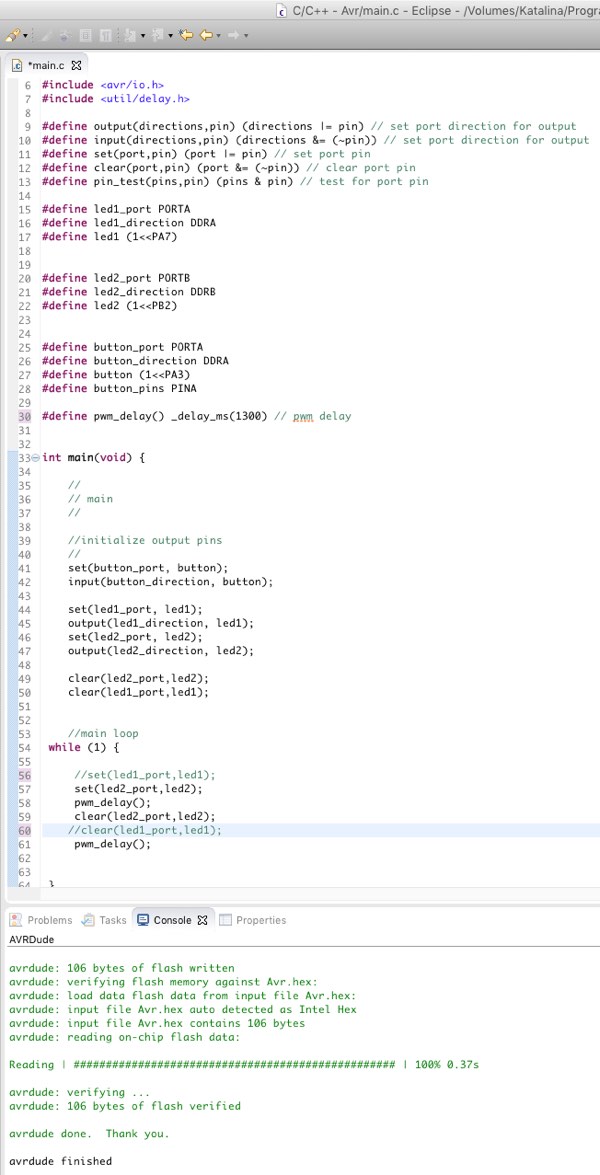
Code
Apart that you can download the code of the different programs you can just copy them here
