Assignment for week 2 Computer-aided Design
Model a 3d design of the final project and post it on class page
Model a 2d design for the final project
Link to this week home assignment page
3D Modelling:
I know a little bit about TinkerCAD so i decided to try something else as well. So, I looked a little bit on Gimp but I really found it very confusing .
Then I tryed 123D Design,I feel like that it is very good for making somthing like gears that I actually want to make for my final project.
First I thought it would be difficult to design something like gears in 3D but, it was quite easy to that in 123D.
Steps I followed to design a gear for my final project
STEP 1 - Making a circle
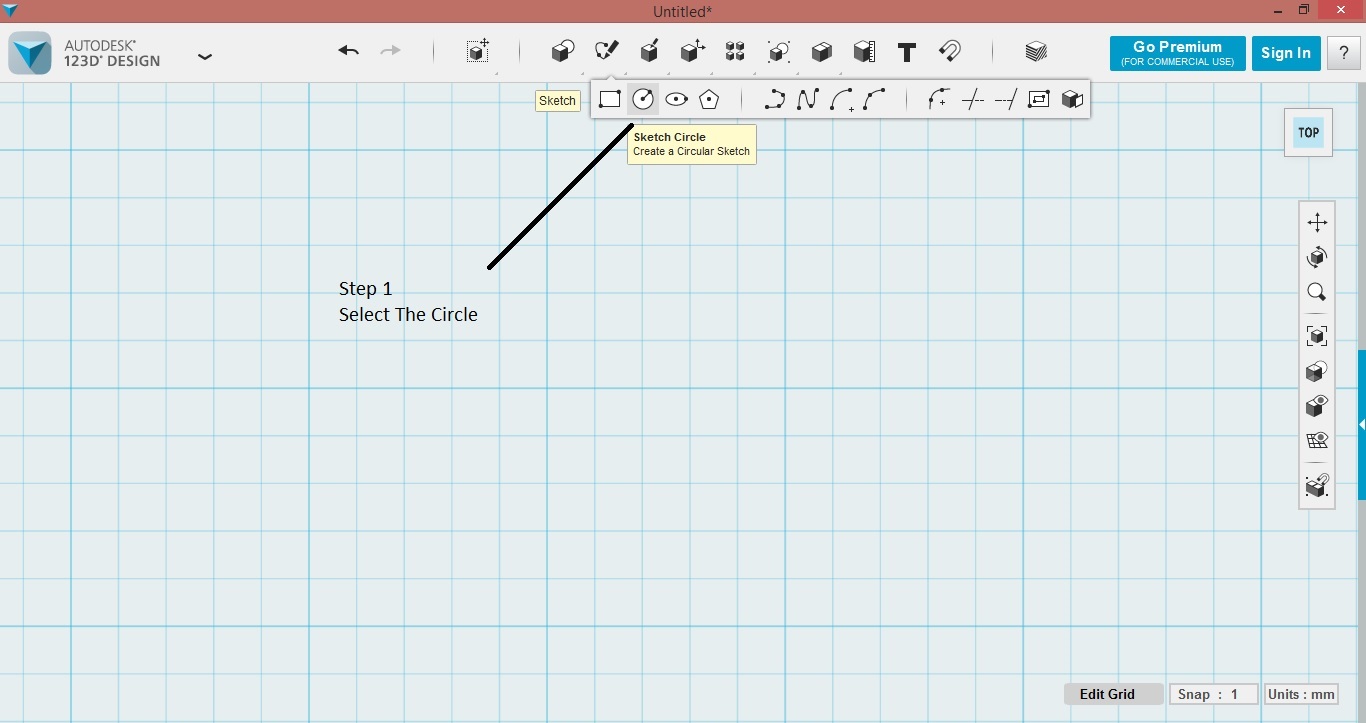
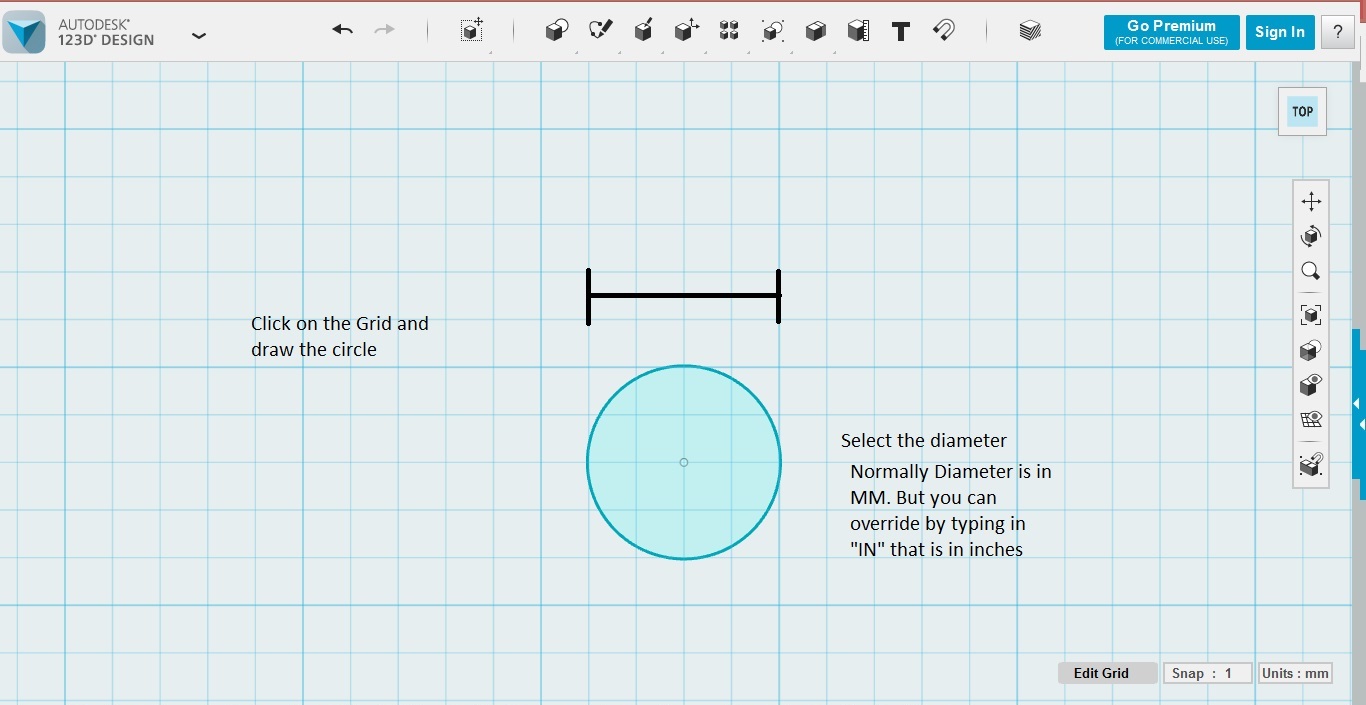
To draw a circle first I clicked on sketch in the toolbar and then select circular sketch
Next I selected the diameter , normally it is set in "mm". But we can override by typing "IN" that is in inches
Step 2 - Draw the tooth

For drawing tooths again fron sketch I selected "polylines"
Next I clicked on the circle to make it a part of the sketch
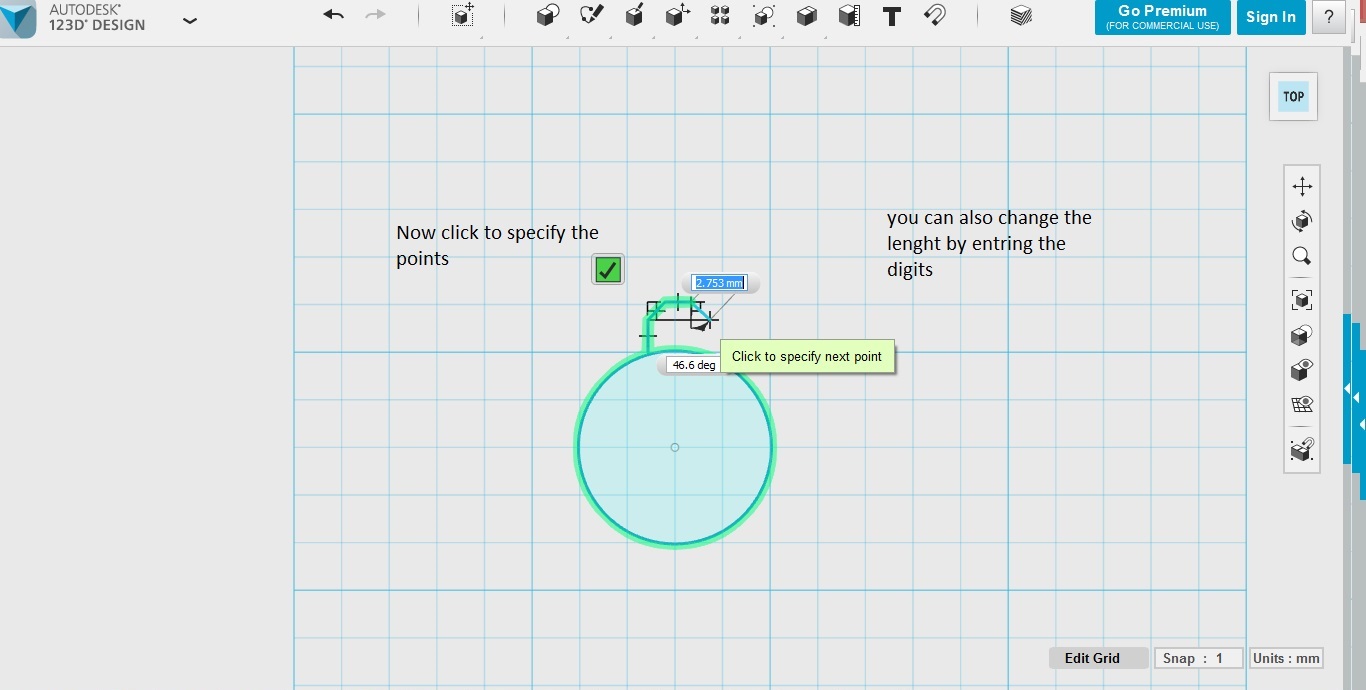
Note : The dash reference lines should be even
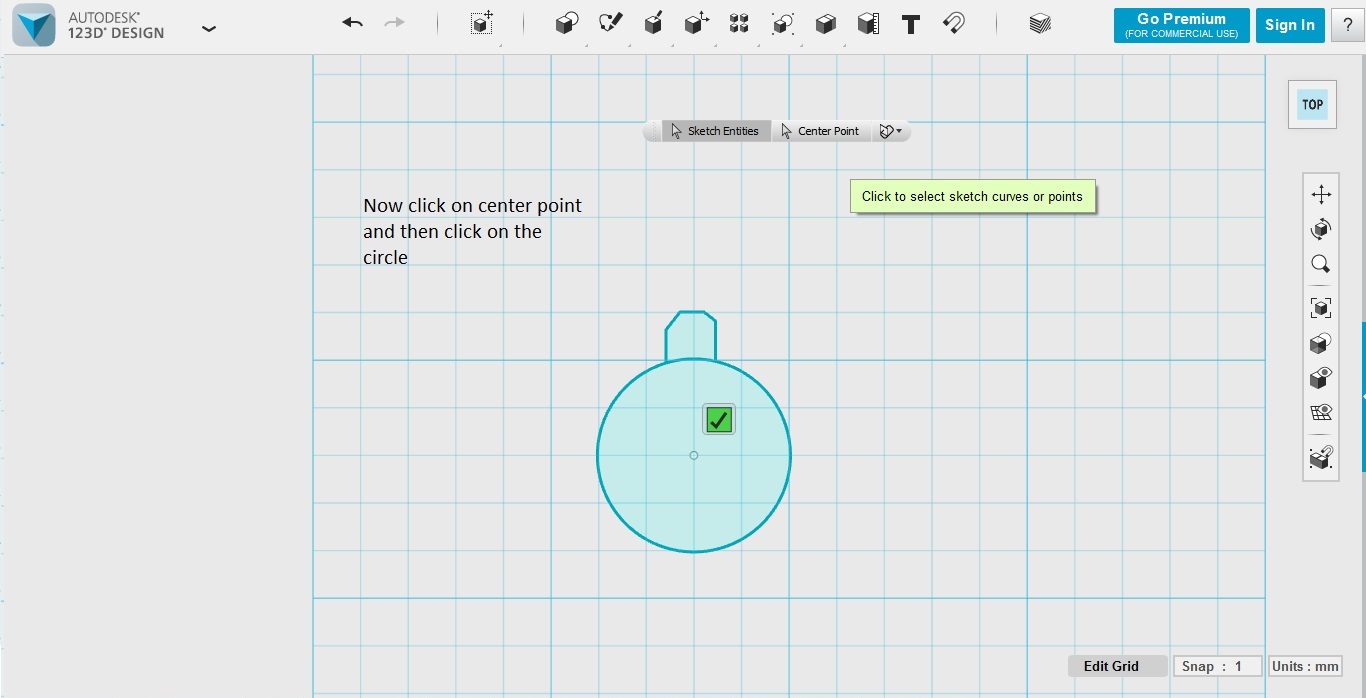
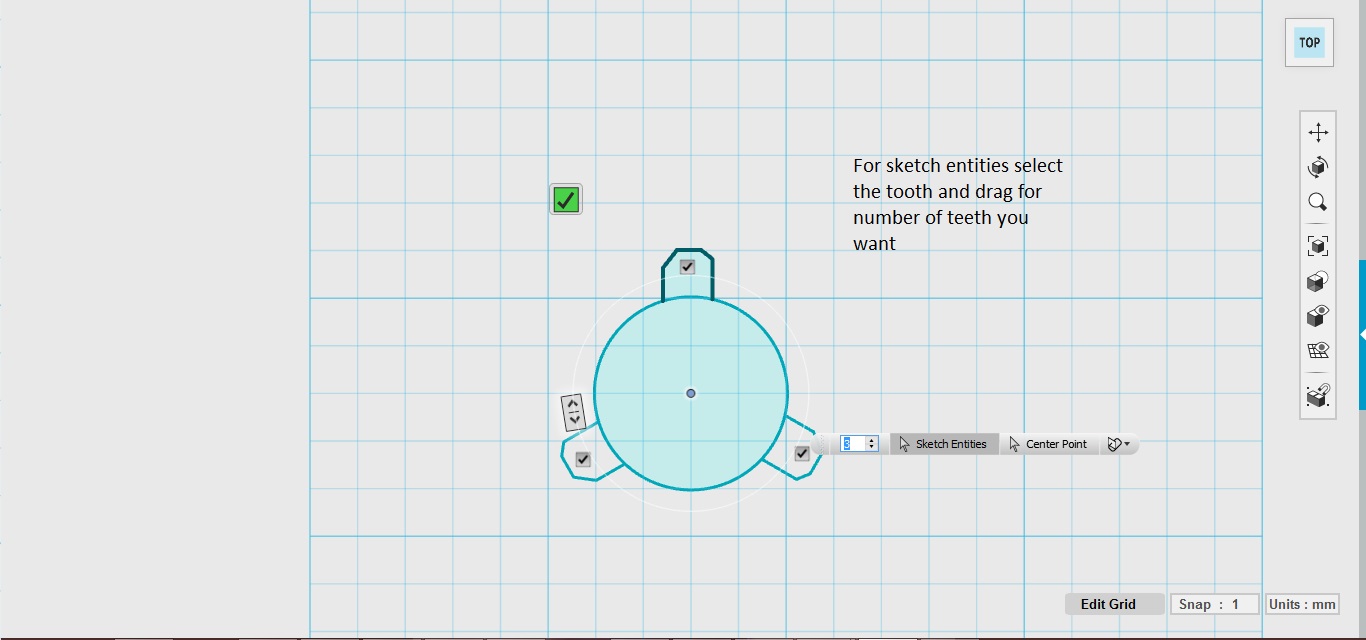
Step 3 -Array the tooth around the circle

To do this I selected the tooth and clicked on the circular pattern
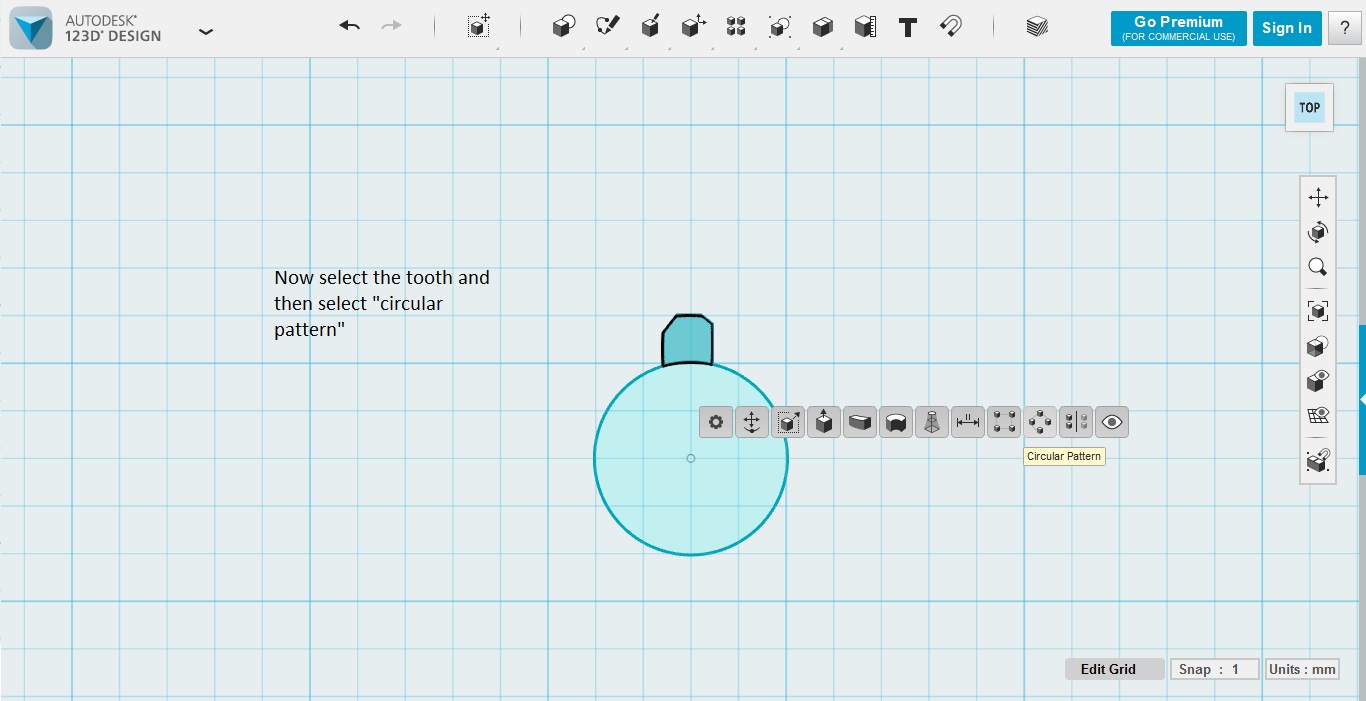
Then for the center point clicked on the circle
For sketch entites I selected the tooth and drag for how many teeth I want for my gear
..
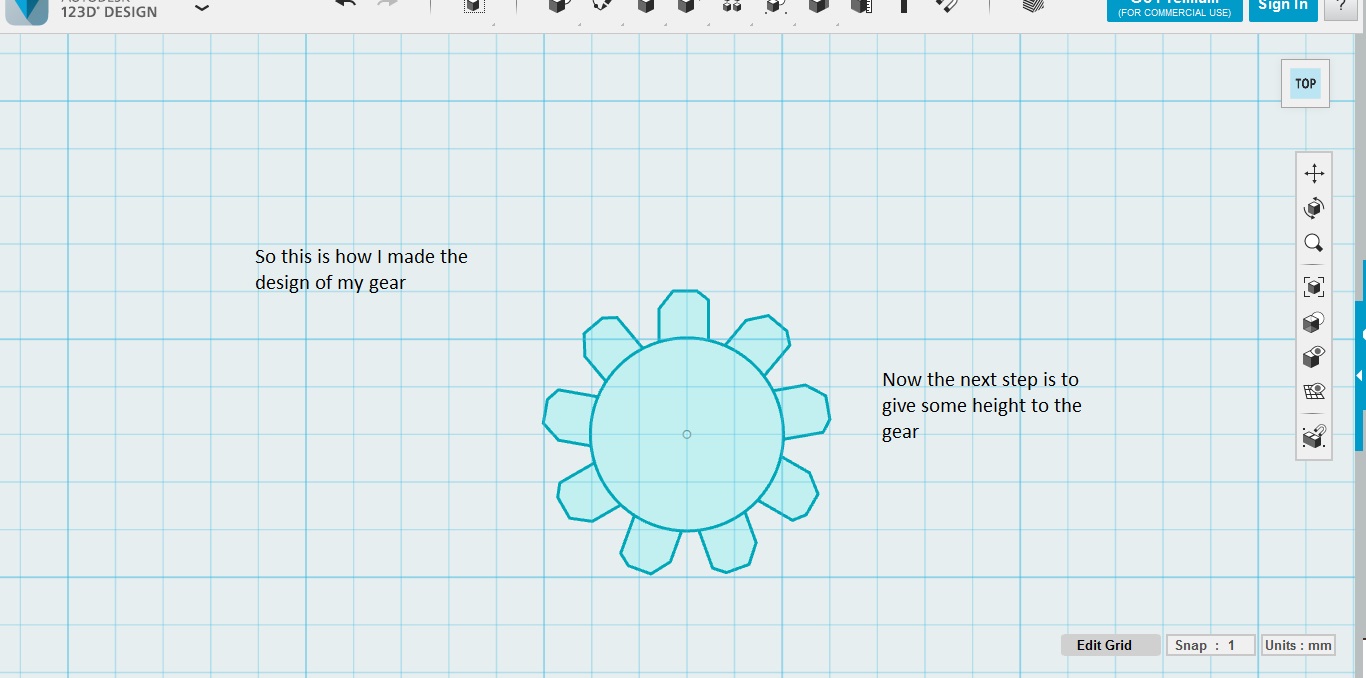
Step 4 - Extruding
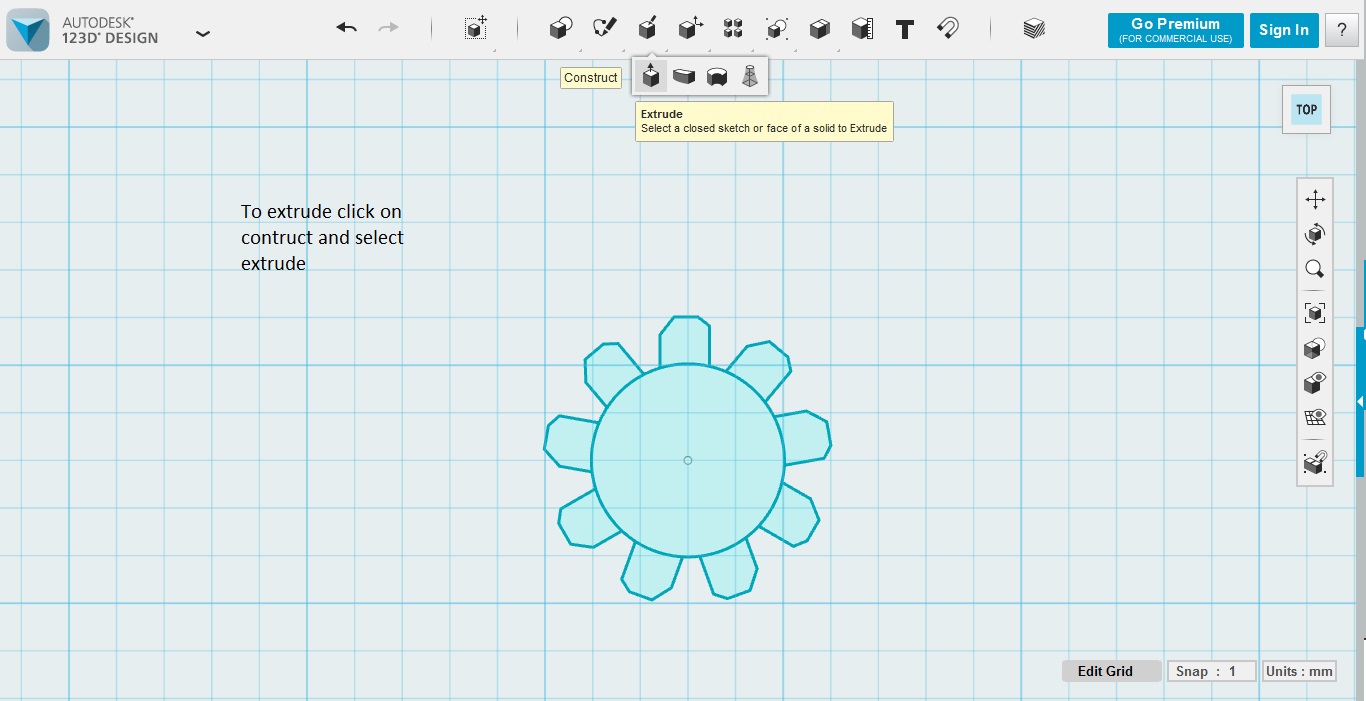
Now, it's the time to give some height to the gear and this can be done with the help of extruder
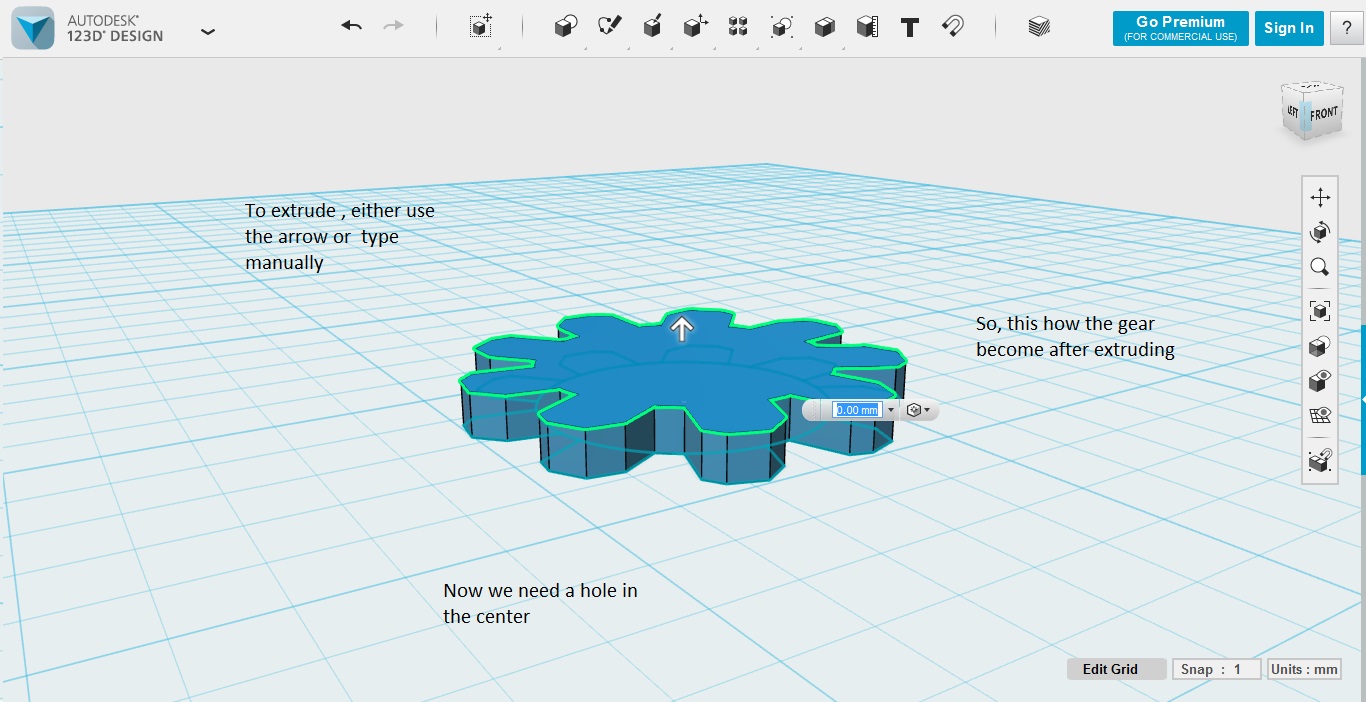
For extruding I selected everything and extrude it up
Step 5- To get a hole in between the gear
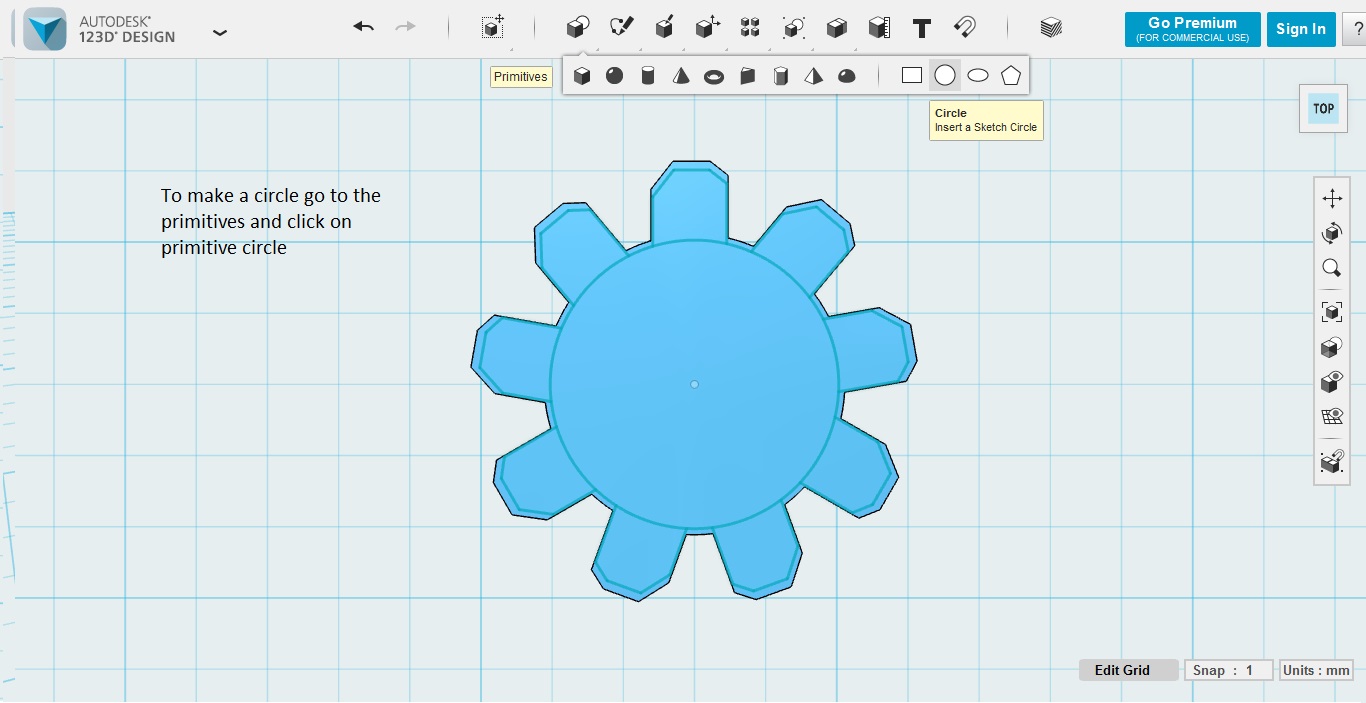
To make the hole I selected primitive circle because it will snap to the center of the larger circle. But, here we need to type the radius in MM because there is no override here
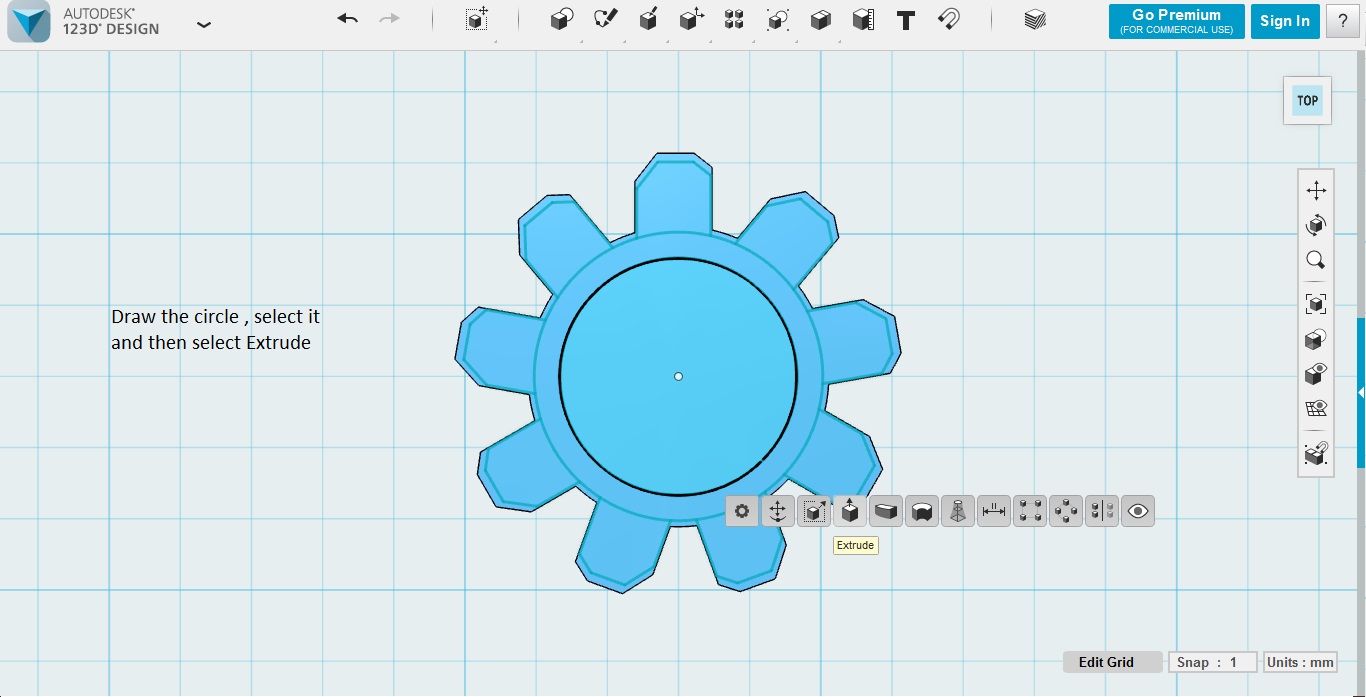
Lastly I extrude it down
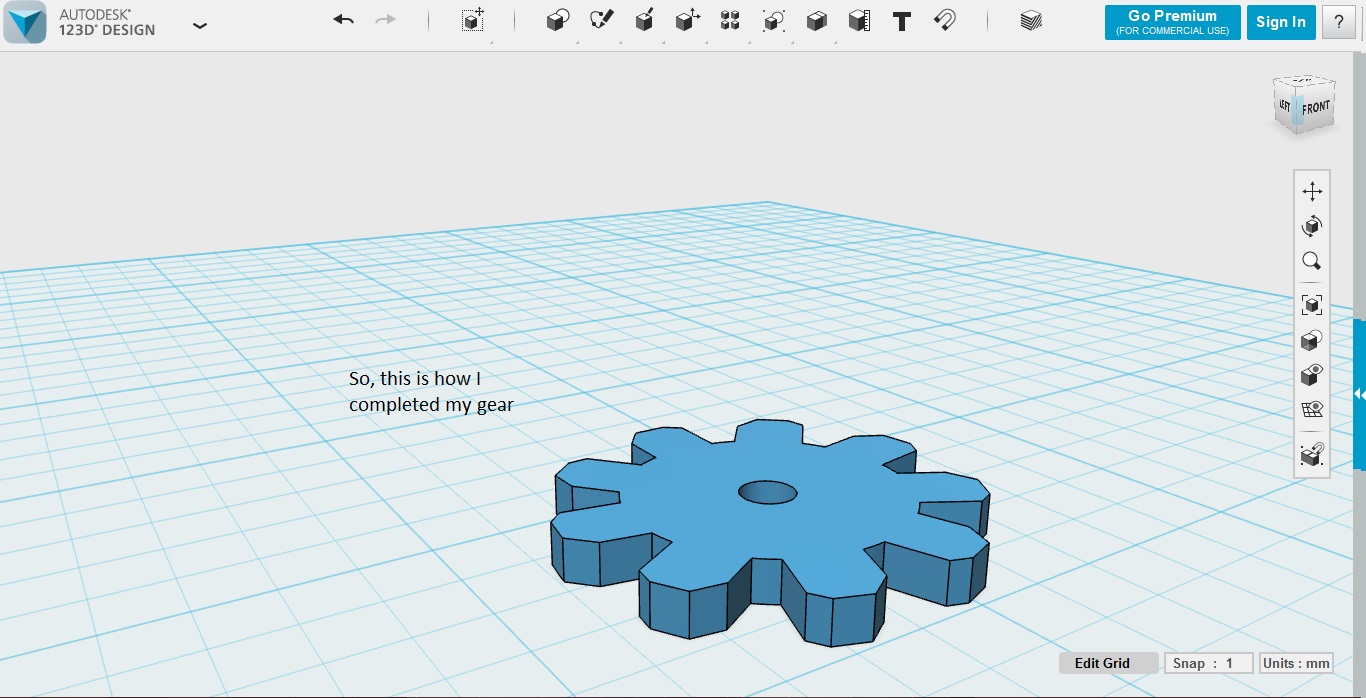
There I have it