Study archive - Week 5
3D Scanning and printing
The lecture 5 on Wednesday 24.2 was about 3D printing and scanning.
We had three tasks this week: 1) test the design rules for your printer(s) (group project); 2) design and 3D print an object (small, few cm) that could not be made subtractively; 3) 3D scan an object (and optionally print it) (extra credit: make your own scanner)
1) Test the design rules for your printer
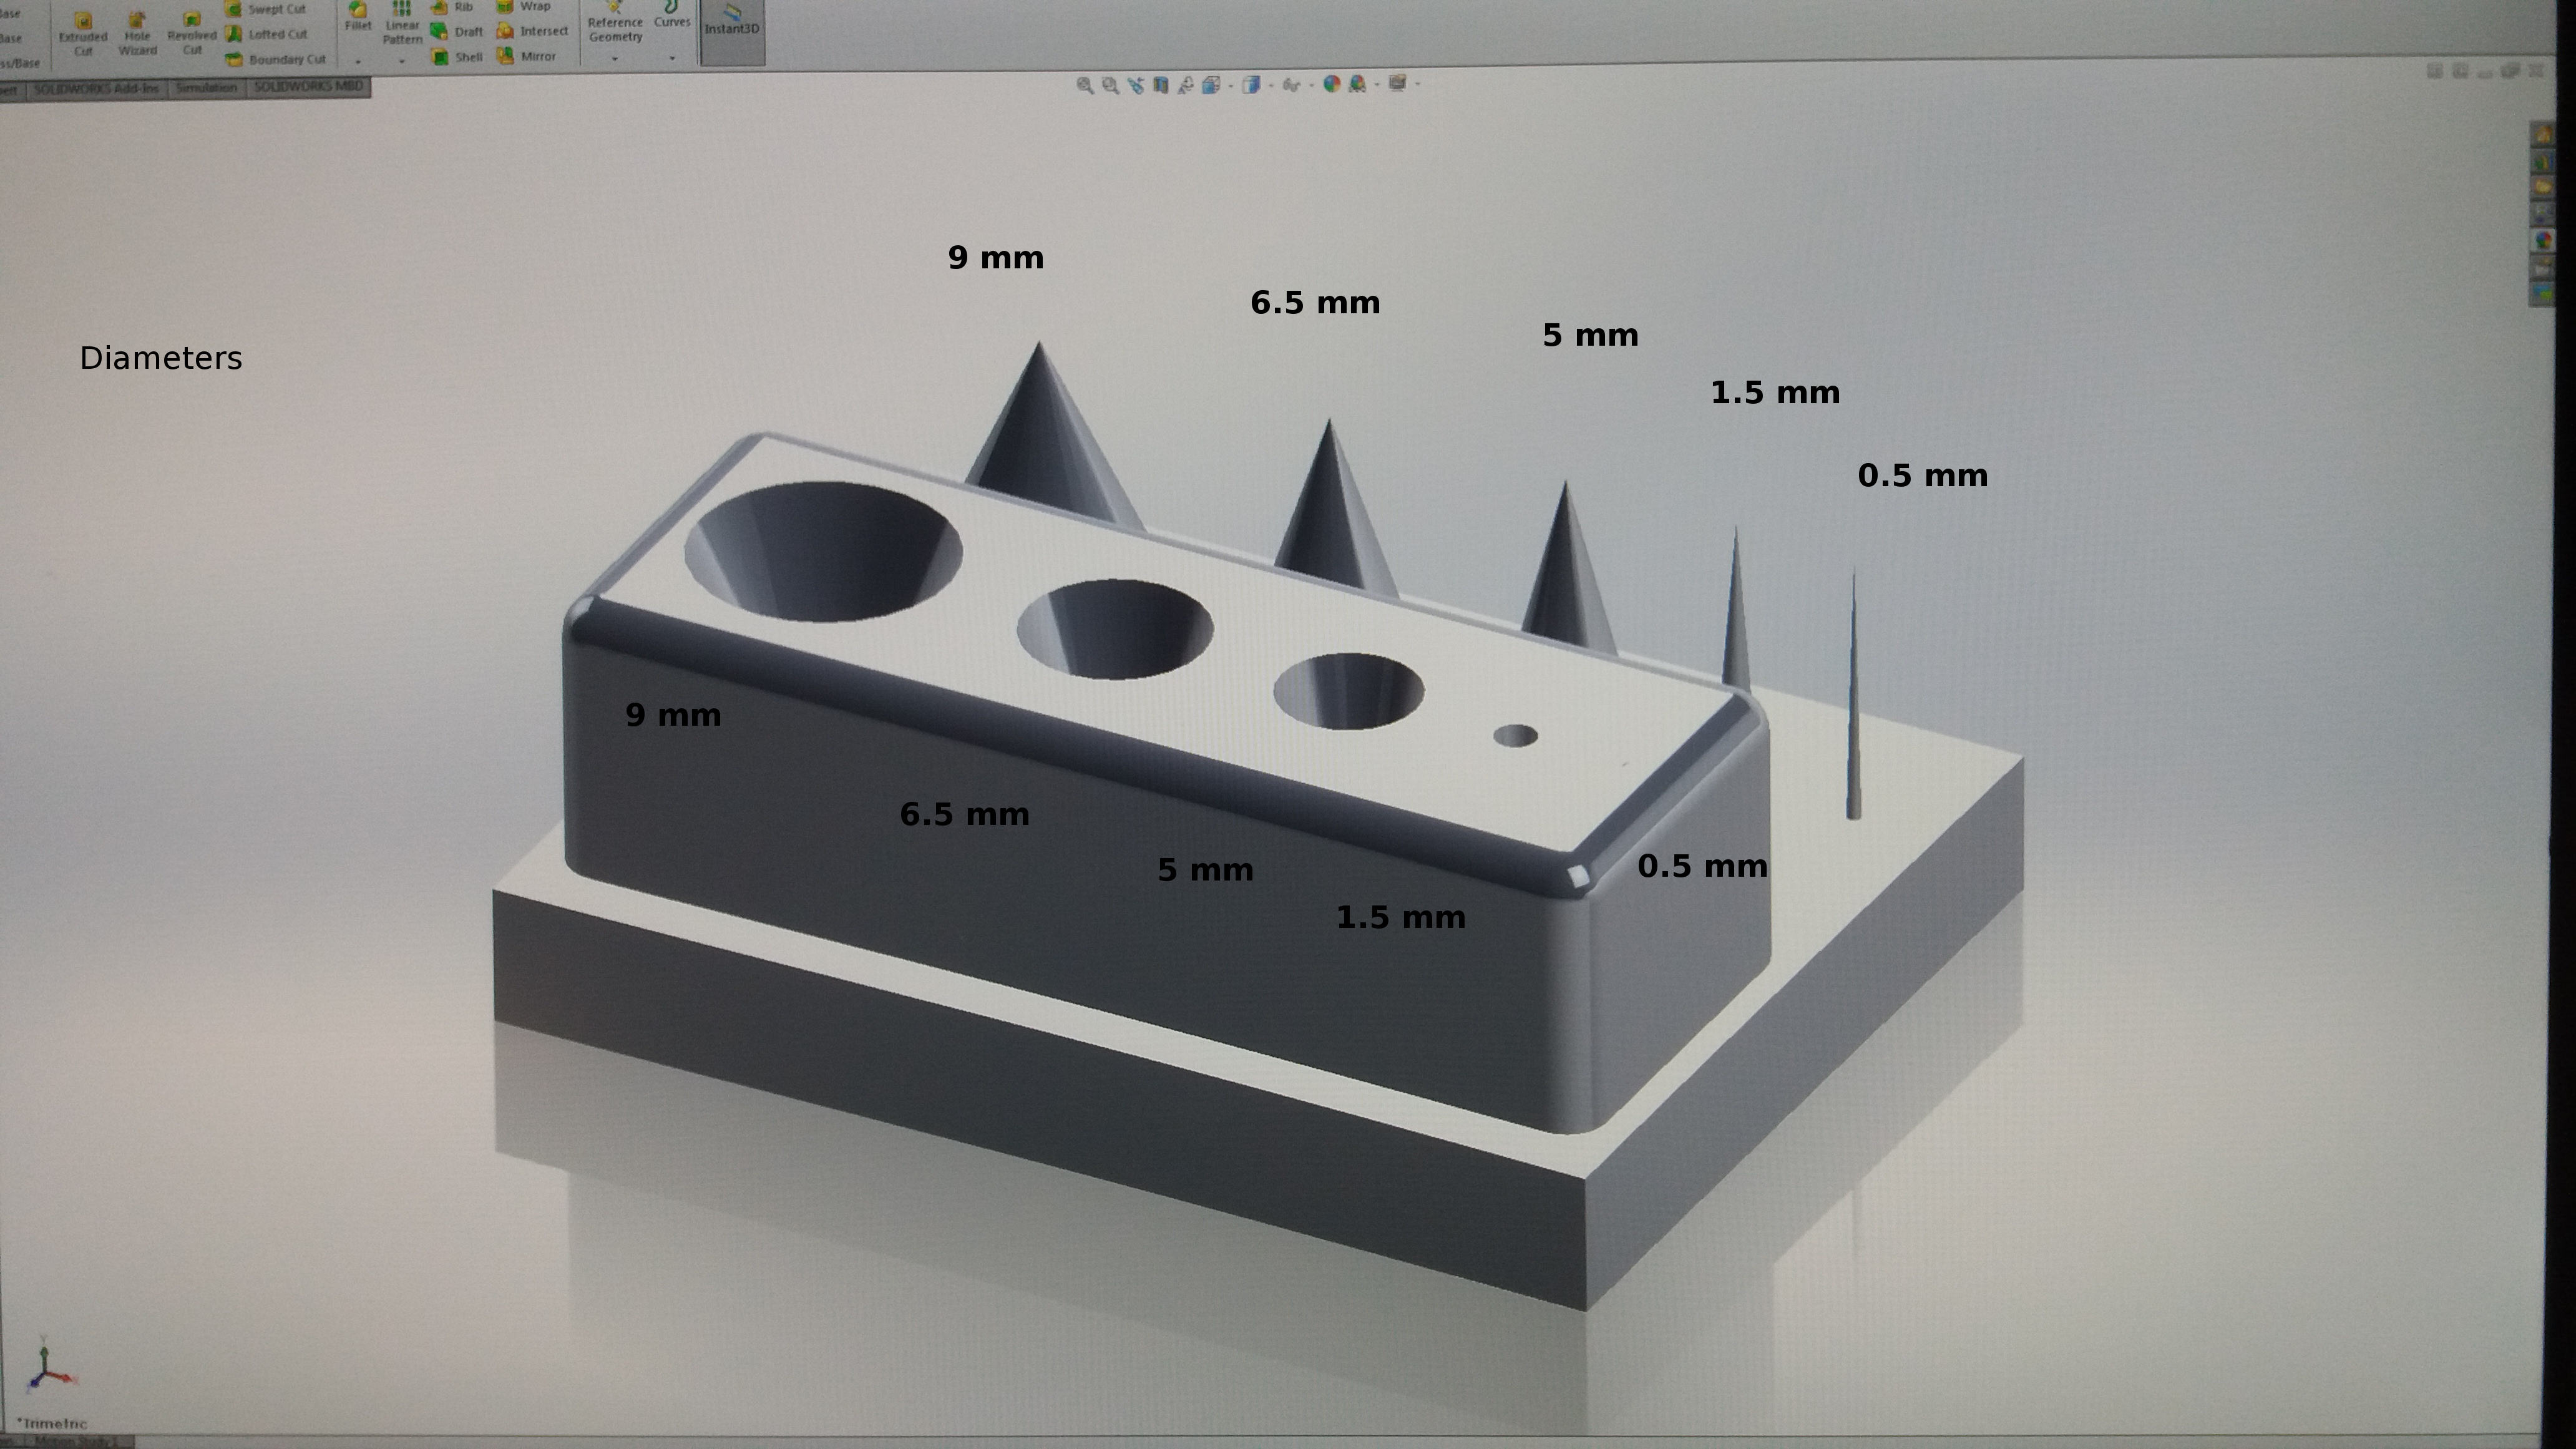
In Fablab Oulu, Antti and Juha have tested and documented the testing of a ready-made test object. (see Antti, Juha)I have designed my own test object based on a commercially available test kit. Due to time limitation, I chose to design and test only one object from the entire kit (the second object in the top row in the link; also presented here). The test object is a rectangle with 5 spikes and 5(or 4) pits of conic shapes.
I used SolidWorks to design the test object of length 4 mm, width 3 mm, and height 5mm (the base). The top part is of size 38 x 14 x 10 mm. The dimensions of the cones are: diameters (mm): 9 / 6.5 / 5 / 1.5 / 0.5; height: about 10 mm; and cone angles (deg): 24.5 / 18.1 / 14.1 / 4.3 / 1.432.
The following picture shows the design outcome in SolidWorks. The annotations are done in Gimp.
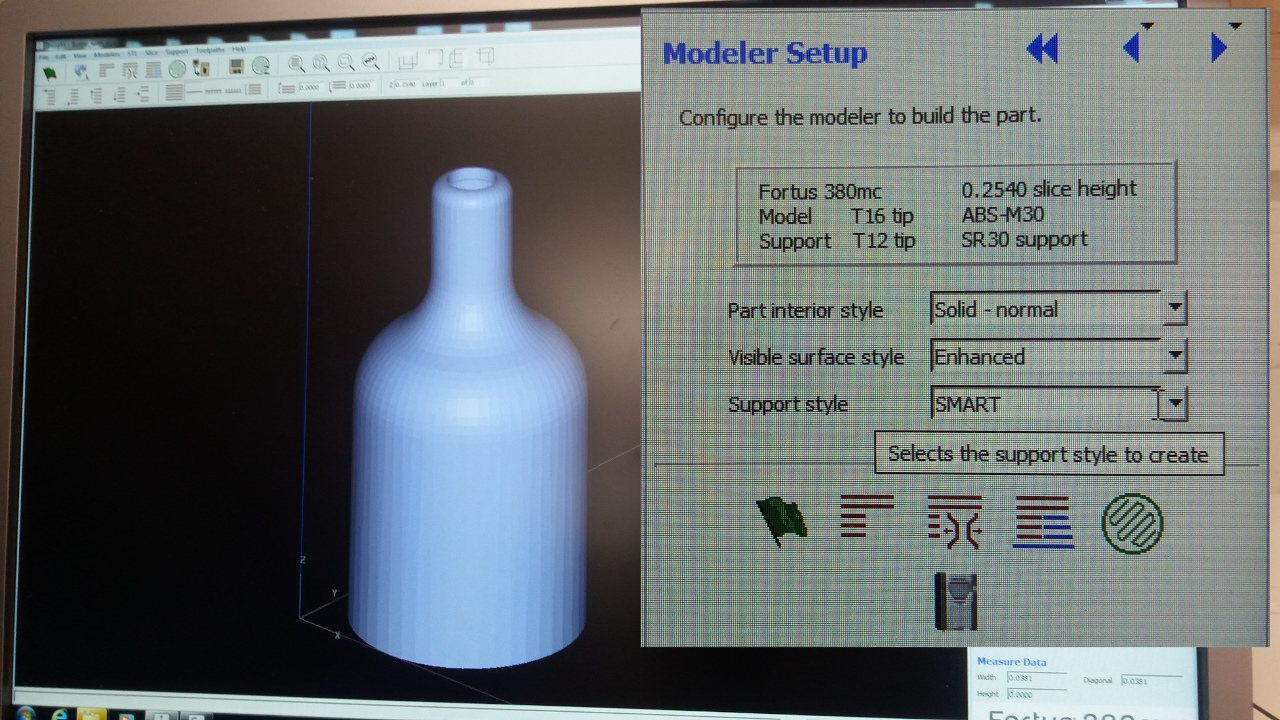
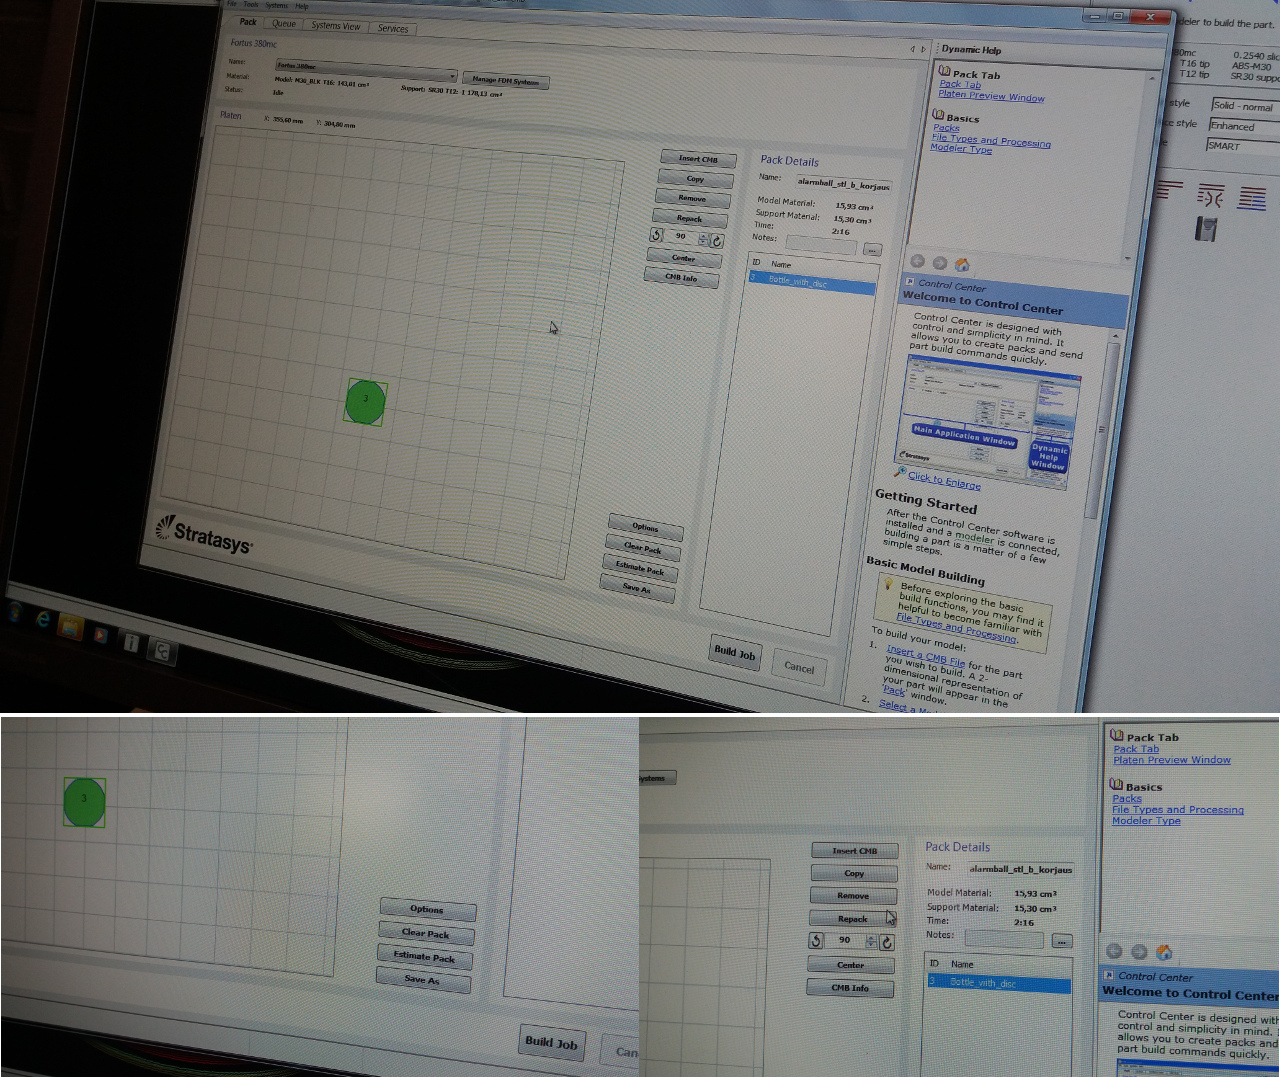
For printing I used the printer Stratasys Fortus 380mc and the software Insight and Stratasys Control Center. The material used was ABS-M30 black. The pictures illustrate the 3D printing settings and the outcome.
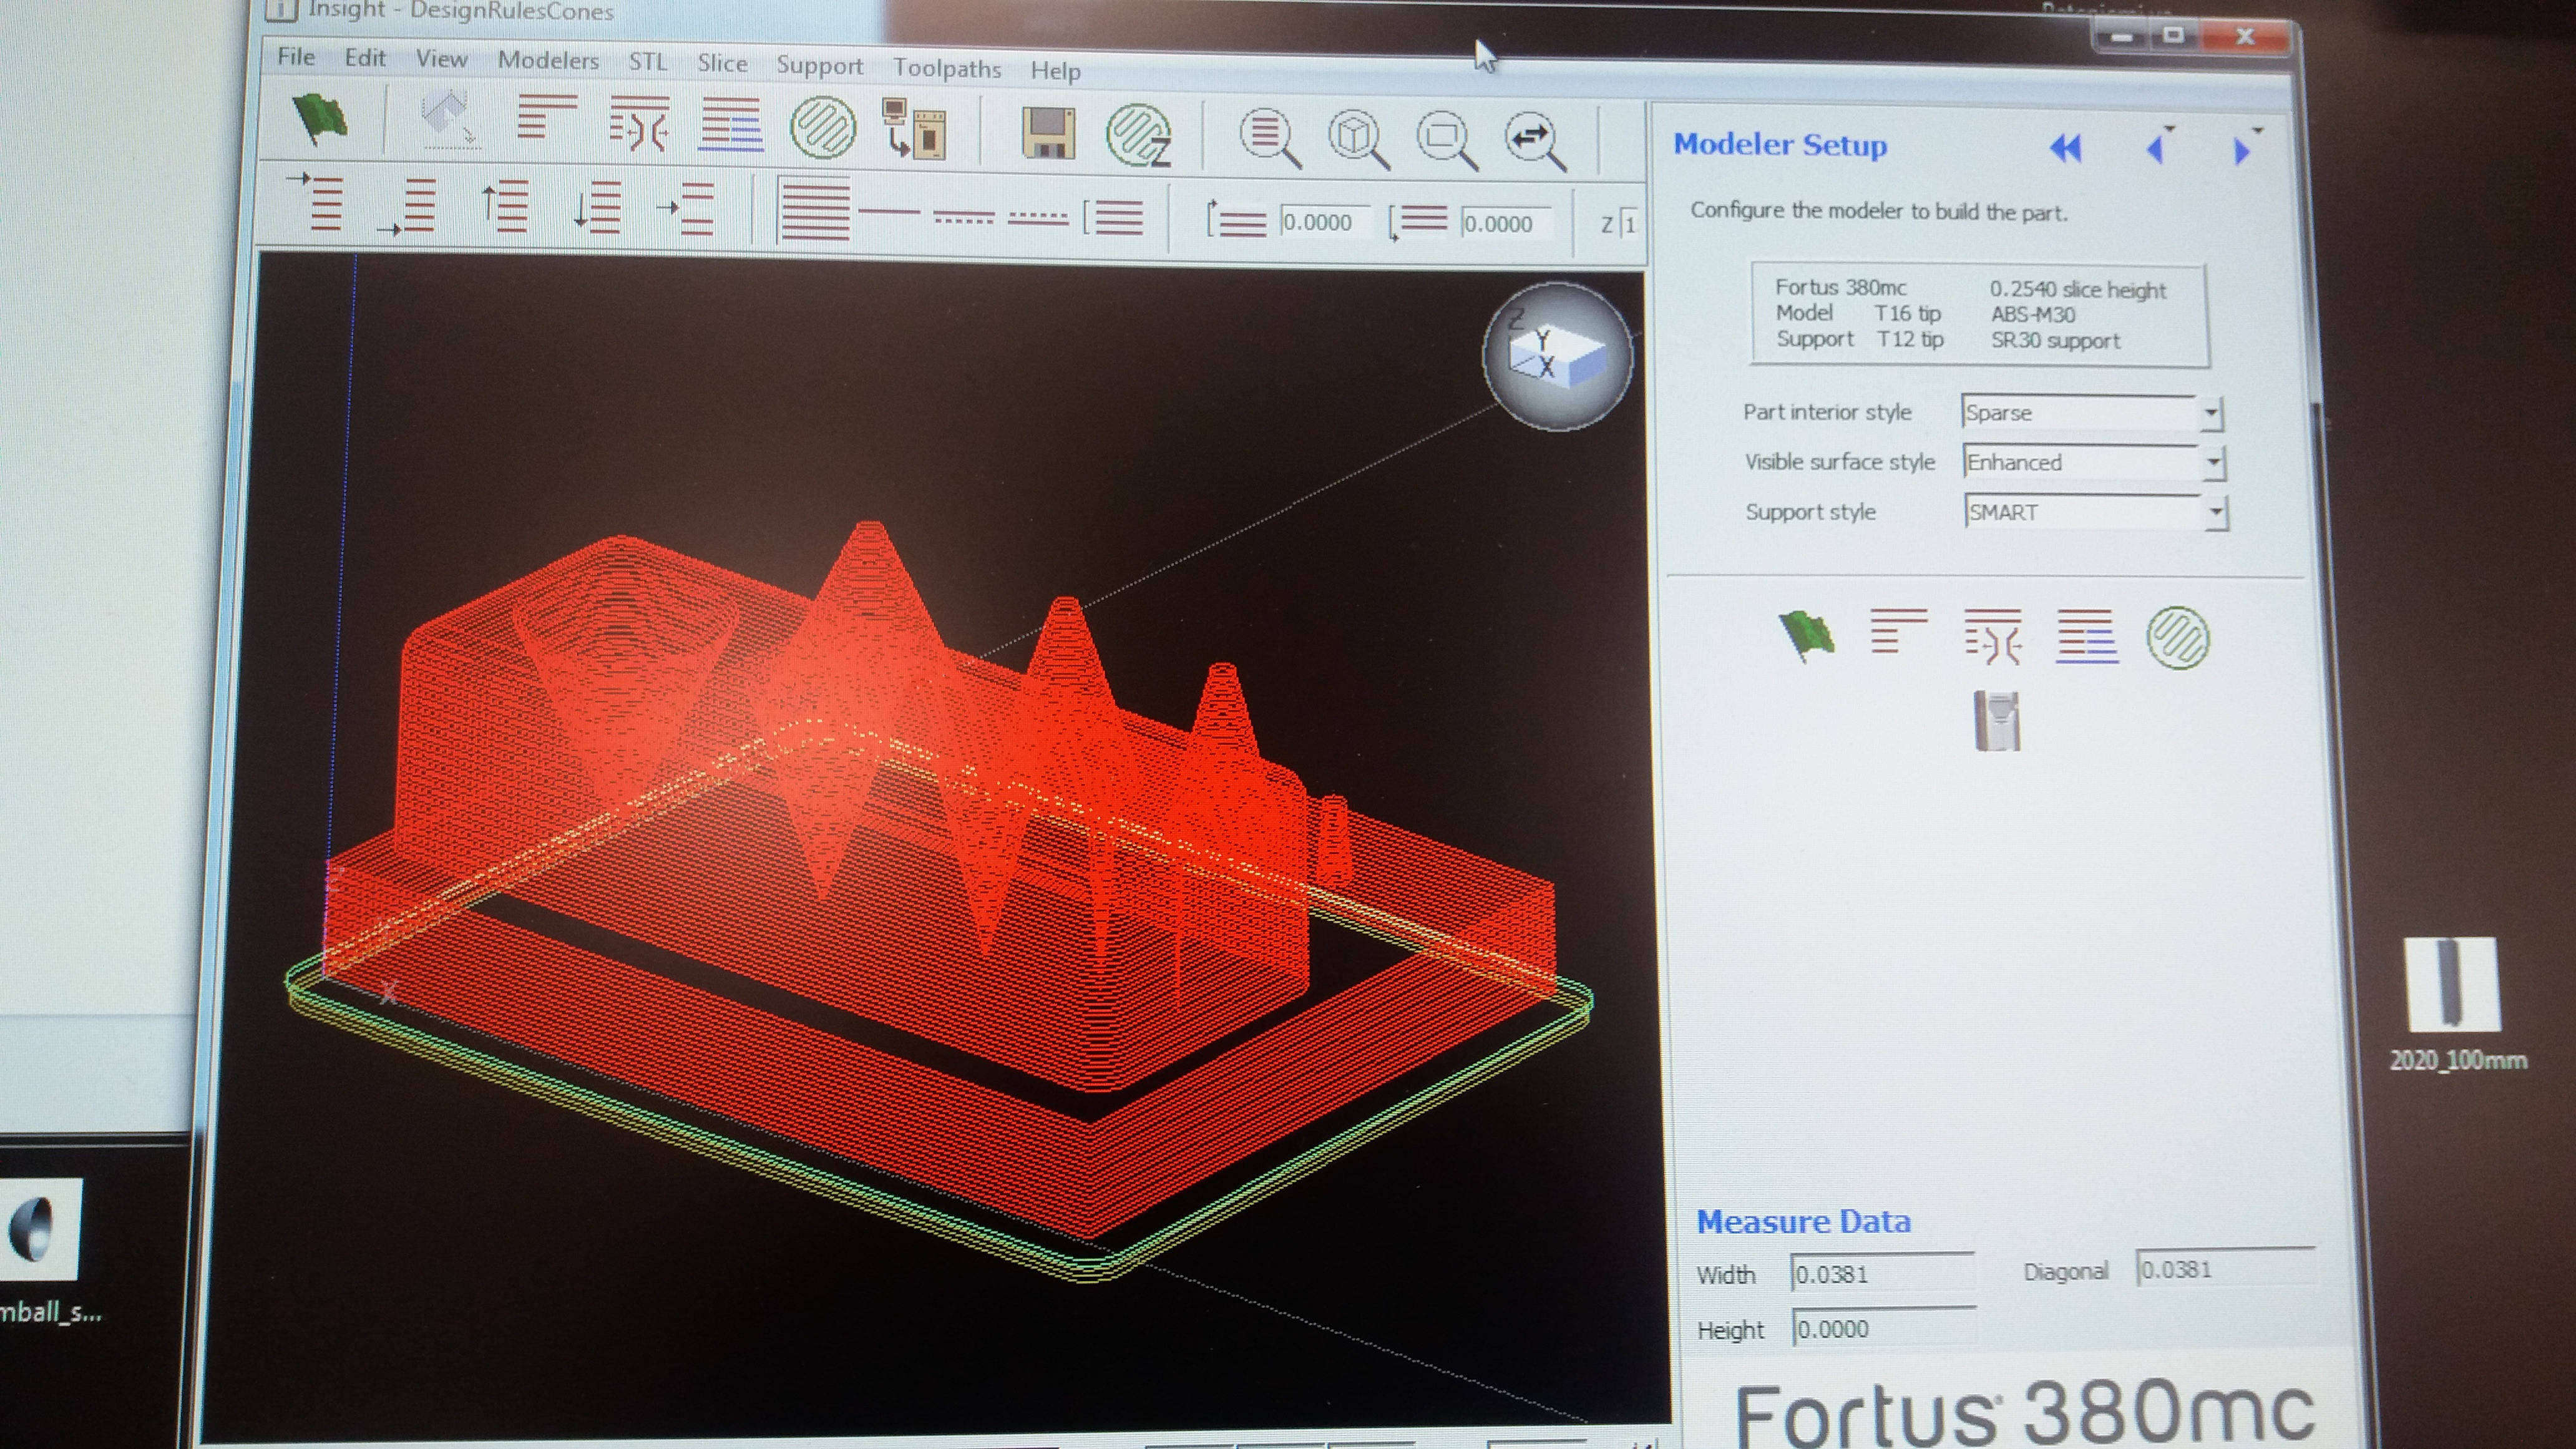
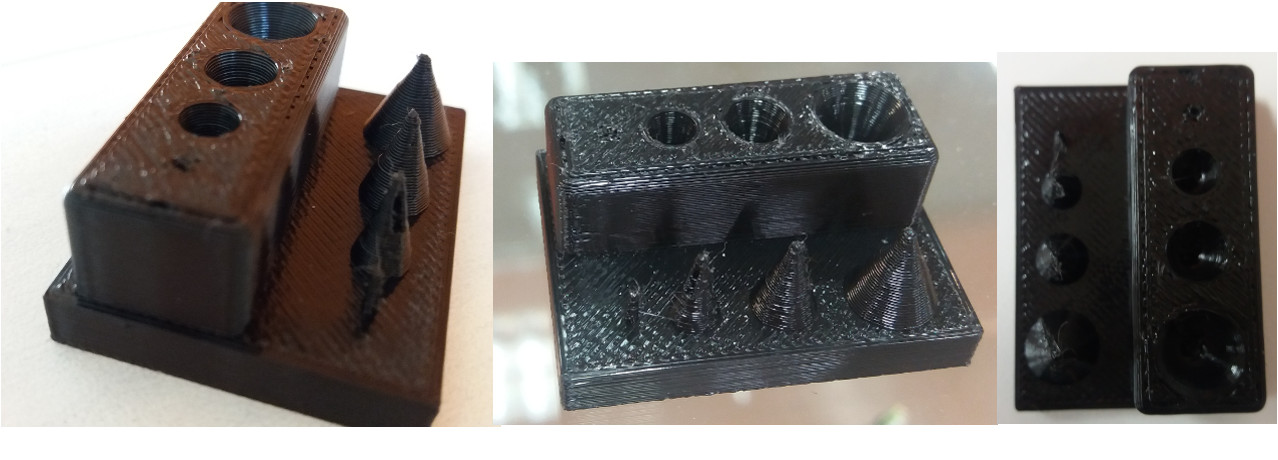
The 3D printing result is generally ok; the surface is neat and the larger cones have good quality. However, the smallest cones 0.5 mm and 1.5 mm are not printed at all or printed with poor quality. The middle spike (5 mm) has a hole on its surface. The results are comparable with the results reported by Juho Vesanto for the printer Dimension SST 1200 (Stratasys), though the test objects themselves vary a bit dimension-wise.
2) Design and 3D print an object (small, few cm) that could not be made subtractively
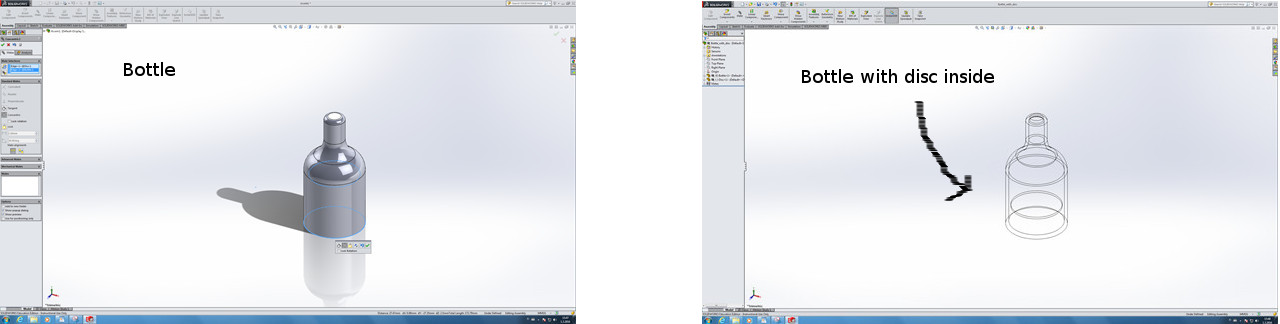
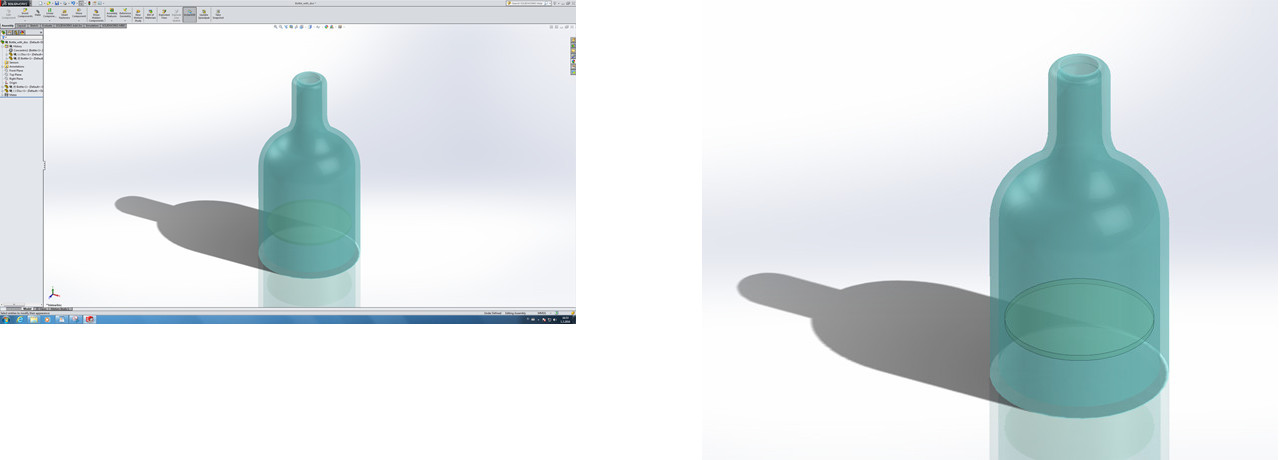
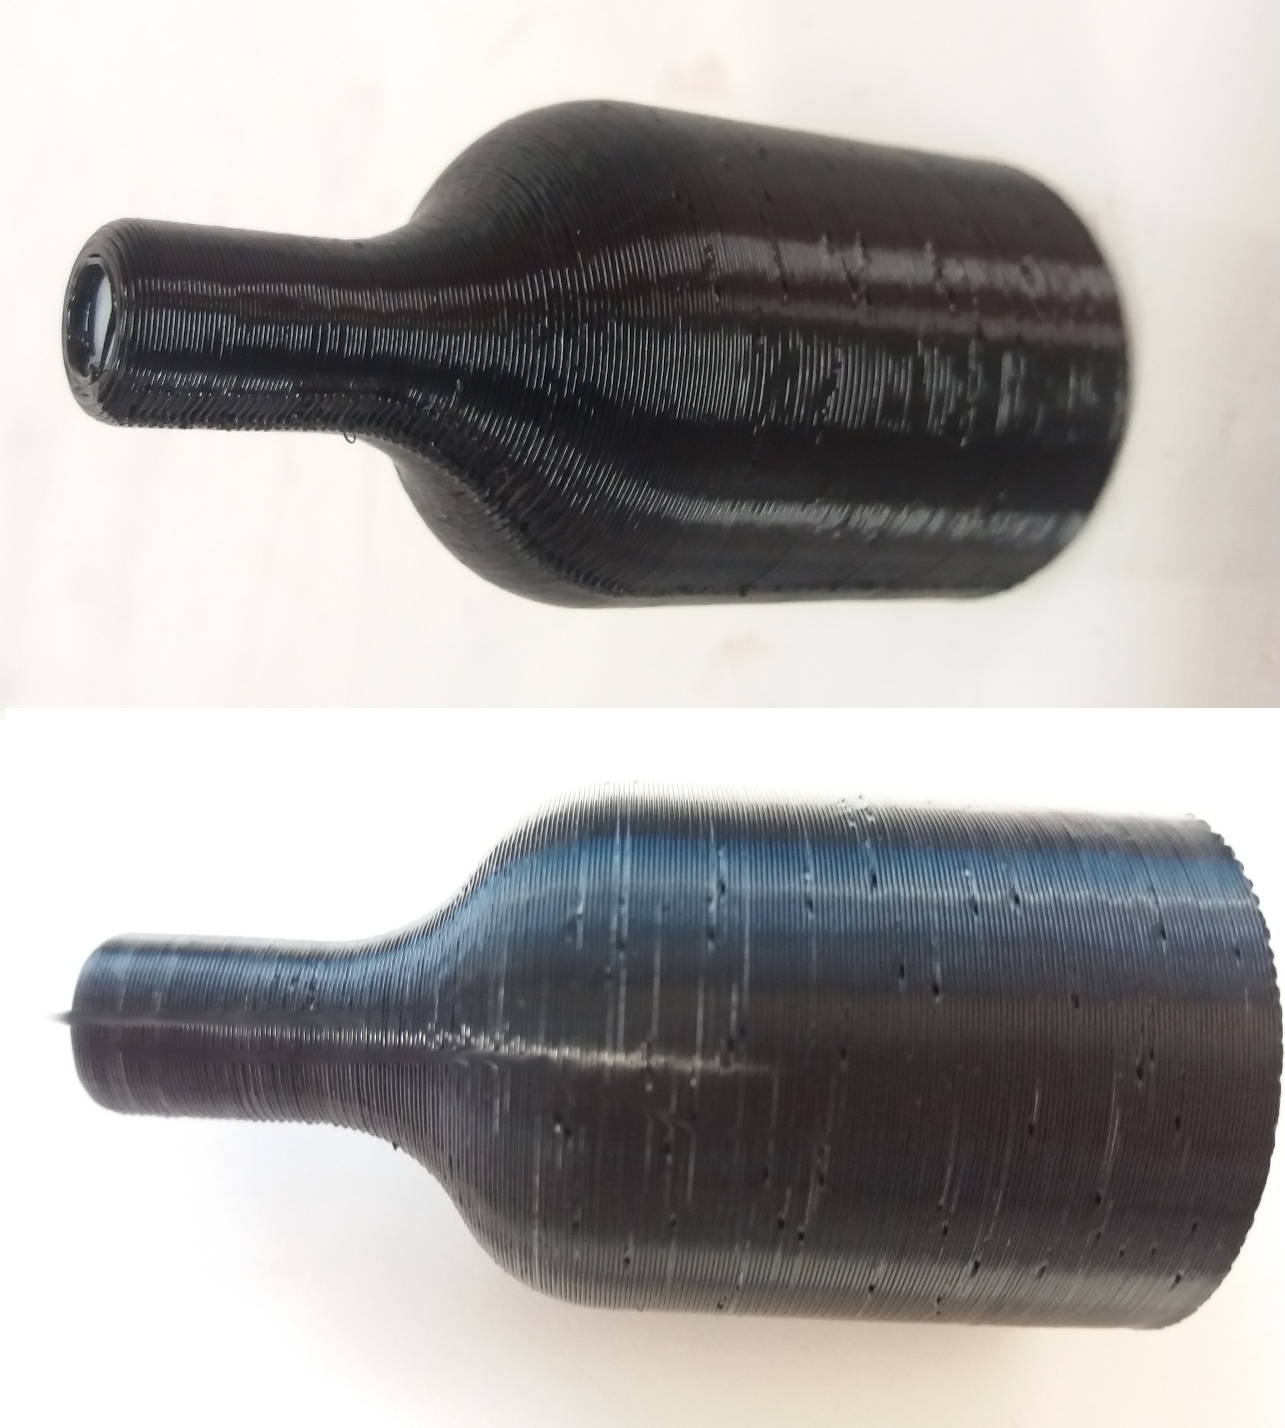
For this task I chose to design and print a bottle with a disc inside. The idea behind it is to create a small recipient for medicines that can sense the number of pills in it based on weight and inform the medicine taker whether is needed or not to take a medicine at a certain time.
The pictures below show some steps in the design and 3D printing process, as well as the result. The bottle was created using two circle sketches with box extrudes features. The base has the diameter 30 mm and height 40 mm. On top, it was added the second sketch with box extrude feature (diameter 10.5 mm and height 20 mm). Three fillets were applied, two with radius 10 mm, and the third on top with radius 2 mm. Then a shell with 1.5 mm thickness was applied over entire object. Finally, to open the bottle, it was added a third sketch with cut extrude feature: sketch diameter 6.5 mm and cut extrude depth 1.5 mm. The disc diameter was 27.5 and thickness 1 mm. The final object was obtained by creating an assembly of the two parts using the concentric mate feature.
Changing the appearance of the bottle.
Configuring the 3D printer modeler.
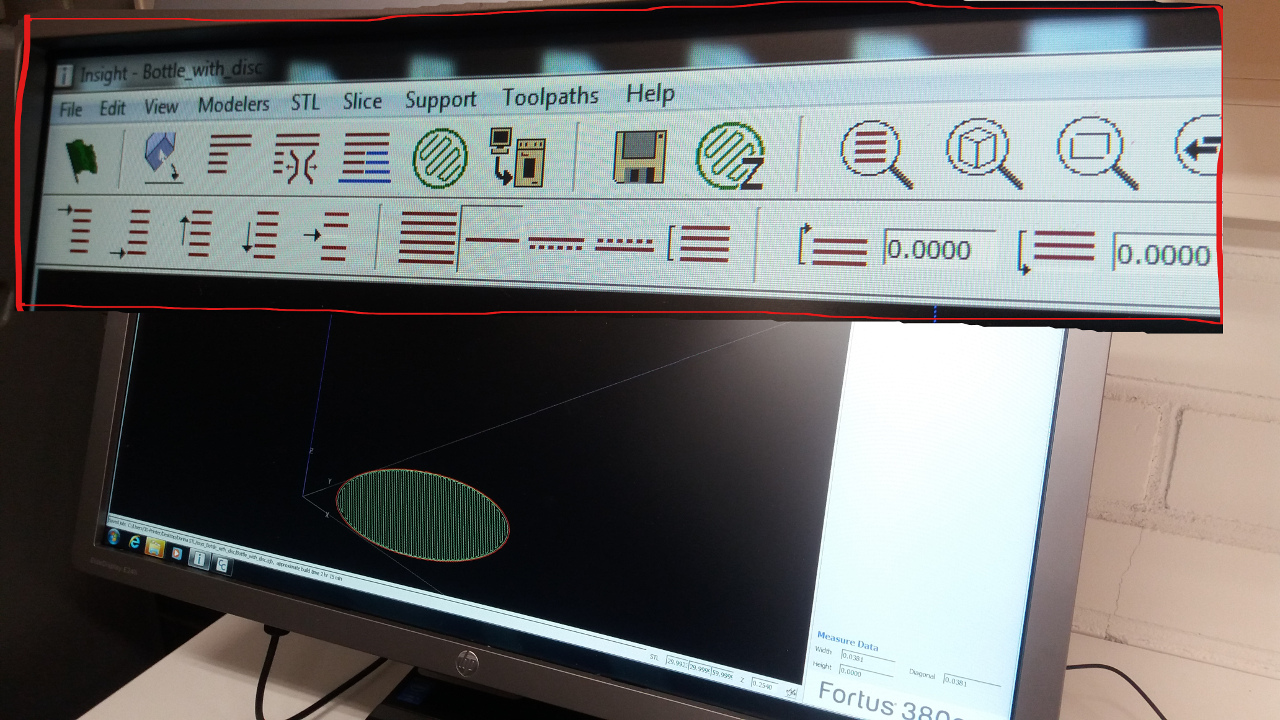
Previewing the printing job.
This object cannot be manufactured subtractively because of the shape: empty cylinder with the base large and the top small, and only the top has an opening. In addition, the shape has a solid disc inside that is larger in diameter than the opening.
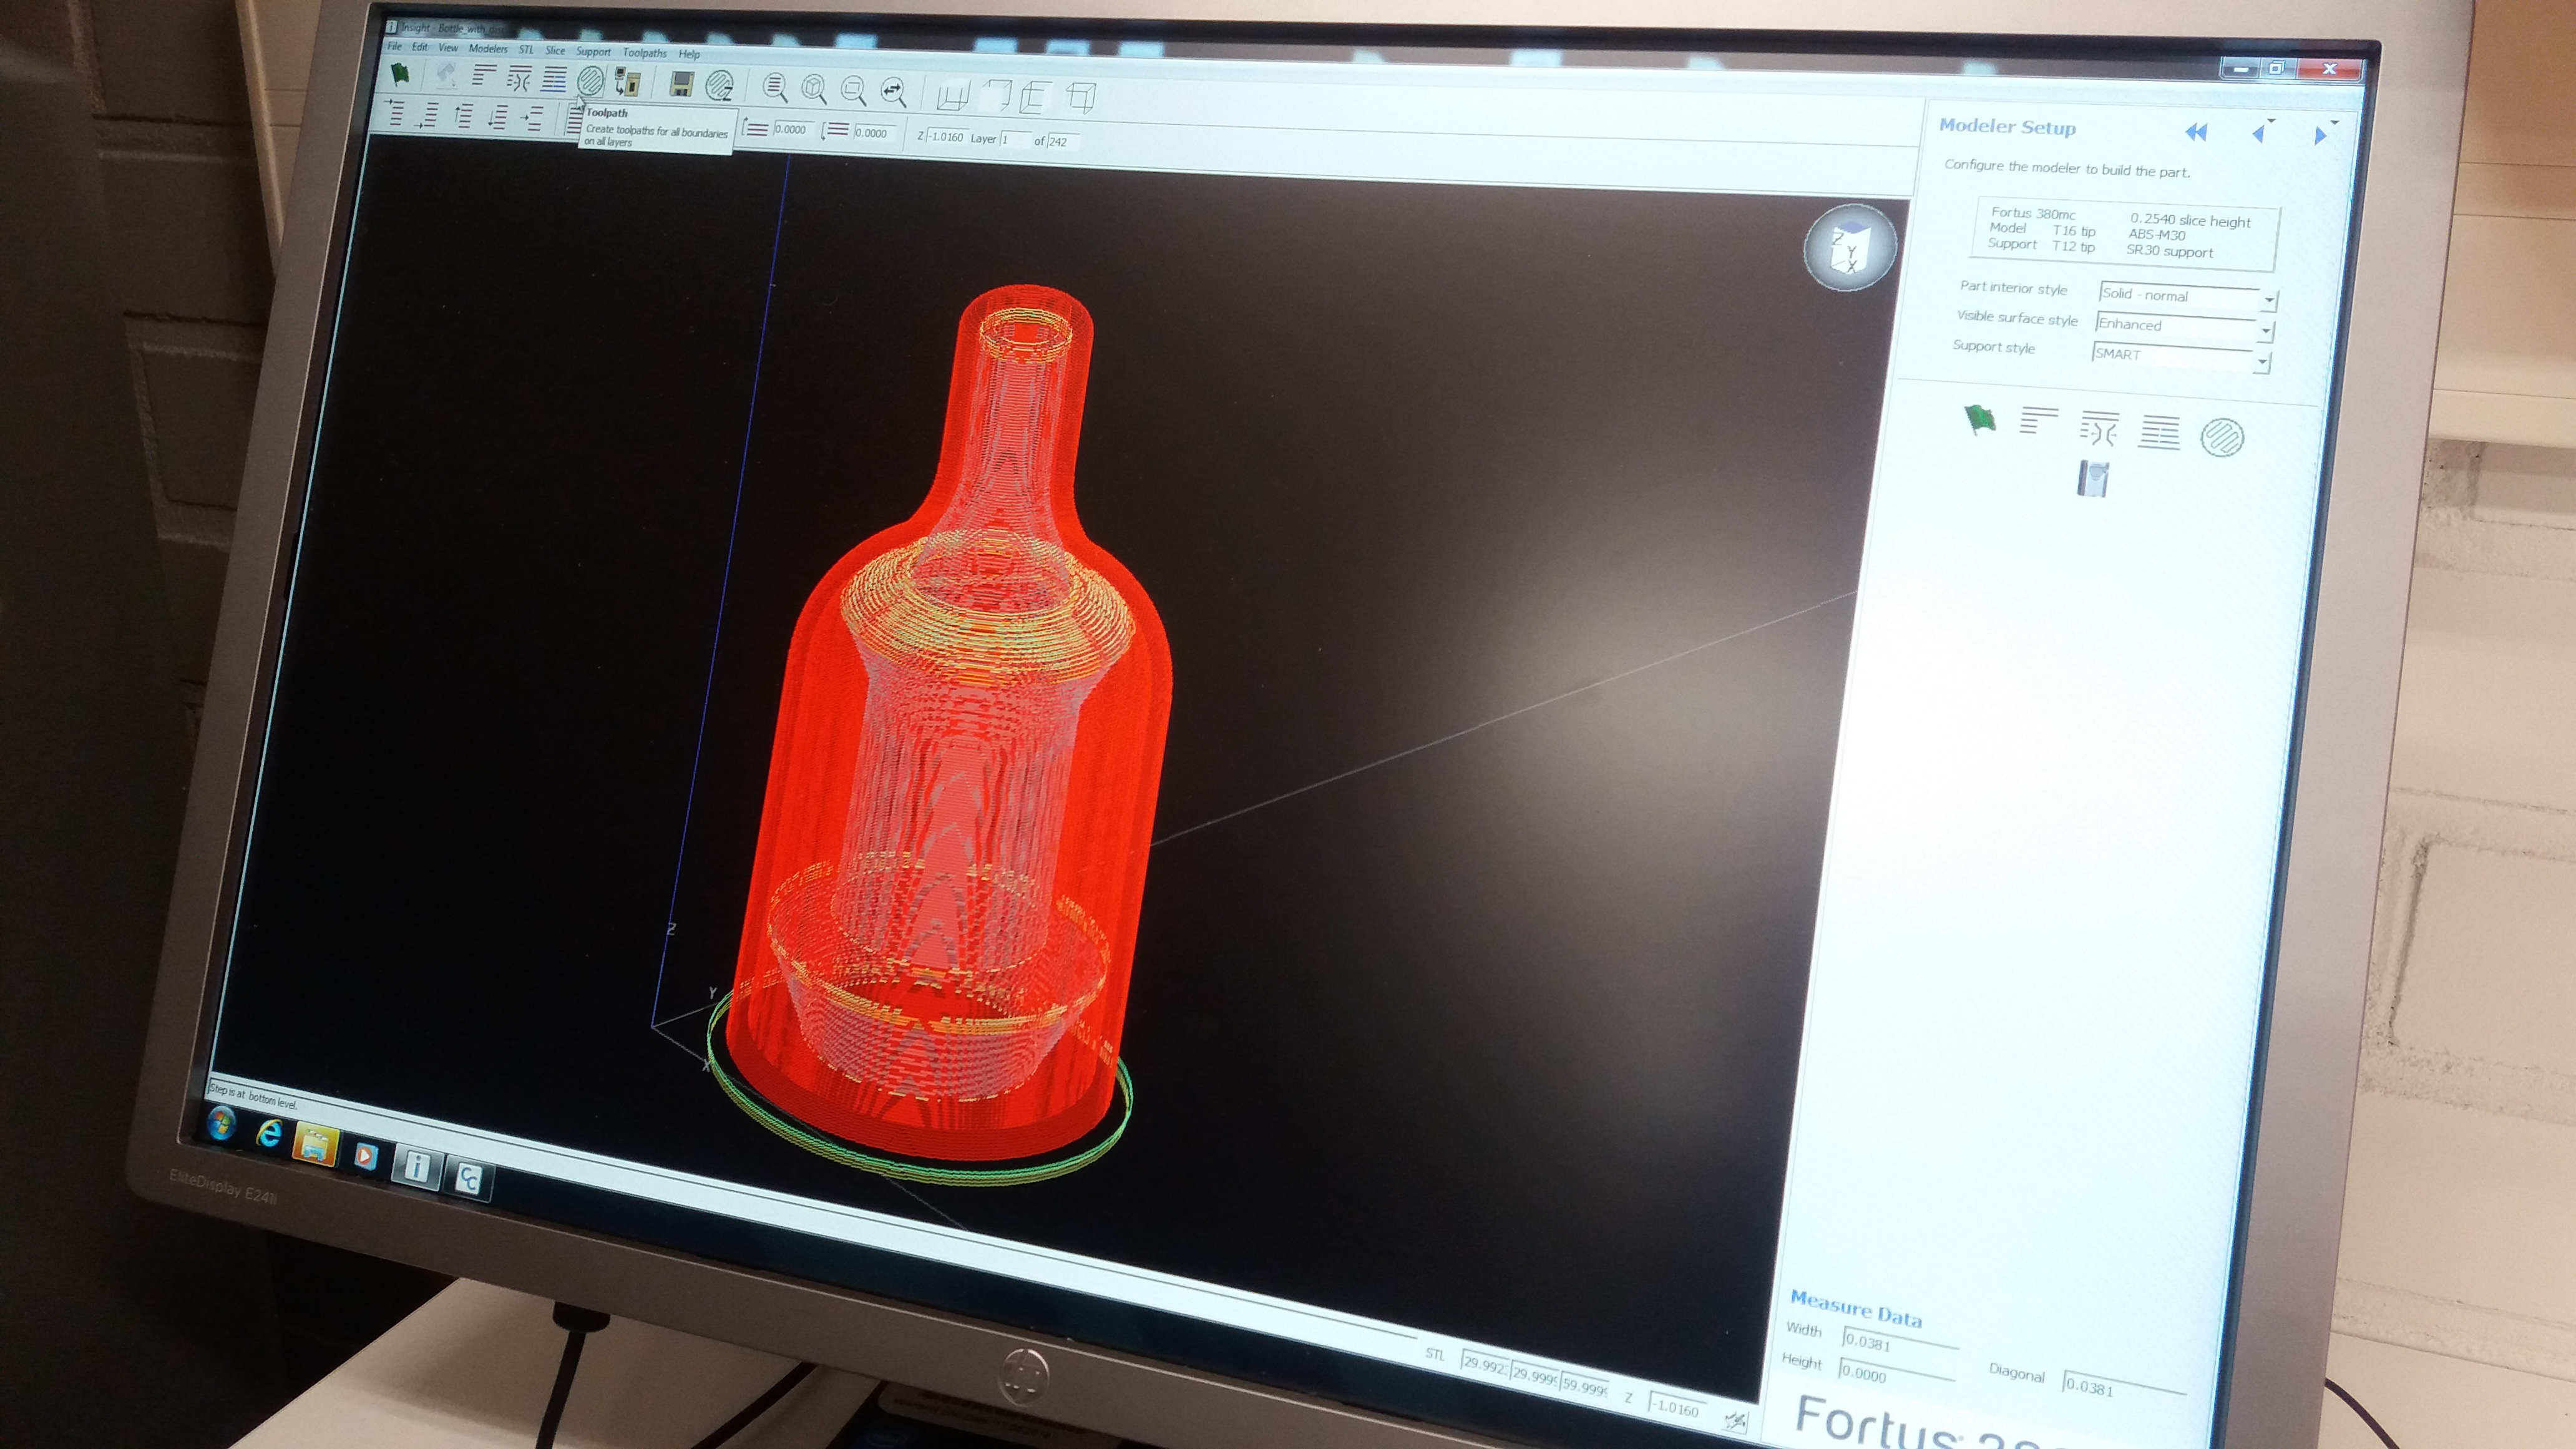
Configuring the printing job.
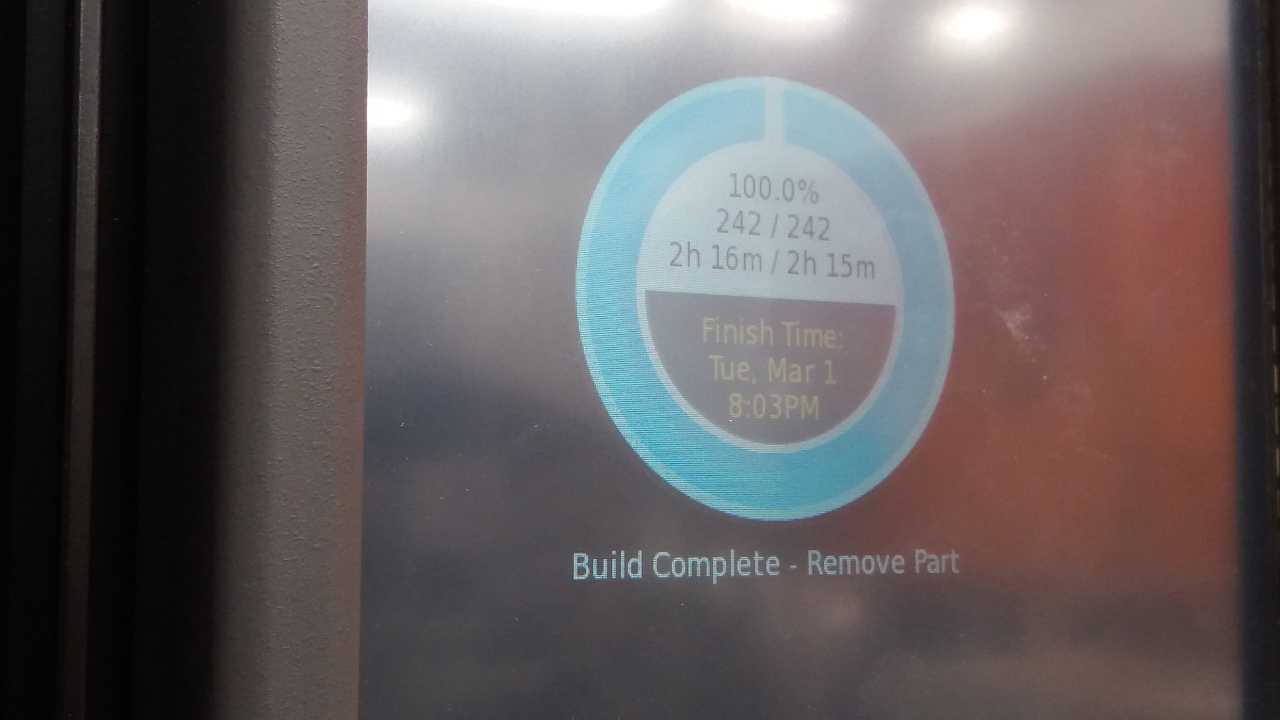
The printing job is completed in about 2h15min.
The print result and the post-processing step: removing and dissolving the supports (the white plastic).
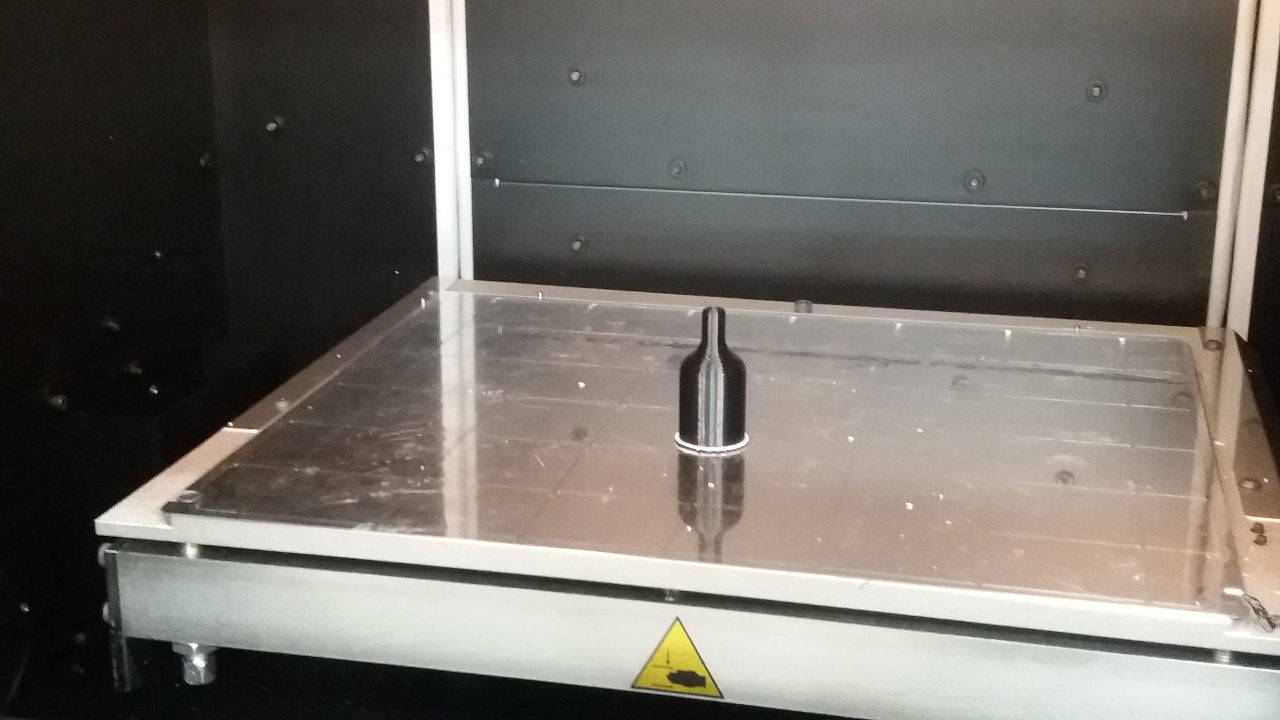
The bottle is ready to be exposed to the public.
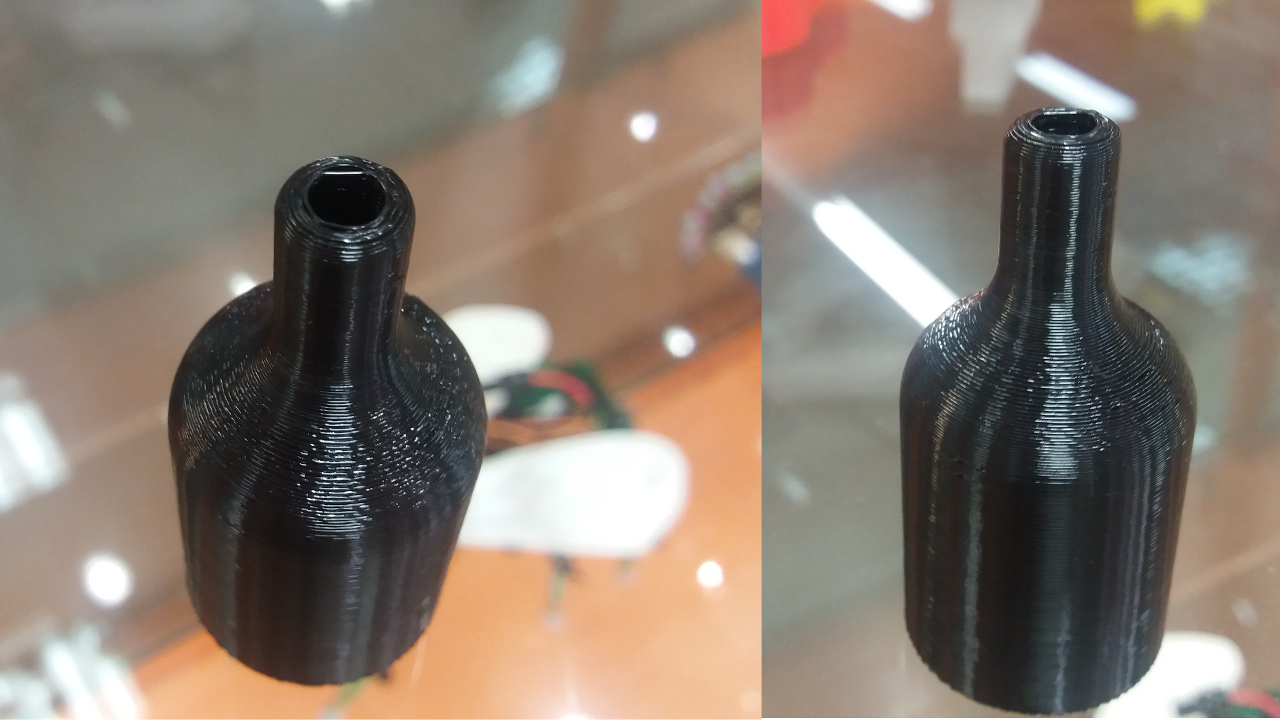
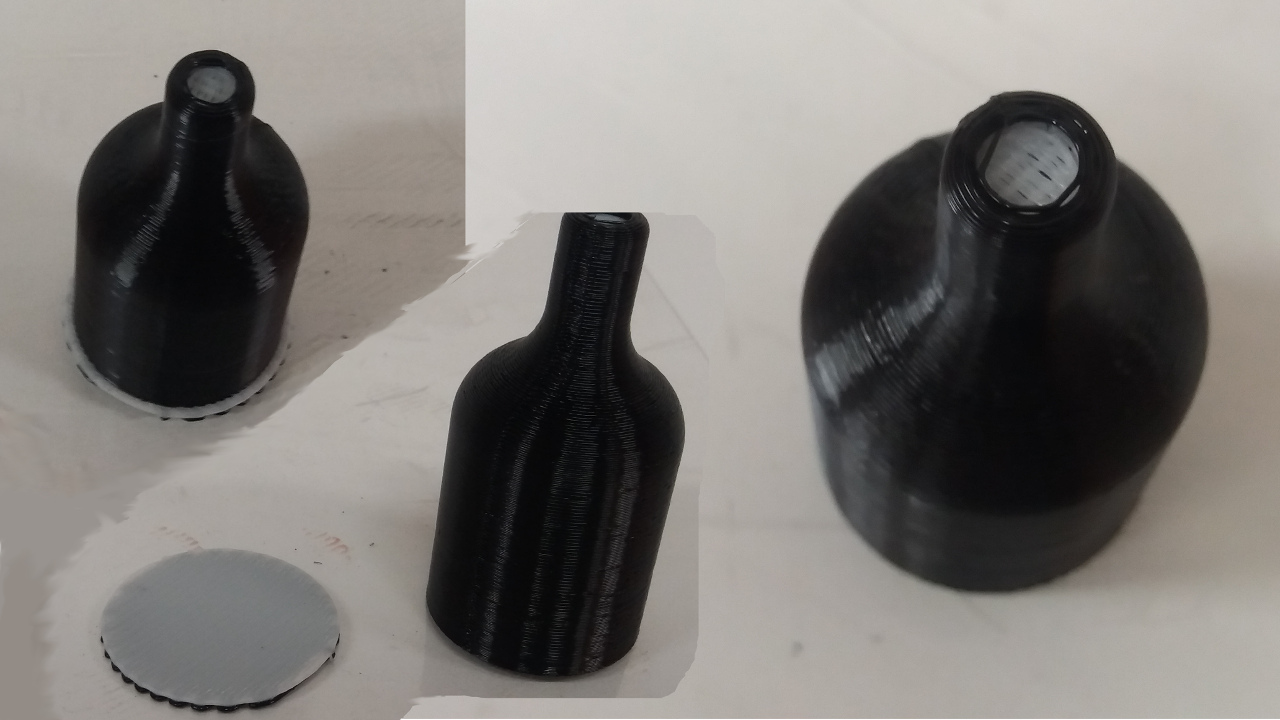
The result is quite good given the dimensions of the bottle (30 mm base diameter and 6.5 bottleneck diameter). The cavity of the bottle seem to be good as well as the disc inside the bottle. Though it is not possible to see the disc due to the small diameter of the bottleneck, one can hear it when shaking the bottle. The only problem with the outcome are the dots in the surface. Could they be from the printing of the support?
3) 3D scan an object
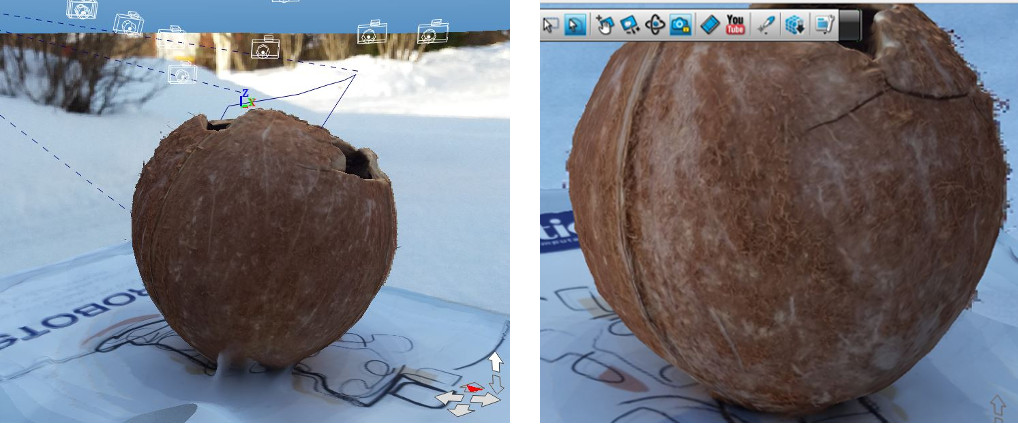
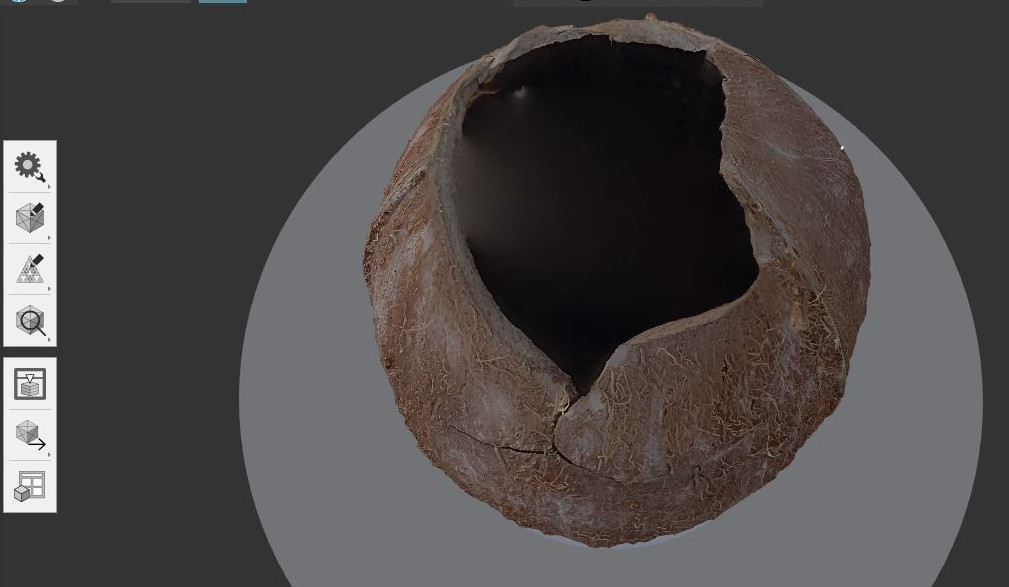
For the 3D scanning I choose to scan an empty coconut. I brought this coconut shell from Hawaii as a memory of a refreshing coconut experience (CoX) on the Shipwreck beach. The plan was to make a candle holder out of the coconut shell. The shell prove to be harder than imagined and not possible to cut with any tool I can handle. Learning how to laser cut at Fablab, I got the idea to try it also on my coconut. But first, I wanted to make a 3D model of it, and thus I scan it. Let's see the process and the outcome.
For the task I had two options: 1) to use Autodesk 123D Catch, Autodesk 123D Design, and Autodesk Meshmixer; and 2) to use Autodesk Memento - a single tool that encompasses the entire workflow.
I downloaded and installed all these SW. Regardless of the tools used, the process consists of the following steps:
- Take photos of the object from different angles (min 8); I took 60 pictures. Adviced by Antti I have put the object on a magazine which acted as a reference for the object being photographed.
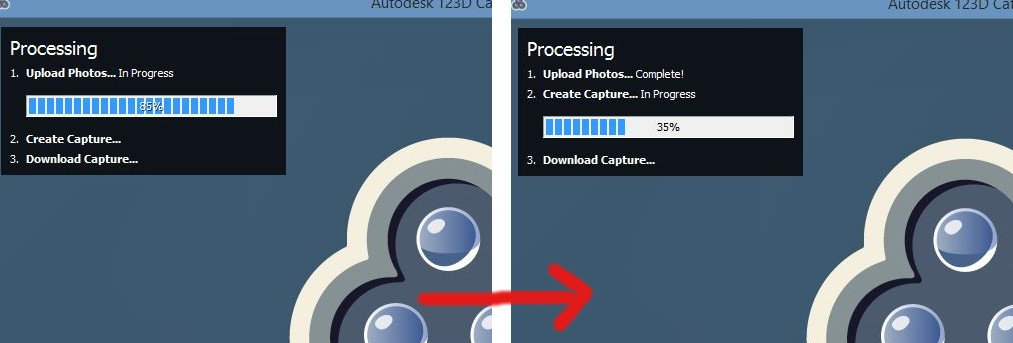
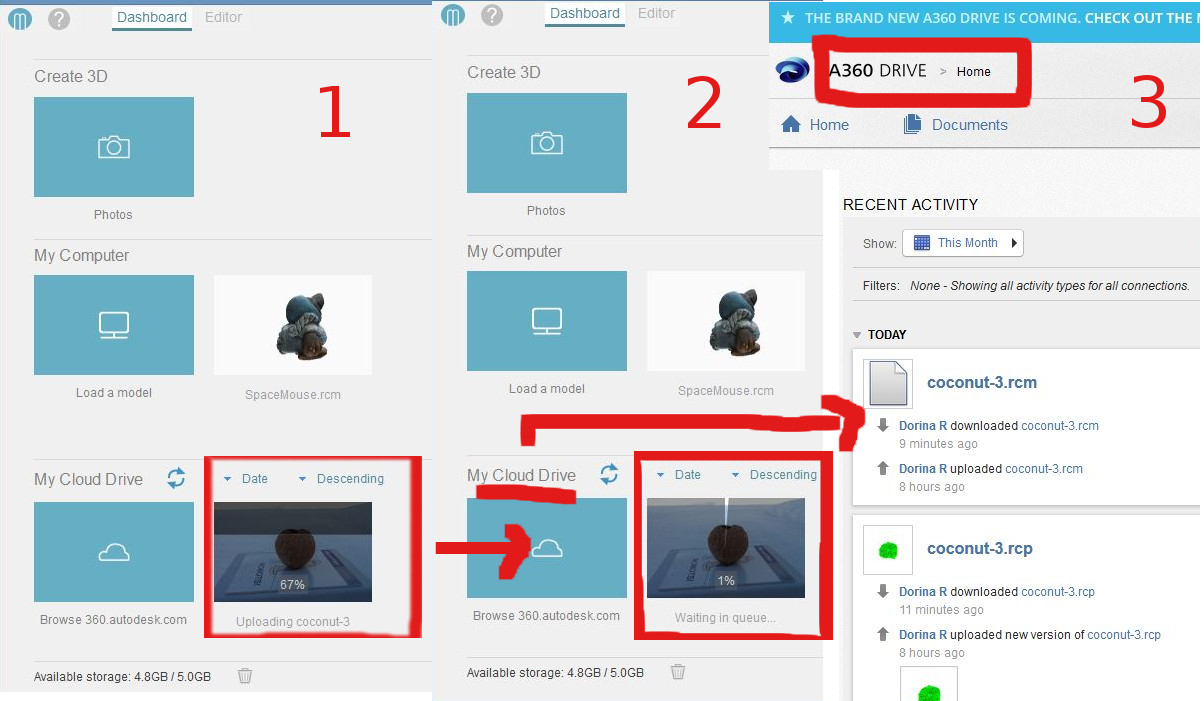
- Upload the photos in Autodesk Catch or Autodesk Memento (I have done both ways). The pictures are uploaded on a cloud service that provides resources for the subsequent processing; thus in order to use these tools you need to register with an email account and password.
- Create model (Memento) or capture (Catch). (both done; when the model is ready it can be downloaded locally)
- Download model. (done with both tools; in 123D Catch I have not saved the model, I only took snapshots to document the process and the outcome)
- Edit the model to fix defects such as holes. (from this point on I used only Memento and did not edit the model obtained with 123D Catch)
Autodesk Catch
The pictures below show some steps in the 3D scanning workflow using Autodesk 123D Catch.

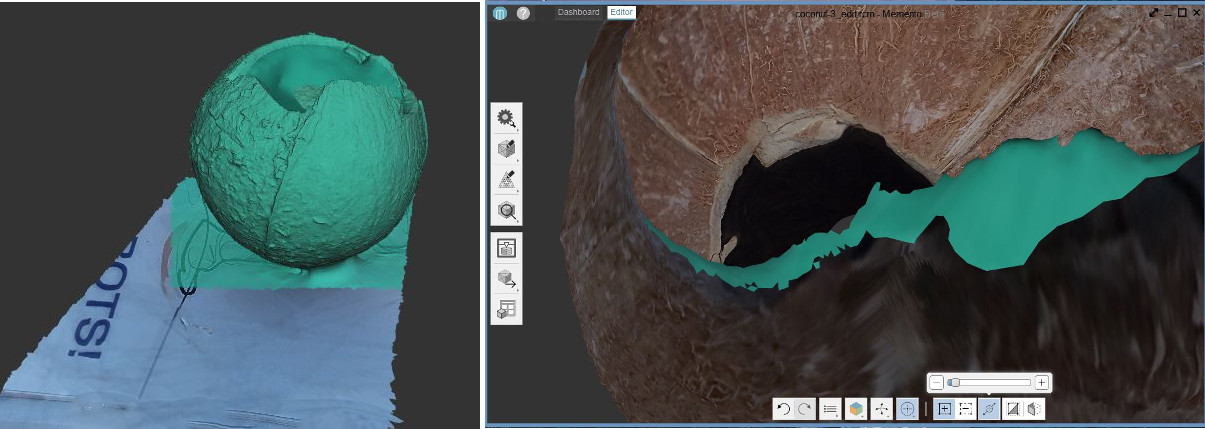
Autodesk Memento
The pictures below show the main steps in the 3D scanning workflow using Autodesk Memento.
Uploading the photos, creating the model, and downloading the model form the cloud (.rcm file). For creating the model, I have used Best for Quality, Smart Crop, and Smart Texture.
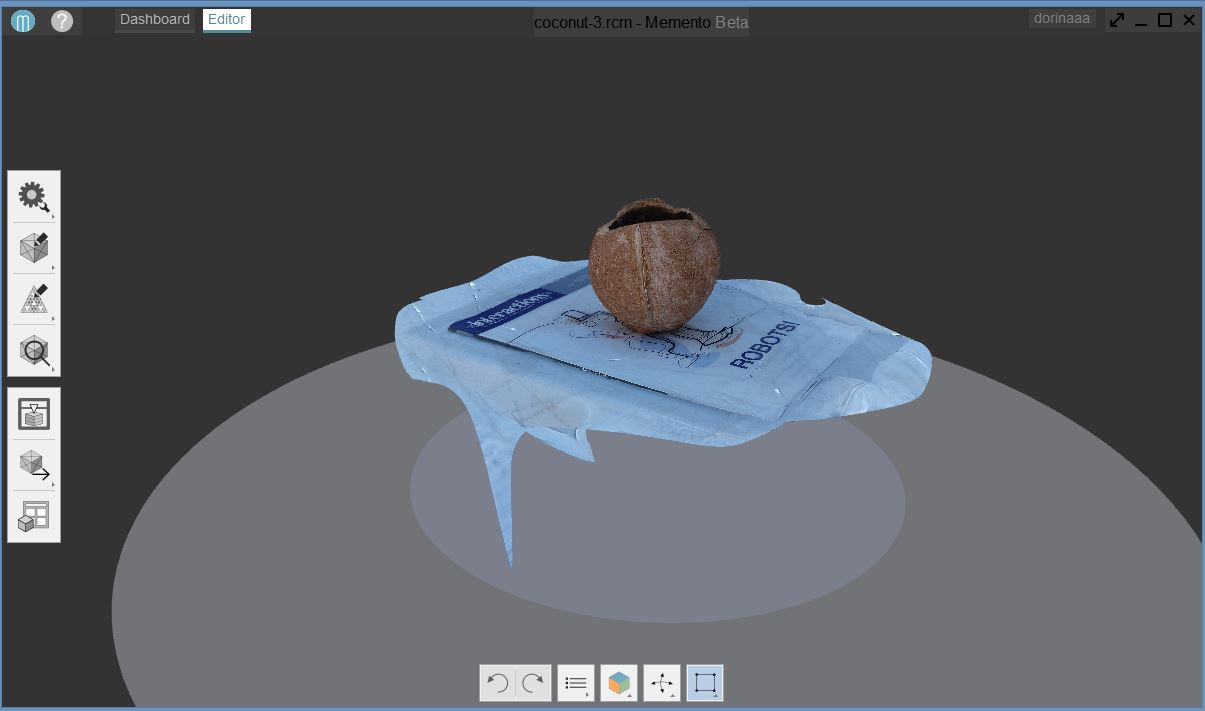
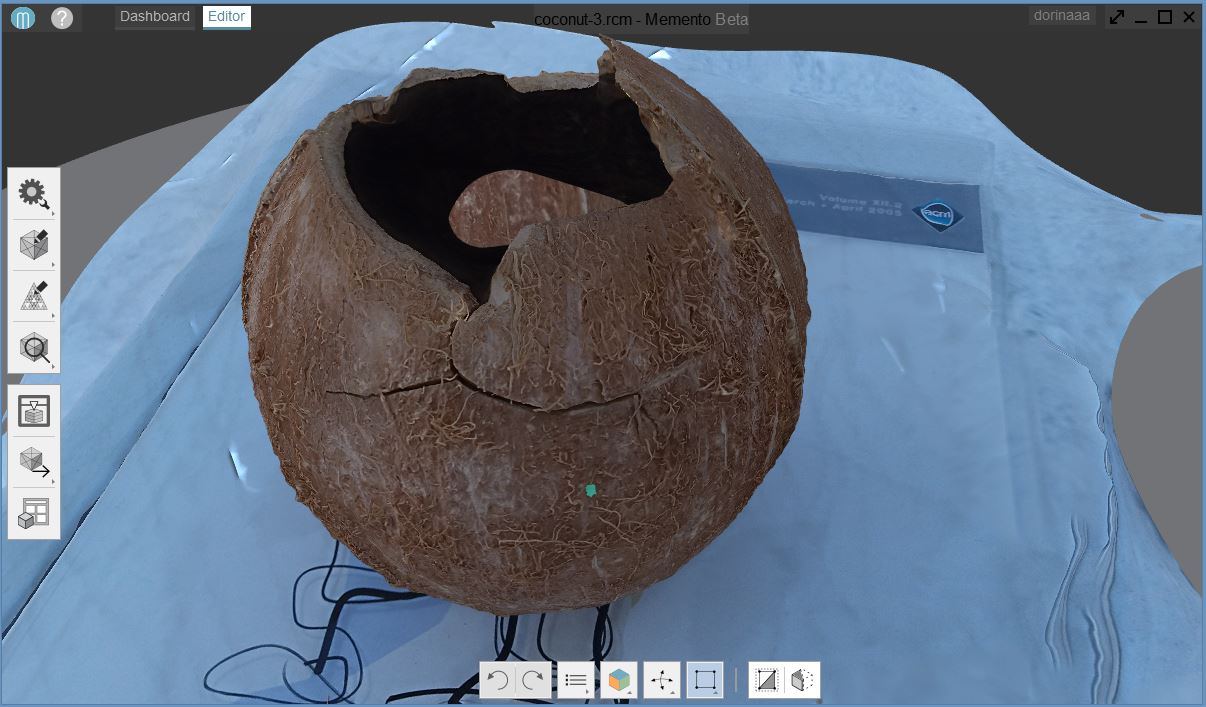
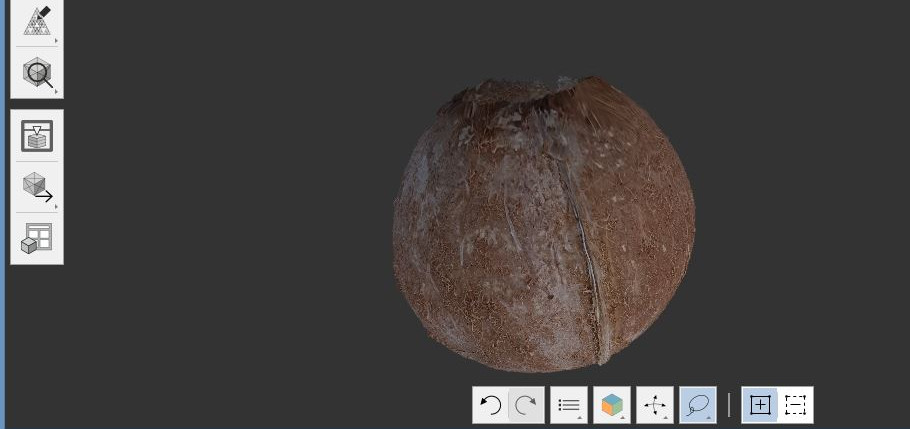
Opening the model (.rcm file) for edit in Autodesk Memento, and viewing it from different angles.

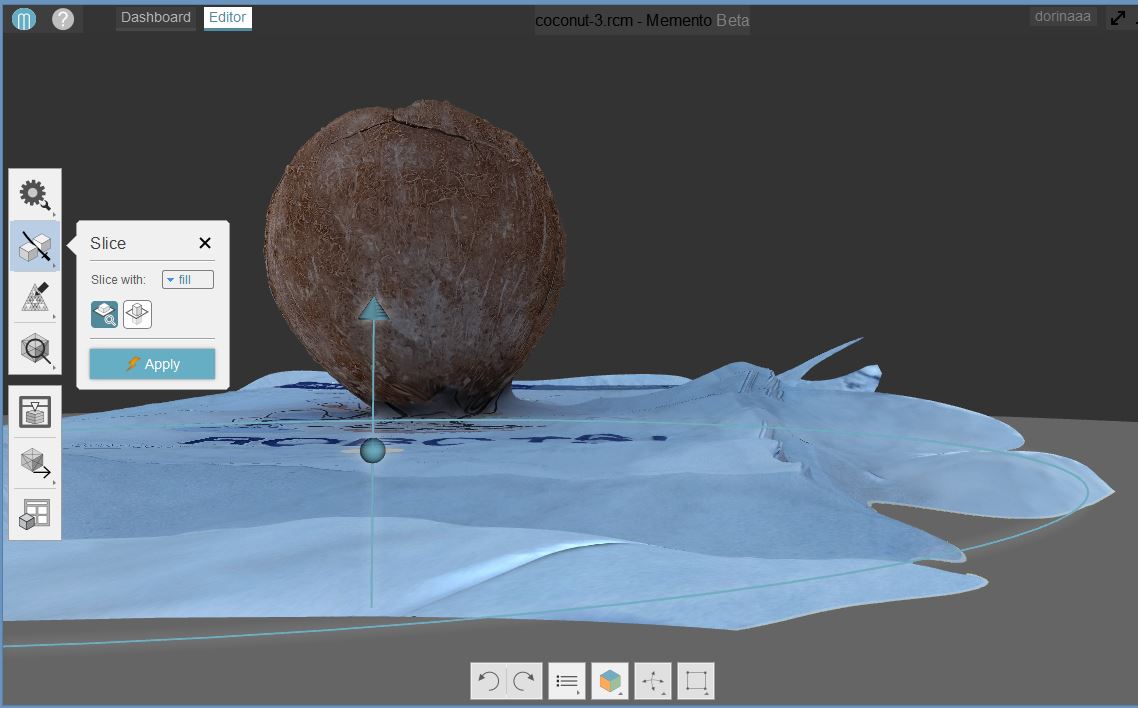
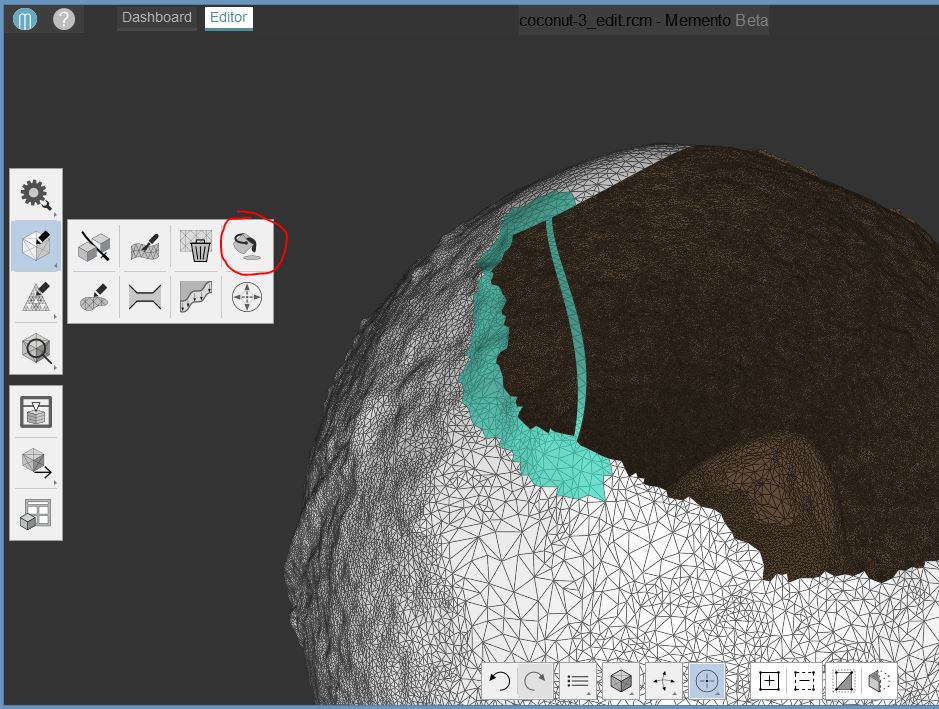
Slicing the model to remove unwanted parts.
Using different selection tools for cleaning further the model. At this point I have saved the model in a new file not to overwrite the original model.
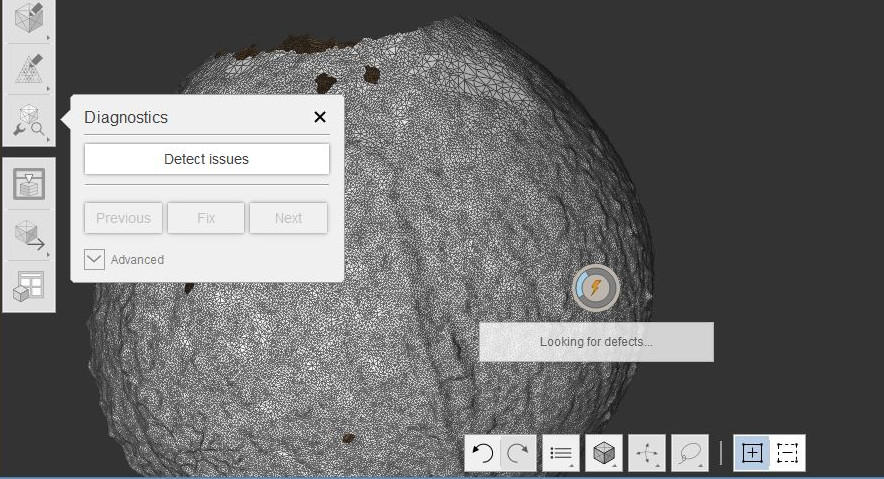
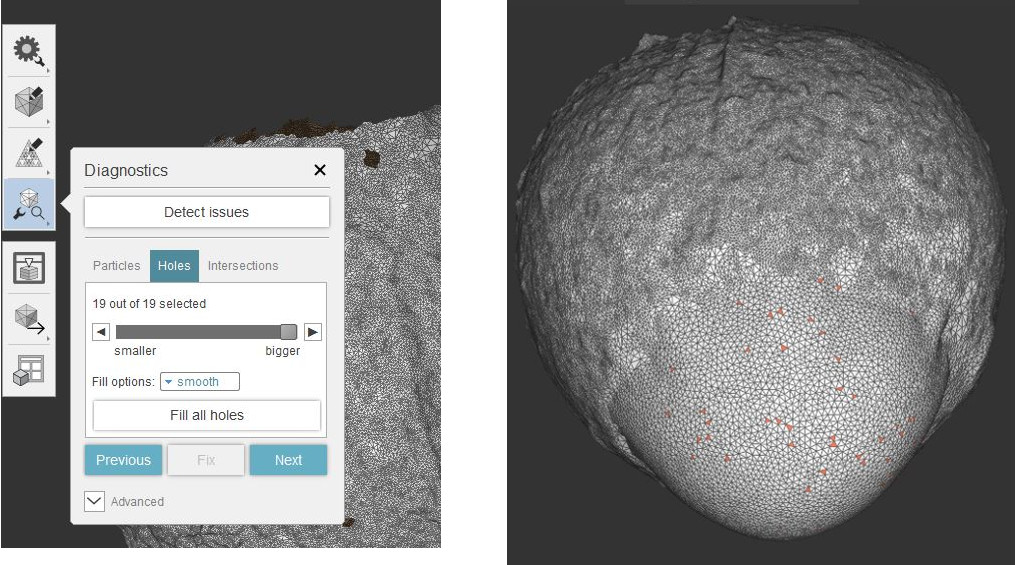
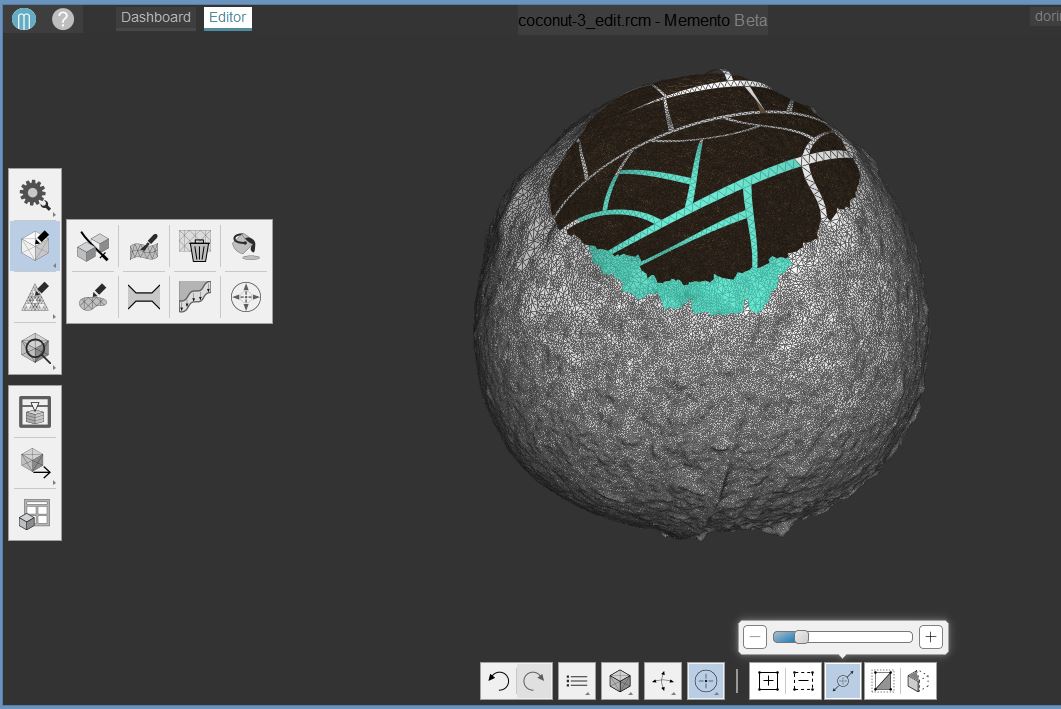
The final model, ready for correcting the holes.
The final model with wireframe visualization (mesh grid view) when applying the "Detect and fix mesh issues" function (from Analyse tab).
The automation fixing tool is not always guessing the real shape; however it saves times and it is easy to use for regular shapes.
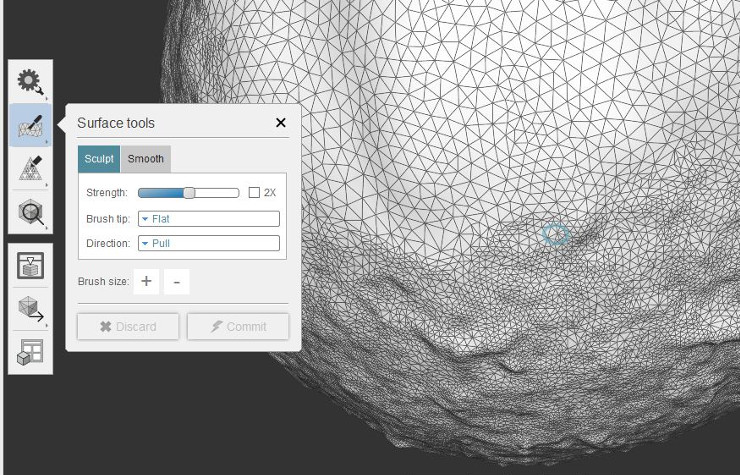
I have removed the automatic mesh interpolation and created one manually using the "Bridge" and "Fill" functions from Edit tab.
Finally, I refined the surface using "Surface tools" and "Smooth" function from Edit.
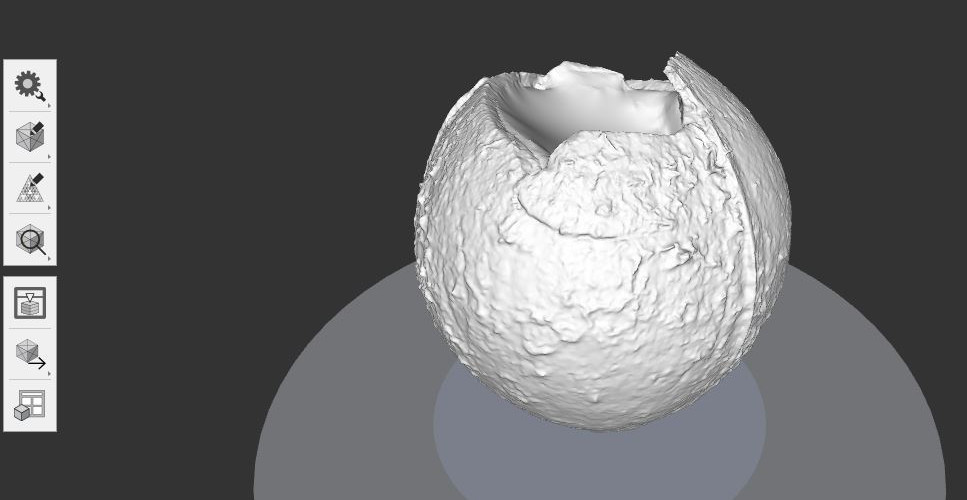
The final model does not have any defects.

The result of editing is a solid white surface on the bottom of the coconut shell.
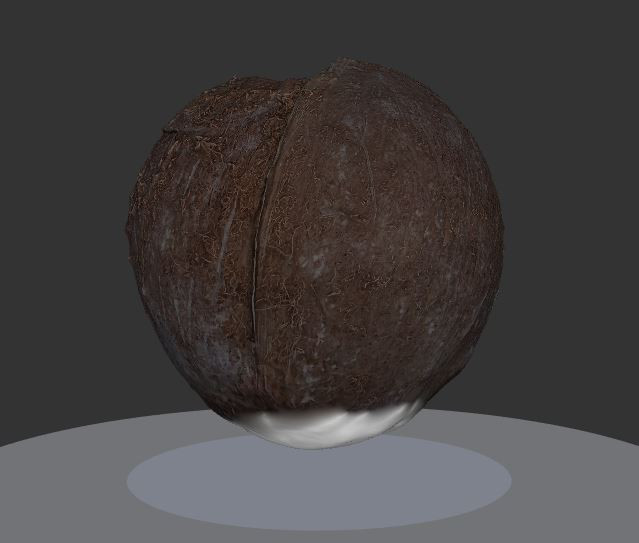
Is beautiful, isn't it?
Now the 3D model is ready to be printed; however the printed object will not have a realistic texture; the limitations of 3d printers will affect the printing outcome; it is not possible with our Fablab printer to reproduce the texture and color.

The printed object will look more like this, but the color and texture depend on the material used. See the documentation of the 3D printing task outcome above.
As mentioned earlier, I am not interested in printing this object, but to model it further in order to be able to use it with the laser cutter. The idea is to cut the top part by a plane and the remaining part to be used as a candle holder. Is this possible? What SW can be used, Blender, 123d Design, SolidWorks? Any suggestions are welcome.
The summary of 3D scanning and printing
- SolidWorks, Autodesk Memento, and Autodesk 123D Catch are amazing tools; I enjoyed very much learning and practicing with them.
- I found this tutorial video on Autodesk Memento very interesting and useful.
Summary of Tools used
Software
SolidWorks - for 3D design
Insight - for 3D printing
Autodesk Memento, Autodesk 123D Catch - for 3D scanning (creating and editing a mesh of a 3D object based on photos)
Hardware
Stratasys Fortus 380mc - 3D Printer
Samsung Galaxy J5 phone camera
Source files for download
SolidWorks files (.sldprt and .sldasm)
.STL files
Autodesk Memento files (.rcm file)


