Study archive - Week 12
Molding and casting
The task of the week was to design a 3D mold, machine it, and cast parts from it.
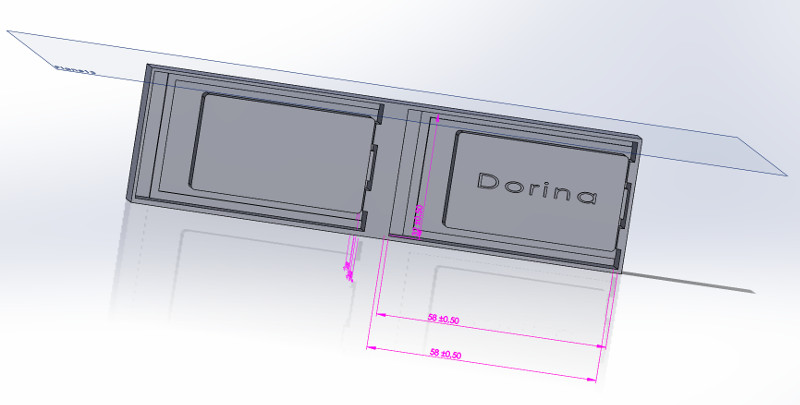
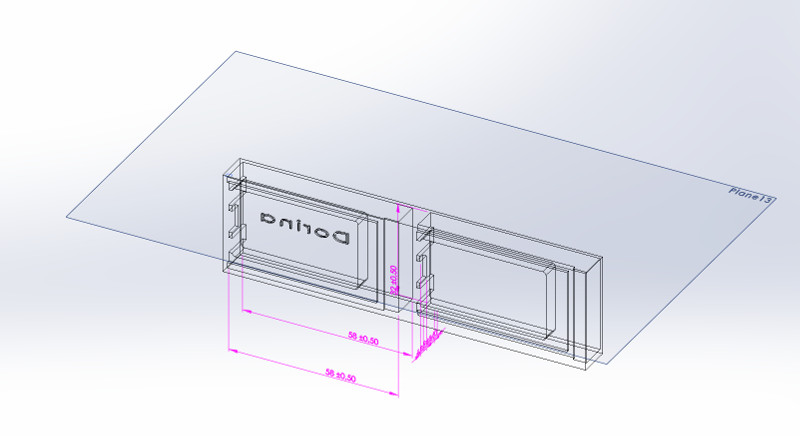
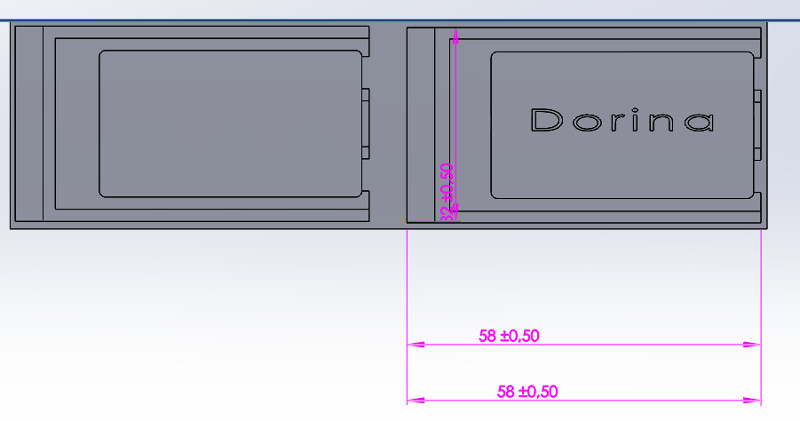
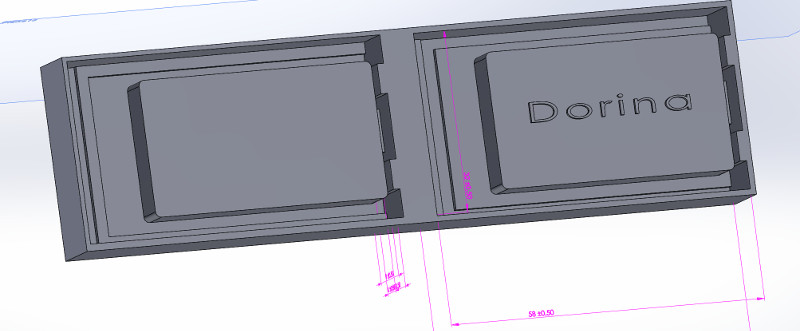
I decided to create a cover for one usb stick so to make it distinctive from computer. The stick is black and can easily be forgotten in the black computers that we usually have in our offices. Seeing other similar projects (eg., Jani's project), I think this is a suitable exercise for this week's assignment.
The process has 4 main steps: 1) create a 3D design for the wax mold. (the design of the positive mold; this is quite challenging); 2) mill the wax block according to the design (it results the positive mold); 3) pour rubber into the wax mold to create the rubber mold and let it cure (it results the negative mold); and 4) pour plastic into the rubber mold to create the desired object (a process called casting) and let it cure. At the end of this process we have a new object of the shape we designed. In my case, at step 4, in the rubber mold I add the USB stick and I pour the plastic over it so that it will get coated with a layer of white plastic. This process can be repeated many times to create many identical objects (e.g., the lifetime of the rubber mold is about 50 castings; the wax mold can also be used many times to create a rubber mold).
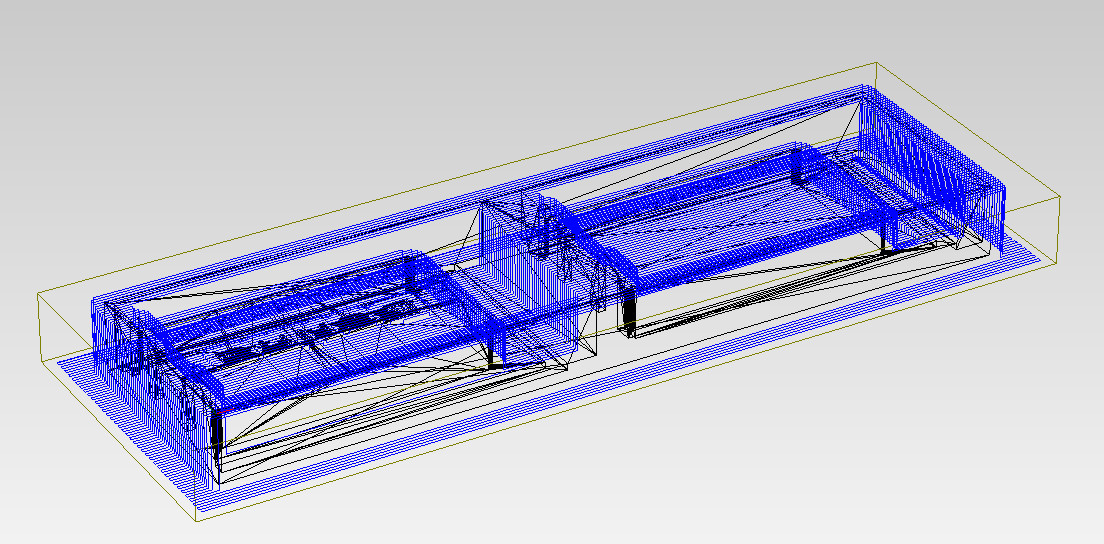
1. 3d Design. I created the 3D shape in Solid Works. This was the most challenging - to create the design of a mold of a mold. Because it is a positive mold, it basically replicates the shape you want to reproduce when casting. However, for a two face mold you have to create two faces of the objects; in addition you have to think of the place to pour the liquid for casting. And more, you have to think of and add to the design some grooves and peaks that match together to hold the rubber mold in once piece. I tried my best to make a good design taking into account these issues. However, I did not consider the type of milling bits we have available, so the milling became an adventure.
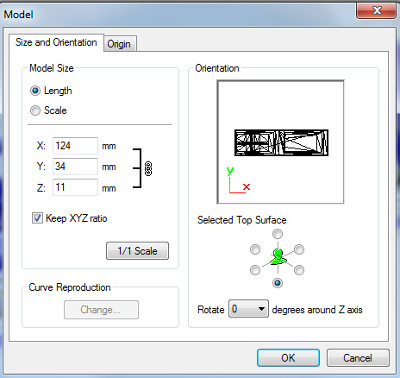
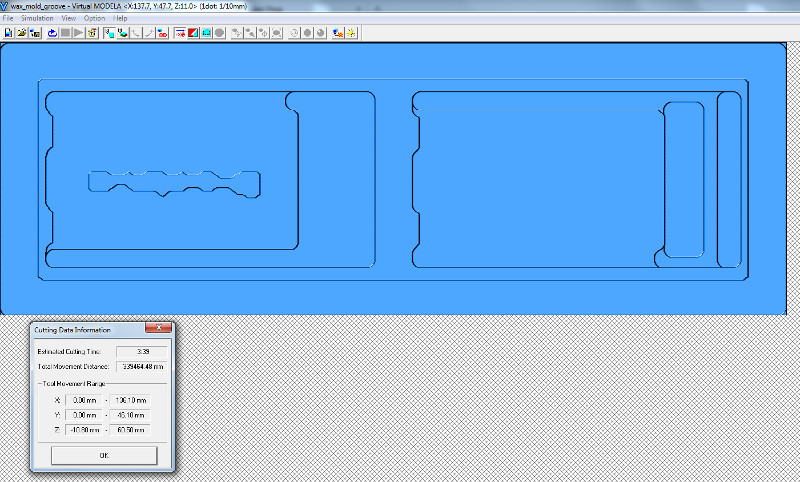
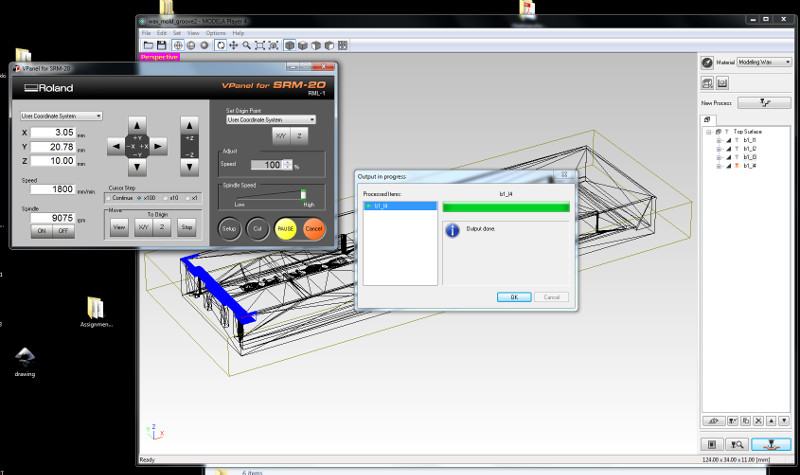
2. Milling. For milling the wax block I have used Roland SRM-20 machine and Roland Modela Player 4 software. The input is the design file created in Solid Works (saved as an .stl file). There are two phases of milling: 1) rough cutting with a large square bit (3,18 mm), and 2) fine cutting with a smaller square bit (0.79 mm diameter). The rough cutting lasted about 4 h (3:39 min) using horizontal (x) scan lines as the type of tool paths. The speed was 30 mm/s; all other parameters were left as default. This was successful. However, before this, an initial rough cut was set up with top surface orientation on the highest point, which was not correct for my design. This resulted in a cut of about 51 min without any real progress. After this, I changed the orientation as shown in the picture below. These parameters were figured out together with Juha.
Orientation (Menu Set > Model)
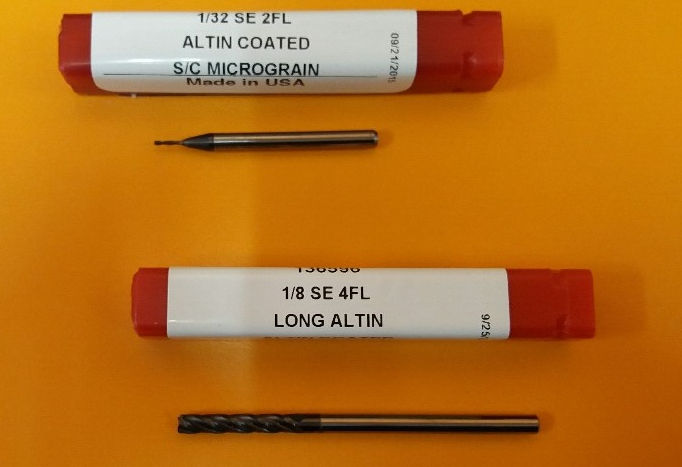
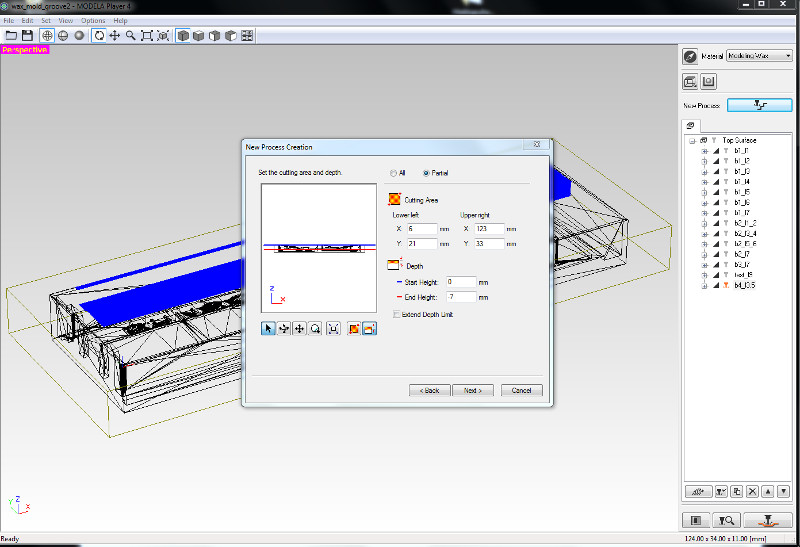
For the fine cutting, I have changed the bit to the small one (0.79 mm diameter). This bit was too short. And it did not support cutting with the parameters I have used e.g., speed 20 mm/s. My design had depth 11 mm, and the bit was about 7 mm long. The large bit was not useful because there were spaces on the model surface smaller than 3 mm. The machine did not like the big bit for the fine cutting, so I had to use the small bit. The solution I came up with was to fine cut layer by layer (e.g., 1 - 4 mm at a time) and to select specific areas for fine cutting down to the depth -7 mm (the length of the bit; see the images below). This was not very efficient solution, but I managed to make an acceptable mold without breaking anything :) It took about 3 hours the fine cutting with this method (instead of 38 min if the milling bit would have been suitable for the design I made). When changing the bit, one has to zero again the z coordinate. The tools paths, cutting preview, and some intermediate steps in the process are shown below.

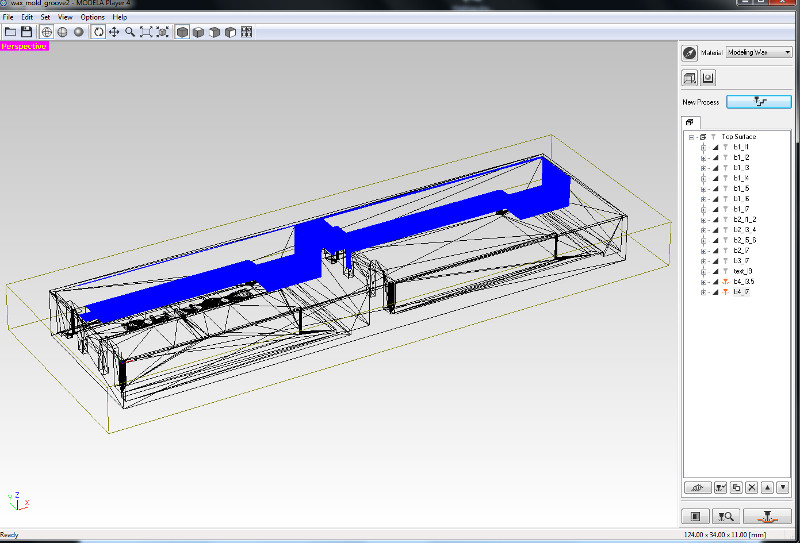
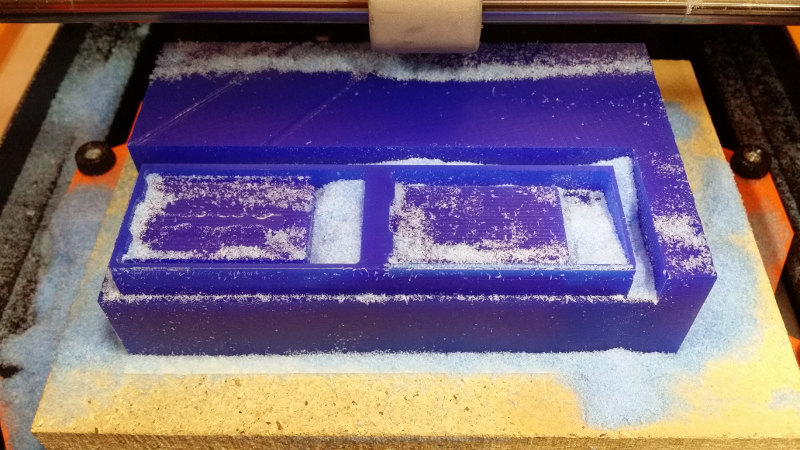
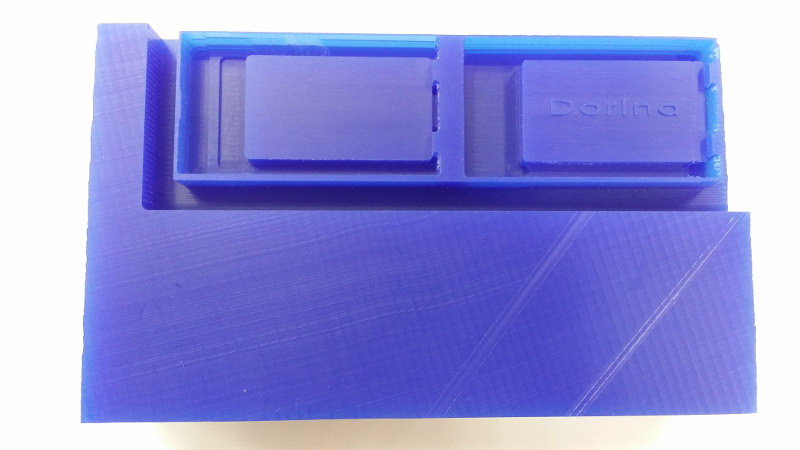
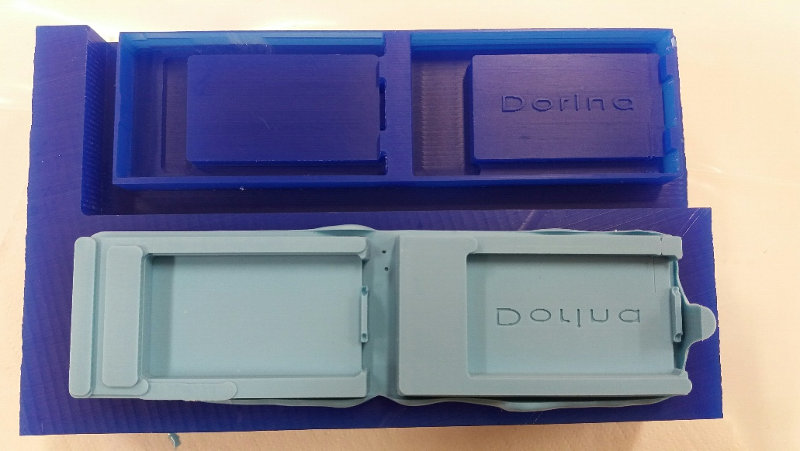
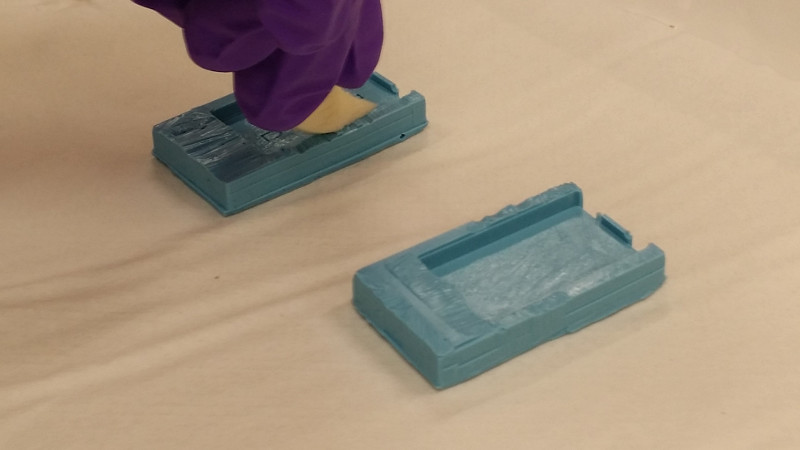
The end result of milling:
The milling process was as follows:
- place the wax block on the plate in the milling machine and secure it with double sided tape.
- set the origin using the VPanel (x,y,z).
- in Roland Modela Player 4, open the .stl file, select the milling machine, set the model properties (size, orientation, origin) and modelling parameters (e.g., cutting area). Add if necessary the bits that you use and their properties.
- Select the modeling material (wax)
- Start new process and set up the process parameters.
- Press cut to start the cutting process.
- If you have many processes on the list you can either run them all in sequence automatically, or run them one by one and in this situation you can unslect the completed ones (like I had; the unslected processes become grey - inactive).
- As cutting parameters I have only changed the speed: 30 mm/s in rough cutting and 10 mm/s in fine cutting.
At the end of the milling, the wax dust should be saved for further processing (melting and reuse).
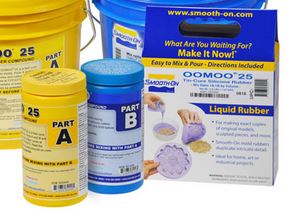
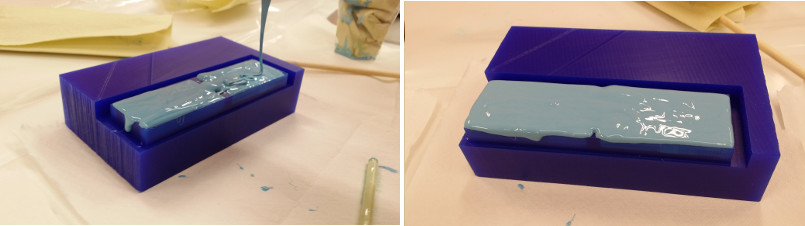
3. Rubber mold. Next I have poured the liquid rubber to make a rubber mold. In Fablab Oulu, we have used Oomoo25. I have mixed two equal parts of liquid rubber and poured the mixture into the wax mold. I let it cure for 24 h (because it was weekend); the cure time in the data sheet is 75 min.
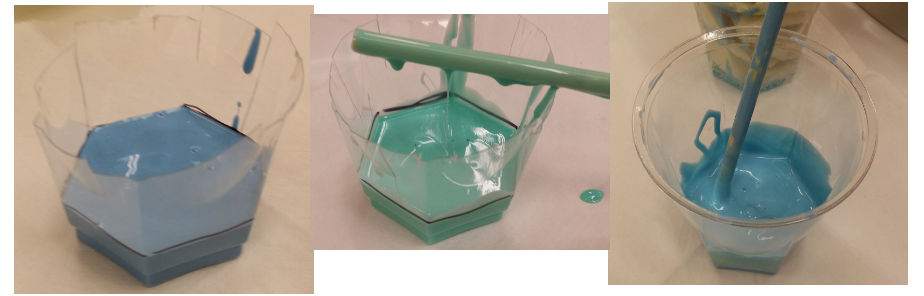
As shown in some tutorials (e.g., Saverio Silli's) I have used a sponge to smoothen the first layer of rubber onto the wax mold so to remove the eventual bubbles that can form on the surface of the mold.
Then I cast the liquid rubber into the mold and I let it cure until next day.
When cured, the rubber mold is ready for use. However, because the milling was not completely successful due to the limitation of available bits, I had to correct the mold by cutting some pieces of it. Moreover, I have filed also the USB stick to remove extra thickness and fit better the stick into the mold.
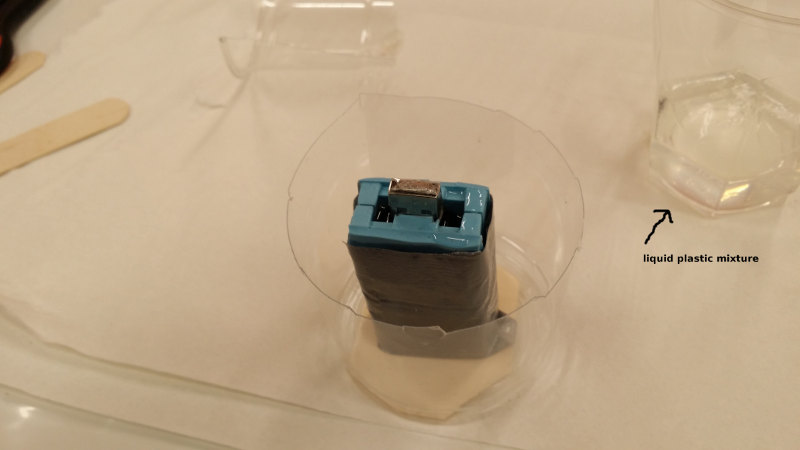
4. Casting plastic. For casting plastic into the rubber mold and creating the desired object, I have used Smooth-on smooth-cast 310 slow setting and Mann release agent for taking out easily the object from the mold when cured.
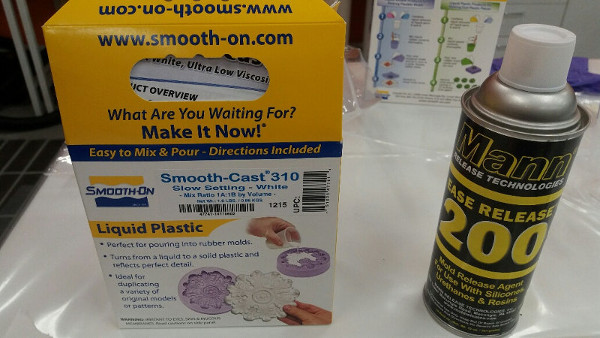
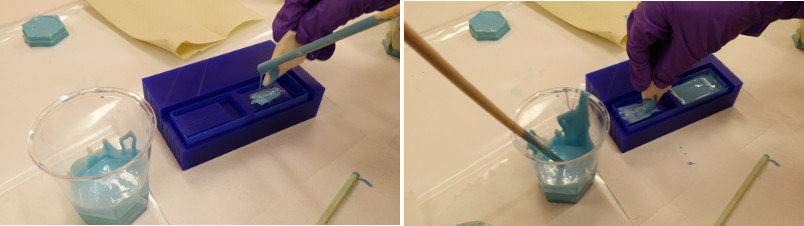
First I sprayed the mold with the release agent and used a sponge to cover all the mold surface with this release substance.
Then I prepared the liquid plastic by mixing two equal parts of substances. After this mixture was ready, I placed the usb stick into the rubber mold. The head of the stick was secured with tape. To hold the two parts of the mold together I used rubber bands and then tape. When this assembly was ready I started pouring the liquid plastic. The mold was placed in a plastic glass and on the bottom I put a double sided tape to keep the mold in place. I have poured the liquid plastic in many episodes, to let it find its place.
I let the plastic to cure for 5 hours.

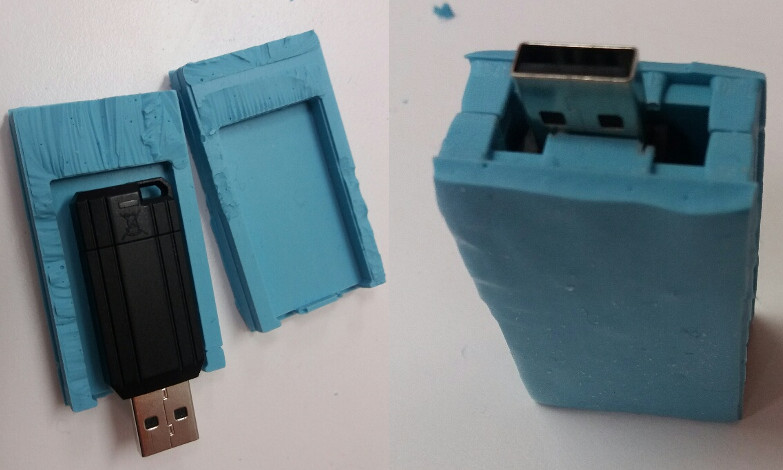
Then I opened the mold, got the USB stick and cleaned it a bit with a cutter.
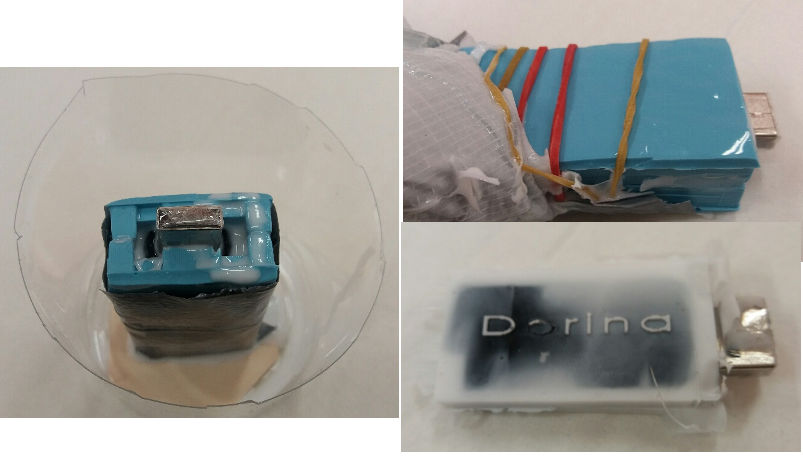
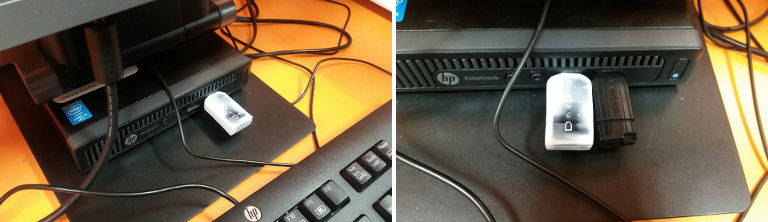
After cleaning the usb stick, it is ready to use and it works fine when inserted in the computer. Also it is bright and big enough to be noticed and not to be forgotten. The assignment was successful. When writing this documentation, the usb stick coated with white plastic is resting for post-curing.
For future, I will add some color on the original black stick to show some nice color effect. Initially I wanted to add color into the letters of the mold, but I leave this for future experiments.
Learning resources
- User guide Roland Modela Player
- slide share tutorial on using Roland Modela by Victor Freundt
- Youtube videos by Saverio Silli (1) and (2)
Summary of the week
It was very interesting week and the outcome was a success despite some difficulties with milling. The task takes a lot of attention in all the stages: design, milling, casting. Bubbles are said to be a big concern, however, with these materials it was relatively easy to avoid them without using the vacuum.
Summary of Tools used
Software
Roland Modela Player 4 and Vpanel for milling
Solid Works for design
Hardware
Roland SRM-20


