Study archive - Week 2
Computer-aided design
The lecture on Wednesday 3.2 presented a variety of tools for 2D and 3D design as well as for animation and simulation.
The tasks of this week consists of modeling the potential final project with as many tools as possible for the following purposes: raster, vector, 2D, 3D, render, animation, and simulation. Animation and simulation are optional given the short timeframe.
We had short training sessions in Fablab Oulu for FreeCAD and Blender, and a few other 3D desing tools such as 123D. However, the complexity of the tools makes it difficult to learn during these sessions everything you need to know in order to work independently. I have tried alone both Blender and GIMP and I realized I need to 1) specify the project concept I am going to design, and 2) learn the modeling tools systematically using tutorials and manuals.
The concept specification and the 2D and 3D design for the final project is documented in the Final project page. At the time of doing this assignment, I have not yet decided on the final concept of the project - but it will be related to a smart home device. Thus, for this week assignment, I focus on drawing and modeling a house as a related part of the final project such as a logo or decorative motif (using 2D drawing and design) for the final product and as a miniature house that is intendend to be an interactive device for visualizing some features of a smart home (using 3D design).
Learning the modeling tools
Once I knew my goal for this week assignemnt - to design a house, I made a list of the tools I want to learn and practice.
- GIMP - for 2D raster graphics
- Inkscape - for 2D vector graphics
- FreeCAD - for 3D graphics
- Blender - for 3D animation
Of the tools above, Blender remains as a learning goal for later; I am interested to practice animation with it, but due to the lack of time, I postpone this task for later.
GIMP
I have installed GIMP 2.8.16 for Windows. GIMP is a raster graphics program for creating and editing image files. It is open source and its acronym derives from GNU Image Manipulation Program. Its performance in professional tasks makes it the open source equivalent for Adobe Photoshop. The images can be exported in different formats, including .png (like the ones on this page). The native format of GIMP is .xcf.
At first it was not very intuitive to use because the image is constructed in a hierarchical way with many layers (practicing with other tools, I realized soon that this is the typical way of organizing images in graphics programs). Thus, for editing some part of the image one has to select the correct layer. When I learned to select and manipulate the layers, everything became easier in GIMP. After becoming confident in using GIMP I can say that the complexity of the program comes with the advantage of providing very useful and powerful tools for image editing.
The following illustrates my work with GIMP.
First, I drew basic lines and text similar to those that can be executed in Paint; however it was not as straightforward as in Paint because of the layers. My goal at this stage was to depict the concept of a smart house which communicates with the environment ;)
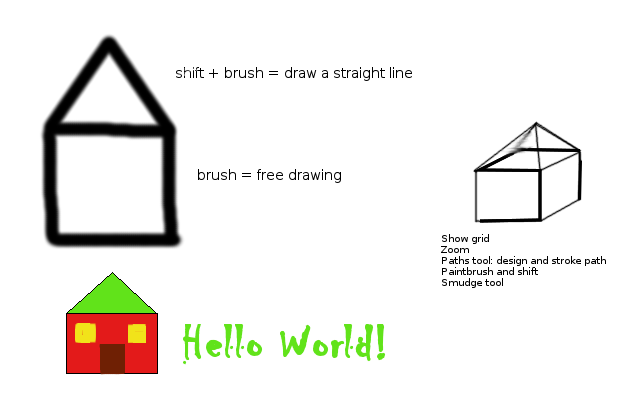
As shown in the picture above I have tried different tools for drawing, and also I tried to make a simple 3D model - however this is not very accurate and quite cumbersome to draw in this program.
The following tools and commands were very useful:
- Layers, Anchor layer
- Toolbox (drawing tools): paintbrush, pencil, straight lines (shift + brush, pencil), Bucket fill tool, Eraser Tool, Smudge tool
- Selection tools, Select menu: float, none
- Text tools: different fonts, different colors
- Path drawing: polygons
- Zoom
- View, Show grid
- Move and Alignment tools
- For moving, the steps are: select, float, move by dragging, anchor or click outside the selection
- Moving text: if not flattened (i.e., if in its own layer), it can be moved as a layer
- To combine all layers in one image: Image > flatten image
- Resize an image: Image > Scale image
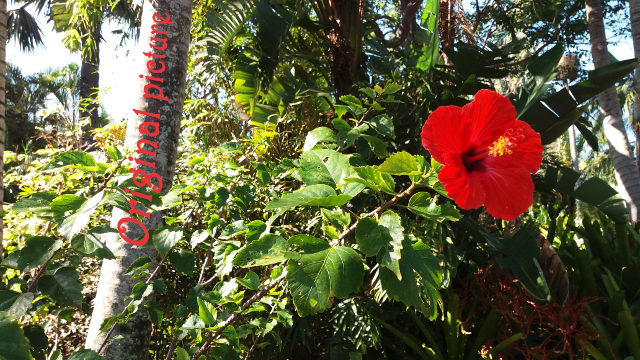
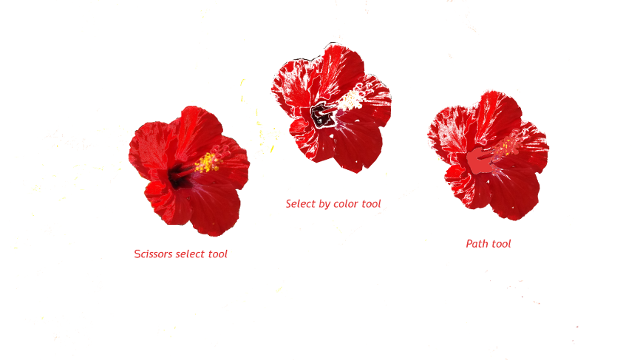
The second task in GIMP was to edit an image. I wanted to try different selection tools and to copy the selection to another file. The second image below shows the types of selection and the outcomes when adding the selections into a new image. For the text manipulation in the original image I have also used Rotate tool and Perspective tool from the Toolbox.
As a summary of GIMP learning session, I am happy with my learning of GIMP and I think I will keep using it in the future and recommend also to others. (You can downlad the source files if you scroll down at the end of this page.)
Inkscape
Inkscape is a vector graphics program which is open source and very useful for creating all kinds of 2D graphics similar to the ones created by professionals in Adobe Illustrator and CorelDraw. I have installed Inkscape 0.91 - the latest stable version. The native format of the files is SVG (Scalable Vector Graphics). The files can be exported as .png image files as well as saved as .pdf and other formats. The power and complexity are similar to the ones in GIMP, but the interface is a bit friendlier.
My task is to draw a house and to try different tools and commands.
The image below shows the house model in Inkscape.The image was exported as a .png file and it is transparent.

In Inkscape I have tried different tools and commands (File > New, Open, Import, Export; Edit > Undo, Redo, Clone; View > Zoom, Page grid; Object > Fill and stroke, Object properties, Transform, Align and Distribute; Path > Trace bitmap, Union, Difference, Intersection, Exclusion, Division, Cut part, Combine, Break apart, Simplify; Text > Text and Font; Filters > Materials). I have also tried most of the drawing tools in the toolbox. The commands in the menu Path seem to be useful, but I did not apply them in the picture above. Inkscape is used also for designing 2D models for vinyl and laser cutting, so more practice of Inkscape will be presented in Week 3 Study archive.
FreeCAD
FreeCAD is an open-source parametric 3D modeling tool for designing real-life objects of any size. Parametric means that the modeled objects are defined by attributes that can be modified during the design process; the attributes can be, for example, dimensions, position, and material density.
I have installed FreeCAD 0.15 for Windows. The native file format is .FCStd (FreeCAD standard file format). It is possible to import/export the files in standard formats like .STL, .SVG, etc. Other features of FreeCAD are that is a full GUI application, the tools are organised in workbenches, and all FreeCAD commands executed in the GUI are translated in python code and can be modified in the python console. One can also save the images as .png or other format files (Tools > Save picture).
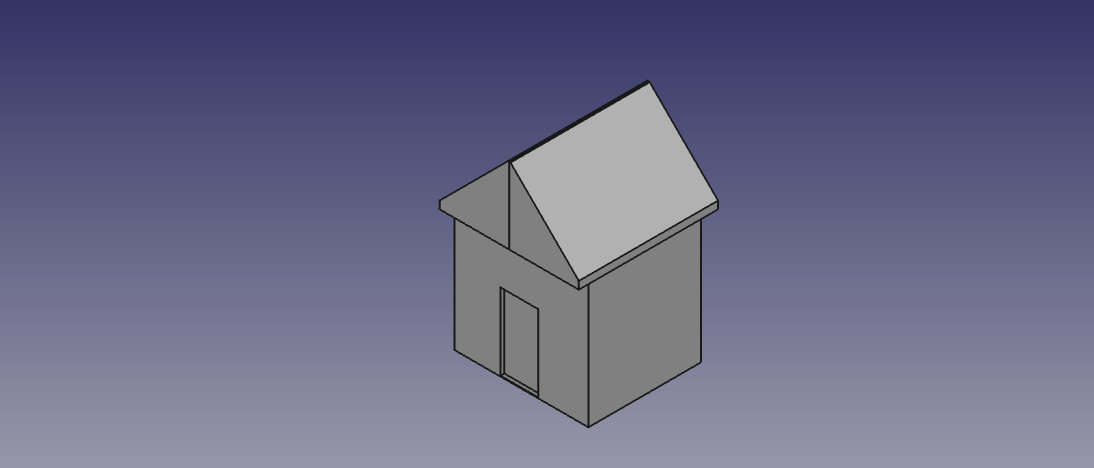
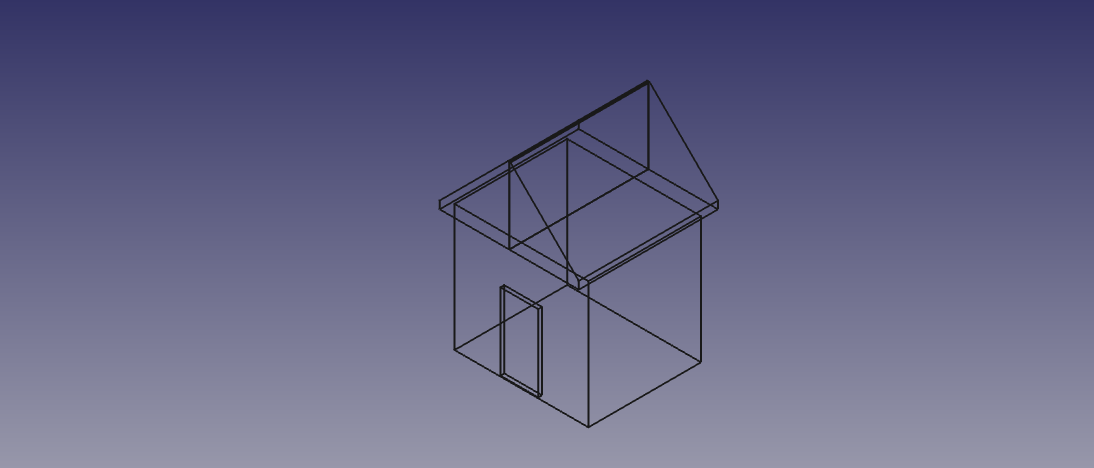
Below I illustrate my practice with FreeCAD for designing a house model. The first picture shows the flat lines drawing style and the second the wire frame drawing style. The model was built with Part Design workbench. The flow of operations are 1) Draw Sketch for modeling the 2D layout - 2) Pad (to extrude the sketch) - 3) Select a face - 4) Add a feature like pocket, chamfer, etc. For adding pockets, one has to draw first a sketch on the selected face of the object. For adding new elements in the model, select the Part workbench to add a cube or a cylinder. Then to model these use the tools of Part Design flow. Tutorials and documentations are available and useful for learning FreeCAD. For modeling buildings (Building Information Modeling, BIM) FreeCAD has a dedicated workbench called Arch.
FreeCAD is still in an early stage of development, and thus it is not so reliable for modeling professional projects; however, for learning the basic 3D modeling tools it is OK because of the nice application structure, framework and interface. I would not recommend this tool for modeling a real project because of many bugs and unresponsiveness to commands; it is however a nice opportunity for developers to contribute to the success of this application.
.For my final project I will use a more reliable tool, probably SolidWorks.
Summary of Tools used
GIMP - a complex and powerful open source software tool for creating and editing images using 2D raster graphics
Inkscape - open source 2D vector graphics program
FreeCAD - for 3D modeling
Source files for download
GIMP files
Inkscape files
FreeCAD files


