Read a microcontroller data sheet and program your board to do something, with as many programming languages and programming enviroments as possible.
This week’s assignment divides into two things, reading a microcontroller data sheet and programing our board to do something, with as many different programming languages and programming environments as possible. I have pretty much no experience in embedded programming so this week is definitely going to be a challenge for me.
Data Sheet
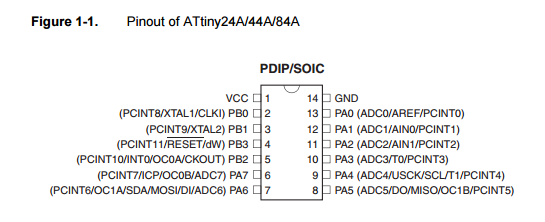
I started this week off by going through the 286 page long data sheet for a 8-bit AVR microcontroller or in our case the Attiny 44. I can’t say that i fully understood the whole thing but i think i am at least a little bit closer to understand how the Attiny works.
Programming the board
The next part of this week´s assignment is to program the Hello board we made in week 6. I had no idea where to start with the programming so i decided to look through some sites from last years students, i found that really helpful and after looking through a few sites i decided to use the Arduino software to program my board, which you can get for free from their website. To use the Arduino software for programming the Hello board you have to tinker a little bit with the settings and many students from last year pointed to the High-Low Tech tutorial to do that, and i recommend that you would read it if you’re going to use the Arduino software, but in short it say’s:
Go to File - Preferences and there you put this URL (https://raw.githubusercontent.com/damellis/attiny/ide-1.6.x-boards-manager/package_damellis_attiny_index.json) in the Additional Boards Manager URLs box.

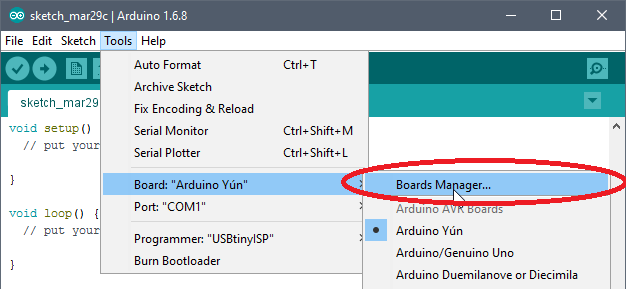
Next you go to Tools - Board and then select the Boards Manager option. Then a new window opens and there you go to the bottom where you should find an entry for Attiny, and if you click on it you should get a install option that you’ll press.
And now if you go back to Tools - Board the Attiny should be listed in the bottom of the list.
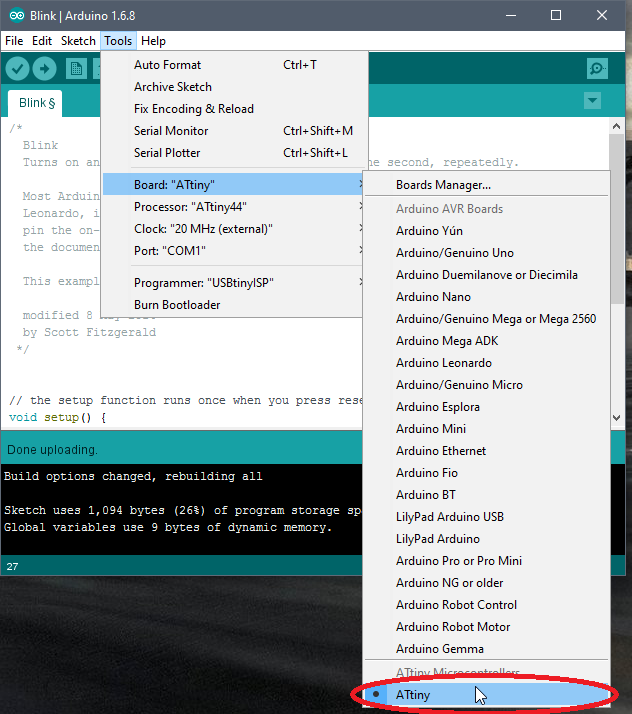
Next it is time to go to Tools where i selected the following: Attiny in Boards, Attiny44 in Processor, the external clock in FabISP is 20 MHz, so i selected 20 MHz in Clock, and the because i was going to program my hello board with Fab ISP i selected USBtinyISP in Programmer. And now all the settings in the software should be ready.

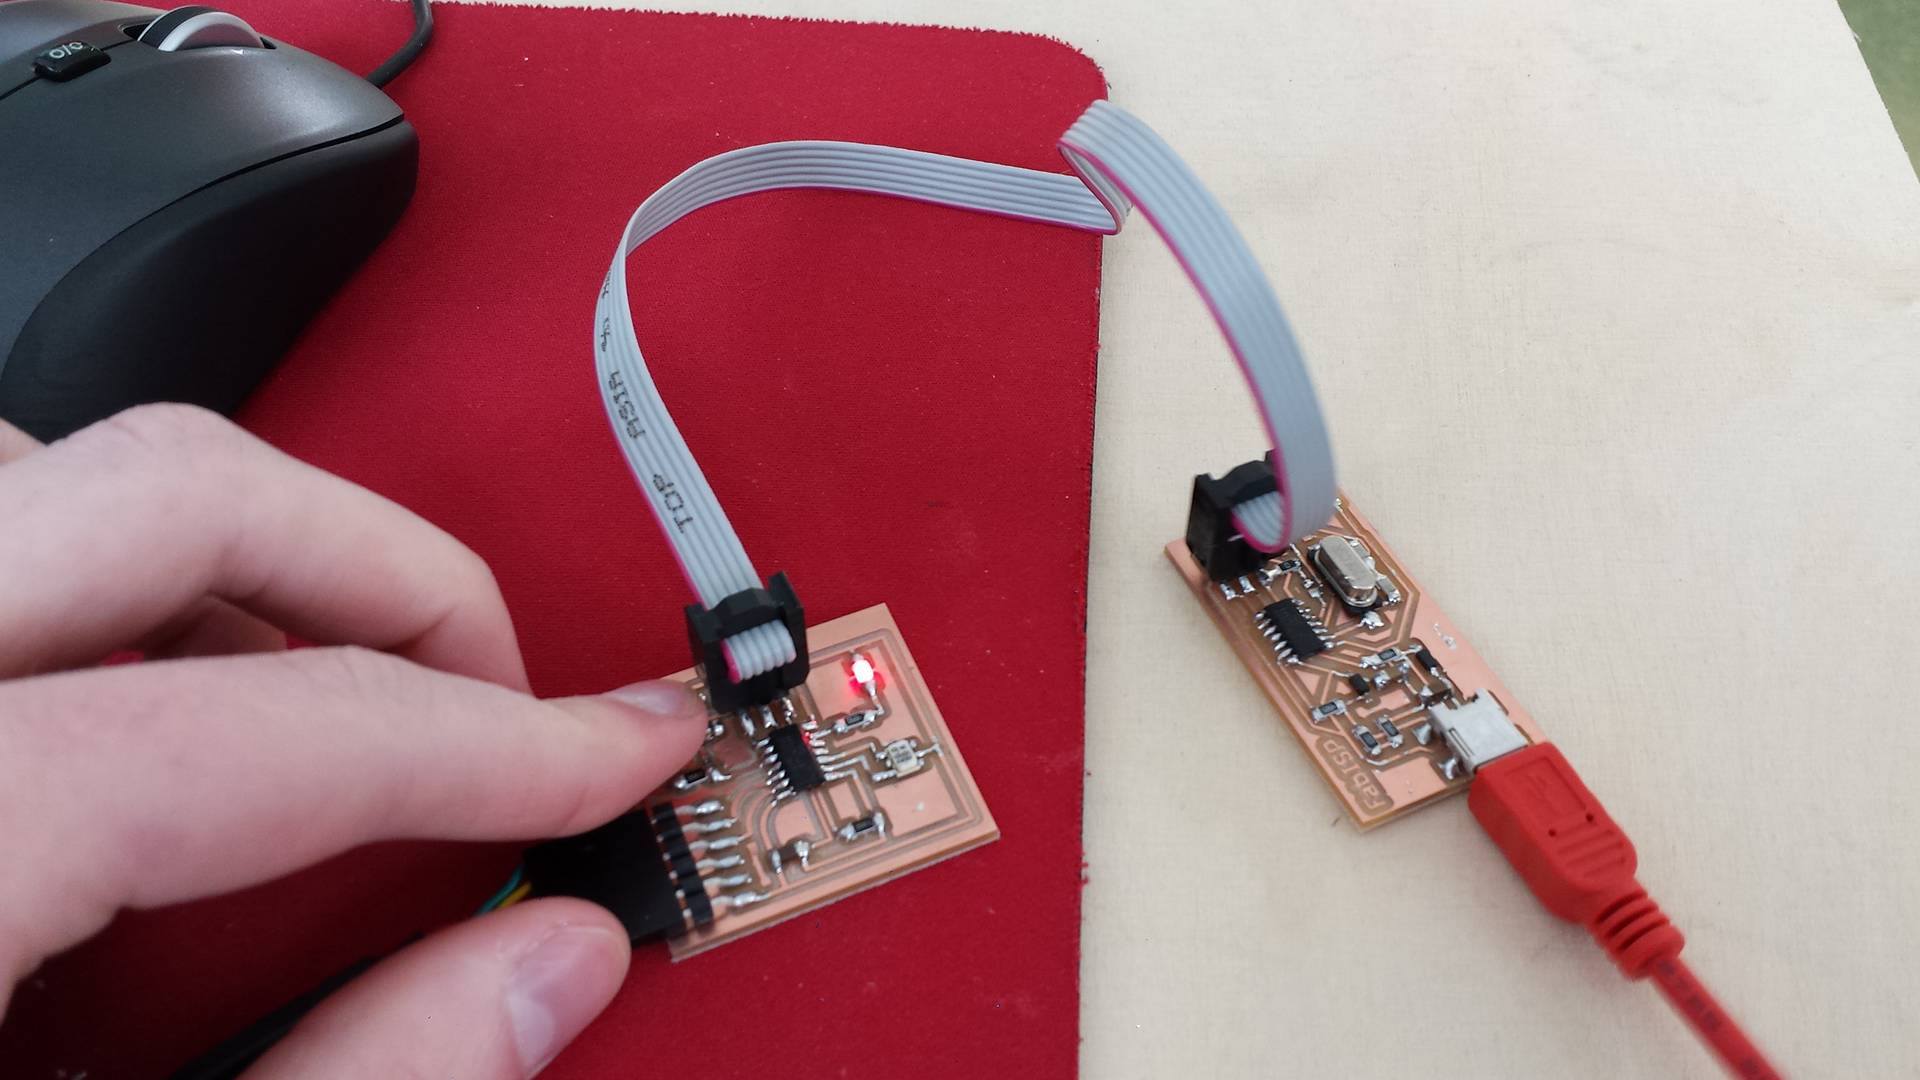
Now i had to get a driver for the FabISP, which i installed from the adafruit website. Then i connected the boards together and then both of them to the computer with a usb-mini and a FTDI cable and next i went to Tools - Burn bootloader in the Arduino software, you only have to do this once for each board
So after all that i was ready to start programming with the Arduino software, i decided to start with a simple blinking program which i got in the software in File - Examples - 01.Basics - Blink Then i verified the code and uploaded it to the code, but nothing happened. That’s because the Arduino Pin numbers and the Attiny 44 Pin numbers don’t line up together, High-Low Tech write about this in their tutorial but i was forgot to read the last part after getting the Arduino software to approve the Attiny. Here are two good tables on the pin numbers
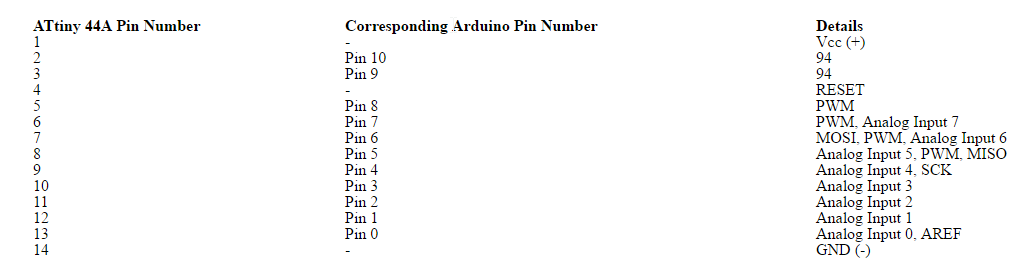

I had my LED on pin 6 on the Attiny so that would be pin 7 in the Arduino software, and the button was on pin 10 on the Attiny so that’s pin 3 in Arduino. So now i could change to the right pin numbers in the blinking code and uploaded it to the Hello board and to my delight it worked so know it was time to get the button to do something.
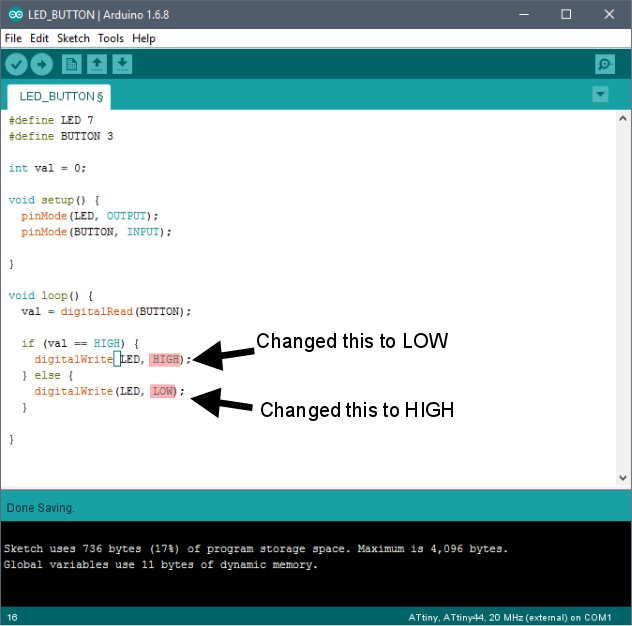
I decided to use a code from a book we have here in Fab Lab Vestmannaeyjar called “Getting started with Arduino” from Make:Projects, there i found a good example code for turning the LED on while the button is pressed. After writing the code in the software and changing the pin numbers i uploaded the code to the Hello board, but the code was reversed the LED was on and when you would push the button it would turn off, i wanted it to be the other way around. So i switched between HIGH and LOW in the digitalWrite function. After that the light worked like it was supposed to, the LED turned on while the button was pressed.
LED from Arnar Sveinn Guðmundsson on Vimeo.
Sandstorm_LED from Arnar Sveinn Guðmundsson on Vimeo.
I also included embedded programming in my final project, but you you can read more about it on my final project development page.