Cut something on the vinylcutter and design, make, and document a parametric press-fit construction kit.
Lazer Cutting
One of the assignment for this week was to design, make and document a parametric press-fit construction kit. I started this week trying to come up with some good ideas on how i wanted my kit to work and look like. I wanted to be simple, easy to use and fun, something you could play with for some time without getting bored with right away. Here in fab lab Vestmannaeyjar we have a fun thing called Polydron a commercialized press-fit kit for kids, and i decided i wanted to make something similar to that kit.
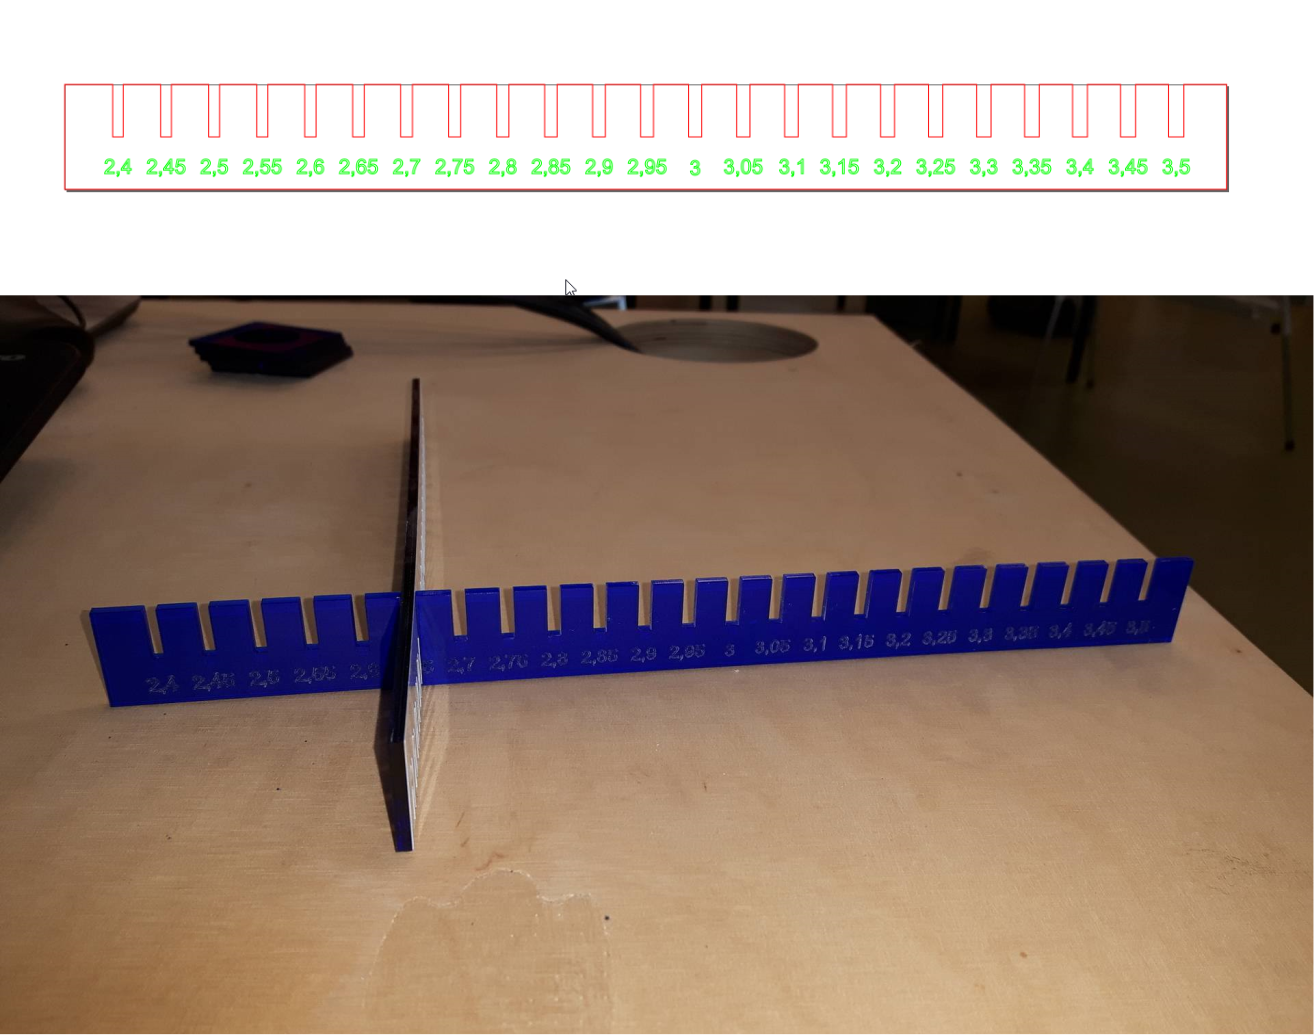
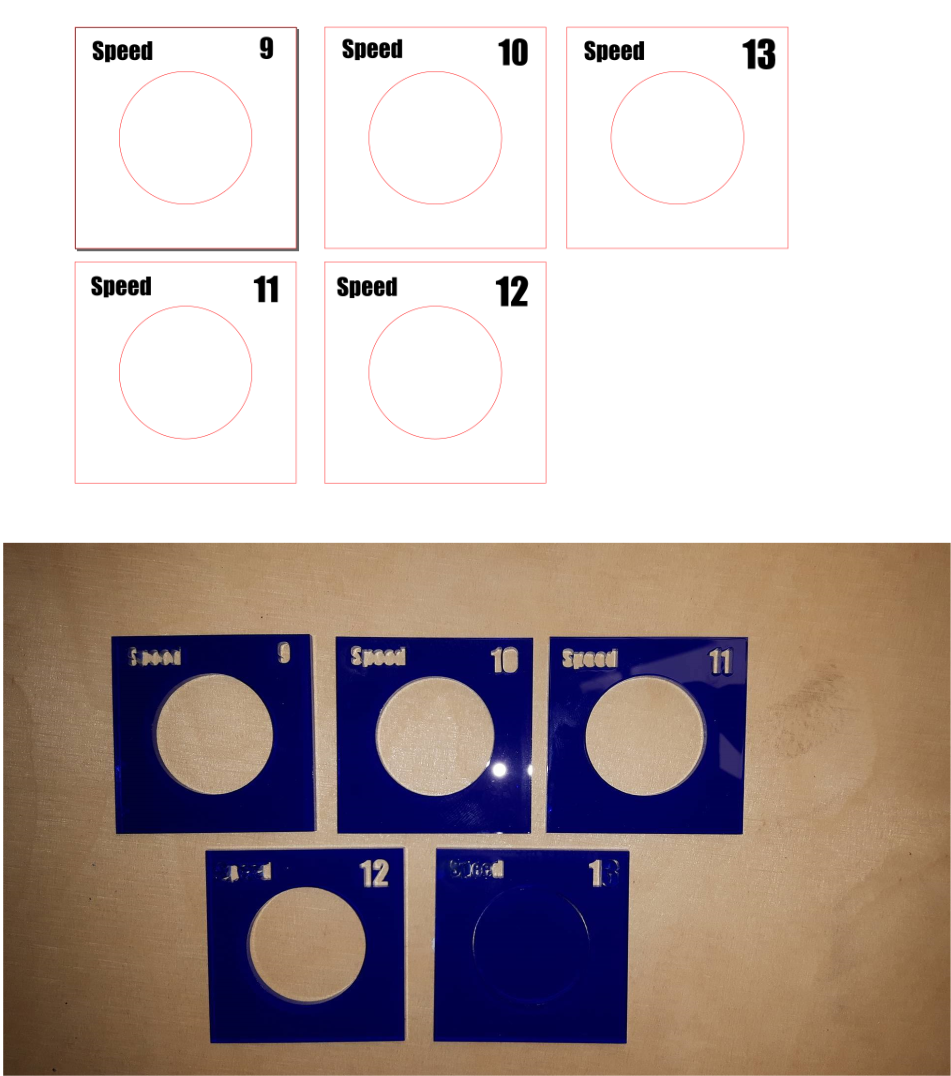
But first i made a speed and thickness test for the lazer cutter. For the thickness test i made two plexi sticks with different sized holes in them so you could see which size whould fit your needs. For the speed test i made 5 squares with holes in them and each with a different speed setting on the lazer
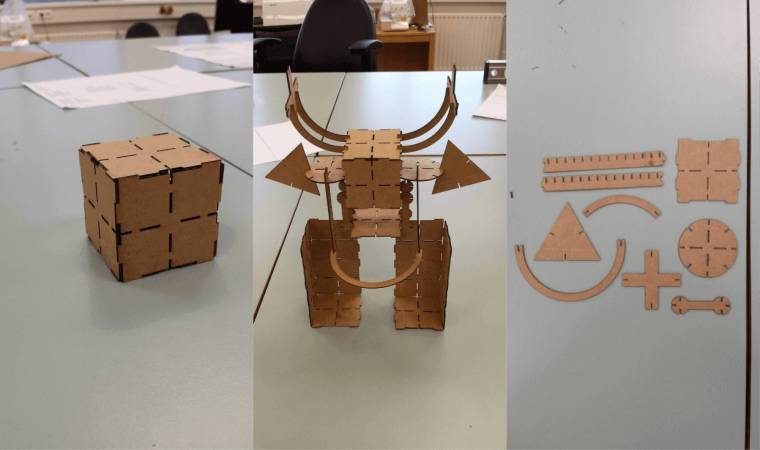
I used inkscape to make my kit so in my next step i made a some basic shapes that i wanted to have in my kit, like a square, a triangle and a circle, but also made half and quadrant of a circle which i made by making a normal circle first with the stroke on and then choosing the “stroke to path” option in the path menu, after that i just cut the circle in half by using “difference” which is also in the path menu.
To make the drawings parametric in inkscape i used the “clone” function, a clone looks like a copy of the original object, but it’s more than that: a clone is a linked copy that changes whenever the original changes. I made all the slots clones of each other. Next i measured the thickness of the cardboard i was going to use to know how wide i should have the slots on the shapes and after measuring i found out 1mm should do the trick.

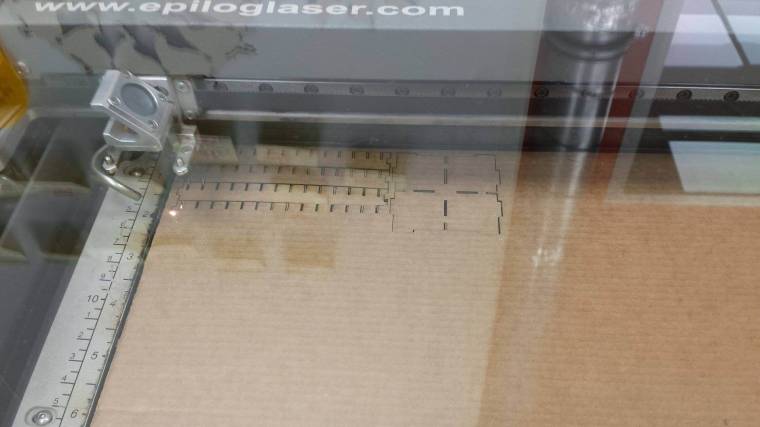
Now it was time to lazer cut a few test pieces and try them out. Here in Vestmannaeyjar we have an Epilog lazer. You start with turning the lazer and the air conditioning on, then you can put your material in and turn on the lazer pointer. Next you turn off the x/y axes and adjust them to your material and after that you adjust the focus. I was happy with the slots on the pieces but wanted to make more shapes and make the circle and the square better and with more “functions”.
So i made two more shapes in inkscape, a plus sign and a line with circle on each end. Then i added “knobs” to the square so it would be possible to make a box and later i added small lines inside both the square and the circle so the knobs could fit inside them. After cutting all the pieces out i played with them for a little while and was quite happy with them :)

Vinyl Cutting
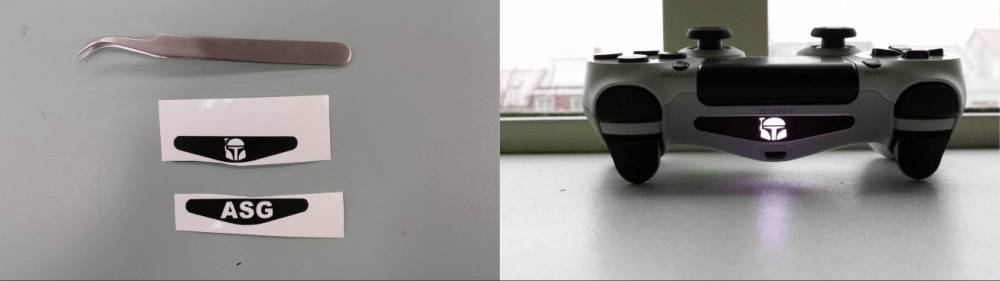
After finishing the press-fit kit it was time to go to the vinyl cutter and make something cool there. I wanted to make a sticker for the lightbar on my PS4 remote. I started off by going through a few websites that showed a bunch of different designs and on one of the sites i took a layout for the lightbar.
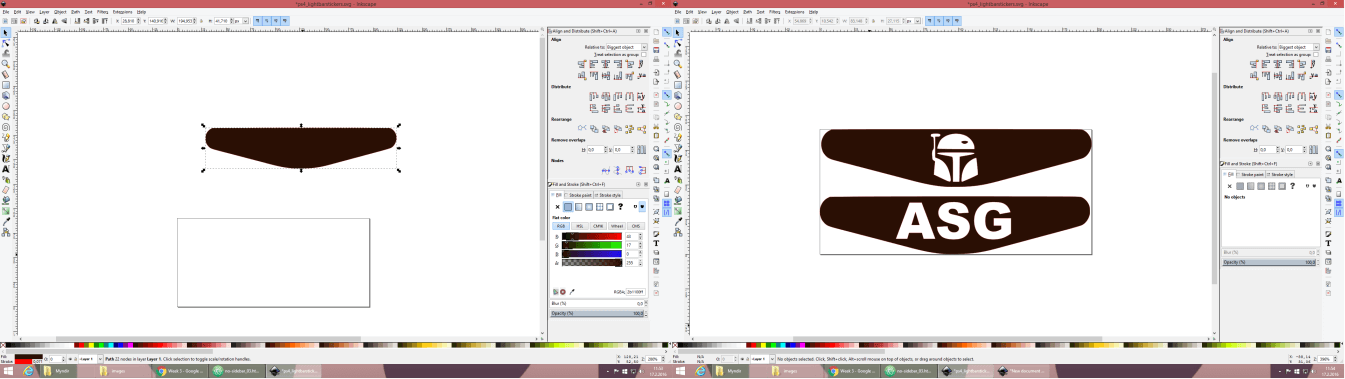
Next i found a simple image of boba fett from star wars that i wanted to use on the sticker, after opening the image in inkscape, i selected a function called trace bitmap, this function turns the image into a vector image which is necessary to cut it out. I also made another sticker with my initials.
I also included computer controlled cutting in my final project by cutting vinyl and plexi for the project, but you you can read more about it on my final project development page.
Files
Lazer Cutting fileVinyl Cutting file
Speed test
Thickness test