bascis of composites - Autoclave process
Before explaining the assignment I completed, I will take through the learnings of the composites materials that are used in Godrej Aerospace Division.
The team of Fab Lab visited the composites section to understand what are the different processes used to create composite materials.
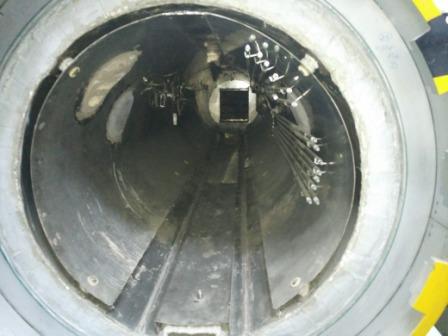
The below images show an "Autoclave System". Industrial autoclaves are pressure vessels used to process parts and materials which require exposure to elevated pressure and temperature. The manufacture of high-performance components from advanced composites often requires autoclave processing.
More details of the autoclave system can be referred at the link given here. Autoclave System

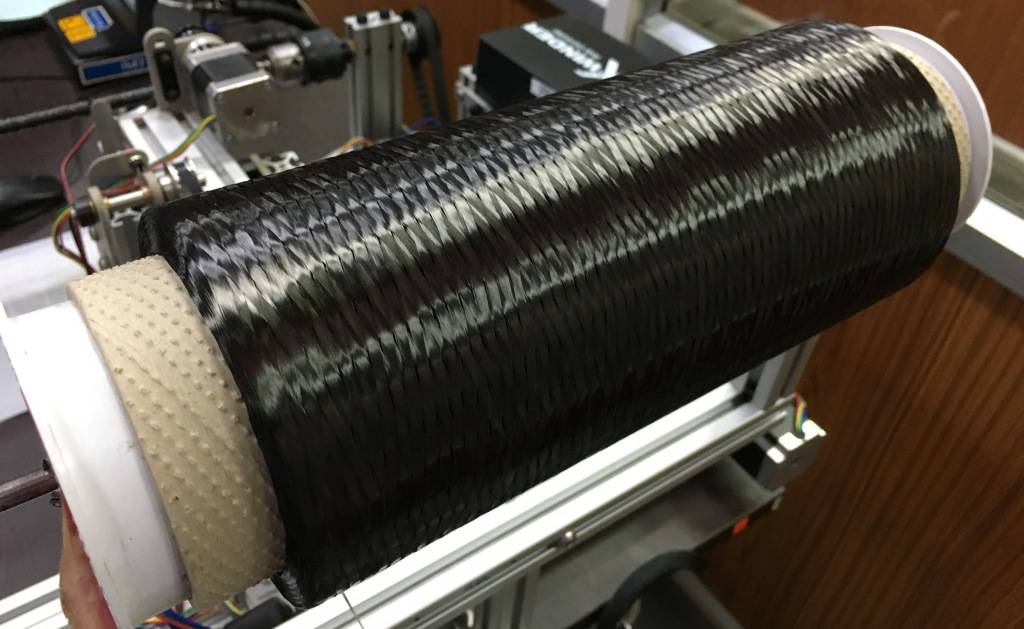
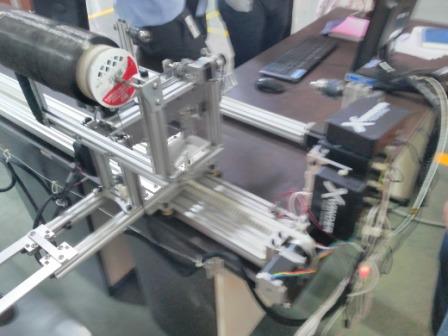
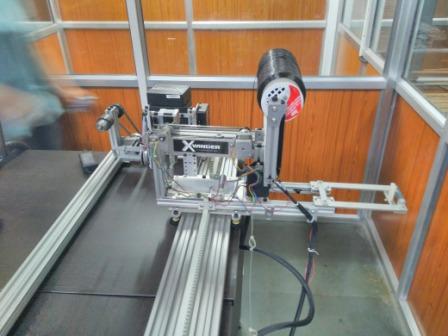
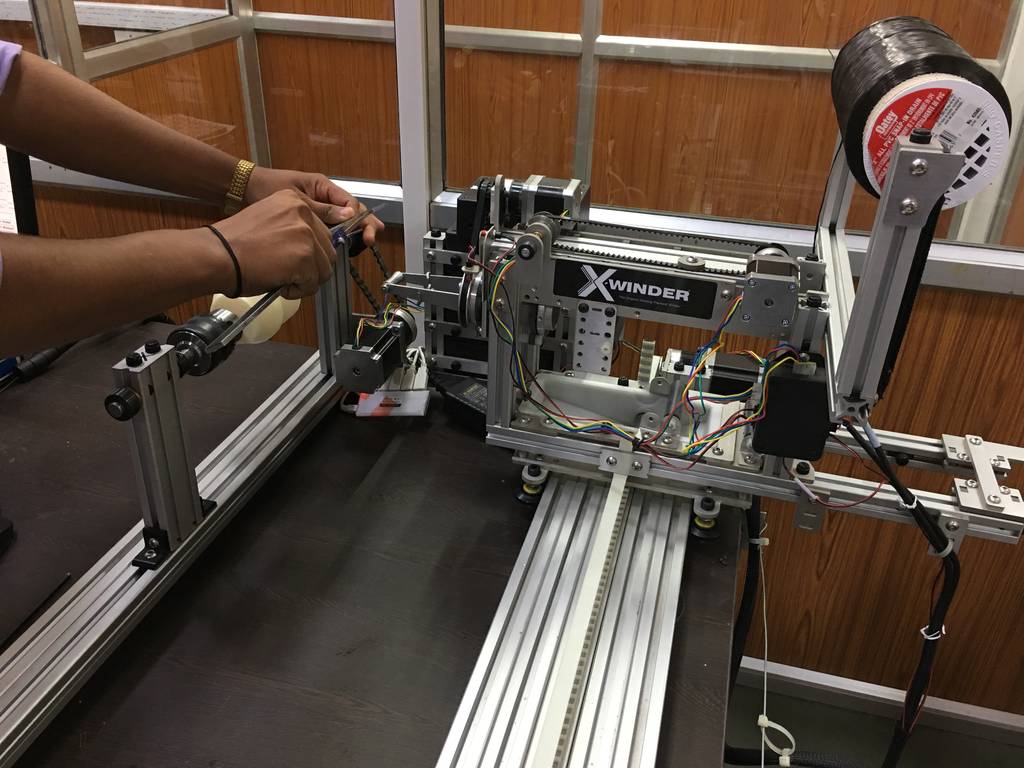
Fiber Winding Machine
We also have a fiber / fiber glass winding machine which can make symmetric spherical composite objects. Below are some of the images of the fiber winding machine.
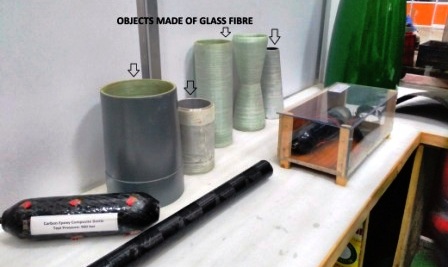
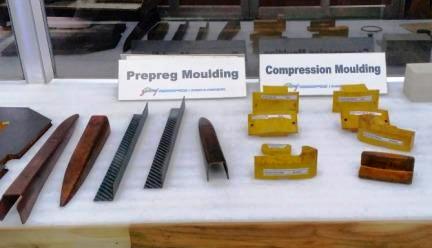
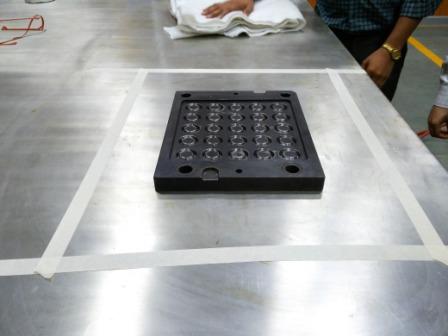
Samples
The below images show samples / display objects of the different composite material.
Vaccum Bag Molding
The simplest form of making composites is Vaccum Bag molding. Our colleague explained the process of making a composite using vaccum bag molding process. As an improvement on the hand lay-up and spray-up processes, it is possible to insert laid-up moulds into special bags, which are then evacuated and/or placed in an autoclave for cure under controlled heat and pressure. This vacuum consolidation method produces high-quality mouldings, with complete exclusion of air bubbles and improvement to the inner surface of the moulding, which is not in contact with the mould.
The controlled curing conditions also improve quality and consistency and allow superior resin systems to be used, while opening the way to a more rapid cure with faster turn round of moulds. Vacuum bag moulding is a modification of hand lay-up, in which the lay-up (necessarily smaller) is completed and placed inside a bag made of flexible film and all edges are sealed. The bag is then evacuated, so that the pressure eliminates voids in the laminate, forcing excess air and resin from the mould. By increasing external pressure, a higher glass concentration can be obtained, as well as better adhesion between the layers/plies of laminate.
Vacuum bag film: This is a polypropylene film, modified to resist elevated temperatures. The elastic nature of the film offers high formability and resistance to puncture, also permitting the film to be stretched over complex moulds without need for a large number of tucks and folds, so improving the efficiency of the vacuum. The film is suitable for use with prepreg and wet-lay-up laminating systems
Breather/bleed fabric: This is a 5 mm or 10 mm thick uncompressed felt of temperature-resistant synthetic fibres, treated with mould release. The material has good drapeability, allowing use with large and complicated mould patterns. It can also be used as a bleed fabric to absorb excess resin from wet lay-ups.
Tacky tape: This is a butyl-based vacuum bag sealant giving high elasticity and tenacity. It has exceptional sealant properties, eliminating the risk of imperfect seals often found in the initial phases of vacuum bag application, so improving the vacuum efficiency and reducing labour. It is suitable for polyester, vinyl ester and epoxy laminating systems.
Finally after all the preparation is done, connect the vaccum to pull out the air inside to create an perfect shape of the mold.

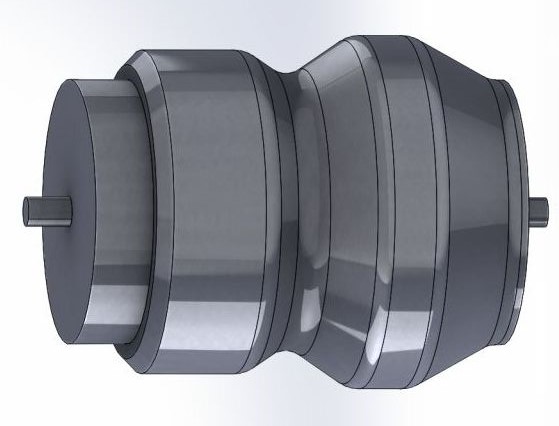
Design of my 3D Model for composite
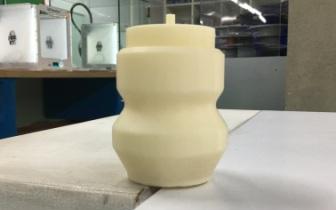
I will be making a composite using "Glass Fibre" - a very simple "PenStand". I have designed the model using SolidWorks. The size of the model Dia 72 by 107mm long.
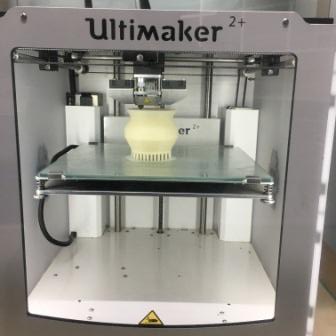
I then converted this model in to .stl file for 3D printing. The below image shows the .stl file being imported into CURA 2.0 before 3D printing.
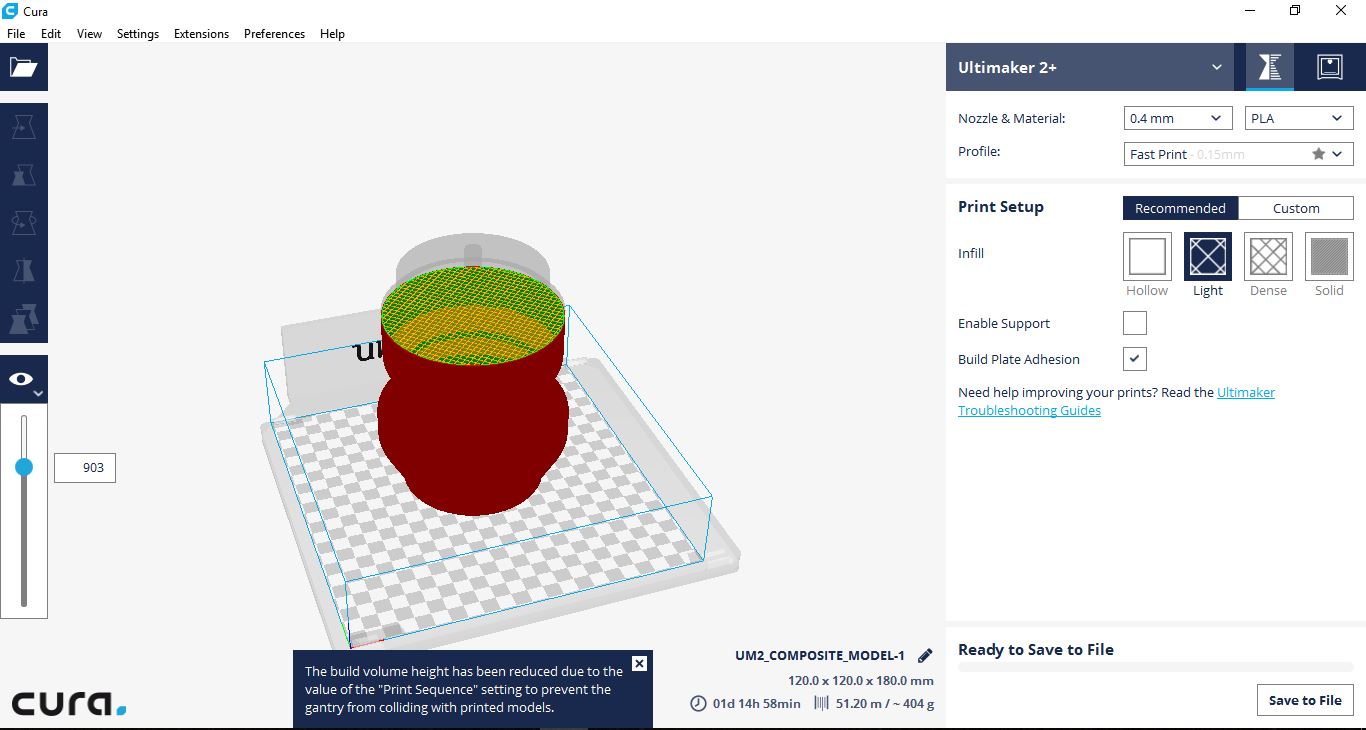
The settings used for the 3D printing are as mentioned below
- Layer resolution: up to 20 µm
- Build volume: 23 cm × 22.5 cm × 20.5 cm
- Position precision X Y Z: 12.5 µm × 12.5 µm × 5 µm
- Print speed: 30–500 mm/s
- Travel speed: 30–350 mm/s
- Filament diameter: 2.85 mm
- Nozzle diameter: 0.4 mm
- Operation nozzle temperature: 180-260 °C
- Operation heated bed temperature: 50-100 °C
The image shoes the 3D printing in progress.
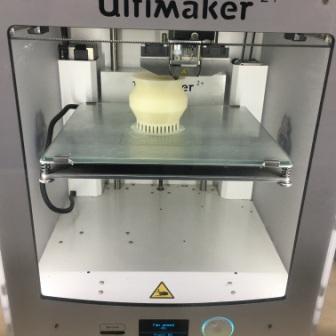
The image shows the completed 3D printed model.
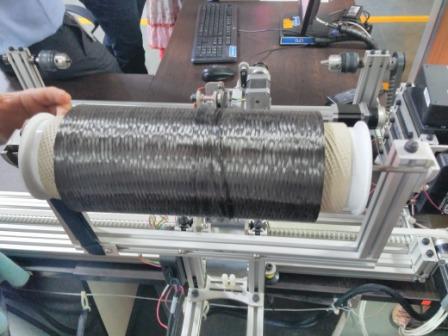
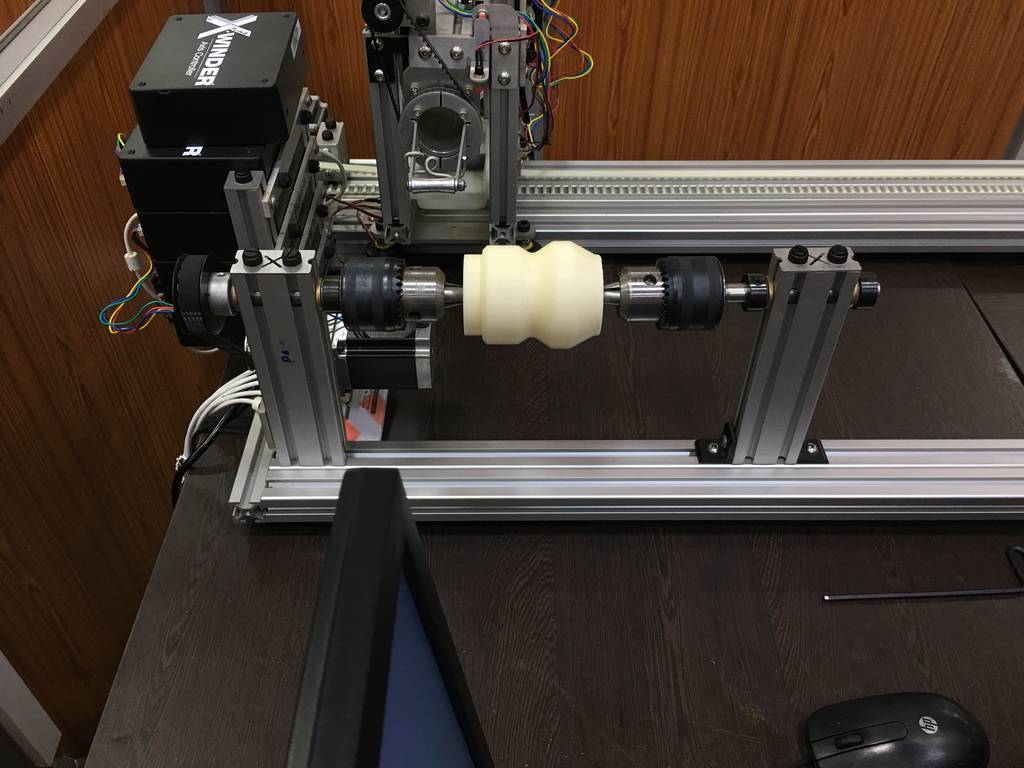
After the 3D print model was ready we started doing the filament winding of the component that I made in 3D printing.The below images shows the setting of the job on the filament winding machine. The winding machine has a filament, carbon fibre 1200 text. This filament is 0.01mm thickness & has good strength to weight ratio after it has cured.
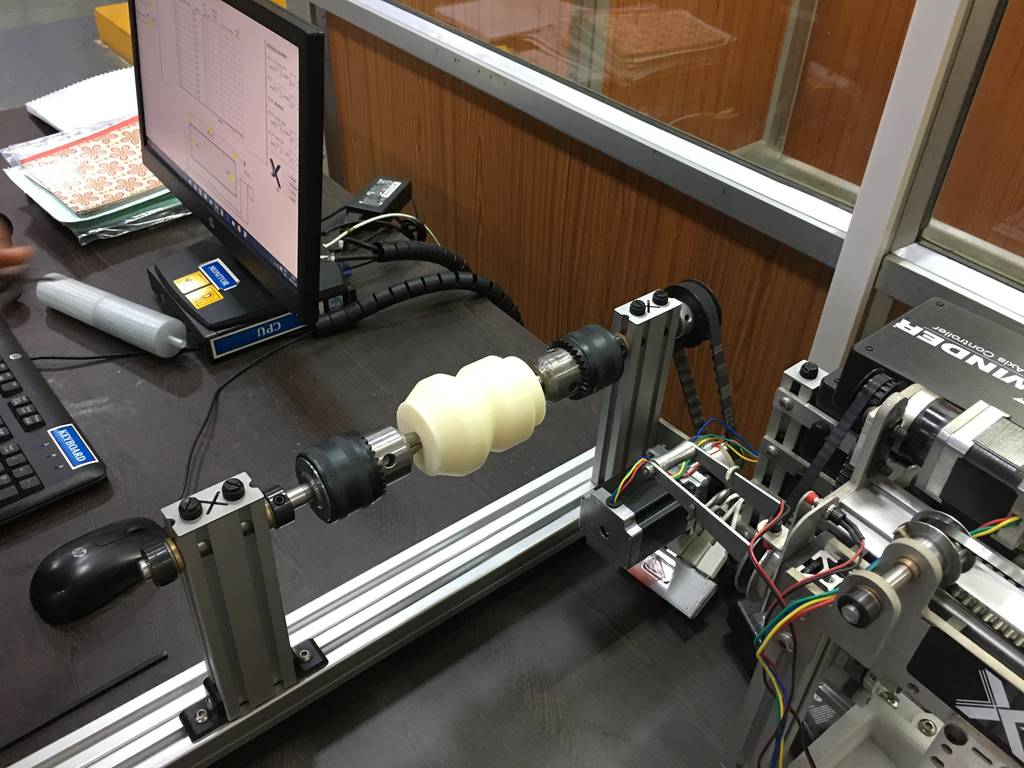
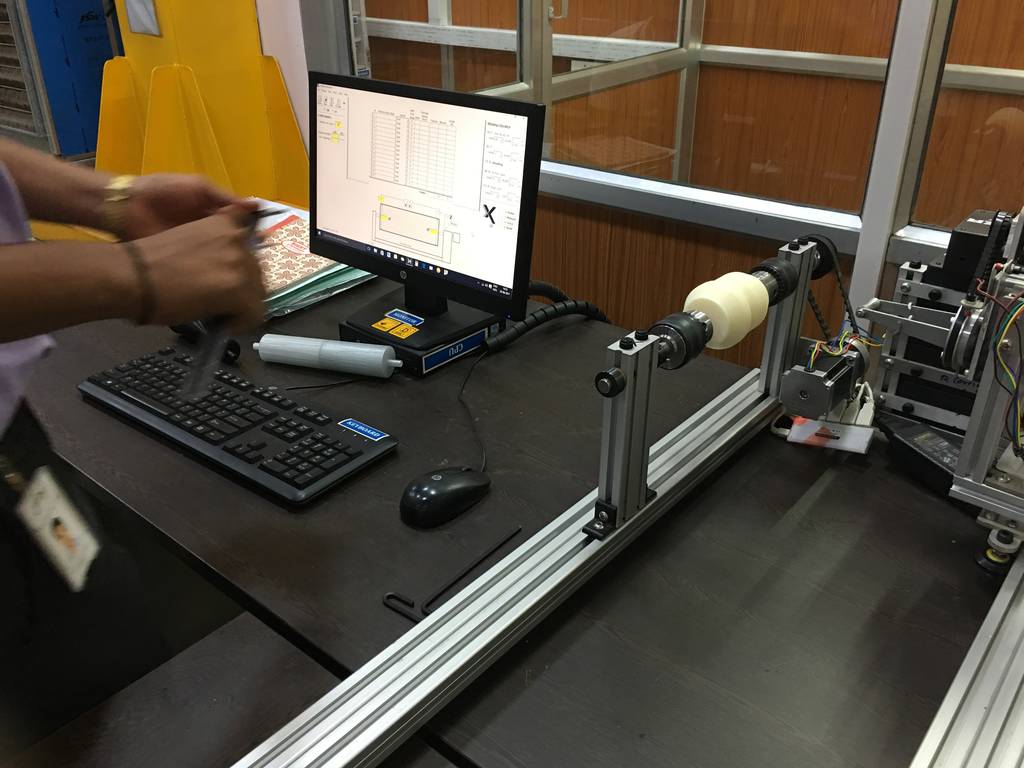
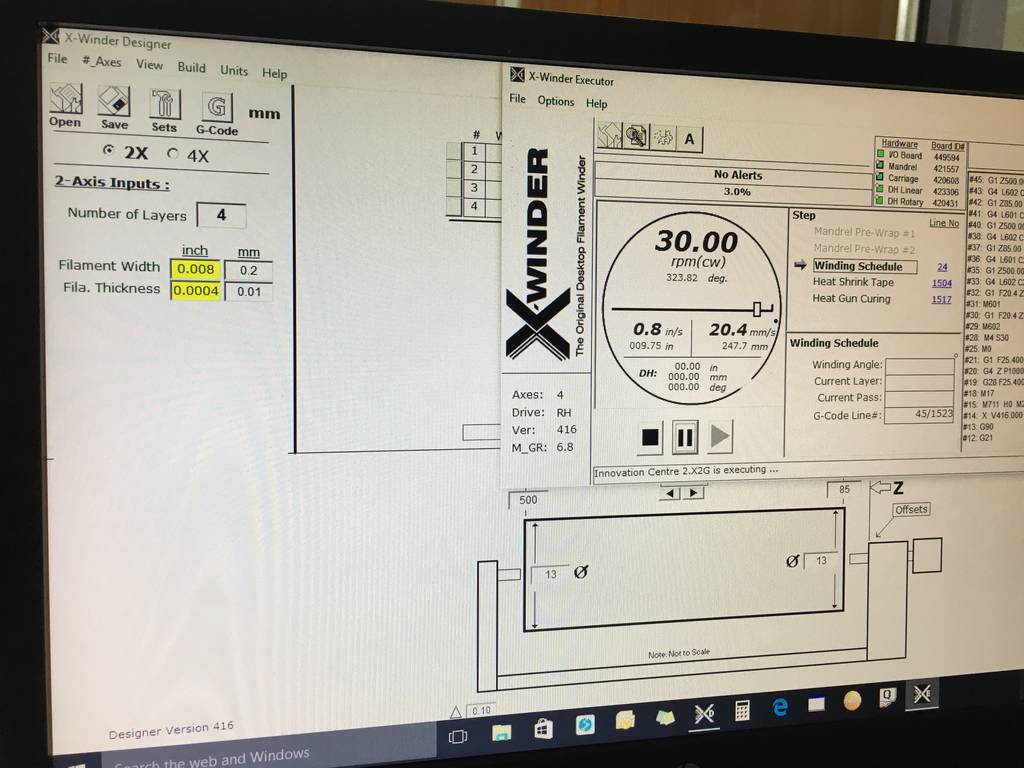
The parameters of winding were applied in the Software & after the setting was done & the job clamped on the filament winding machine, we started the filament winding of the model as shown in the video below.
COMPOSITE-VIDEO-1 from Clement Burga on Vimeo.
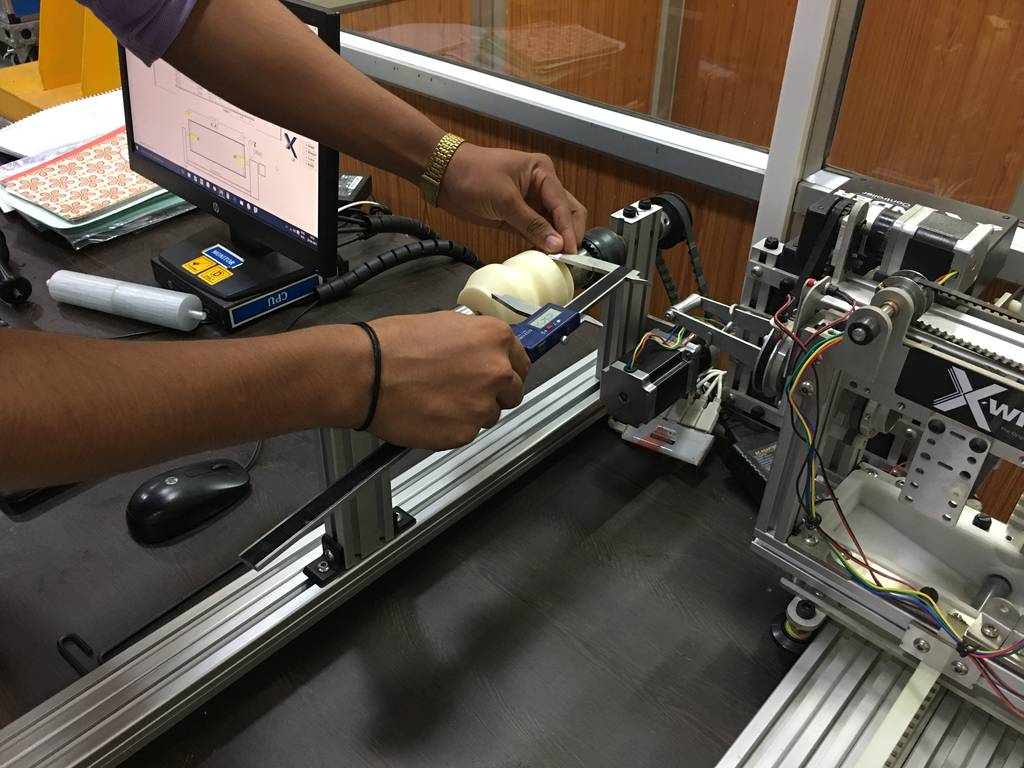
Later after few rotations the job broke from the stub which was held in the chucks as shown below
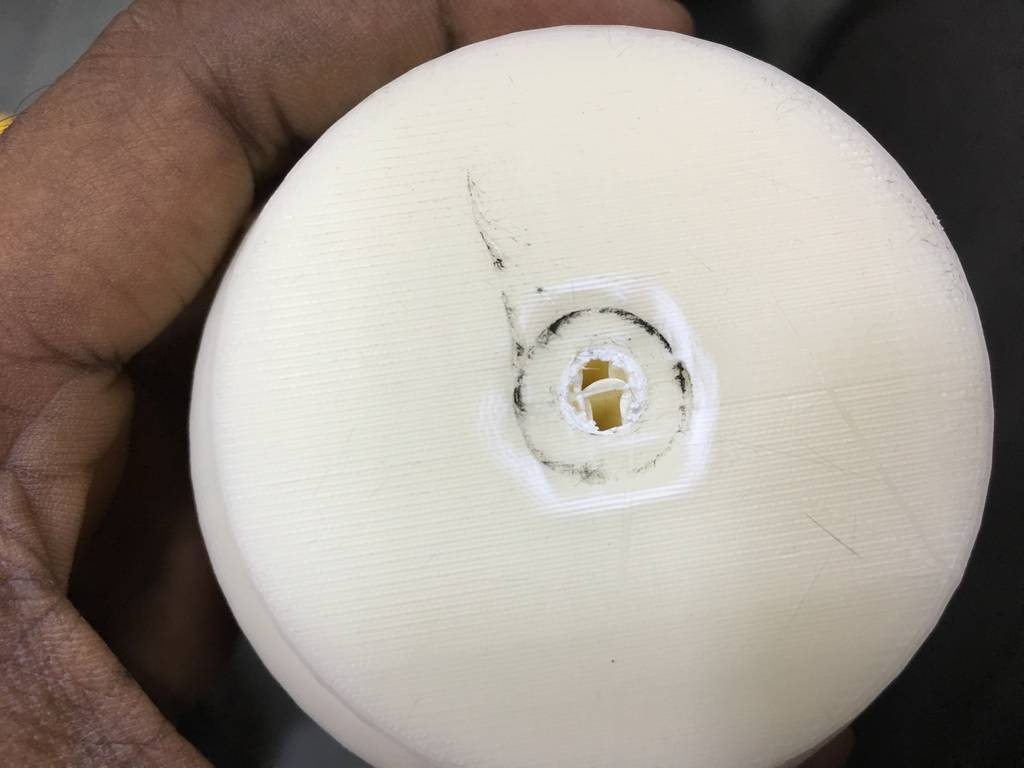
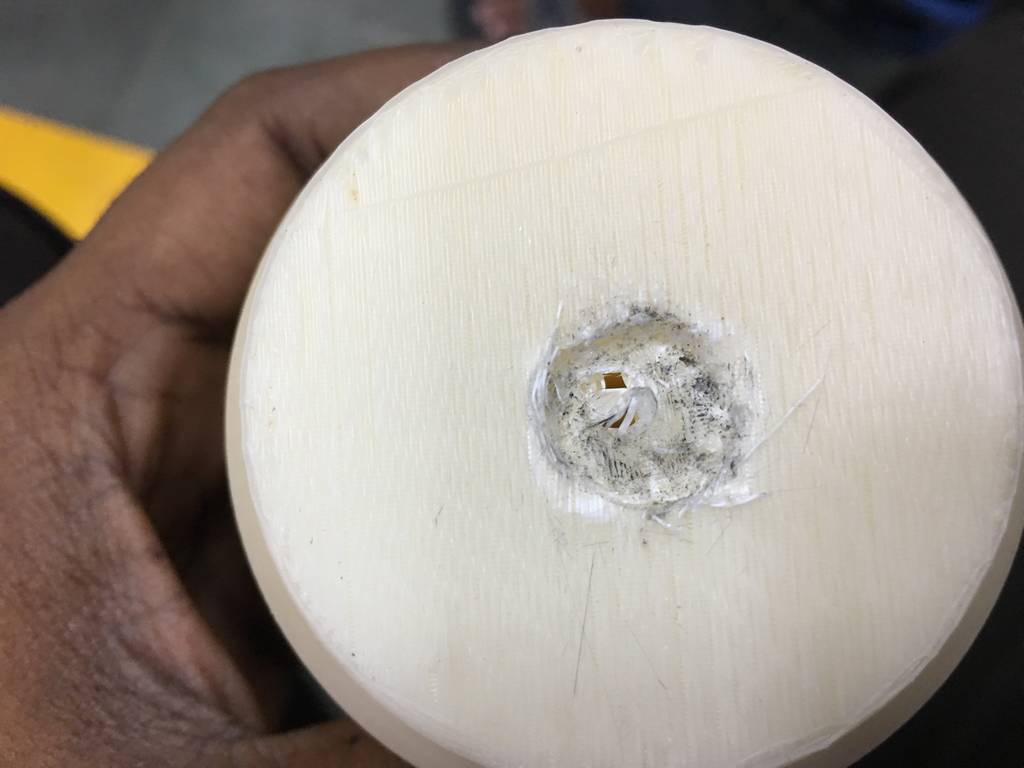
Later we found out that all the similar kind of jobs are getting broken due to the job being made in 3D printing. We realized that the jobs made in 3D printing will not be suitable for filament winding as there is lot of tension created for winding process.
To check the process of winding we took a metal cylindrical hollow tube for winding as shown in below pictures.
The below video shows the resin being applied on the winding after 1 layer of winding is done. This way we did 4 layers of winding & after winding of each layer we applied a layer of resin.
COMPOSITE-VIDEO-2 from Clement Burga on Vimeo.
COMPOSITE-VIDEO-3 from Clement Burga on Vimeo.
We then planned to continue with other method by suing Hand Lay up process.
study of resin used in the assignment
We have to study the MSDS & the TDS of the resin used for our assignment. I have gone through the Internet & found out the MSDS sheet which can downloaded from my page below. The solution applied here is a combination of a Resin (L12) & a hardener (K6)
The resin used for this application was L12 & the details of the same can be referred from this link here. L12 Resin - Datasheet .
Some other technical details of the resin can also be referred through this link - L12 Resin - Datasheet
I have studied the available data & have extracted few technical specifications as shown in the below image.
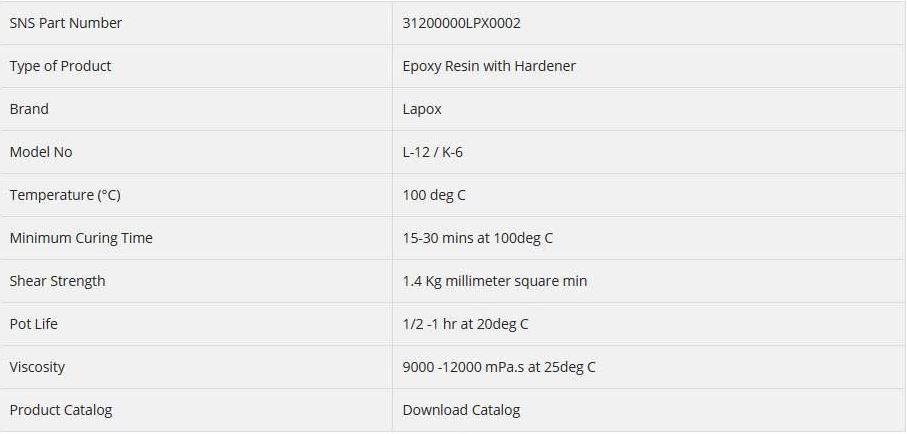
The hardener K6 the details of the same can be referred from this link here. K6 Hardener
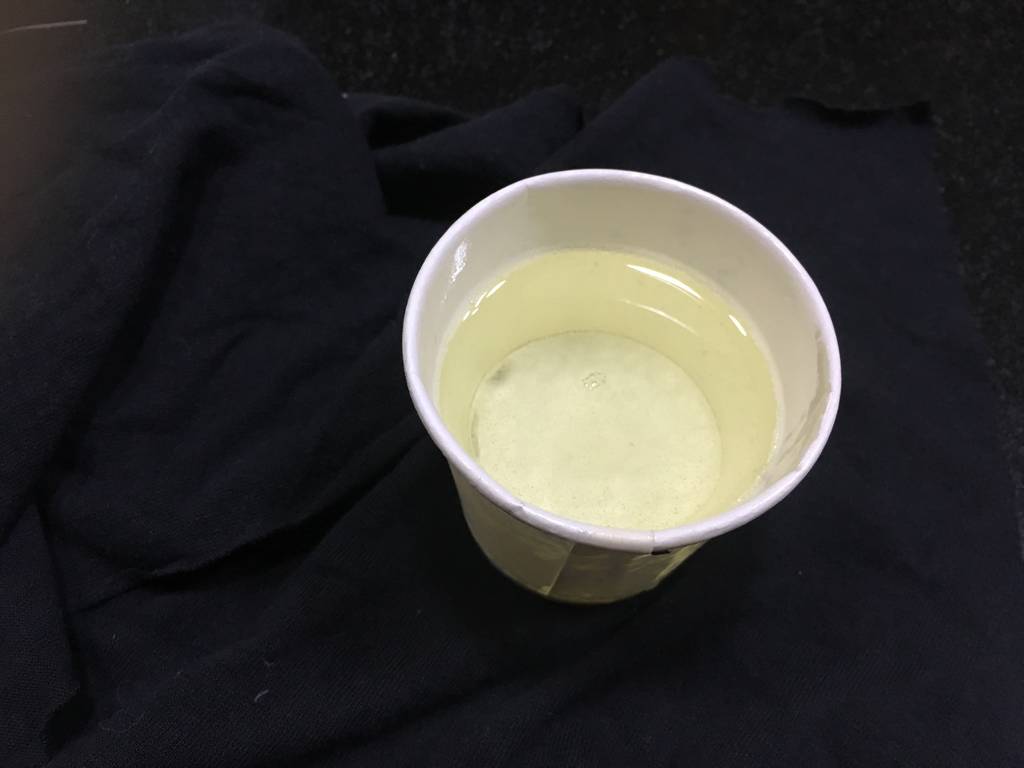
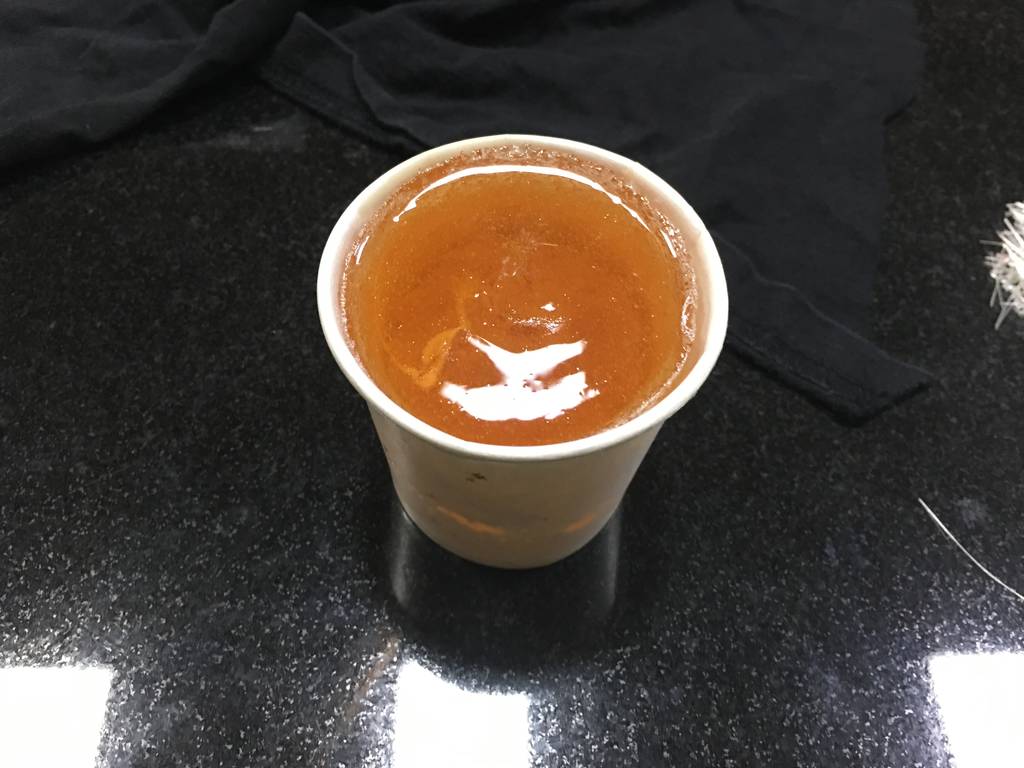
These 2 component have to be mixed in the ratio 100:10 by weight & also very importantly in the required quantities. The reason being that this solution after mixing, ther is an exothermic reaction taking palce. If this mixture is not used within the stipulated time then it gets hardened and will be of no use at all.
The mixture of these resins have a pot life of 10 - 15 minutes once the mixinf is done. If the solution is not used before this time it will get hardened & be of no further use. The below image shows that the mixture getting hardened when we used it above the stipulated time.
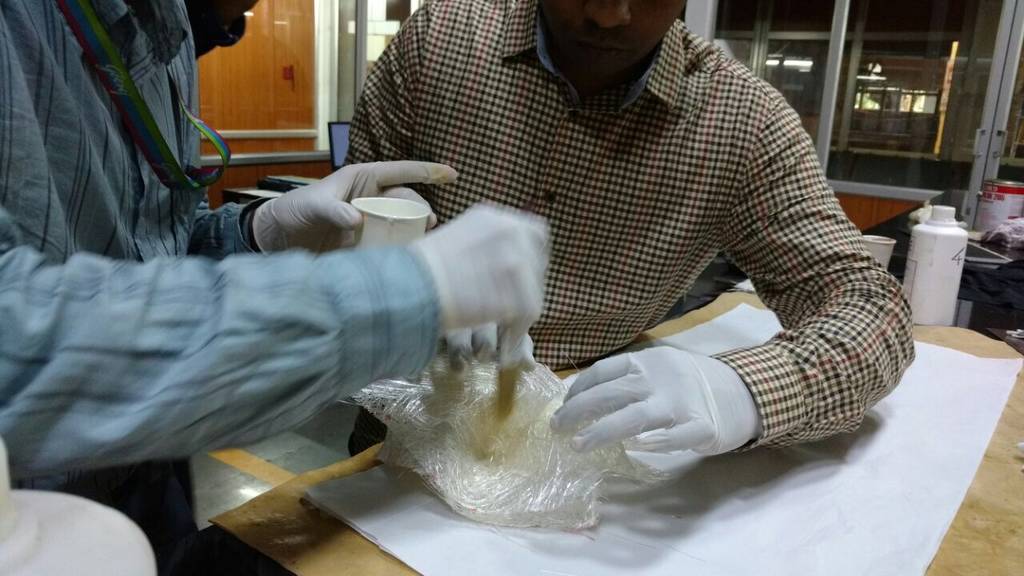
Hand lay up process
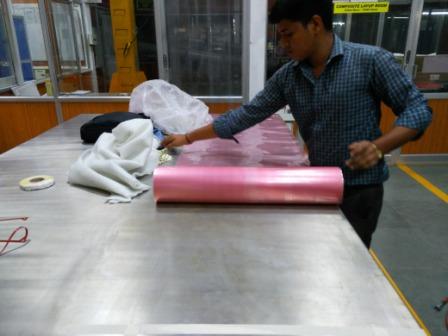
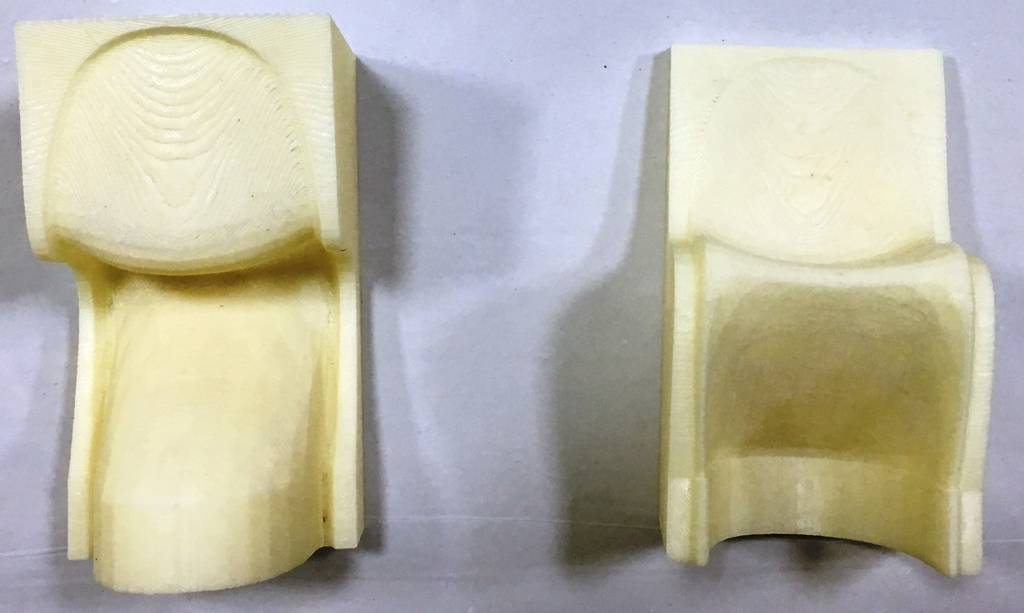
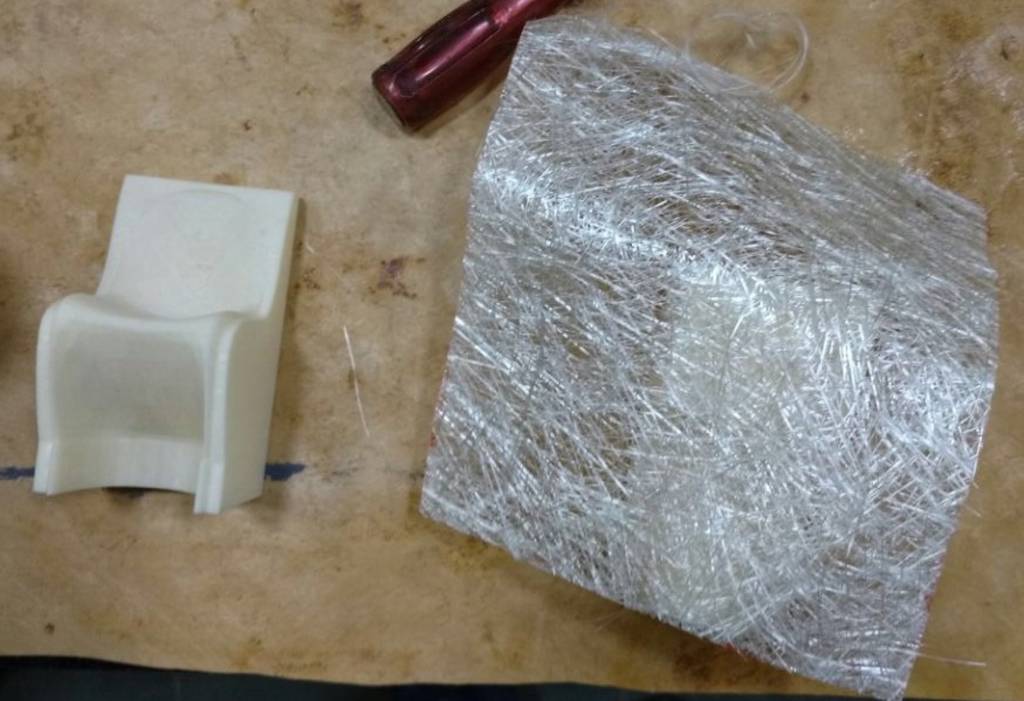
Hand lay up process is the simplest of them all & requires no more skill to prepare the composite. My team member had designed a model & did the 3D printing of the model as shown in the below image. The task was to lay up 2 layers of Fibre Glass in the shape of the model. Below I have also displayed the fibre glass sheet

The process that I followed for hand layup process is explained here:
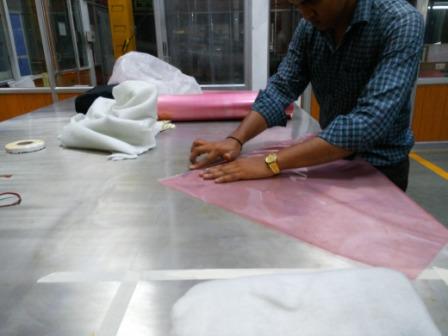
Step 1: Wear Hand gloves before handling the glass fibre as it is harmful to hold the fibre with bear hands.
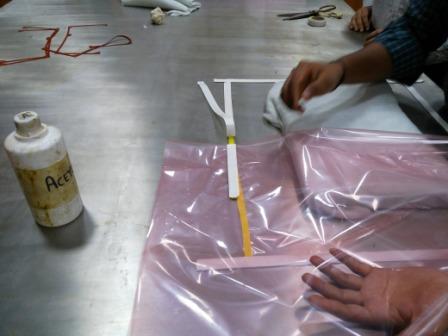
Step 2: Clean the 3D print models with Acetone to remove any dirt on the models.
Step 3: Place the fibre glass layer on the model and hold on the corners to avoid the fibre coming out of the mold.
Step 4: Mix the required volume of Resin & Hardener in a container in the prescribed proportions.
Step 5: Then apply the mixture of the resin on to the glass fibre
Step 6: Place another layer of glass fibre & repeat applying the resin mixture on the glass fibre.
Step 7: Place the other half of the mold on to the glass fibre layers on the first half of mold.
Step 8: Allow the mold to rest till the resin gets cured

The below videos show the working during the Hand lay up process
HandLayup-1 from Clement Burga on Vimeo.
HandLayup-2 from Clement Burga on Vimeo.
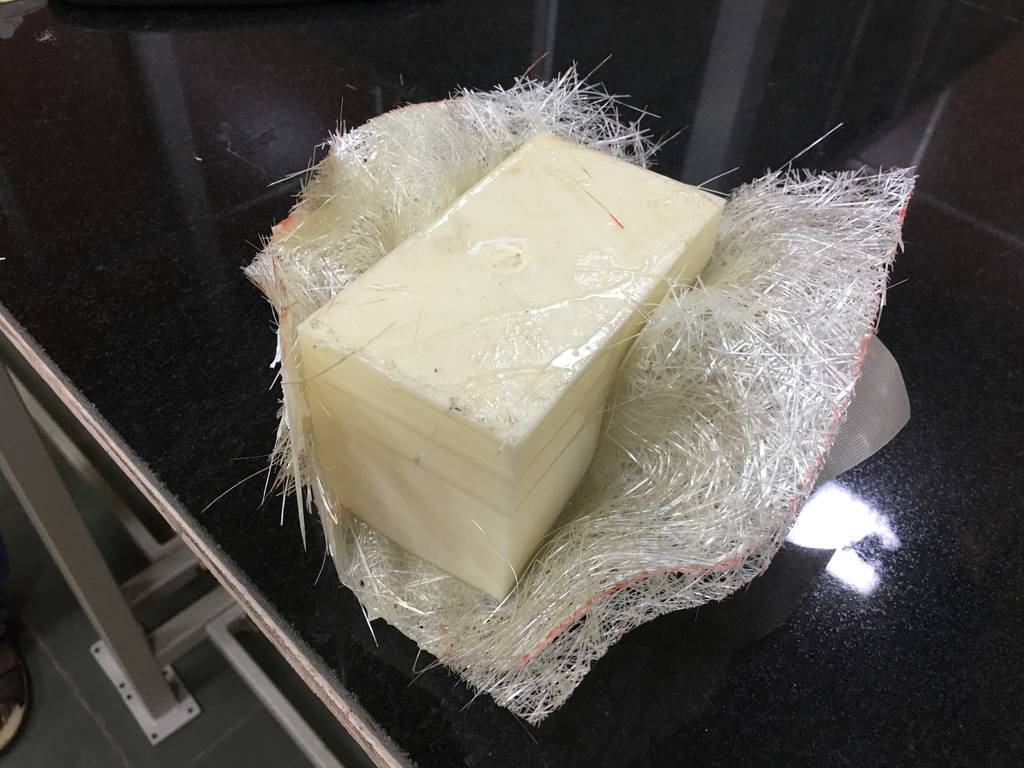
After curing was over we found out that the mold was not able to be removed. As we analyzed the situation we were told by the instructor that the surface of the mold was not smooth enough as was required for the hand lay up process. Also the mold was in chair shape which further created a tight lock between the fibre glass & the mold surface.
Hence it is always recommended to use a smooth surface mold for had layup process.
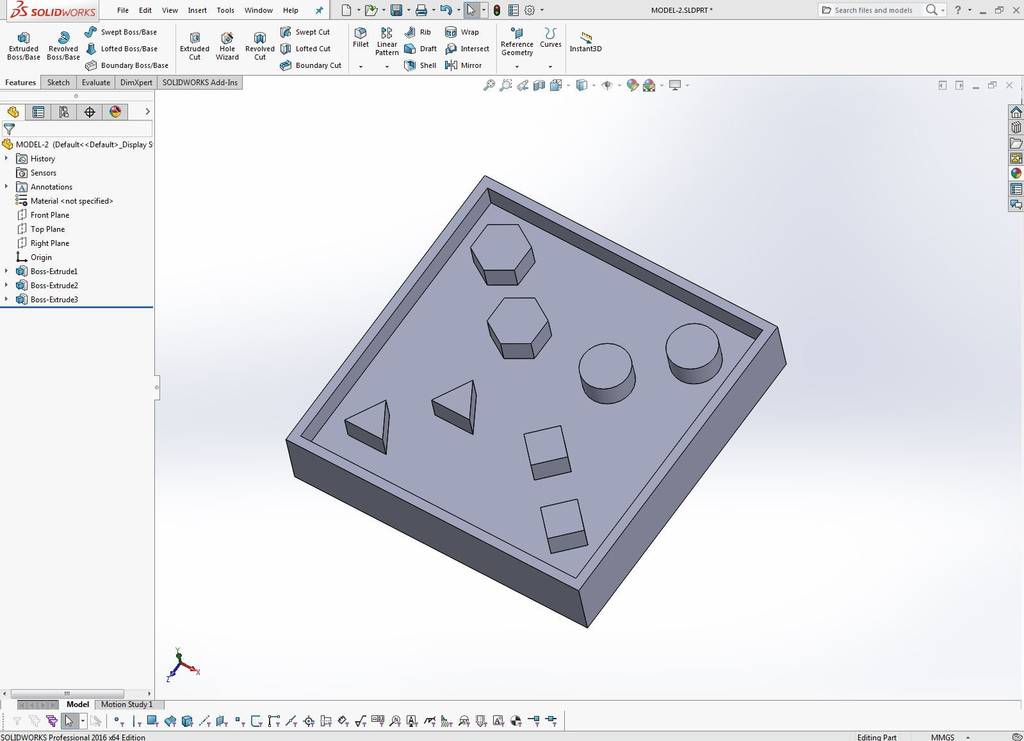
Hand Lay UP Assignment
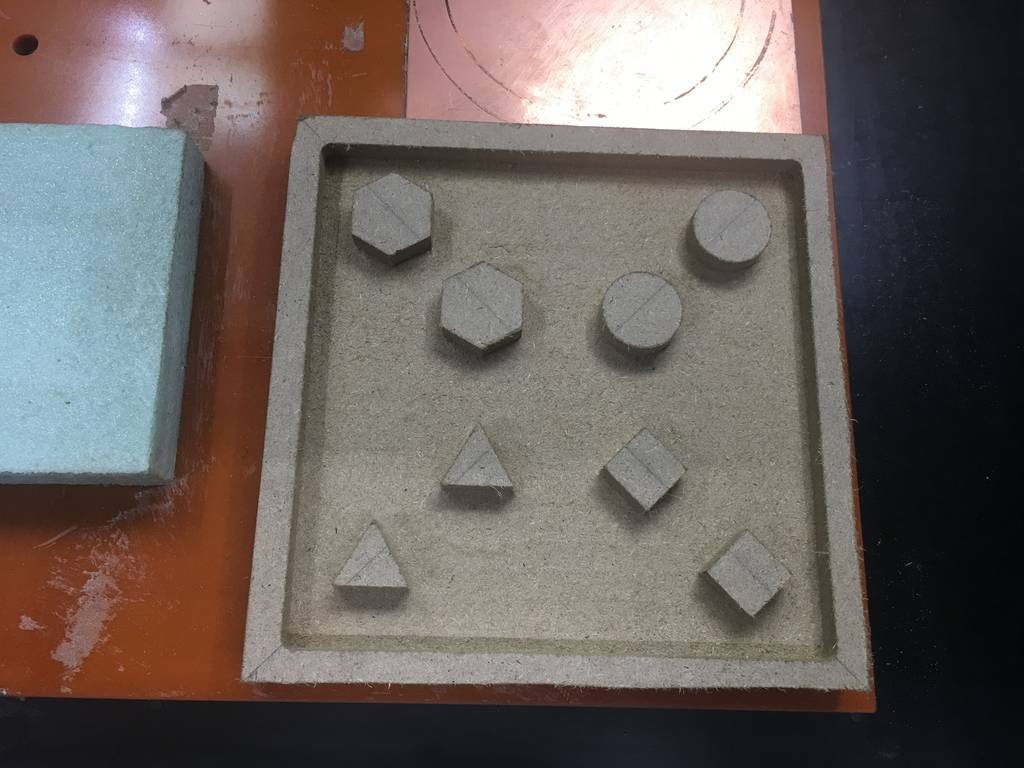
I then designed a model for another exercise of Hand Layup process. I will prepare the mold this time using MDF 18mm thickness. I will use MDX-40 Milling machine to machine the mold. The below images show the model & the model extracted in the Fab modules.

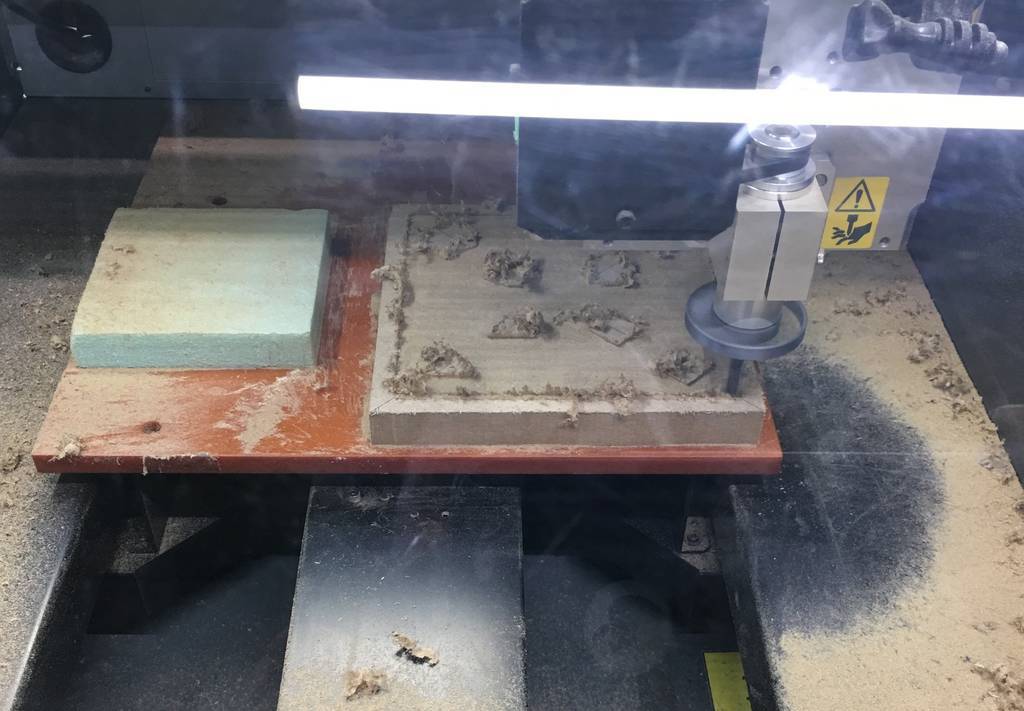
The below images show the mold being machined on the MDX-40 milling machine and the mold ready after complete milling is done.
I will explain in details the steps followed to do the vaccum bagging process for this mold.
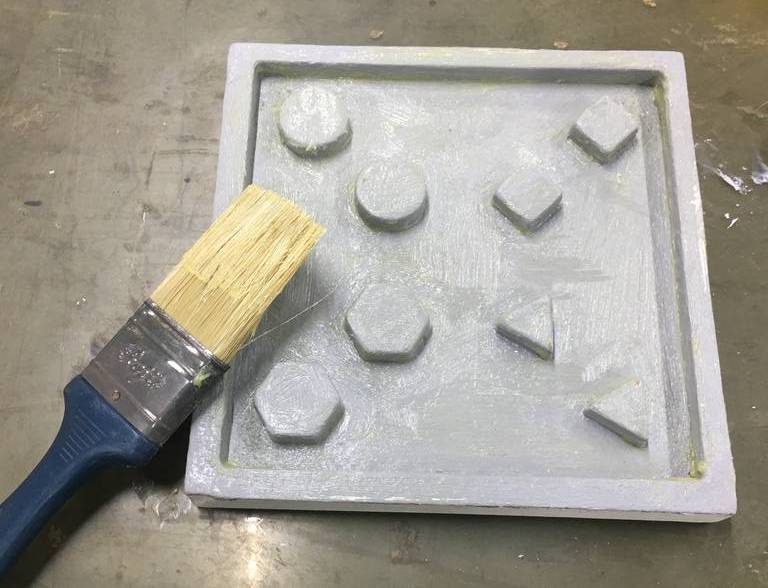
Step 1: As I have used a MDF so I have to make the mold non-porous. Hence Apply the primer to the mold as shown & leave it to dry for 12 hours.
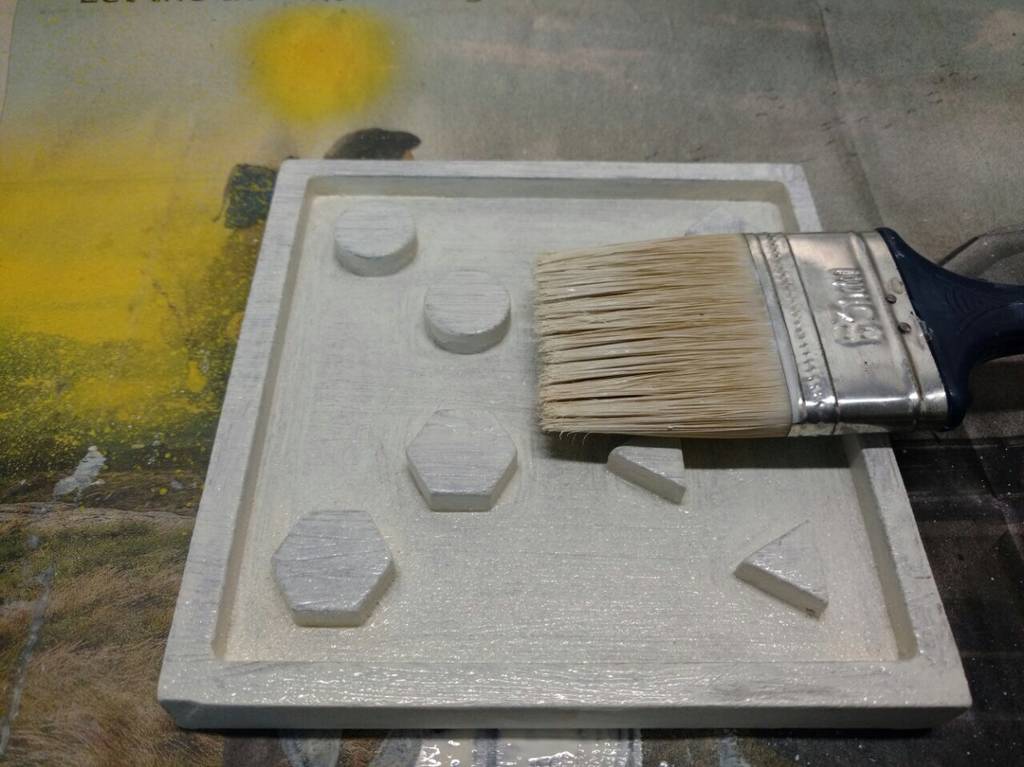
Step 2: Then I applied putty to the mold as shown. This layer of putty will ensure that the walls of the mold are completely sealed & there is no leakage of air. Allow the mold to dry for 8 hours. After drying; sand the mold for any rough surfaces with sand paper.

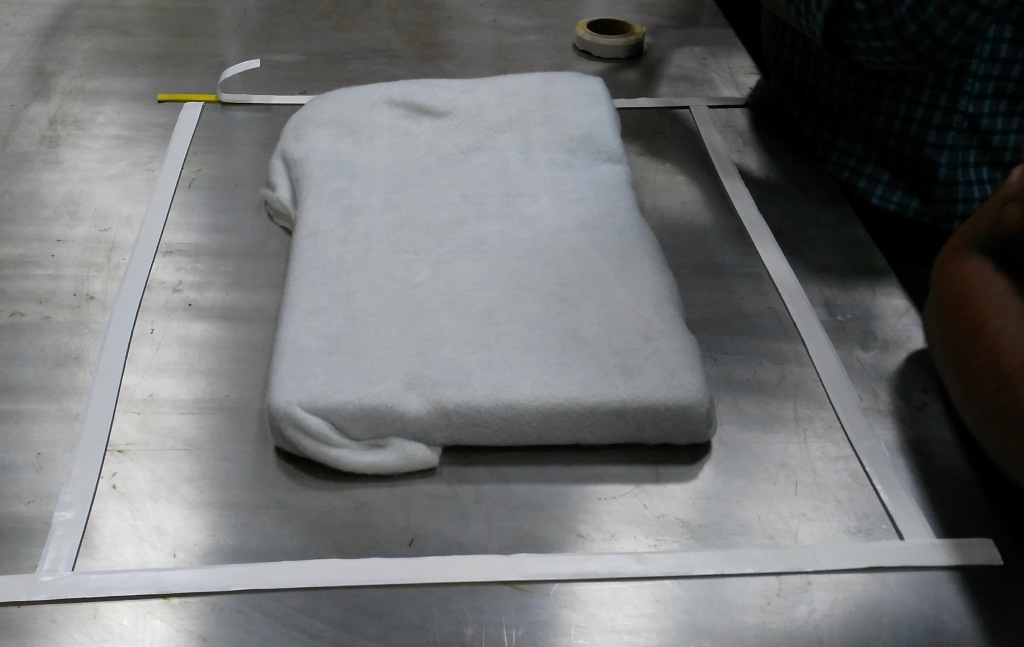
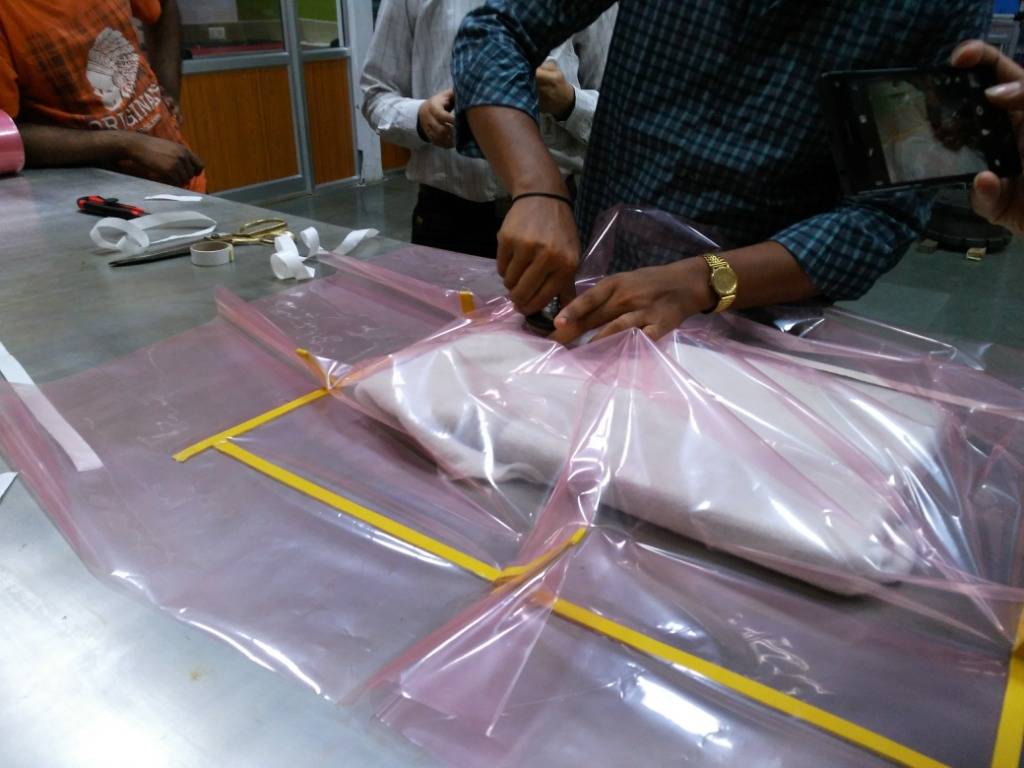
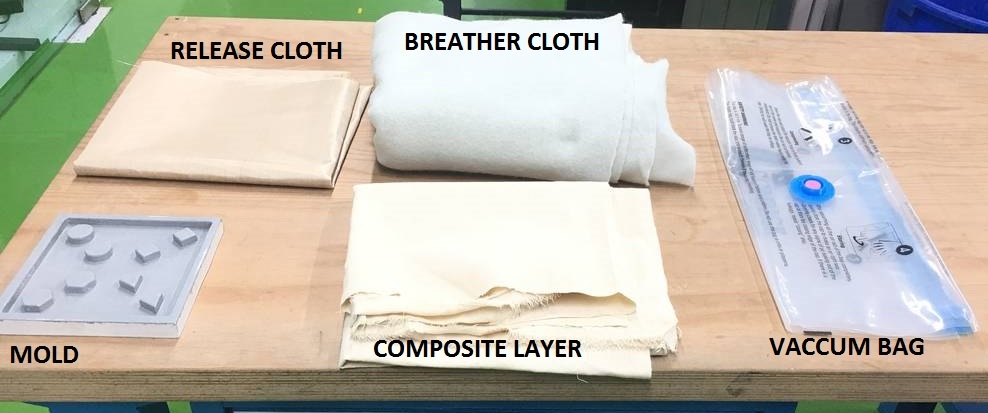
Step 3: Once the mold is ready for vaccum bagging, organize all the material required
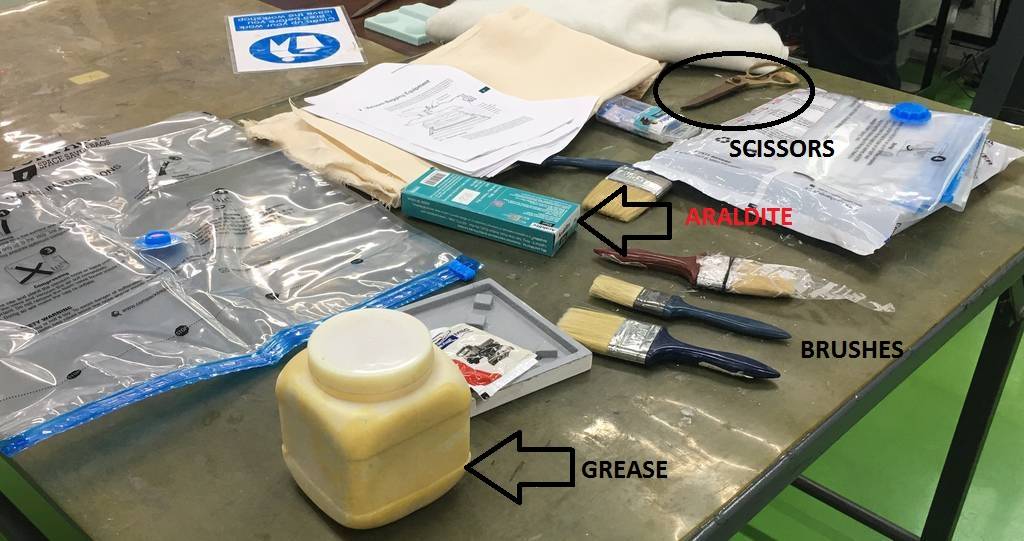
Step 4: Apply grease to the mold to ensure that the composite layer doesn't get stuck to the mold once it is dried.
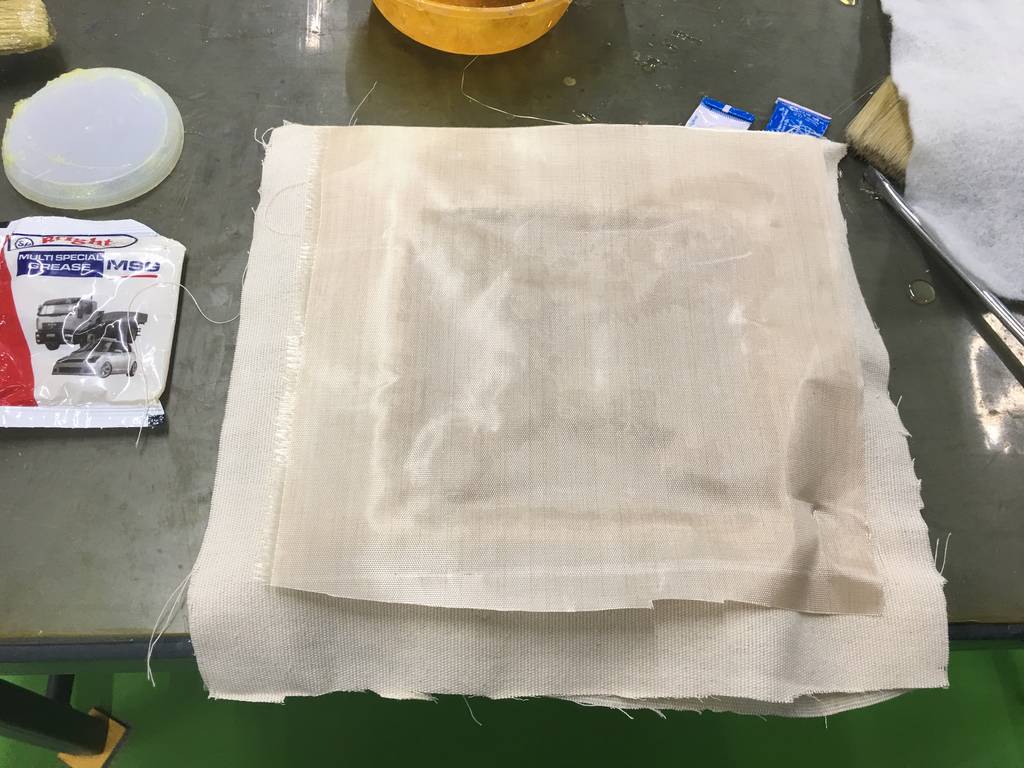
Step 5: Cut the layers of composite cloth, release film & the breather cloth to the required size of the mold.
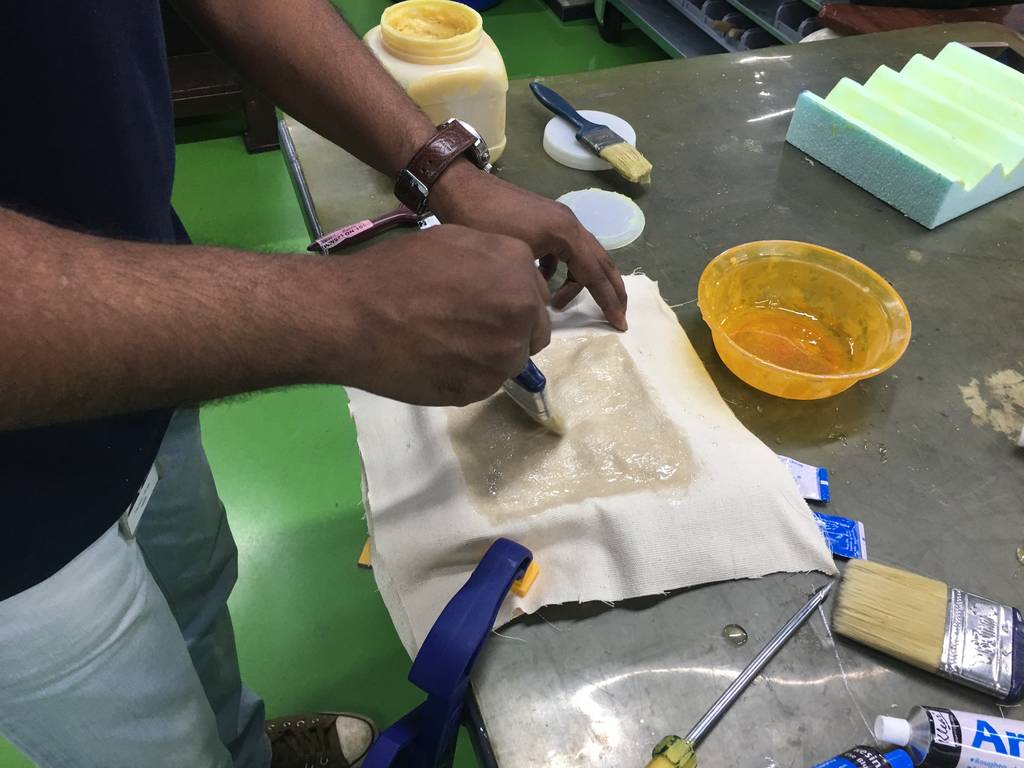
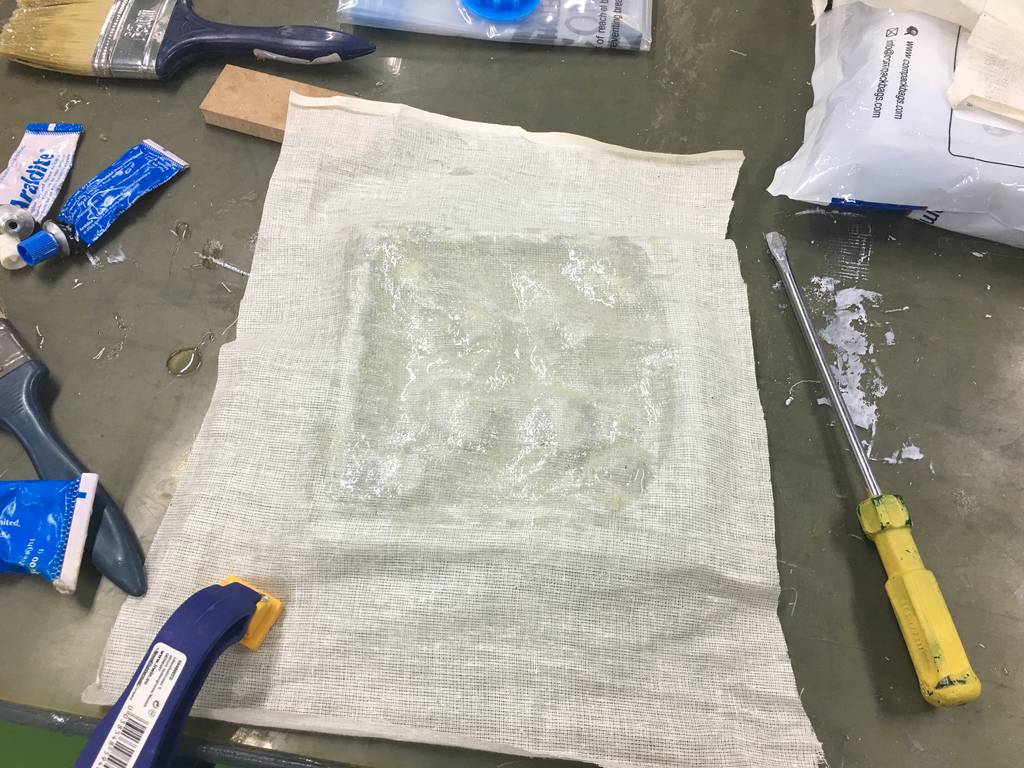
Step 6: Mix the equal portions of the Araldite in a bowl. Then place one layer of composite cloth on the grease applied mold & apply the mixed araldite on the cloth as shown.
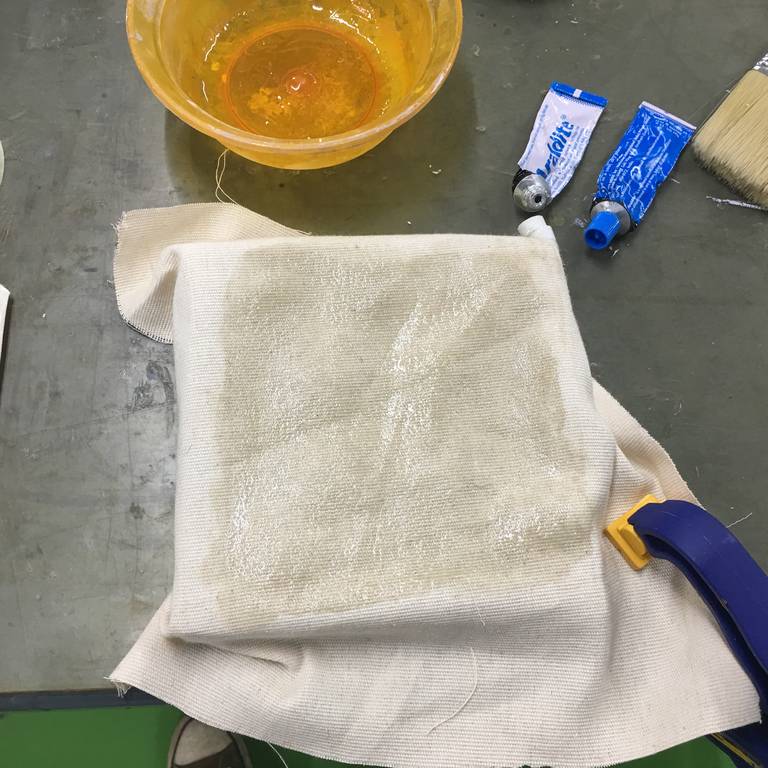
Step 7: Place another layer of the cloth & follow step 6 again
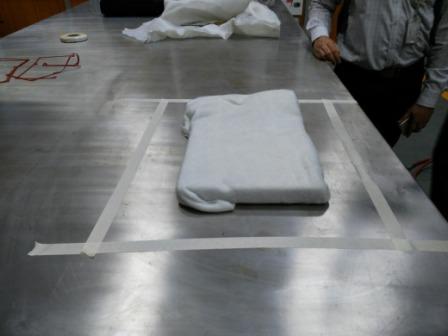
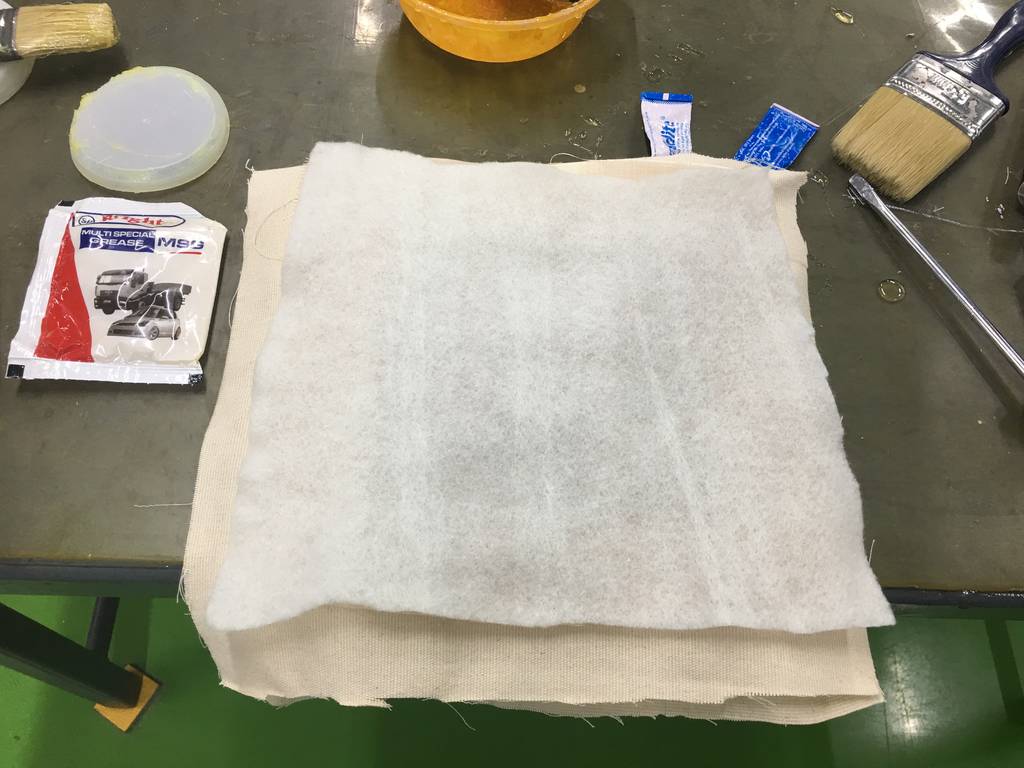
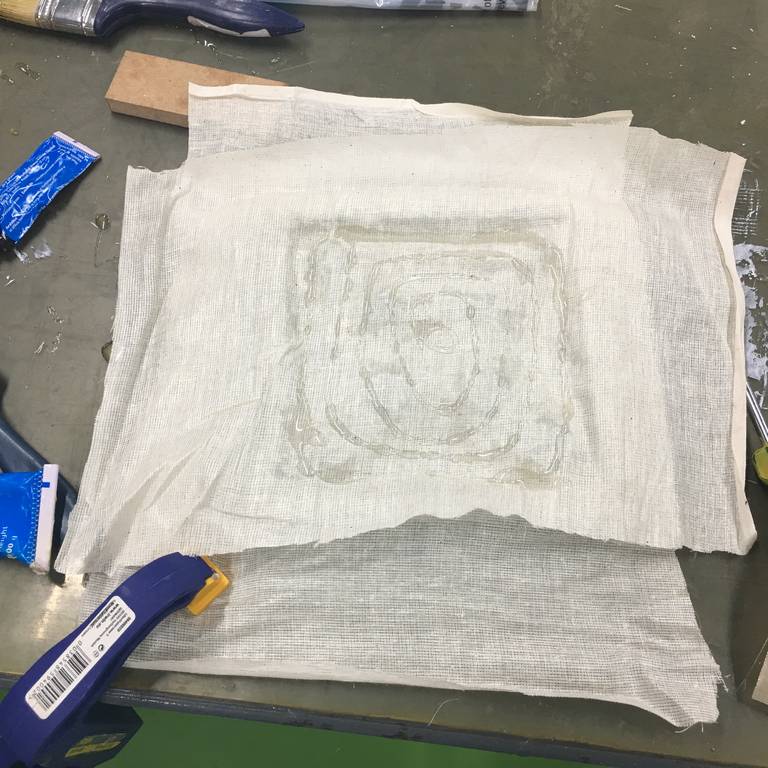
Step 8: Later place the release film cloth & the breather film on top of the 2 layers of composite cloth as shown.
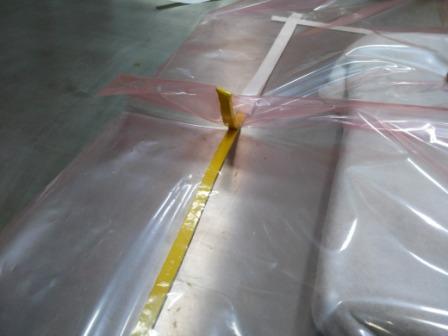
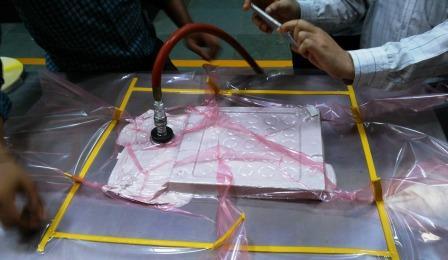
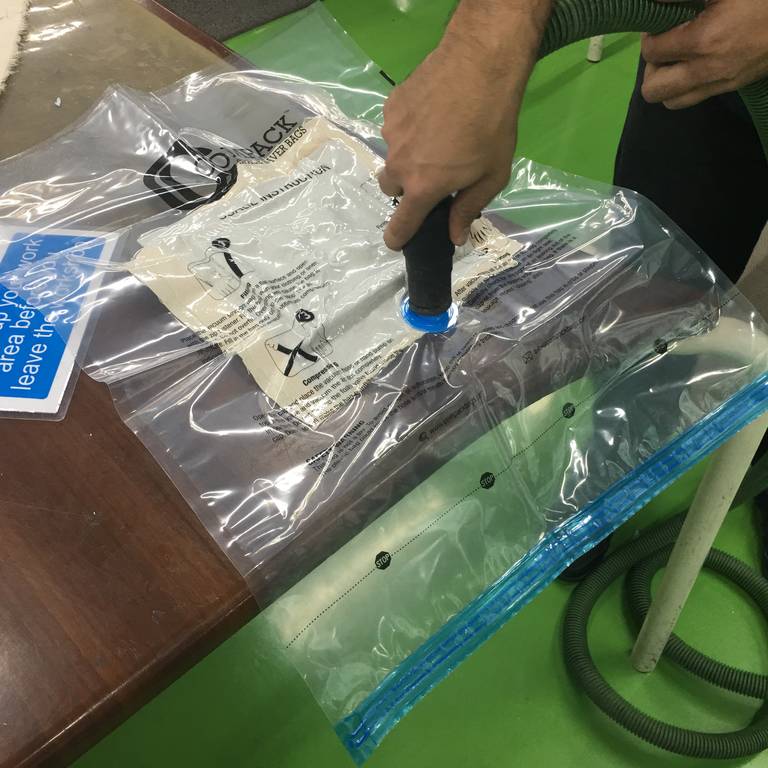
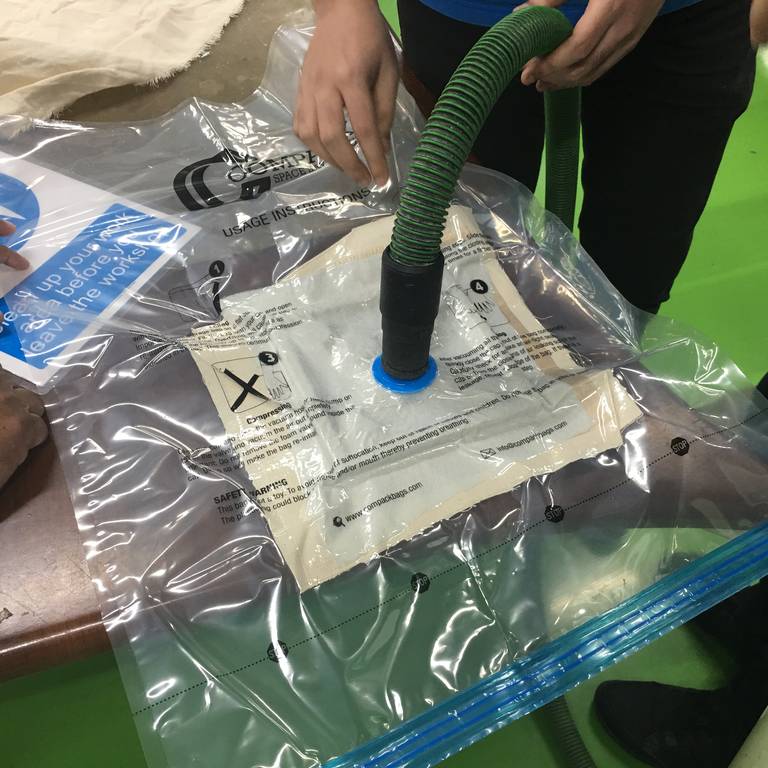
Step 9: Hold all the objects together & place them in the vaccum bag & apply vaccum for the composite clothes to bind together. Keep the vaccum ON for 60 to 80 seconds & then remove. Let the mold with the layers of composite rest inside the vaccum bag for 10 minutes.
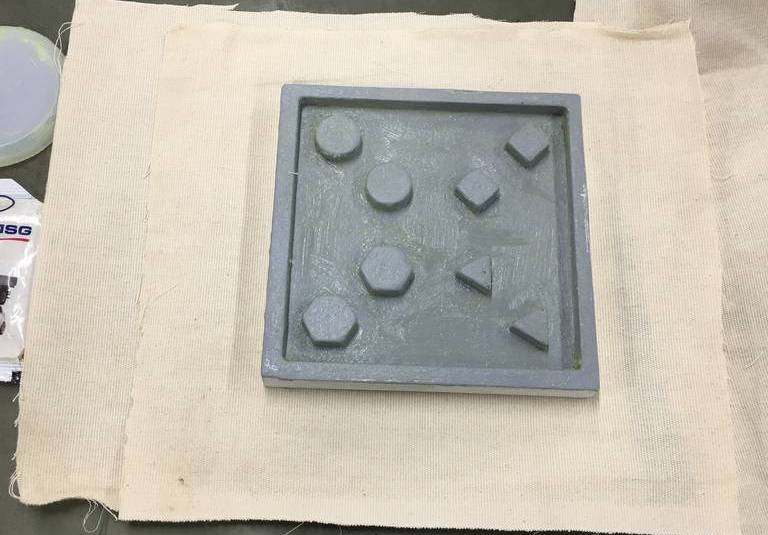
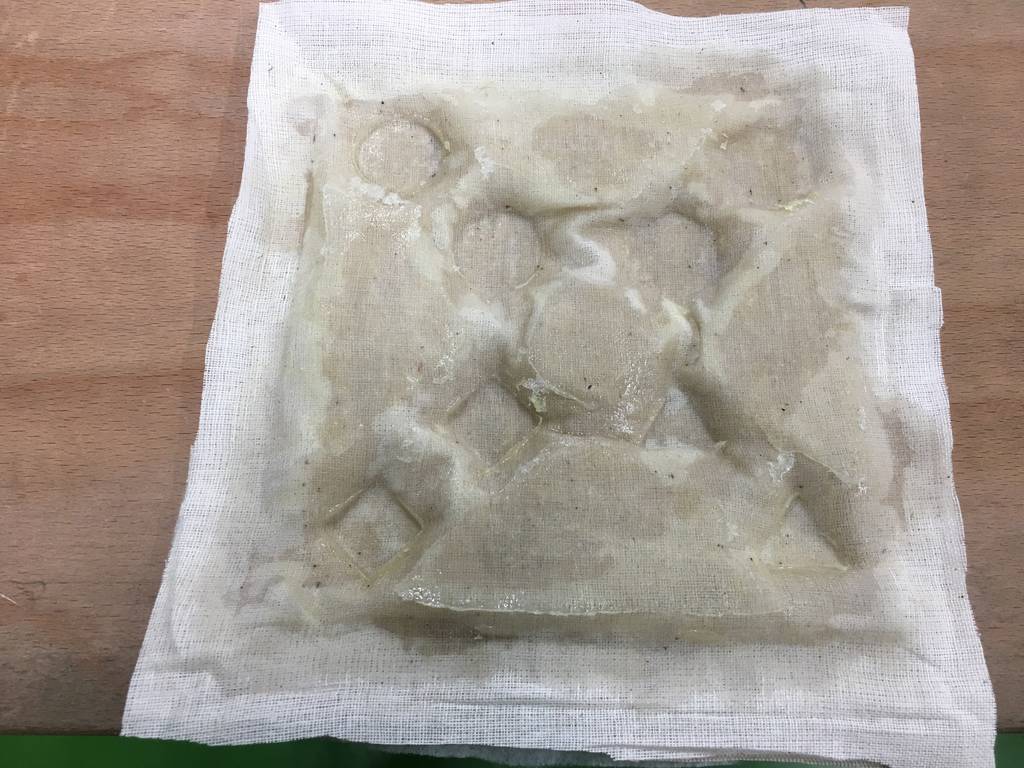
Step 10: After 10 minutes remove the mold from the vaccum bag & check if the impressions of the mold are prominent on the composite layers. Below images show the mold being retrieved from the vaccum bag but the impressions of the mold on the composite clothes is not that prominent.
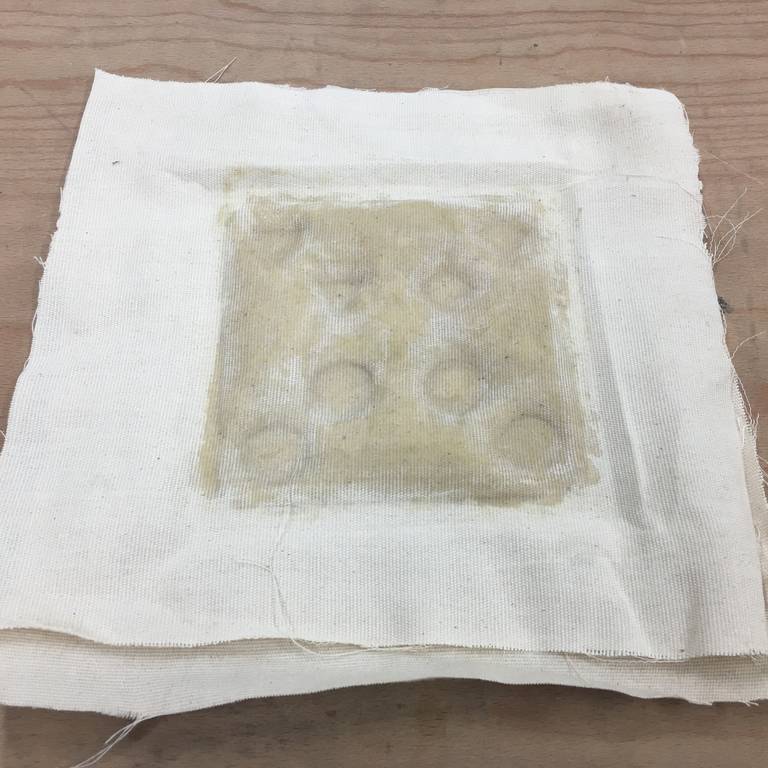
Since the composite layers did not come out well as desired I repeated the process from Step 5 to Step 10 with a thinner layer of composite cloth.
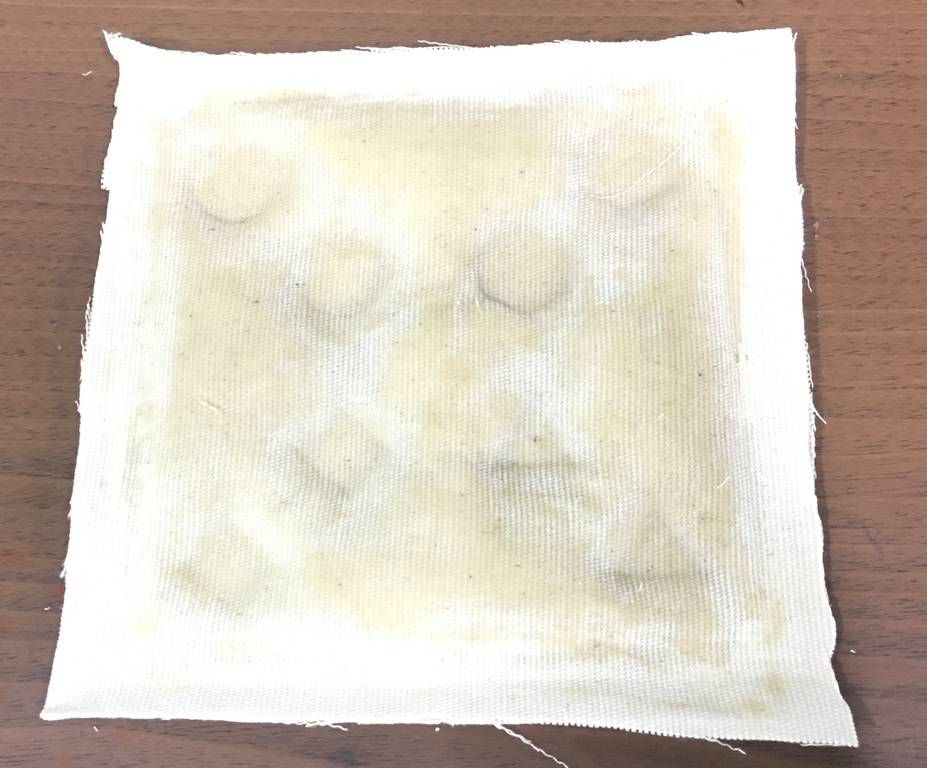
This time it can be seen that the composite layers have good impression as compared to the previous layers.
After I changed the composite cloth thickness and redo the vaccum bagging the result was better than the previous attempt as shown in the below image.
learnings of this week
- This week I learnt things more than any in the previous weeks. And as the name suggests Composites is a skilled job.
- 3D printing objects cannot be used for filament winding machines. As the stubs for holding the work piece in the machine chuck is very weak.
- Drastic decrease or increase in the shape of the objects cannot be suitable for filament winding process.
- The resin mixtures should be used very quickly as they will harden off in their pot life.
- Safety is of utmost importance in this week as we have to handle few hazardous materials..
- The complete vaccum bagging process used for composite manufacturing.
Files to download

This work is licensed under a Creative Commons Attribution-NonCommercial-ShareAlike 4.0 International License.