#09 & 11week
mechanical design
tasks- - design a machine (mechanism+automation), including the end effector
IDEA PLANNING
As a group project, we decided to make a solar tracker system, which uses the sunlight on one beam to draw 2D objects on a 2-axis bed.
Two main methods of using the sun's power are considered:
(1) - The use of a parabola collector with mirrors to redirect the beam to a focus point.
(2) - Fresnel lenses.

Both methods offer advantages and disadvantages.
Parabolic reflector's geometry offers a focus point of light. Before hitting the dish, sunlight beams are parallel to each other and upon hitting the surface of the dish, beams reflect to the focus of the parabola.
Fresnel lenses have large aperture and short focal length, they are lighter and thinner than conventional lenses, they come in a variety of forms, including flat sheets.
Fresnel lenses do not change the direction of propagation of light within a medium and are built using concentric annular sections on a curved profile. When extruded, the profile takes the shape of a conventional lens, but with better focusing properties. Some fresnel lenses use flat surfaces and are build with an array of prisms arranged in circular paths.
Fresnel lenses are used for light collection, magnification or collimation. There are two types of fresnel lens: non-imaging which use flat cross-section segments and imaging which have segments with curved cross-sections. Imaging lenses produce sharp images, whereas, non-imaging do not.
We collected some ideas regarding what machine we want to build and our choice fell to a Sunlight-engraver with Solar-tracker abilities. As this task was pointed out as a group assignment we have divided the project into several task for each student in our Fab Lab. My part was to design the xy-structure and then I made also a design for the focusing part and the supporting structures for the big turntable.
At first I had a look at the MTM modules to see what I could use for my design and then I made a first sketch in Rhino. After I discussed the design with my fellow students I moved to Fusion to make use of the parametric feature.
Ahmed was responsible for the base so I took his sketch/build as reference to make sure that our designs will fit togeether.
We also decided to use the software (gestalt) of the MTM's but with our own mechanical design.
Cesar and I worked together on some basic stuctures because he covered the part of controlling and programming the MTMs with the Gestalt-nodes in Python (Programming language) A good thing was the exchange between us what during all time of designing and testing that involved everybody in any stage. That way many problems were discussed and many solutions also
With the following pictures I documented the design process from the xy-table and after that the lower lens focusing element.
I also designed and printed a set of sliding plastic (ABS) bearings for the leading rods of the table, that is working just fine.
DESIGN OF BED
The base will consist of a two-axis system. We decided to use a modified version of the MTM machines.
 First, we measured all parts and drafted them on paper:
Then we calculated the dimensions of the moving bed & length of the thread.
First, we measured all parts and drafted them on paper:
Then we calculated the dimensions of the moving bed & length of the thread.
 Next, Rhinoceros is used to roughly draw a draft of the design of the bed.
 A second axis is added, to allow for the xy-movement of the bed.
 The final rough sketch looked as follows:
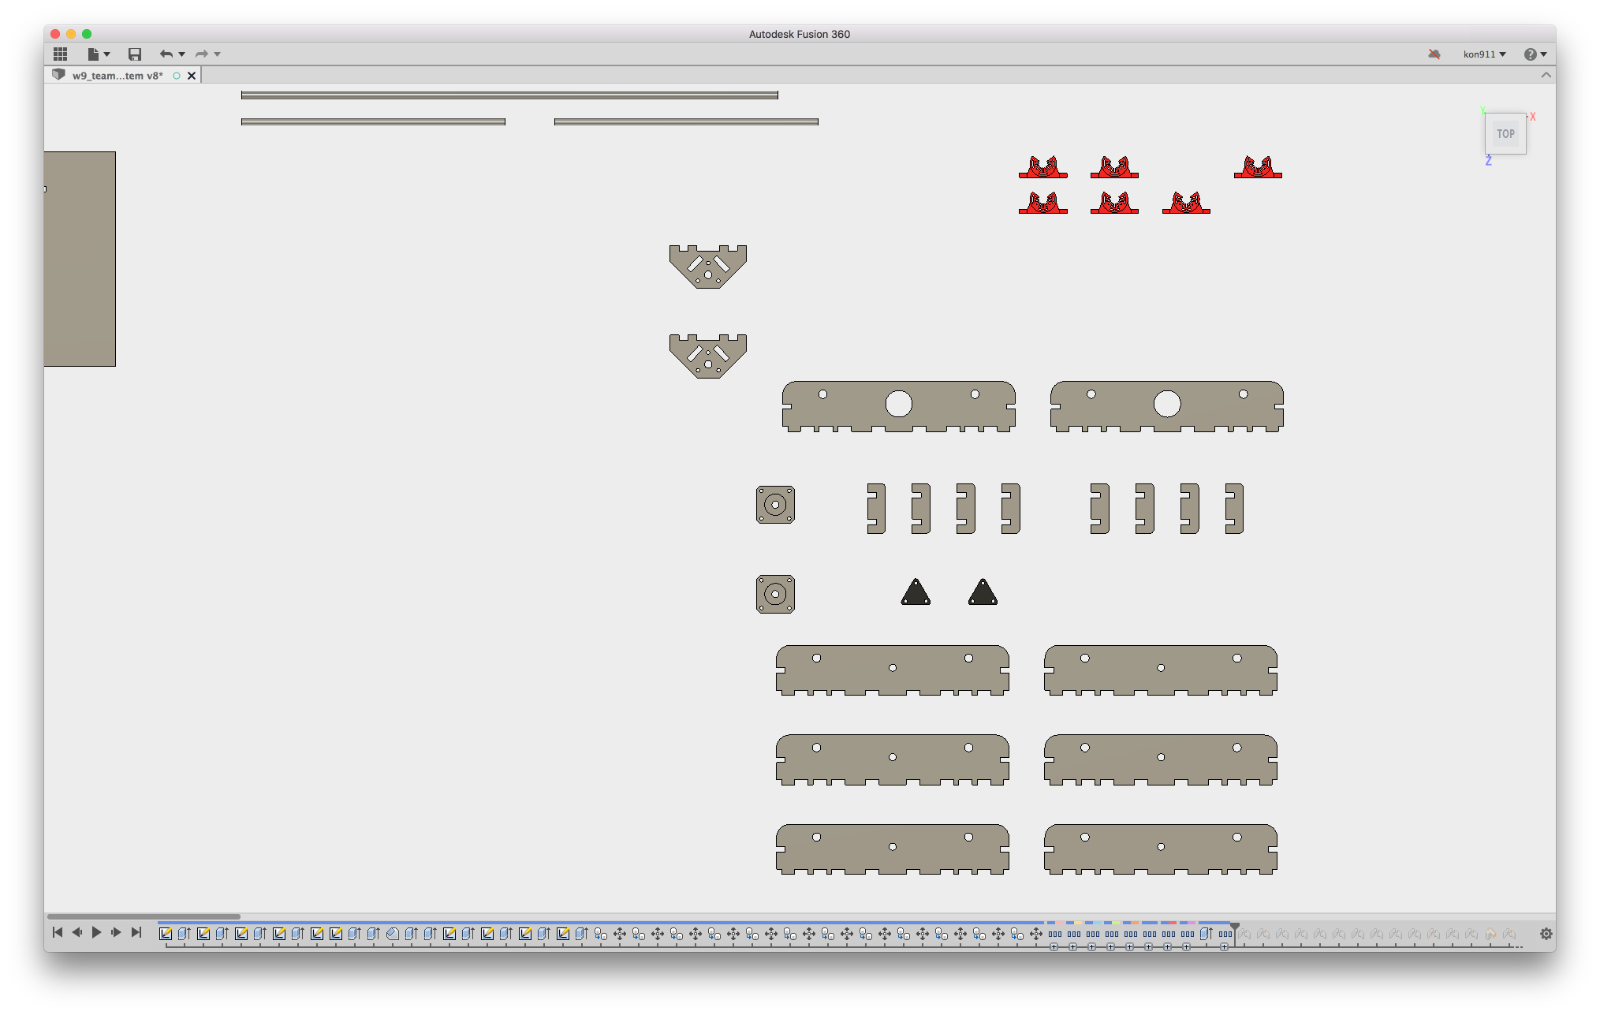 first I designed all elements of the xy-table - actually they are just a handfull different elements - and a numbers of copies.
 then I joint the lower part of the table within Fusion
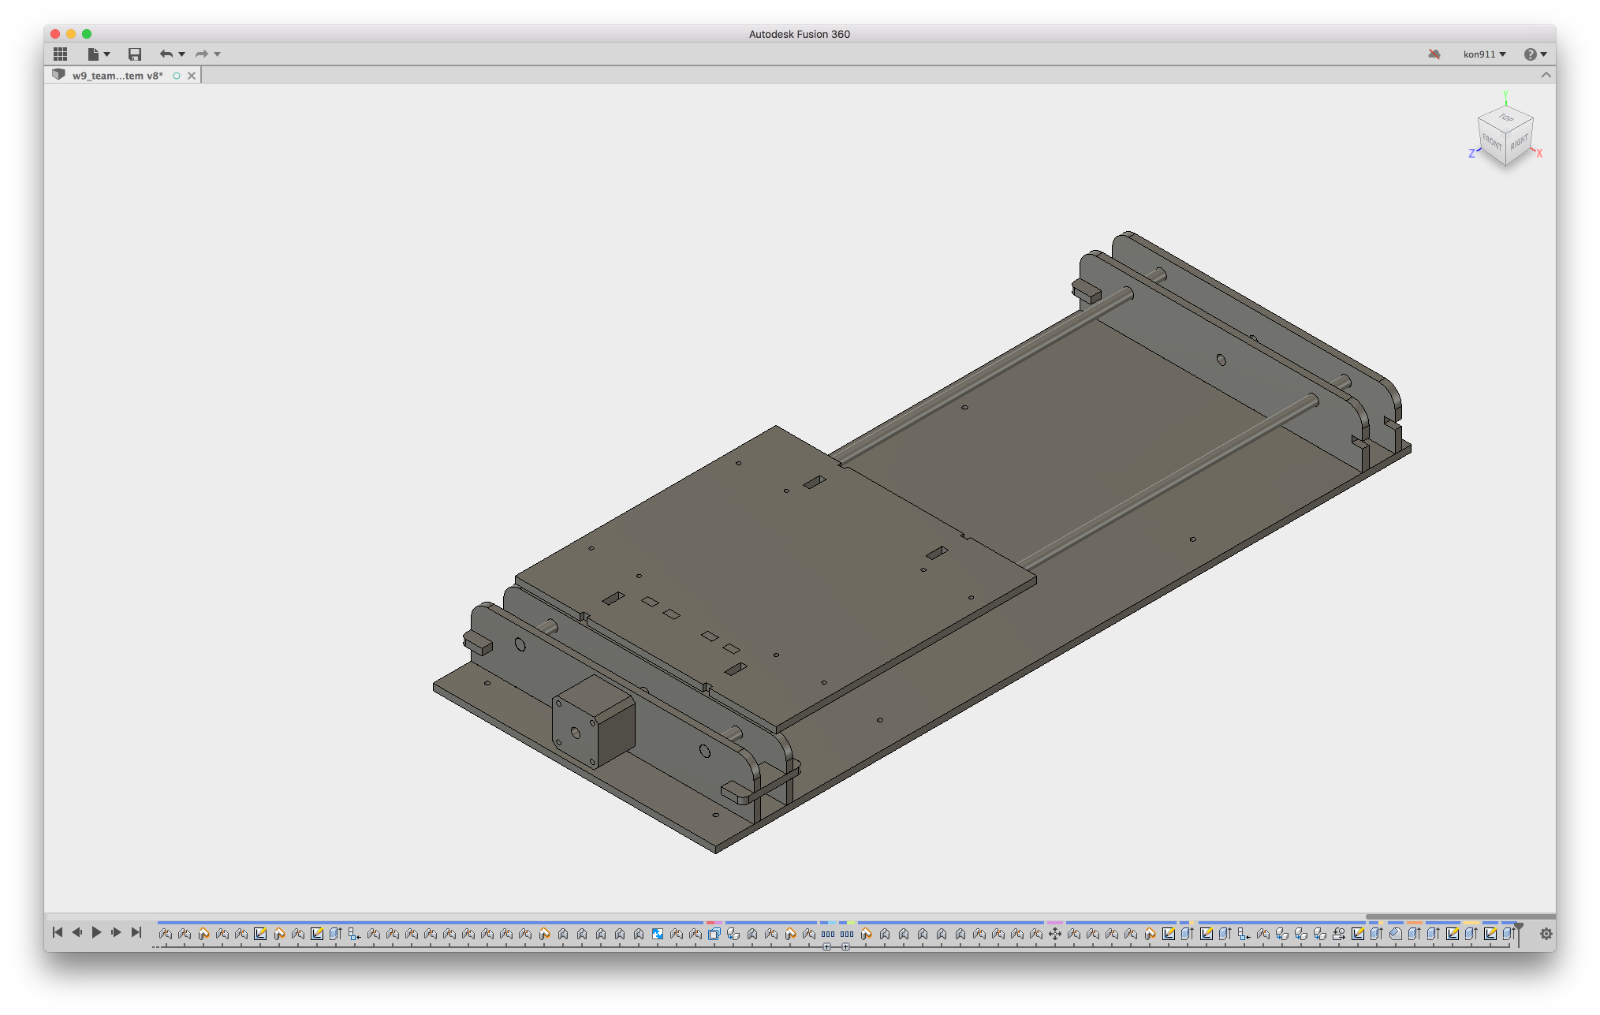 ...with jointed top plate
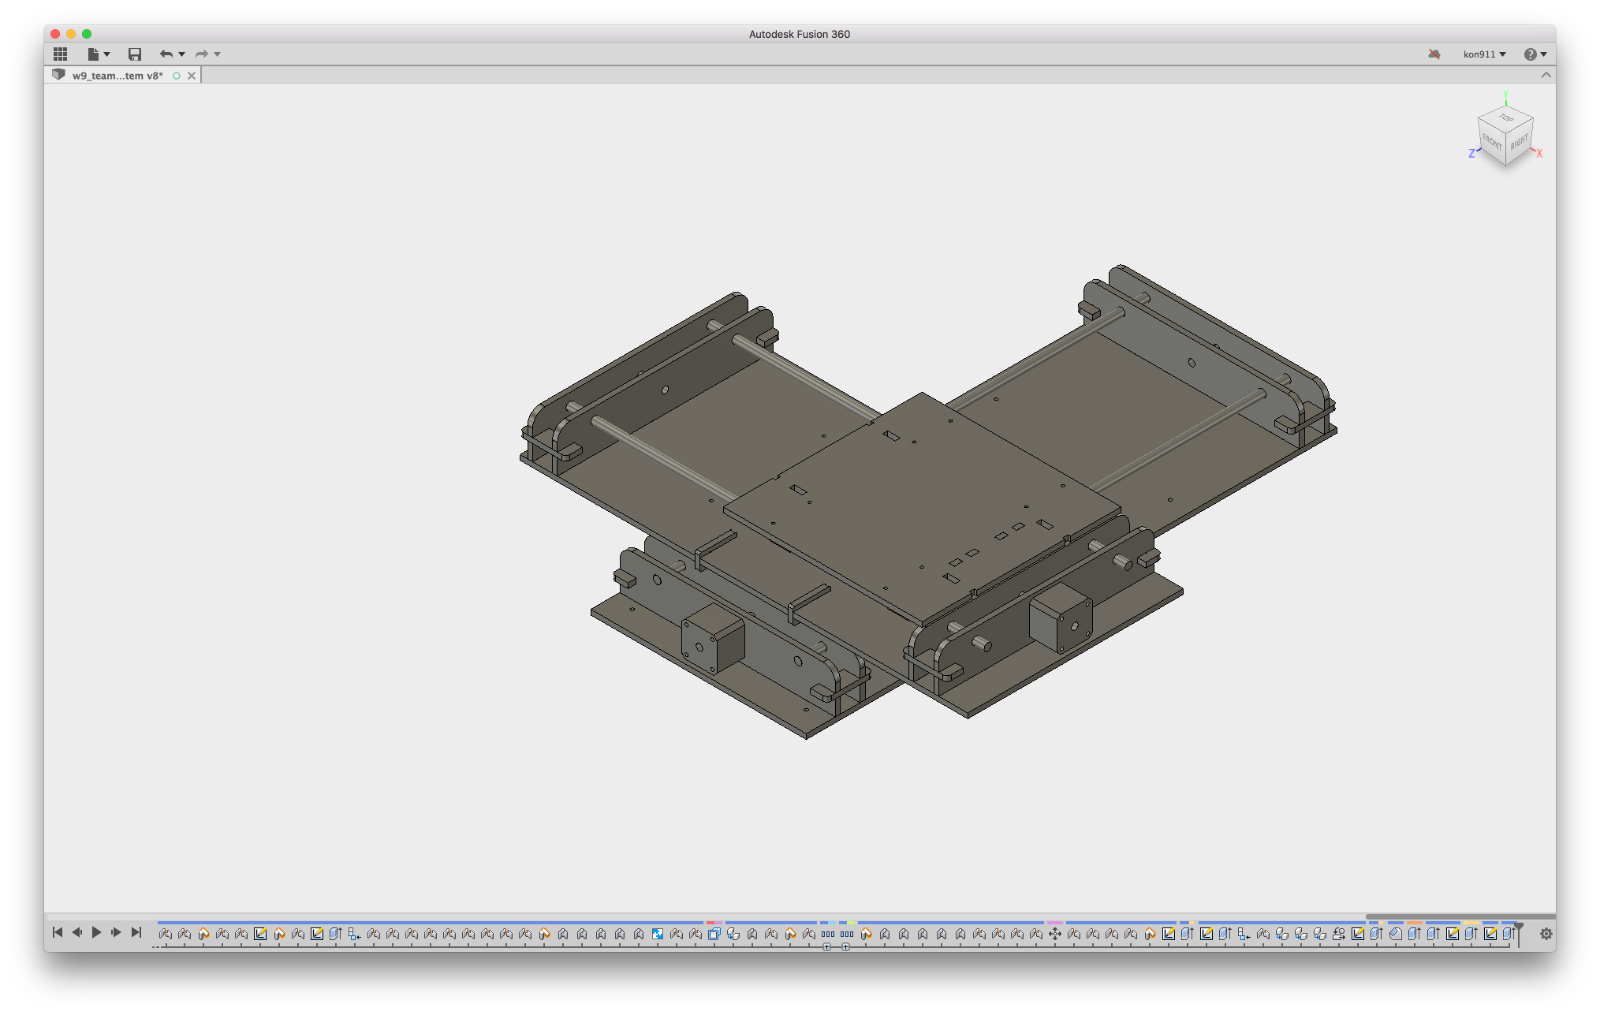 ...and complete assembly
 ...a closer look on the turntable
 ...than I started cutting the elements with the laser cutter
 I decided to use the laser cutter because I wanted to achieve a light but stiff structure (6mm MDF)
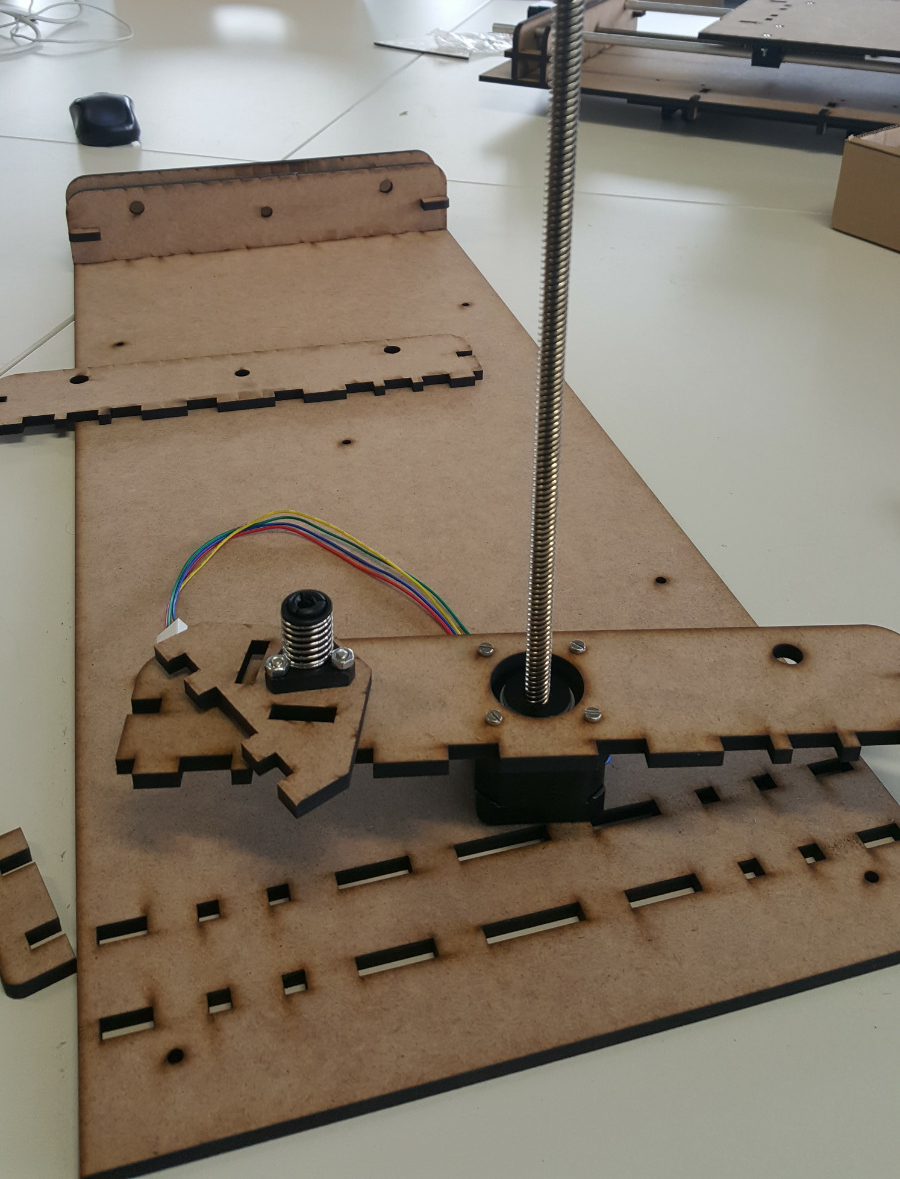
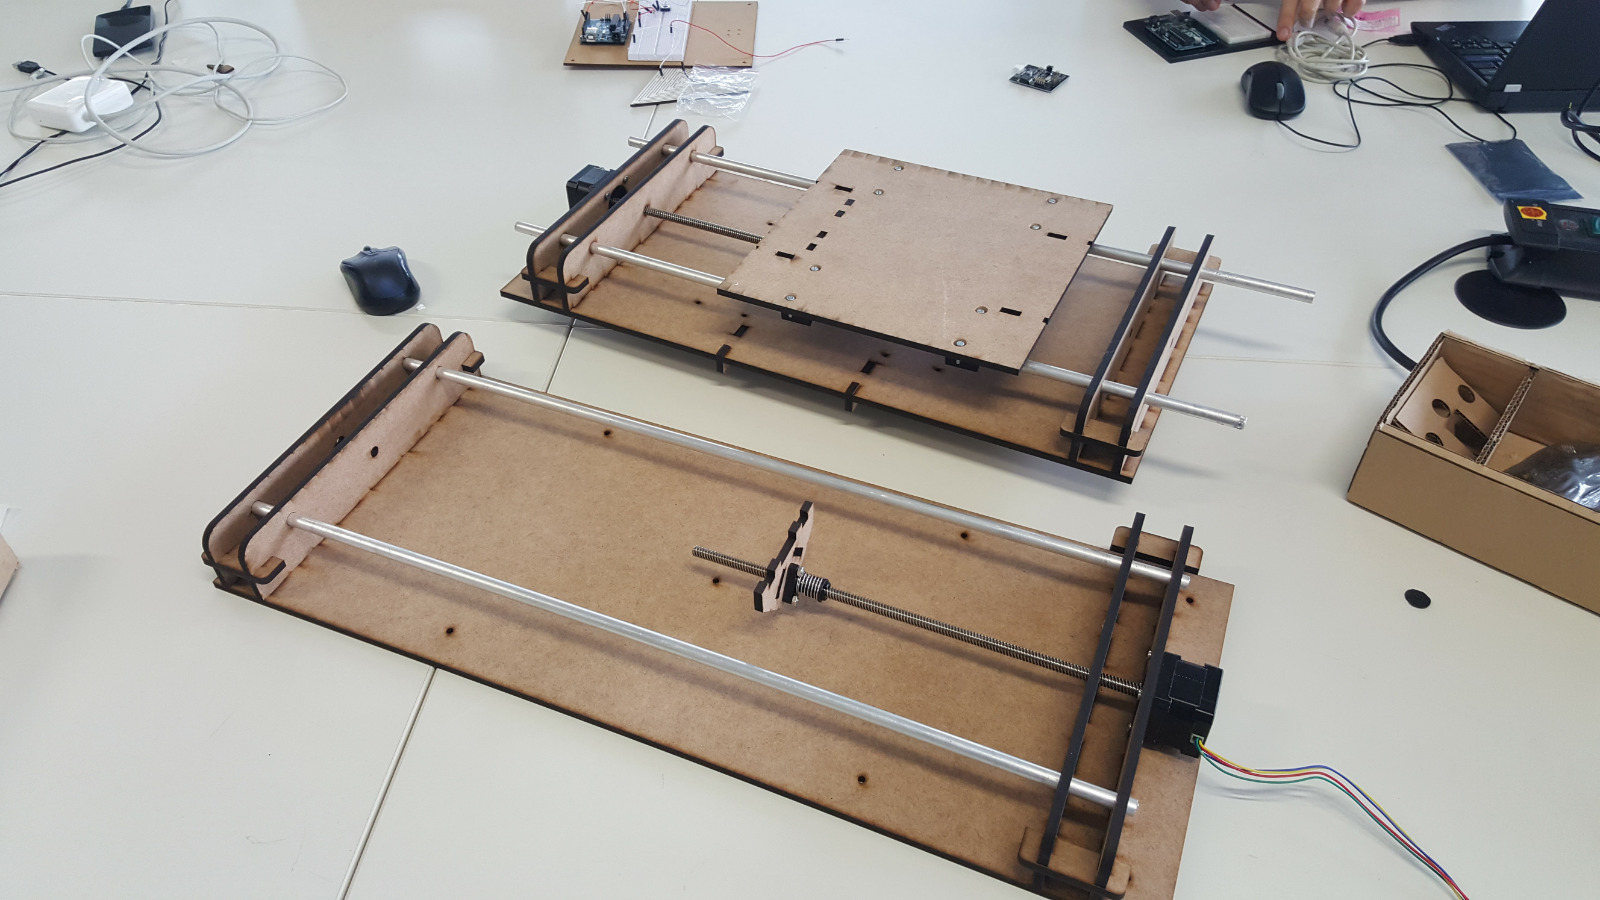 ...this is a short series about the assembly of the xy-table elements
 starting with the lower part...
 going over to the upper part..
 ...a view from the botoom side...
 the completed assembly - but upside down...
 the sketch for the sliding clip on bearings..
 ..and the ready cad file - made in Rhino
 This was first in ABS 3D printed bearing - came out really nice
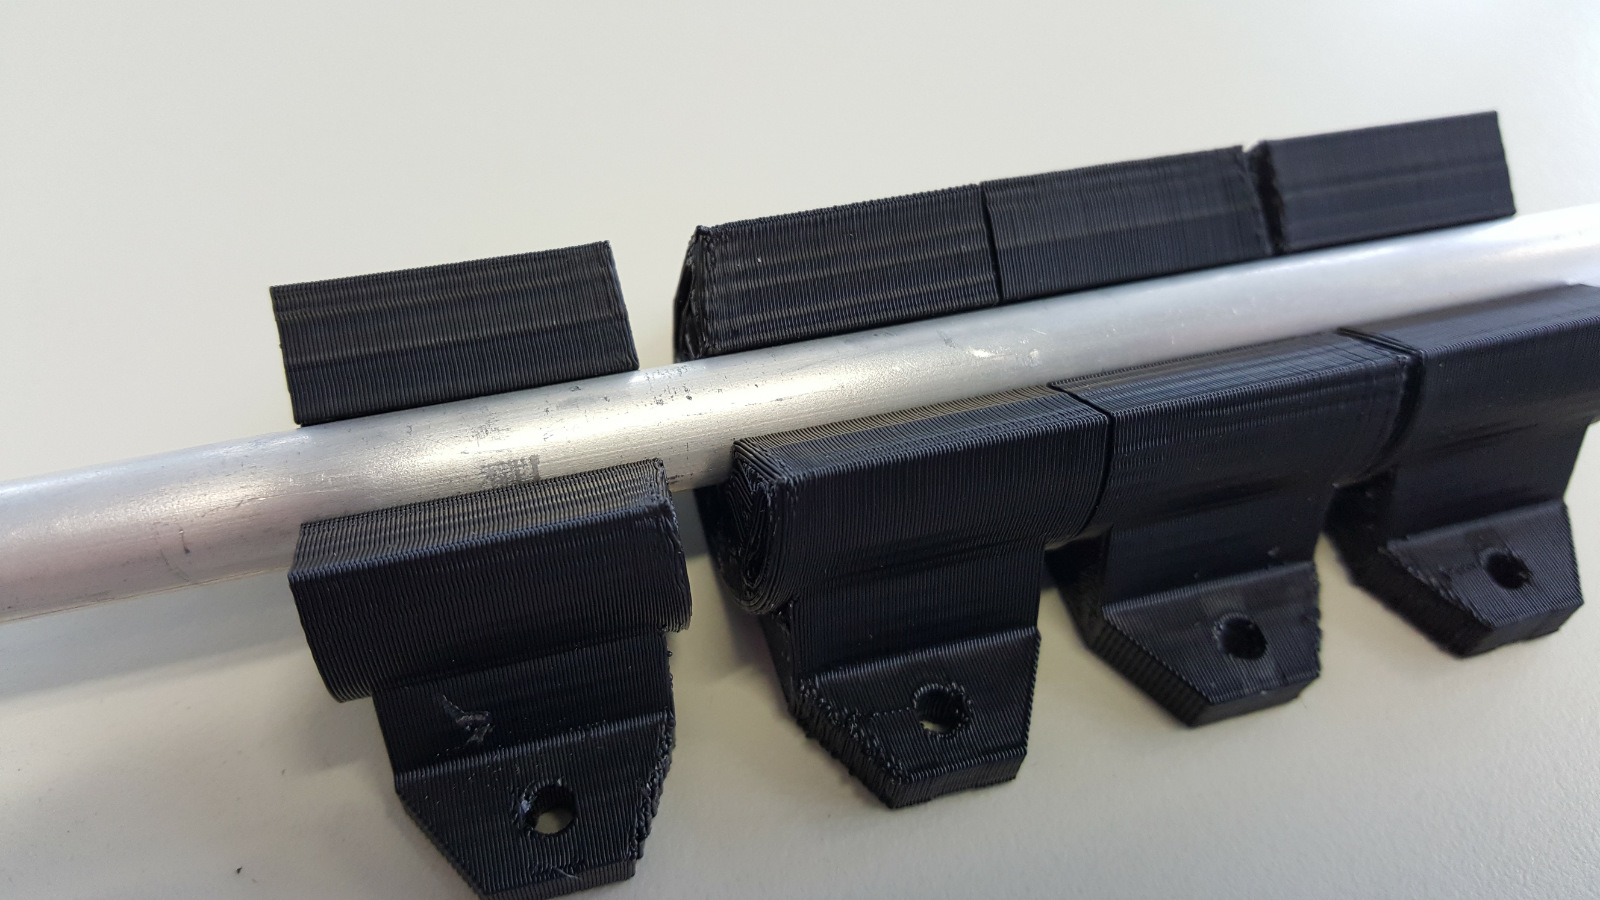 This was first in ABS 3D printed bearing - came out really nice
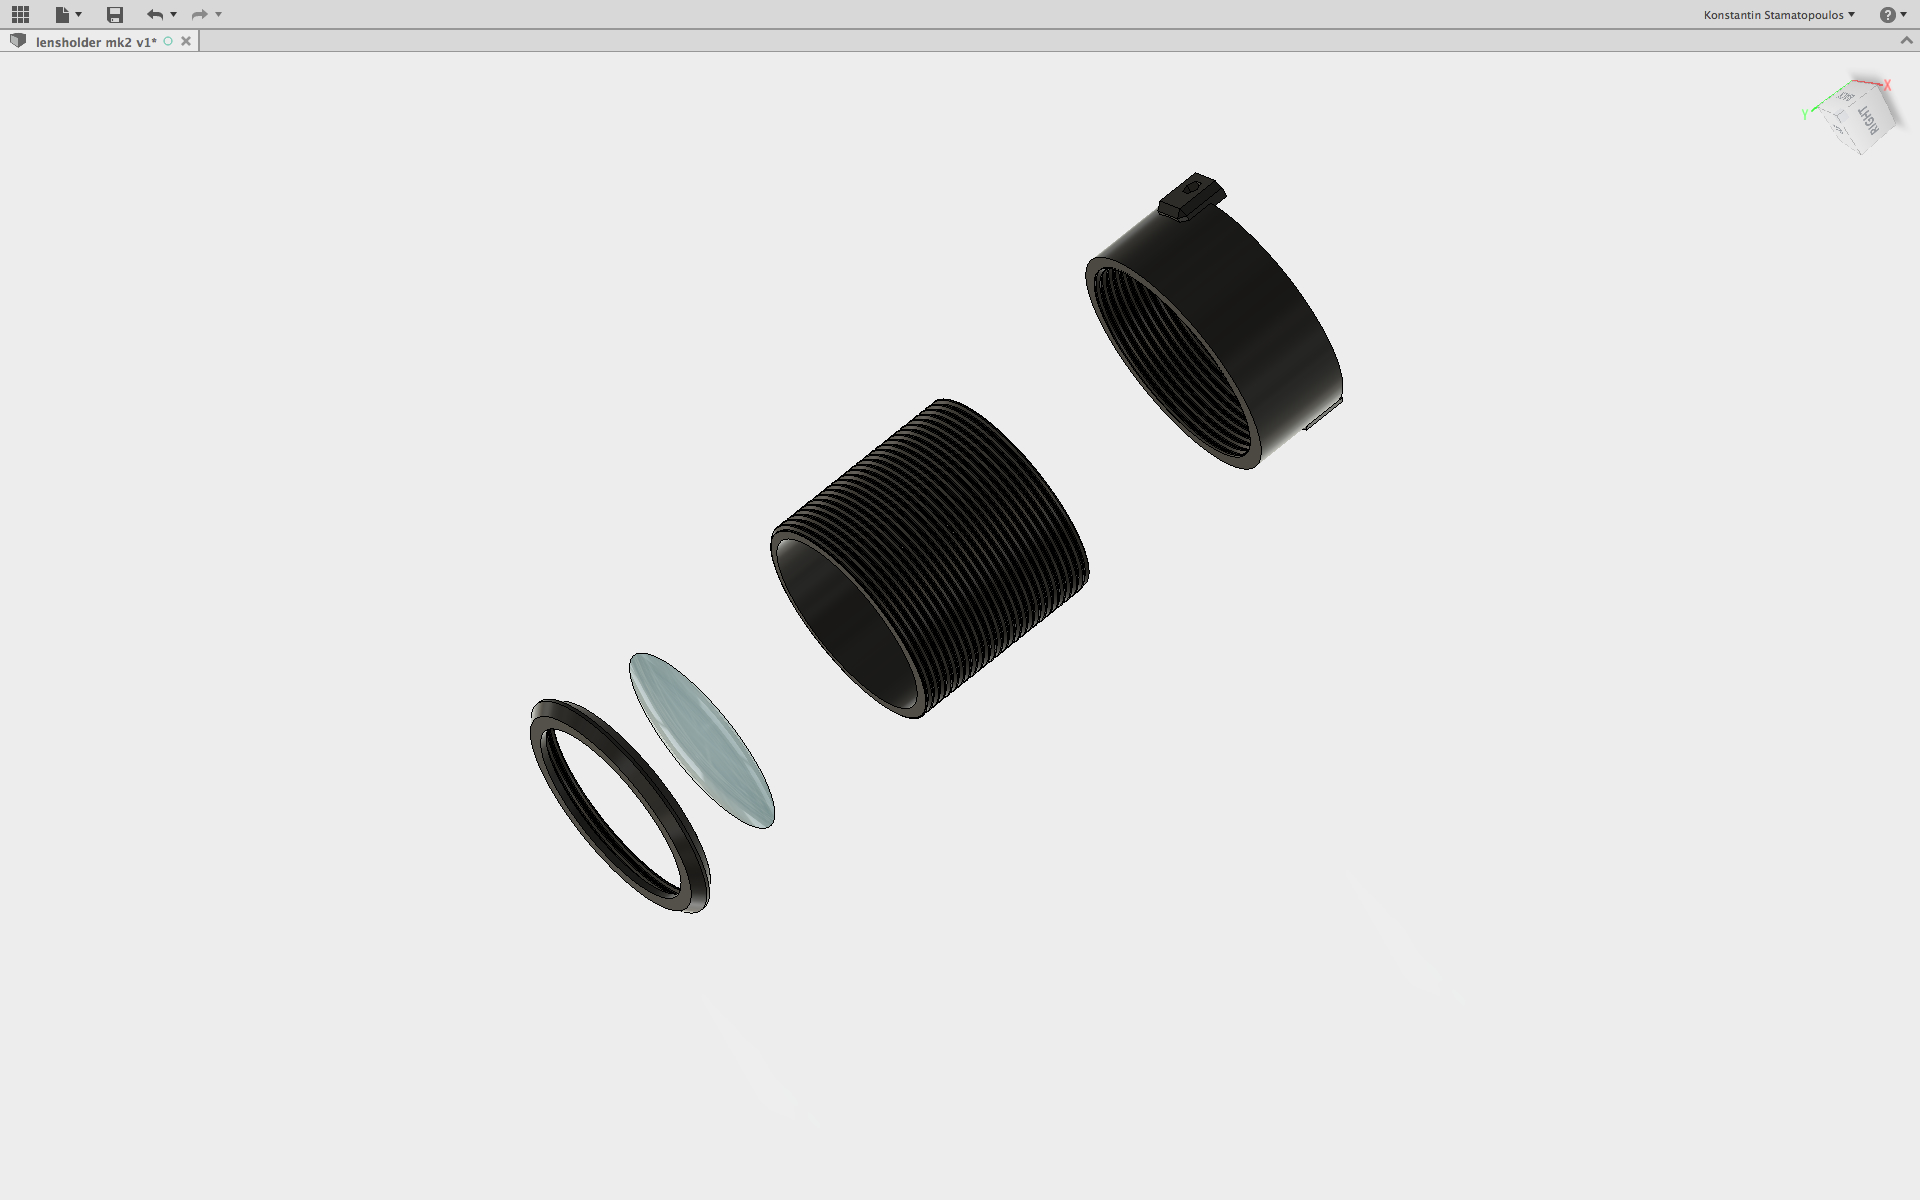 and this is my construction for the the focusing of the sun beam on the lower end...in Fusion and animated here
 ...final tests with my fellow student Cesar and our Instructor Daniele
 to prevent the turntable from wobbeling I designed a kind of adjustable pins to support the table
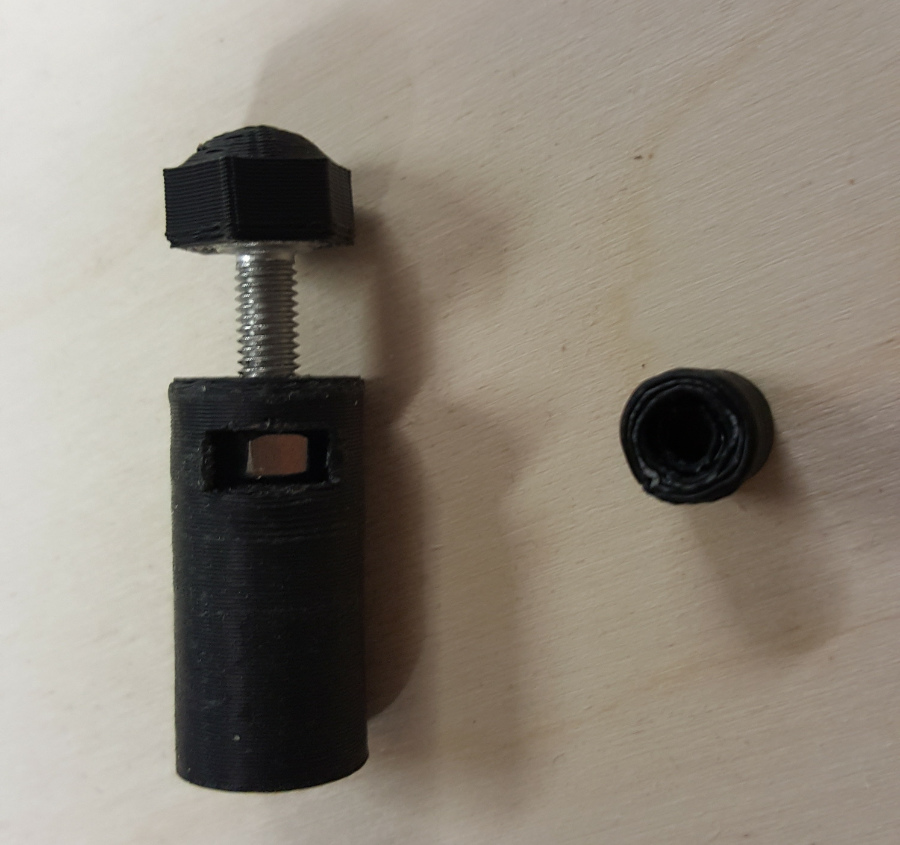 ...but we discarded this because it didn't worked as it should and we used an other design with bearings
Resumee
I have to say that i really liked this week task a lot, because I enjoyed the teamwork. We had a lot of discussions to find the right machine and how to build it. It was very productive and everybody came up with lots of ideas. Also that we sticked together at any problem that came up - and we never lost our humor - we had a lot of fun despite the view problems. So - a big thank you to all of our Fab Lab here in Kamp Lintfort!
Downloads & Resources
All the files that have been used in the group assignent are there linked for download. Here are just a few links to site with some usefull informations and those files that we finally didn't use for the final build up.

This work is licensed under a
Creative Commons
Attribution-NonCommercial-ShareAlike 4.0 International License.