#14week
composites
tasks
- - design and fabricate a 3D mold
- - produce a fiber composite part in it
- - read the material safety data sheet (MSDS) and technical data sheet (TDS) for the resins that you're using
This week scope was composites - after casting and molding - a logical step. Both skills have similar workflows but with different results. The knowledge about the processes behind them and the usage of the different materials and composites can be a critical point in a project that decides about failure or success.
Besides that, really amazing projects can be realized with those skills and even more in combination.
And again part of this week assignment relies on what we learned in previous assignments, like designing in CAD, setting up the CAM Modul and preparing the CNC machine.
I had a couple of ideas that I wanted to try out for the composite assignment, but because of the timing i decided to do a notebook stand. Besides the resin material I wanted to use a natural fibre - in this case burlap. I really like the appearence and the structure - it gives the object a kind of old industrial touch. And I think if the mold and the composite process is well done it will look amazing.
For my first design I did a sketch in Rhino and exported this as a STEP file, because I had to use the CAM modul in Fusion.I had good experience with STEP files when it becomes exporting and importing for further processing. If any changes or modifications would be necessary I could do this in Fusion. THe Fusion file is available in the download section at the end of this page.
Like in the assignment for casting & molding the steps are quite identical. So after the design was ready I had to setup the CAM modul for the 3d milling.
After the designing part comes the machining part - the cnc..
For the composites we used following Epoxy resins from Behnke
 ...for this assignment I wanted to try medium coarse burlap, because I like this industrial lookalike
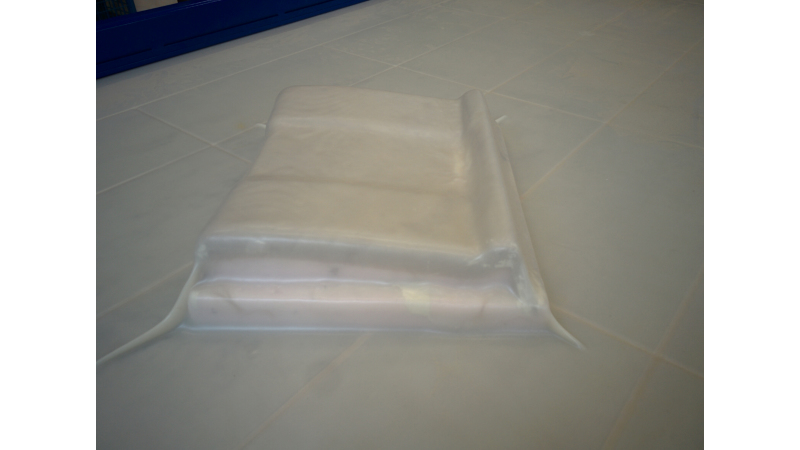
 Now the vacuum is activated, and the silicone cover wrapps around my object. That way it applies constant pressure all over the composite object
 and from the front - it is good visual that in the corner some wrinkles appeared because of the sharp edges - but it has no negative effect at all
 and after releasing teh vacuum and the lock - the composite is finished just some finishing work has to be done if wanted.
Resumee
For a firsttimer in composite making I am quite satisfied - it is not 100% but I know where the hooks are. Like using the right release agent is not enough, also the surface has to be prepared for the release agent and the following composite. Because I cound't find any information about the compability of the epoxy resin with different foam materials and plastics, I made some tests with small rests of foam with the epoxy mixture and the release agent. As these tests didn't show any negative effects like melting the foam or any weird other reactions I used the release agent directly on the foam. But it came up that the surface is so porous therfore the effect could not take place so my composite layers sticked to the mold. But on top where I used alloy film that I have covered with the release agent before I applied it to the composite surface went of easily without any problems. I used the alloy film as a "in-between-layer" to prevent that any resin could stick or get in contact to the silicone sheet of the vaccum press. The vacuum press in our FabLAb is quite a big one, it uses the power of vacuum to build pressure on object that lie on the working bed. Because of its flexible silicone sheet that is fixed on the upper frame it has the ability to cover round objects and overhangs as good as anything else. With pure mechanical pressure systems like clamps or special made forms this would be hard to achieve - even if those processes can build up more pressure power than the vacuum press. But fo rmost of the projects the vacuum press will be the ideal tool. As on the pictures shown.
The final steps now that remain are to cut my piece with the bandsaw and try to get the inner foam out/off the composite.
Safety Issues
Even when the datasheet doesn't mentions any warnings directly the label on the container itself has three chemical warn signs. These are: corrosive - health hazard - hazardous to the environment! And that means special precaution has to be taken by handling these chemicals. Fundamentally said, if working with chemicals of any kind some basic handling workflows should be considered if not mandatory: Please wear suitable protection like gloves made of nitril if possible, also protect your eyes with glasses and if you don't want to waste your clothes an overall is a good solution.
Ressources

This work is licensed under a
Creative Commons
Attribution-NonCommercial-ShareAlike 4.0 International License.


