15th Week, Networking and communications
This week we focused on networking and communications. The assignment was to design and build a wired/wireless network connecting at least two processors. I decided to link once again this week with my final project, and work on connecting my ioanduino (see week 10) via the bluetooth module HC-05 with my phone.
BLUETOOTH MODULE HC-05
A few words about my (and everybody’s) bluetooth module HC-05.( HC-05 datasheet ) 
The bluetooth uses serial communication to send and receive data. Serial communication is the process of sending data one bit at a time, sequentially, over a communication channel. This is in contrast to parallel communication, where several bits are sent as a whole, on a link with several parallel channels. A great page for understanding the basics about serial communication can be found here by sparkfun.
I am using the bluetooth module HC-05, which is a wireless Bluetooth Serial Transceiver Module, designed for transparent wireless serial connection setup. It can be set to be either Master or Slave, and it uses 3.3V signal levels, but its Voltage can operate with 5V. The module has two modes of operation, Command Mode where we can send AT commands to it and change its settings, and Data Mode where it transmits and receives data to another bluetooth module.

The characteristics of the module are very well explained with detail in these pages:
BlueTooth-HC05-HC06-Modules-How-To
Serial Port Bluetooth Module (Master/Slave) : HC-05
For entering Command mode and using the AT commands, you will find good information in these pages:
AT Command Mode of HC-05 and HC-06 Bluetooth Module
Arduino with HC-05 (ZS-040) Bluetooth module – AT MODE
How to set AT Command mode for HC-05 Bluetooth module arduino (YouTube)
I started by connecting the bluetooth module to the Arduino Uno, to make sure I understand how it works. Data is received or transmitted with an arduino using the Serial interface (Serial.print() and Serial.read()) . The application I am using on the Android phone is Arduino bluetooth control. (Sadly the bluetooth HC-05 doesn’t connect with iPhone, or any other iOS). Here’s what the arduino code looks like for blinking a LED.

The connection is simple:
VCC--> VCC
GND--> GND
RX-->TX
TX-->RX*
*In fact arduino logic ports use 5V signals, while the bluetooth module uses 3.3V signals, so a voltage divider is needed on the TX(module)-RX(arduino), otherwise the board can be damaged. Here's diagram showing the connection.

Tips:
-You need to remove the RX and TX cables when you’re uploading the sketch to your Arduino.
-If the HC-05 Bluetooth Module asks for a password, It’s’1234′.
Download code for Arduino Uno here
And this is how it works.
Arduino Uno + bluetooth module HC-05 from Ioanna Mitropoulou on Vimeo.
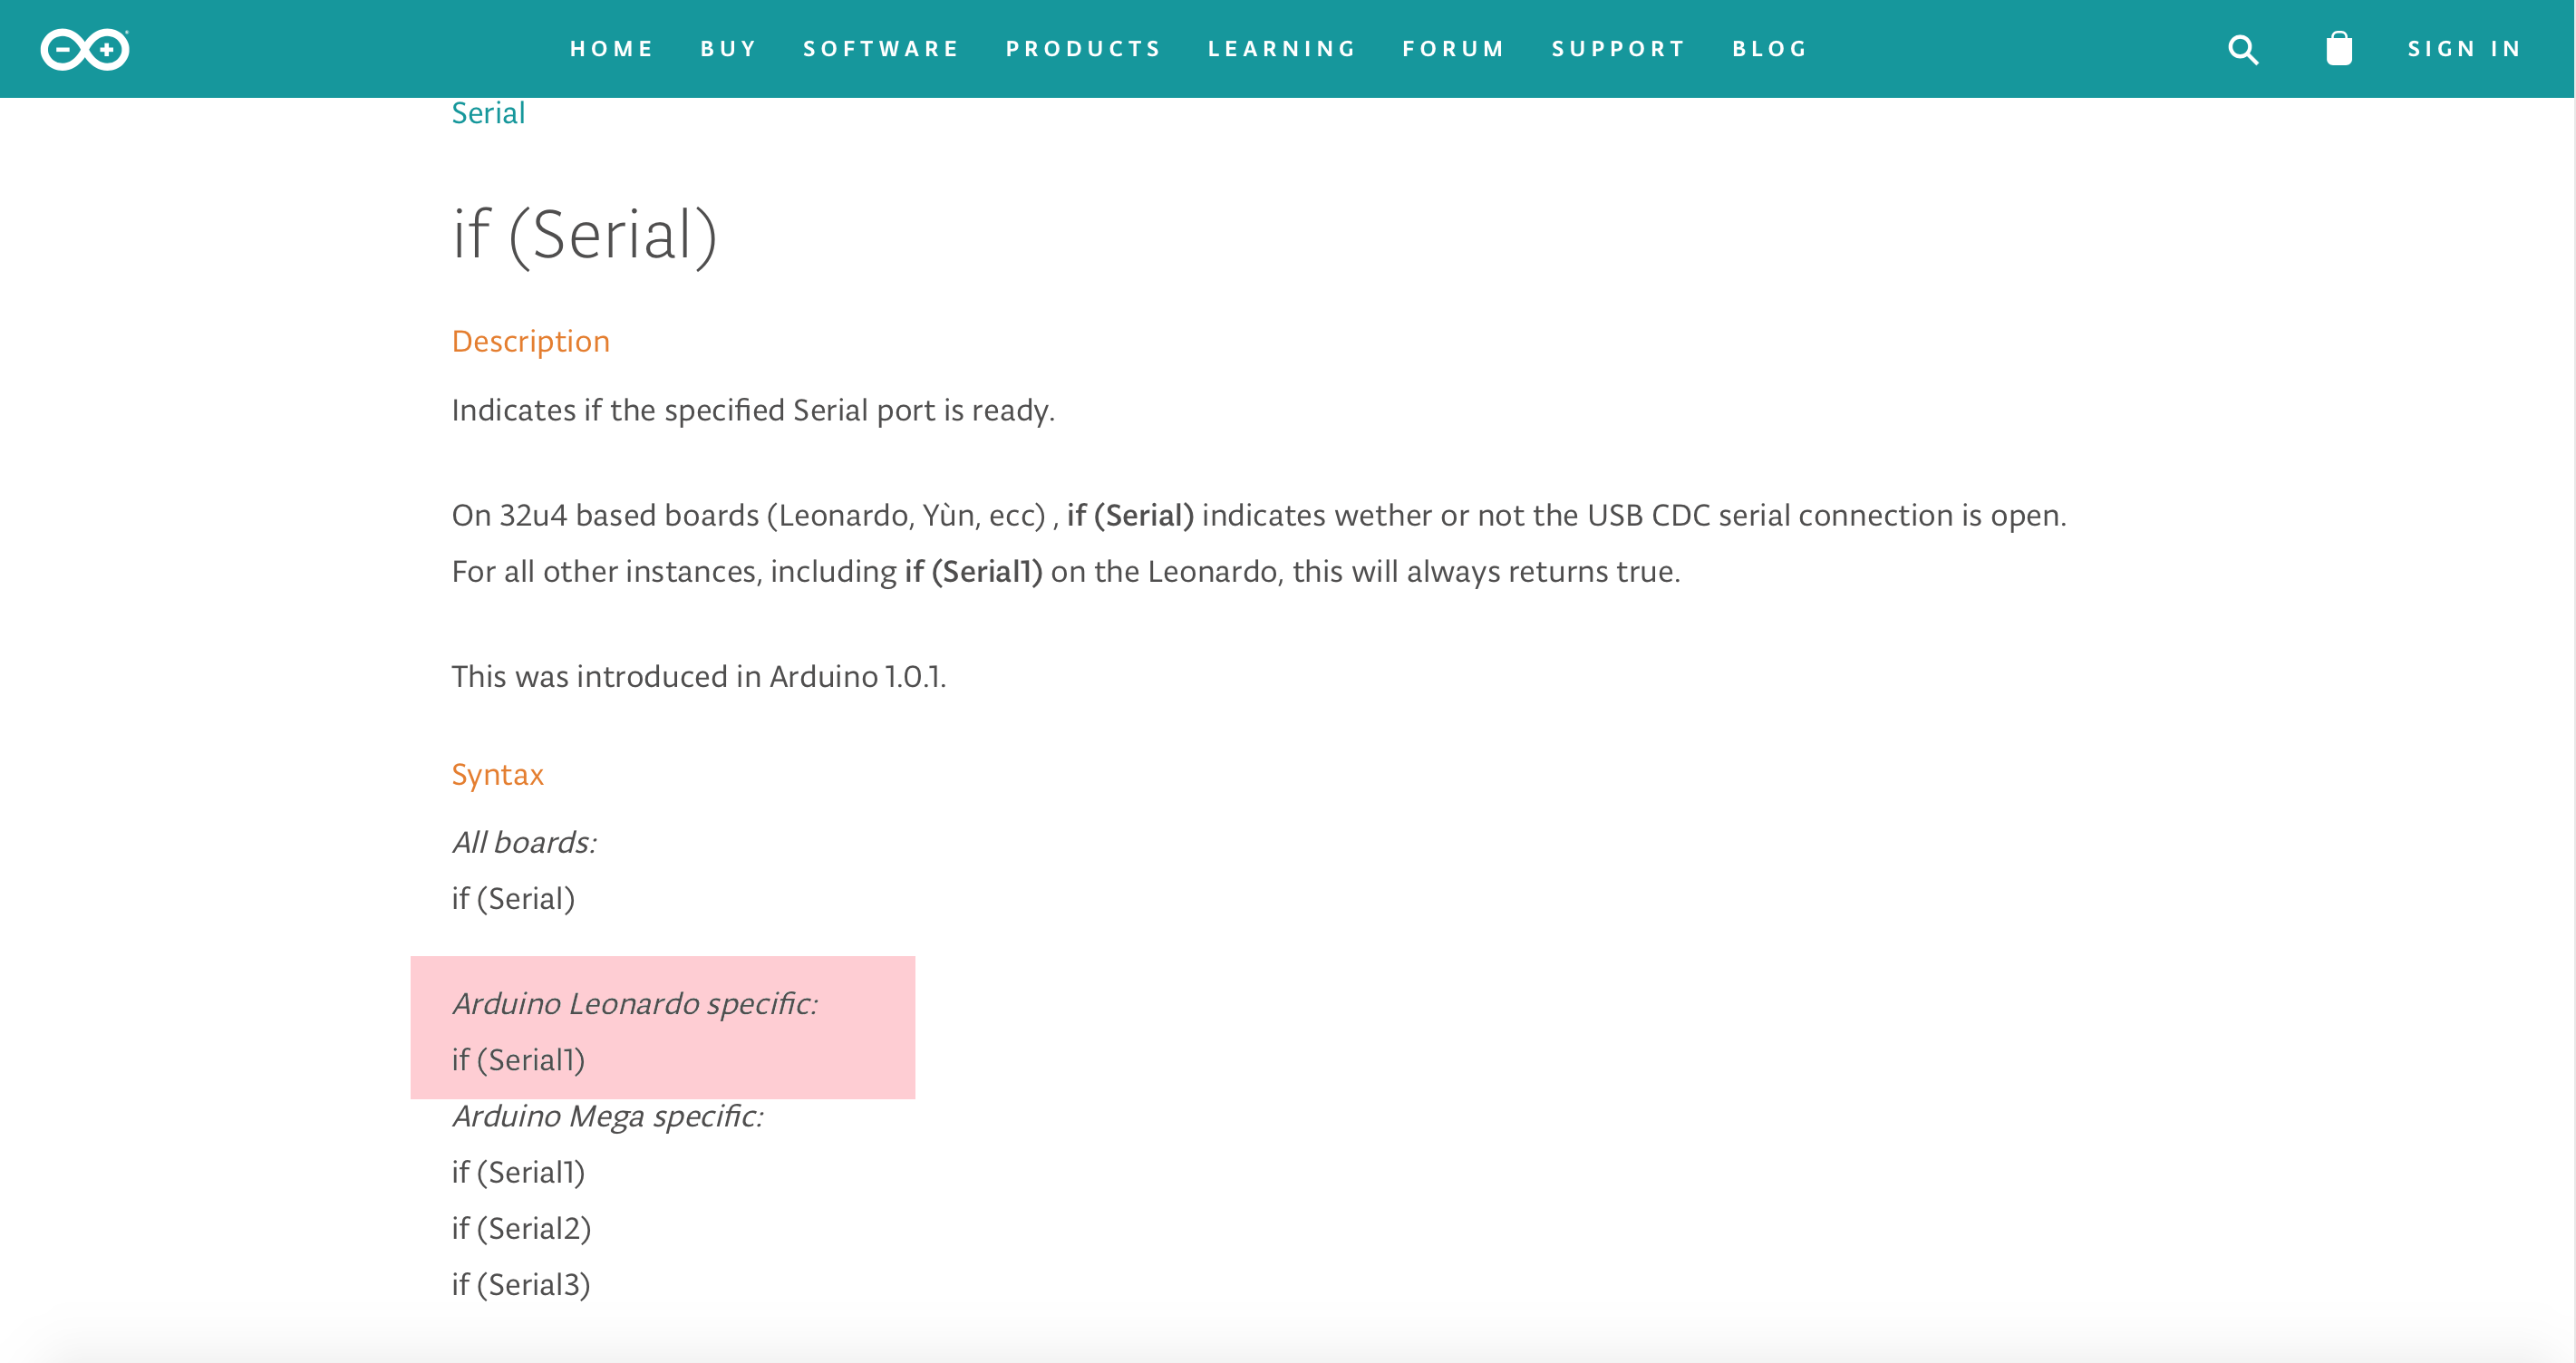
Naturally then I tried to do the same, but it wouldn’t work. After many frustrated hours checking all the connection and searching online forums, I discovered the problem in this page Getting Started with the Arduino Leonardo, where it explains that Arduino Leonardo uses a different type of serial communication.
"On the Leonardo, Leonardo ETH and Micro, the main Serial class refers to the virtual serial driver on the board for connection to your computer over USB. It's not connected to the physical pins 0 and 1 as it is on the Uno and earlier boards. To use the hardware serial port (pins 0 and 1, RX and TX), use Serial1."
Then visiting the If(Serial) reference page, i saw that indeed…
So the code for the ioanduino had to look like that:
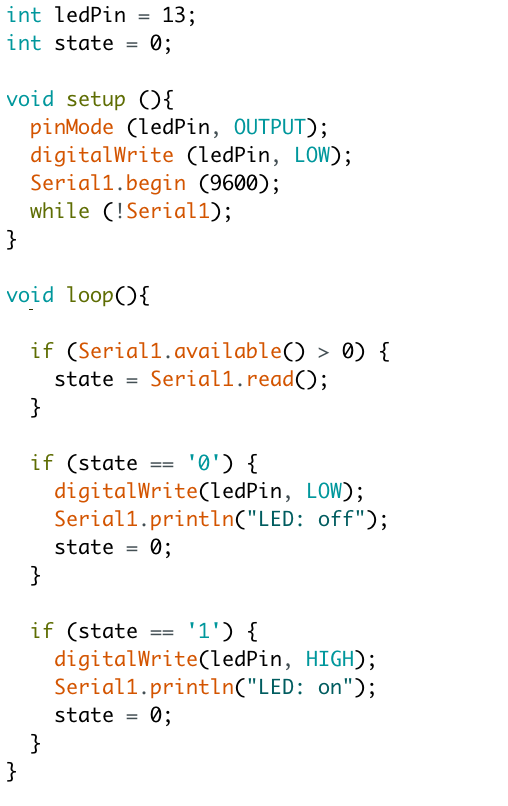
And here’s how it works blinking a LED.
ioanduino + bluetooth module HC-05 from Ioanna Mitropoulou on Vimeo.
Download code for ioanduino here
Spoiler Alert!:
In the next week I made an application for the phone so that I can control the two servos of my final project.