14th Week, Composites
This week we focused on composites, that are made by combining two or more materials with different properties so that the whole combines the structural properties of the . The assignment of the week was first to read the material safety data sheet (MSDS) and the technical data sheet (TDS) for the resins that we are using in order to be aware of what the instructions say and what the dangers are, and then to design and fabricate a 3D mold and produce a fiber composite part in it.
Epoxy resins, also known as polyepoxides, are a class of reactive polymers which contain epoxide groups. In general, uncured epoxy resins have only poor mechanical, chemical and heat resistance properties. However, good properties are obtained by reacting the linear epoxy resin with suitable curatives to form three-dimensional structures. This process is commonly referred to as curing process.Curing of epoxy resins is an exothermic reaction and in some cases produces sufficient heat to cause thermal degradation if not controlled. This takes around 12 hours.
Curing may be achieved by reacting an epoxy with curatives or hardeners. In principle, any molecule containing a reactive hydrogen may react with the epoxide groups of the epoxy resin. Common classes of hardeners for epoxy resins include amines, acids, acid anhydrides, phenols, alcohols and thiols.
Details about the resin we used in the Fablab can be found here: Entropy resins.
I started by reading read the material safety data sheet (MSDS) and the technical data sheet (TDS) to get familiar with the epoxy.
The information on those documents is very important, as it explains all the necessary information one needs to know before using the epoxy. In those documents you can find the properties of the epoxy, possible hazards, information on the ingredients, first aid measures in case of contact with the epoxy such as inhaling, eye or skin contact, and information about its physical and chemical properties. Personal precautions, protective equipment and emergency procedures are described with detail so that if something goes wrong during the process, the user knows how to deal with it. In those documents, you can also find out under which conditions of storage and use it reacts, and how it should be transported and disposed after its use.
I decided to experiment with different curvatures, and use textiles with holes to see if I can make semi-transparent surfaces with good structural properties, that allow for light to penetrate them in interesting ways.
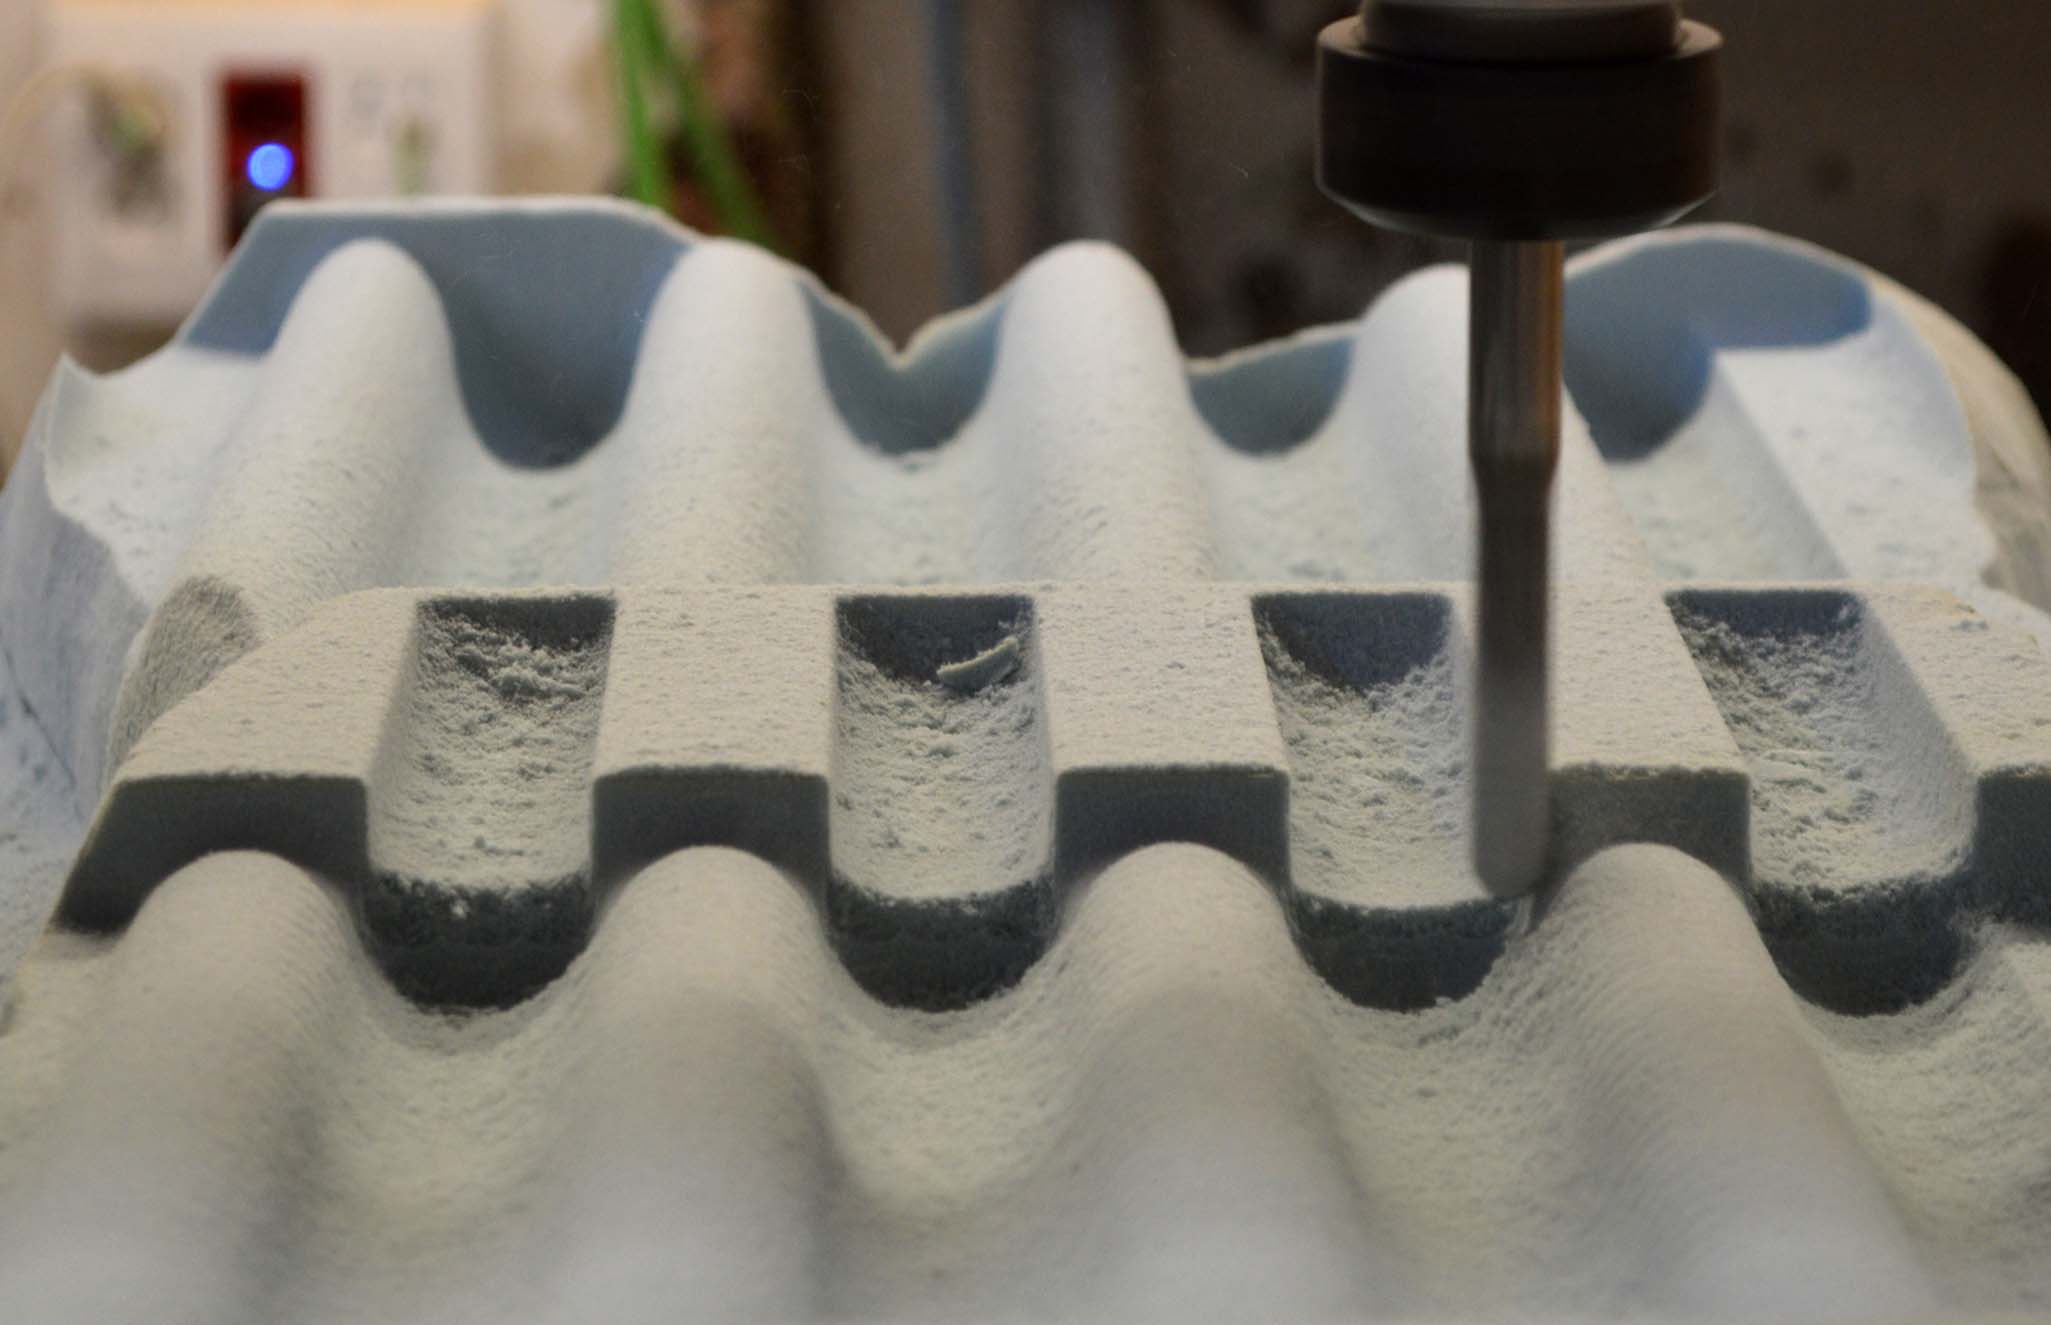
Milling the mold
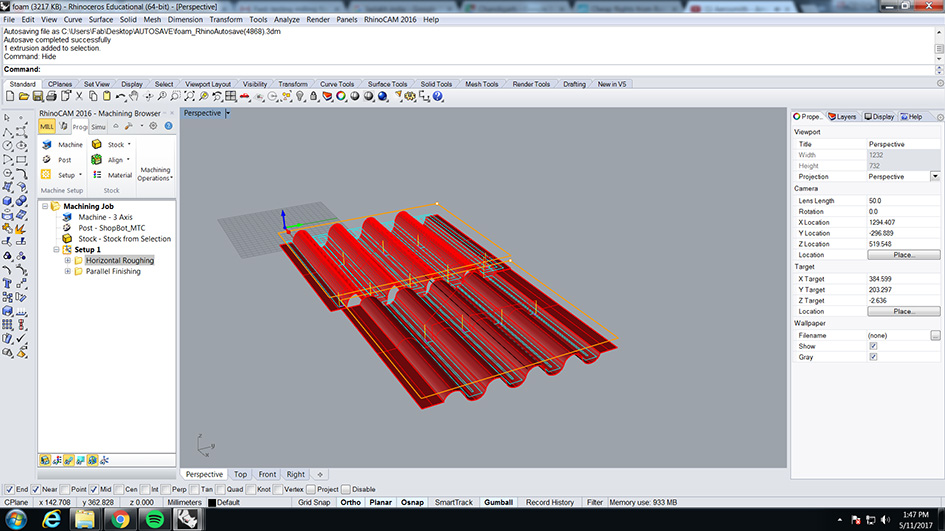
I started by designing my pattern on rhino. I decided to make two patterns with different curvatures in order to test which one works better. I then used the RhinoCam to calculate the tool-path.
Rough Cutting
Parallel finishing
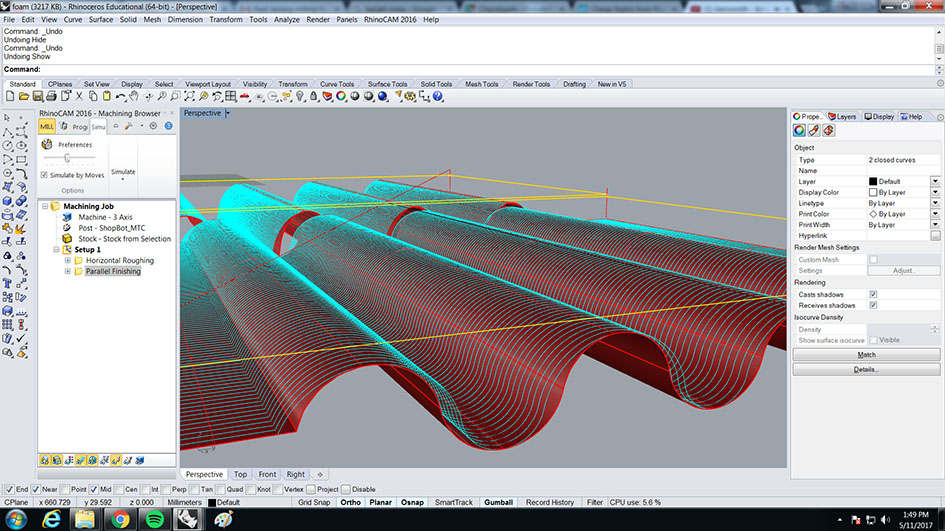
Simulation

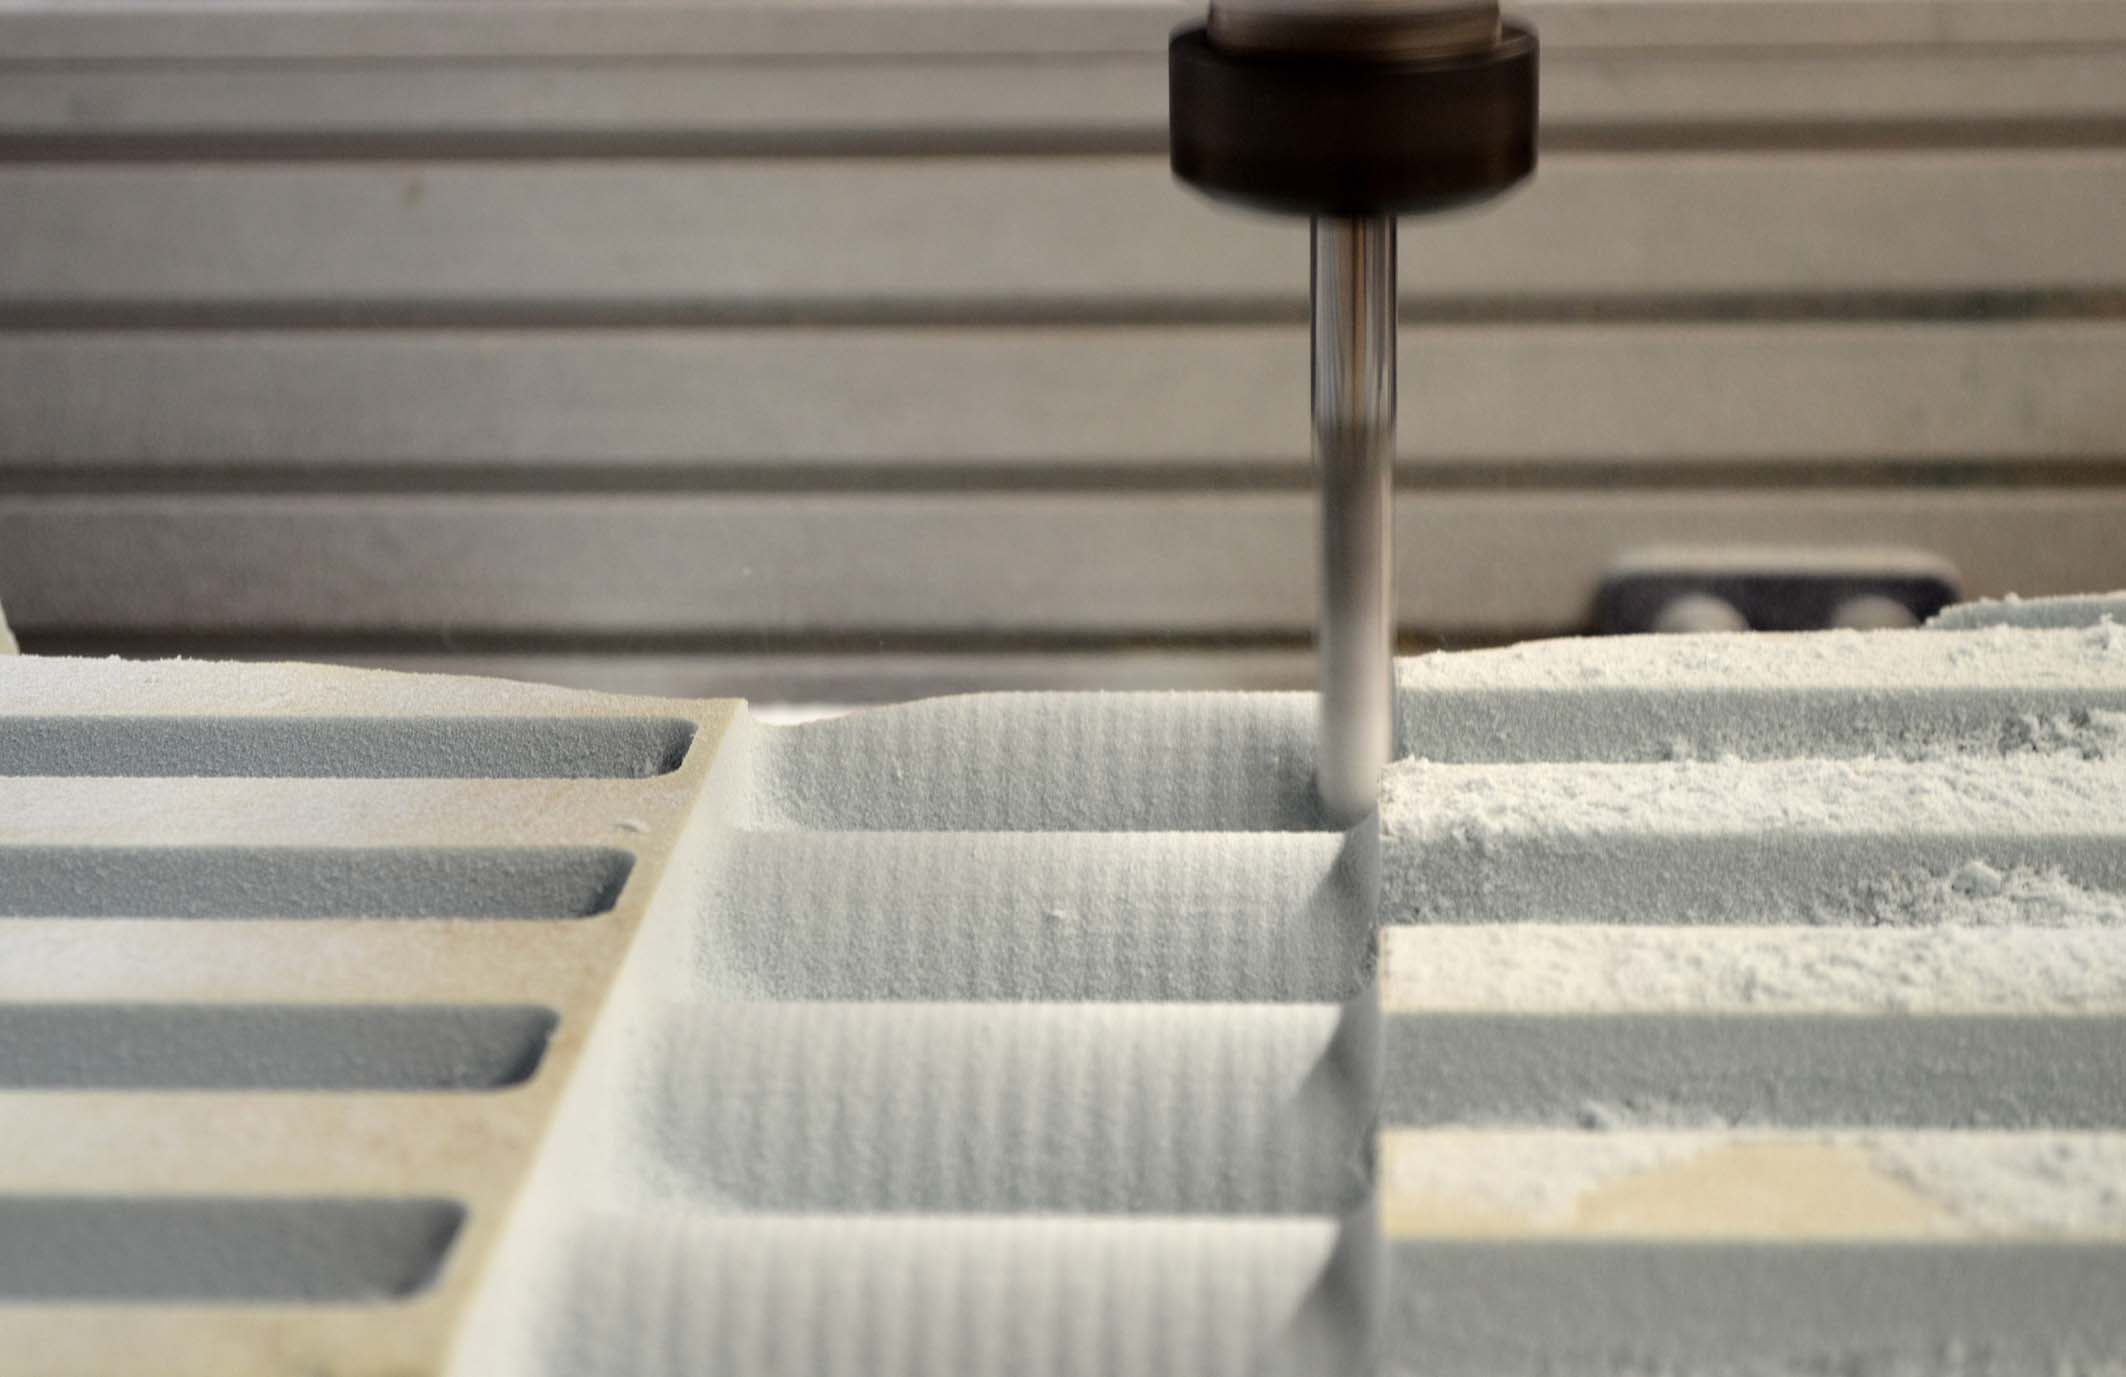
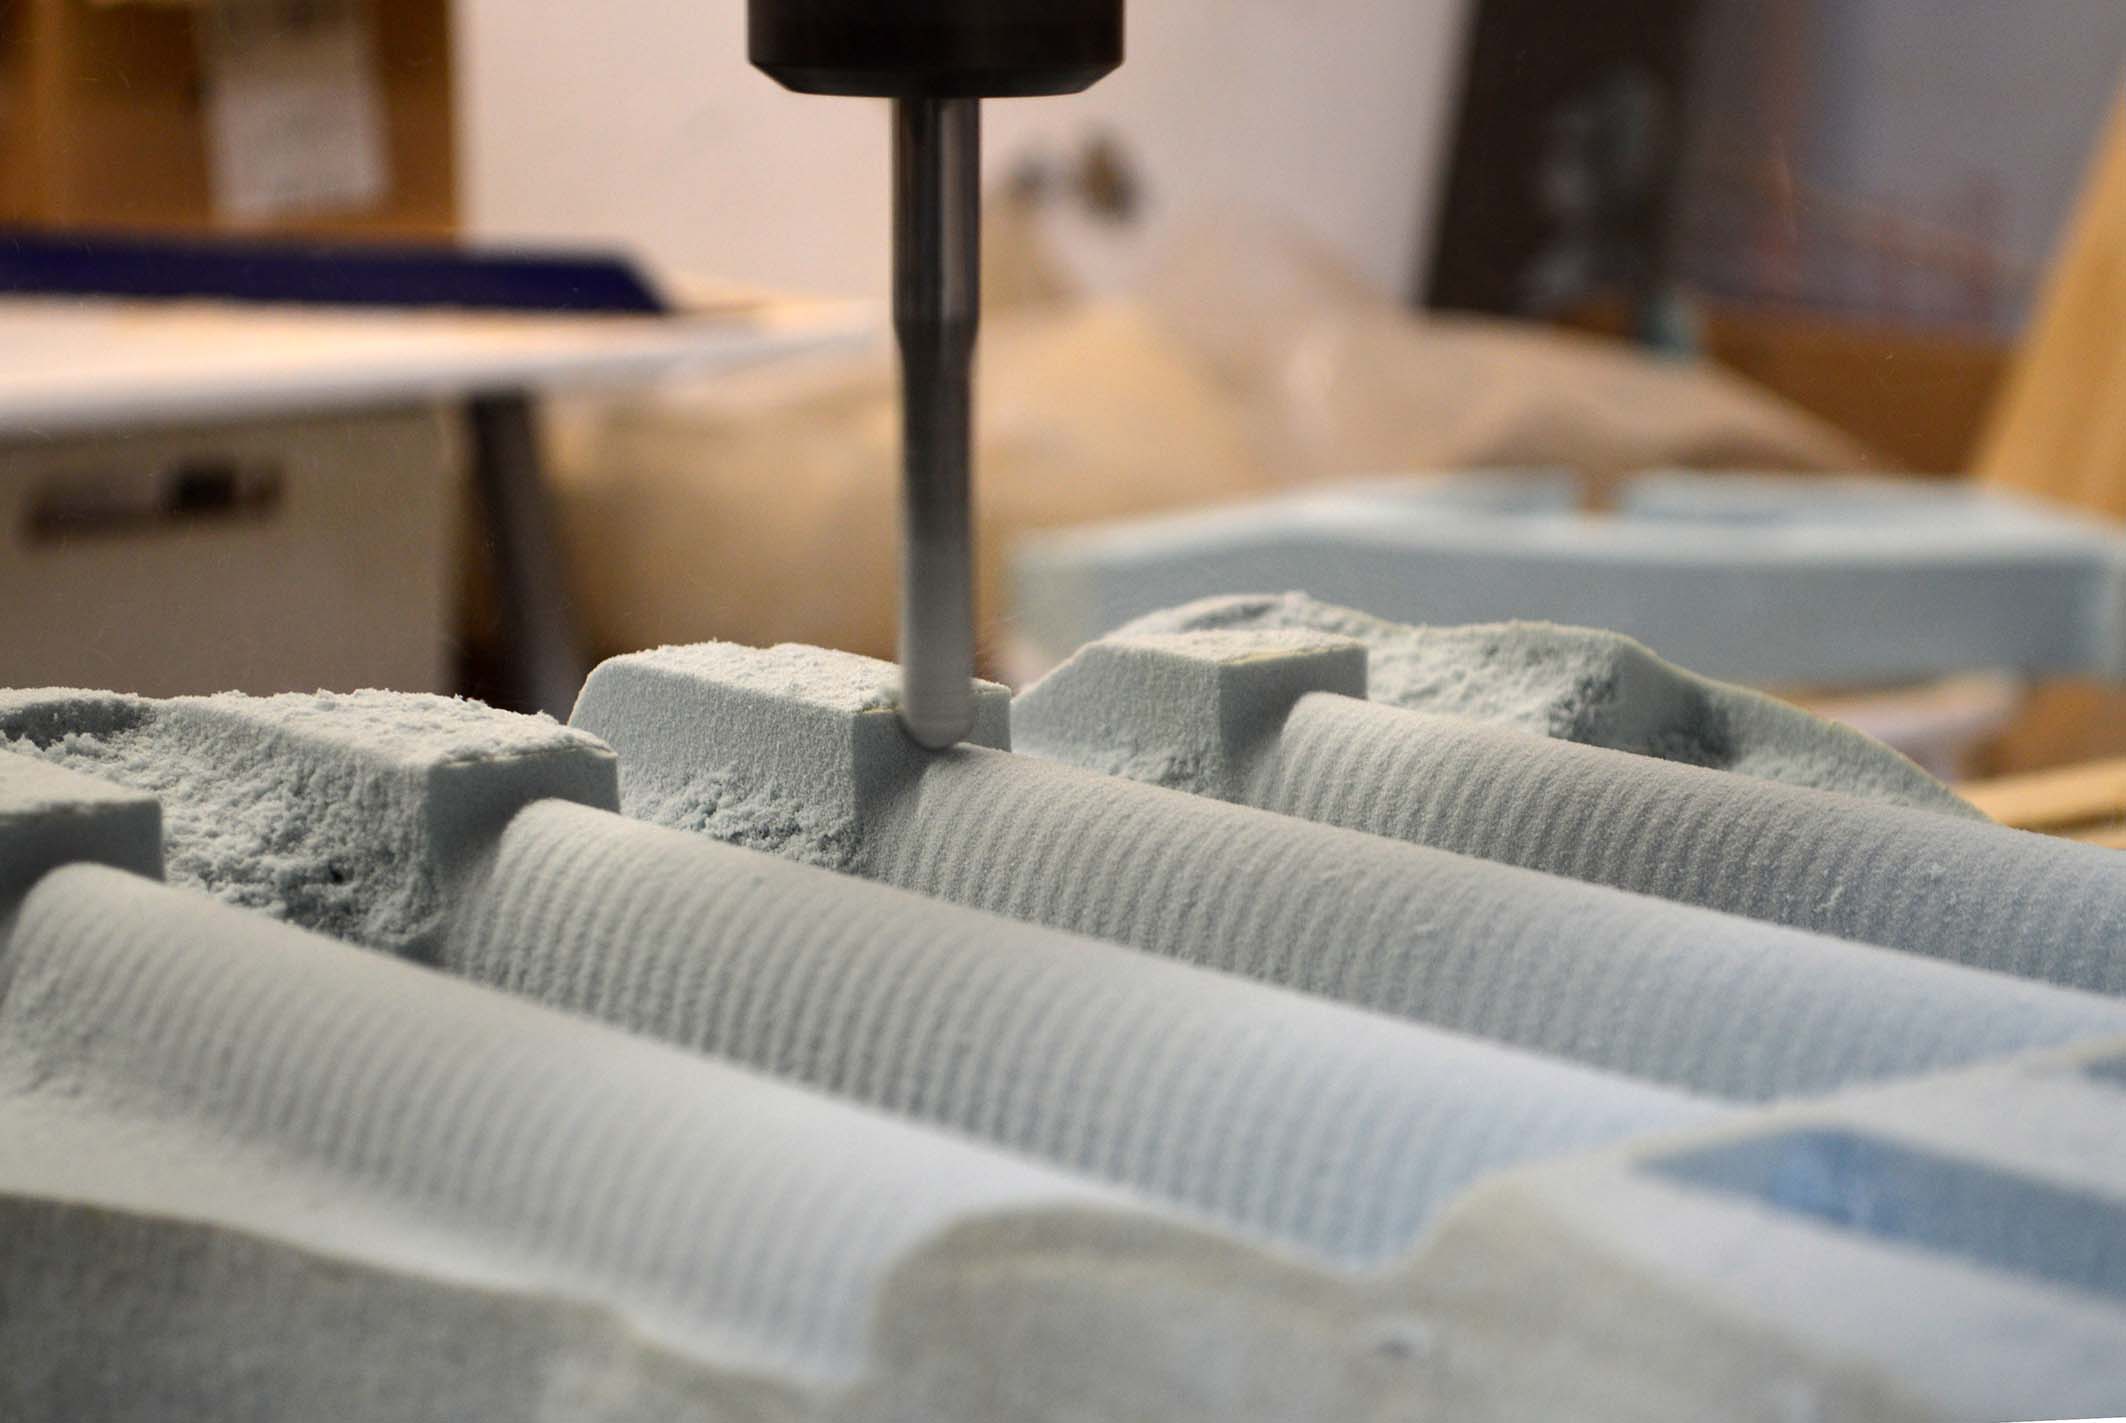
The foam was attached on the sacrificial board of the CNC using some 3mm plywood that was screwed down so as to constraint the foam. For the mold I used a scrap of high-density foam which I found in the lab. I milled it on the Shopbot using a 12mm ball mill with two flutes.
Creating the composite
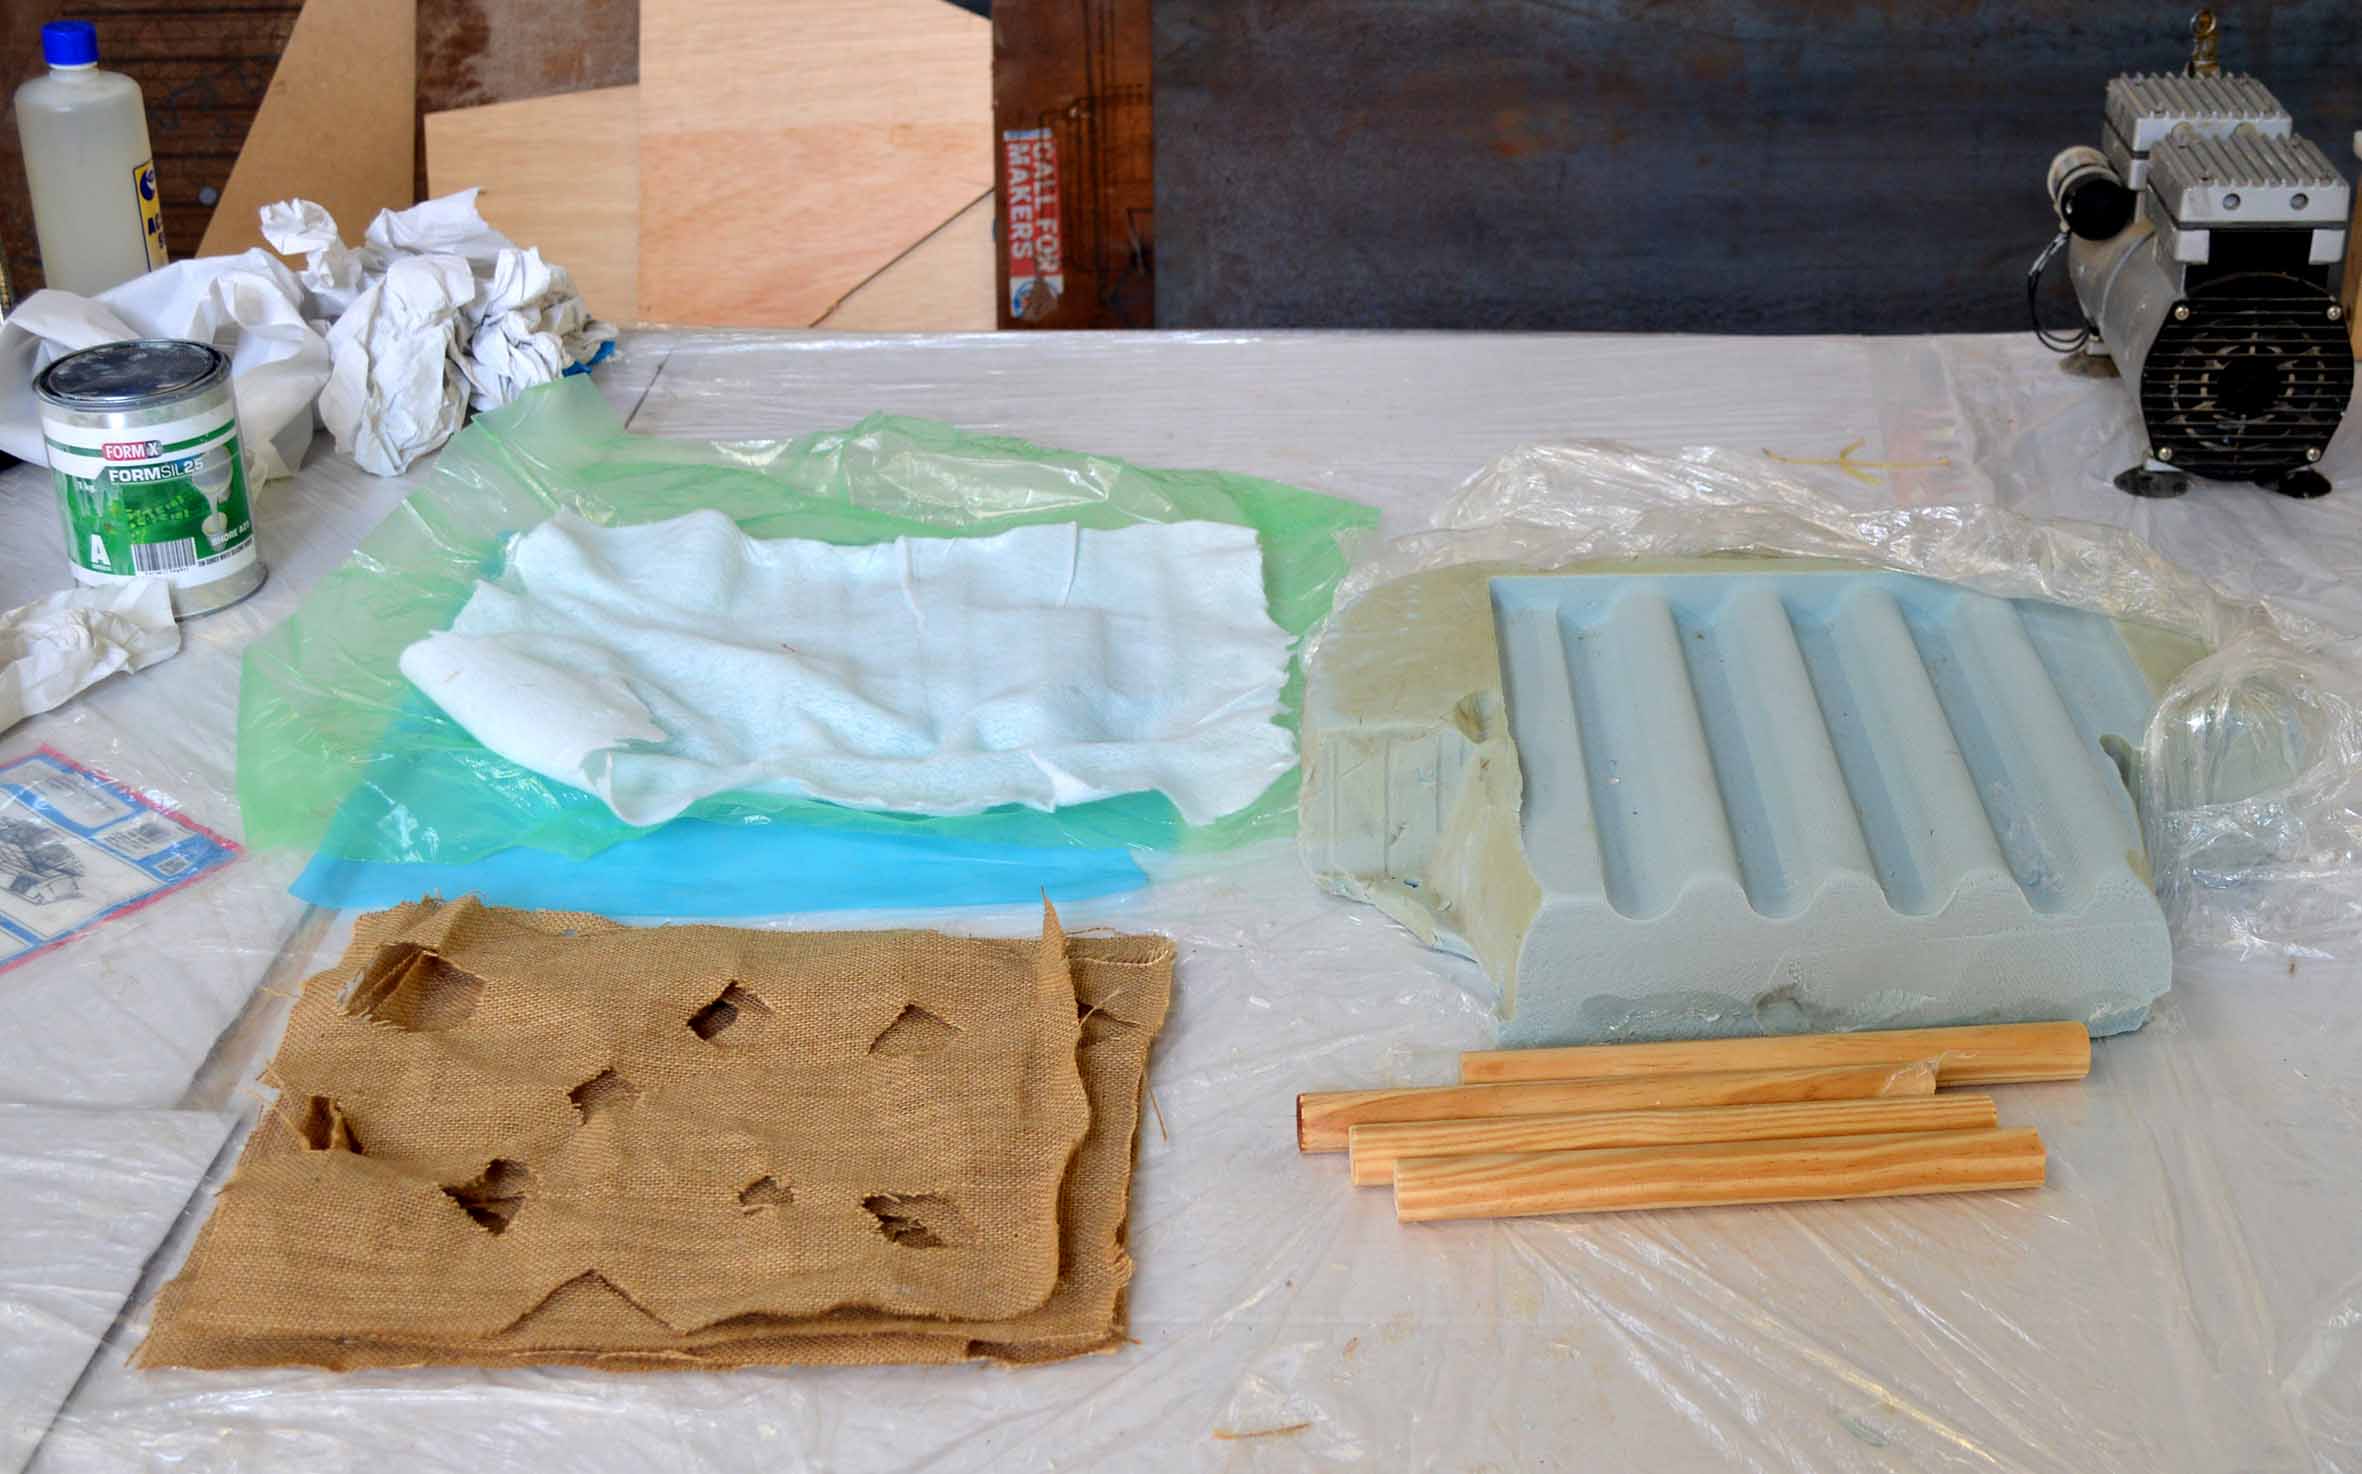
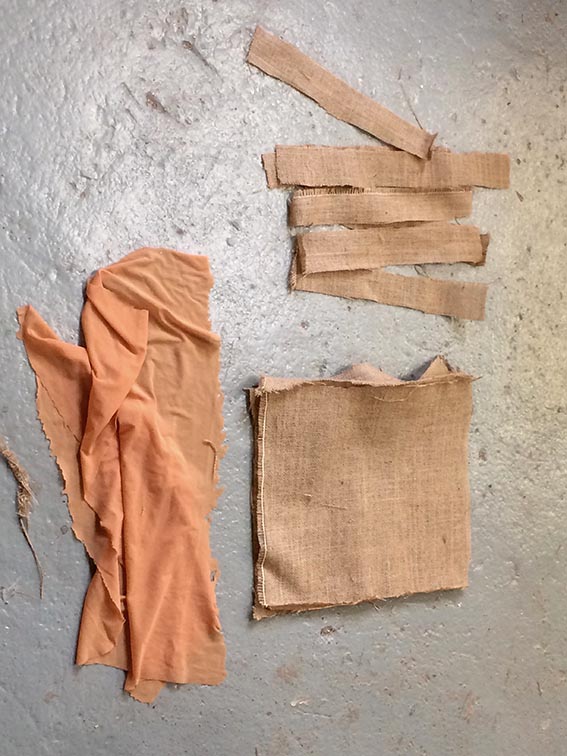
The process of putting together the composite is a very interesting one, but if you are not well prepared it becomes significantly difficult, and might not end up in a very pleasant way. The first thing is to cover your space with a plastic because otherwise you will create a mess. After this is done, you need to find all the materials you will use, cut the in the correct size and pile them next to your working space in the correct order you are planning to use them. Here are the materials most usually used in this process.
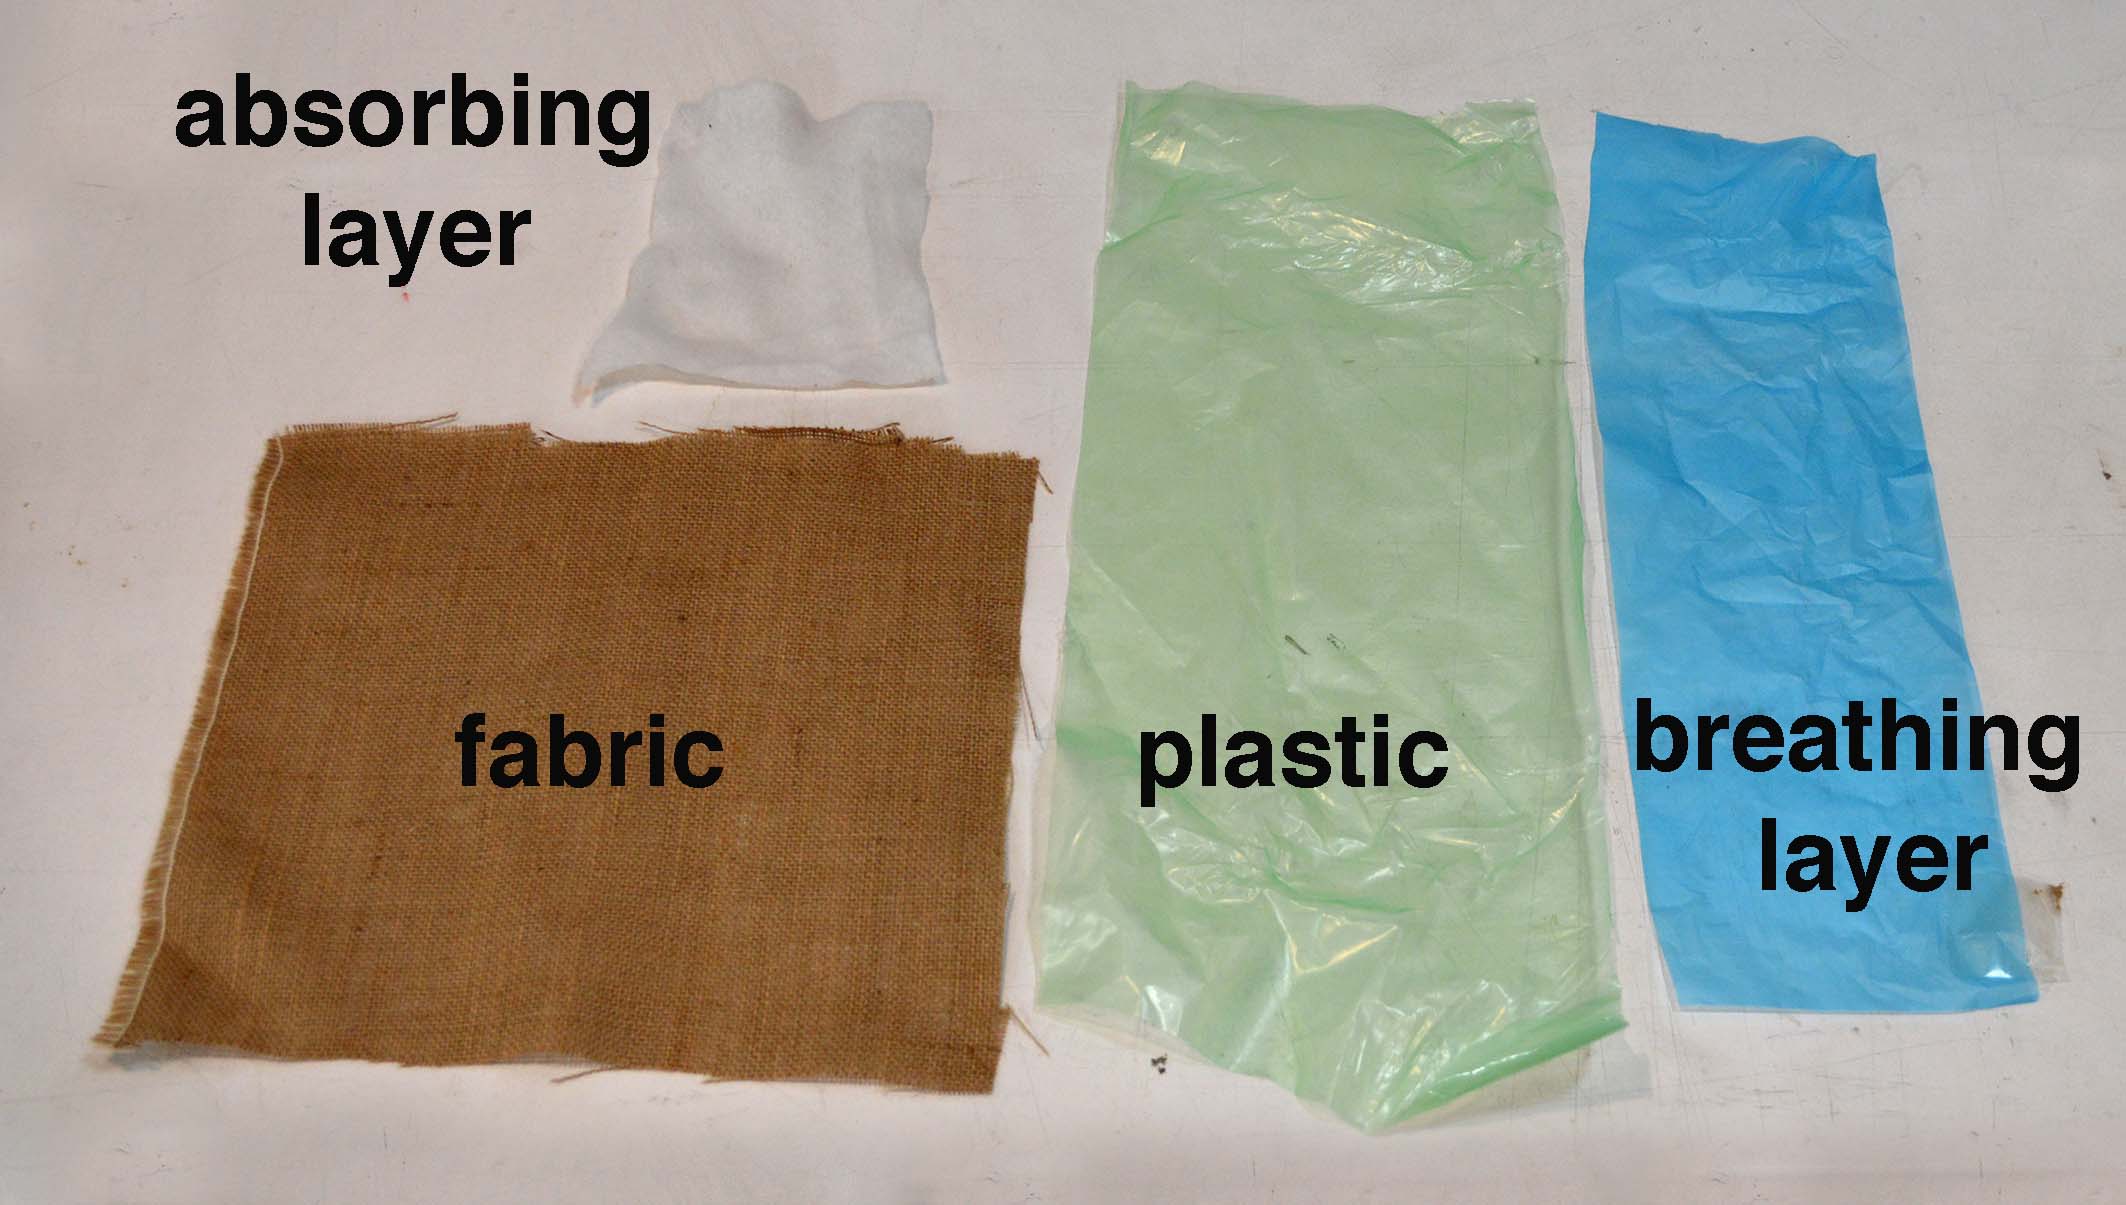
The order goes as such.
First you need to have the mold. Check!. It should be covered with a plastic (like the green one, but you can also use a cheaper transparent plastic, but this might stick to the composite). On top of that you put your layers of fabric that have been wet with the epoxy. To create the epoxy mix you need to mix the epoxy with the hardener, the ratio is 2:1 (2:1 resin/hardener ratio). You can experiment with the number of layers depending on the structural properties and the thickness you want to achieve. Next comes the breathing layer (a blue plastic with small holes in it), and on top of it the absorbing layer (a white thick absorbing sheet). Finally the whole thing has to be covered in plastic so that no epoxy leaks, and it should be put in a vacuum press for around 12 hours.
In the vaccuum
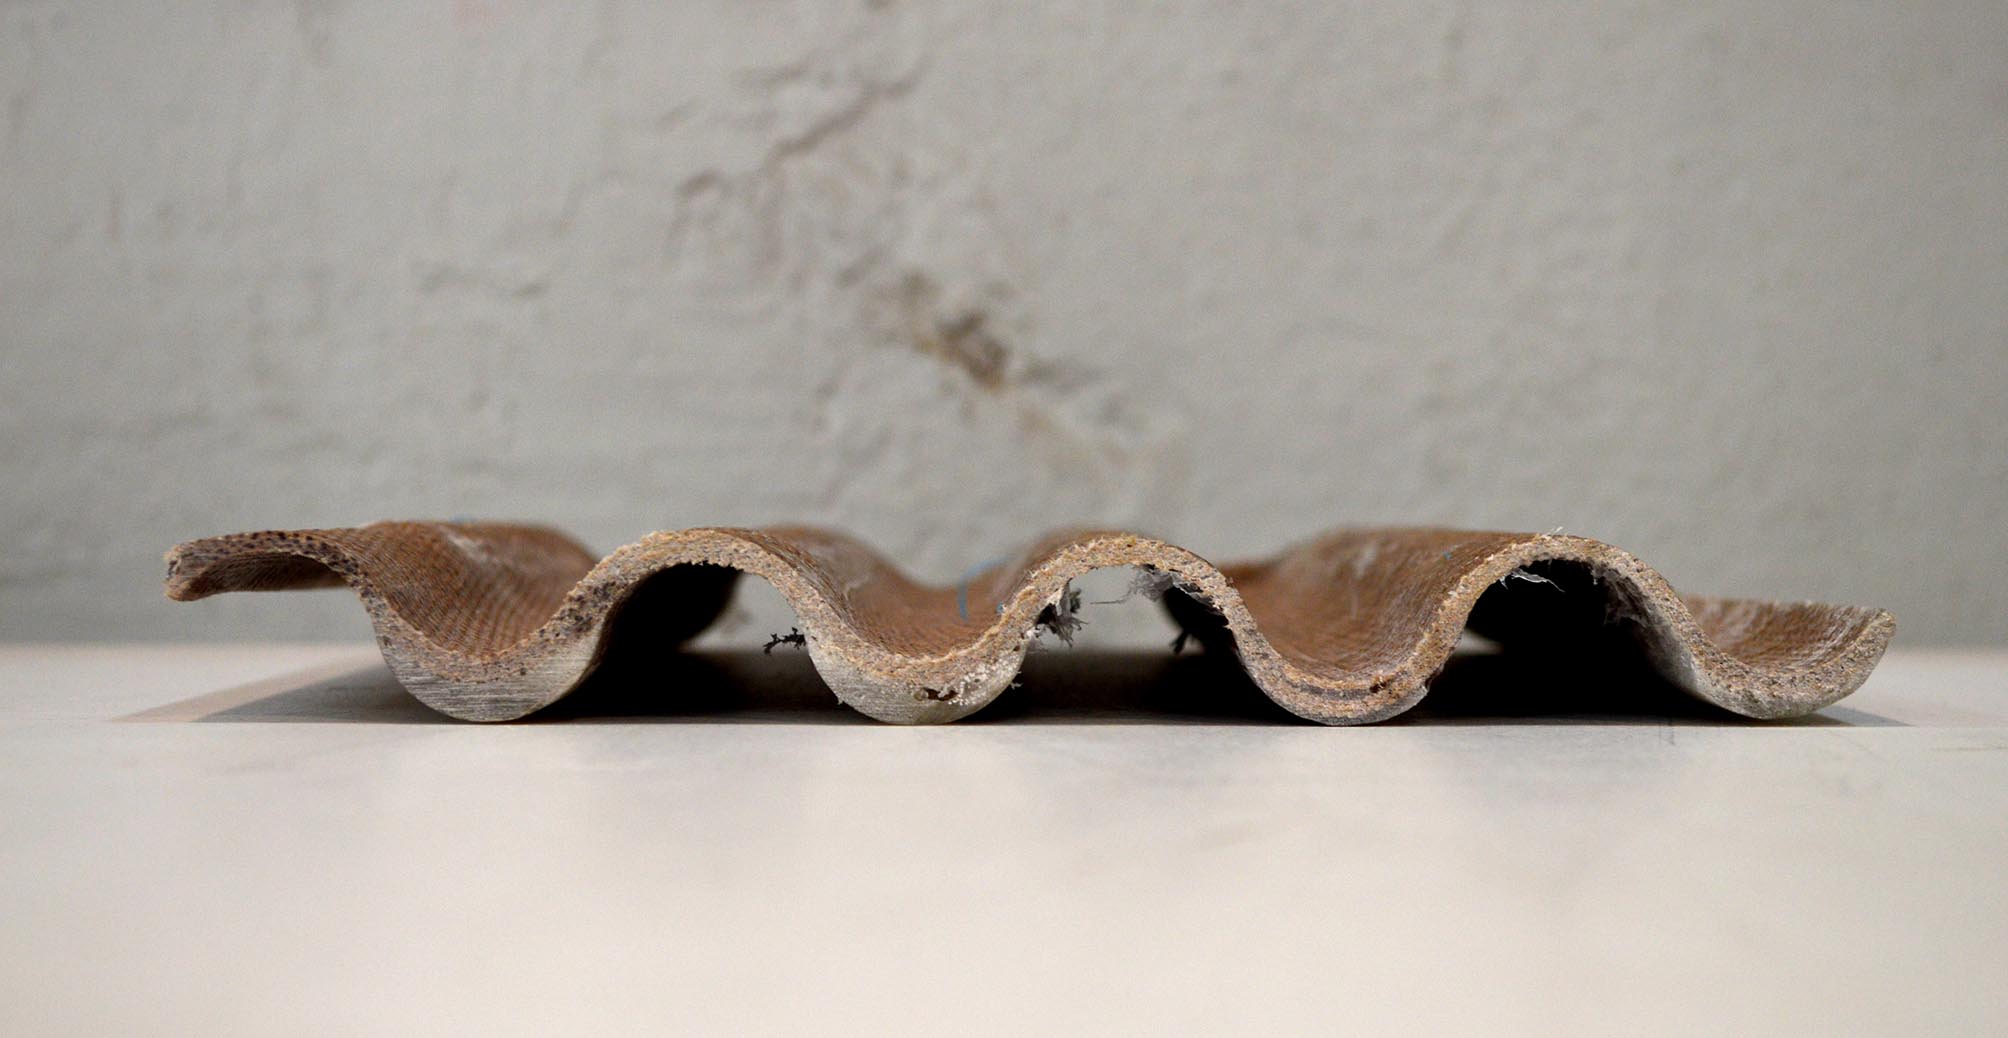
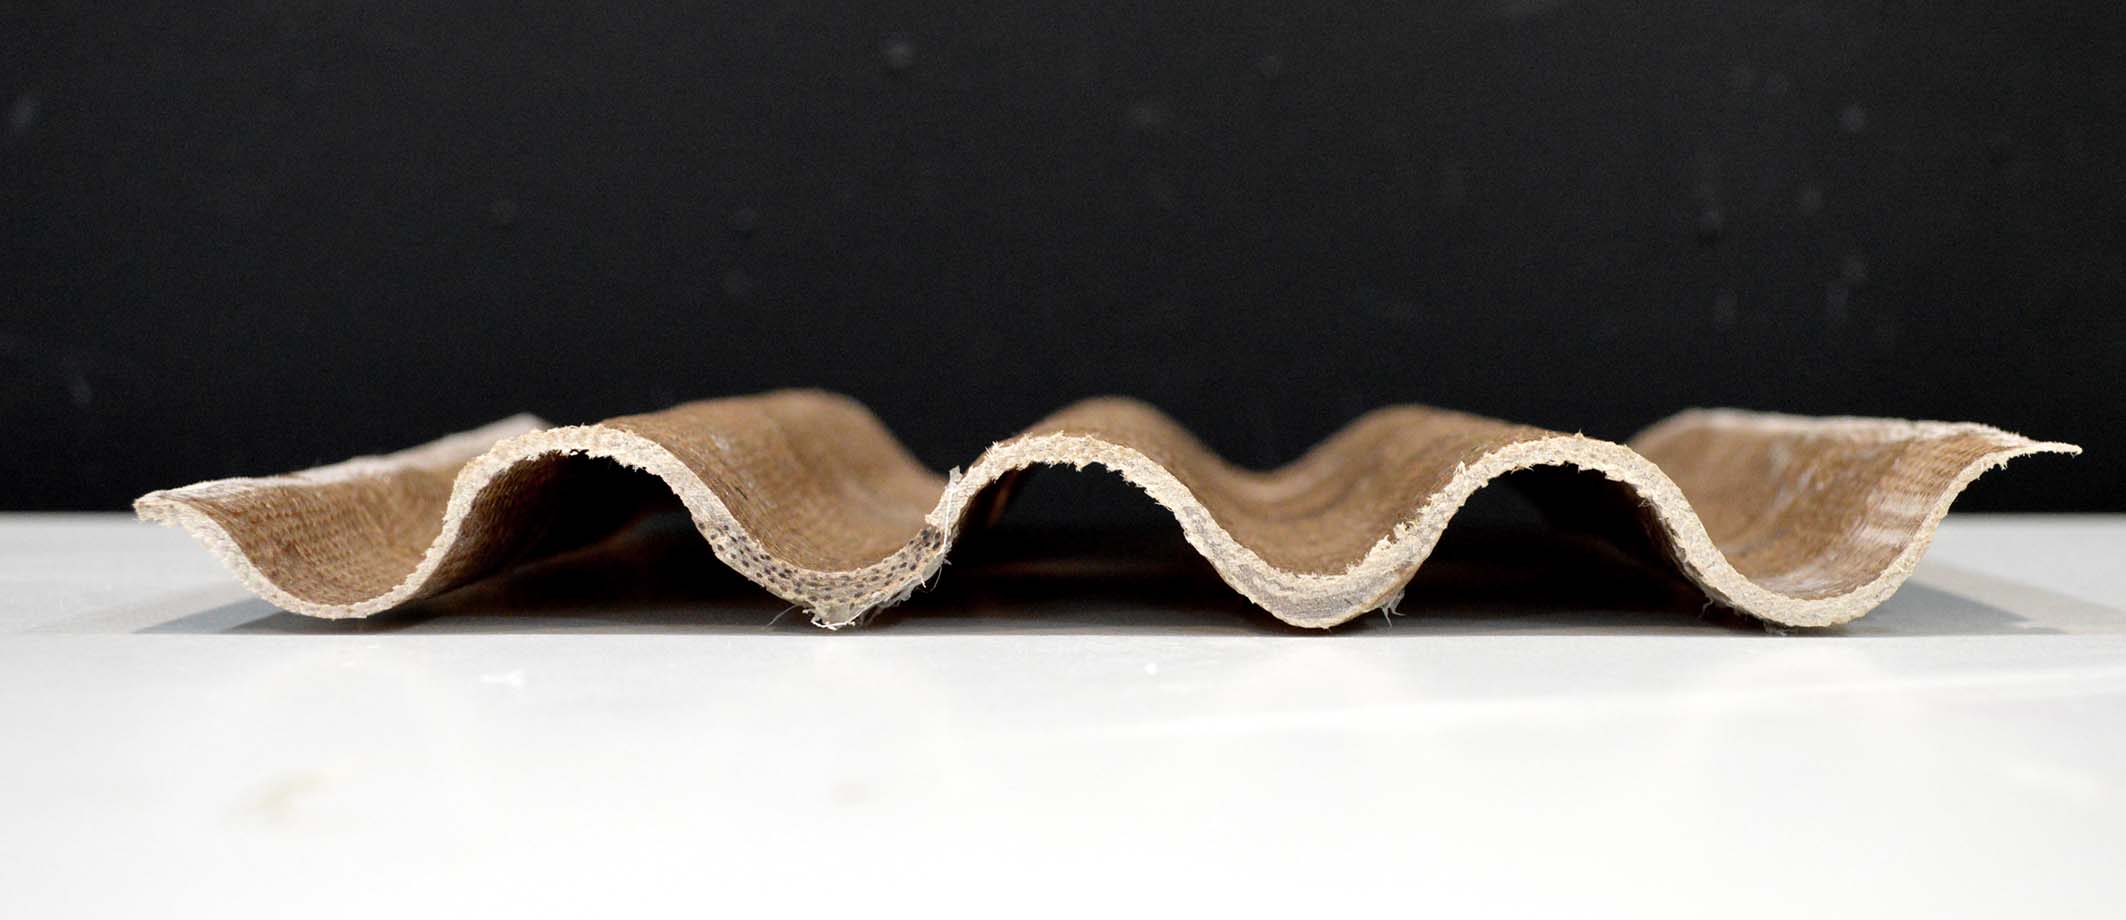
On my first attempt I made the mistake of not putting the absorbing layer in the correct place, and consequently the extra epoxy was not absorbed and accumulated in the bottom of my composite. Here’s what it looked like.
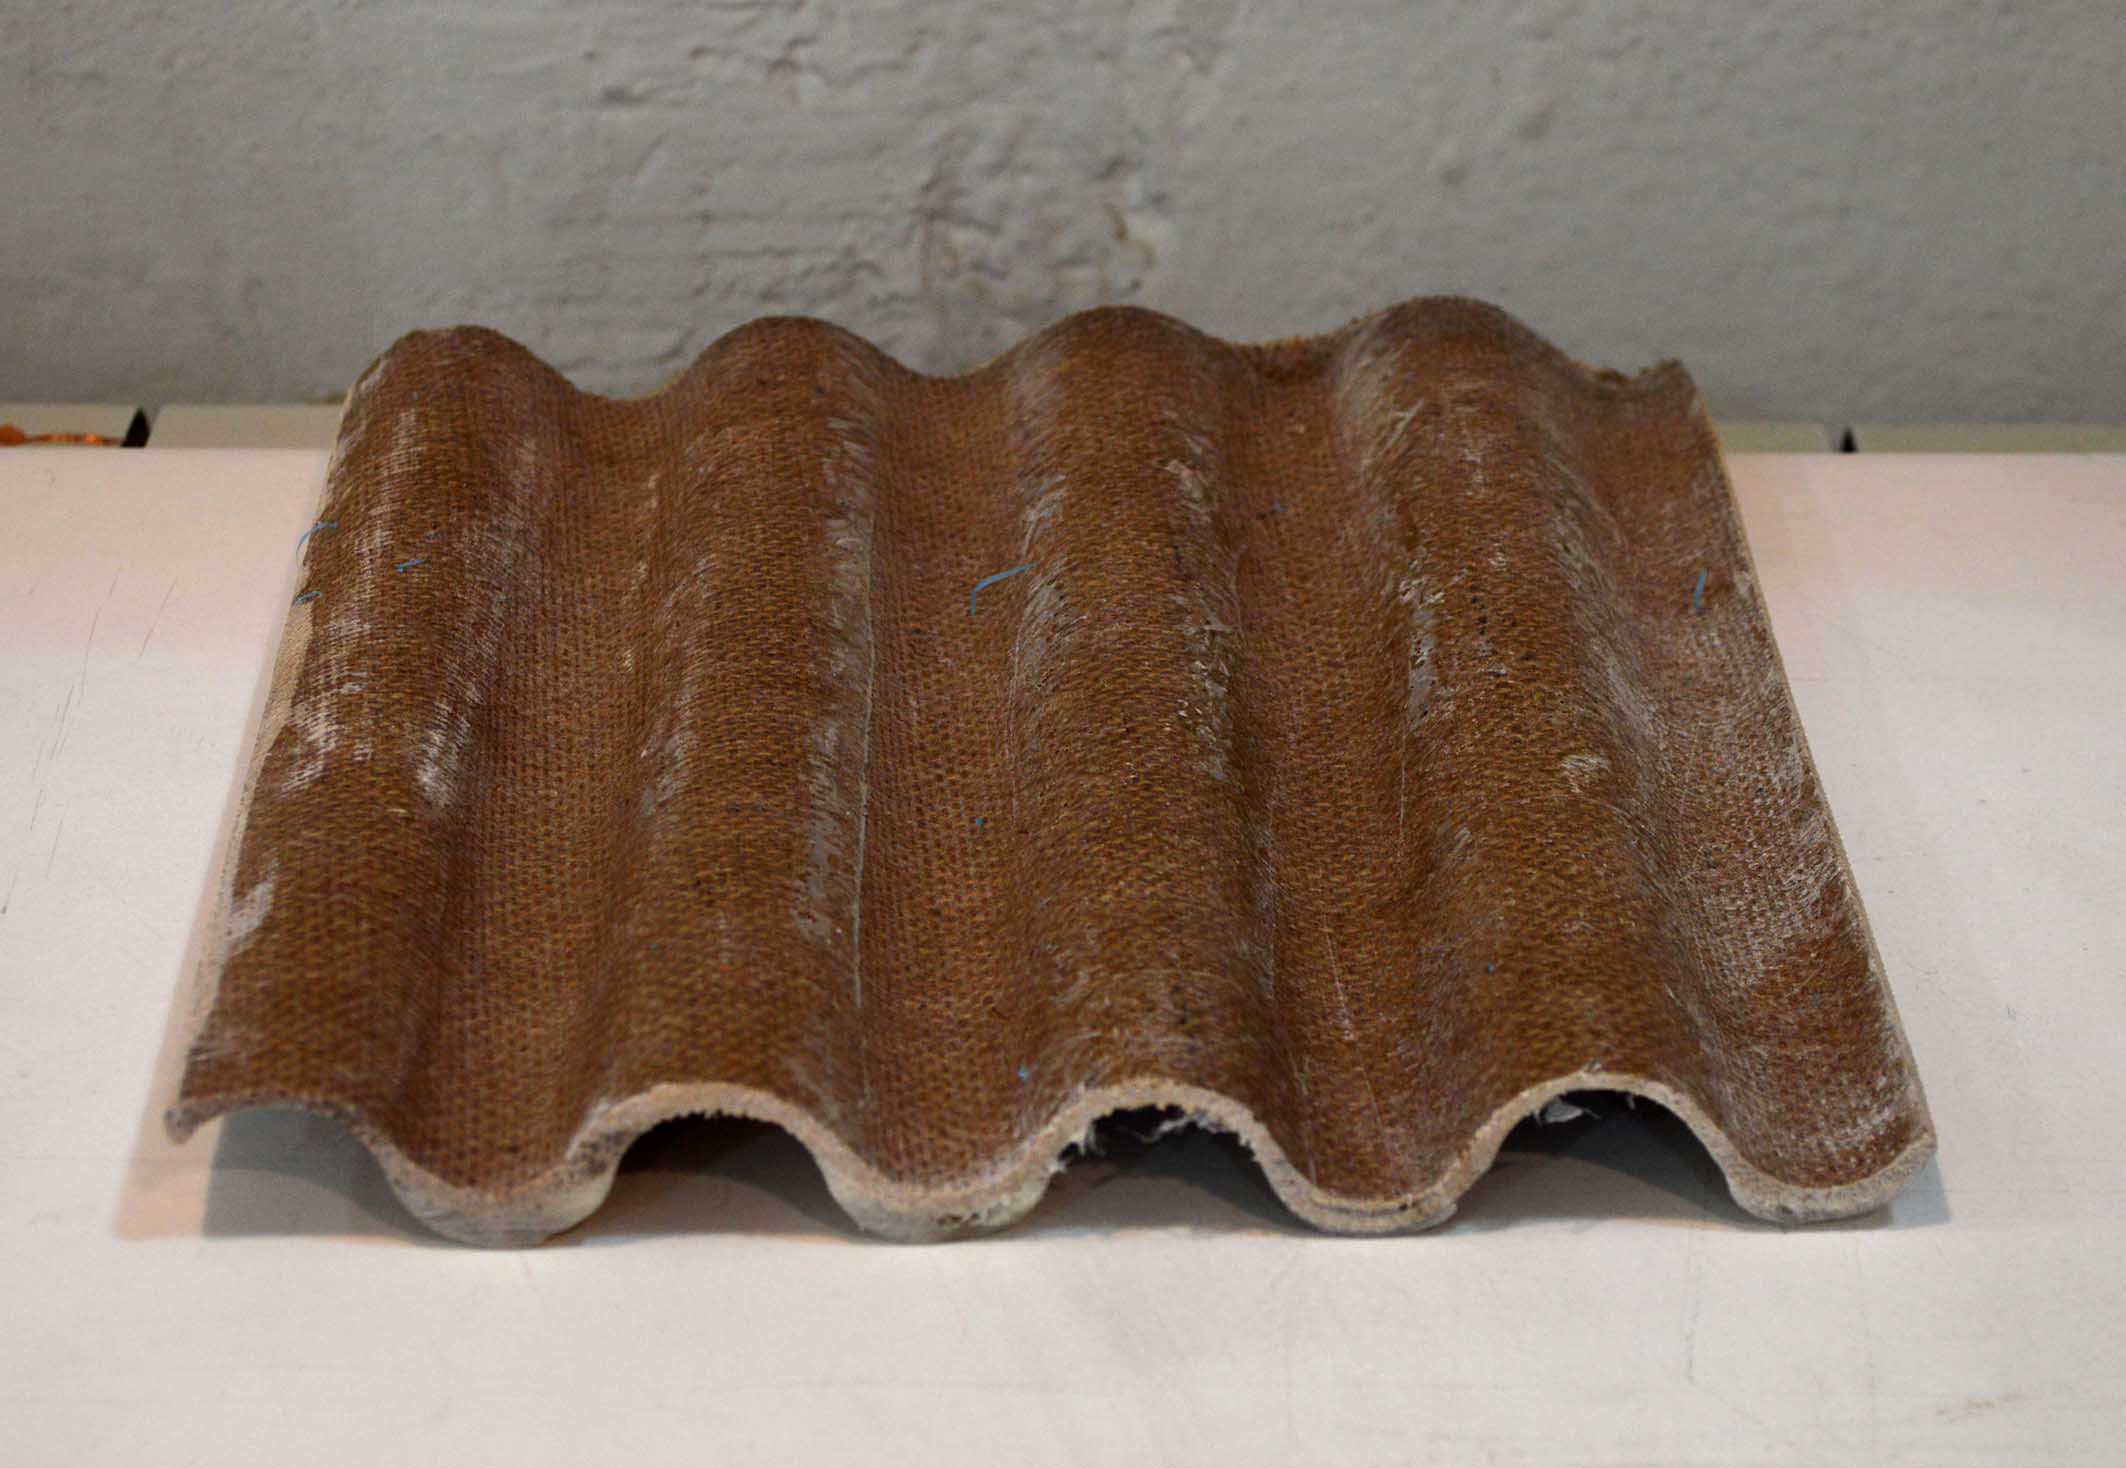
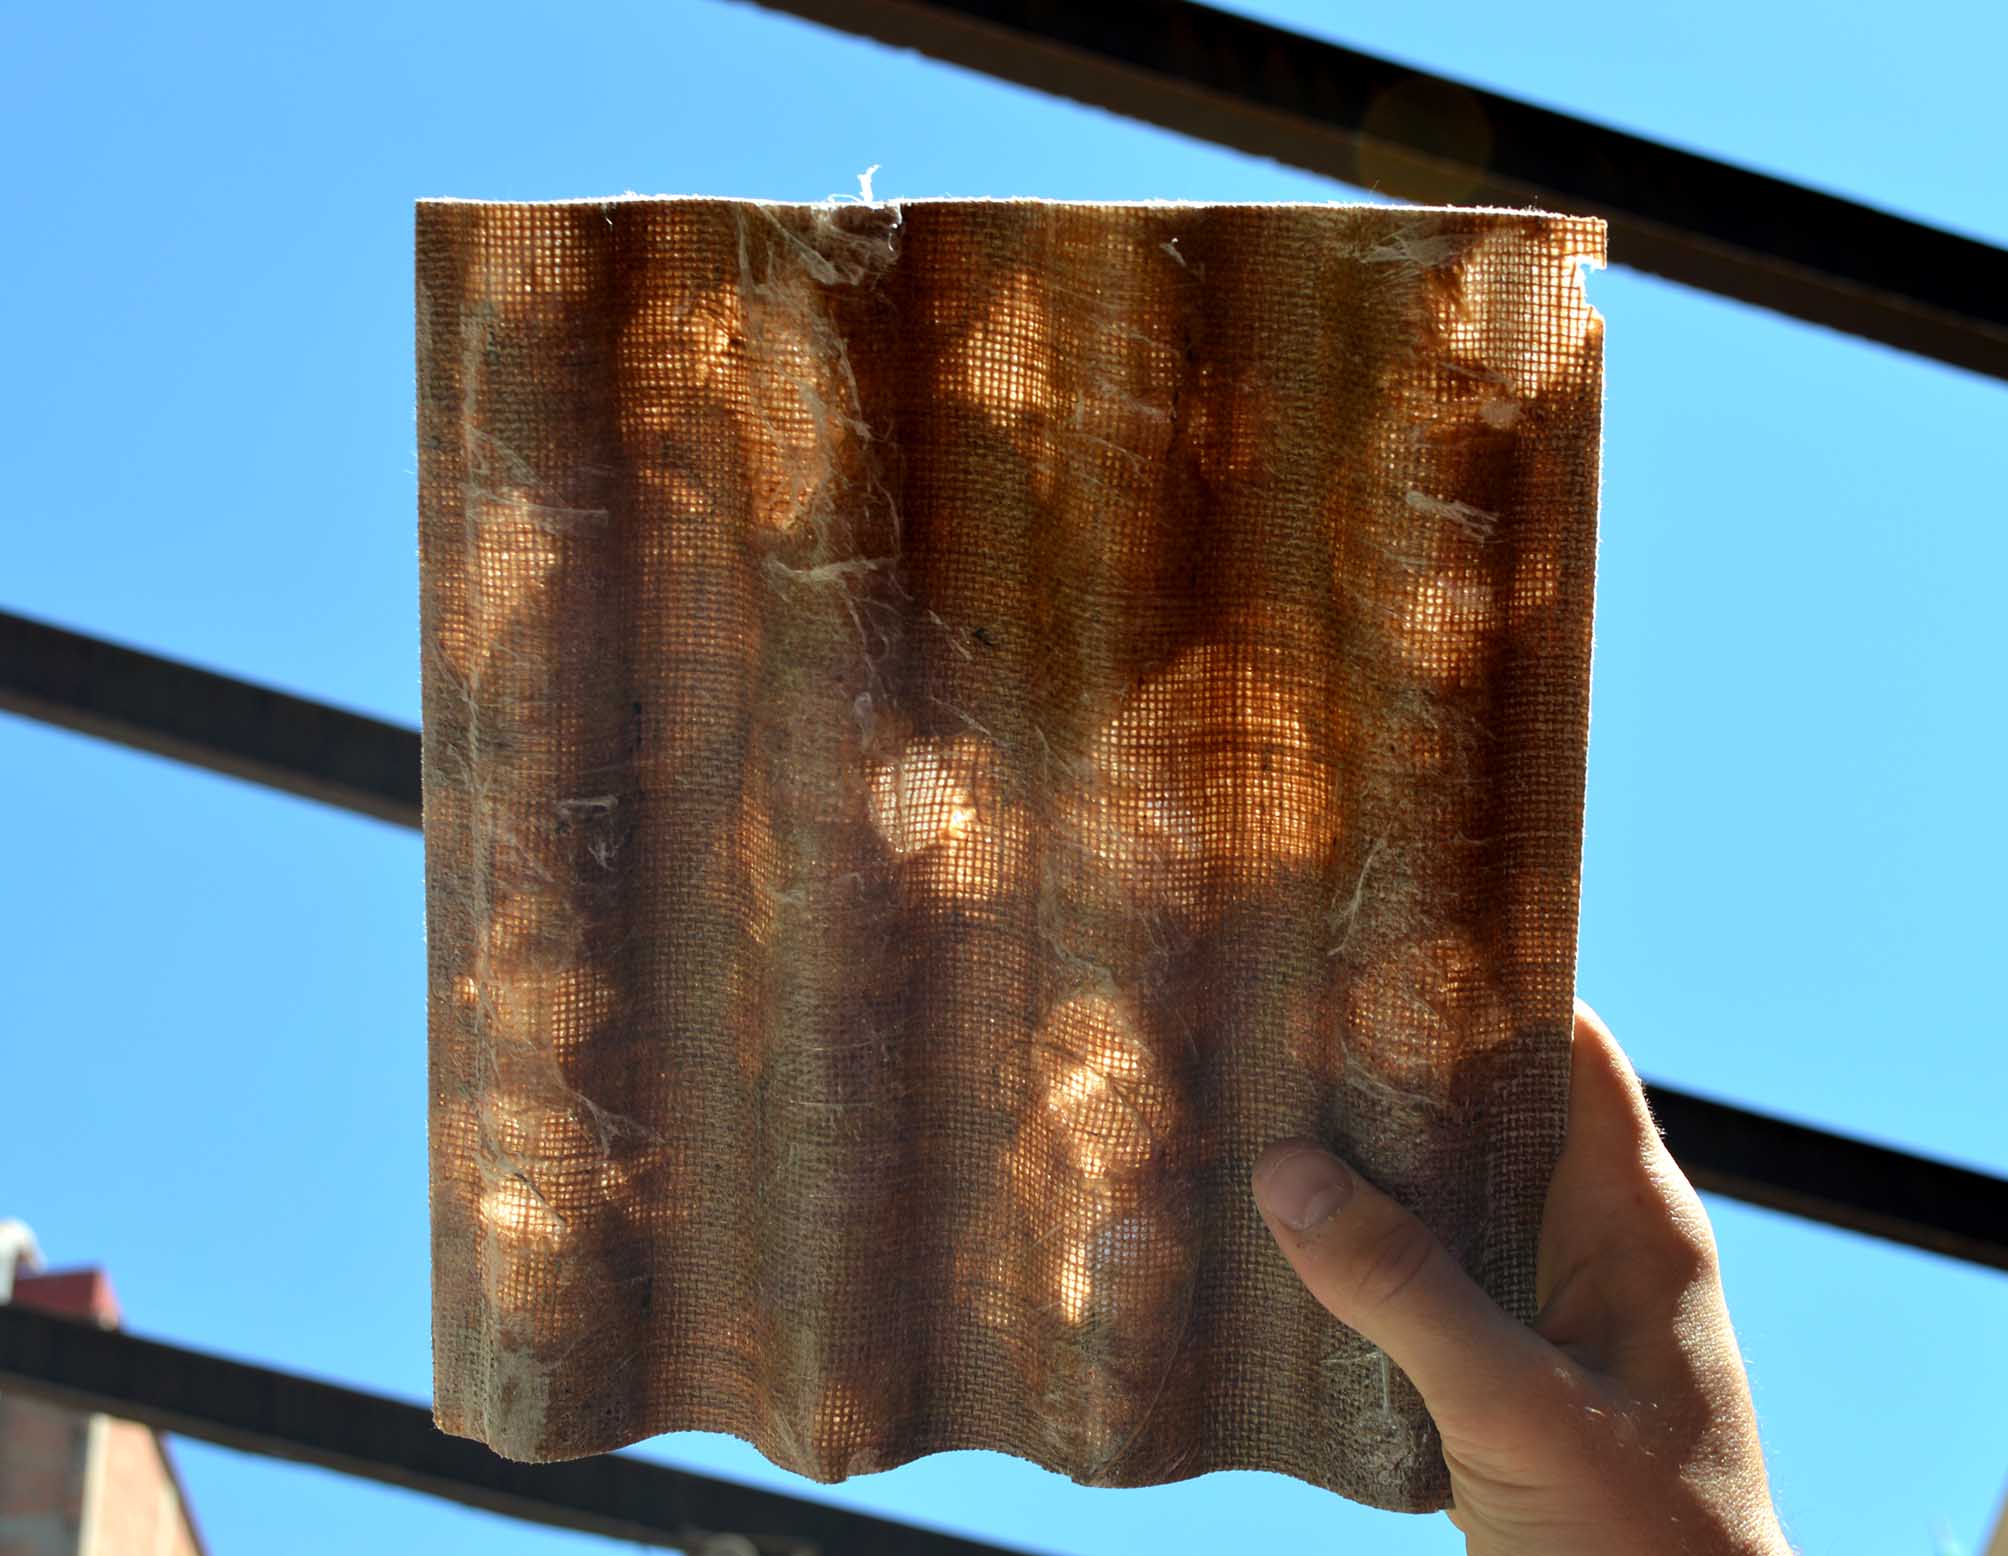
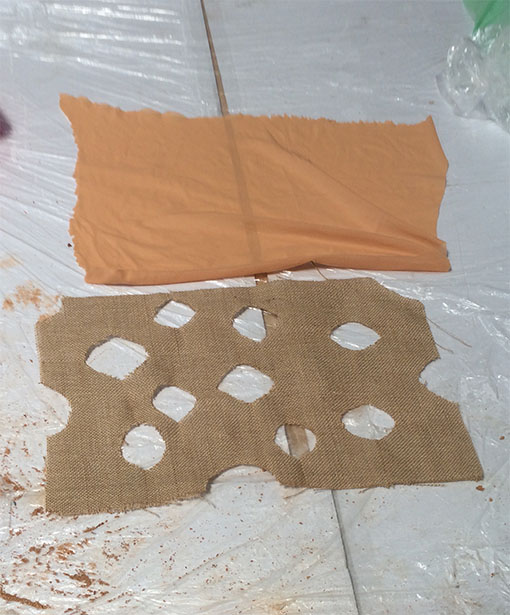
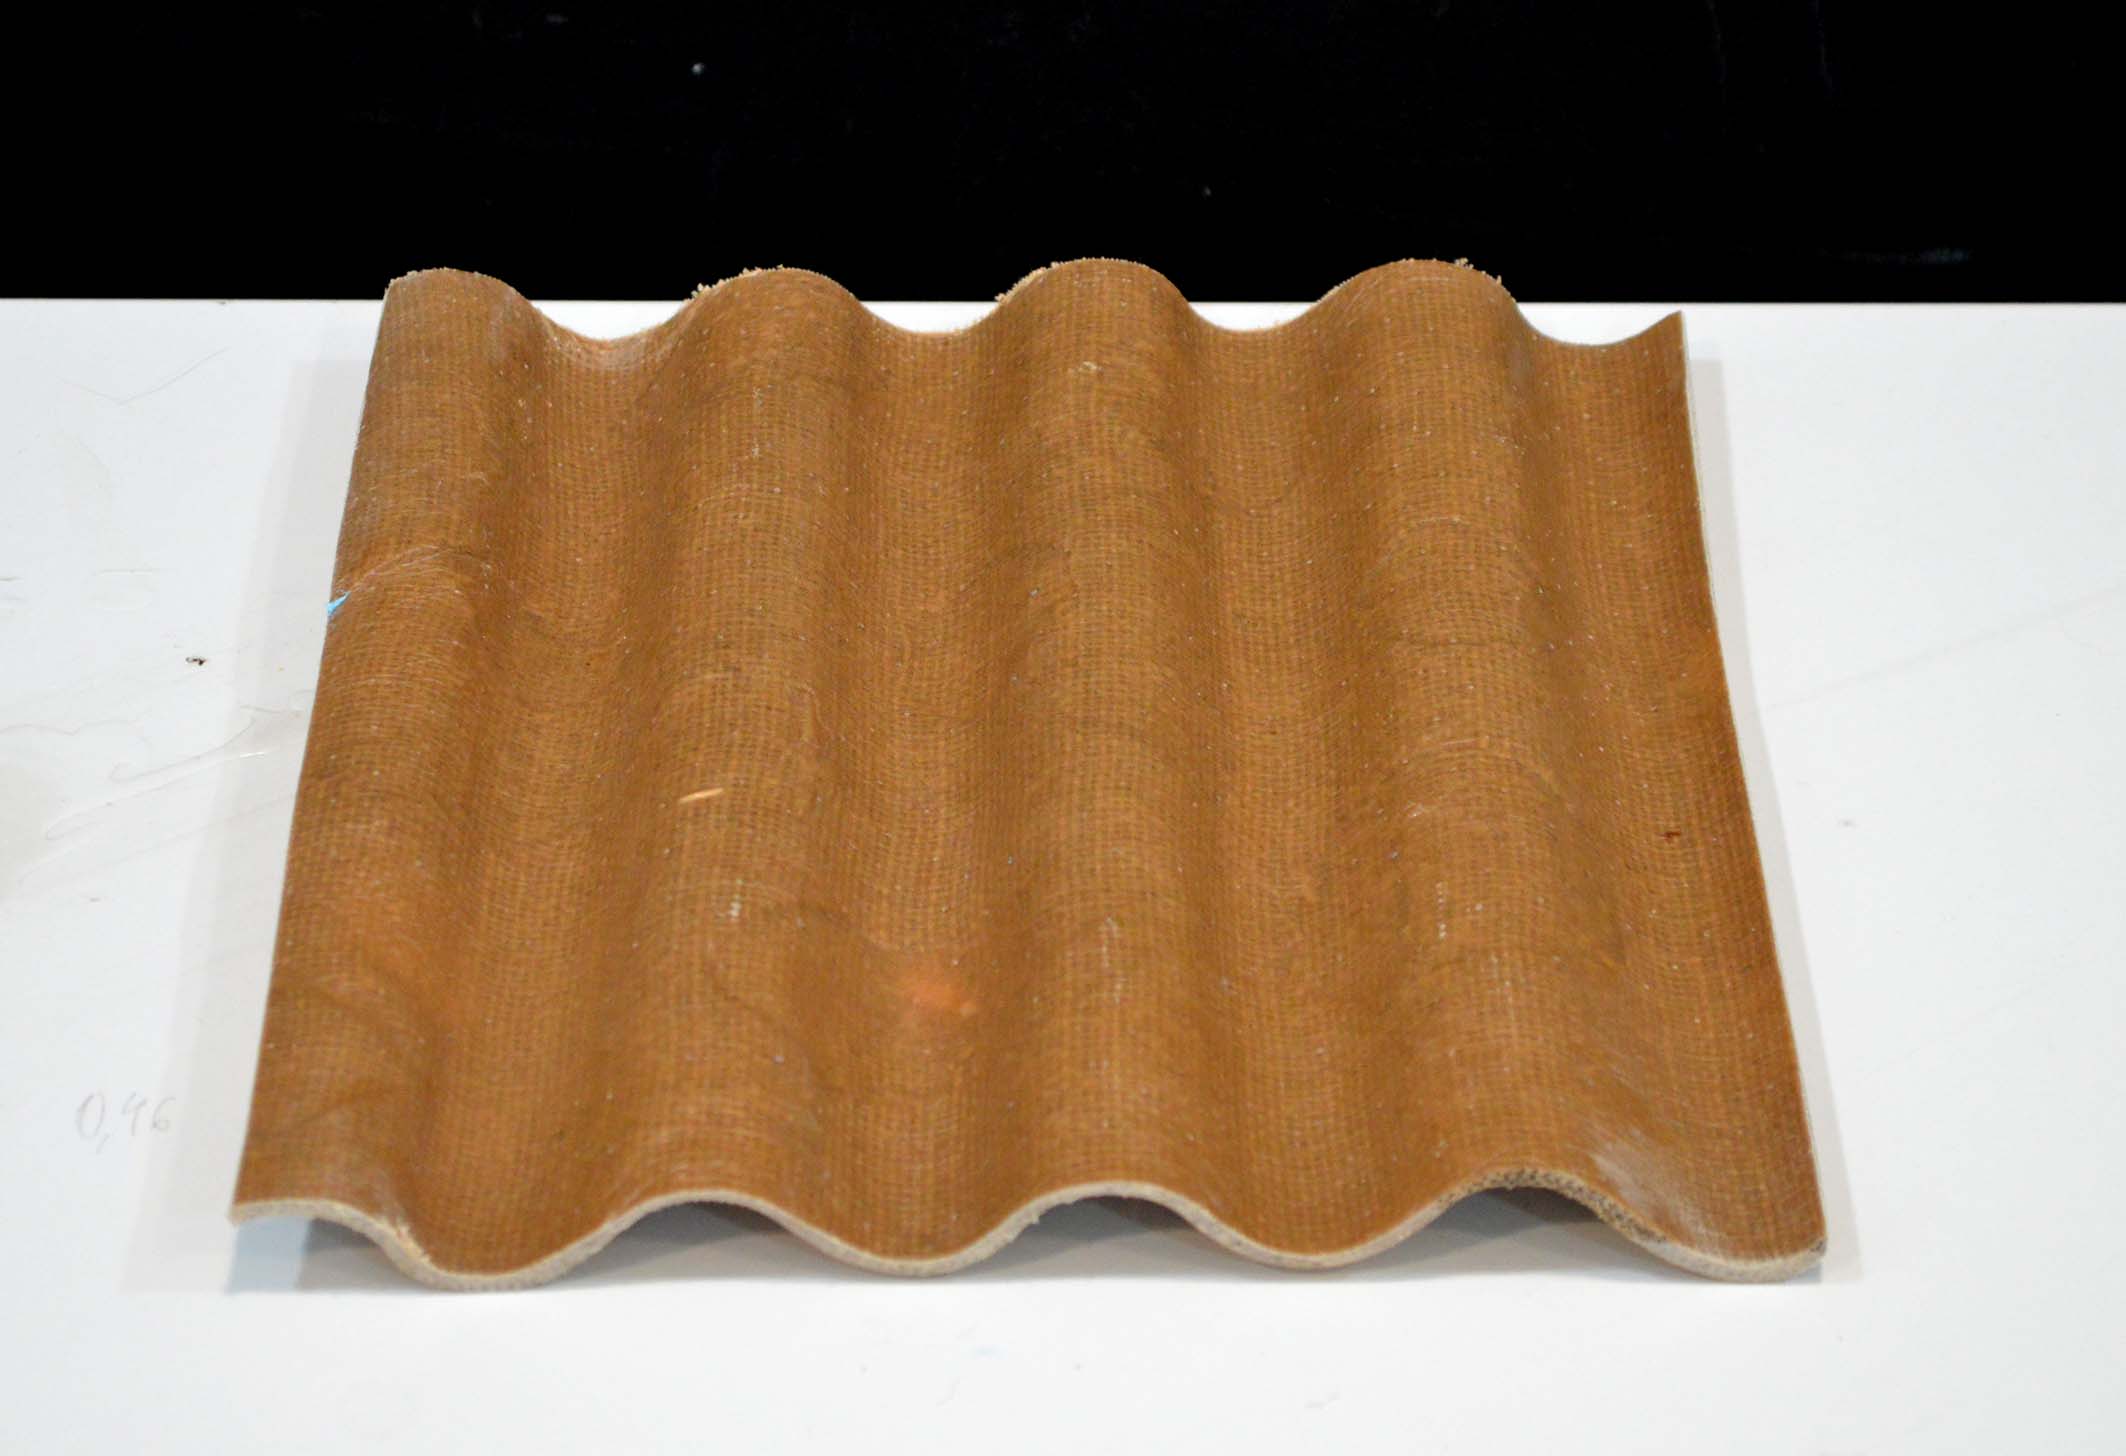
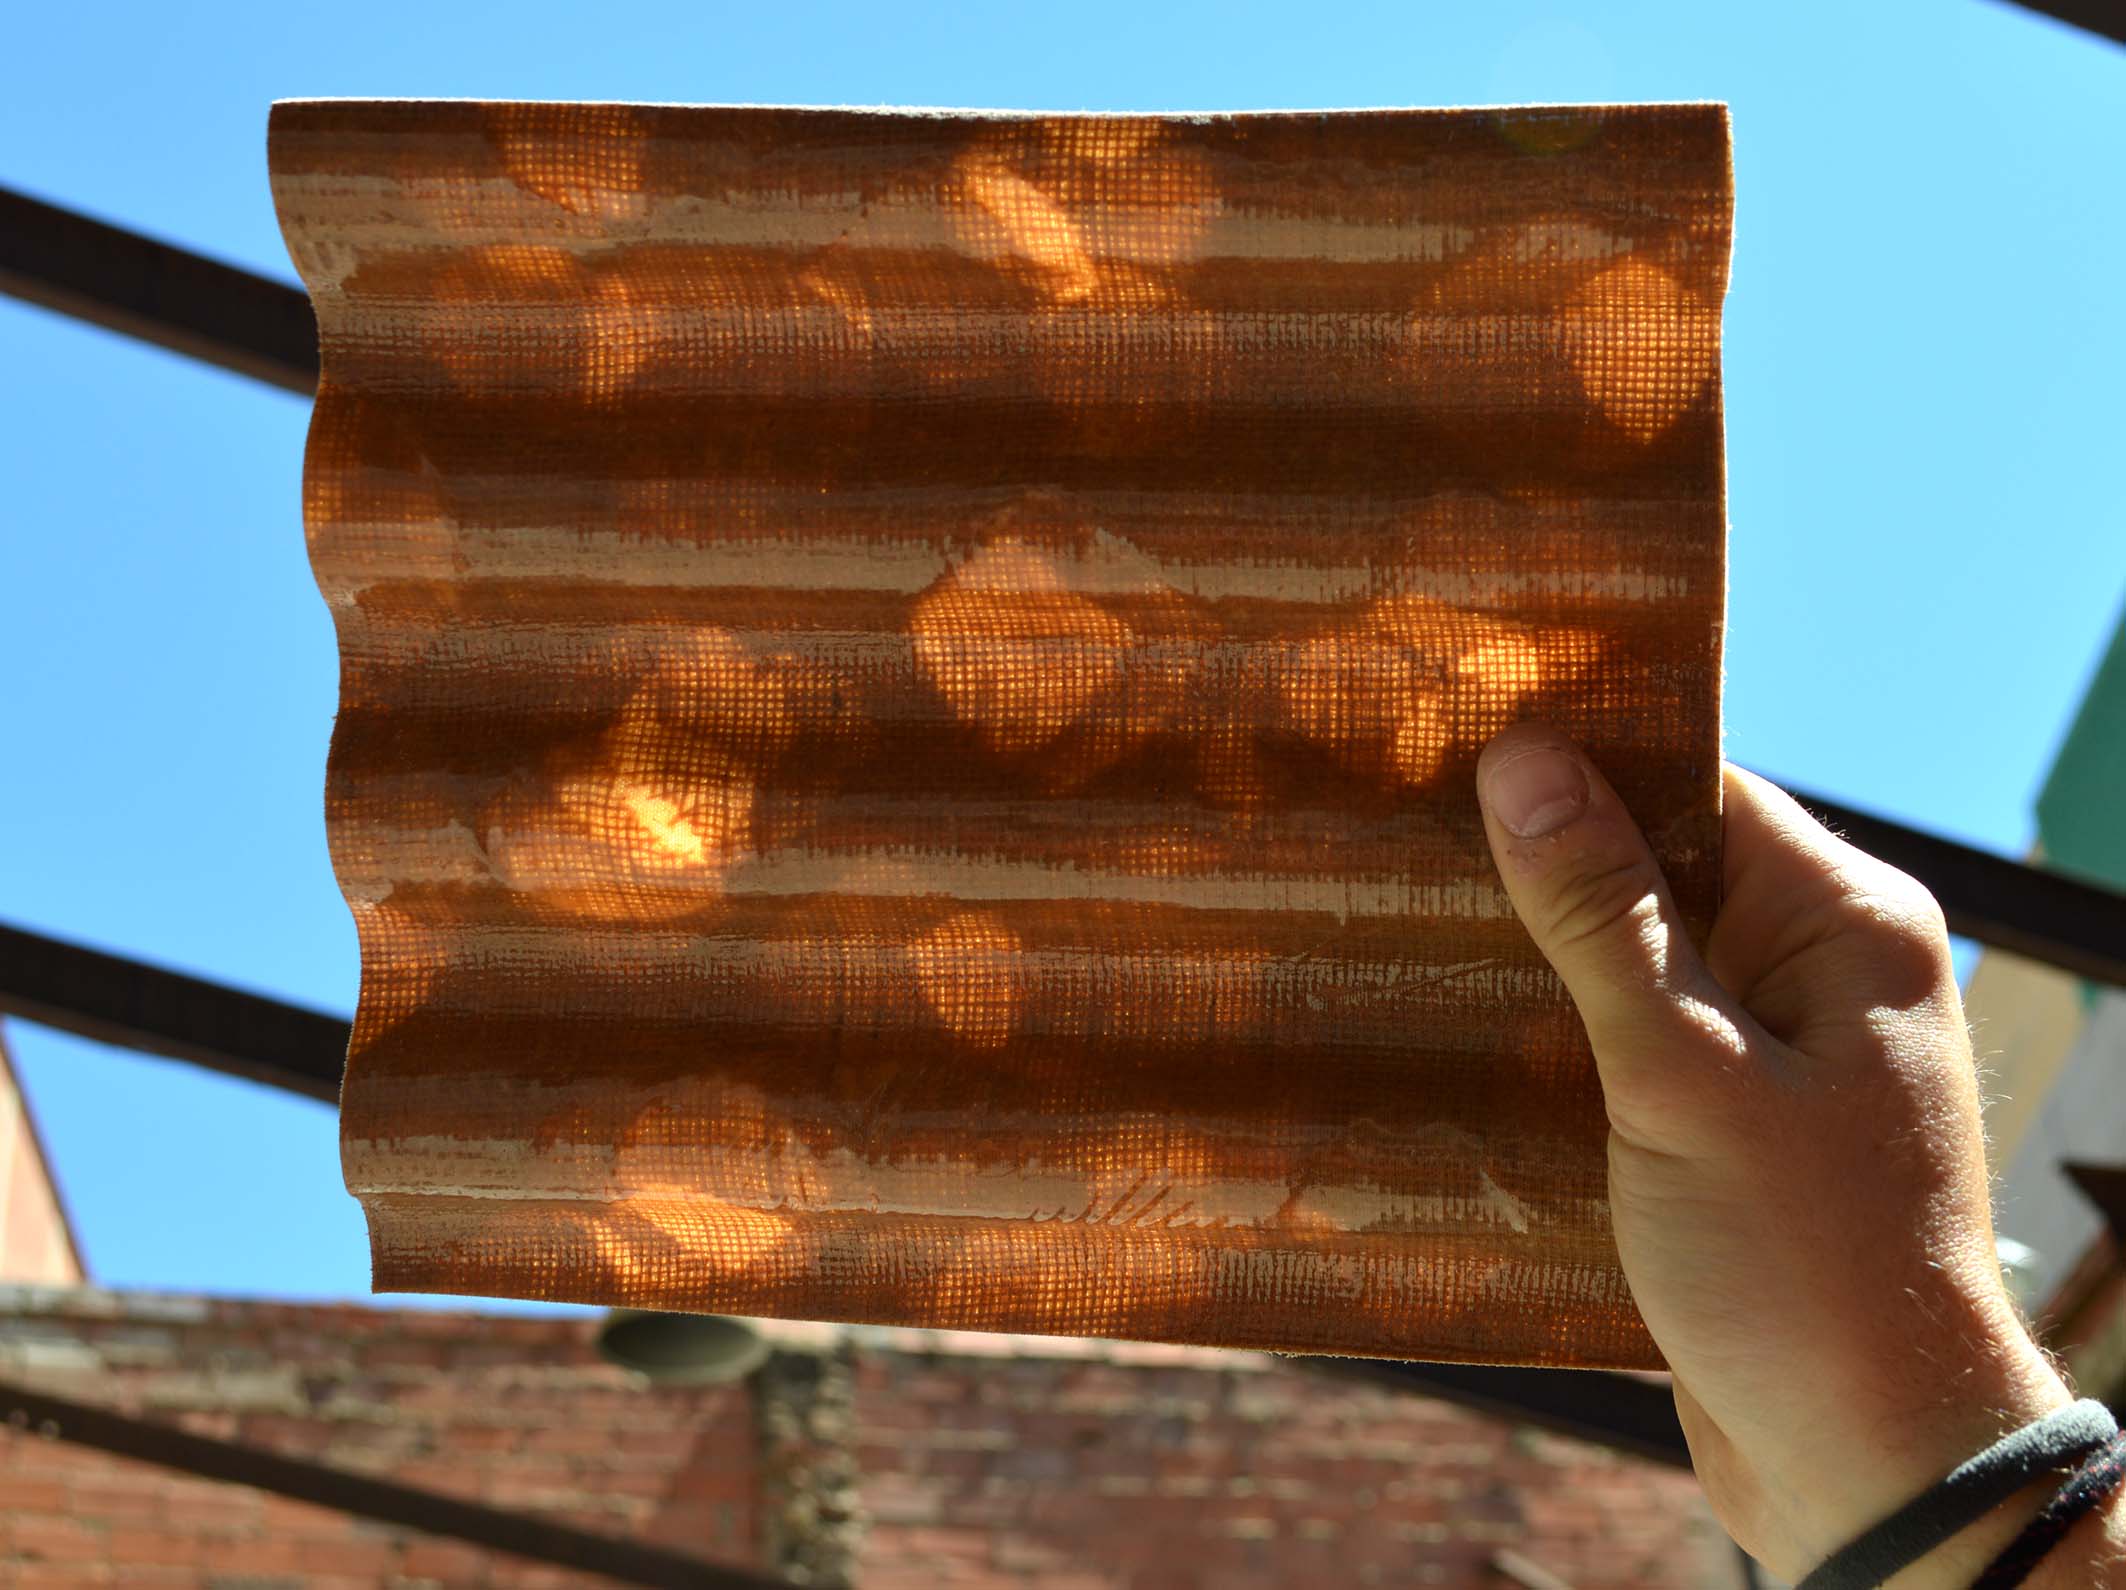
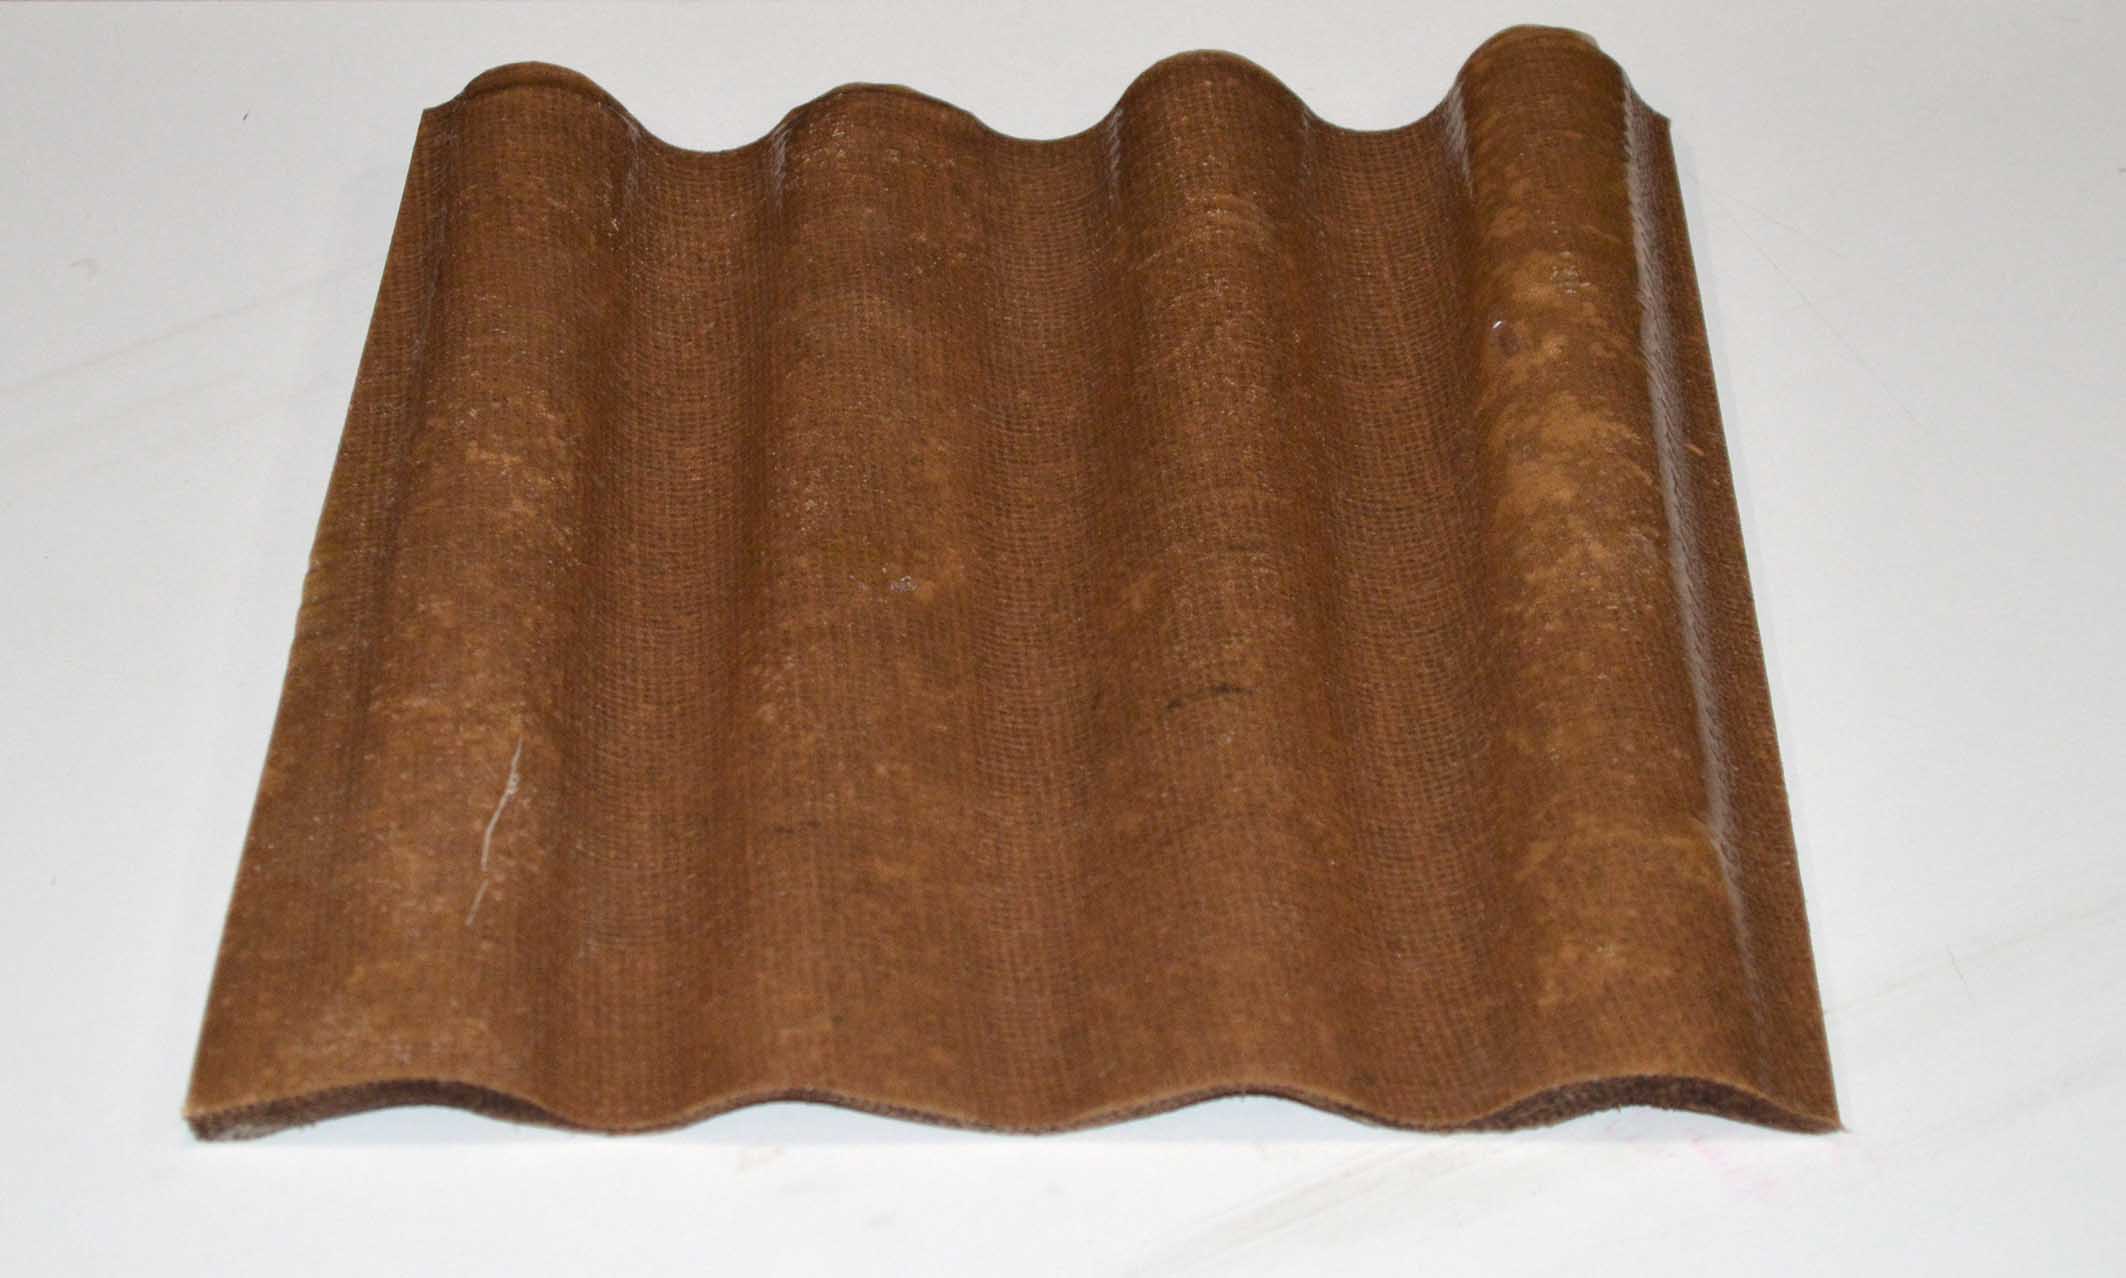
So I decided to repeat the process, but this time I wanted to experiment with cutting holes on the fabric in order to create a semi-transparent composite that would produce an interesting visual effect under the sun. Here are my new materials piled up and ready to be used.
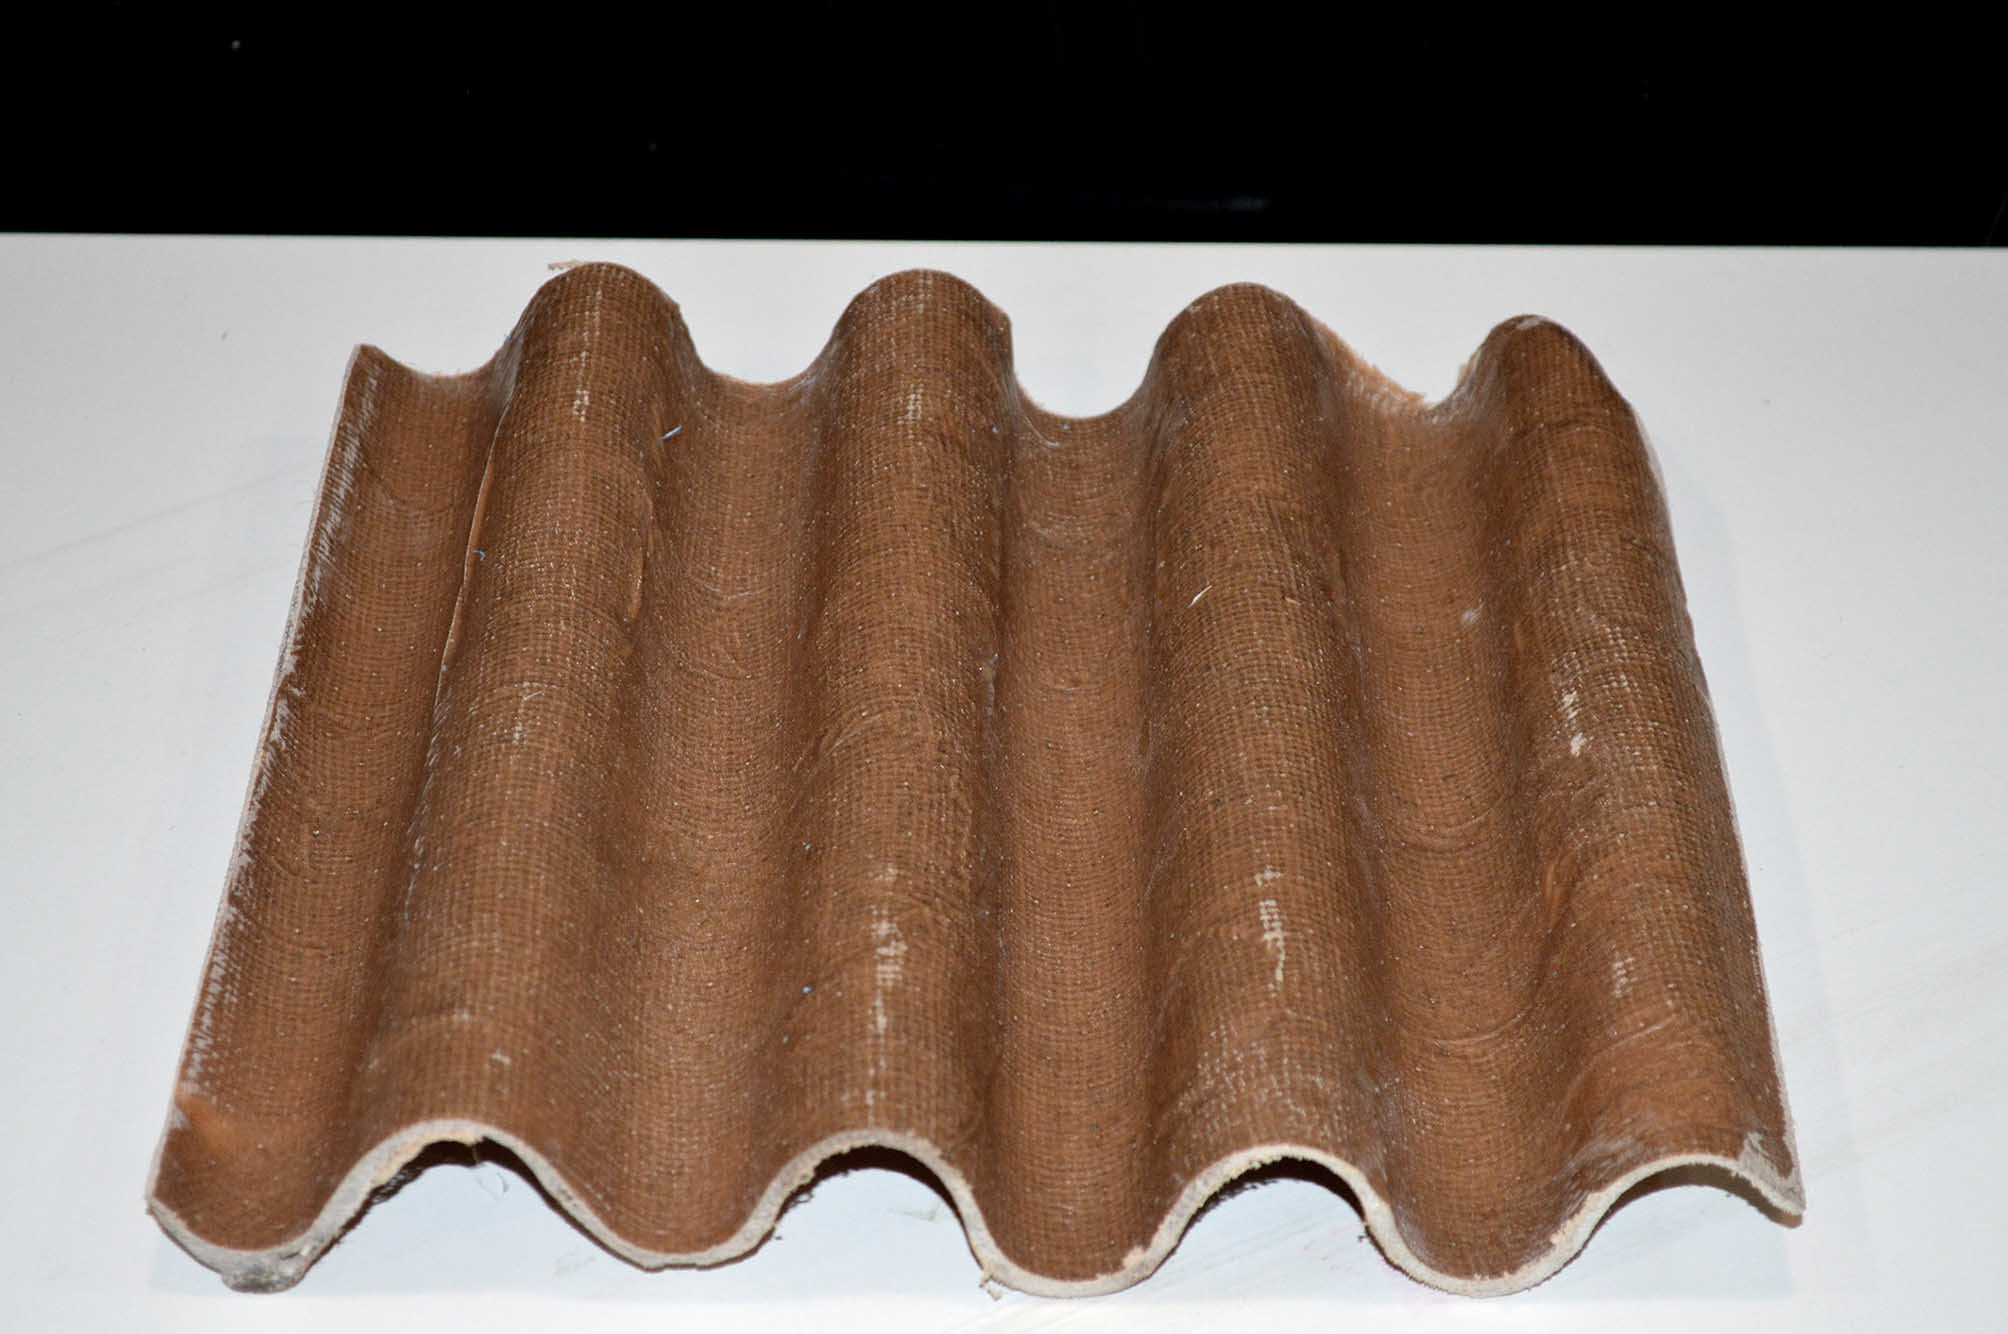
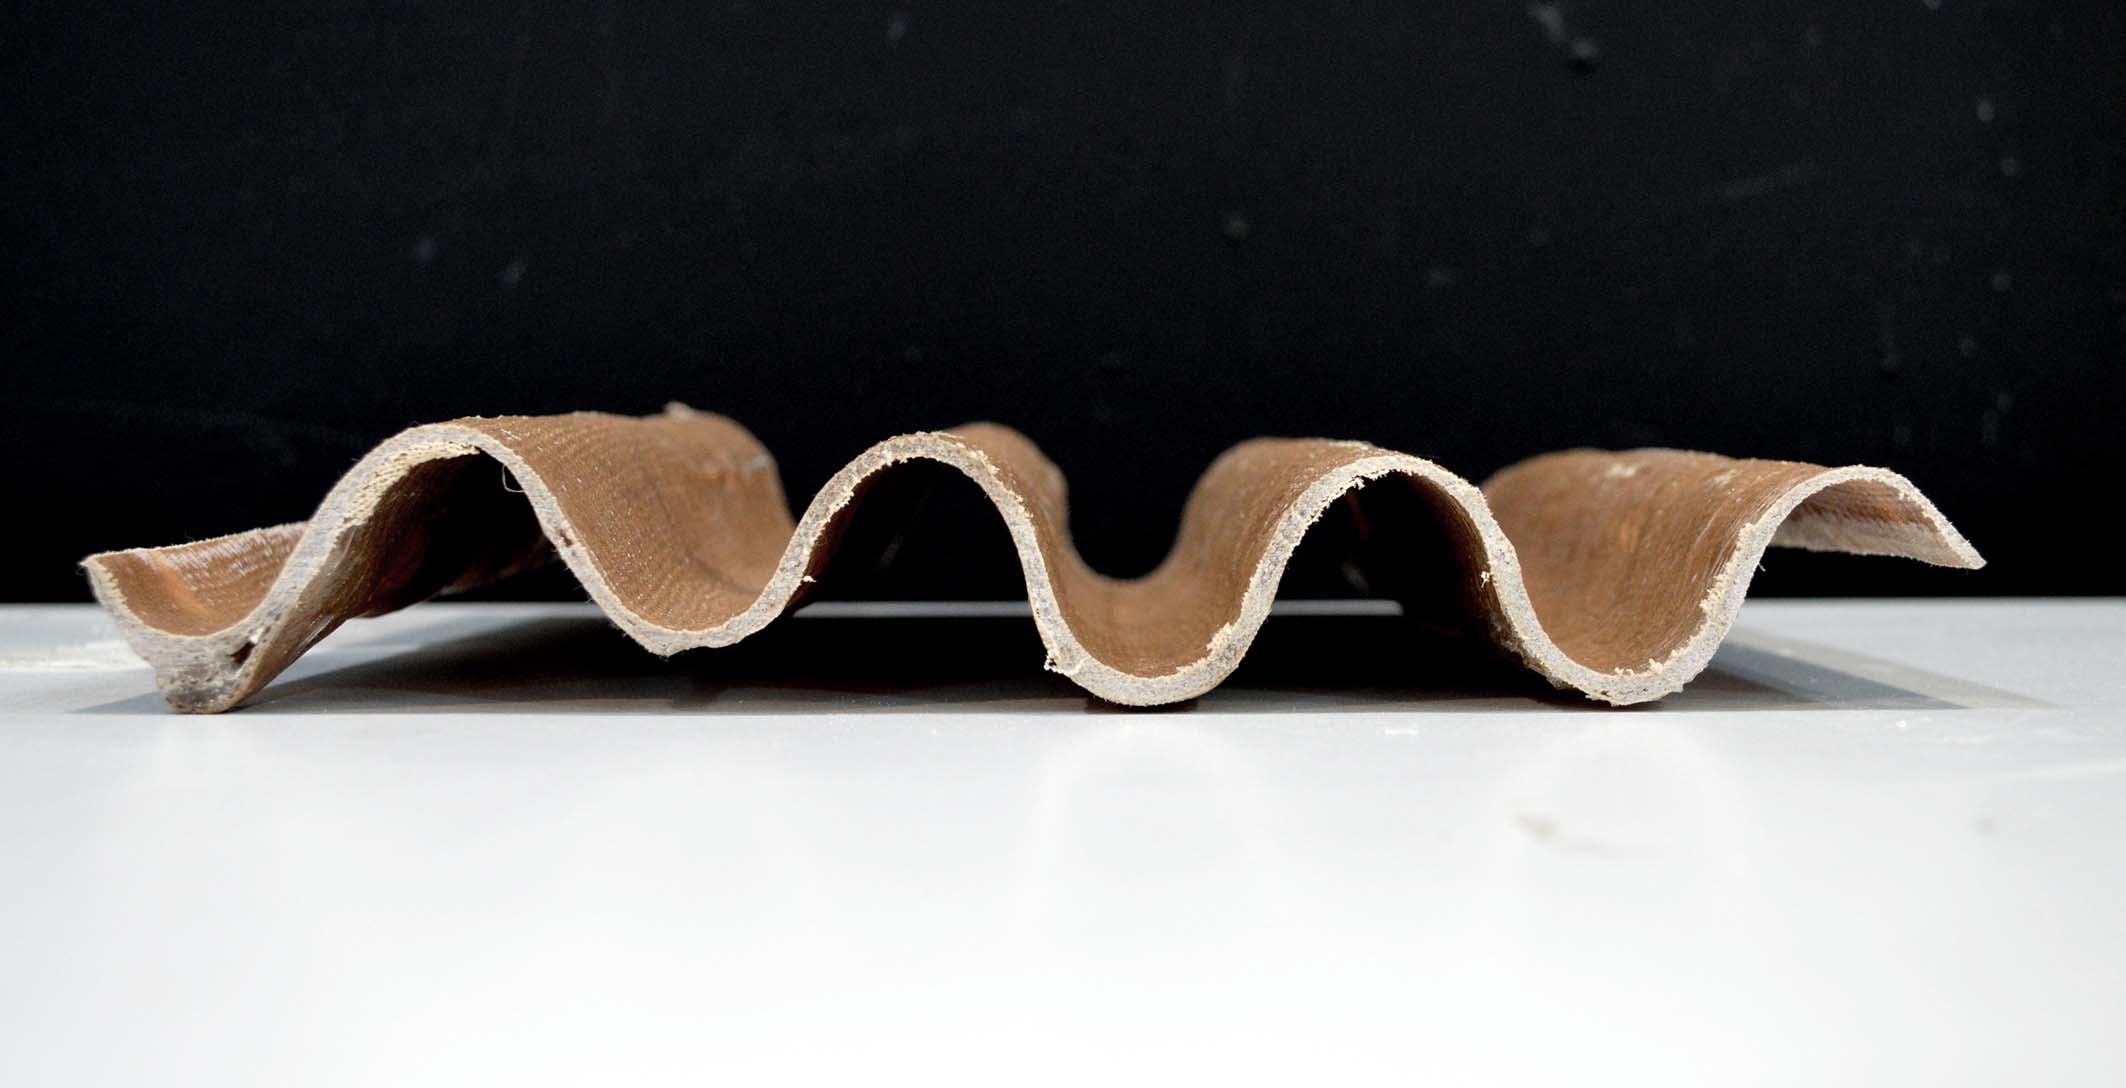
What came out of this try was definitely better than the first one, but still, not quite there yet.
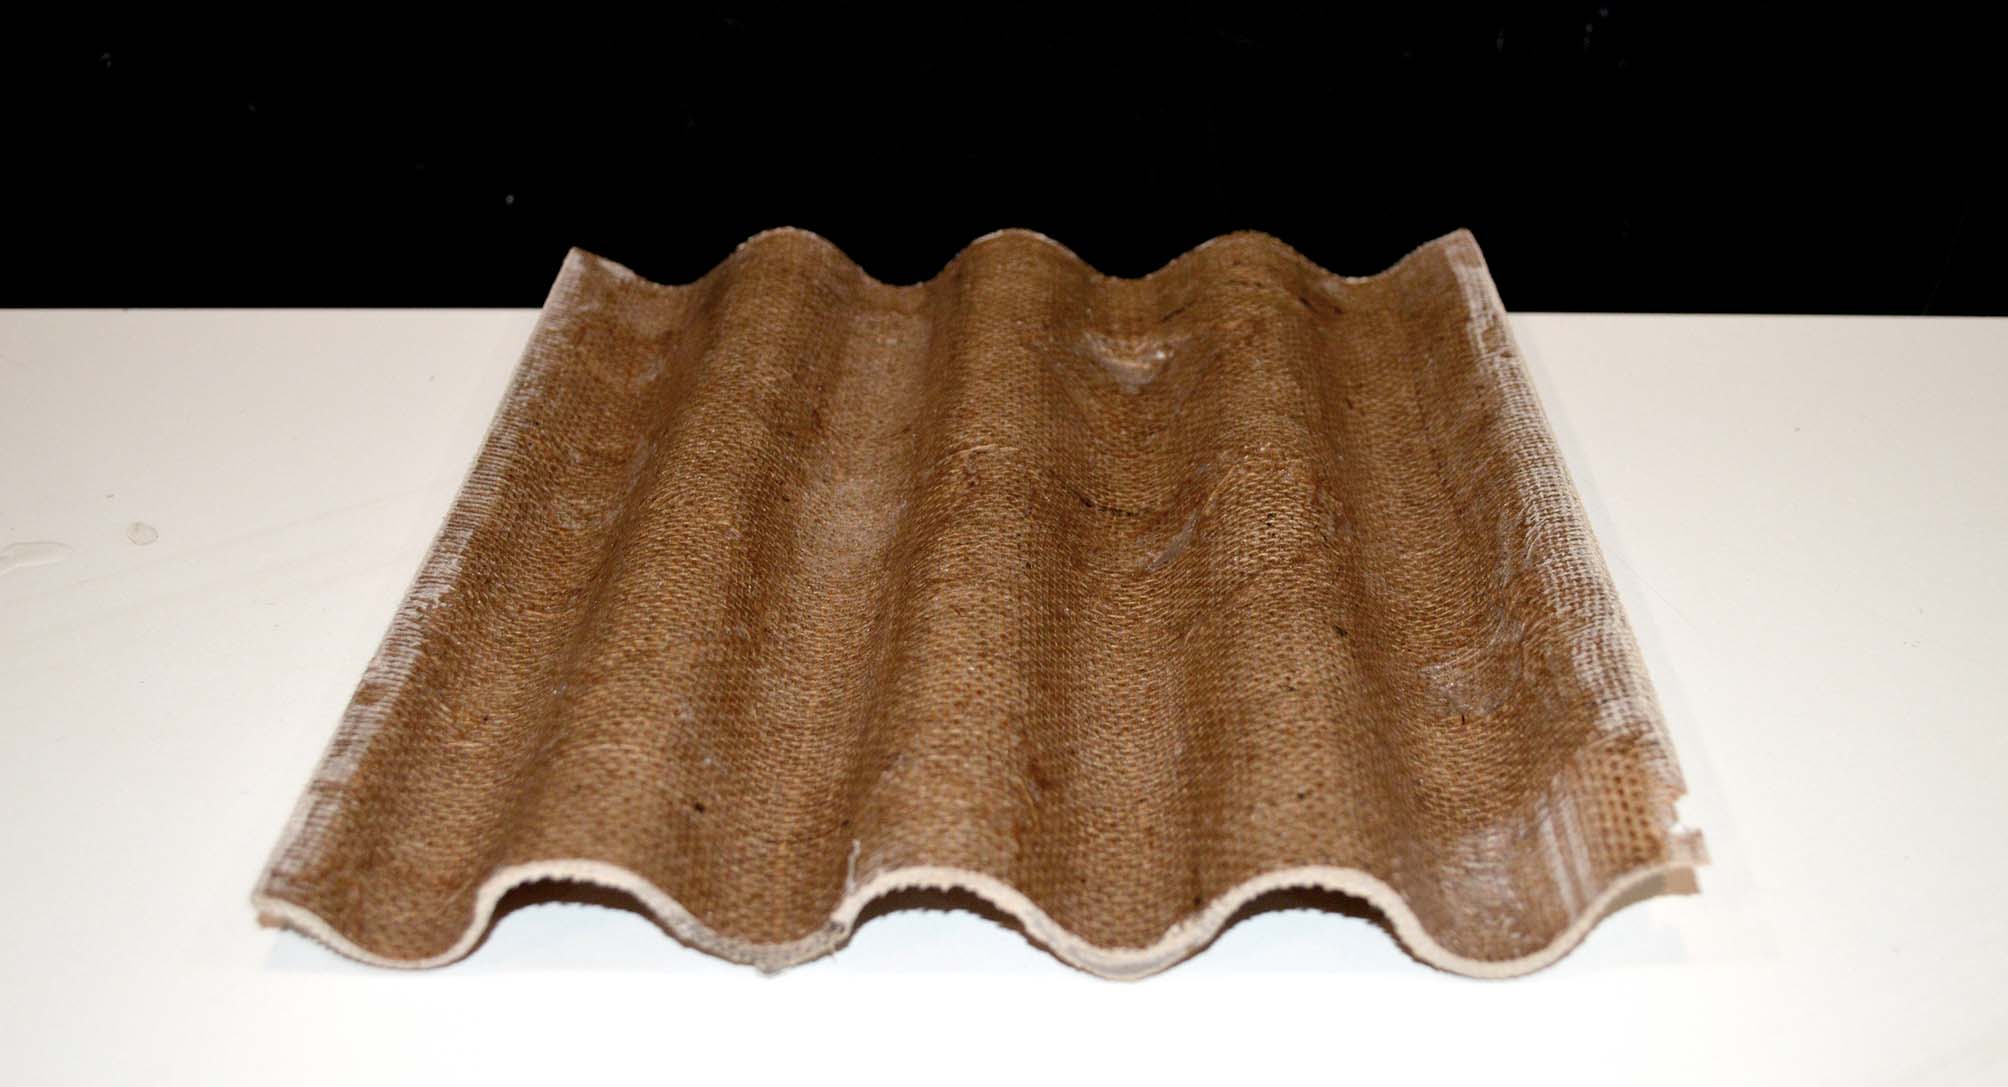
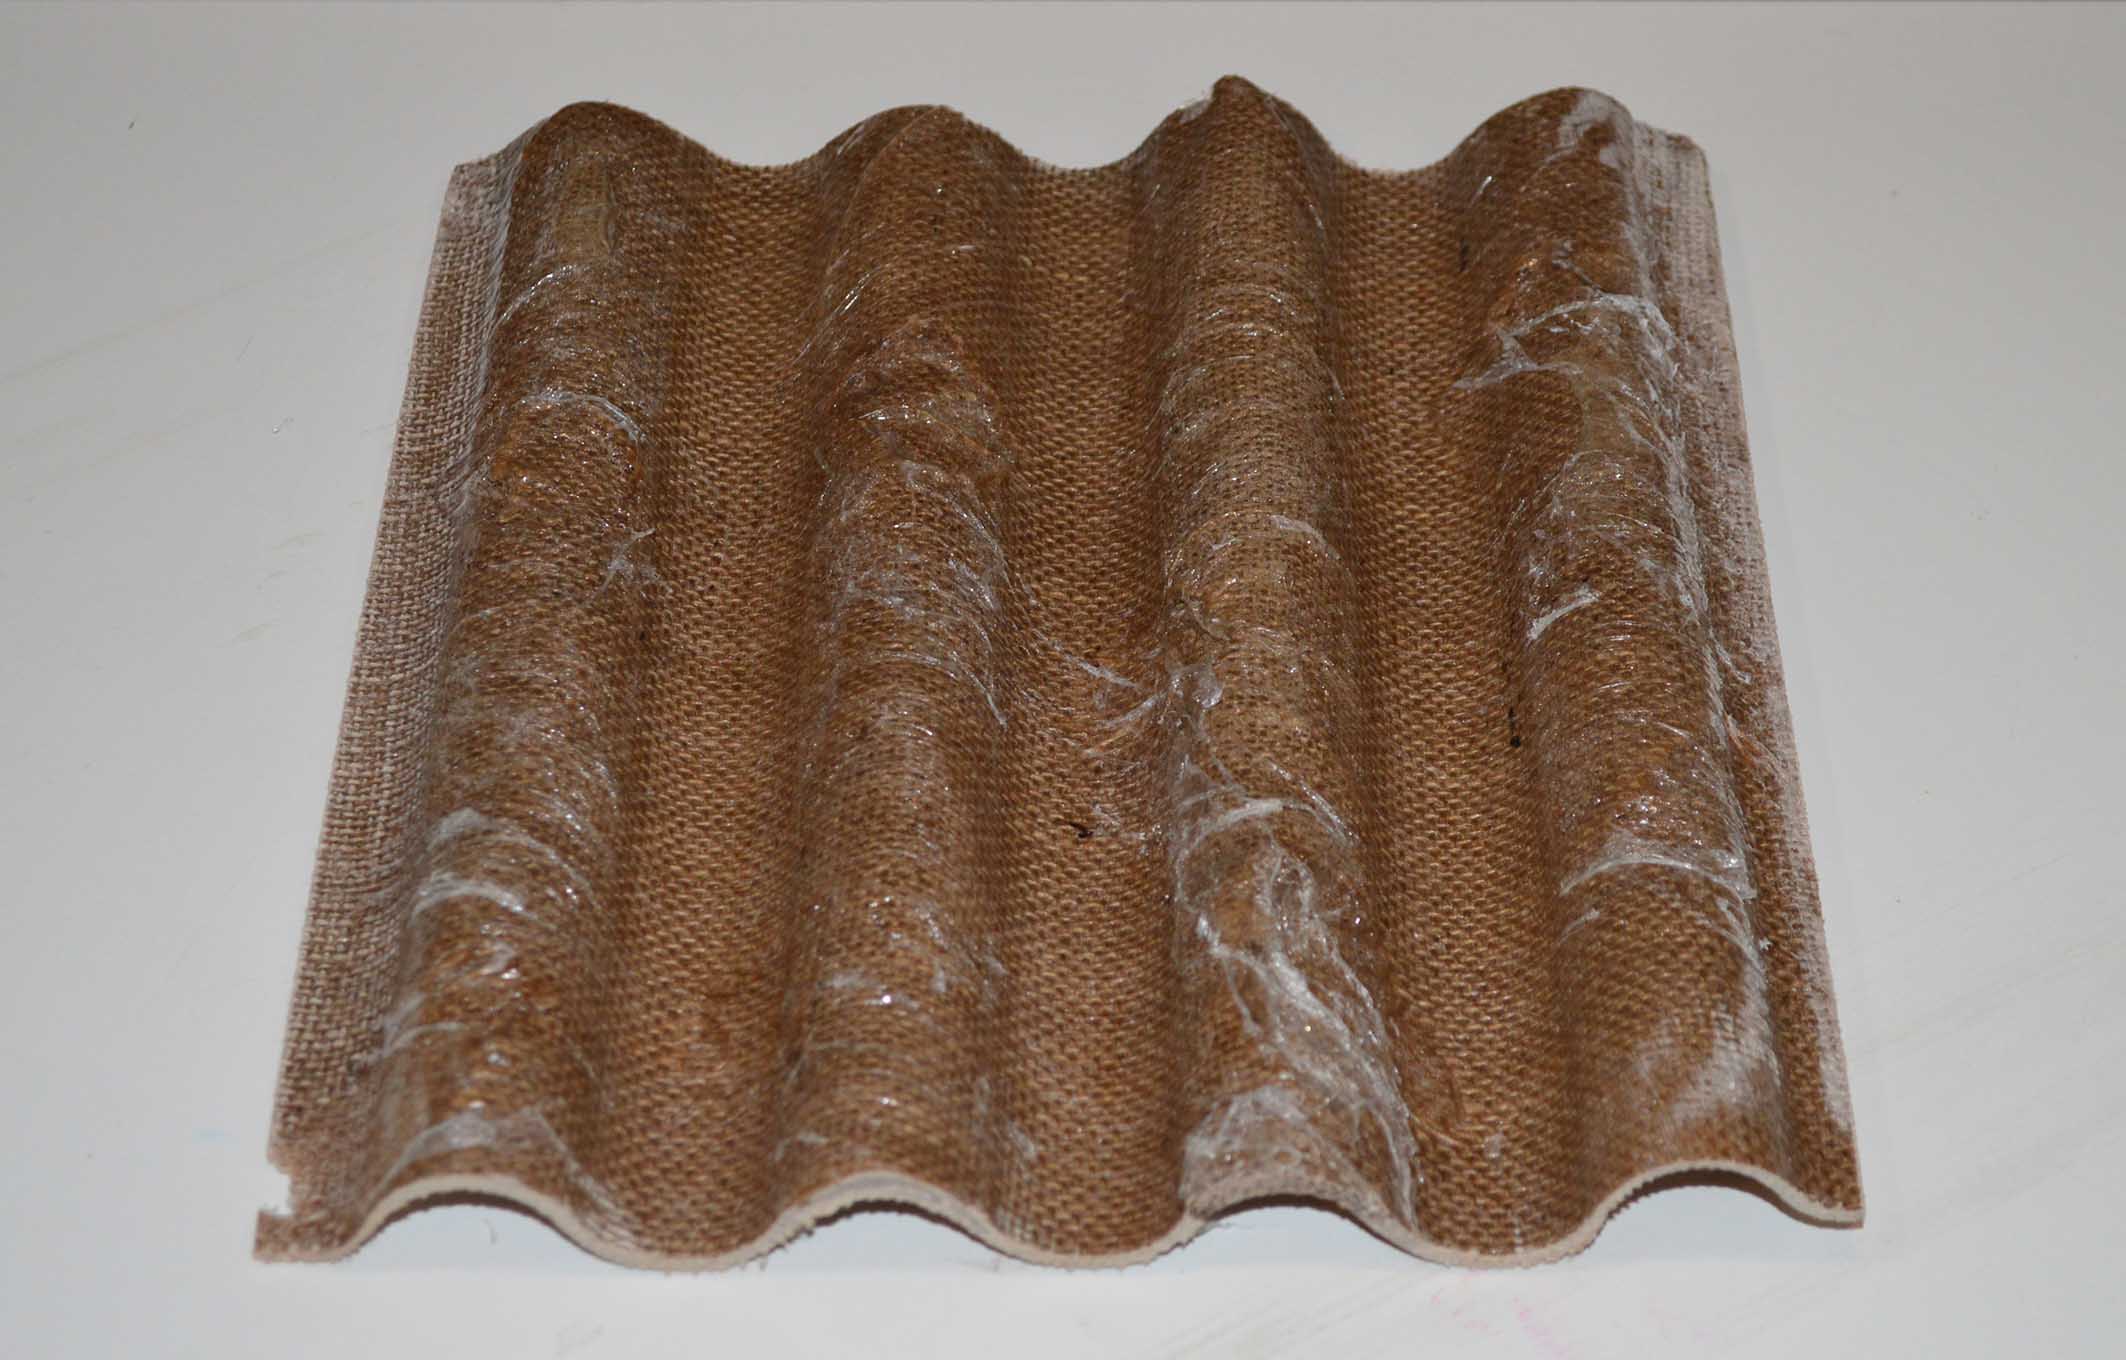
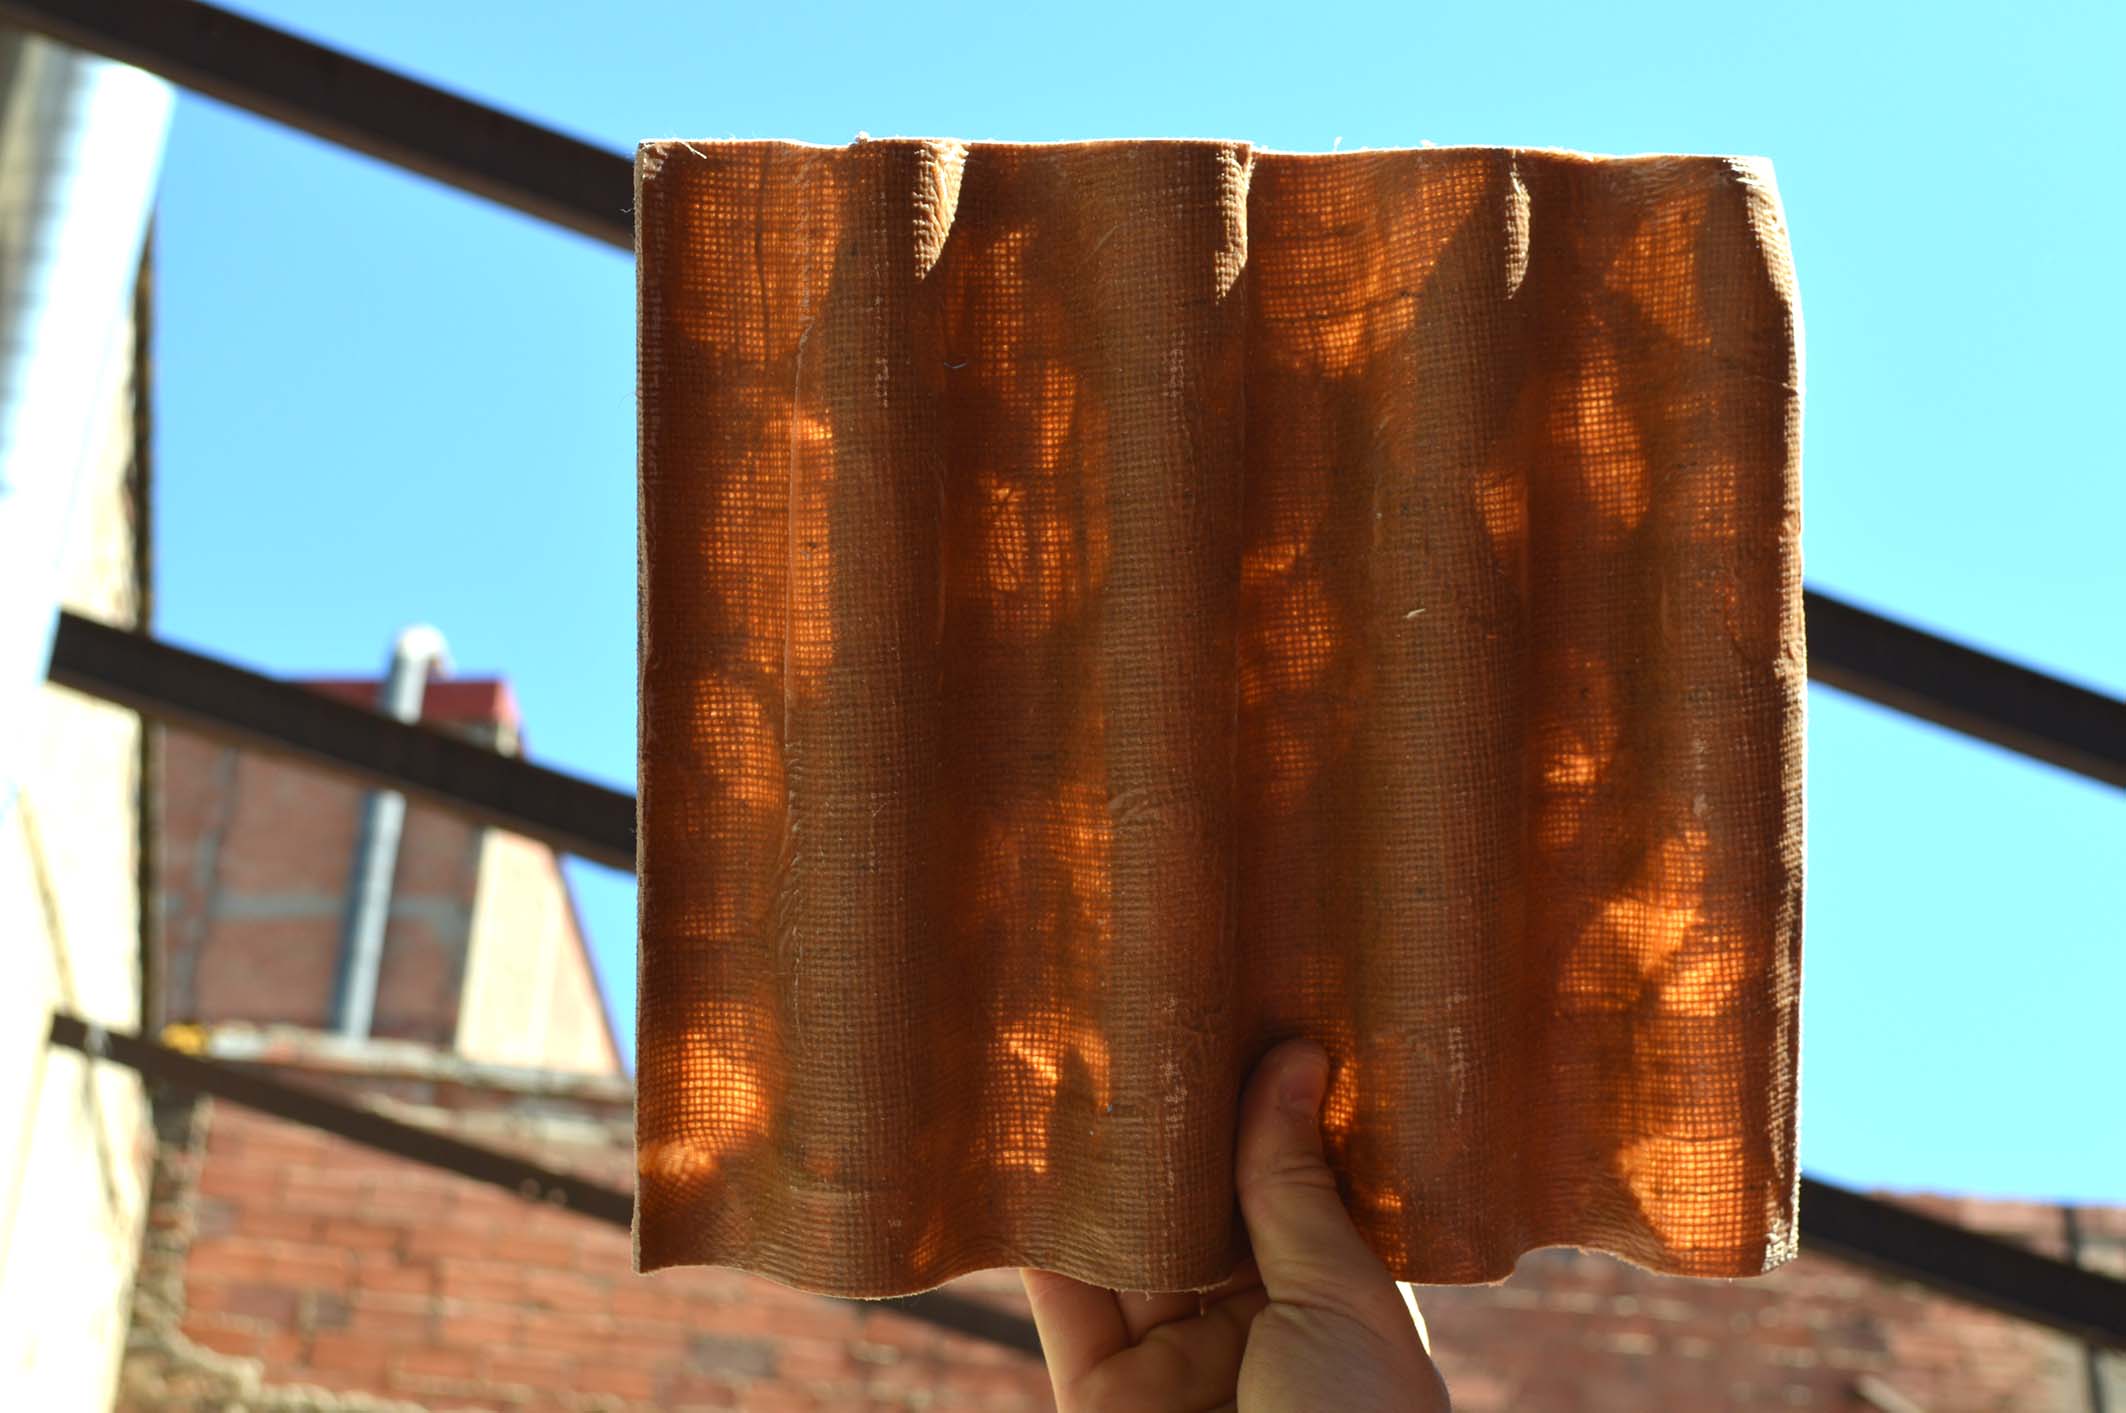
In the back the plastic was forever stuck on my composite, and because of the wholes, the surfaces were not very nice. Here's what it looks like under the sun.
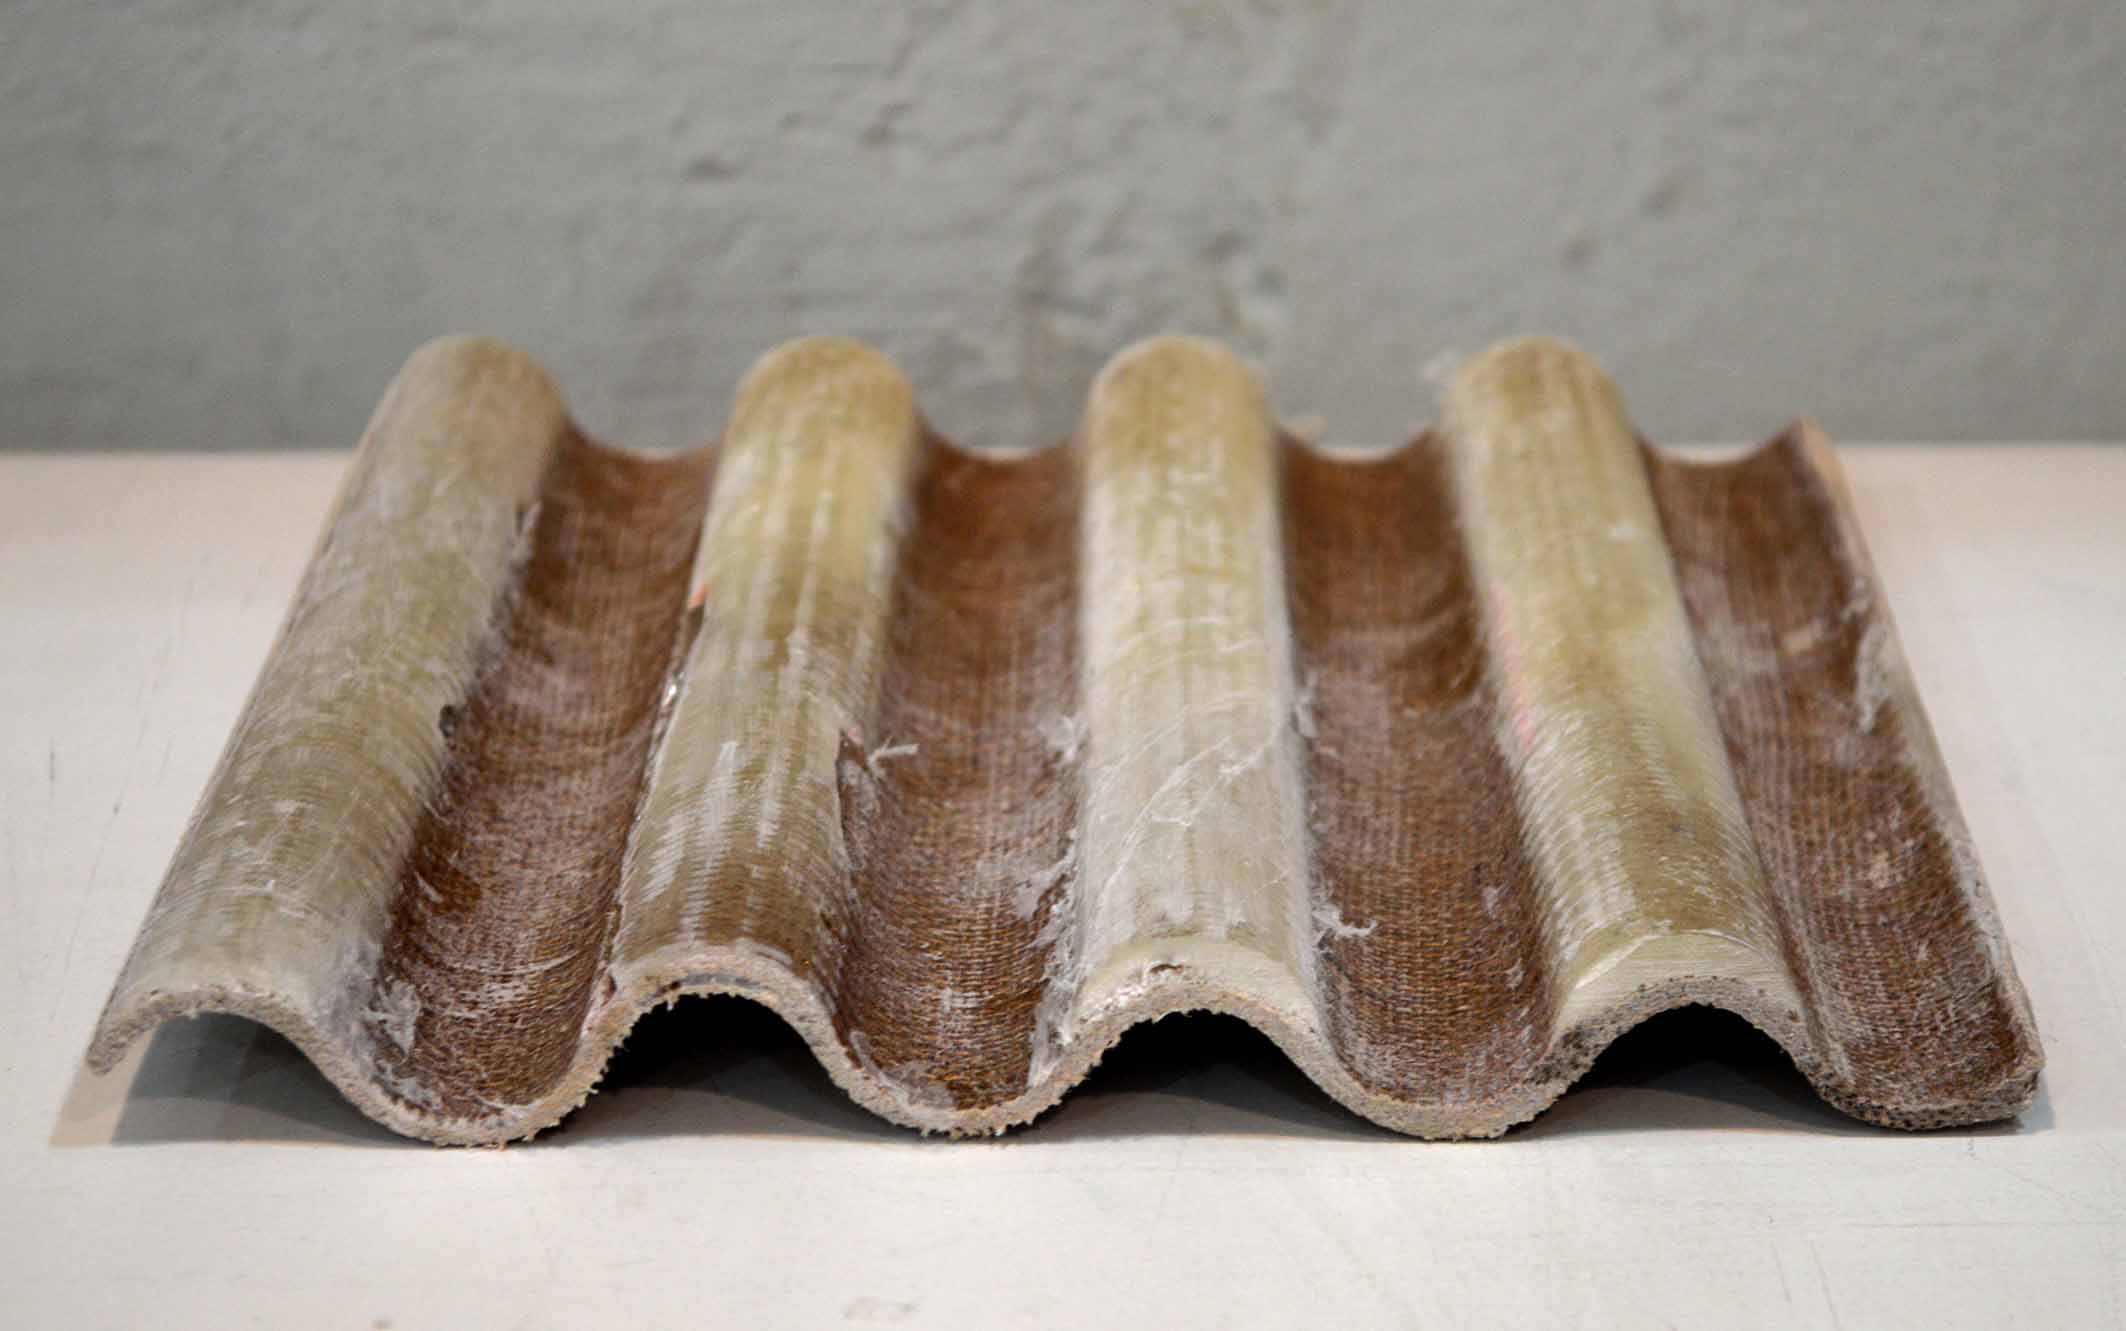
In the next test, I added two extra layers of thin fabric in the top and the bottom of the composite, hoping that this would help me achieve a better finishing on the surface.
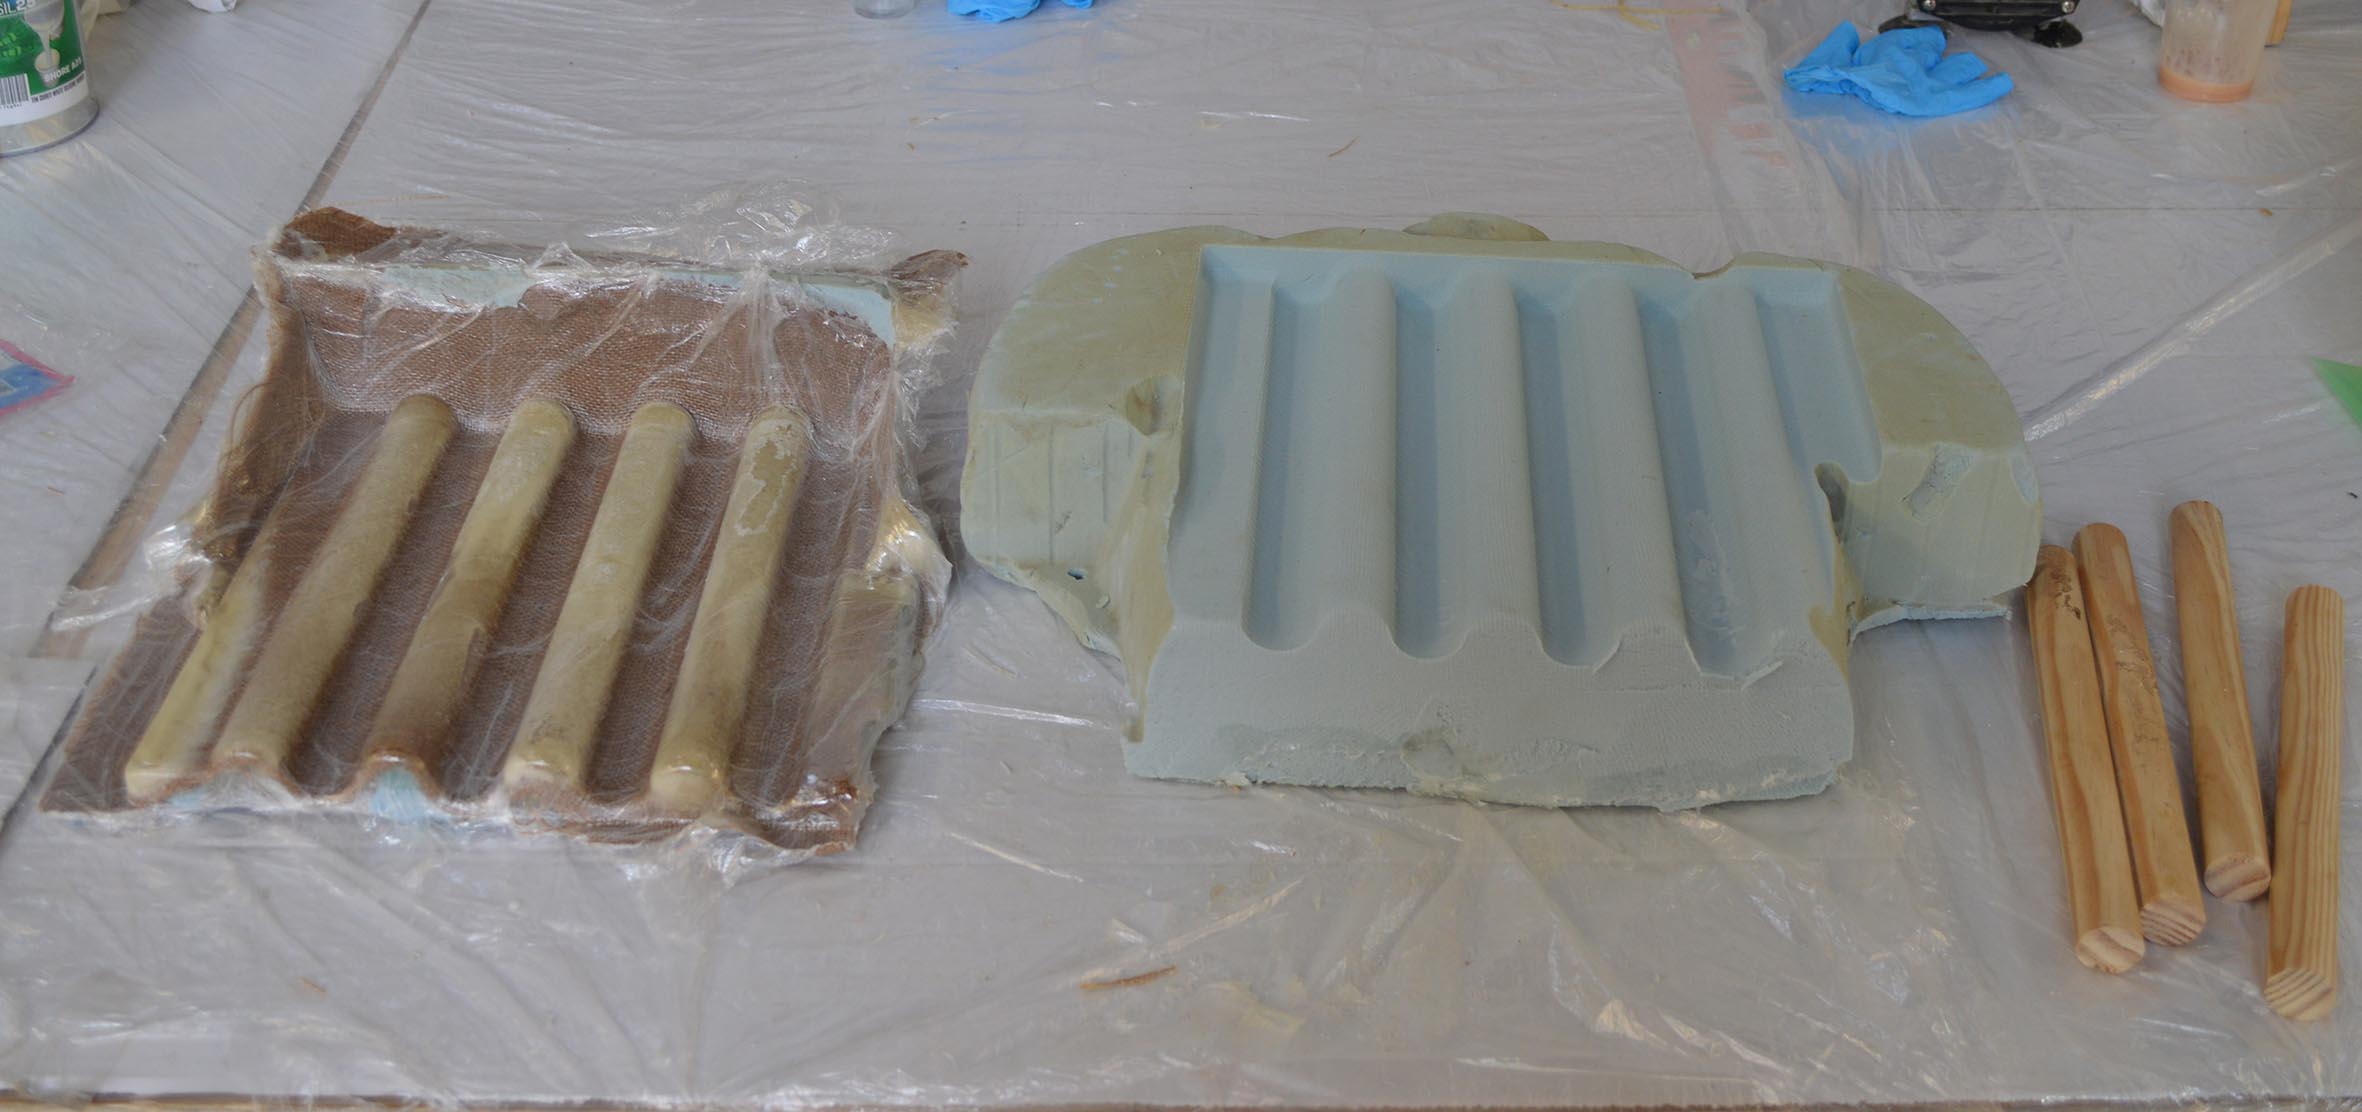
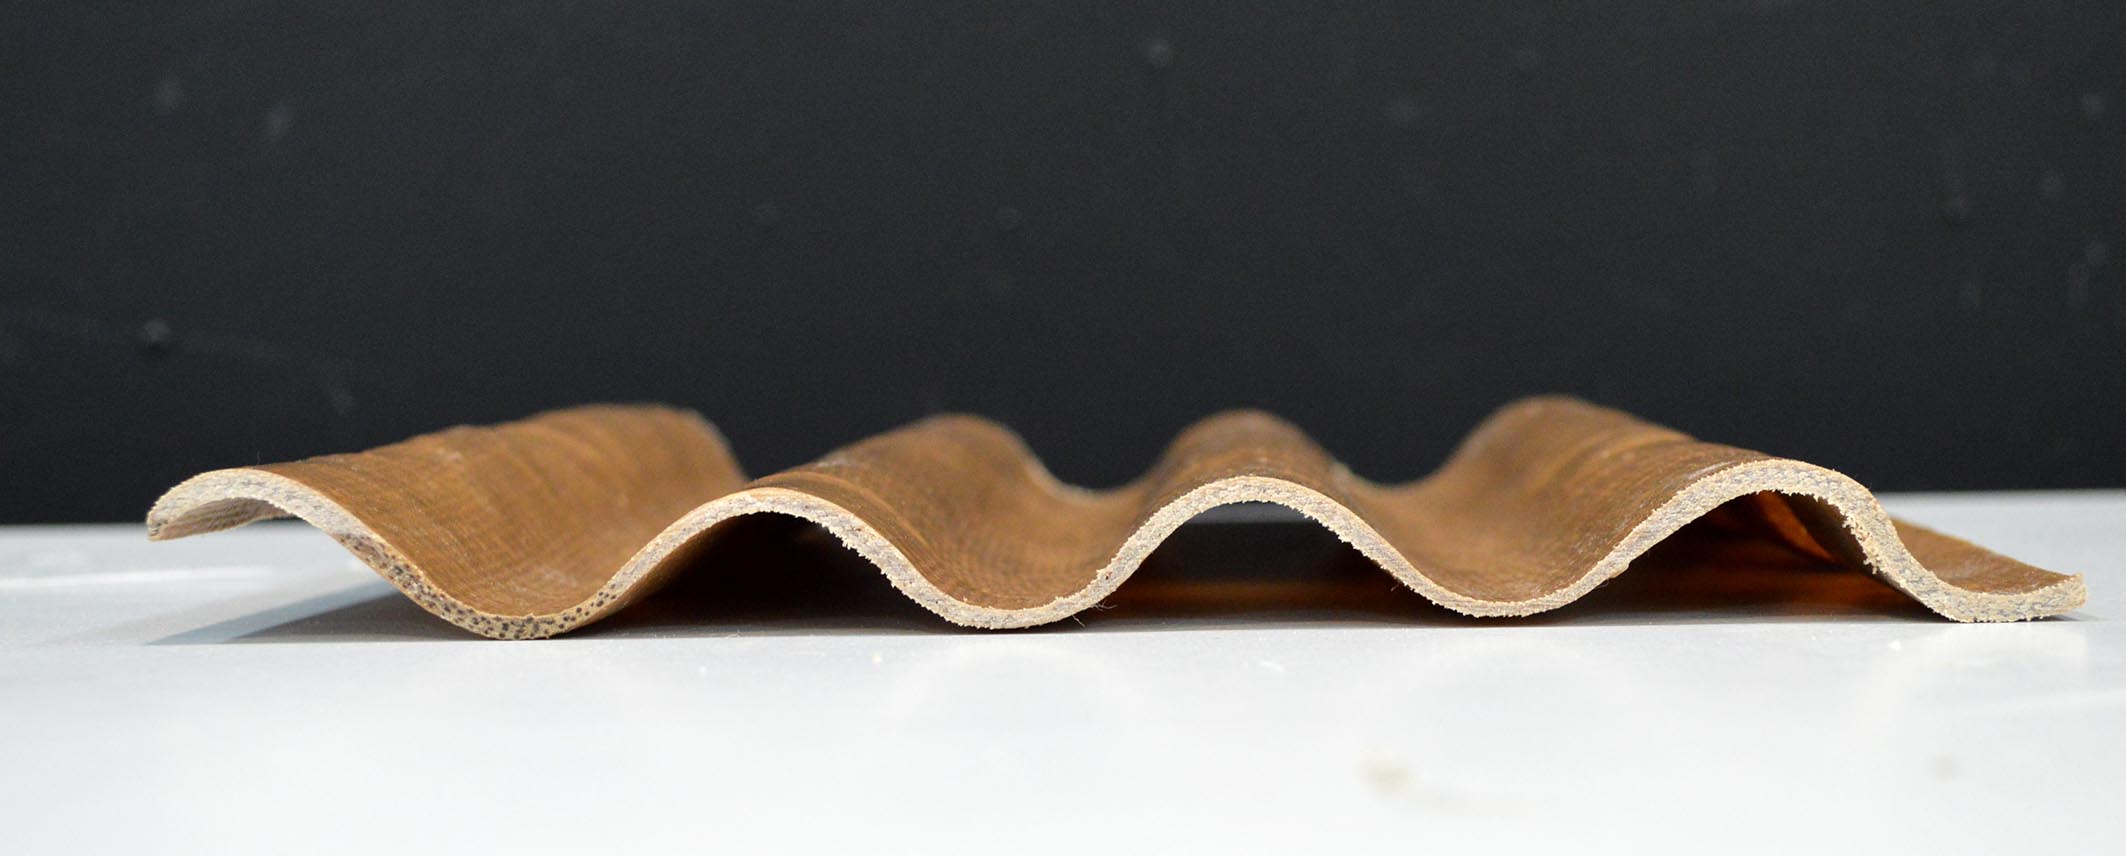
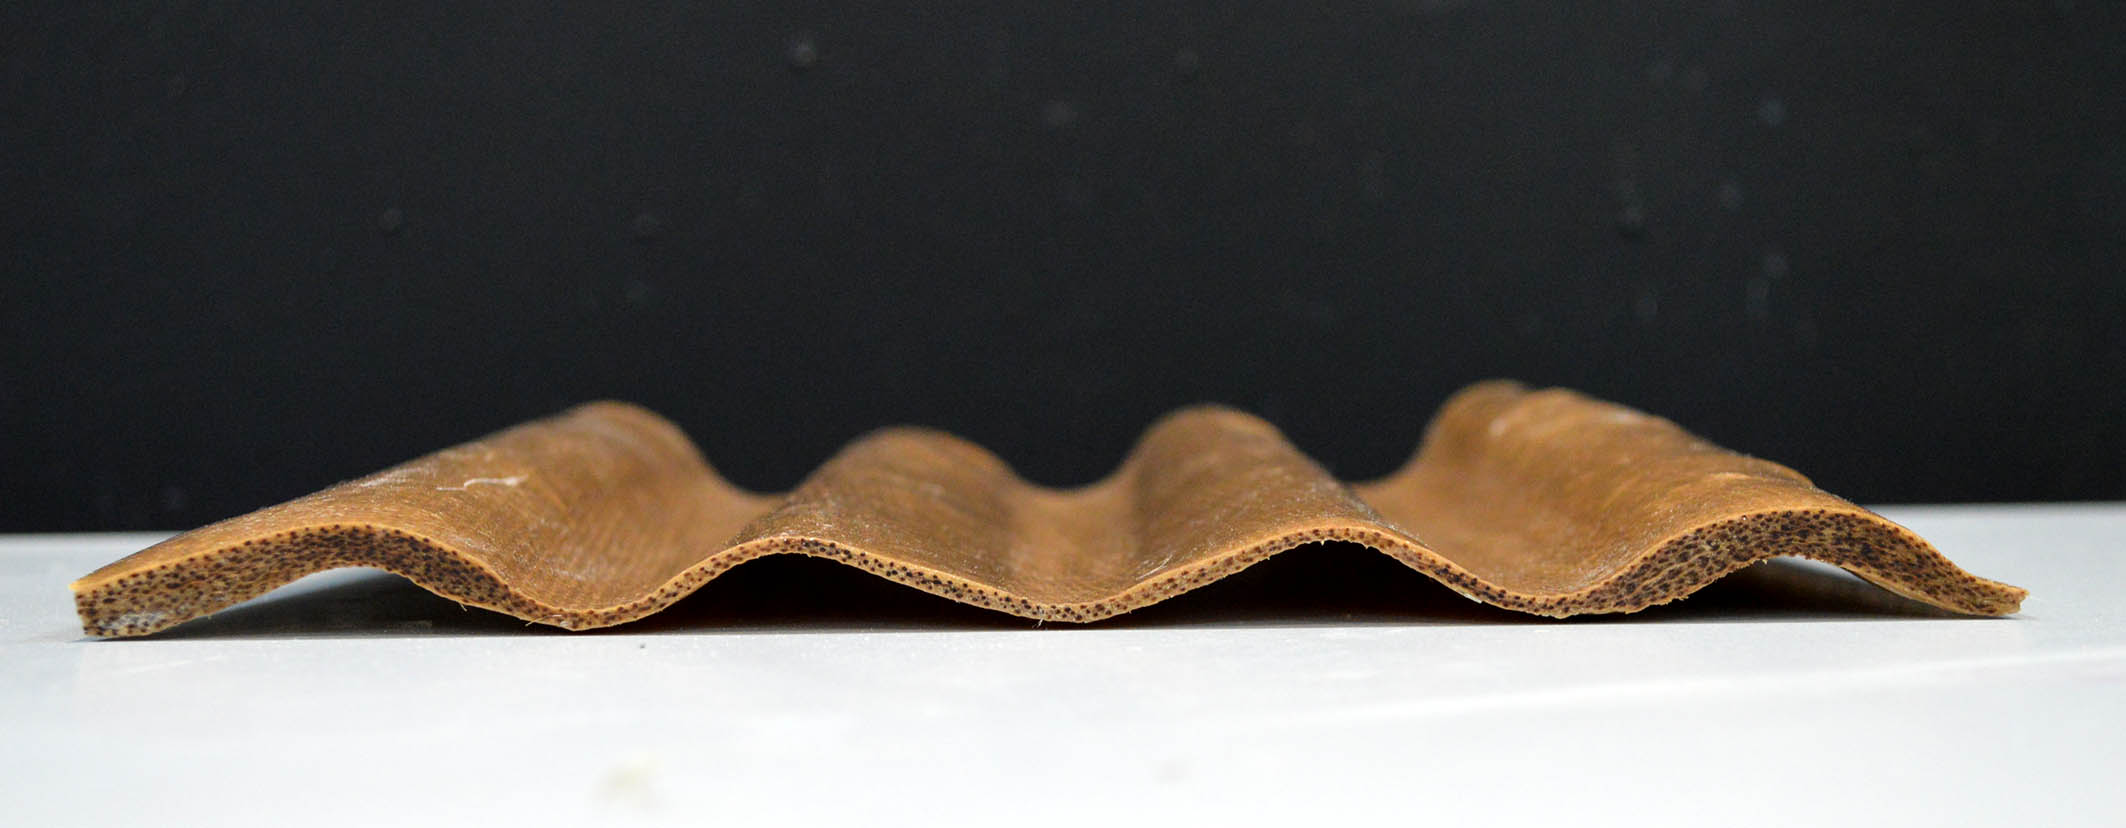
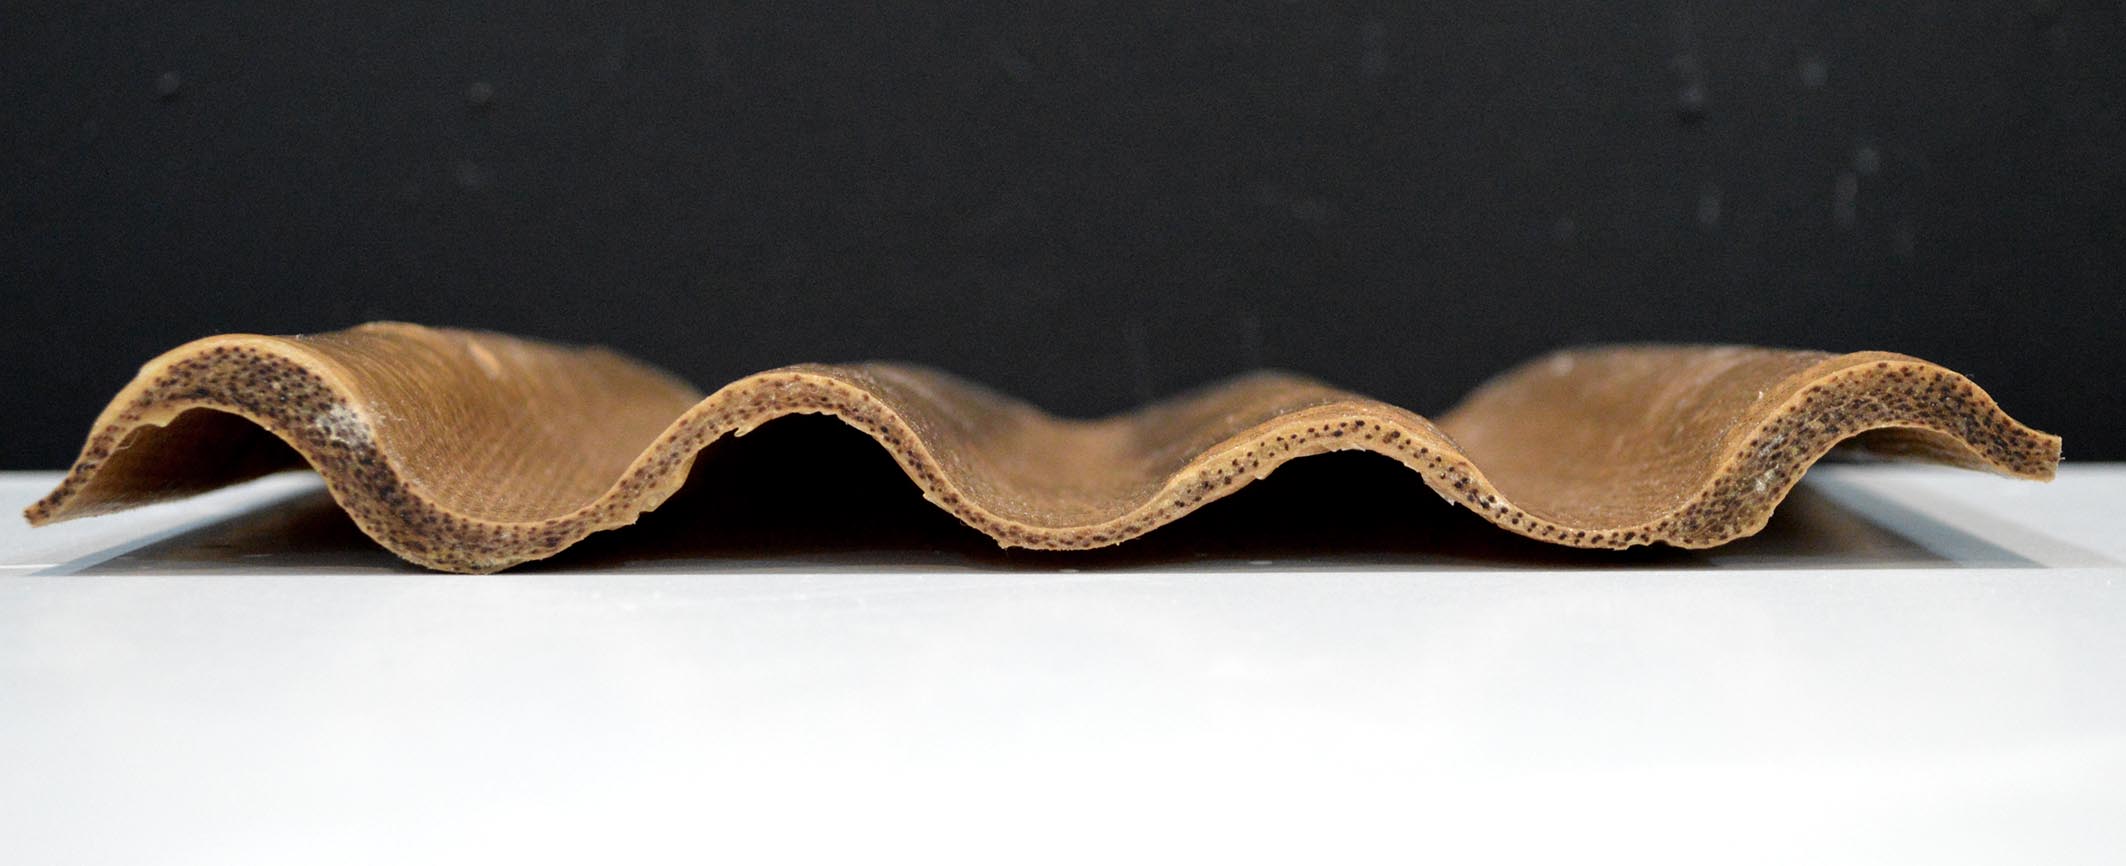
I made two tests with different curvatures. Here they are.
Large curvature
Small curvature
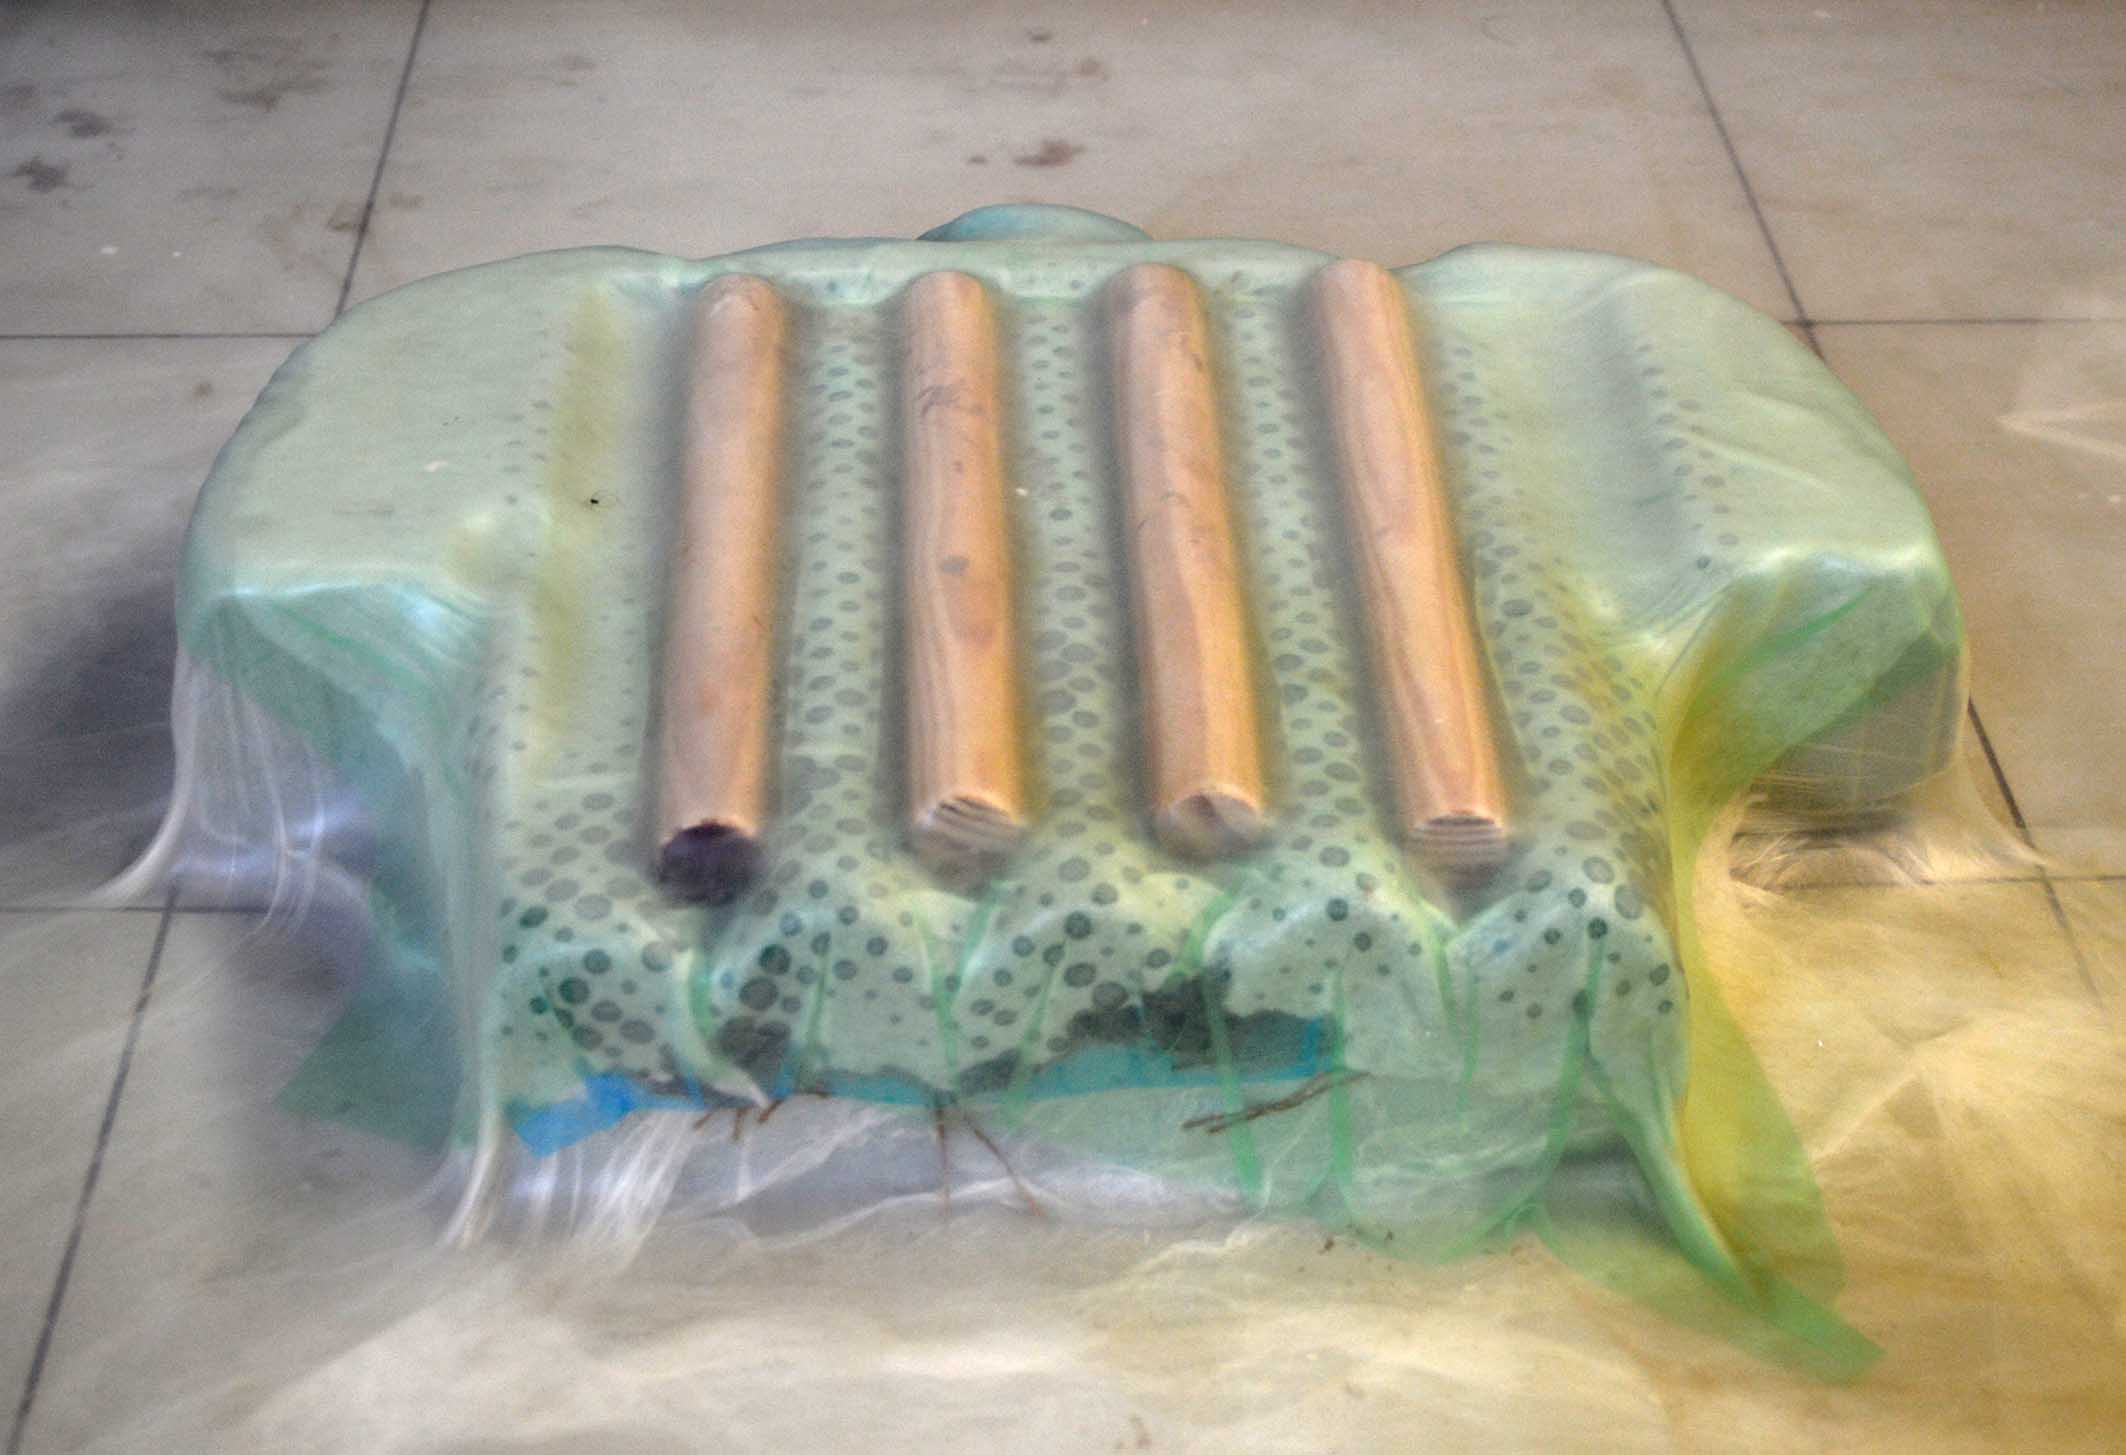
Finally I tried to variate the thickness by adding extra stripes of fabric in some places. This time my materials looked like that:
And 12 hours later:
Here you can download the Rhino file with the 3d moulds:foam.3dm