
WEEK 16 – INTERFACE AND APPLICATION PROGRAMMING
Weekly assignment:
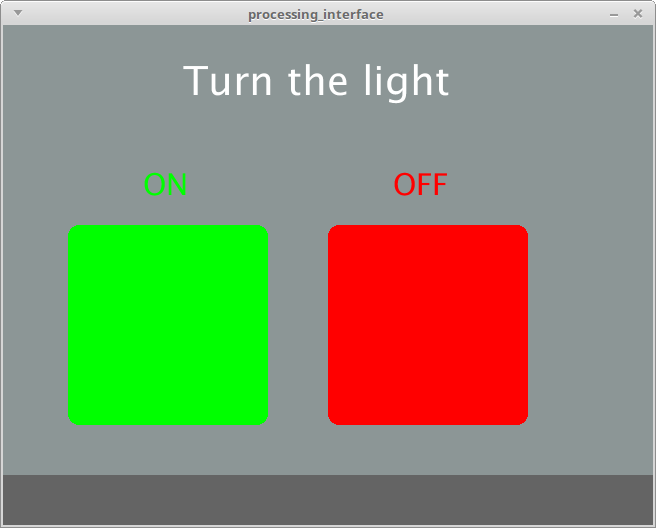
For this week assignment I wanted to make an interface to turn on and off a light. In this case the light is the LED on a hello board
To manage this task I needed two software tools that were new to me: Processing to design my interface and Arduino IDE to write the code and enable my board to communicate with the GUI
Processing
I've choosen this one among all the others possible because I heard about it by some of my classmate and so I get curious
Processing is a specific programming language for visual arts, and as I discovered it let you do very many things designing every part of your job and managing all the graphic details by coding. I knew this from a starting point tutorial I've found on Silvia's page (I've also taken a look to her job and so to Luca Giacolini's page)
But I've found it mostly focused on shape design and this was definetly not enough for what I had to do to make my GUI interactive, so I've seen some of the most specific features on the original website examples, here you can find almost everything
Therefore I've taken a summary look at the various topic and I've made some attempts just to see how the program worked
Then I focused on what I really needed for my aim
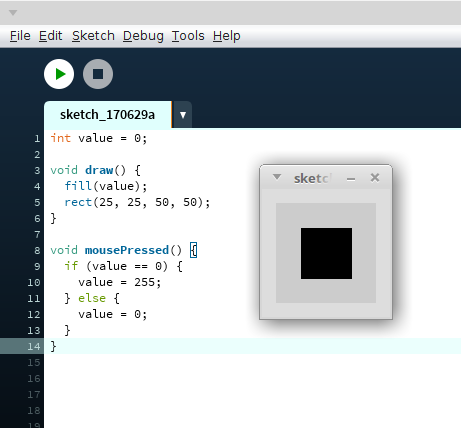
I wanted to do a simple interface with two buttons to turn on and off an LED, so the most important to me was the button example sketch
Also mouse pressed and println functions reference have been very useful, sice I used both in my code
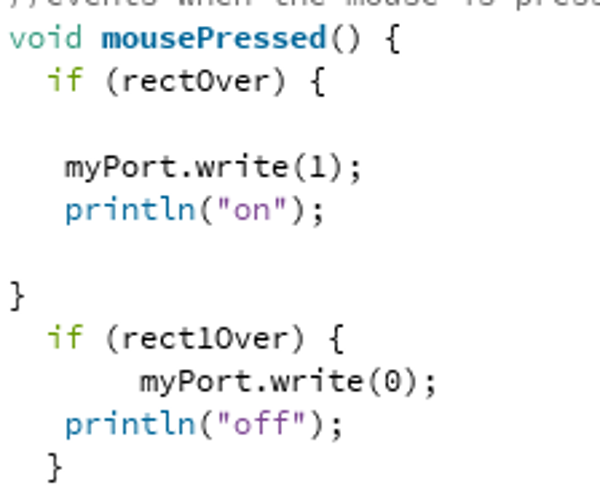
I've used those functions to get a printed text on the console area. I recieved an 'on' wen the button ON is pressed and an 'off' when the button OFF is pressed
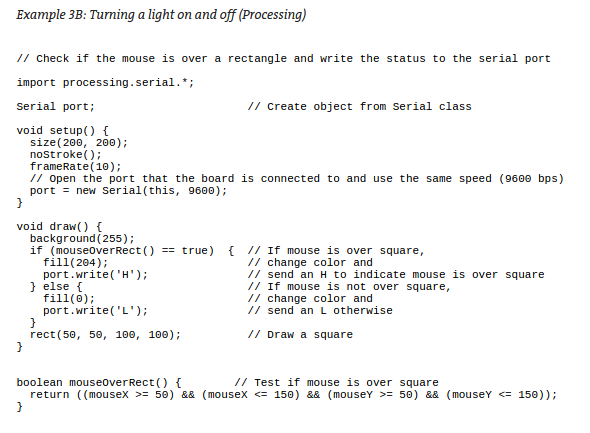
I also had a look at this tutorial, very useful for my goal
And that's how my GUI shows
Arduino IDE
Now I had to program my board to comunicate with the interface I made. To do this I decided to use the Arduino IDE
This Integrated Development Environmennt is a software application that provides, among others, a source code editor
It's usually used to code all the various version of Arduino boards, but it let you program even other microcontrollers
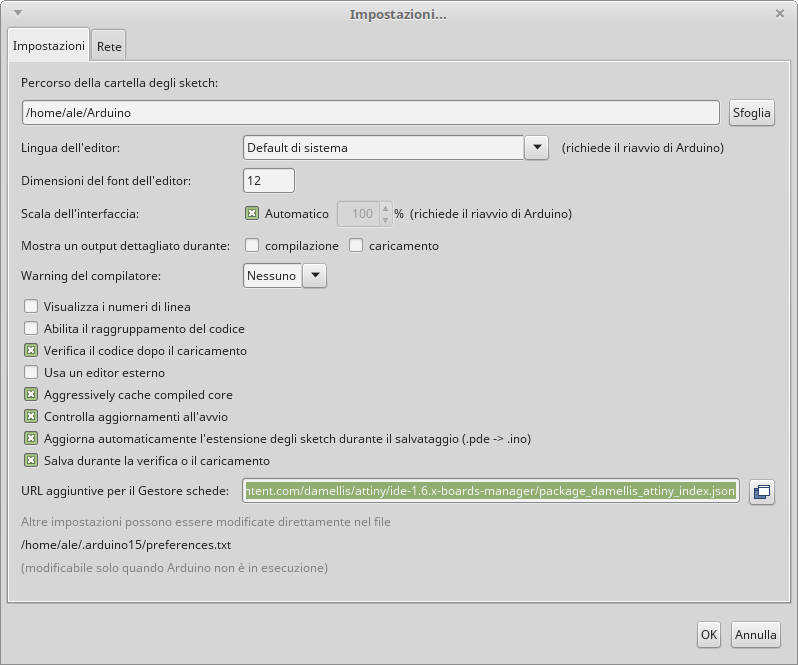
And that's my case, since I'm programming a board with an ATtiny44
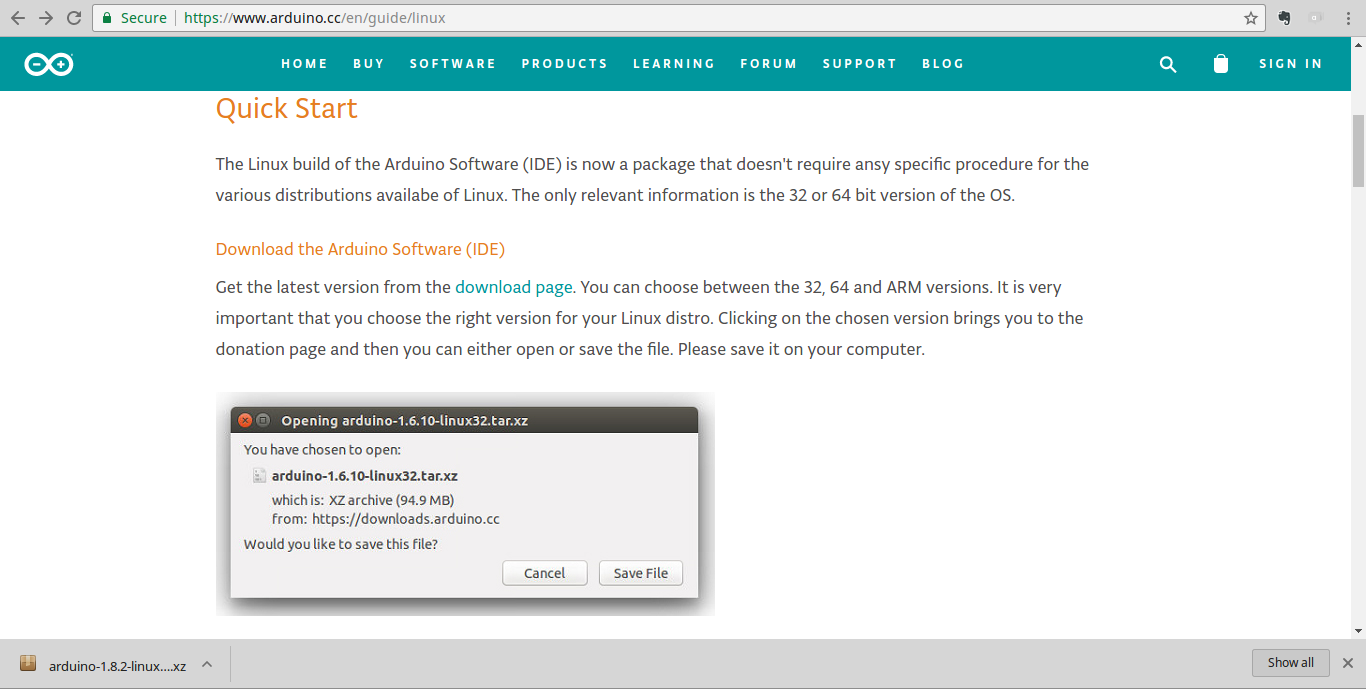
To do this I first had to download and install it
Then I had to add the ATtiny board package to the Arduino IDE's board manager

And I've installed it
In this way I've been able to program my board using my FabISP through the IDE

Now has come the time to write some code. Mhmm...
Ok. I knew that I had to connect my board to my laptop via FTDI for serial communication (Rx and Tx pins on FTDI)
So I looked for how to do this with Arduino IDE, and I've found the SoftwareSerial library on Arduino website and how to use it
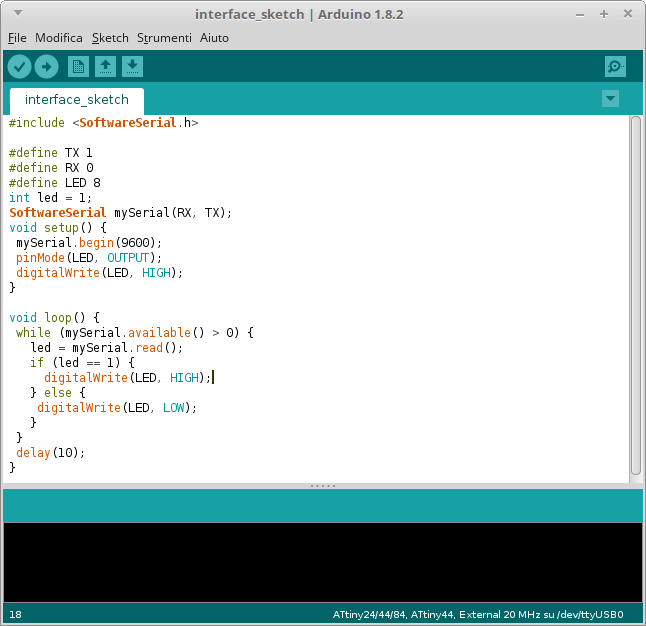
First I had to include it on my sketch and then define my board pinout
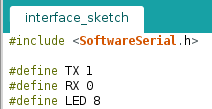
To do this in the right way I had to compare my board connection with the Arduino pinout for ATtiny44
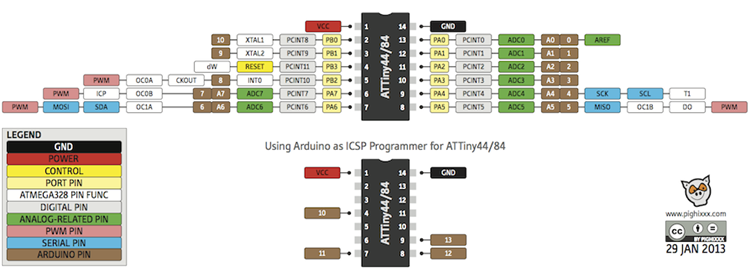
And also thank to the SoftwareSerial example on Arduino website I was able to write a working code
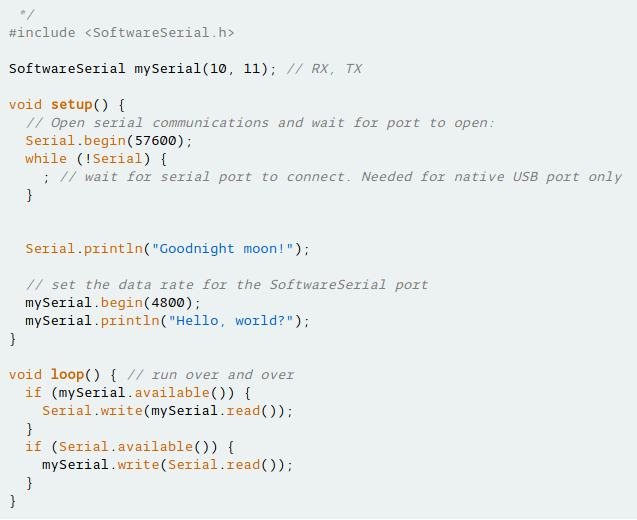
And that's my code
Driving the board through the GUI
Once the code was done, I uploaded it on my board through my FabISP
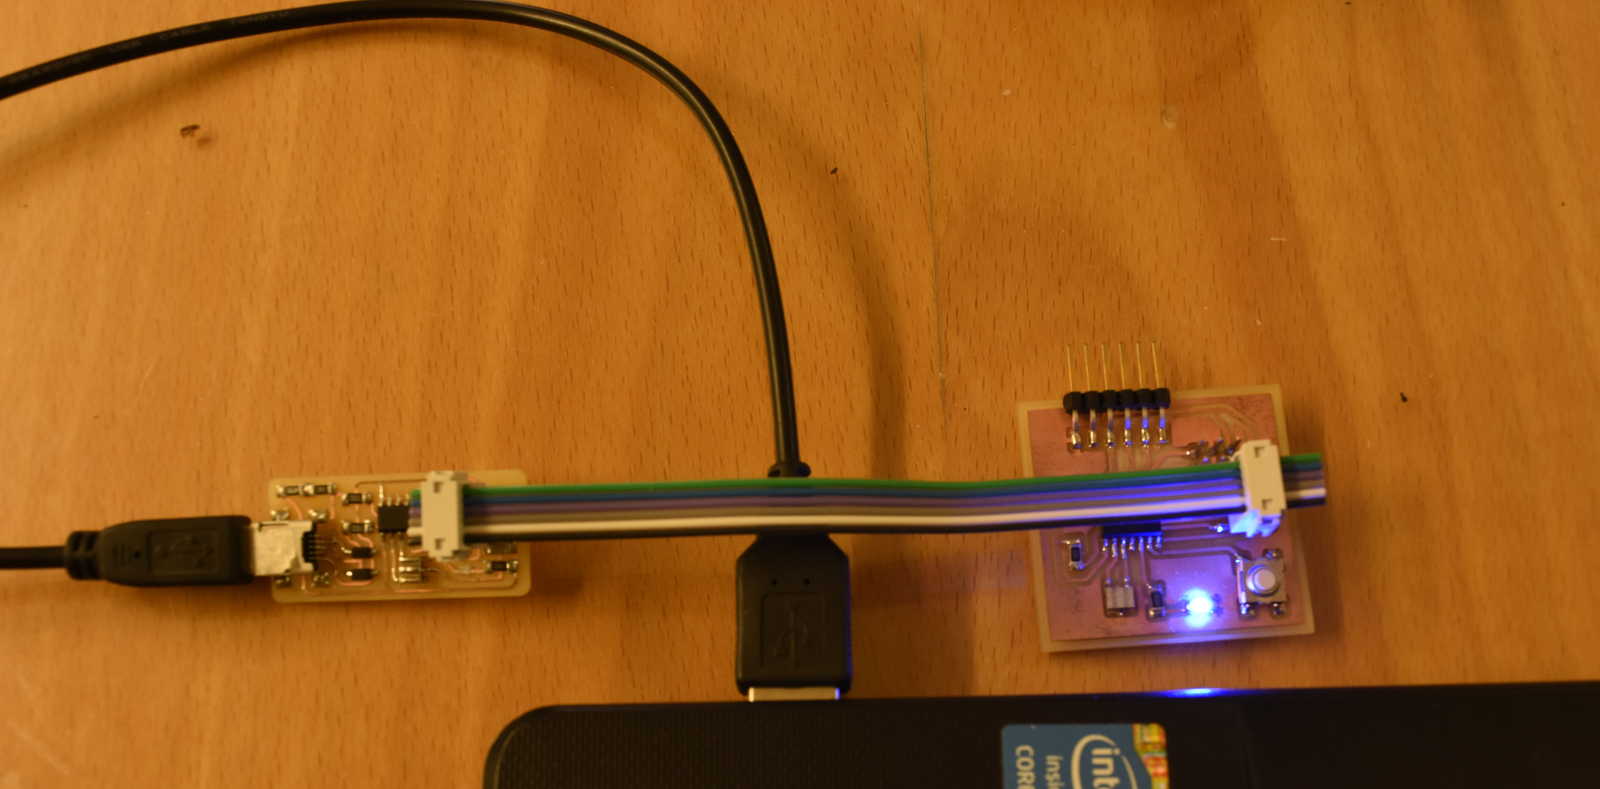
When I connected it to my laptop the LED started blinking because it was still uploaded a previous sketch made during the previous weeks
Now I was ready to test my board with the interface
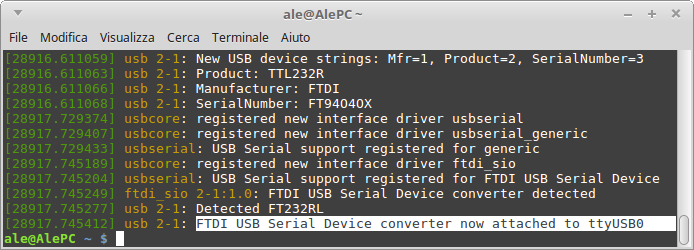
The last think I had to take care was to type in the Processing code the right USB address for the FTDI cable
To know it I typed a dmesg on my terminal

And it worked well!
When I tried to use my interface while the board was not connected (to modify something and see the result for example) I recieved an error, to fix it I just had to comment it with //

Download Arduino code and Processing code here

