
WEEK 8 – EMBEDDED PROGRAMMING
Weekly assignment
This week's assignment was to:
program our board to do something
Read a microcontroller data sheet
To reach the goal the first thing to do was to read the data sheet of the installed microcontroller.
Every week I started from the bottom level, but this time I really hadn't any idea of what I was going to do actually.
For this reason I had to spend the most of the time to study (and asking help around me...)
These are some interesting sources I consulted:
Previous years student's pages (Diego Dal Canto and Linda Wanders)
Data Sheet
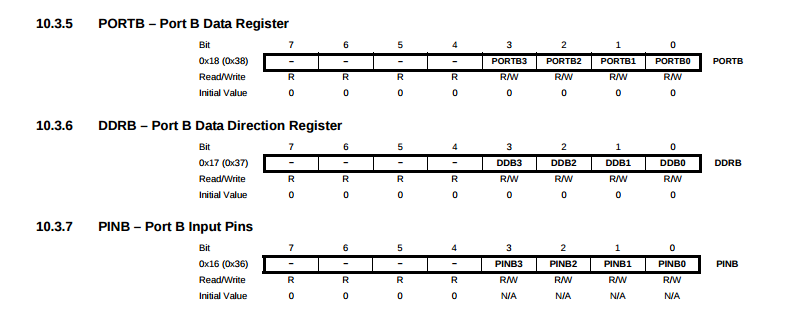
First of all I read the data sheet of the ATtiny44 to find some information about this kind of microcontroller
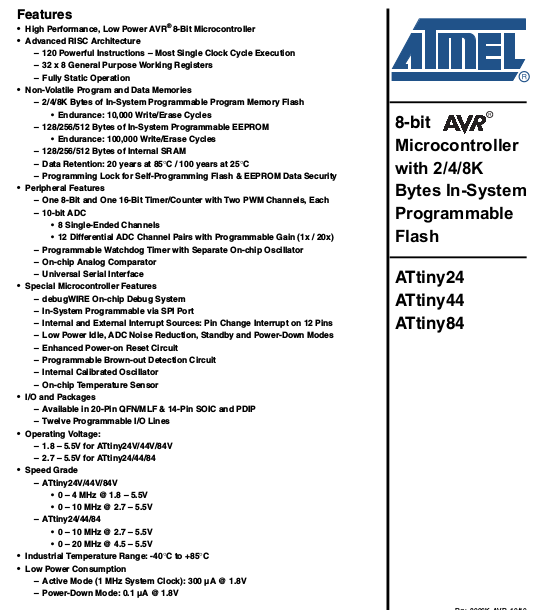
In the first page there is a summary of the device's main features
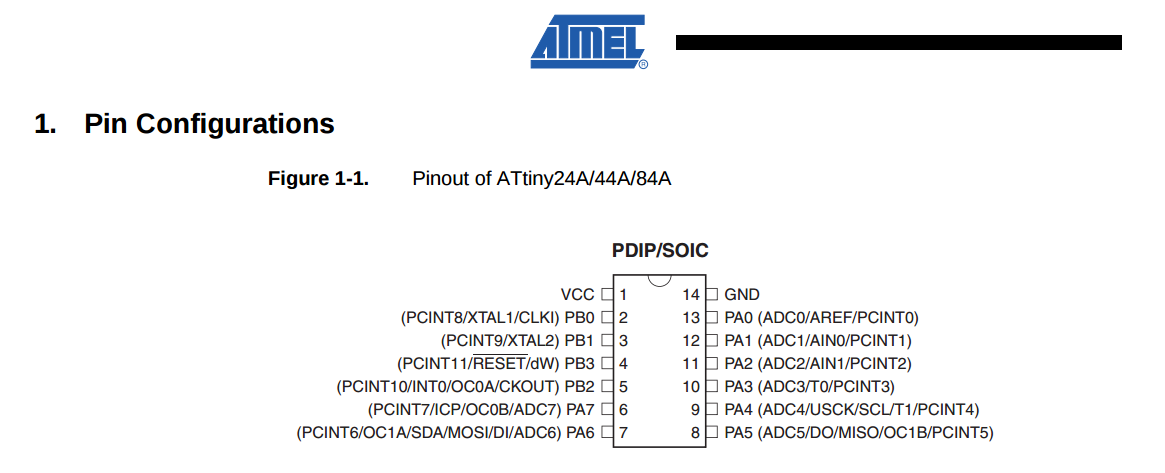
I moved to a section focused on pin configuration
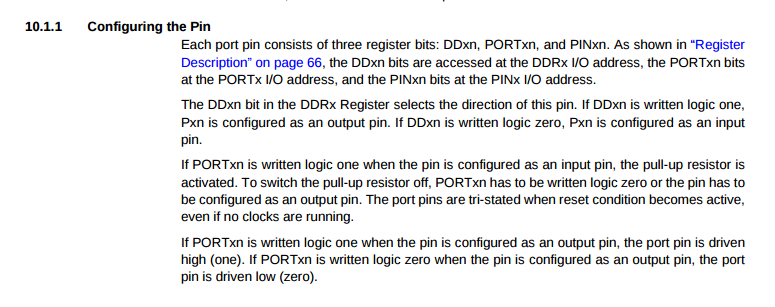
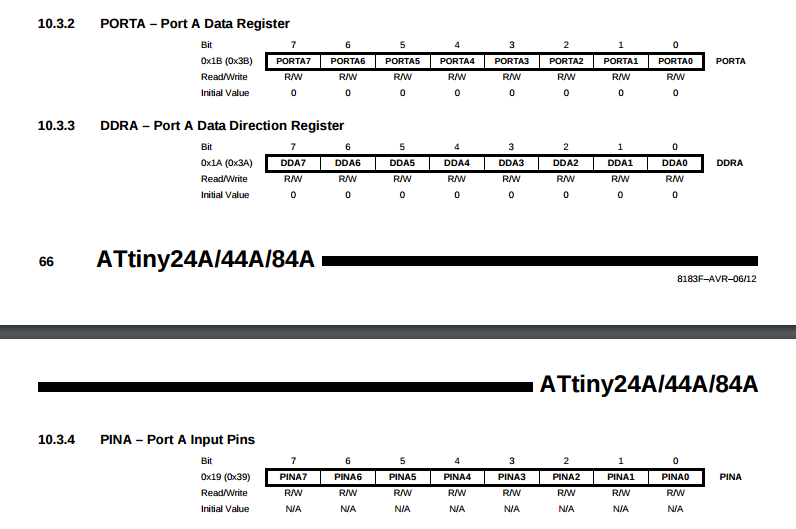
On my board I connected the LED to the PB2 pin and the button to the PA7, so I checked the register description
Once I collected these basic informations I thought I was ready to flash my board and make it to do something
Programming the board
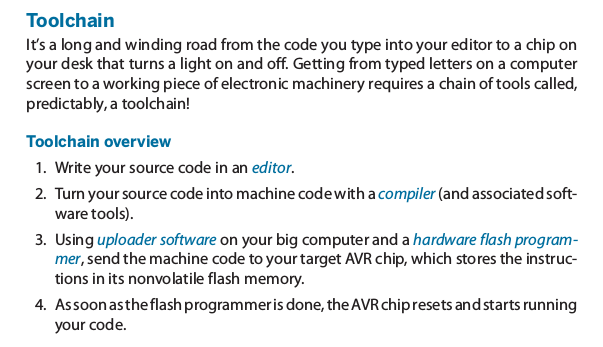
To program your board you need a series of software and hardware tools that are summarized in the toolchain
The editor is used to write the C code (or others language), you can opt for some specific software editor (for example to write this website I'm using Atom and it's good also for the C code) or a basic text editor you can find in every OS.
Once you have your C code you need to transform it in a lower level format, the .hex. To do this you need a compiler, we use the GCC.
avr-gcc your_program.c your_libraries.c -o your_program.hex
In this line what follows the -o is the output.
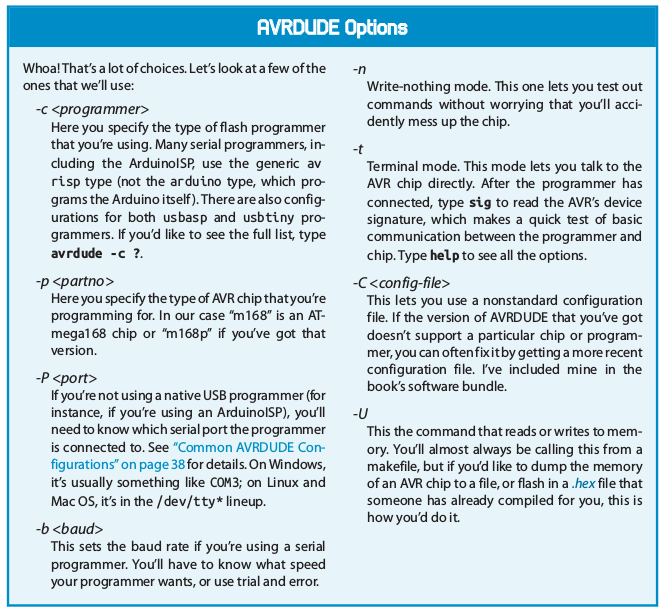
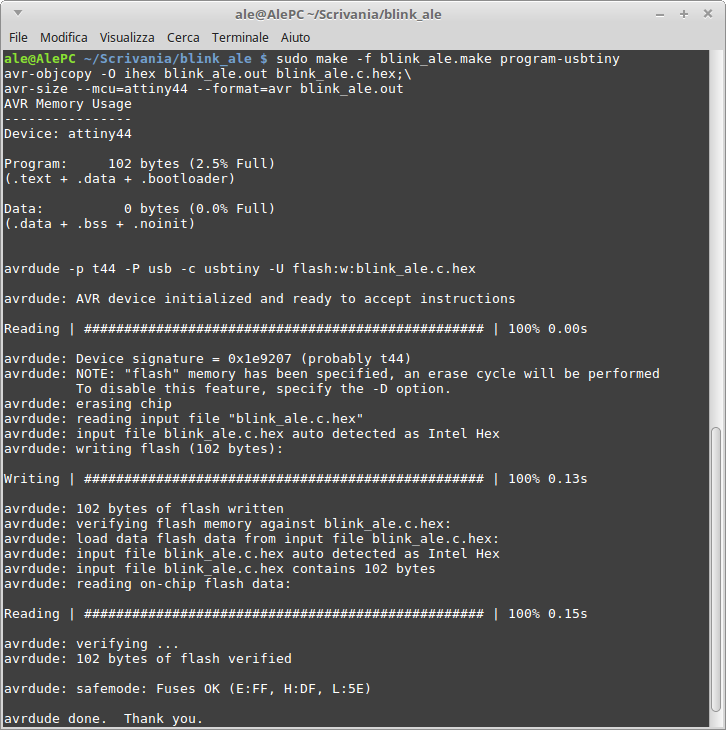
Now you need an uploader software, we use AVRDUDE that has some different arguments
As hardware flash programmer I used the FabISP I made for the electronic production assignment
The compiling and uploading procedure are keeped in the make file, that contains a bunch of dependency rules and instructions for processing your files, so you don't have to compile them manually each time
I downloaded Neil's hello.ftdi.44.echo.make and I changed the file name (first line PROJECT=)
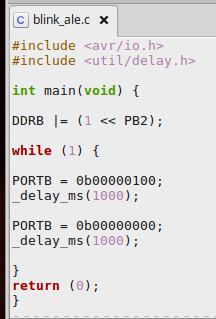
To try quickly if my board worked and the LED blinked I used a C code I found on Make:AVR programming
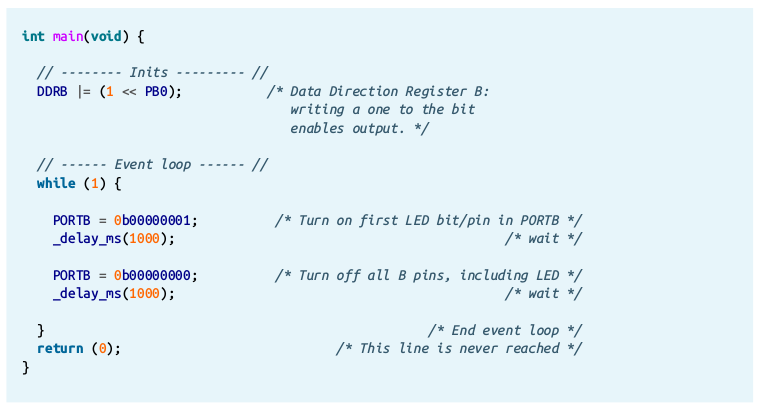
Obviously I changed the pin from PB0 to PB2 (where my LED is connected)
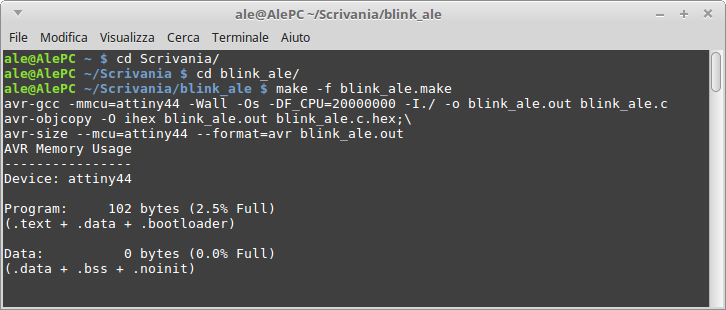
Then I executed the programming procedure by the terminal
make -f file_name.make
make -f file_name.make program-usbtiny-fuses
make -f file_name.make program-usbtiny
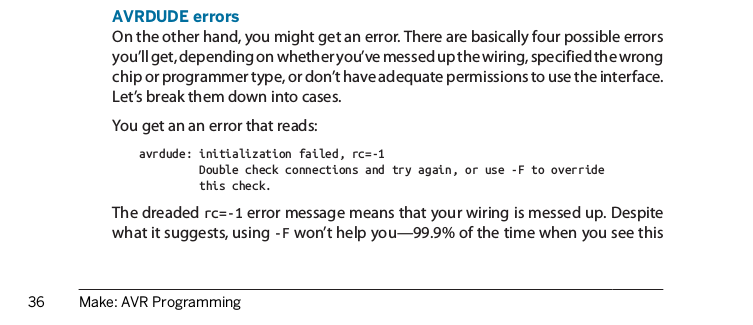
But when I moved to the second step I recieved an error
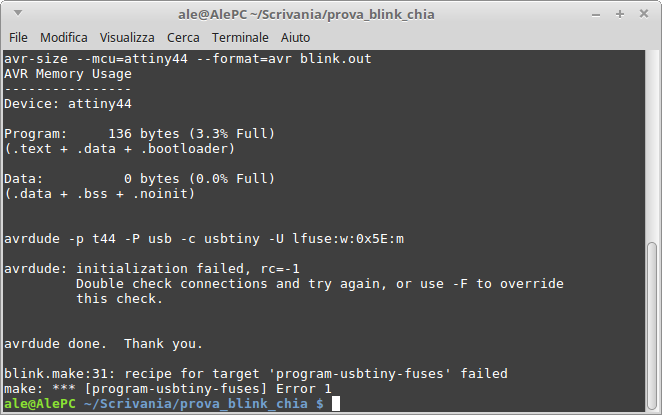
As I read in Make:AVR programming it was a wiring error
So I started to check any possible problem in my board
First I checked the weld joints and when I found some inaccuracy I soldered it again, checked with the voltmeter and tried again
But nothing changed
So I checked the design I made with Eagle, to see if the problem was at that level, but everything seemed good
Then I moved to the picture of the milled board without components and I found that a pin and a trace were linked...
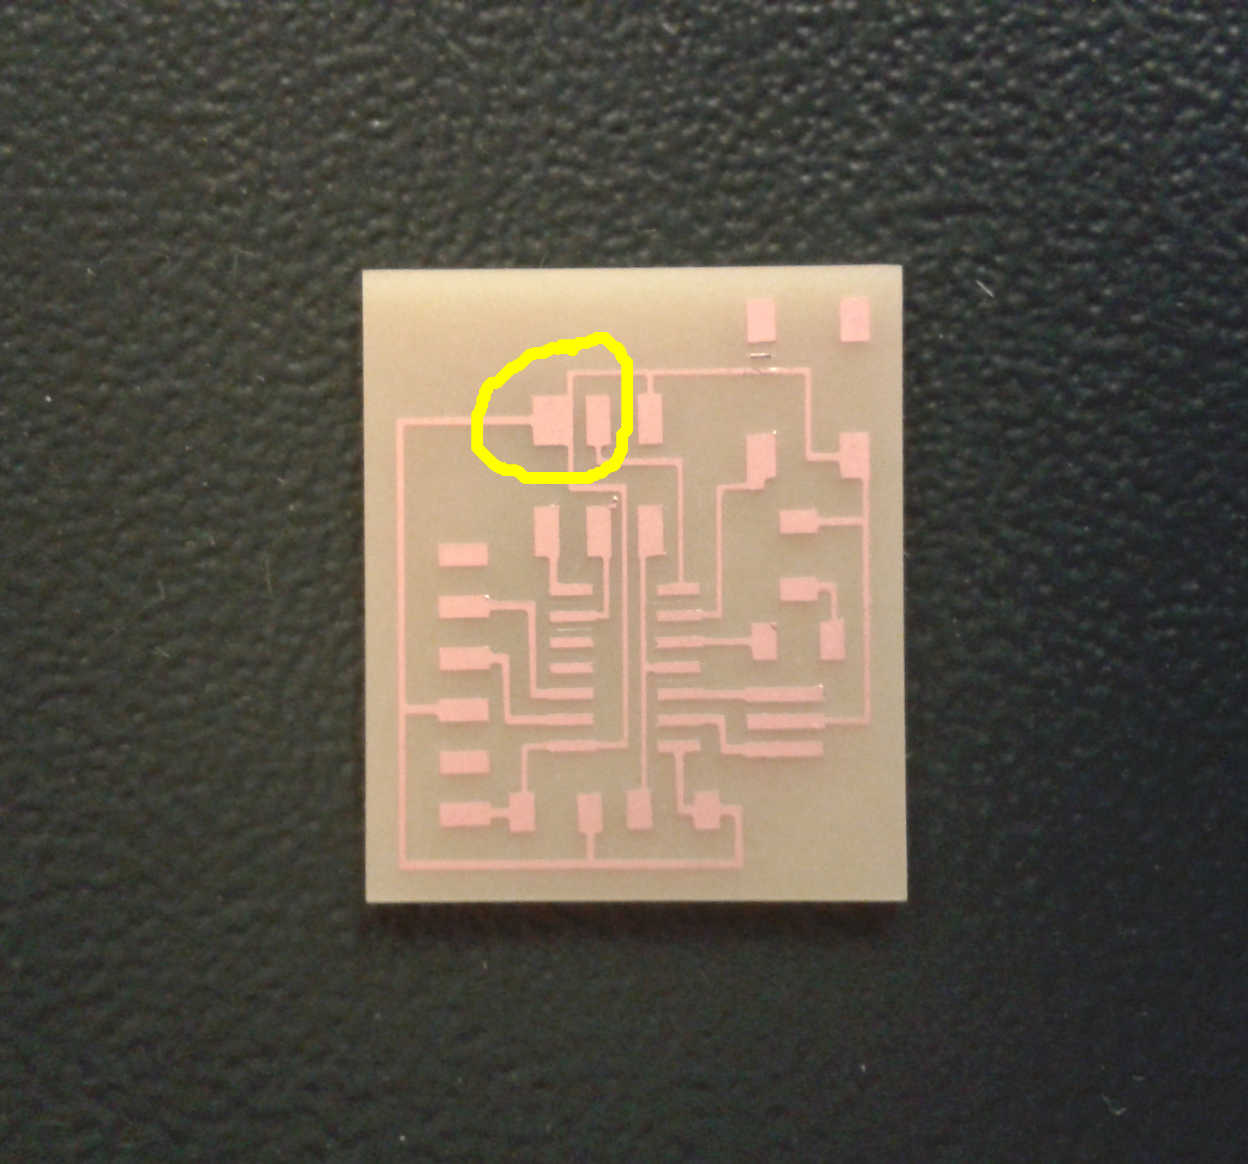
I've fixed it engraving manually and creating a space between the pin and the trace
But there was something wrong again, and finally I've found that I connected the FabISP and the echo ello-world board in the wrong direction...
Fixed this I recieved the right outcome

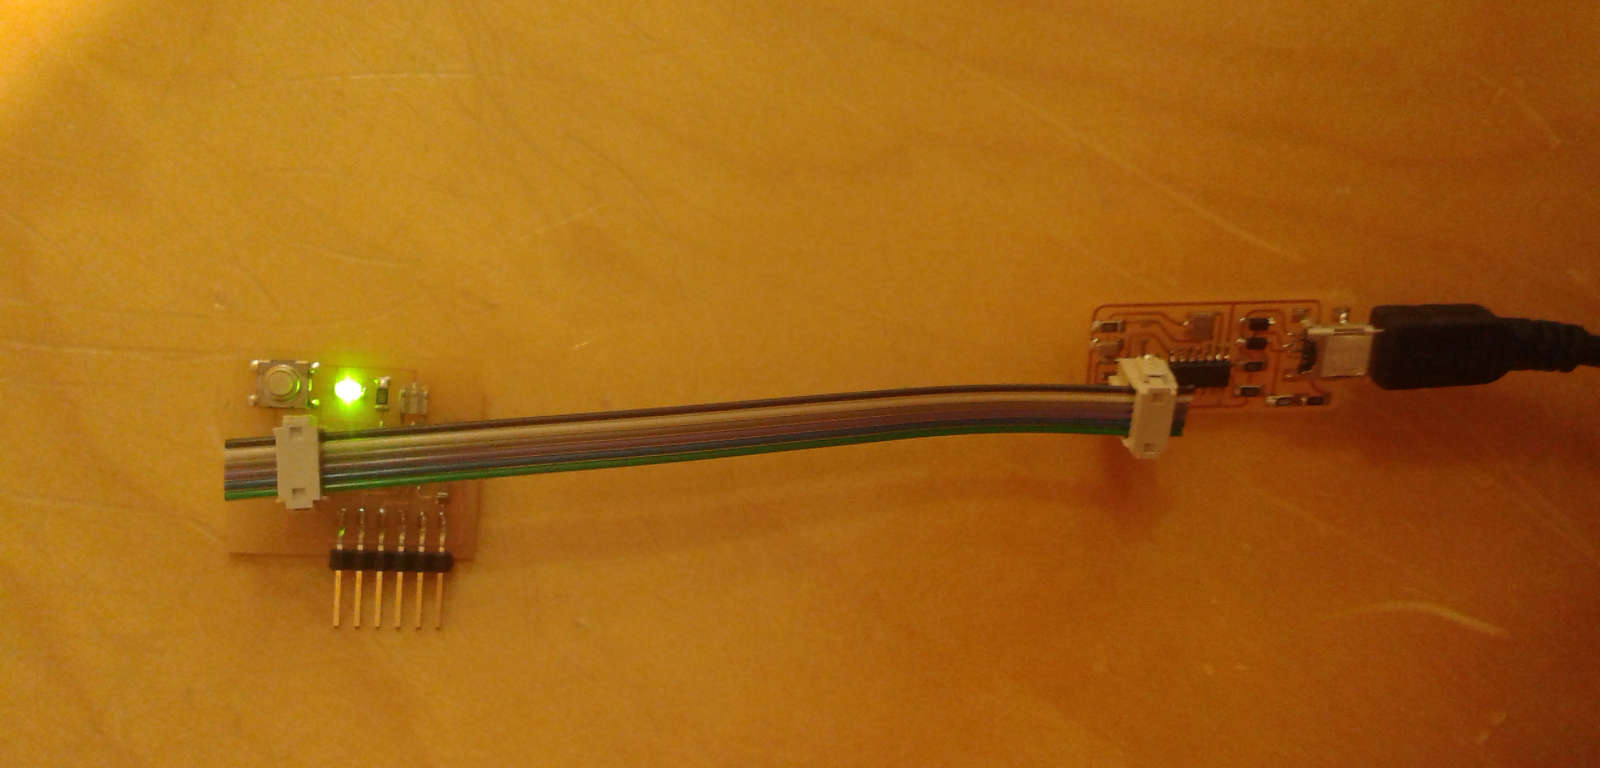
And my LED finally blinked
Even due to these problems, in addition to the amount of study I had starting from zero, I had not enough time to train with coding, but I'm going to study it more and try to write something more complex
Here is the folder in wich I put my programming files

