Interface and application programming
Have you:
- Described your process using words/images/screenshots
- Explained the protocols you used
- Had a fun time
- Outlined problems and how you fixed them
- Included original code
Described your process using words/images/screenshots and Explained the protocols you used
LabVIEW
For this assignment I used the printed board to control step motors fabricated in the assignment Output Devices, an Arduino and LabVIEW software.
You can download LabVIEW from Here and NI VISA functions from Here to communicate by serial port with Arduino.
With this application you can control the direction of rotation of a stepper motor from the PC via serial communication.
- Create a New VI
- CTRL + T: Tile pages (Front Panel and Block Diagram)
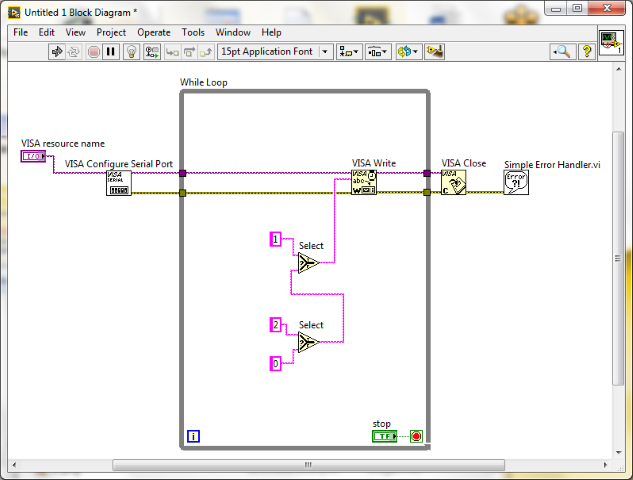
Block Diagram
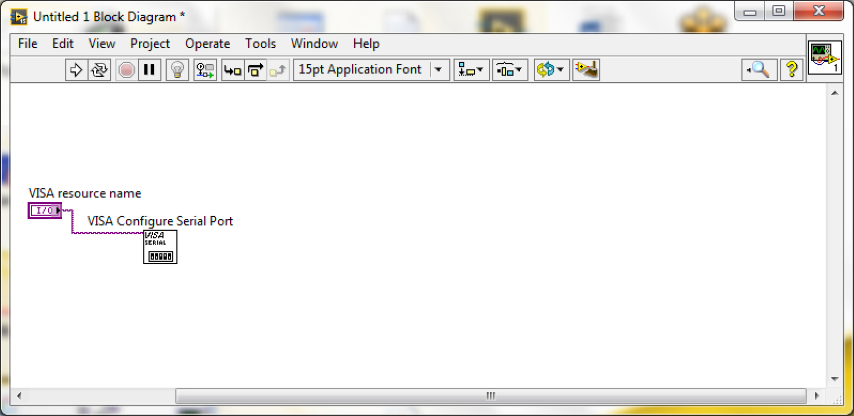
- Insert VISA Configure Serial Port function from Instrument I/O>>Serial of the Functions palette (right-click on Block Diagram).
- Create Control from VISA Resource Name terminal of the VISA Configure Serial Port function.
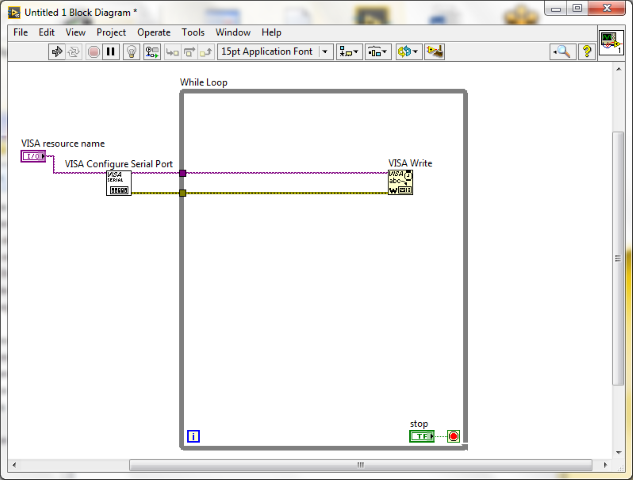
- Insert While Loop from Programming>>Structures of the Functions palette.
- Create Control from Loop Condition of the While Loop.

- Insert VISA Write function from Instrument I/O>>Serial of the Functions palette (right-click on Block Diagram) inside the While Loop.
- Connect VISA resource name out terminal of VISA Configure Serial Port with VISA resource name terminal of VISA Write function.
- Do the same with error out and error in of both functions.
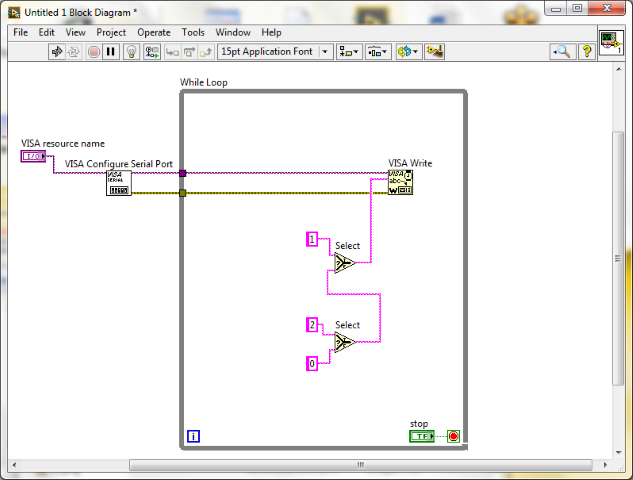
- Insert two Select functions from Programming>>Comparison inside the While Loop.
- Insert three String constants from Programming>>String. Give them the following values: 0, 1 and 2. Connect them how show it on the fig.
- Connect the output of the second Select function with input terminal "f" of the first Select function.
- Connect the output of the first Select function with Write Buffer terminal of VISA Write function.
- Insert VISA Close from Instrument I/O>>Serial of the Functions palette (right-click on Block Diagram) outside the While Loop.
- Connect VISA resource name out terminal of VISA Write with VISA resource name terminal of VISA Close function.
- Do the same with error out and error in of both functions.
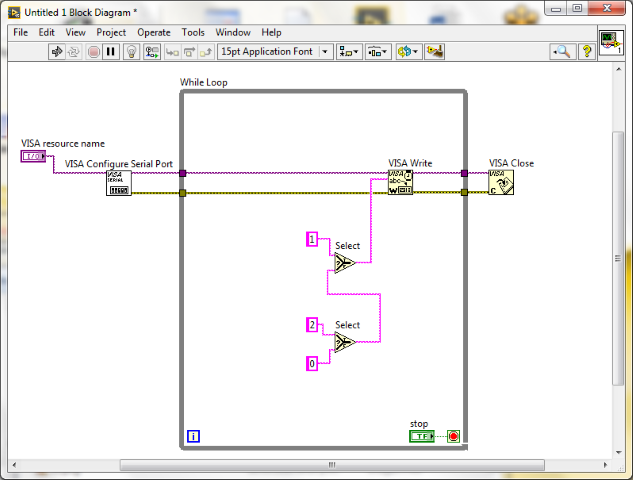
- Insert Simple Error Handler from Programming>>Dialog & User Interface next to VISA Close and connect error in and error out of both functions respectively.
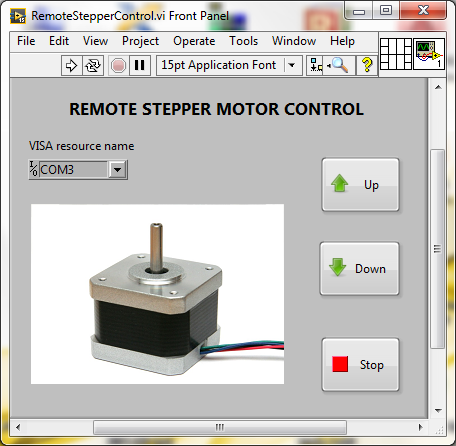
Front Panel
- Insert Down Button and Up Button from Silver>>Boolean>>Buttons of the Controls palette.
- Insert a Picture, from Edit menu choose Import Picture to Clipboard and select your image, then Paste (CTRL + V) and resize.
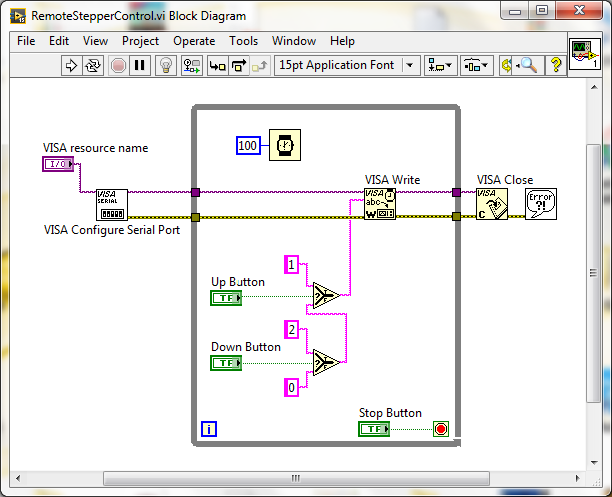
Block Diagram - Come back to Block Diagram and connect Up Button terminal in "s" terminal of the first Select function. Connect Down Button terminal in "s" terminal of the second Select function.
- Insert Wait(ms) function from Programming>>Timing. Create constant from milliseconds to wait terminal and enter 100 value.
Before to Run, choose the serial port of Arduino from VISA resource name.
Arduino code.
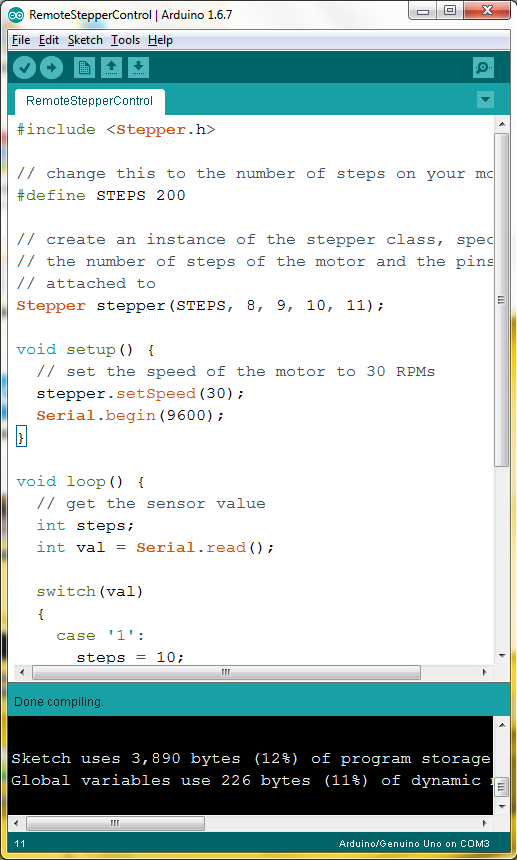
										#include "Stepper.h"


										// change this to the number of steps on your motor

										#define STEPS 200


										// create an instance of the stepper class, specifying

										// the number of steps of the motor and the pins it's

										// attached to

										Stepper stepper(STEPS, 8, 9, 10, 11);


										void setup() {

											// set the speed of the motor to 30 RPMs

											stepper.setSpeed(30);

											Serial.begin(9600);

										}


										void loop() {

											// get the sensor value

											int steps;

											int val = Serial.read();


											switch(val)

											{

												case '1':

													steps = 10;

													break;

												case '2':

													steps = -10;

													break;

												default:

													steps = 0;

													break;

											}


											stepper.step(steps);

											Serial.println(steps);

											delay(100);

										}
Outlined problems and how you fixed them
Fortunately I had no problems to control the stepper motor using LabVIEW remotely, the interface is very friendly and simple.