Final Project
Step 2 : The Design
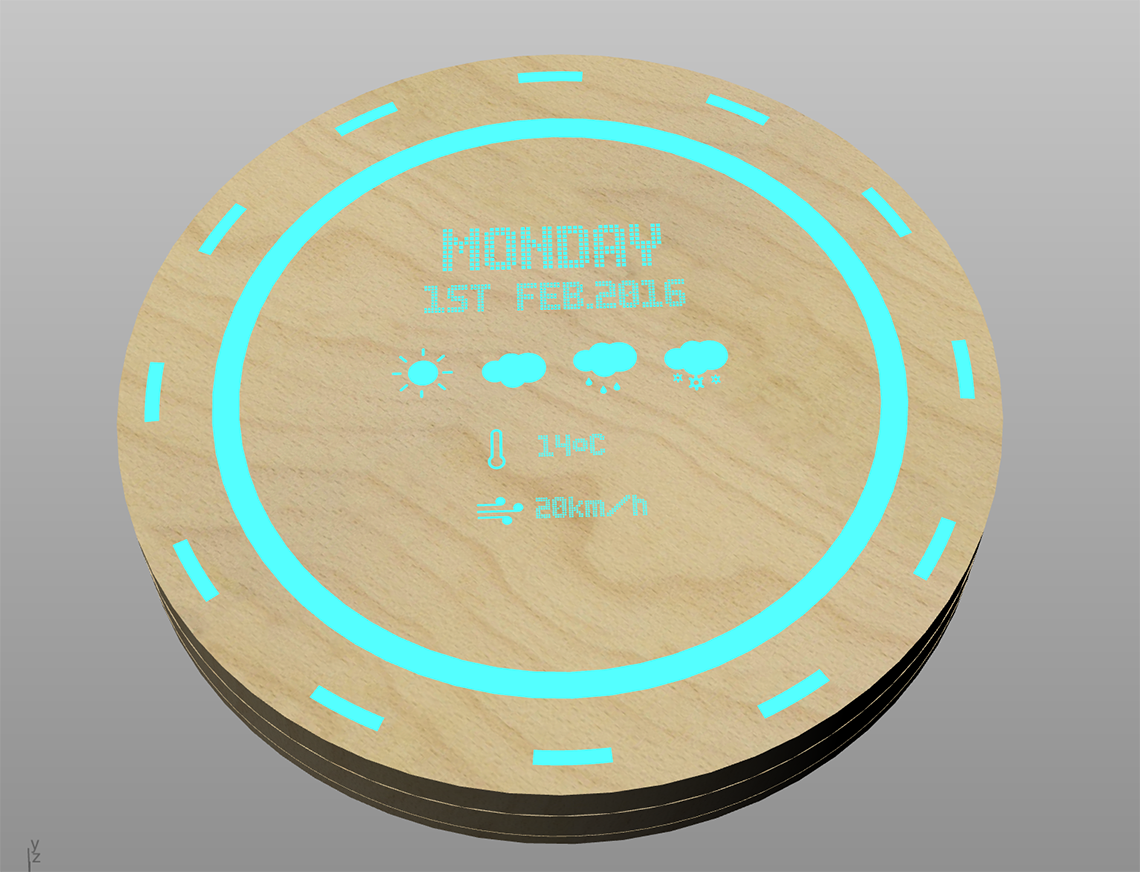
Update 07/06/2016After some more thinking I decided to switch to a simpler way of displaying the minutes on my clock, using 60 fixed LEDs instead of a single moving one.
This is the final design :
 See Electronics page for the explaination of how it works, and Prototyping page for the description of the fabrication.
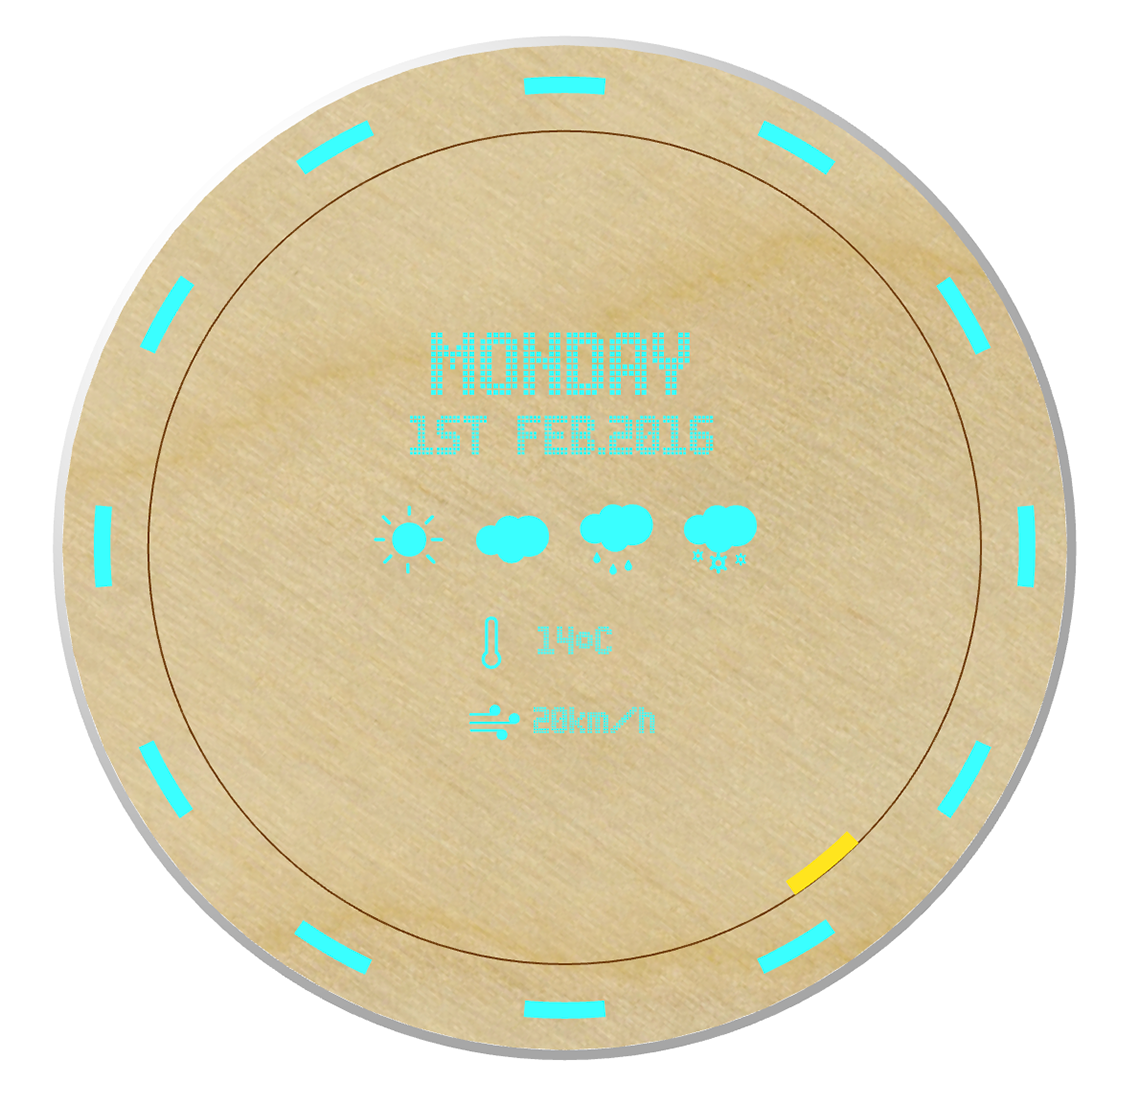
Update 09/05/2016
I've decided to simplify the design of my clock again, and to rethink several details, directly linked to electronic and mechanical matters.
- I supressed the buttons and indications for the selection of day and time of the day : these controls will be in the interface instead
- The weather indicators (cloud, sun...) will be also displayed on the LED screen or by a LED, but not engraved
- Made the minutes indicator bigger, and I plan on using a different color for it
Update 02/03/2016
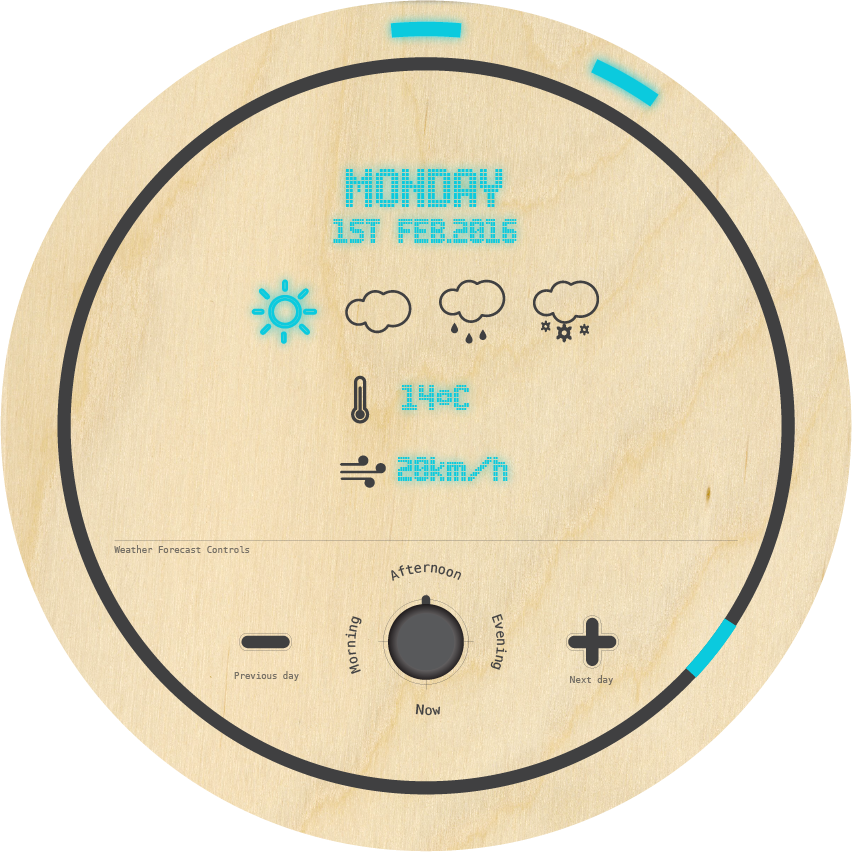
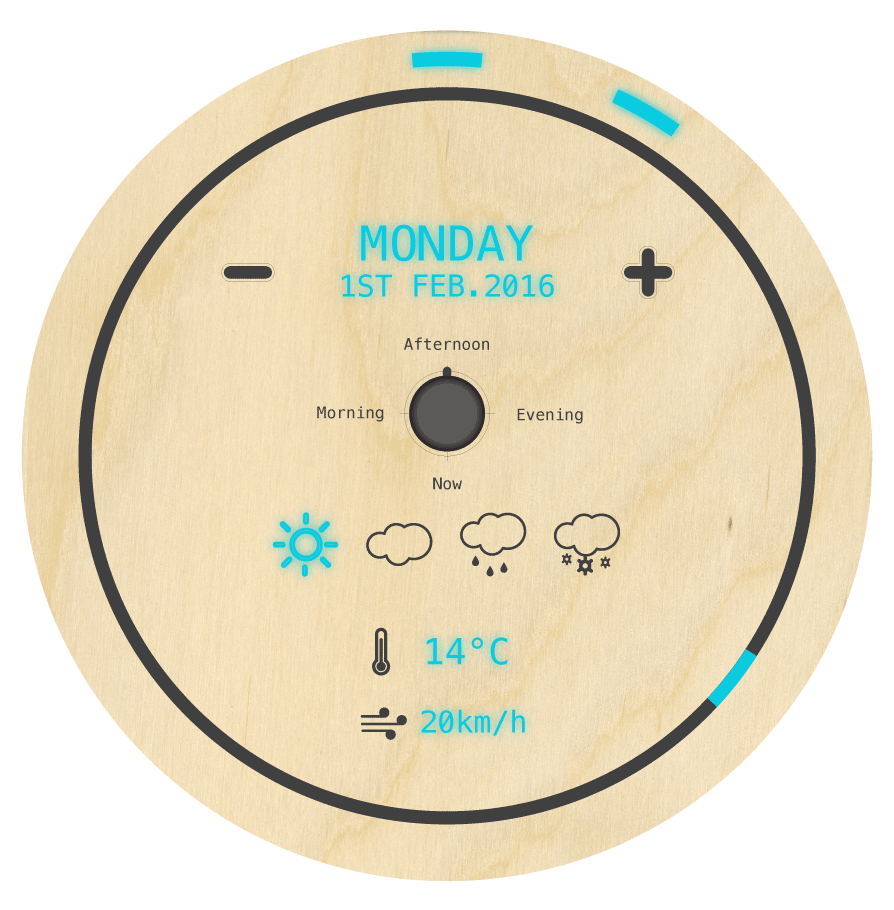
After a discussion with one of my instructors, I tried to modify the design to make it more efficient : on the front of the clock, the information displayed were mixed with the controls, so I decided to separate those items into two different sections on the clock.
On the upper part are the information and on the lower part are the controls. This way it is easier to read and will be as well certainly easier to build :
 Then I also modified the 3D model :
In this section I will present the work I have done on the design of my final project.
Once I had a better idea of what I wanted to do, I modified my initial 2D design using Illustrator.
I want my clock to be made of wooden structure, with a translucid front-panel. The idea is to have a thin-enough panel so that we can see le LED's light through it. The hours will be represented by 12 segments of a circle and will only be visible when the LED underneath the front panel is lit. The minutes will be represented by a spinning circle on which will be placed a colored marker to indicate the time. The date, temperature and wind speed will be, like the hours, displayed on LED's visible through the wood panel. As for the 4 wearther symbols, I'm thinking on cutting the shapes through the wood panel and maybe add a PMMA sheet under which I would place the LEDs. This way the shape of the symbols would be neat and bright. The temperature and wind speed symbols will be engraved on the panel. I chose to use a light-blue color for the LED's in my design but I am planning on using RGBs so that I can set any color I want in the end.
Then I had to think of how I wanted to design the interactions that I wanted to have. I've imagined two main features : choice of the day I want to have the forecast of, and choice of the "moment" of the day (morning, afternoon, evening or real time).
For the choice of the day, I figured the simplest way was to use a + to display the next days and a - for the previous ones. I could also use arrows, but for the moment I will stick with the + and -.
For the moment of the day, it is a little bit trickier because I did not want something too complicated to use and understand, and I did not want it to occupy too much space on the front panel. So I decided to use a selector switch and to simply engrave the 4 possible states on the panel.
It stays simple and it will add a nice "old school" touch.
I am planning on 3D print the selector switch as well as the + and - buttons.
During the 2nd week, we learned how to use 3D desiging softwares, which allowed me to model and render my clock in 3D, with as much details as I could. I found this nice plugin with which you can manipulate my model :