Computer-Controlled Machining
Week 7's assignment
- Bit : a 6mm square bit
- Material : a 12mm thick 1200x2500 plywood sheet
- Software :
- Rhino
- V-Carve
 I did not chose the easiest thing for my assignement, but let's go back to the start...
1. Design rules
To begin the week, we had a really interesting lecture from our instructor Saverio about the design rules to keep in mind when designing for CNC milling, based on this presentation from last year, as well as some really important tricks and tips to help us save some time.
Here are for me the most important things to remember :
1. Make one part, with joints
2. Extrude it
3. Use it to make holes for connections in the other parts using the boolean difference command
4. Use layers to distinguish joints from other parts but also because it is way easier in Vcarve
5. Make your design parametric ! I will use the blocks technique in Rhino (see Week3) : it is really important of course to make sure it is easy to change the size of your joints according to test resuts or change of material...
6. Check if all lines are closed in your files
7. Don't forget to add some tabs to make sure the cut pieces stay in place
8. WHen nesting, take into consideration the size of the bit !
2. Idea and design
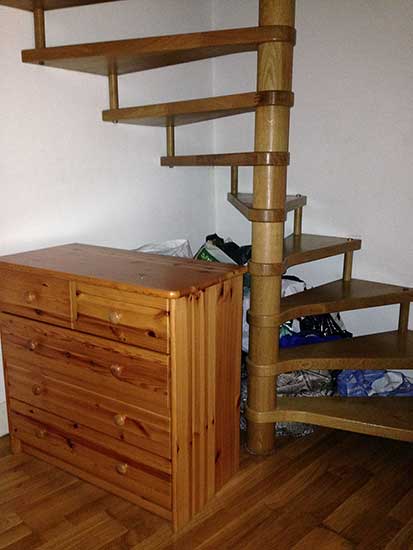
The assignment of the week being "make something big" I tried to think of something that could be also useful in my apartment. I live in a duplex flat and I always thought I should try to find of better way to store my stuff under the staircase that leads to my bedroom :
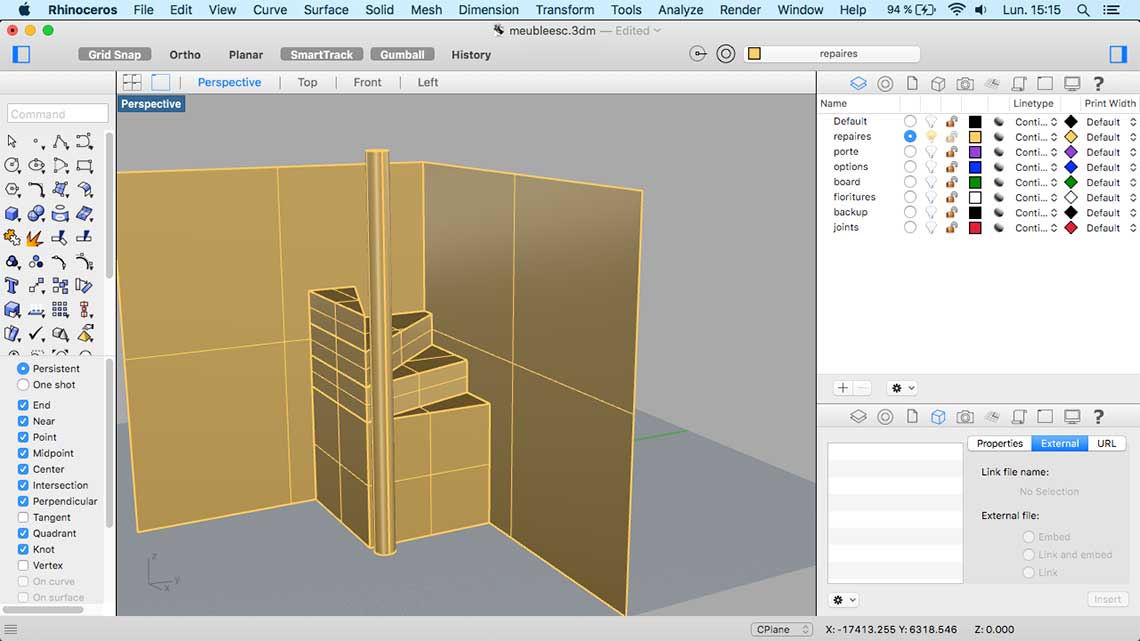
 First, I took mesasures of the space I had and of the staircase itself, then I reproduced the staircase as accurately as possible in Rhino, to have a 3D model of it and a base to work around.
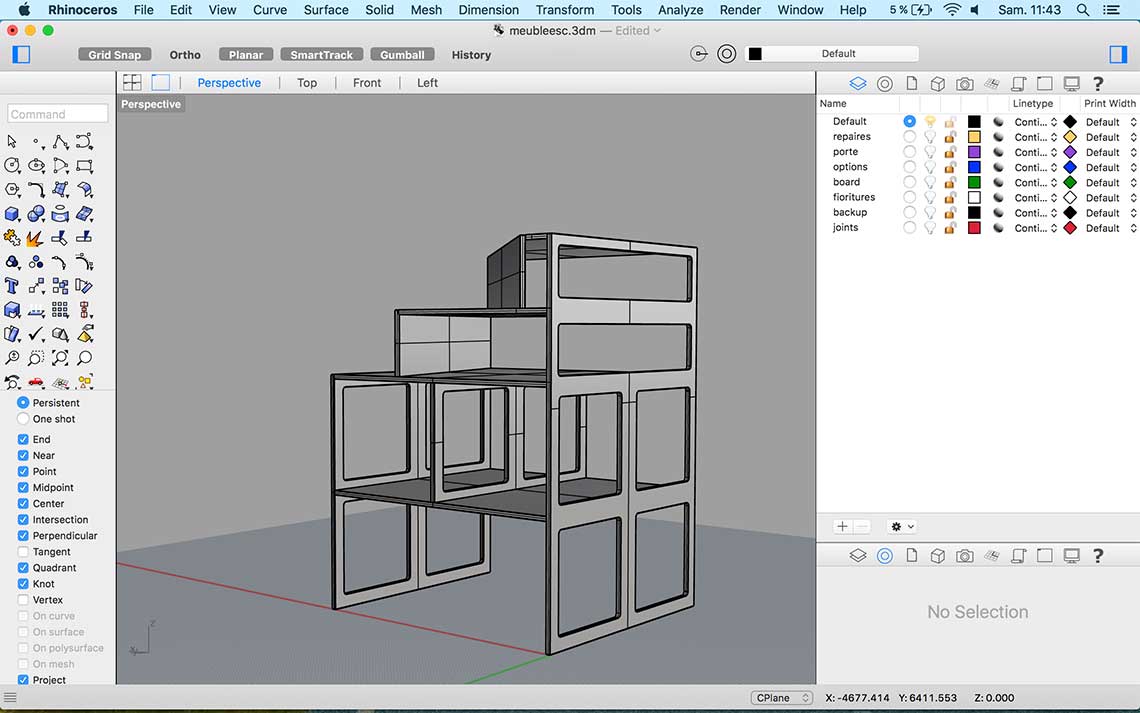
 Then I spent a lot of time trying to find the good configuration and design. I quickly realized that, for such a project, I had an important handicap which the amount of material available. So I had to spend a lot of time on imagining a structure that would not be to material consuming.
Here is the first version I came up with :
Then I spent a lot of time trying to find the good configuration and design. I quickly realized that, for such a project, I had an important handicap which the amount of material available. So I had to spend a lot of time on imagining a structure that would not be to material consuming.
Here is the first version I came up with :
 But I was not completly happy with it and also, after discussing about it with our instructor, I thought it would be better to design something that could be modular. I like the idea that I could reuse the whole furniture when I'll leave my apartment.
So I spend a lot of time modifying the original design to make it modular...
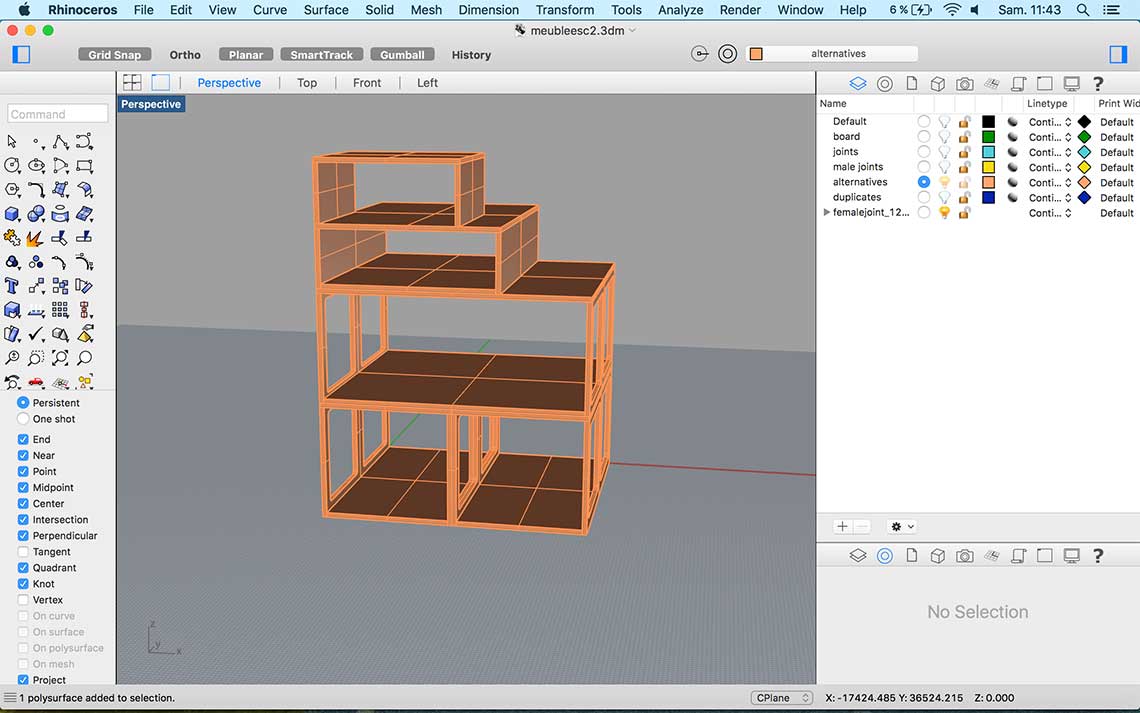
 The design in very basic, but once again it is on purpose, because of a lack of material. Basically, it is composed of boxes of different sizes, but all propotional and stackable.
I planned on adding some "doors" to the front as on the example below, that could be decoratively engraved, but it will have to wait because I won't have enough room to fit then on the plywood board we have.
The design in very basic, but once again it is on purpose, because of a lack of material. Basically, it is composed of boxes of different sizes, but all propotional and stackable.
I planned on adding some "doors" to the front as on the example below, that could be decoratively engraved, but it will have to wait because I won't have enough room to fit then on the plywood board we have.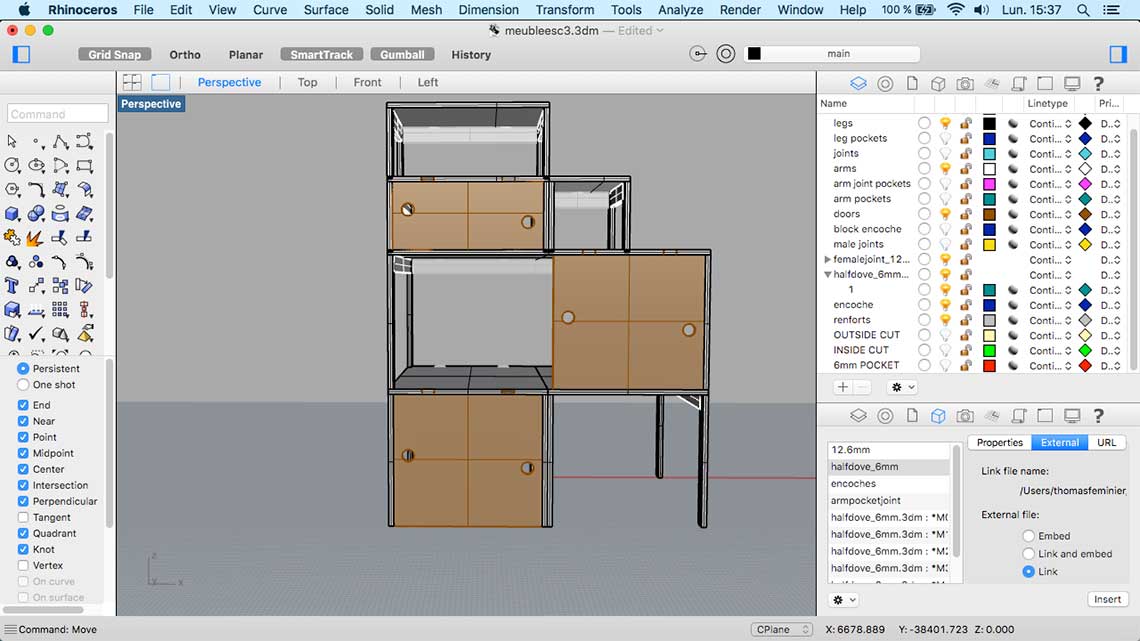 The hardest part arrived when I started to add joints to my design. It was really complicated and time consuming considering the amount of parts composing the shelving system.
In order to create parametric joints, I used the block function in Rhino, creating one separate Rhino file per joint type.
The hardest part arrived when I started to add joints to my design. It was really complicated and time consuming considering the amount of parts composing the shelving system.
In order to create parametric joints, I used the block function in Rhino, creating one separate Rhino file per joint type.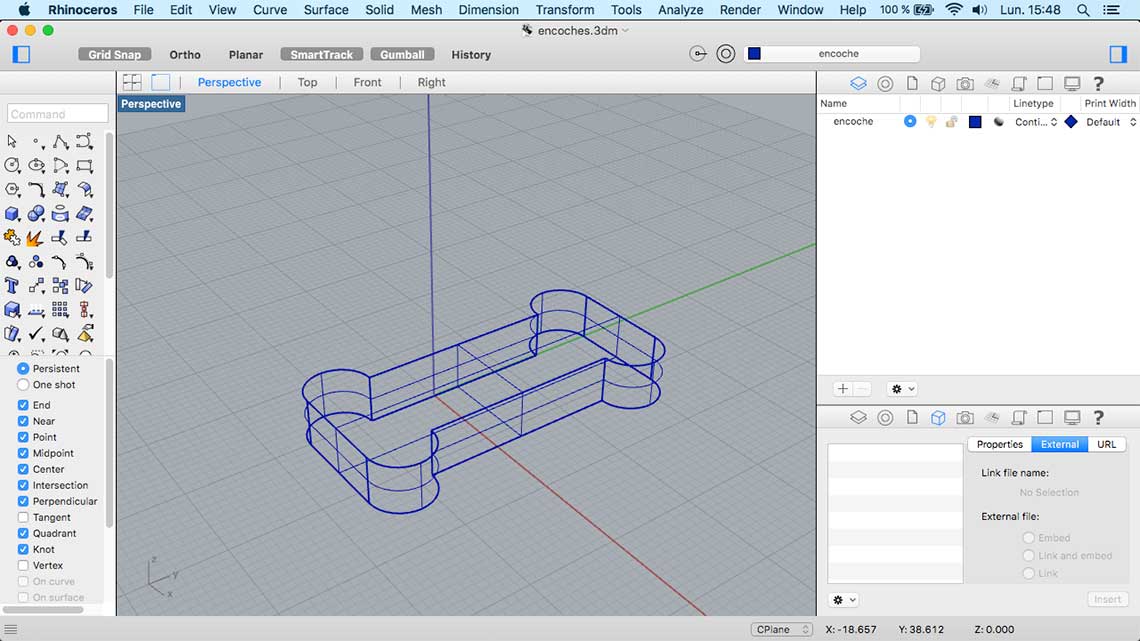

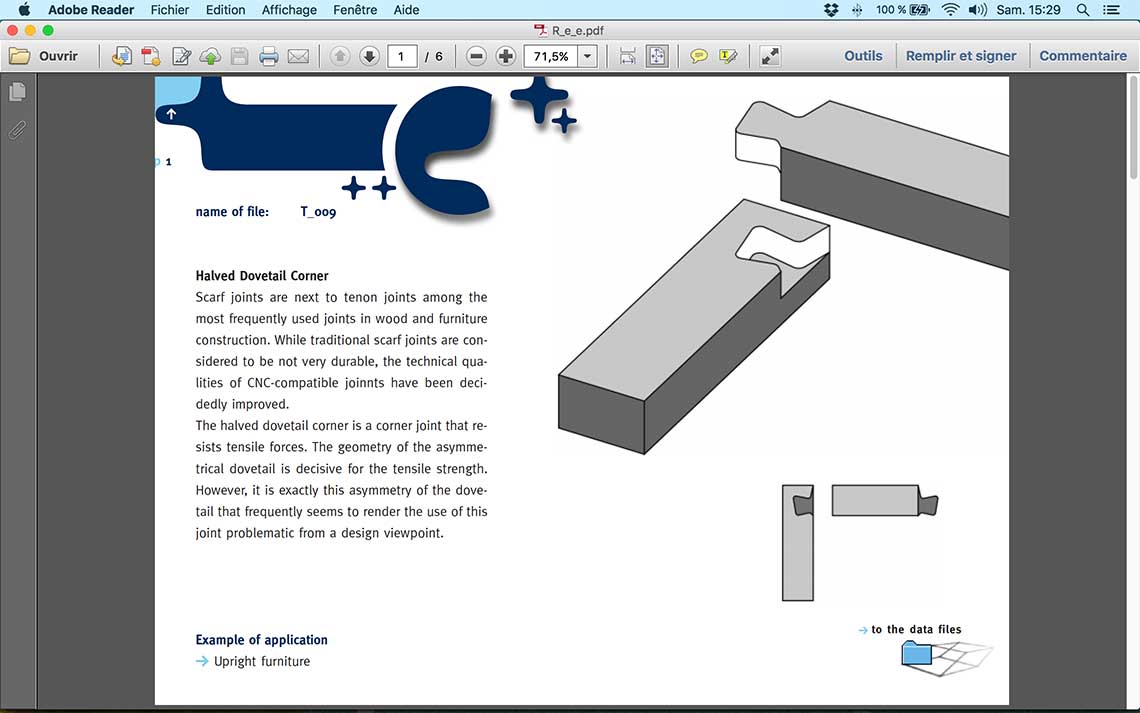
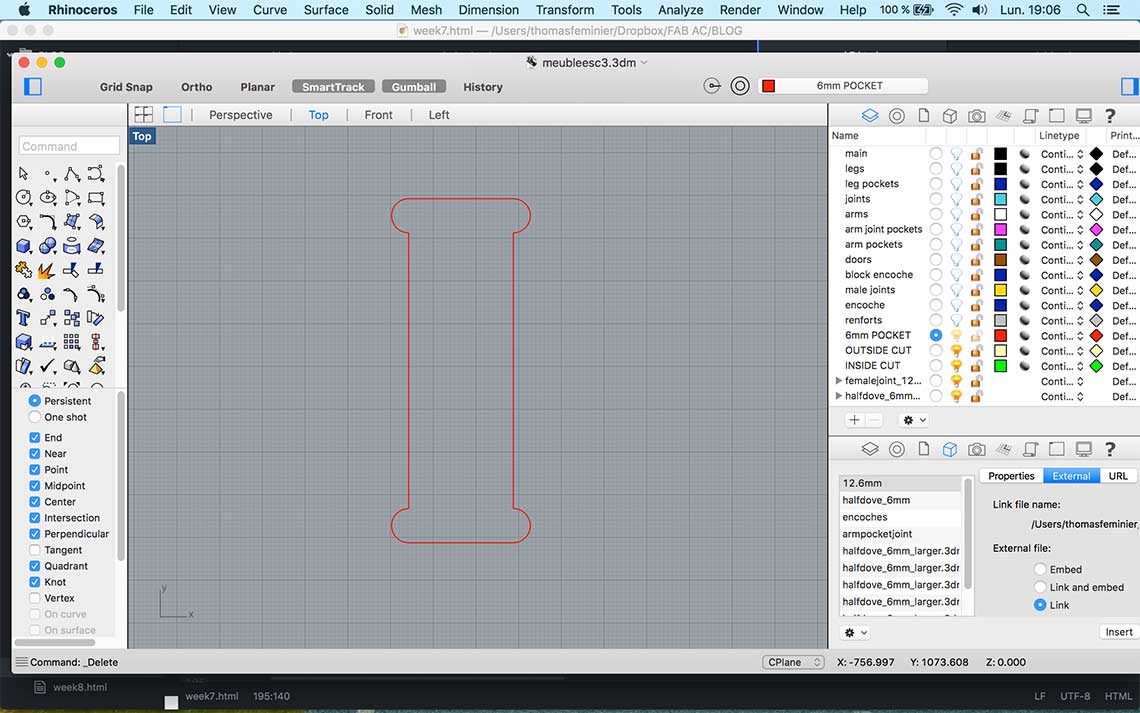
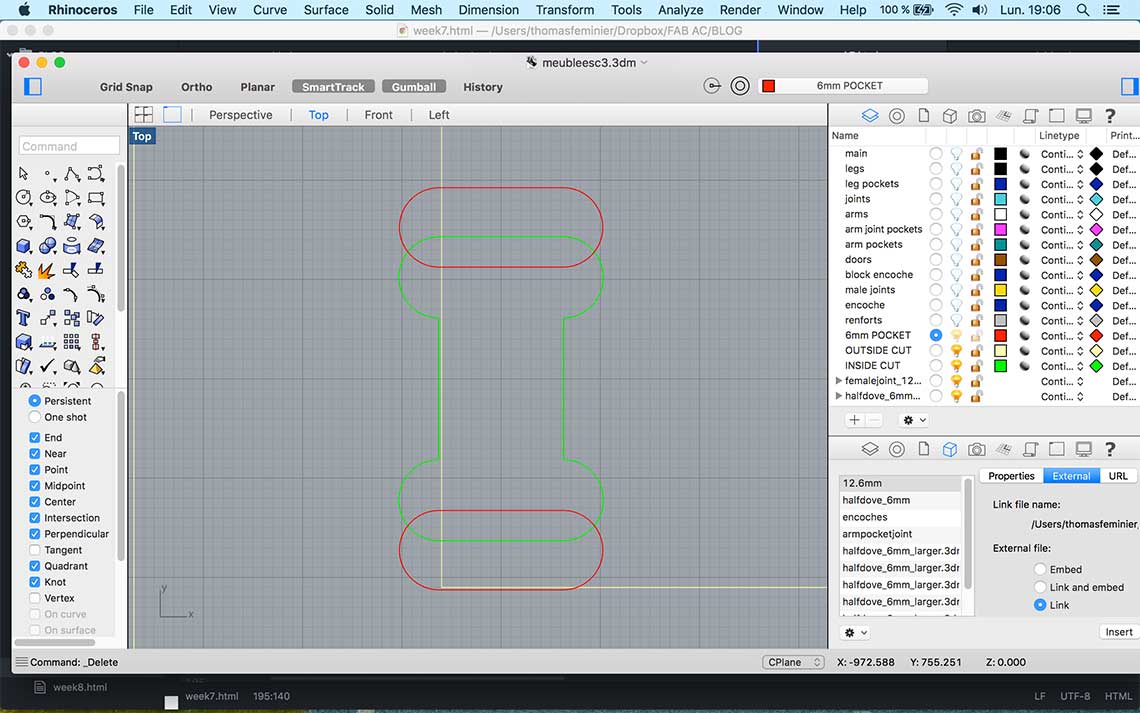
The third one is based on the very useful wood joint library that you can find here. I used the exemple bellow to give an optimal strengh to my boxes :
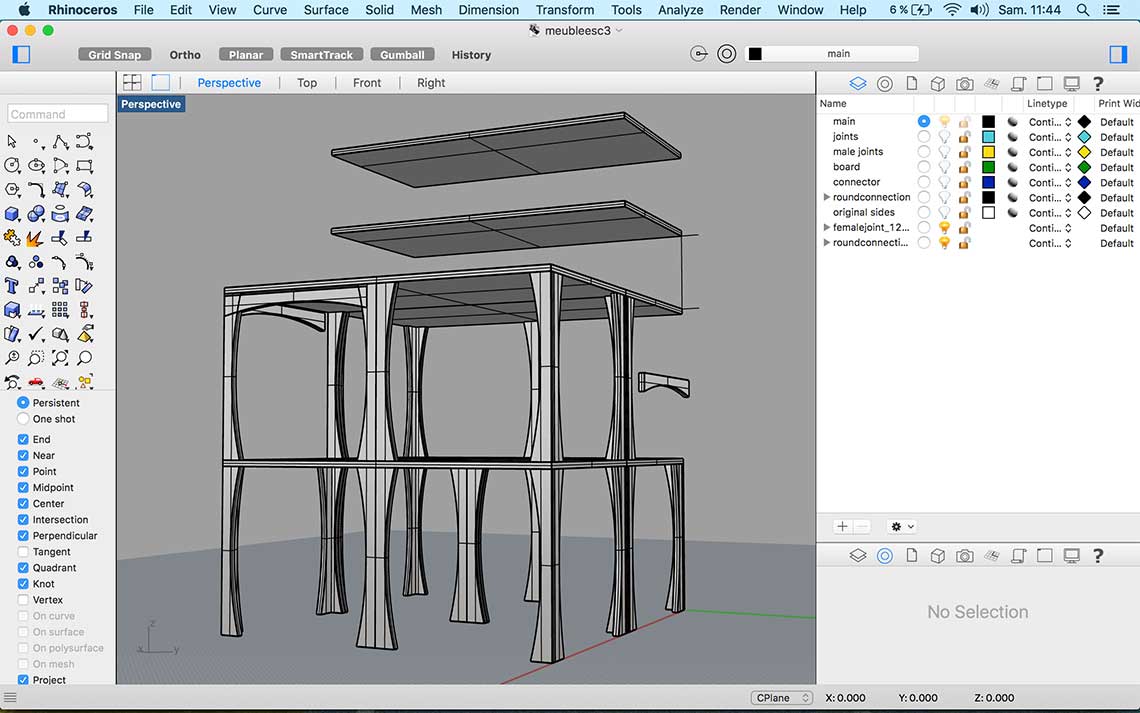
 Them came the longest part of my work : place correctly all the joints in the 3D model. Maybe that was not the quicket way but it was for me the only way to be sure nothing was missing. After adding all the joints to the structure, the result was very colorful and I was very tired :)
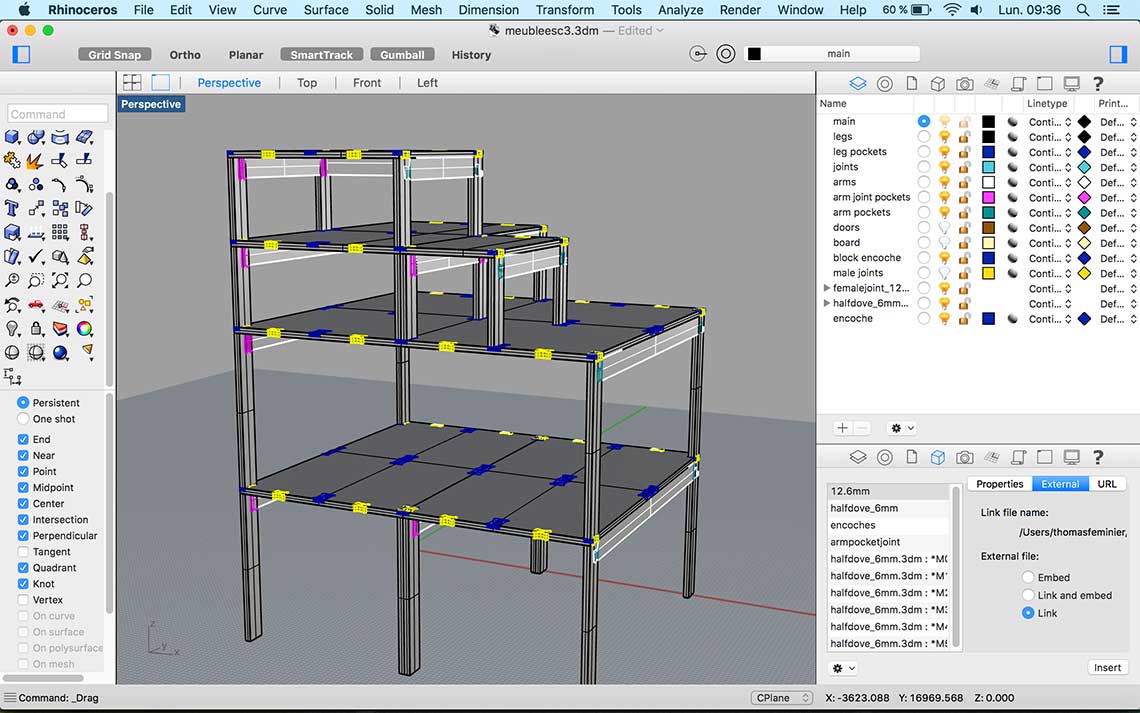 Last part of the job was to prepare the .dxf file for the fabrication. Basically, I manually "flattend" my design, which was again quite difficult for me because I had to think of every little detail. Switching constantly from 3D to 2D is probably what gave me headaches !!!
 Anyway, one very convenient way to do it is to use the
 DupFaceBorder command in Rhino, which became my best friend ! It allow you to copy the border of any selected face of a polysurface. Thanks this tool, I reproduced in 2D all the parts of the boxes, making sure to fit them all in the 2500x1200mm frame that I created to represent the plywood board.
And the good news is they all fit into it !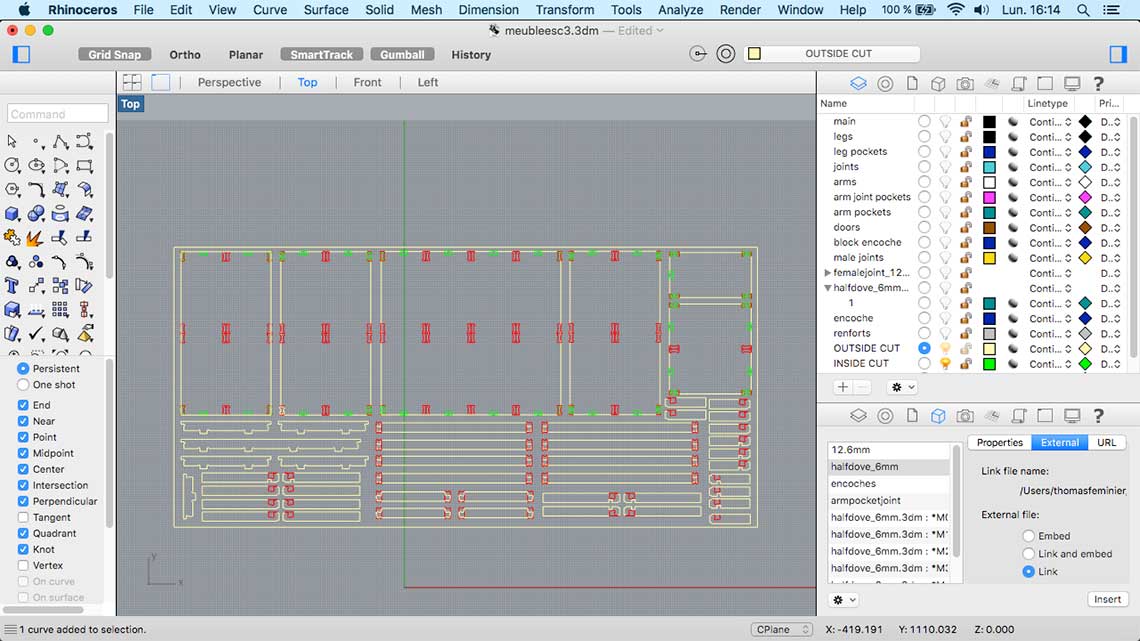 After this I exported the shapes in a .dxf file and before switching to V-Carve for the creation of the toolpath, I sent my file to Saverio for him to check if everythinh was fine.
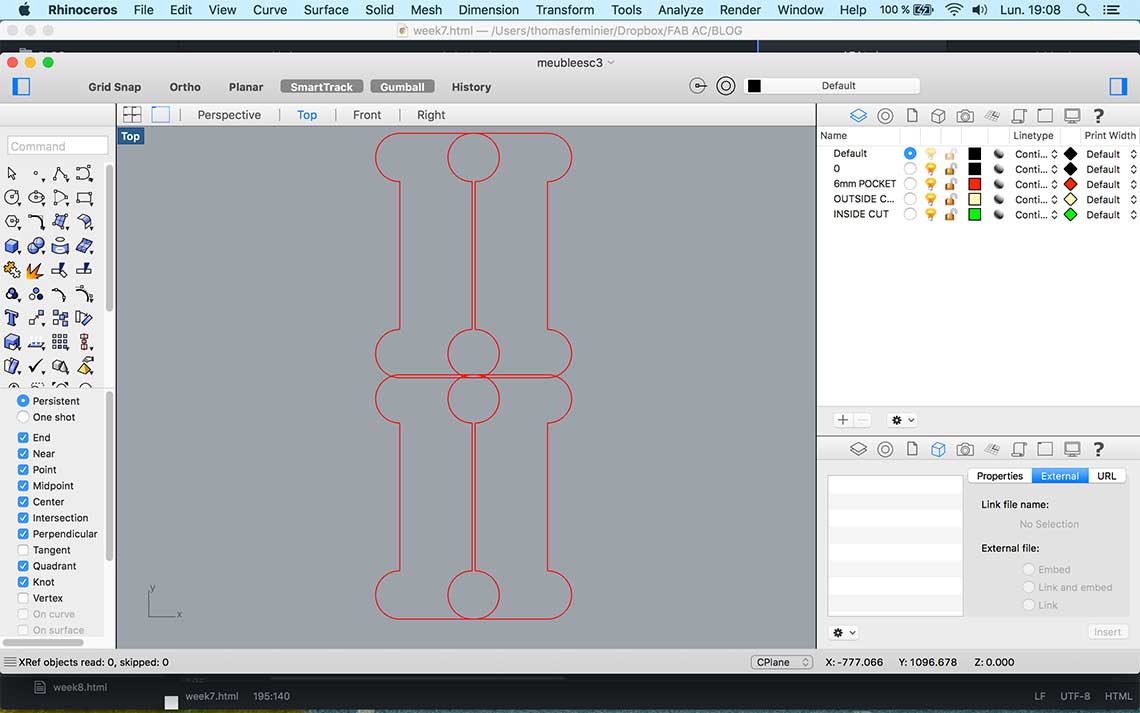
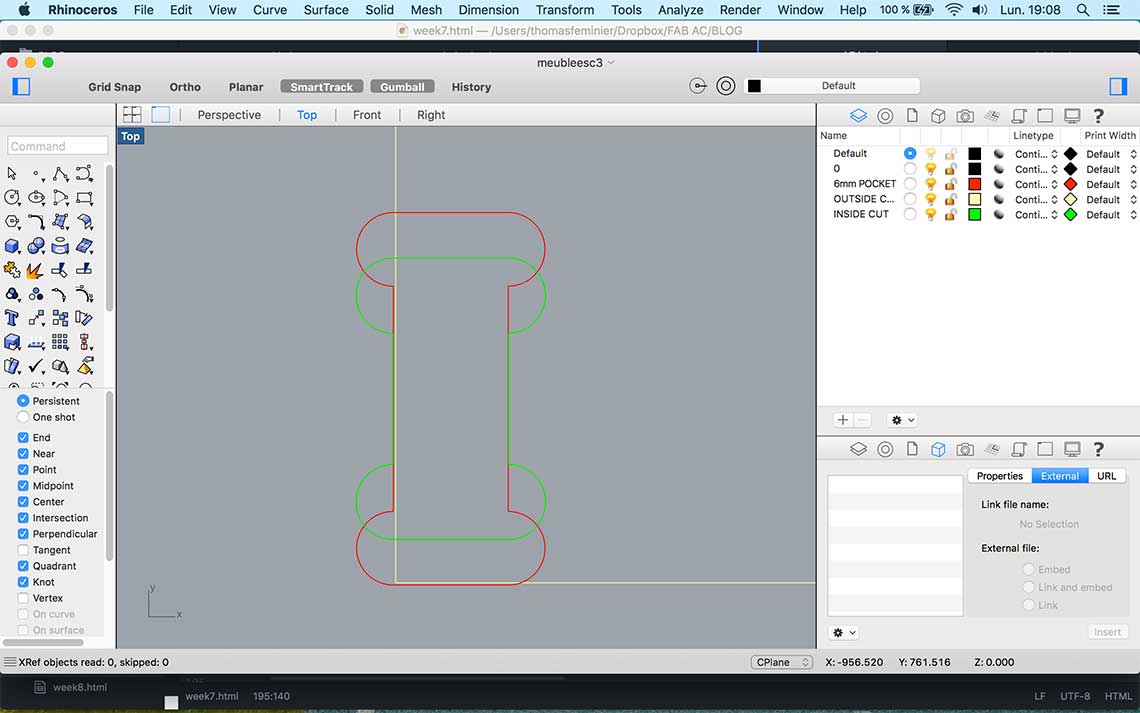
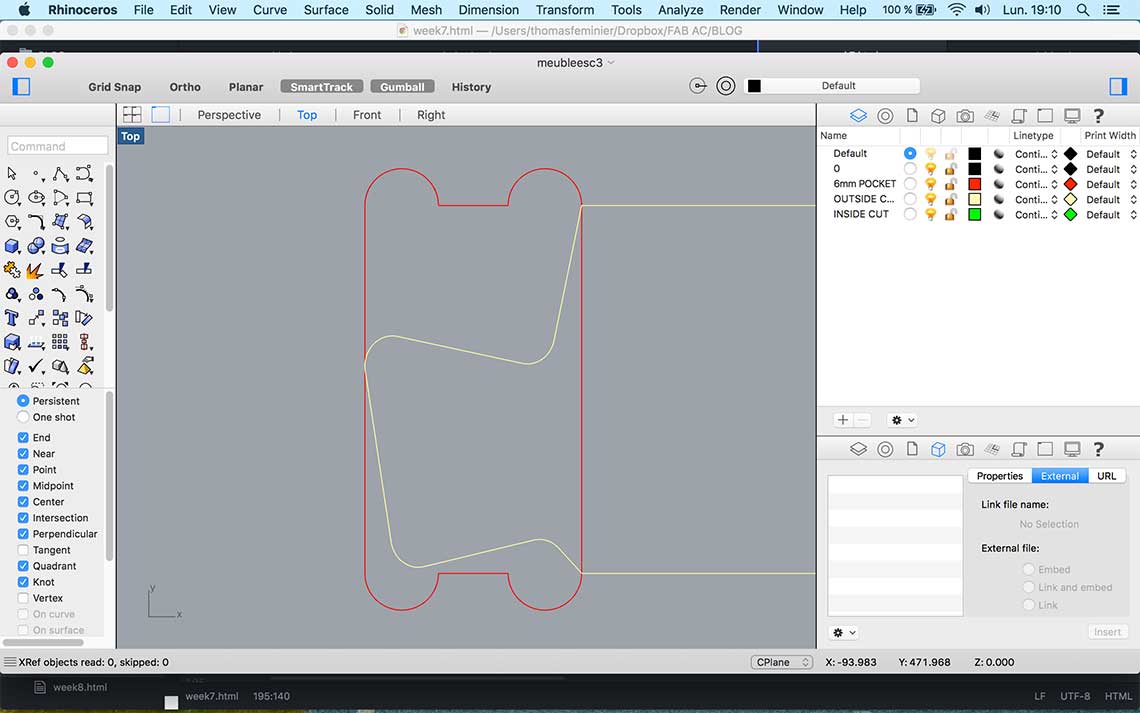
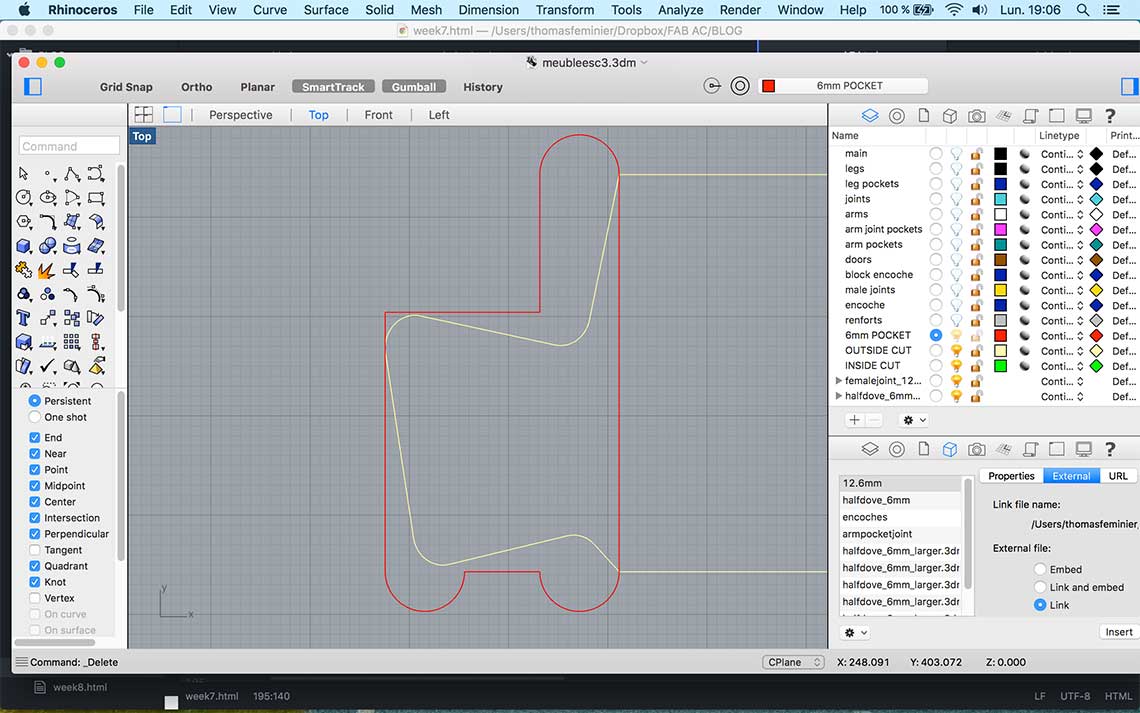
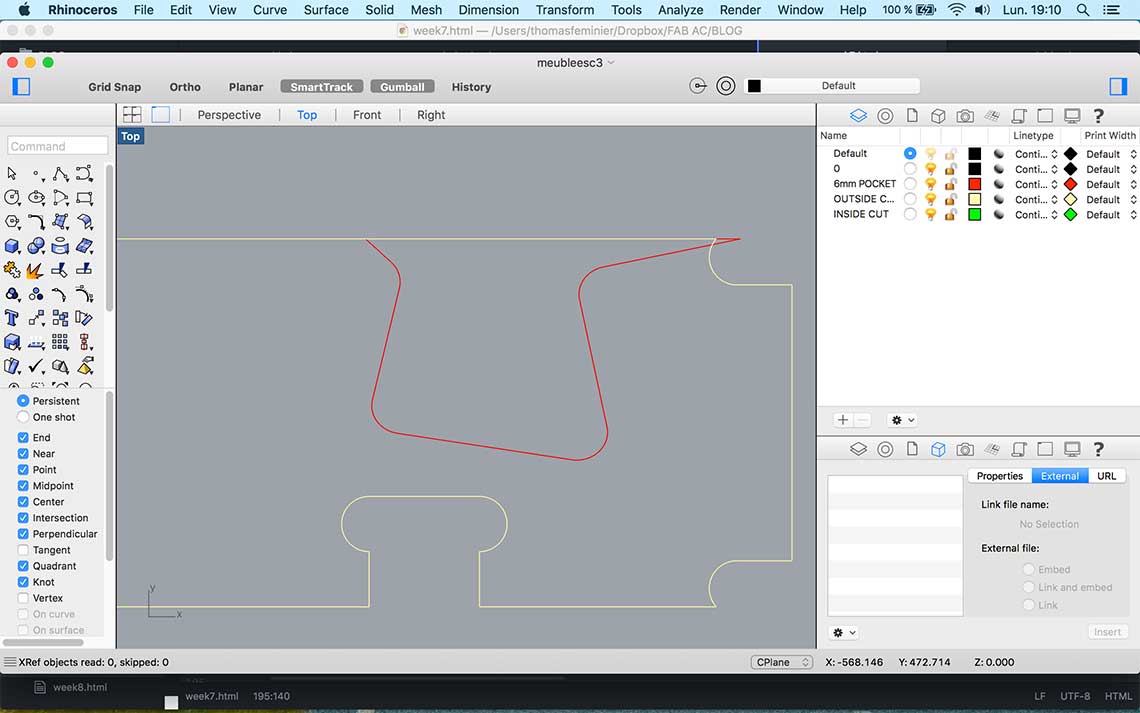
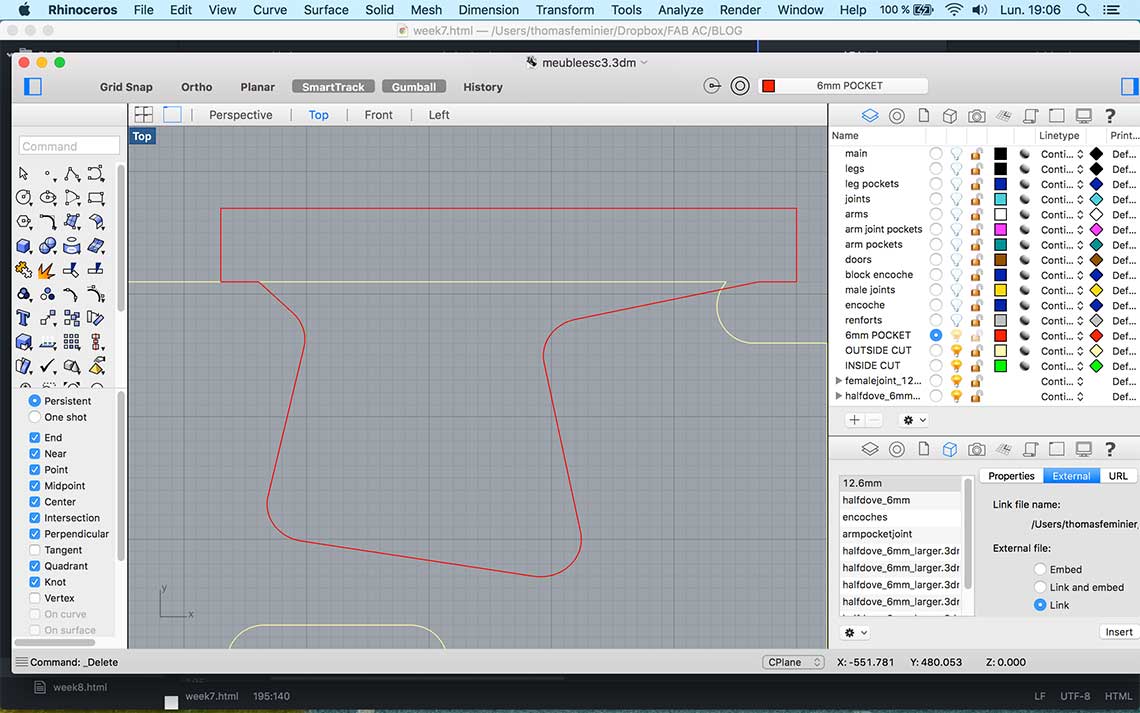
It was actually a good idea because he found a lot of things that could be perfected. It was not some big mistakes, but more of an accumulation of details that could make the fabrication much longer than necesary. The problems where that some of my joints where overlaping, which is fine, but I did not merge them, so I would take more time. You can see bellow the illustration of that, before and after :
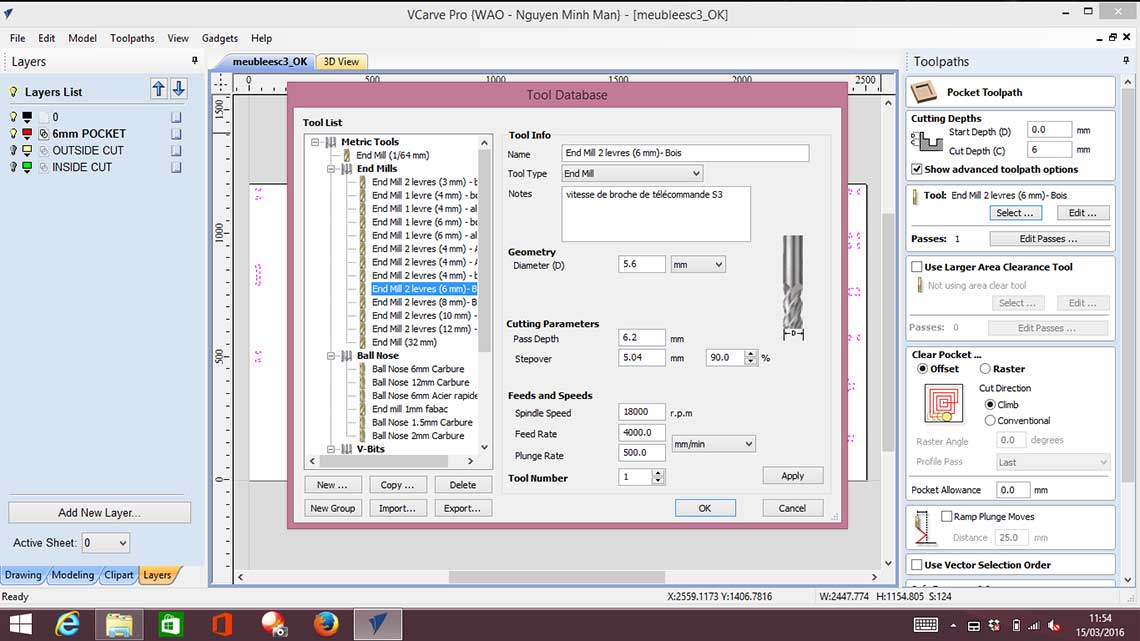
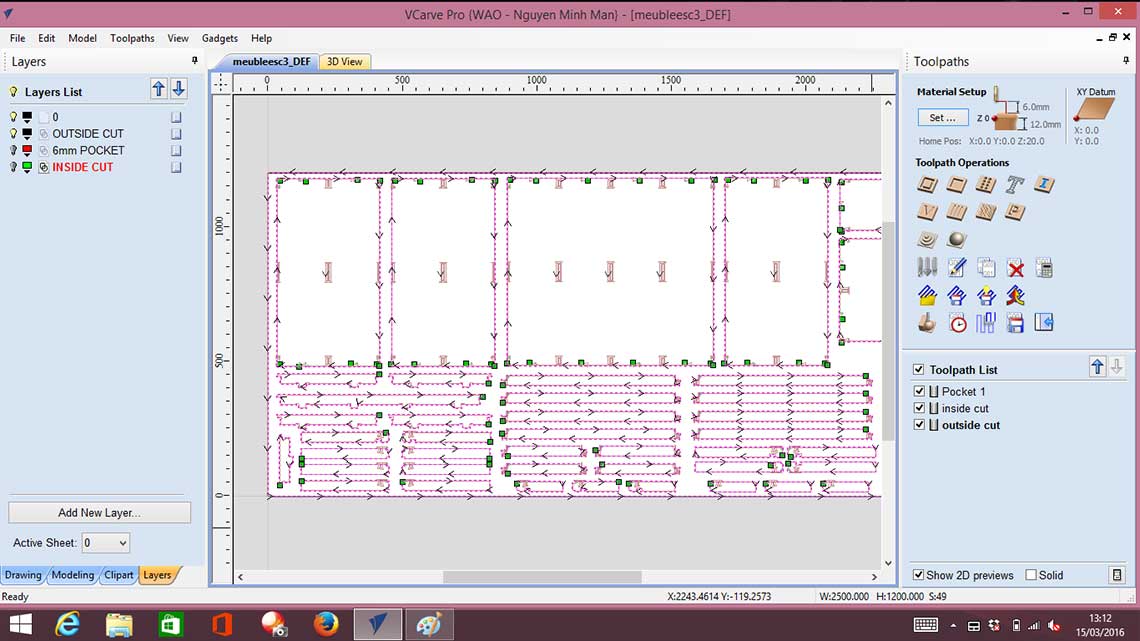
3. The fabrication
Parametring the V-carve file was quite fast. I only had three different toolpaths to create : one for the pockets, one for the inside cuts and one for the outside cuts.
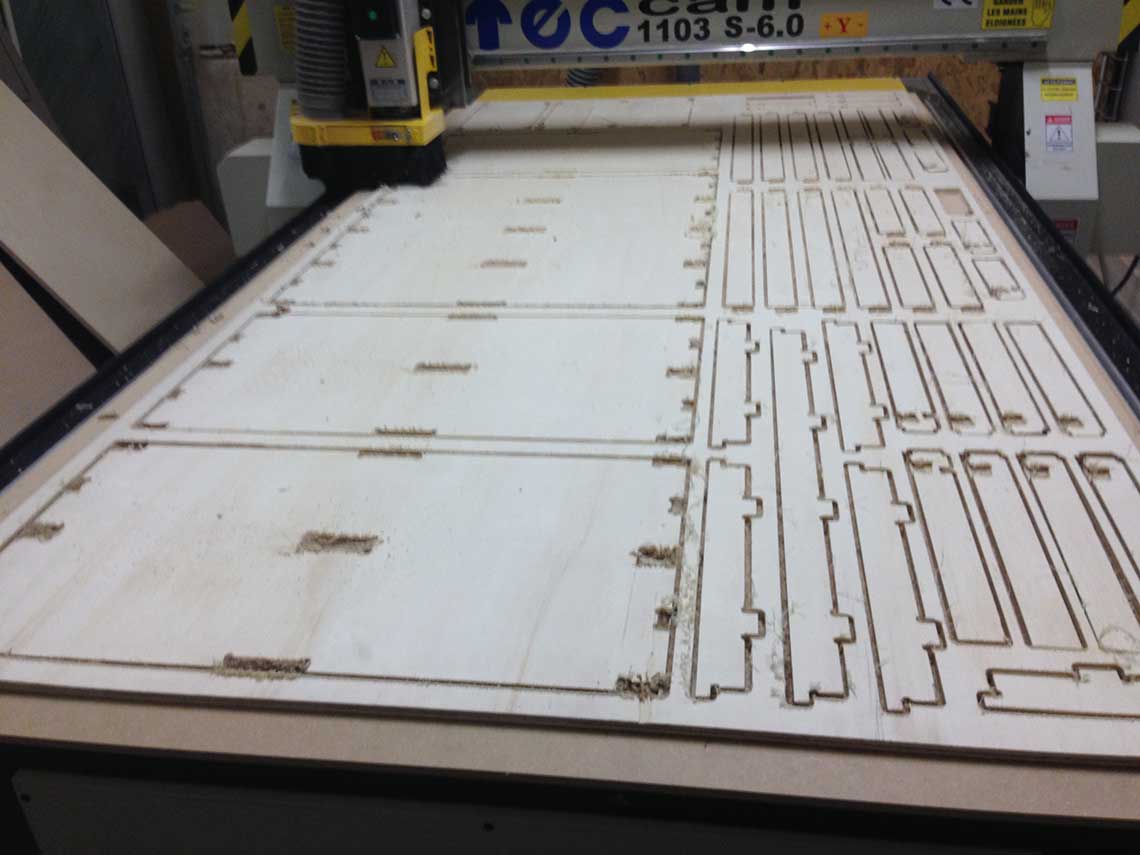
 Then I made a prayer and launched the job ! ETA : 1,5 hour.
At first everything went fine and I even shot this video to show the progress of the job :
But at some point, the plywood started to catch fire where it was being cut !!!
I was taking a break when it happened and someone else was supervising the cut so I don't know exactly how it started but we think it is because the dust aspiration was full.
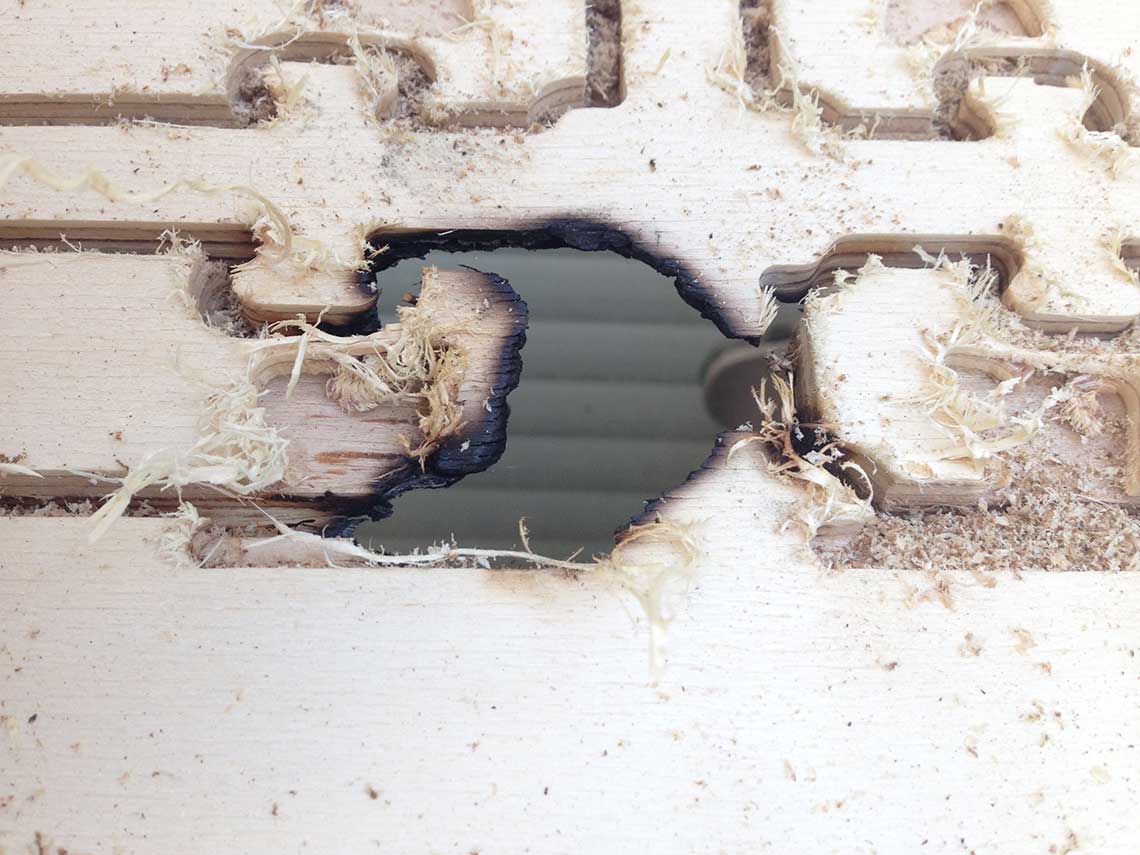
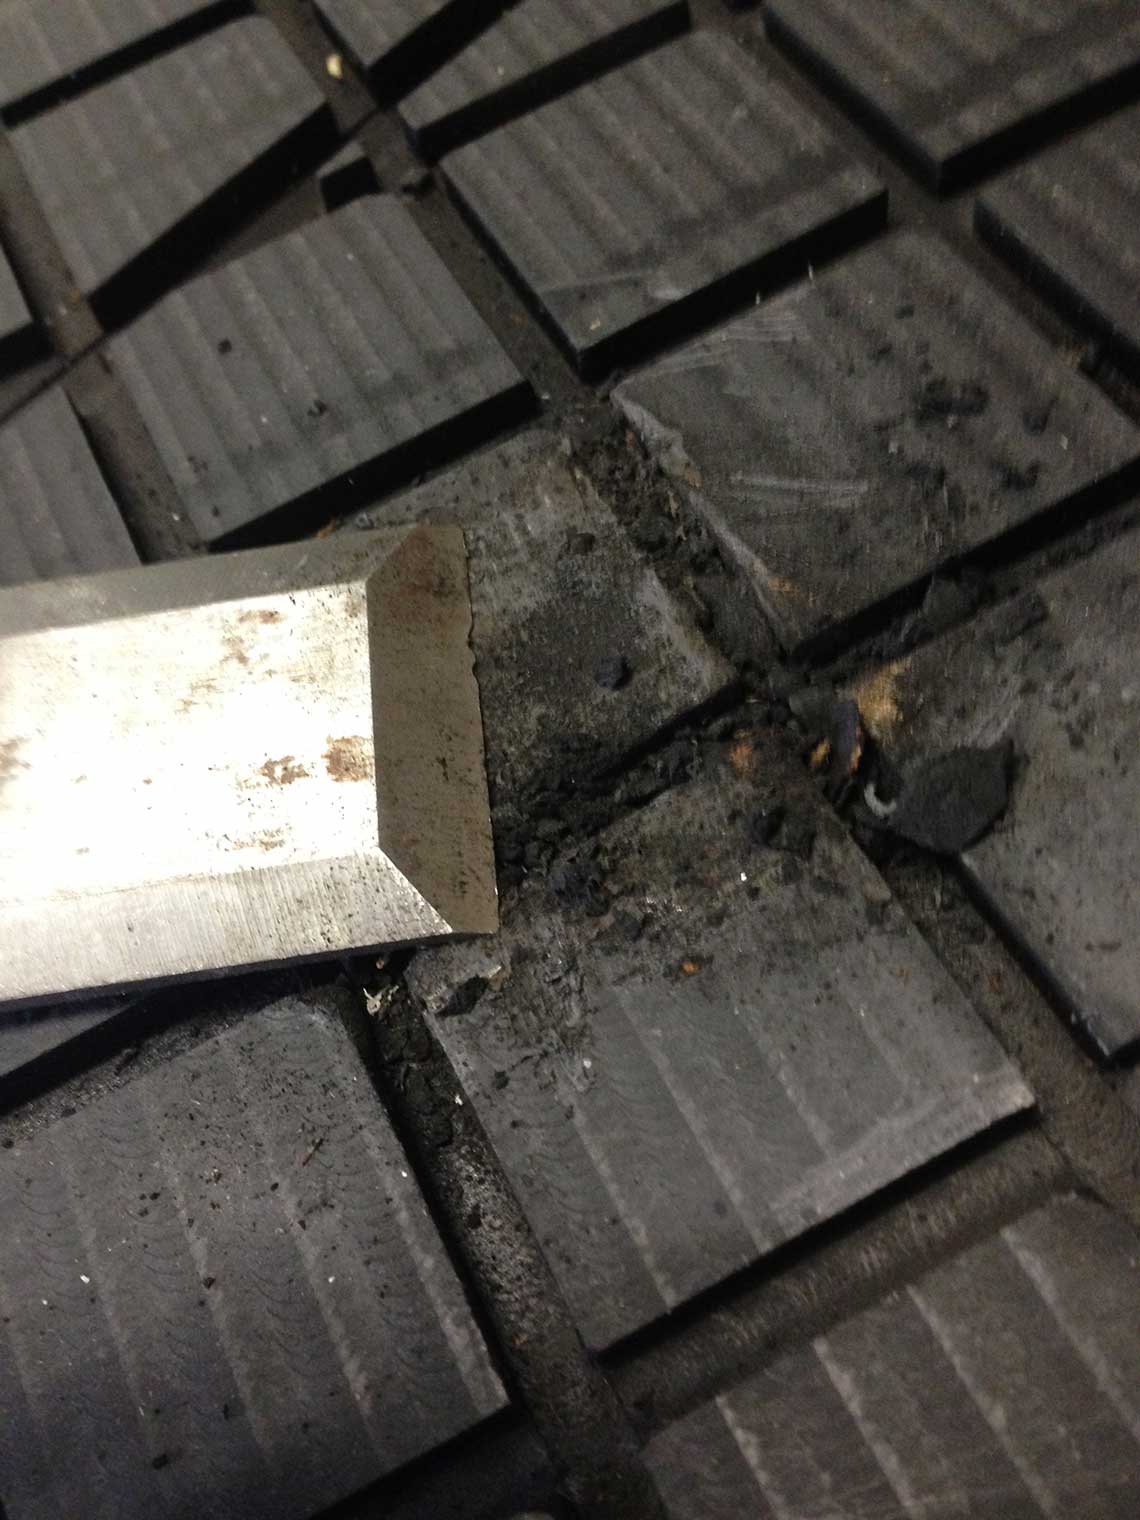
 We noticed it and reacted on time so no big damage except from a wasted board and sacrificial layer and a little burn on the bed of the CNC machine. It was a little swollen so I had to scratch it to make it flat again.
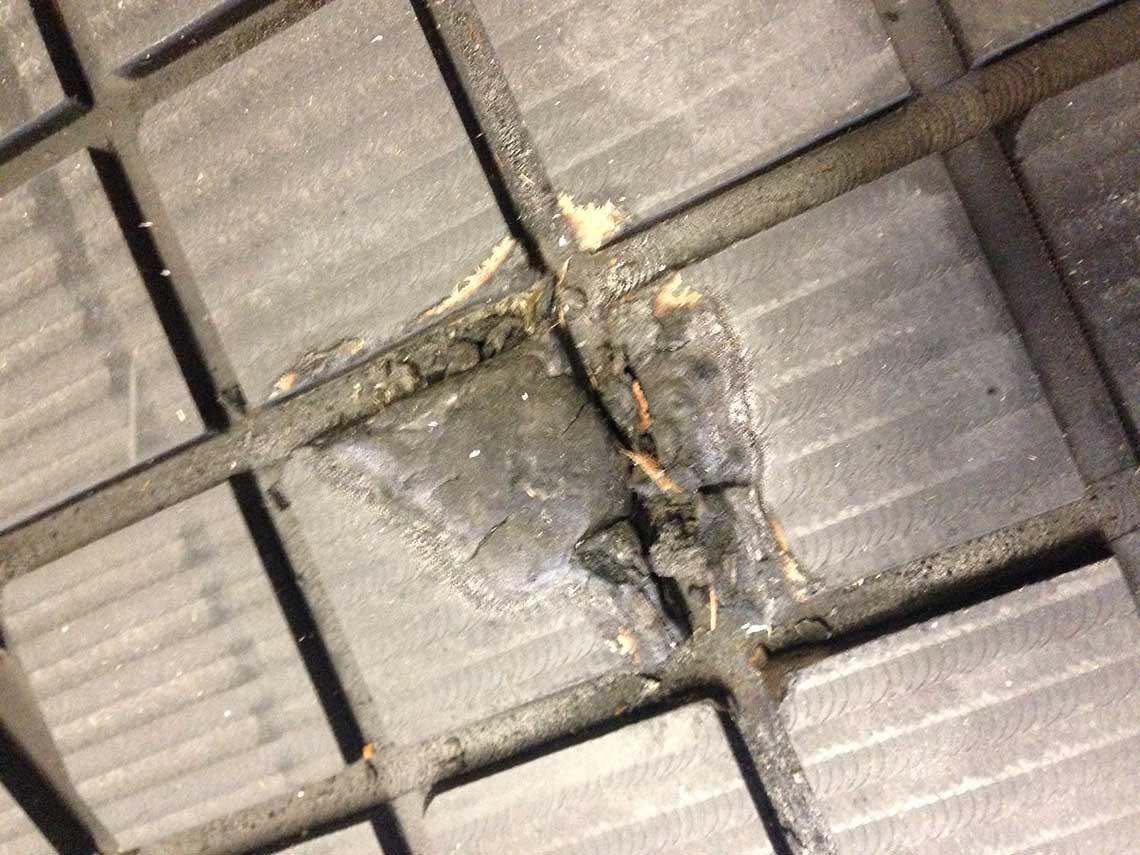
 Then we had to clean everything, empty the dust aspiration and redo a new sacrificial layer because it had burned as well.
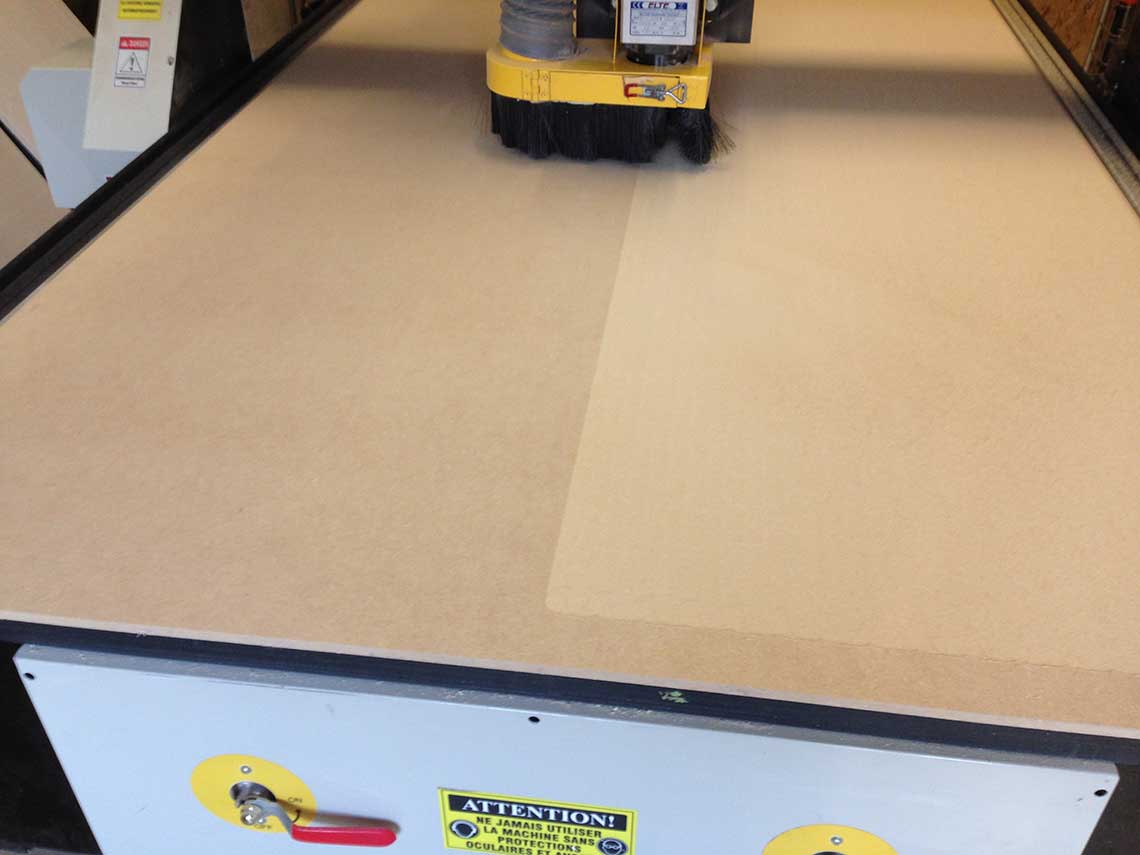 After this emotional event, I realized that something was wrong with my tool paths because some parts were cut inside instead of outside !! So even without the fire incident, I would have had to recut everything !!
Other thing important to know : the second time I tried to cut, after I redid the tool paths, I forgot to uncheck the "use offset" box in Vcarve, so every time I launched the cut, the CNC said "X off limit" and the cut wouldn't start... So good to know, never check this box ! After that, everything went finally fine and 1,5 hour later the job was done :
 And I did not have time to finish sanding or to begin to assemble the kit so to be continued...
4. Update : assembling.
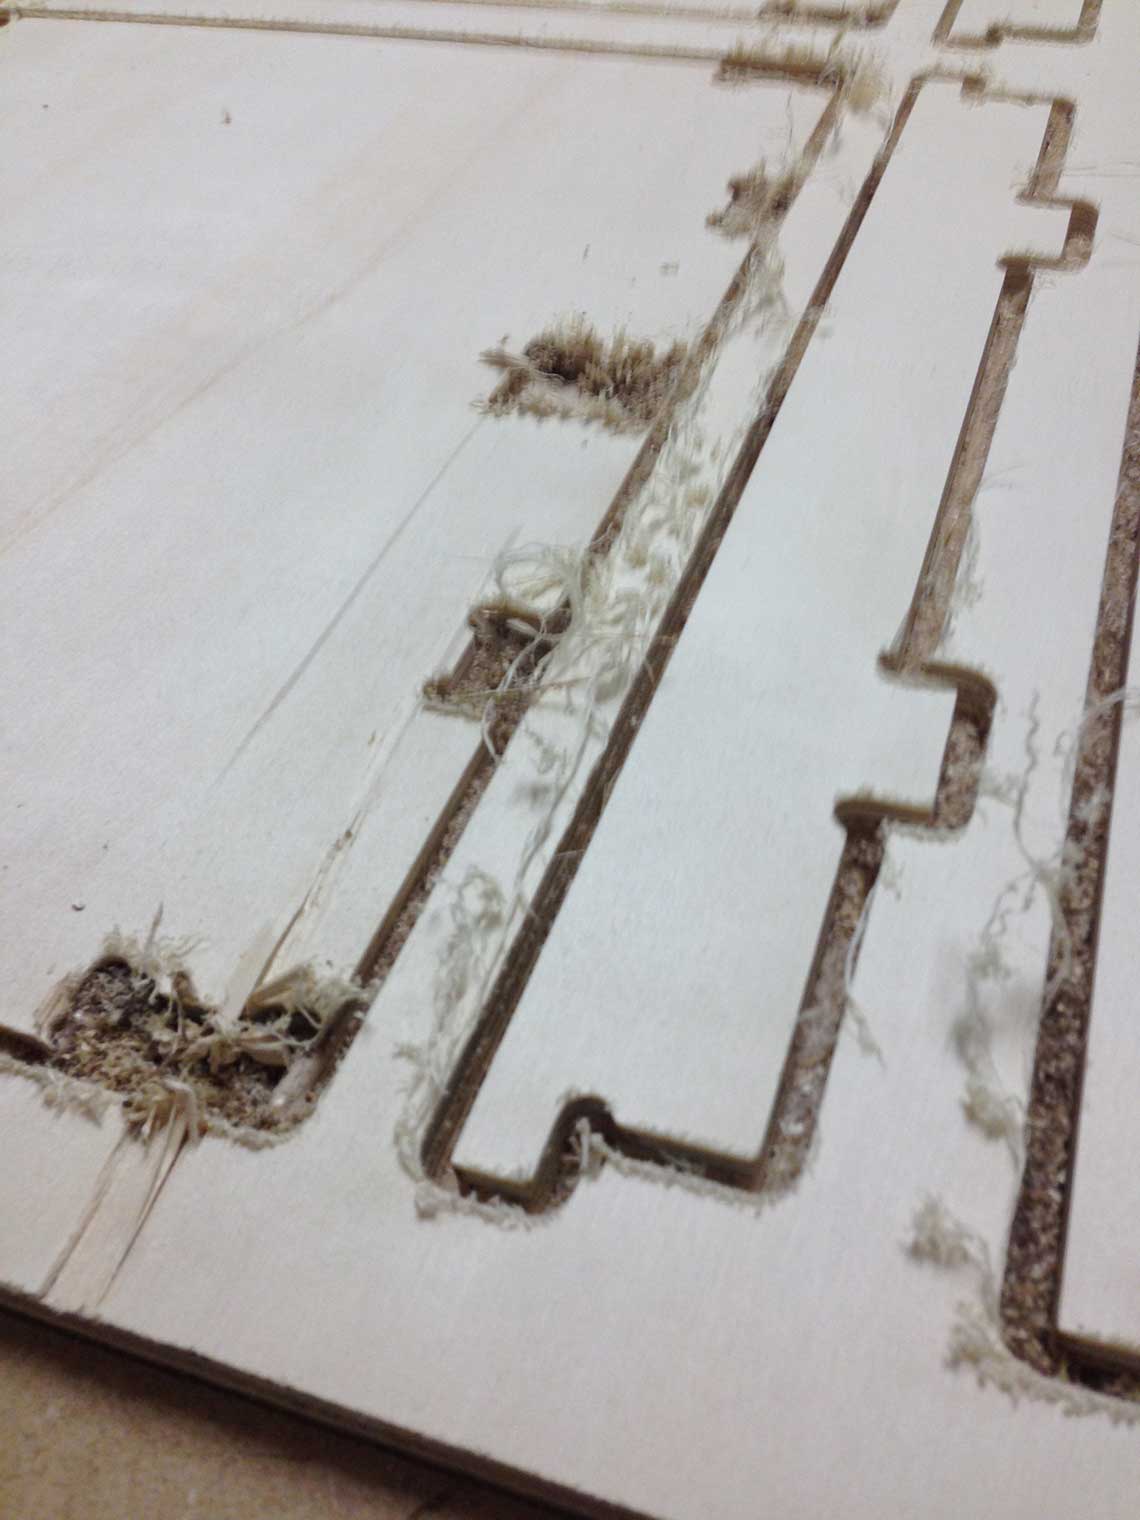
I found that the parts of my kit were not cut very cleanly : I had to sand all of them and remove the unproperly cut leftovers and splinters.
After that I tried to assemble the smallest module of the shelving system. Here is the result in video : as you can see it is quite unstable...
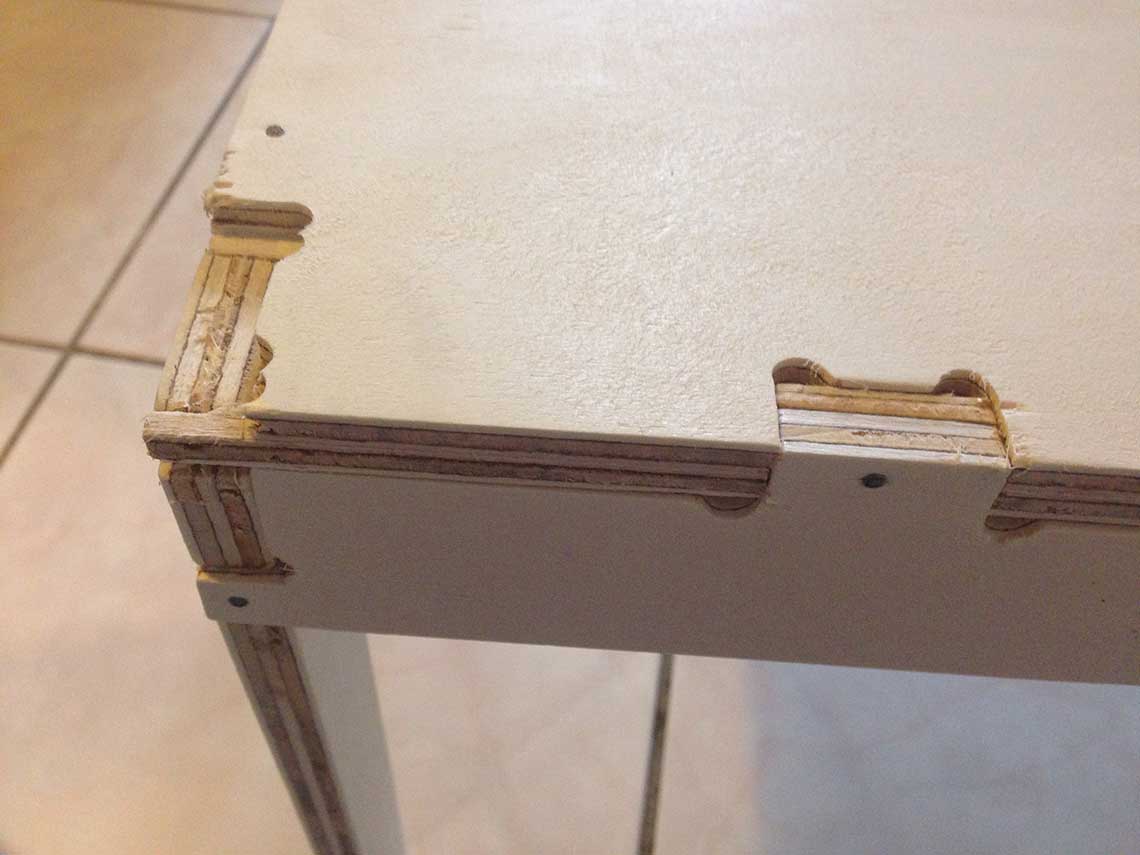
And also two pictures of details :
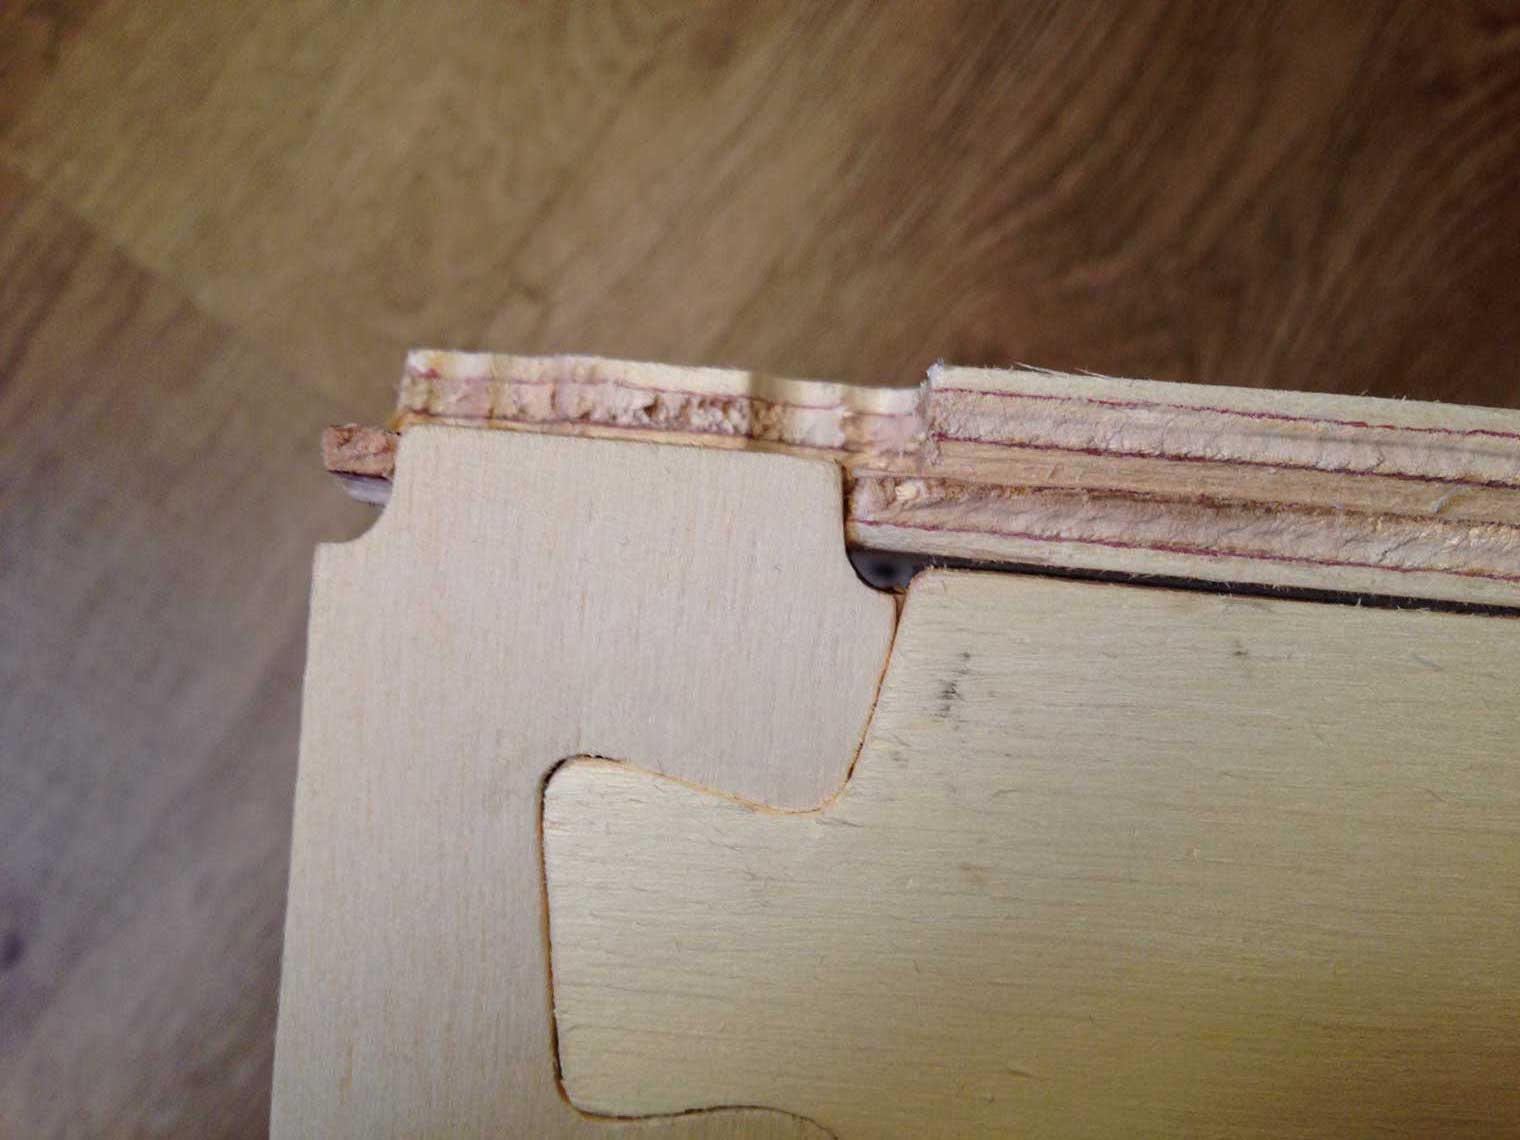 here we can see that the top joint for the legs is not big enougth : it doesn't go all the way through, which was intentional but is certainly a mistake.
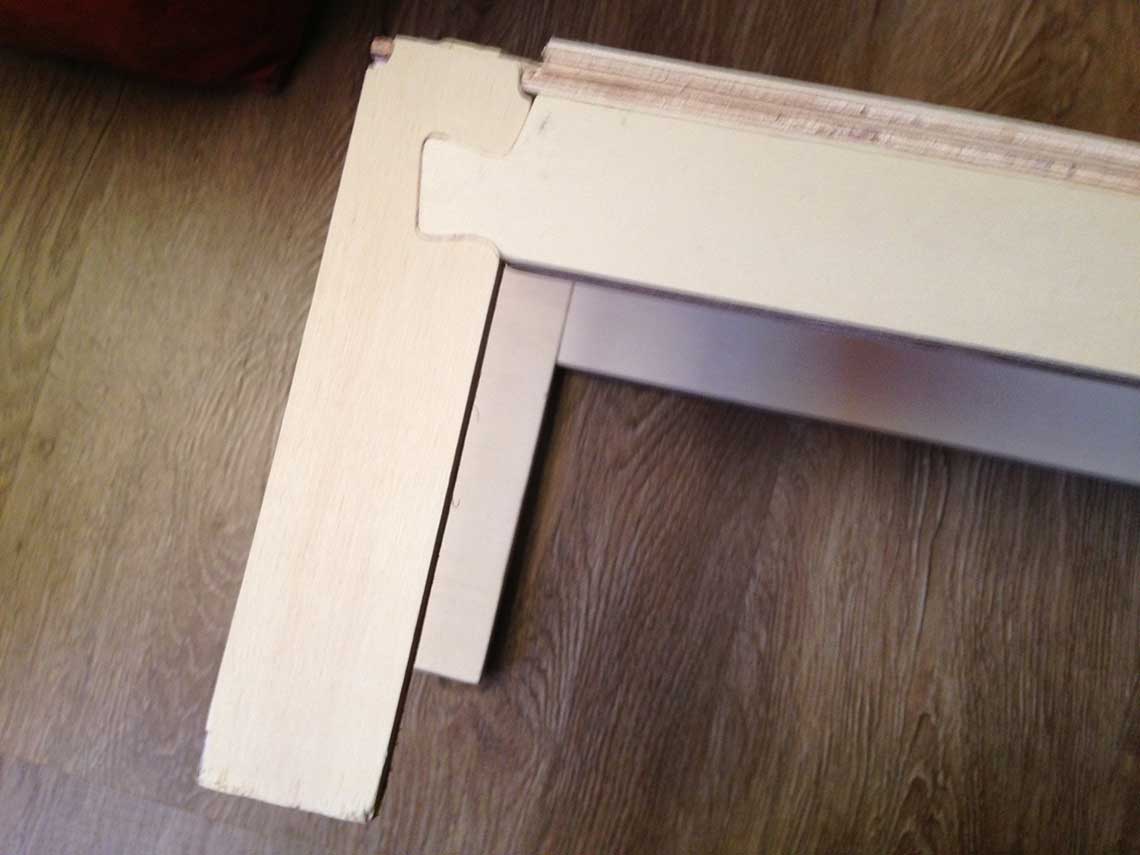 on the other hand the half-dove joints for corners work really well.
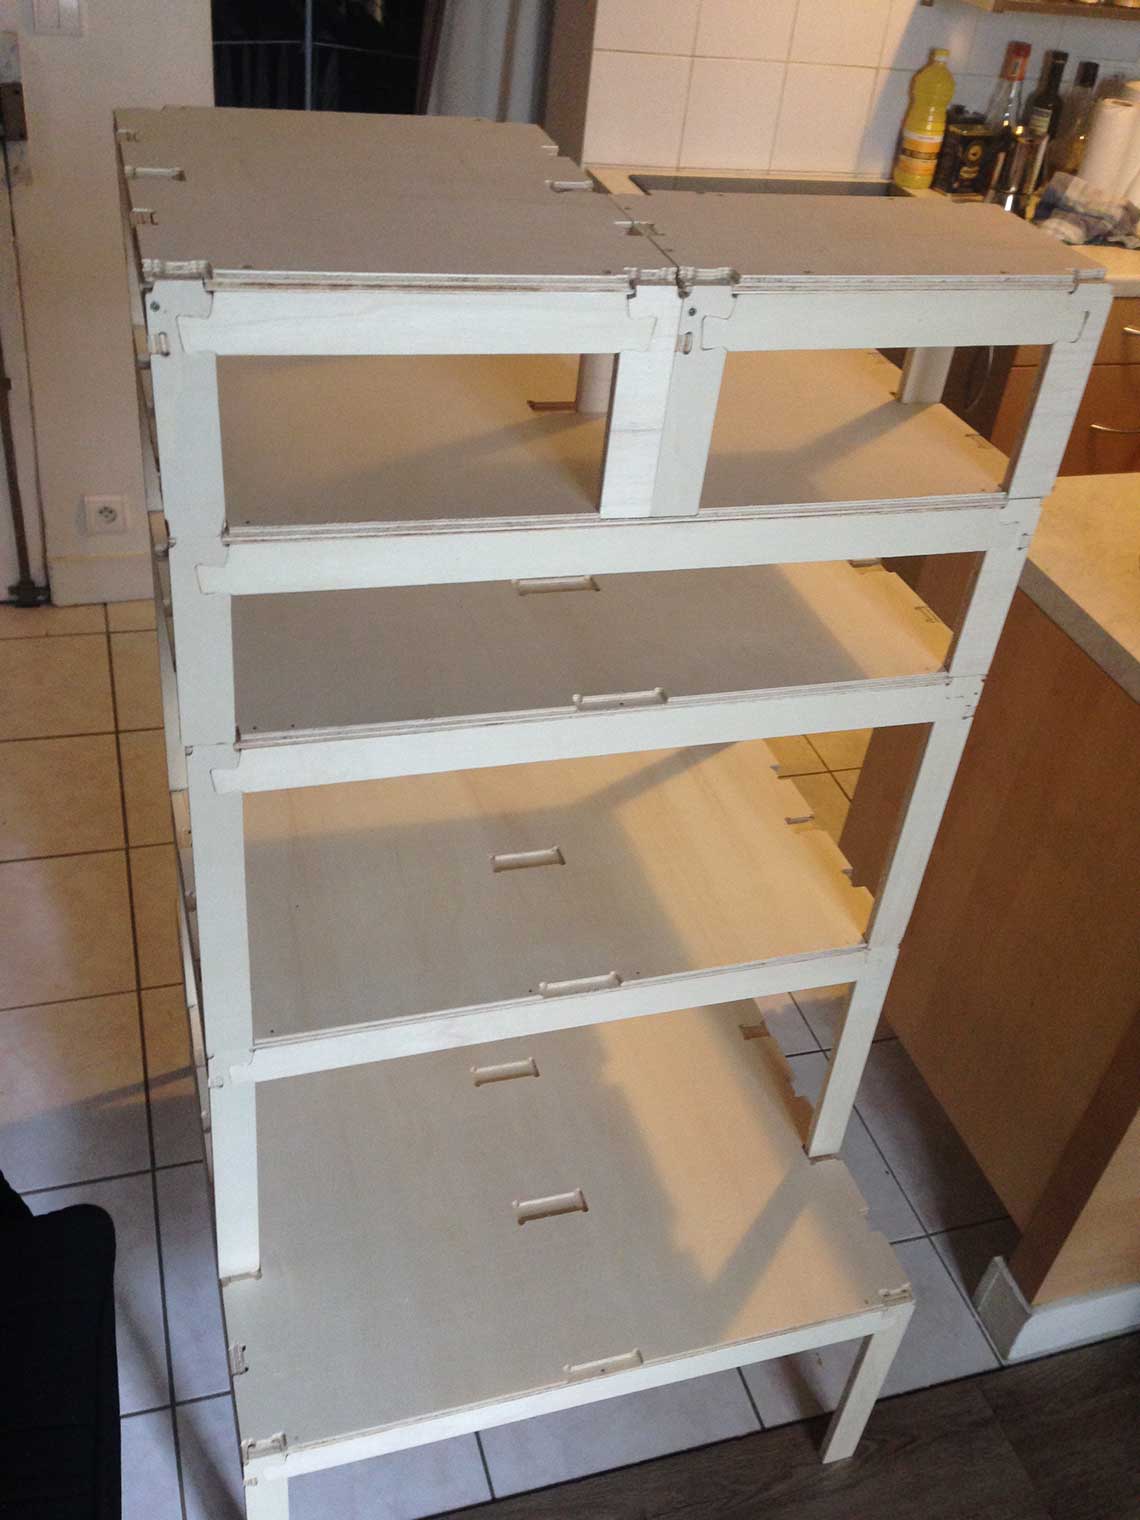
Update July 1
I finished the cleaning and assembly of all the parts and tried different combinations to test the modular function of the system :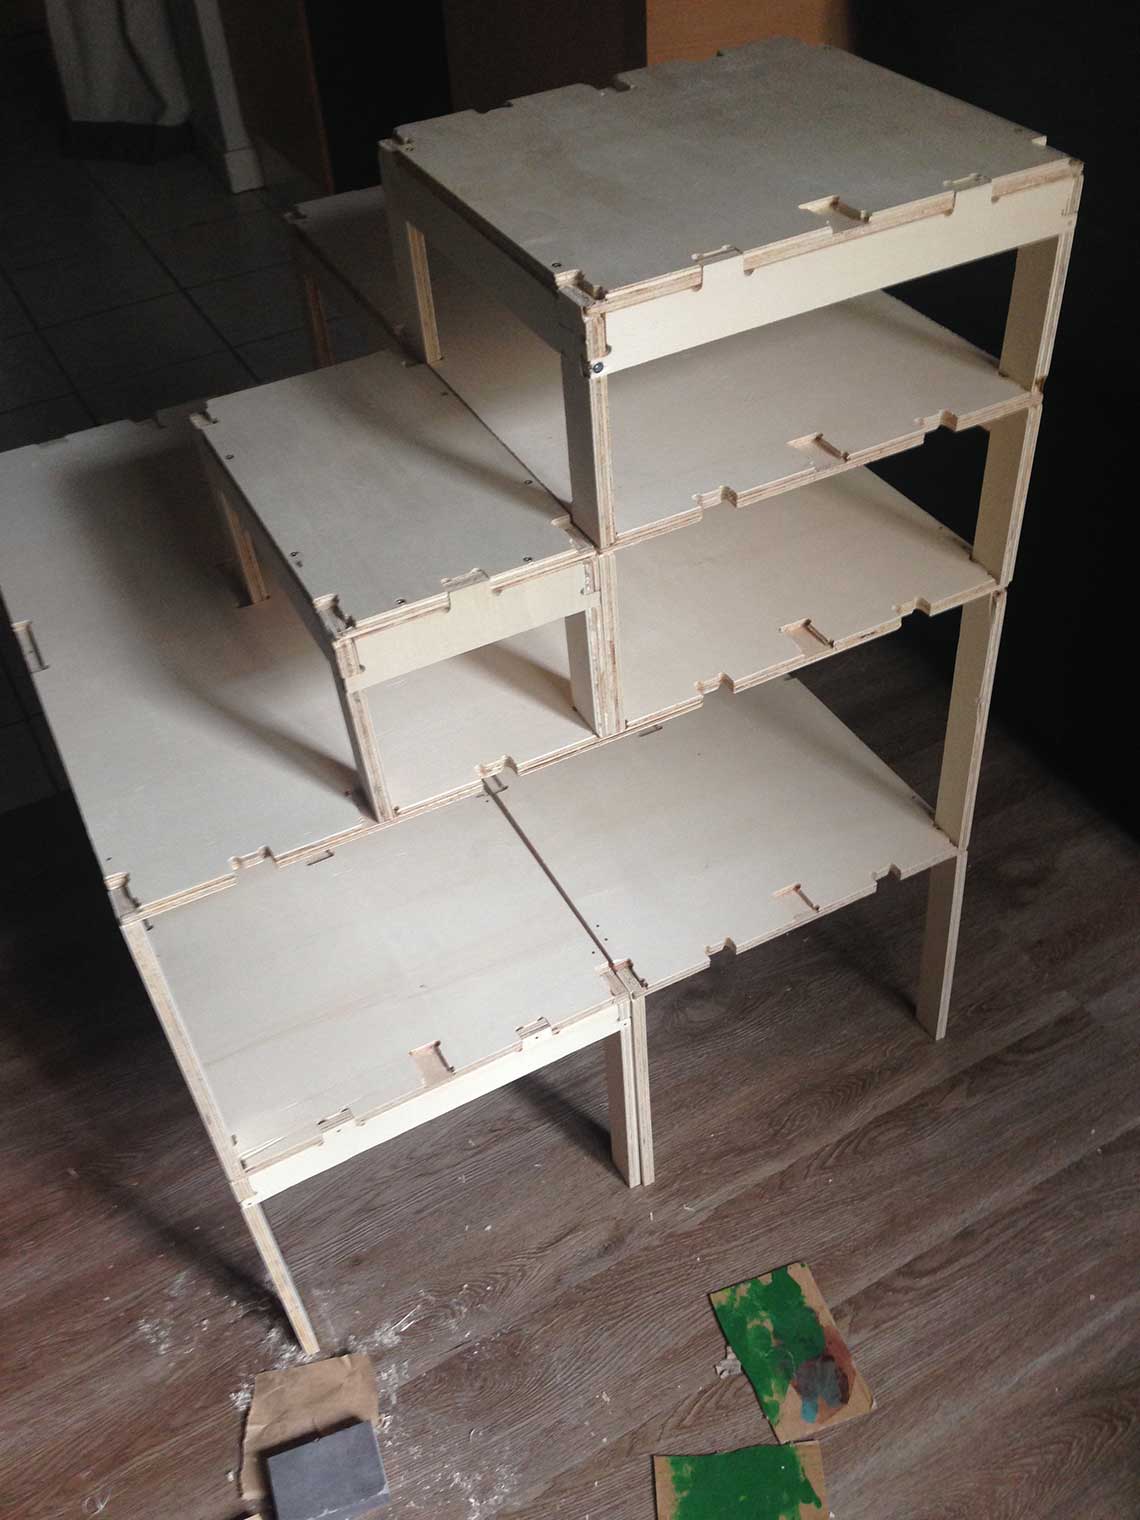
 And installation :
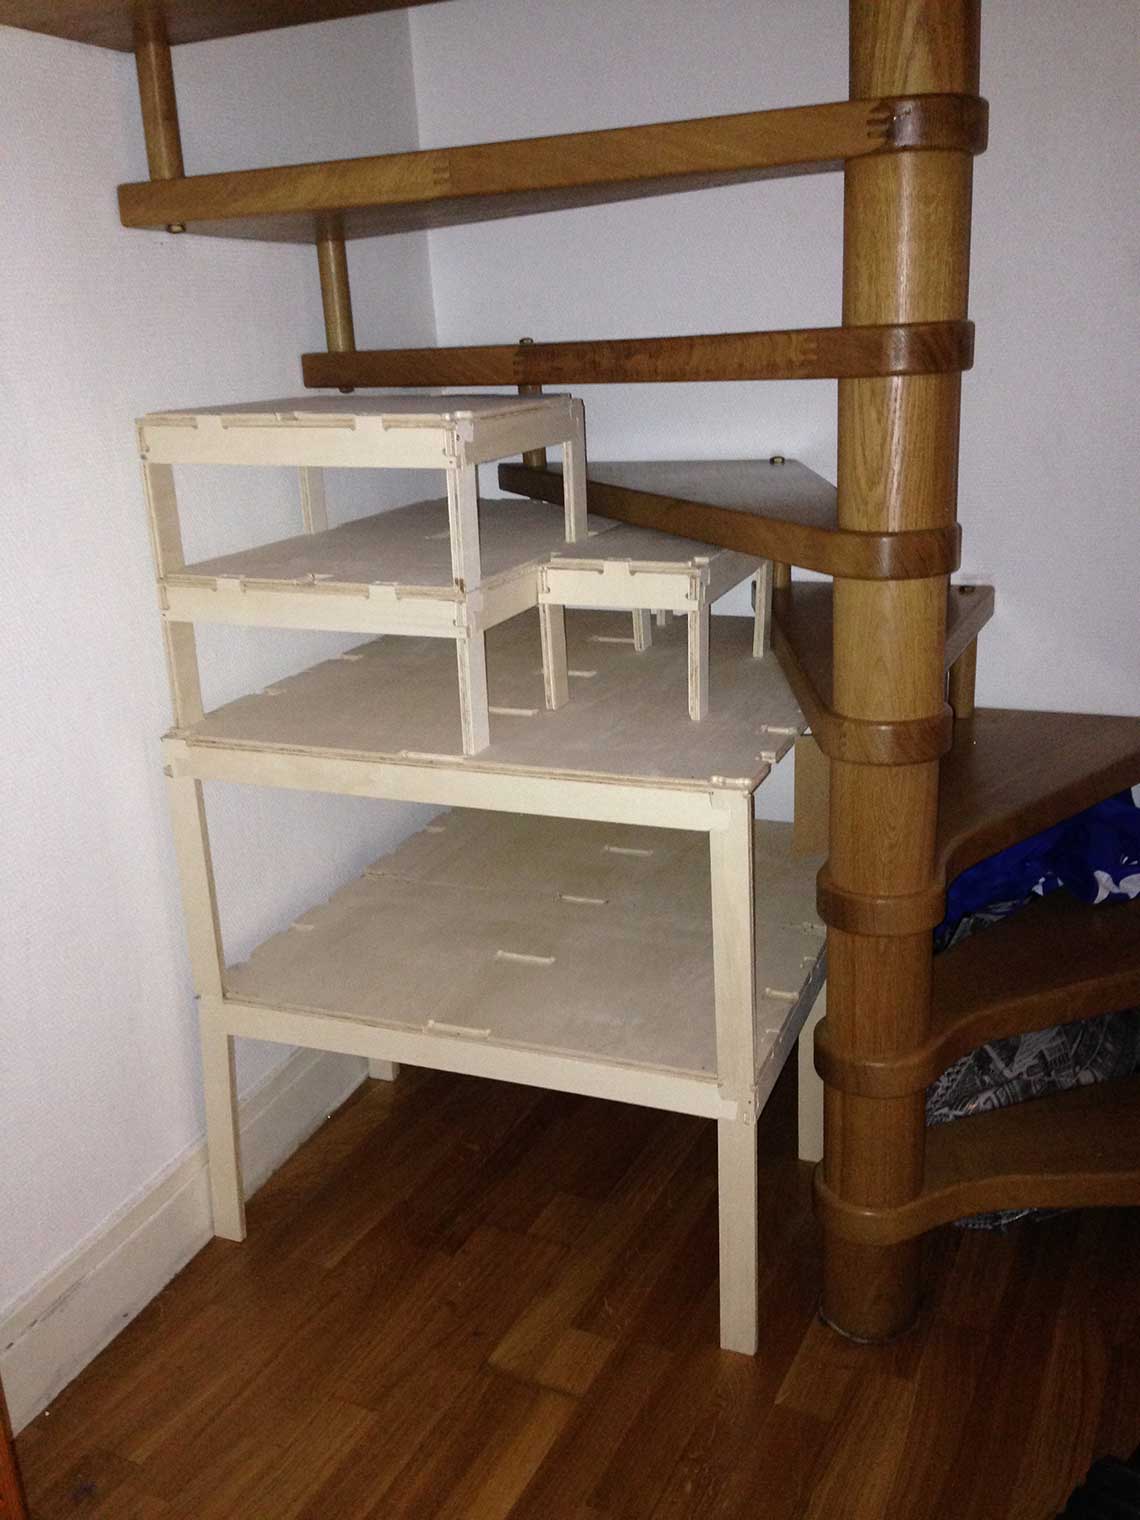
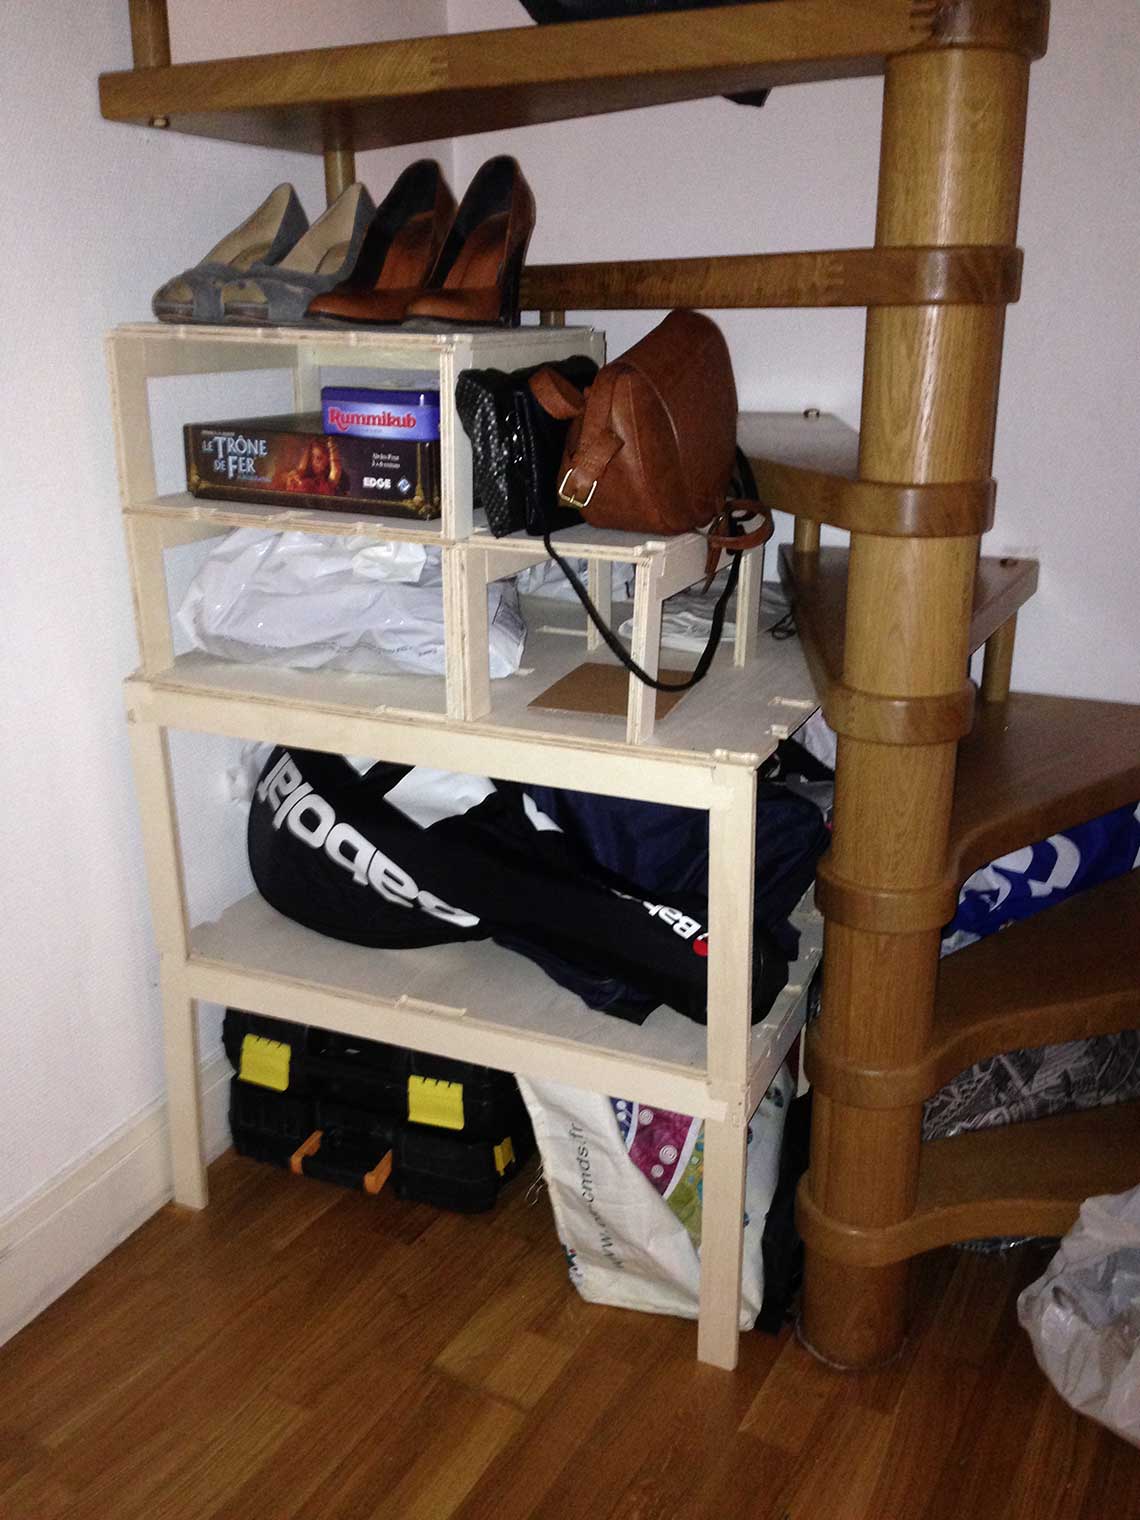
I had to put nails everywhere to make the shelves more stable :
 Also, I did not put tabs in the cutpath, and as a result some the the smaller parts (legs) moved during the cut and were not as precisely cut as they should have been, which also weakens the structure.
On the other hand, one good point is the modular layout, which works pretty well.
So with some improvements and also whith a stronger and thicker plywood, I think I could do something of this shelving system !