Networking & Communications
Week 15's assignment
Specific material and softwares used during this assignment
- Machine :
- small CNC mill for the fabrication PCBs
- Software :
- Eagle for the edition of the Satchakit boards
- small CNC mill for the fabrication PCBs
- Software :
- Eagle for the edition of the Satchakit boards
My goals for this week are the following ones :
- Make two satchakits and make them communicate together with I2C. Try first with Arduino
- Try Wifi communication for my final project
I hope it will work !

I2C connection
At the beginning of this assignment, like each week, we had a presentation on the subject by our instructor Fabien. Here is the link to this presentation.This allowed me to understand better the different networking protocols that we can use. For starters, I wanted to try I2C, but also Wifi communication since I will be needing it for my final project.
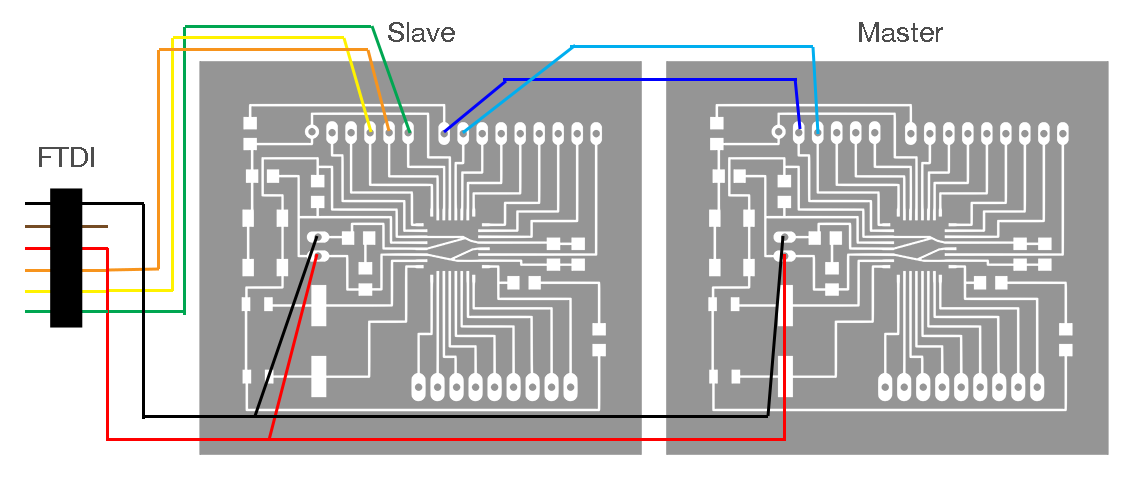
To start, I took two Satchakits that we made and make them communicate together via I2C. In order to do so, you must connect SDA pin of the 1st board, to the SDA pin of the second one, and do the same thing for SCL pins.
On Arduino UNO, and therefore on the Satchakit, the SDA pin is A04 and the SCL is A05. Then connect ground of first board to ground of second.
Then use the FDTI connection scheme to connect to slave Satchakit to the computer. The other one must be onlu connected to ground and power. Here is the complete conenction scheme :
 I found a example of sketch using the Wire library for Arduino, that allows the master board to send a character to the slave. This character is received by the slaved and then printed out on the Serial Monitor. Bellow, are the sketches for the master and for the slave.
Master :
    #include <Wire.h>

    void setup()
    {
      Wire.begin(); // join i2c bus (address optional for master)
    }

    byte x = 0;

    void loop()
    {
      Wire.beginTransmission(4); // transmit to device #4
      Wire.write("x is ");        // sends five bytes
      Wire.write(x);              // sends one byte
      Wire.endTransmission();    // stop transmitting

      x++;
      delay(500);
    }
Slave :
    #include <Wire.h>

    void setup()
    {
      Wire.begin(4);                // join i2c bus with address #4
      Wire.onReceive(receiveEvent); // register event
      Serial.begin(9600);           // start serial for output
    }

    void loop()
    {
      delay(100);
    }

    // function that executes whenever data is received from master
    // this function is registered as an event, see setup()
    void receiveEvent(int howMany)
    {
      while (1 < Wire.available()) // loop through all but the last
      {
        char c = Wire.read(); // receive byte as a character
        Serial.print(c);         // print the character
      }
      int x = Wire.read();    // receive byte as an integer
      Serial.println(x);         // print the integer
    }
You can see here on the serial monitor the character sent by the master to the slave. Each time a charater is send, the RX LED also blinks. When pressing Reset on the Master board, the character count starts again from zero :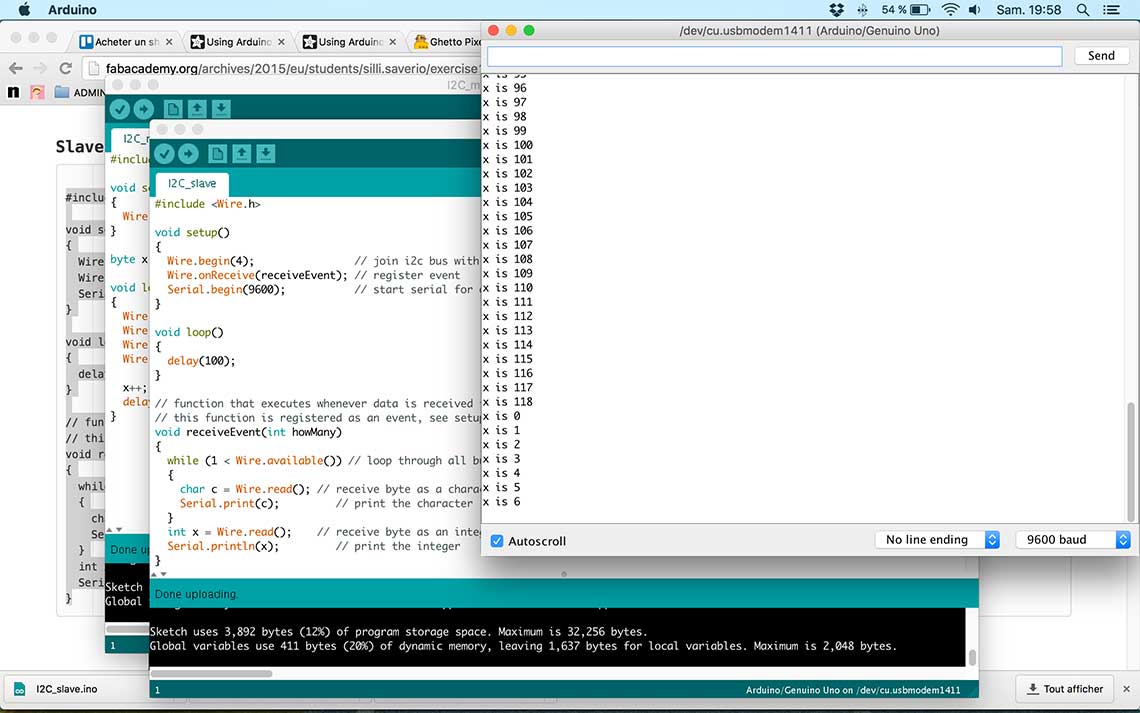 And here it is live :
WiFi connection
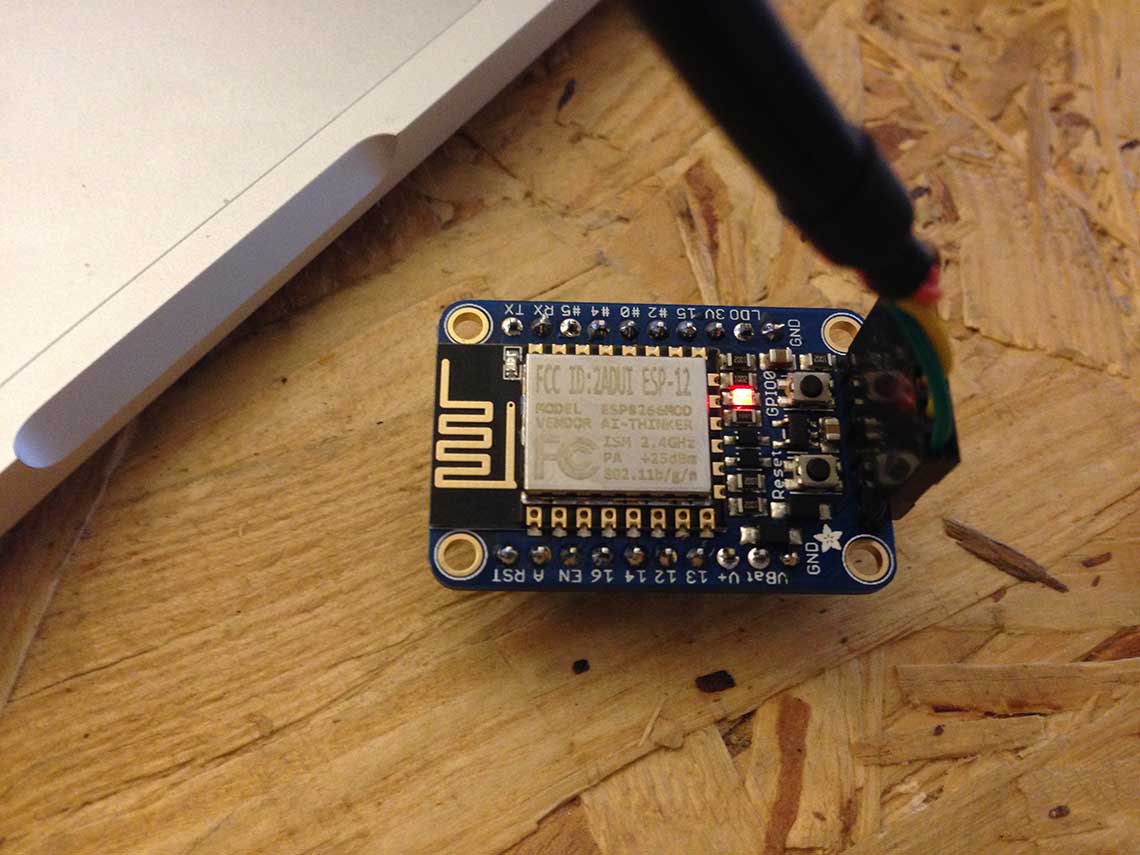
I bought an Huzzah ESP8266 WiFi breakout, which I think will be very usefull for my final project, and I wanted to try it :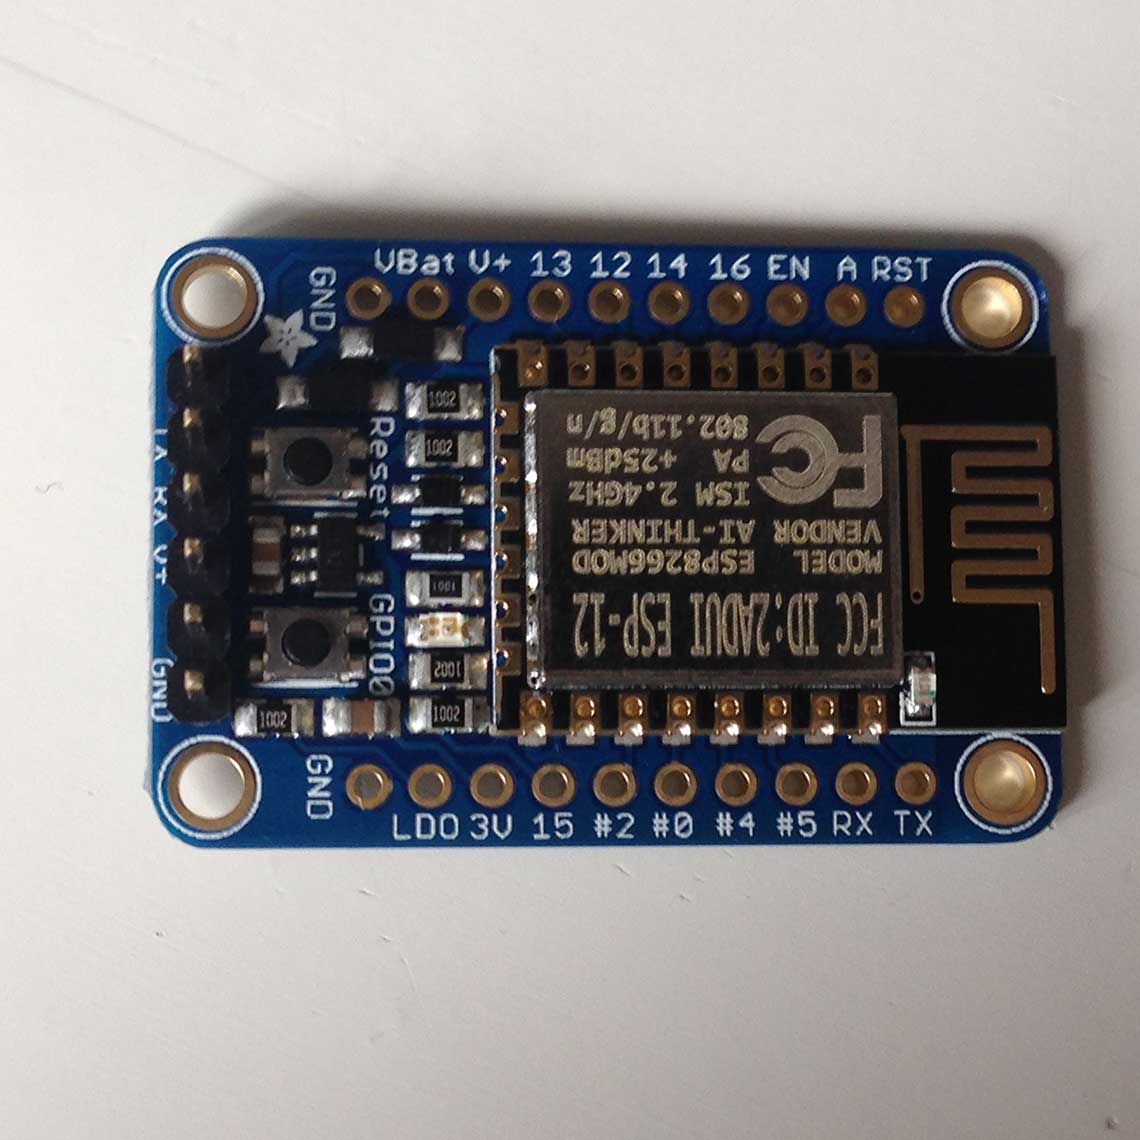 This thing is really cool because it has a 80MHz processor and you can program it just like you would do with an Arduino board, using the Arduino IDE and an FTDI cable !
The test I wanted to do was to gather some weather data on the Internet and display it on the Serial Monitor. This will be very usefull for my final project !
The process I use was inspired by this Adafruit Tutorial on how to build a weather display.
Basically it is based on the forecast.io API that provides accurate weather forecasts. Perfect for what I need and quite simple to use !
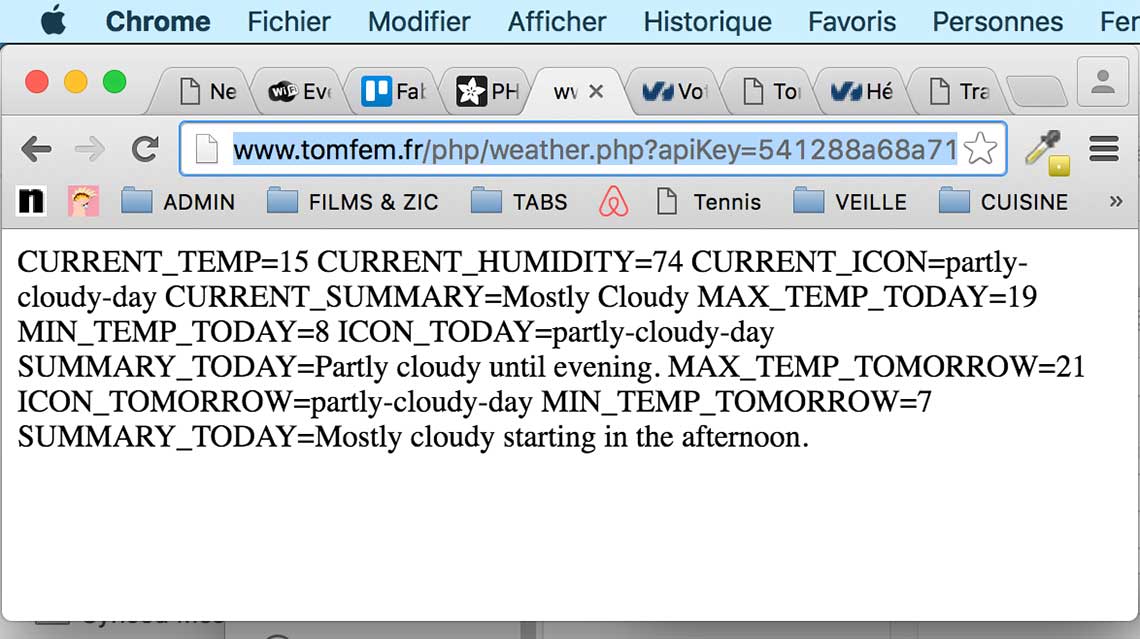
First I created a website (I will certainly need it later for all kinds of purposes), then I installed the PHP script and library on the server and configured the API for my Latitude an Longitude. When accessing the page, I am now able to get the requested forecast in a very basic way :
 So now I want to be able to access this information with the ESP8266 and display it on the serial monitor. For this I use this sketch based on the one provided by Adafruit for testing the connection of the HUZZAH :
    /*
     *  Simple HTTP get webclient test
     */

    #include <ESP8266WiFi.h>

    const char* ssid     = "WOMA 2"; //the name of the network I'm connecting from
    const char* password = "WOrkingMAking"; //the network's password

    const char* host = "www.tomfem.fr"; //my domain

    void setup() {
      Serial.begin(115200);
      delay(100);

      // We start by connecting to a WiFi network

      Serial.println();
      Serial.println();
      Serial.print("Connecting to ");
      Serial.println(ssid);

      WiFi.begin(ssid, password);

      while (WiFi.status() != WL_CONNECTED) {
        delay(500);
        Serial.print(".");
      }

      Serial.println("");
      Serial.println("WiFi connected");
      Serial.println("IP address: ");
      Serial.println(WiFi.localIP());
    }

    int value = 0;

    void loop() {
      delay(5000);
      ++value;

      Serial.print("connecting to ");
      Serial.println(host);

      // Use WiFiClient class to create TCP connections
      WiFiClient client;
      const int httpPort = 80;
      if (!client.connect(host, httpPort)) {
        Serial.println("connection failed");
        return;
      }

      // We now create a URI for the request
      String url = "/php/weather.php?apiKey=541288a68a7158ad6065fe8c0102123e&lat=48.868438&lon=2.348573&units=auto"; //the url to the API's feed on my domain
      Serial.print("Requesting URL: ");
      Serial.println(url);

      // This will send the request to the server
      client.print(String("GET ") + url + " HTTP/1.1\r\n" +
                   "Host: " + host + "\r\n" +
                   "Connection: close\r\n\r\n");
      delay(500);

      // Read all the lines of the reply from server and print them to Serial
      while(client.available()){
        String line = client.readStringUntil('\r');
        Serial.print(line);
      }

      Serial.println();
      Serial.println("closing connection");
    }
Uploading my sketch to the ESP8266 is really simple. It is Arduino friendly so after installing the board in the Arduino IDE, you just have to connect your device to the computer with a FTDI cable. To bootload, you must press the GPIO0 button and hold it, then press reset shortly, then release GPIO0. Then red LED will stay on but dimmer, wich means the board is ready to be bootloaded :
 And we can see that it works, I can connect to the network and acces the requested URL but the serial monitor does not print what's on the page so I'll have to modify my sketch :
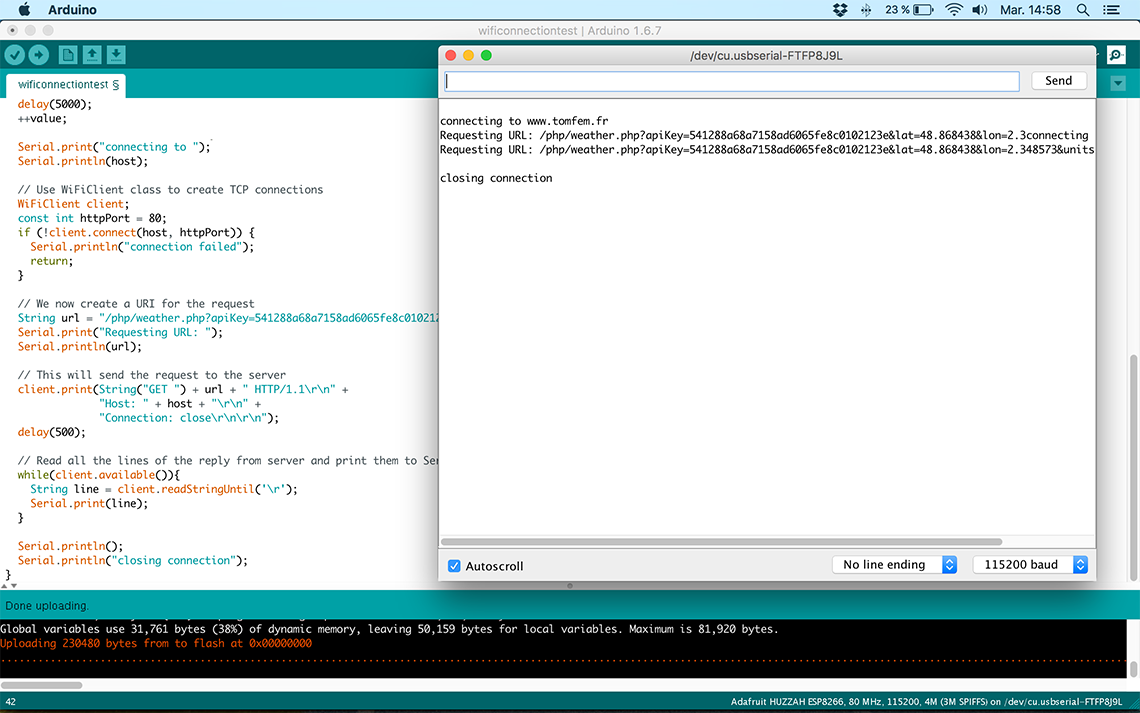 It turned out this was just a matter of giving enough time to the program to recieve the data. In the following line I changed to delay to 2000 and this time it worked ! :
      // This will send the request to the server
      client.print(String("GET ") + url + " HTTP/1.1\r\n" +
                   "Host: " + host + "\r\n" +
                   "Connection: close\r\n\r\n");
      delay(2000);
