Project Management
Week 1's assignment
Developing a website using HTML and CSS
During this first week, the goal was to familiarize ourselves to web development and in order to achieve that, to create our own website to present ourselves, our final project idea and to document every step of our training. I already had some basic knowledge of HTML and CSS3 so using a text editor to build the website was ok for me, as long as I could use an existing template and modify it, rather than creating the website from scratch, which certainly would have taken me much longer than a week !
With a few trials and errors and using the developer tools of my browser, I should be ok ! After a few tries, and following the advice of Roman, one of my co-students, I chose to use Atom for text editing. It is really simple to use and has some interesting features that could be useful in the future. One I find really useful is the Find and Replace function, especially because I’ll be working on a existing template on which there will be some multiple modifications to make. This will really be a time saver. There is also a Git Diff option, which I am not familiar with yet, but which could be handy too according to Roman.
Here’s Atom’s website : https://atom.io
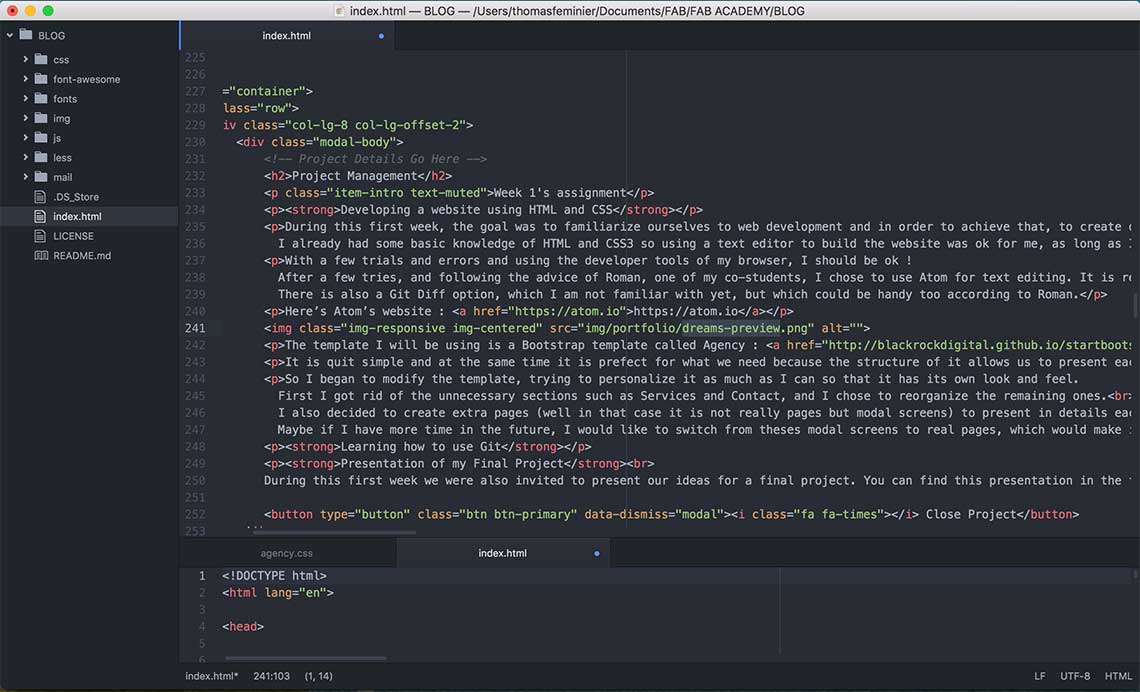
The template I will be using is a Bootstrap template called Agency : http://blackrockdigital.github.io/startbootstrap-agency
It is quit simple and at the same time it is prefect for what we need because the structure of it allows us to present each assignment independently and to give an overview of our final project, step by step on a kind of timeline.
So I began to modify the template, trying to personalize it as much as I can so that it has its own look and feel.
First I got rid of the unnecessary sections such as Services and Contact, and I chose to reorganize the remaining ones.
I also decided to create extra pages (well in that case it is not really pages but modal screens) to present in details each step of the final project.
Maybe if I have more time in the future, I would like to switch from theses modal screens to real pages, which would make it possible to access each independently without passing through the homepage.
Learning how to use Git
The other main subject of this first assignment is to learn ho to use GIT, which is a version control system. Version control is an essential notion because it allows you to keep history of every version and changes that you have made and will make on a particular file or set of files. It is particularly useful for graphic design, coding, writing but also for a large variety of other things. One of the biggest advantages of this system is that nothing is ever really lost. In our case, what we will program an document will evolve constantly throughout the Fab Academy course so GIT is very good tool to keep track of what we did. Of course this will also allow our instructors to have access and control on our work. Through GIT, they will be able to assess our work weekly before it is pushed on the Fab Academy Website for updating our personal pages.
For me, GIT was a little bit difficult to understand and use at the beginning. But after Aldo, our instructor showed me how to configure GIT on my Mac and how to generate the SSH Key and clone my folder from the repository to my computer, the rest was easier and after a while I finally was more comfortable with the whole thing.
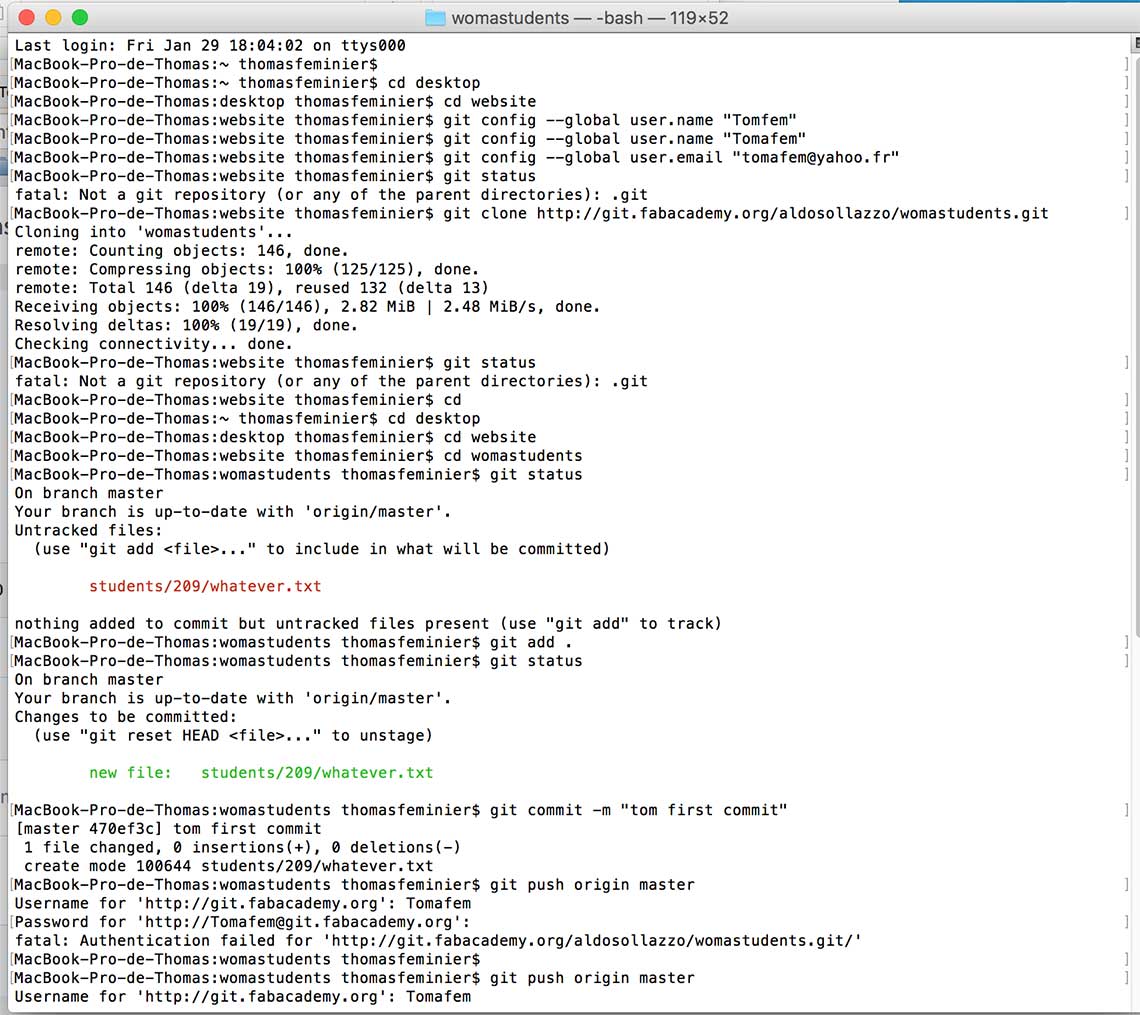
Basically it is quite simple because it only consists on passing lines of command into the Mac Terminal to communicate with the Git Lab once it is configured.Here’s the process :
- I open the terminal and type
git- I type cd desktop, then to access the folder in my computer that I use to store my data
cd folder
- Then, to access to the repository
cd womastudents
- To check the system and read the status I enter
git status
- Then to literally pull everything from the repository to my folder I must type
git pull origin master
- Then, to upload the file I changed
git add -A
- To commit and comment what you are commiting (inside the brakets)
git commit -m « »
- And finally, to send to the online repository
git push origin master
This is how it looks like in the Terminal :
One really wise advice that Roman, who is a master of GIT told us is ;) :
- Rule #1 :Always begin the day by pulling
- Rule #2 : Always end the day by pushing
This way we are sure never to make any mistake, and even if we do one, it won’t be so much of a problem.
An other important thing that Aldo taught is is to always work on a different folder than the one we use for GIT. This way we will always have an backup.
Tutorial on Rhino and Grasshopper
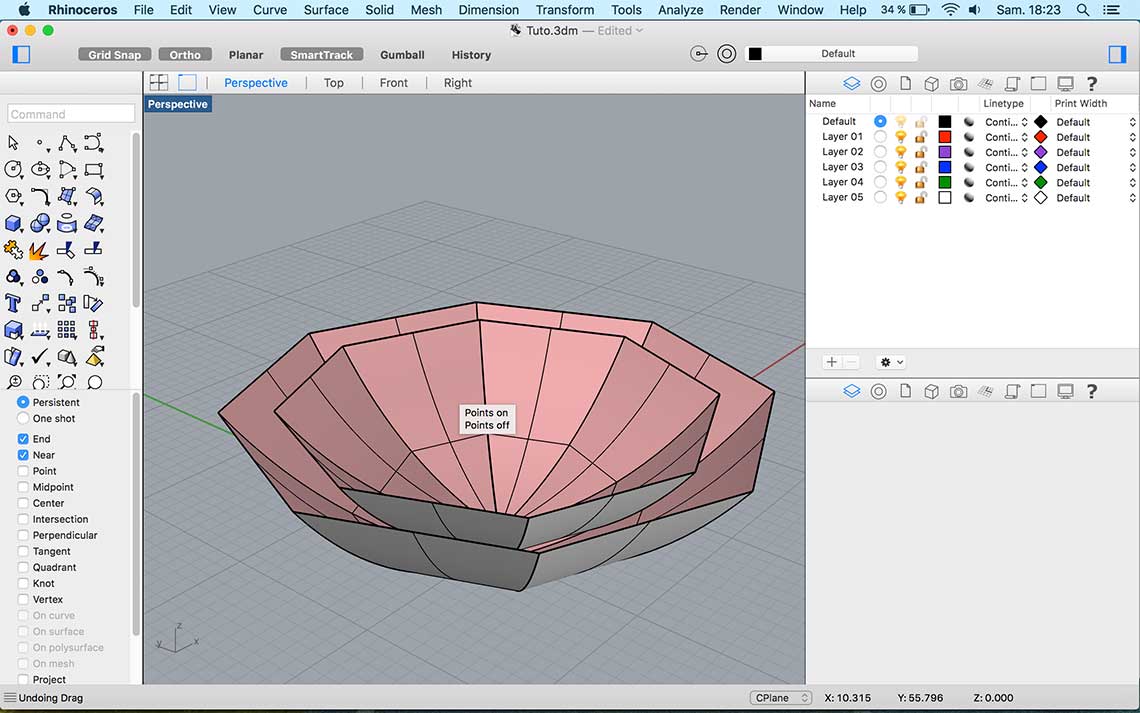
On friday 28th, Aldo gave us a tutorial on Rhino and Grasshopper which are 3D modeling softwares.
Although it was only an introduction, it was really interesting to see how powerful those tools are.
I’ve been using Blender a little bit so I am not completely new to this kind of software, but I find that Rhino offers a much clearer and user-friendly interface.
The first exercice consisted in making a kind of cylinder and to add surfaces to it.
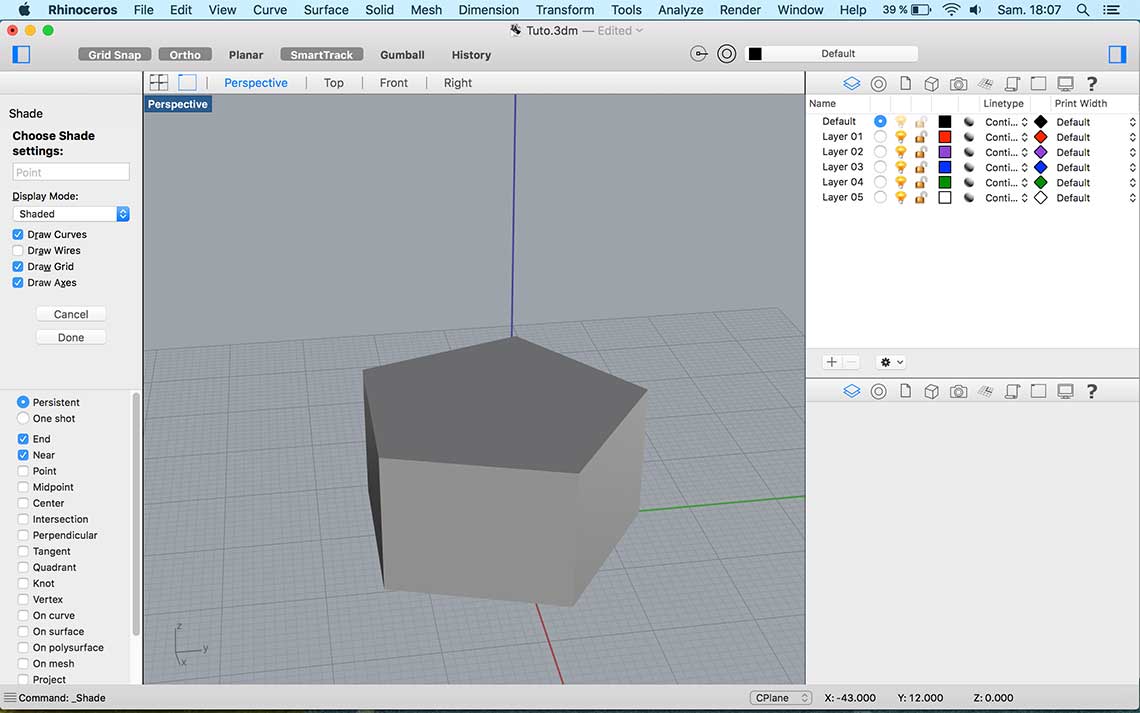
The second one was to design more complex objet using some to the many editing options.
After that, we had a presentation of Grasshopper which works completely differently but in a very efficient way. It is a editing plugin for Rhino and it works with what they call graphical algorithms. To create your design, you have to use components from a vast library. Each components has inputs et outputs. By linking them together you can build complex designs little by little, that you can then very easily transform. Grasshoppers being a plugin for Rhino, you can directly visualize what you do in Rhino’s viewport. Too bad that Rhino is only available for a 2 weeks evaluation on Mac…
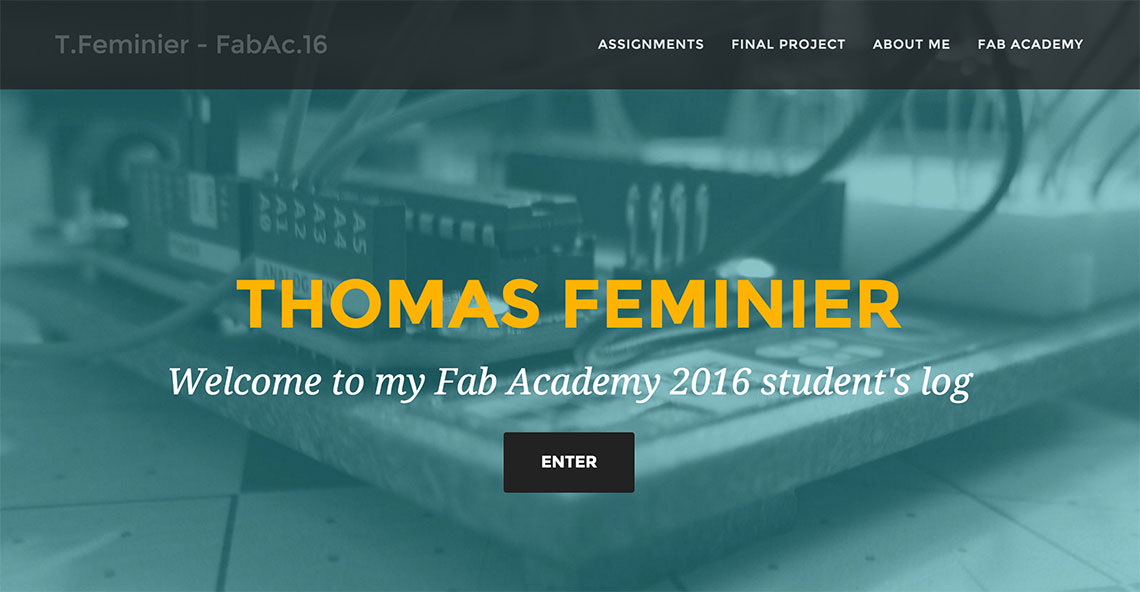
Presentation of my Final Project
During this first week we were also invited to present our ideas for a final project.
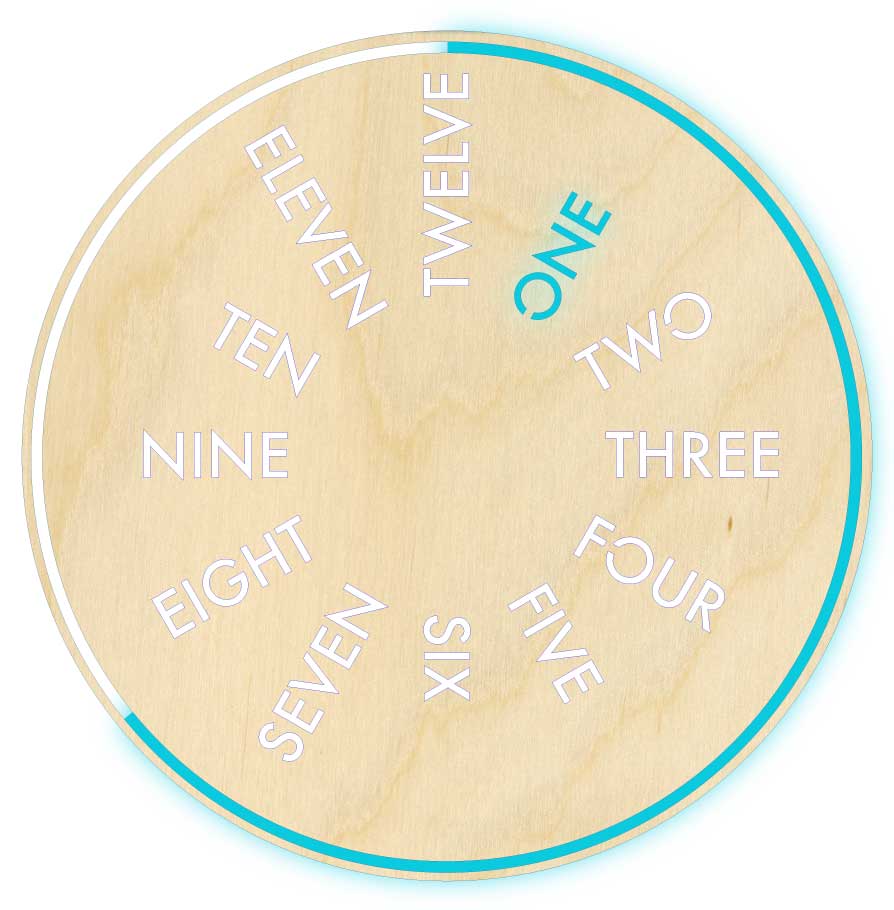
My idea at the begining, was to build a design LED wooden clock, which particularity would be that the hours are represented by the actual words that match with each our (One, Two, etc.) and the minutes are represented by a circle.
As the time goes by, the word representing the current hour is lit, and the circle representing the minutes fills itself following the current time as well. If it is 1:30 for example, le word One is lit, and the circle is 50% full.
This circle could be made of 60 different LED’s, one for each minute.
The clock would be equipped with a bluetooth chip to make it easy to set the our and change the colors of the LED’s using a specific program.
After I presentend my project to the instructors, they advised me to think of a way to give it a real purpose and improve it so that it becomes a smart devices, rather than a simple LED clock. An interesting suggestion from them was also to think a mechanical function that could be added. I have to keep in mind that the purpose of that final project is to use as much as we can every skill et technique that we will be learning during the Fab Academy.
So following the feedbacks I received after the presentation of my final project, I tried to figure how I could improve it rather than completing changing it and finding another idea, which I was first tempted to do. I wanted to created an every-day-object and for this reason, I found the clock to be interesting. My instructors told be I would be better if I tried to give to my object a real purpose, and preferably something related to the internet of things.
So I thought of weather forecasts.
I would find it really nice to have a wall clock that not only is a nice design object, by which is also useful in a way that it gives you information that you don’t have to search yourself on the Internet for.
So this is how I would like to improve my clock :
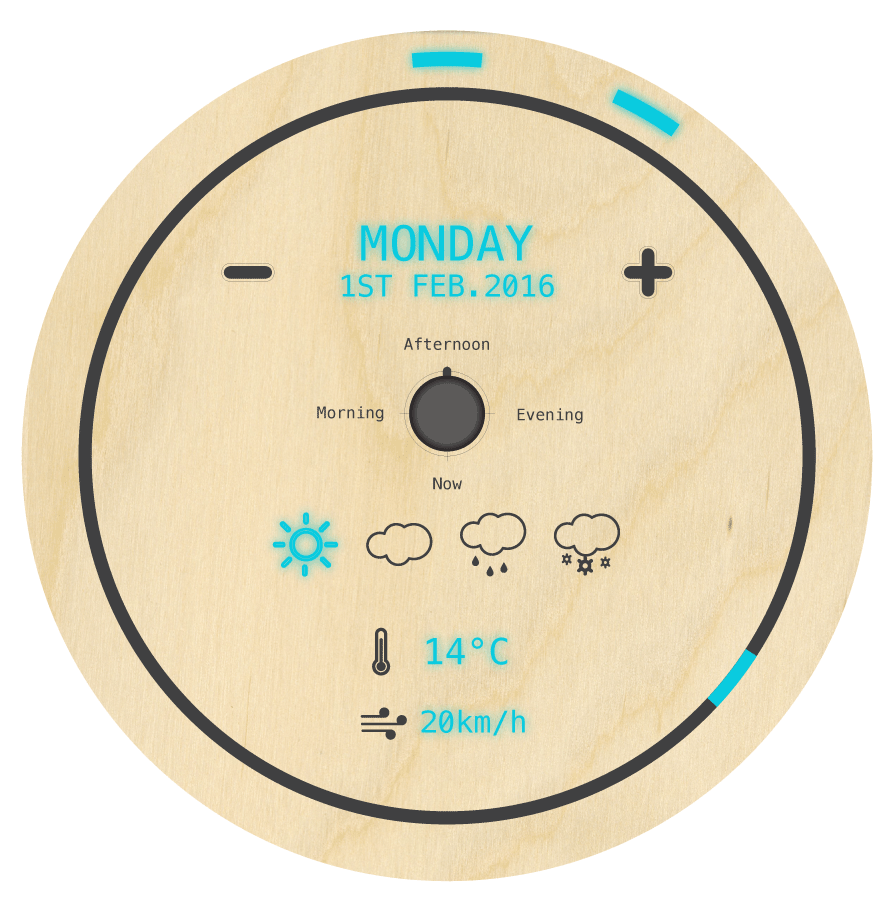 It still works with LEDs to mark the hours, but instead of written hours, I would use simply segments of a circle placed at each hour’s spot.
The minutes are marked by circle that spins mechanically, on which there is a indicator, that could be also a LED. This could be tricky because if I won’t be able to use wires so I will have to figure a way to power the LEDs wirelessly. So for the moment I consider this detail an option.
It still works with LEDs to mark the hours, but instead of written hours, I would use simply segments of a circle placed at each hour’s spot.
The minutes are marked by circle that spins mechanically, on which there is a indicator, that could be also a LED. This could be tricky because if I won’t be able to use wires so I will have to figure a way to power the LEDs wirelessly. So for the moment I consider this detail an option.
Basically, on the surface of the clock, will be displayed the weather forecasts for a given day. The weather information will be gathered using a weather API. You can select a particular day by using the - and + switches, and a particular period of the day (morning, afternoon, evening of real time) by using the selector switch.
You can find the complete presentation of my idea here.