Week 8
Embedded programming
Assignment
- Read a microcontroller data sheet
- program your board to do something, with as many different programming languages and programming environments as possible
Week workflow
Here is how I see the week's flow :
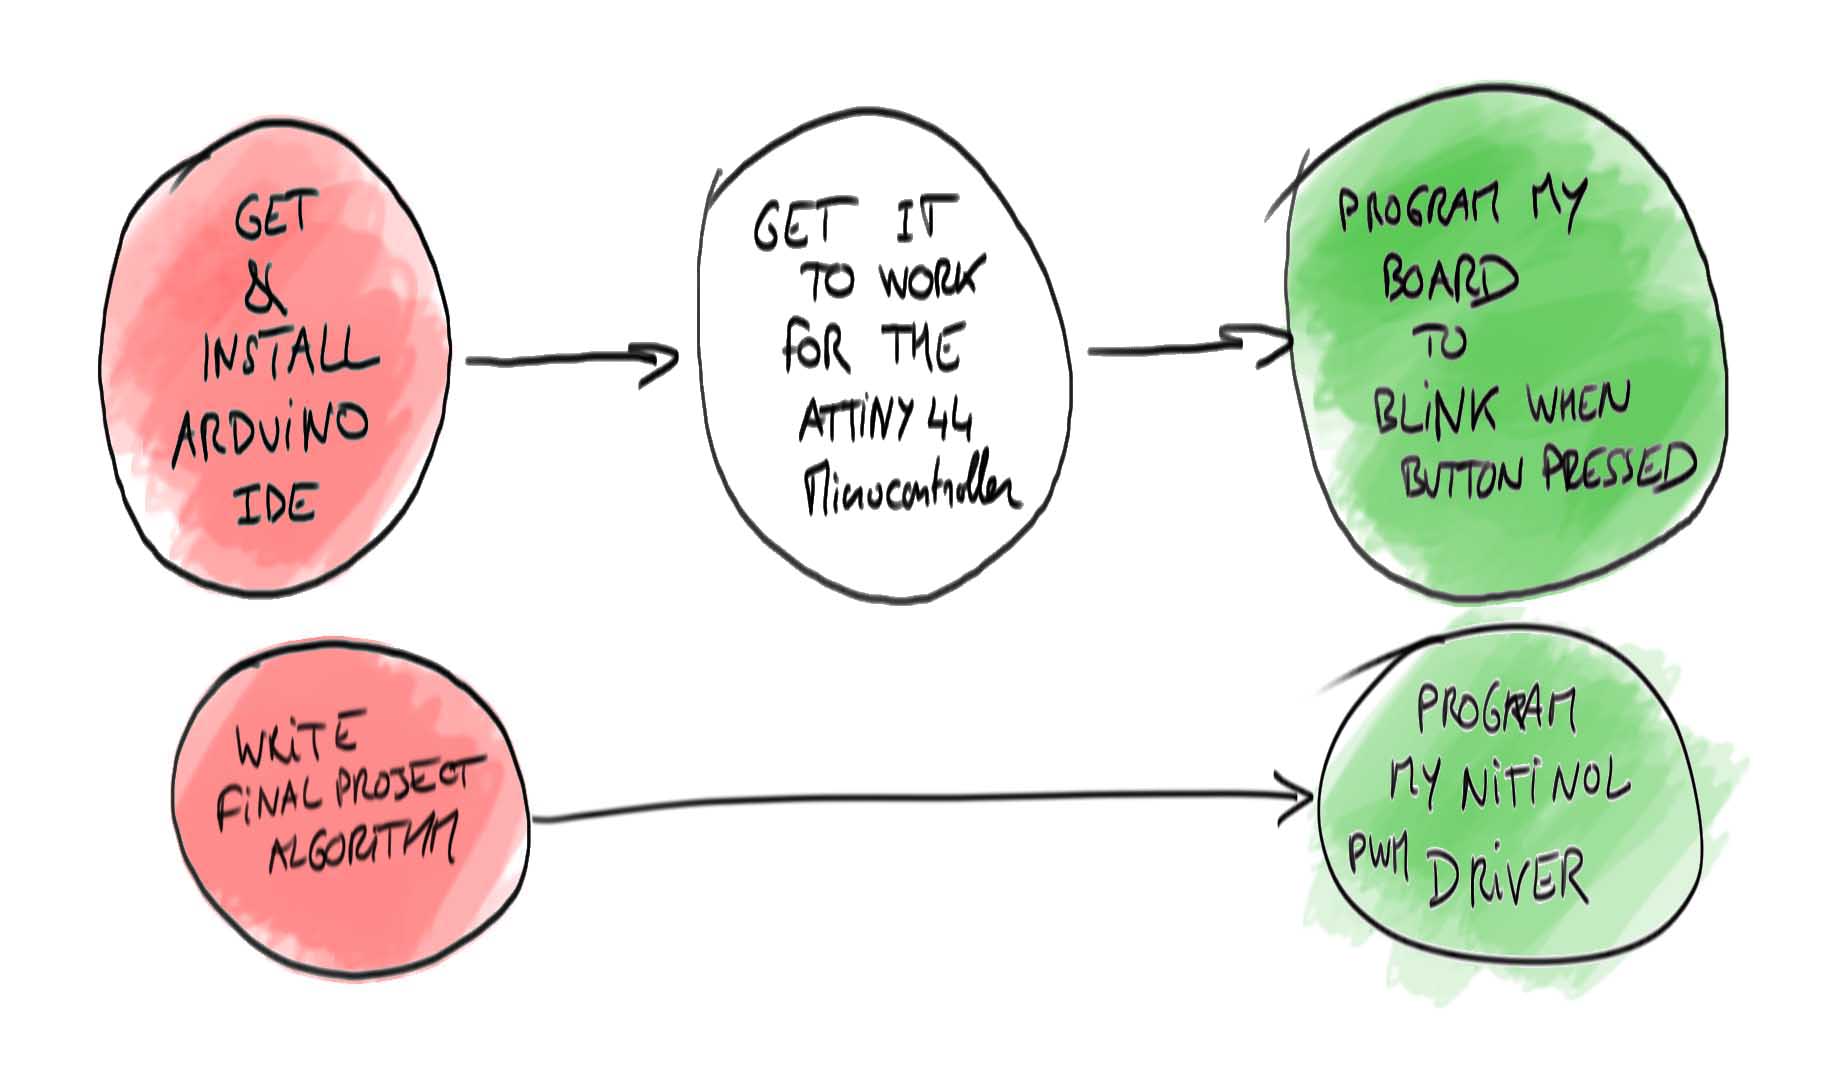
Flow chart for this week
Table of content :
STEPS
Arduino IDE
Even though we're not using an Arduino, we can still use the IDE (integrated development environment) for Arduino.
But we'll have to tweak it a little.
So I download and install the Arduino IDE
When we start it, we get :
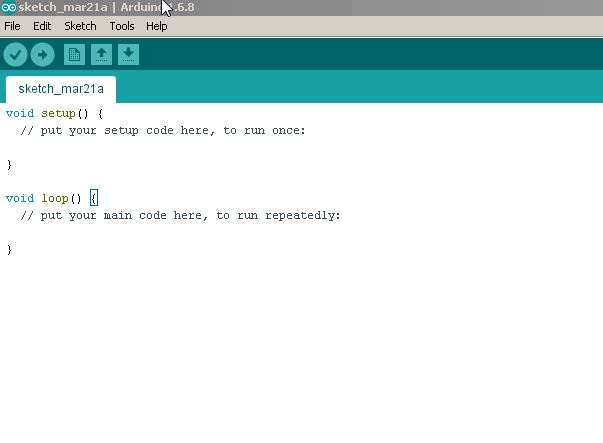
The Arduino IDE interface
That's where we write our C program.
From here we can compile and upload our program to the microcontroller we are programming.
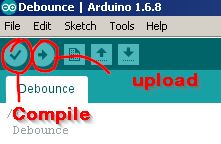
Compiling and uploading the program
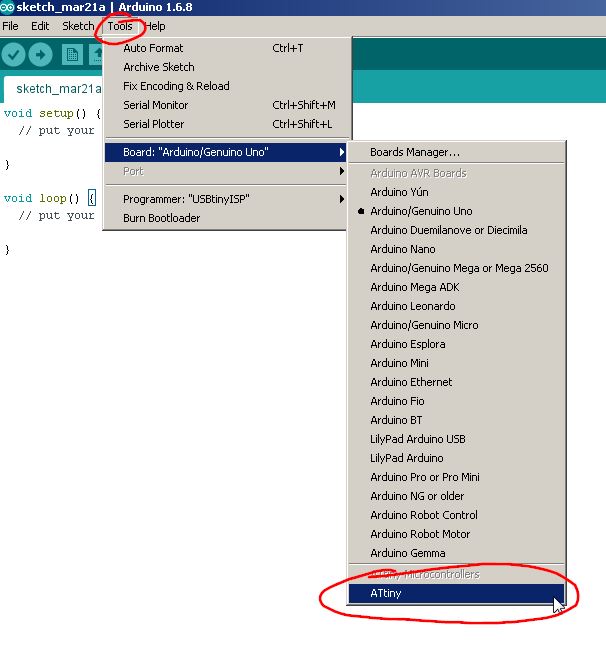
But which board are we programming??
The tool menu lets us pick one :

List of boards to program
And also the programmer that we'll use, i.e. the usb board that will transfer our program from the PC to the target microcontroller, from usb to serial :
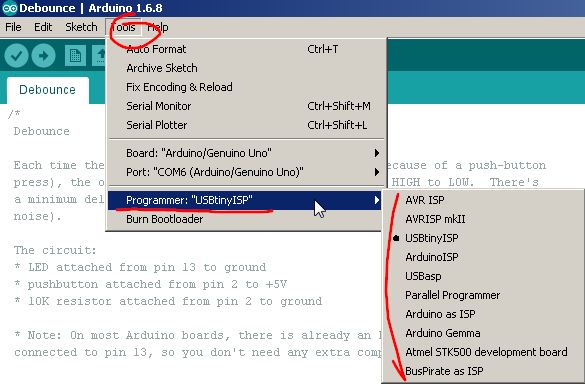
List of programmers
But we have a problem : We don't want to program an arduino but our attiny44 board that we made two weeks ago.
Thankfully, there is in the Arduino IDE preferences a possibility to get definitions for third party boards right from github :
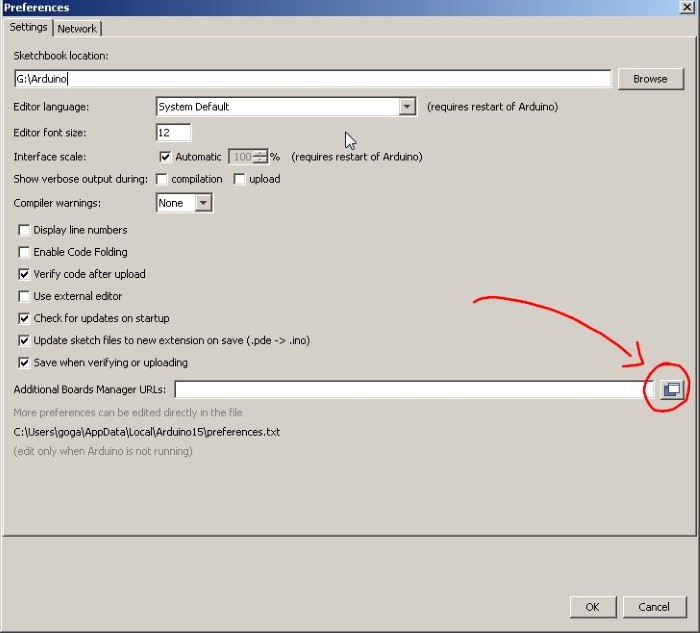
Getting third party hardware definitions right from github
We copy in this windows the link to where we can get the hardware definition.
In our case, David A. Mellis has written a definition for ATtiny44 :

github link
That basically add a text file "boards.txt" in the Arduino IDE install directories that describes the hardware :
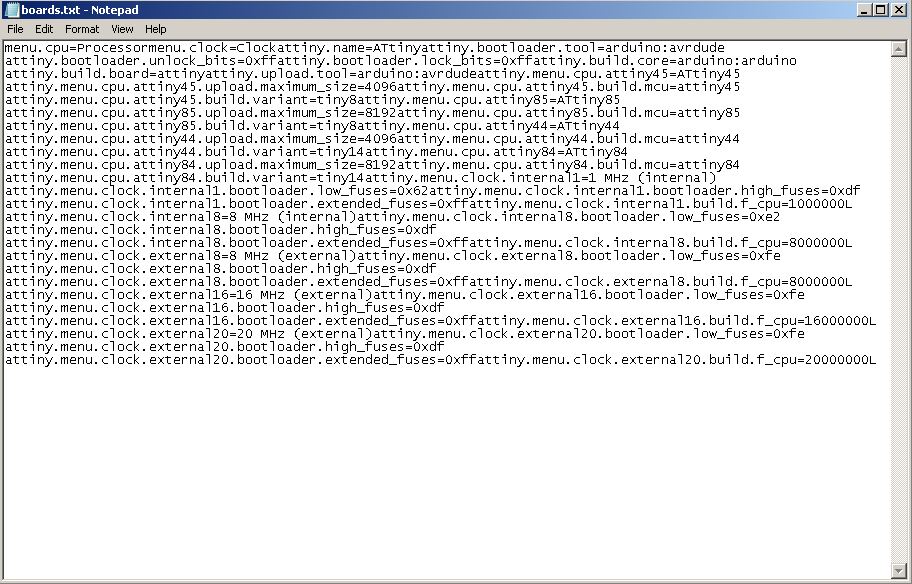
the boards.txt file
Now we can go to the Board manager :
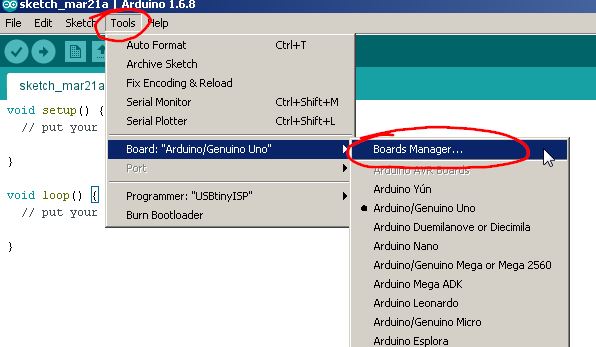
the board manager menu
and find our ATtiny44 board :
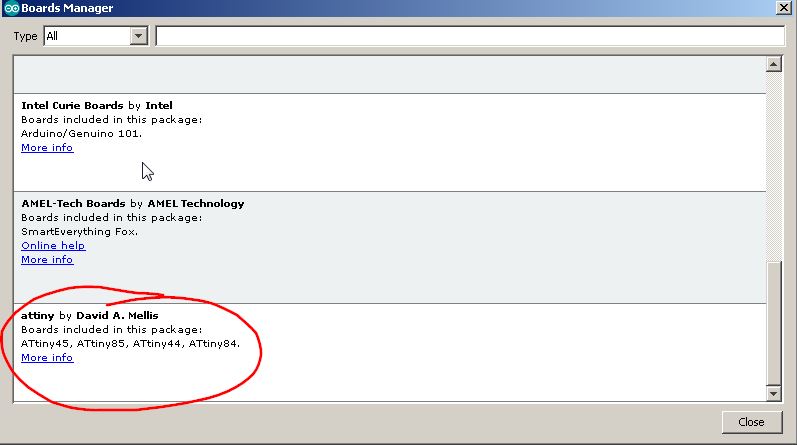
Our ATtiny44 board
We can then select the right one in the menus :
Our ATtiny family
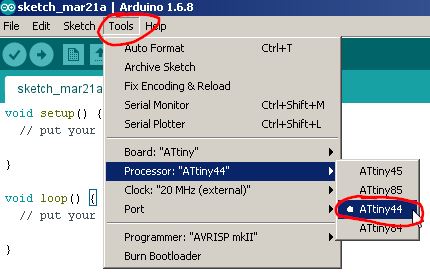
Our ATtiny44 board
And since we designed our board to be timed by an external clock at 20MHz :
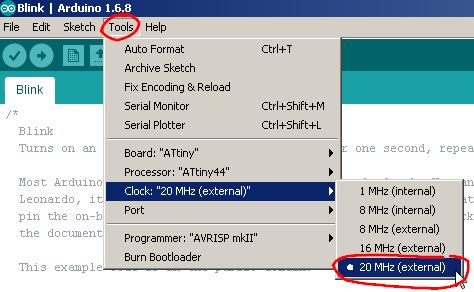
Setting the external clock
The last thing we need is to specify the programmer we'll use.
I'll try two different ones : The FabISP that we did at the beginning of the fabacademy and the avrisp mkII.
But this would be the menu where we select this :

Setting the programmer
Here are the two different setup :
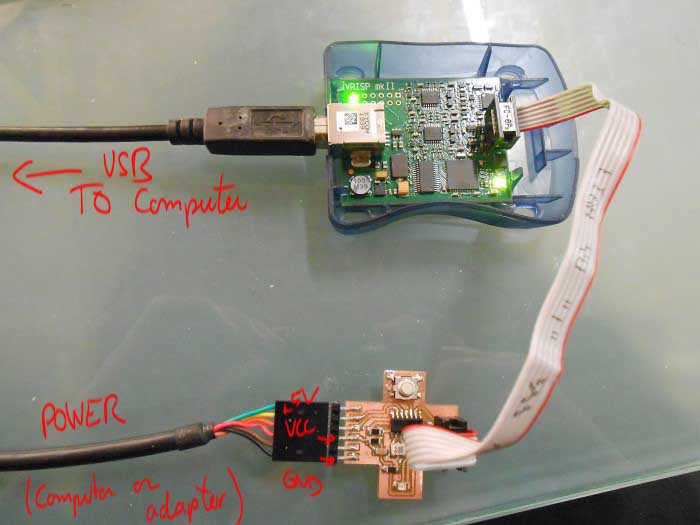
AVRisp mkII programmer configuration
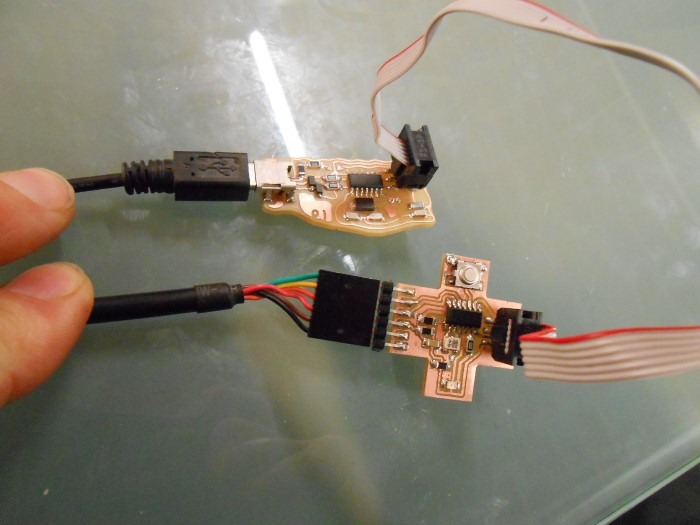
USBTiny programmer configuration
Let's try to make our board LED blink
We open a handy Arduino example :
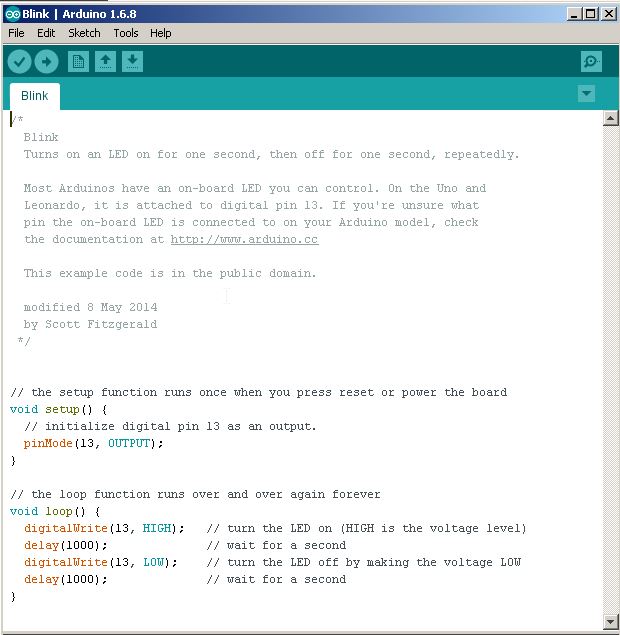
The Blink Example
Because on the board we designed the pin with the LED is pin PA7, we change this in the code :
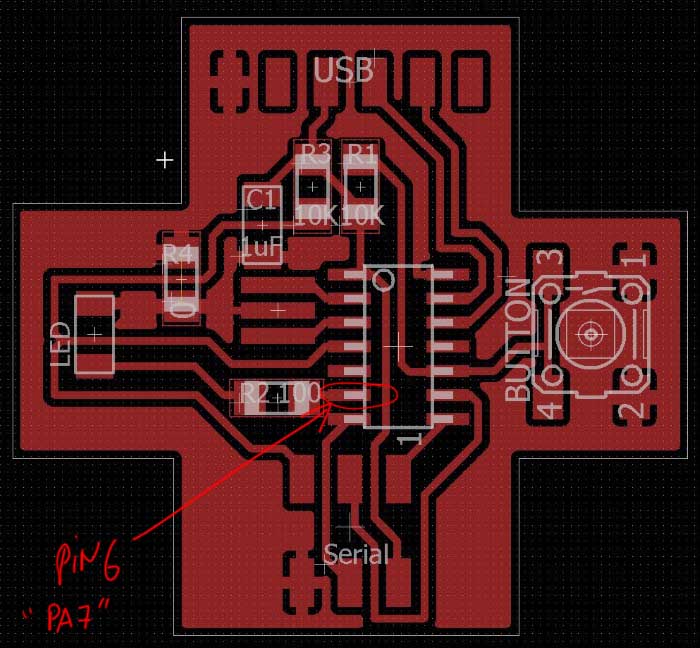
Pin A7
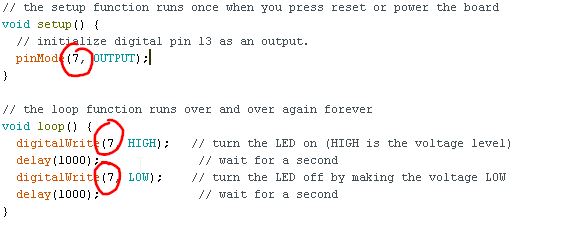
Modifying the code
And after we've compiled and uploaded, we have a blinking board !
Our board, blinking - Changing speed.
Now let's just take a minute and realize what we've done so far. To make a board blink is not really incredible but let's realize we completely did this from scratch. First we drew, cut and populated our programmer board. Then we designed, cut and populated a simple ATtiny44 board with one button and a LED. And finally just programmed this board to do something. This opens many doors...
Since we have a button we can also play with this :
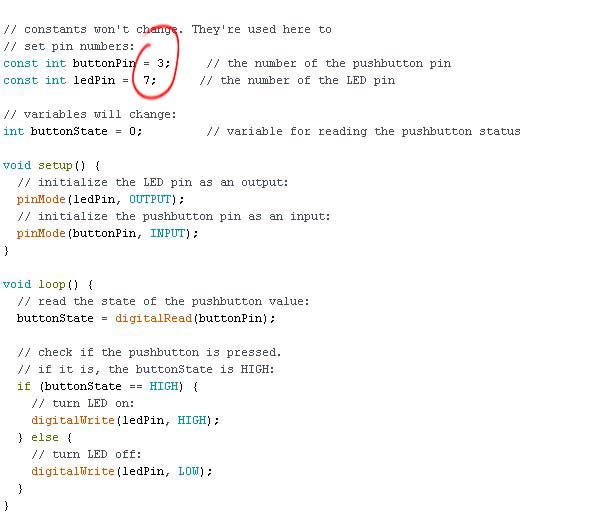
Using the button
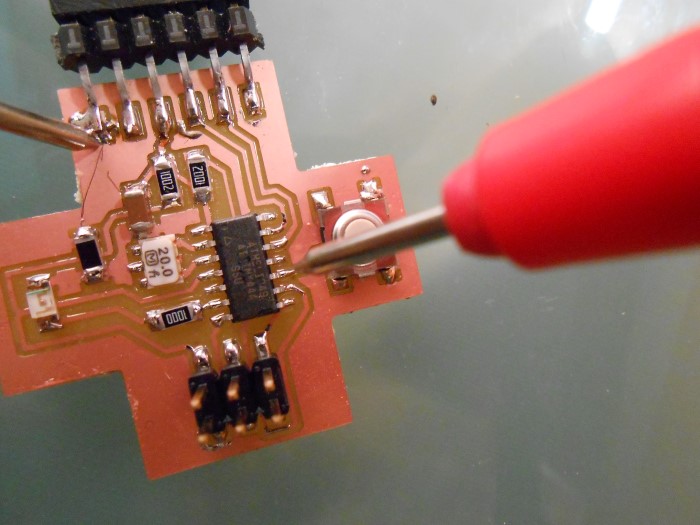
Then the problems started.
My button worked for a little while but the LED started to crackle.
I tried to reupload > no luck.
I tried to use A3 instead of 3 > no luck.
Unplug and replug all the power sources > no luck.
Upload the previous program "blink" > the blink program doesn't work anymore, the LED crackles.
I make another board > same thing, work for a while and then random behaviors
I take the multimeter out of his shelf and notice that the voltage on the pin RESET is way too low (~1V)
Same thing on the input pins, the low voltage shows like there is no pull-up resistor. It's as if the impedance of the MCU's ports became much lower than usual.
Debugging the board
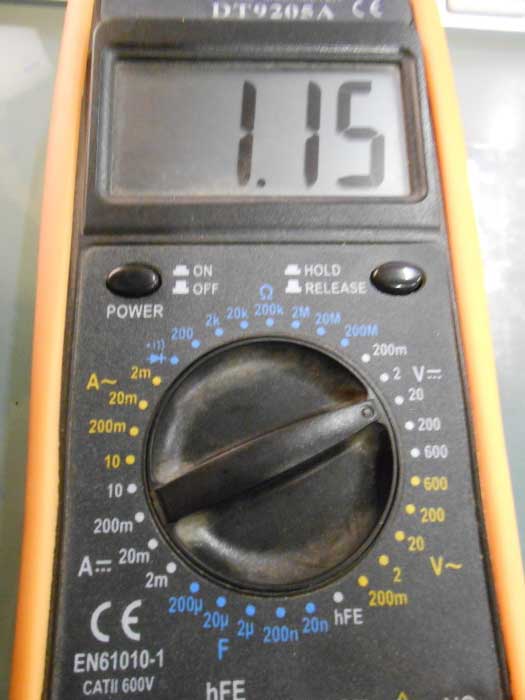
Not high enough voltage
I try to use the internal pull-ups by writing in the code :
pinMode(3,INPUT-PULLUP);
No luck!
I made 5 different boards in total (one is not in the picture obviously) and they all end up having this bizarre behavior
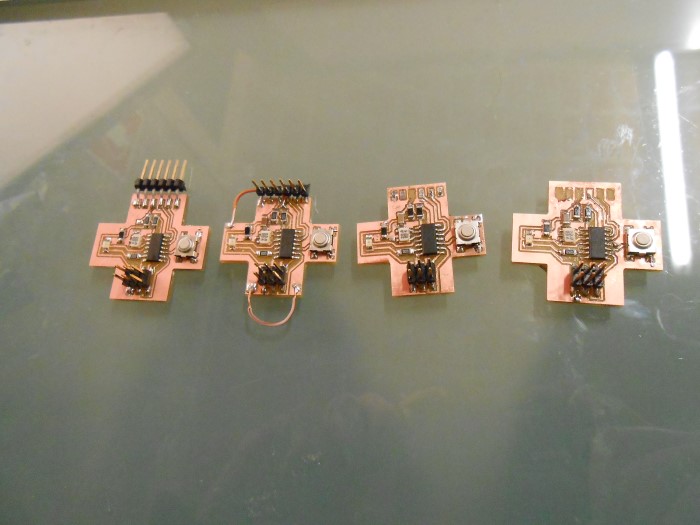
All my boards
If I short Vcc and reset, which is like the strongest pull-up, then the board works perfectly
There's really a "consistent random" taste to this issue
Just to feel better, I programmed an Arduino UNO with my fabISP, which worked nicely :
Programming the Uno
Its LED blinks perfectly forever, no weird behavior.
Simulating a button by shorting the pin 2 with ground works also perfectly with the "button" program"
What's wrong with my board??
I decide to go to another fablab to get other components. I go down the mountain to Barcelona to FabLabBcn and make a board there.
I just want to point out that going to another fablab and making the same board by just downloading your files from the internet and using pretty much the same machines and process is a very nice feeling of universality
I soldered the components back in my fablab : the GreenFabLab
This board is working perfectly !
What's wrong with the other boards, I don't know.. Maybe a bad batch of ATtiny44, how likely is that??
Alright, so I play around with the Arduino IDE examples, blink, button, etc. They all work fine.
Now I want to program something useful for my final project.
Nitinol driver
So I want to start writing a program that would drive the nitinol contractions that I'm using for my final pump project.
The idea is to turn ON the PWM (Pulse Width Modulation) that's available on the pin 3 (the one we're using for the LED) to heat up the Nitinol.
For now, of course, the LED emulates the Nitinol.
Later, my idea is to replace the LED by a MosFet that would drive current through the nitinol wire.
Nitinol heats up and goes back (contracts in our case) to an original pre-set shape when current flows though it.
Then it needs to cool down to be able to be deformed again.
Usually, it takes much longer to cool down then heat up
I sketch the algorithm on a paper :
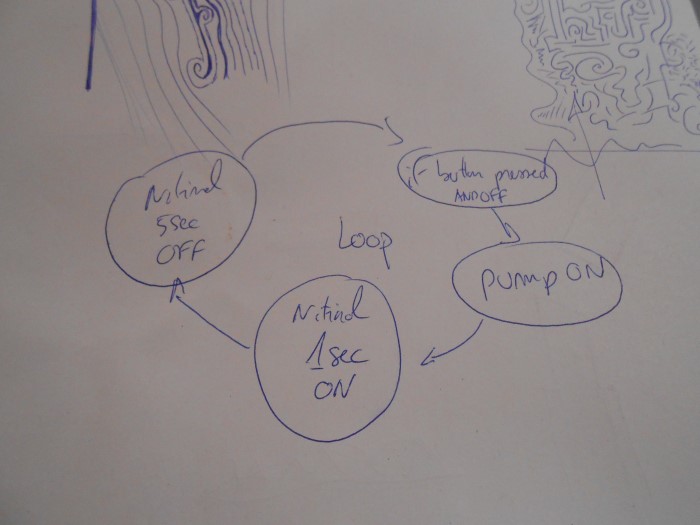
First sketch
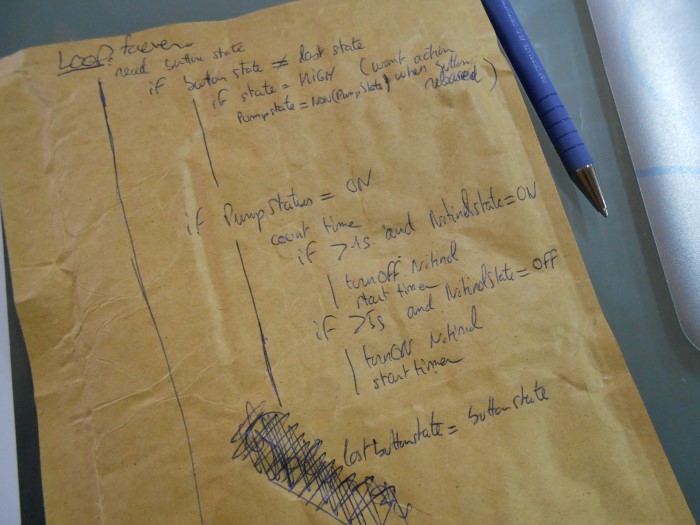
More detailed sketch
Then I start writing it in the Arduino IDE
After some fails, I have it right :
                /*
  Nitinol Driver

  created 26 March 2016
  by Gregoire Durrens


*/

// constants won't change:
const int i_buttonPin = 3;    // the number of the pushbutton pin
const int i_mosFetPin = 7;      // the number of the LED pin
const int i_dutyCycle = 50;     // the duty cycle of the mosfet
const long l_contraction_time = 1000;   //the nitinol contraction_time
const long l_decay_time = 5000;     //the nitinol decay_time
const long l_debounceDelay = 50; //the debounce time

// Variables will change:
int b_Pumpstatus = HIGH;         // the current state of the Pump
int b_buttonState = HIGH;             // the current reading from the input pin
int b_lastButtonState = LOW;             // the last reading from the input pin
int b_NitinolState = HIGH;     // the current state of the Nitinol
unsigned long ul_previousMillis = 0;  //last time Nitinol was contracted
unsigned long ul_currentMillis = 0;     //the current time

void setup() {
  pinMode(i_buttonPin, INPUT);
  pinMode(i_mosFetPin, OUTPUT);

  // set initial state of mosfetpin
  analogWrite(i_mosFetPin, 0);

}

void loop() {
  // read the state of the switch into a local variable:
  b_buttonState = digitalRead(i_buttonPin);

  // compare the buttonState to its previous state
  if (b_buttonState != b_lastButtonState) {
    // if the state has changed, increment the counter
    if (b_buttonState == HIGH) {
      // if the current state is HIGH then the button
      // wend from off to on:
      b_Pumpstatus = !b_Pumpstatus;

      if (b_Pumpstatus == LOW) {
        analogWrite(i_mosFetPin, 0);
        b_NitinolState = LOW;
      }

      if (b_Pumpstatus == HIGH) {
        analogWrite(i_mosFetPin, i_dutyCycle);
        ul_previousMillis = millis();
        ul_currentMillis = millis();
        b_NitinolState = HIGH;
      }

    }
    // Delay a little bit to avoid bouncing
    delay(50);
  }

  // save the current state as the last state
  b_lastButtonState = b_buttonState;


  // start pumping:
  if (b_Pumpstatus == HIGH) {
    ul_currentMillis = millis();
    if (b_NitinolState == HIGH) {
      if (ul_currentMillis - ul_previousMillis >= l_contraction_time) {

        // save the last time the Nitinol contracted
        ul_previousMillis = ul_currentMillis;

        analogWrite(i_mosFetPin, 0);

        // change the state of Nitinol
        b_NitinolState = !b_NitinolState;
      }
    }

    if (b_NitinolState == LOW) {
      if (ul_currentMillis  - ul_previousMillis >= l_decay_time) {

        // save the last time the Nitinol contracted
        ul_previousMillis = ul_currentMillis;

        analogWrite(i_mosFetPin, i_dutyCycle);

        // change the state of Nitinol
        b_NitinolState = !b_NitinolState;
      }
    }
  }
}
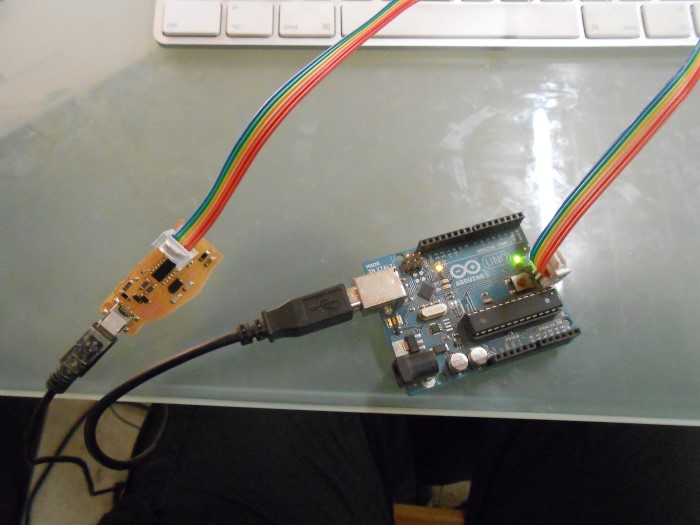
And here it is in action :
Our board, driving the LED as if it was the nitinol MosFet
Source files
Here are the sources files of the projects I talked about on this page :
The Arduino sketch
Conclusion
***