Week 1
Website design
Git
Assignment
- Make a proposal for my personal final project.
- Build my personal site in the class archive describing me and my final project.
- Familiarize myself with Git and publish my website.
Week workflow
Here is how I see the week's flow :
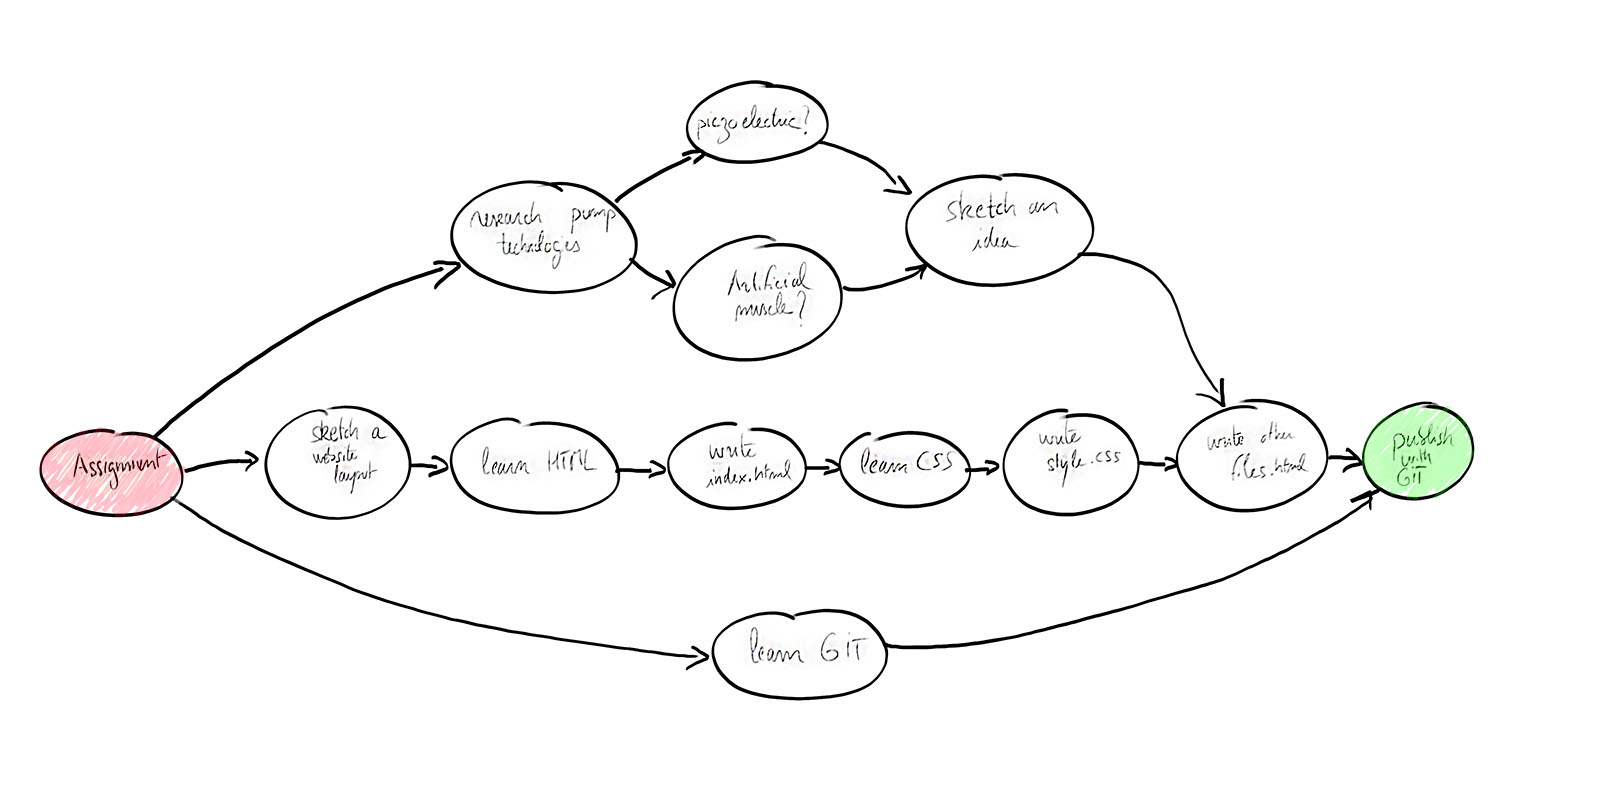
Flow chart for this week
Website development
Layout design
Here's some hand sketches I did to design the layout of my website :
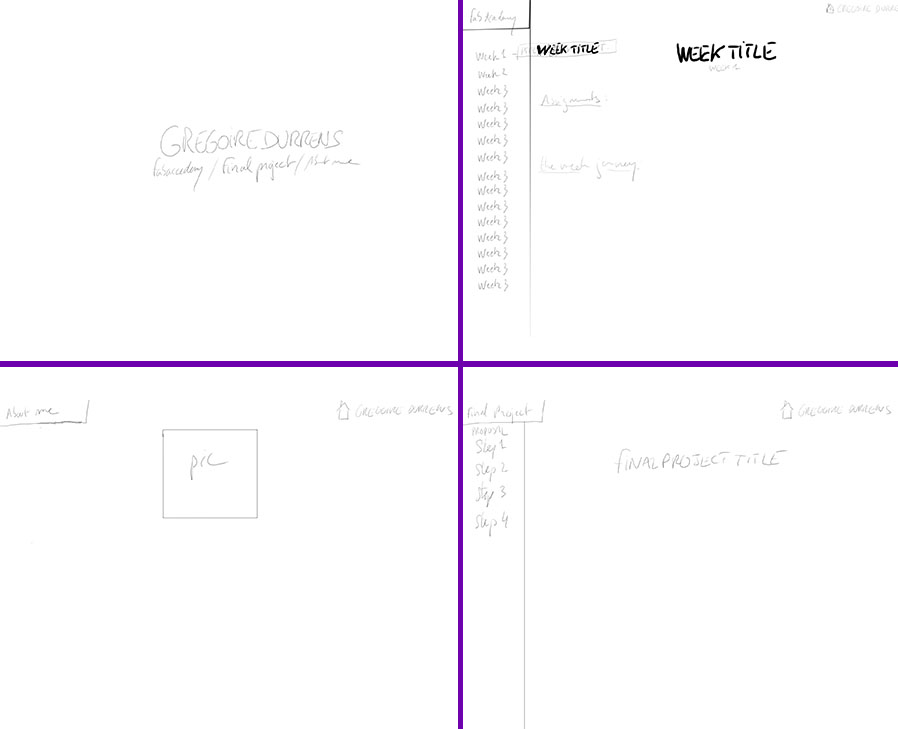
Layout sketches
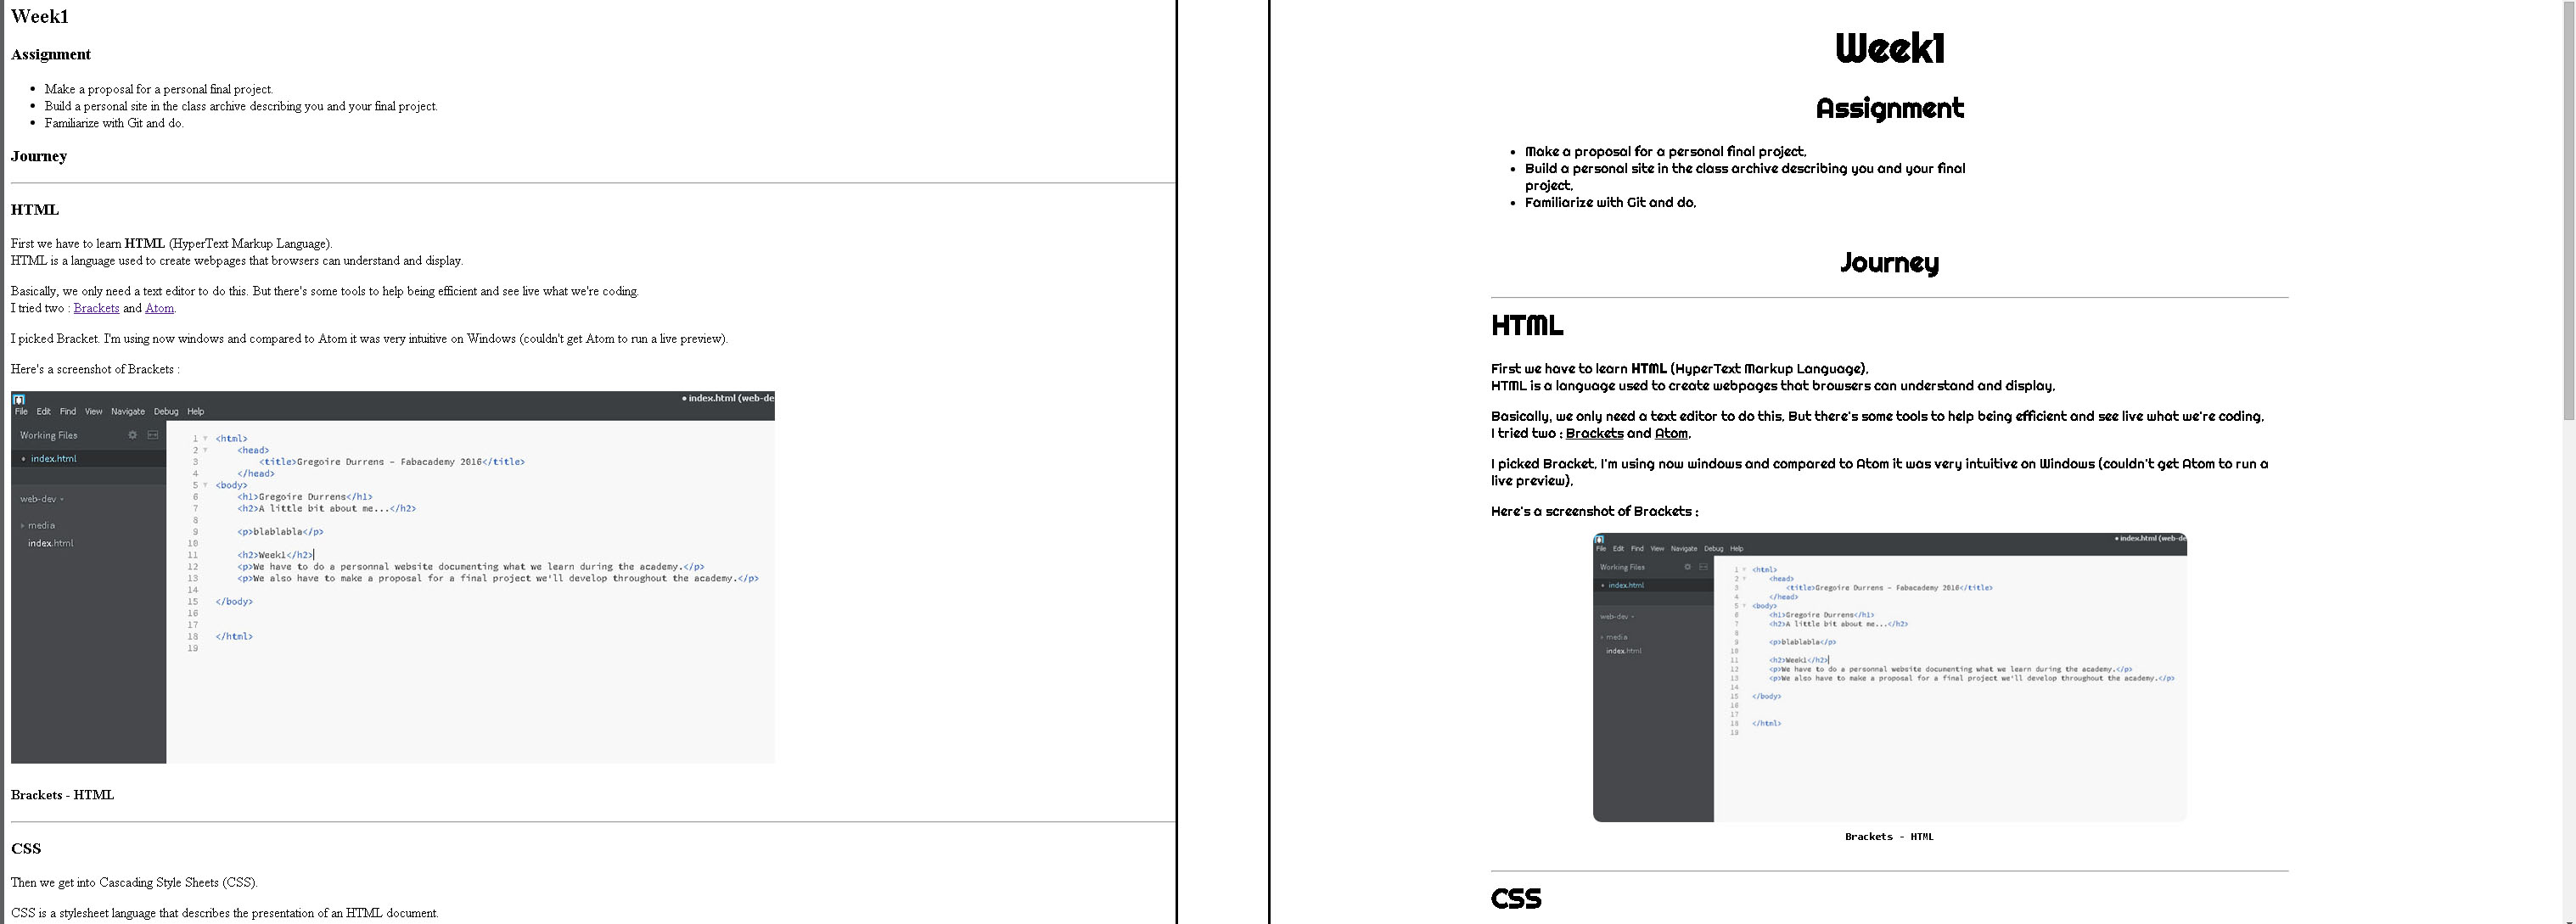
HTML
First we have to learn HTML (HyperText Markup Language).
HTML is a language used to create webpages that browsers can understand and display.
Basically, we only need a text editor to do this. But there's some tools to help being efficient and see live what we're coding.
I tried two :
Brackets and
Atom.
I picked Bracket. I'm using now windows and compared to Atom it was very intuitive on Windows (couldn't get Atom to run a live preview).
Here's a screenshot of Brackets :

Brackets - HTML
I found the site W3schools.com great for learning HTML, CSS and Javascript.
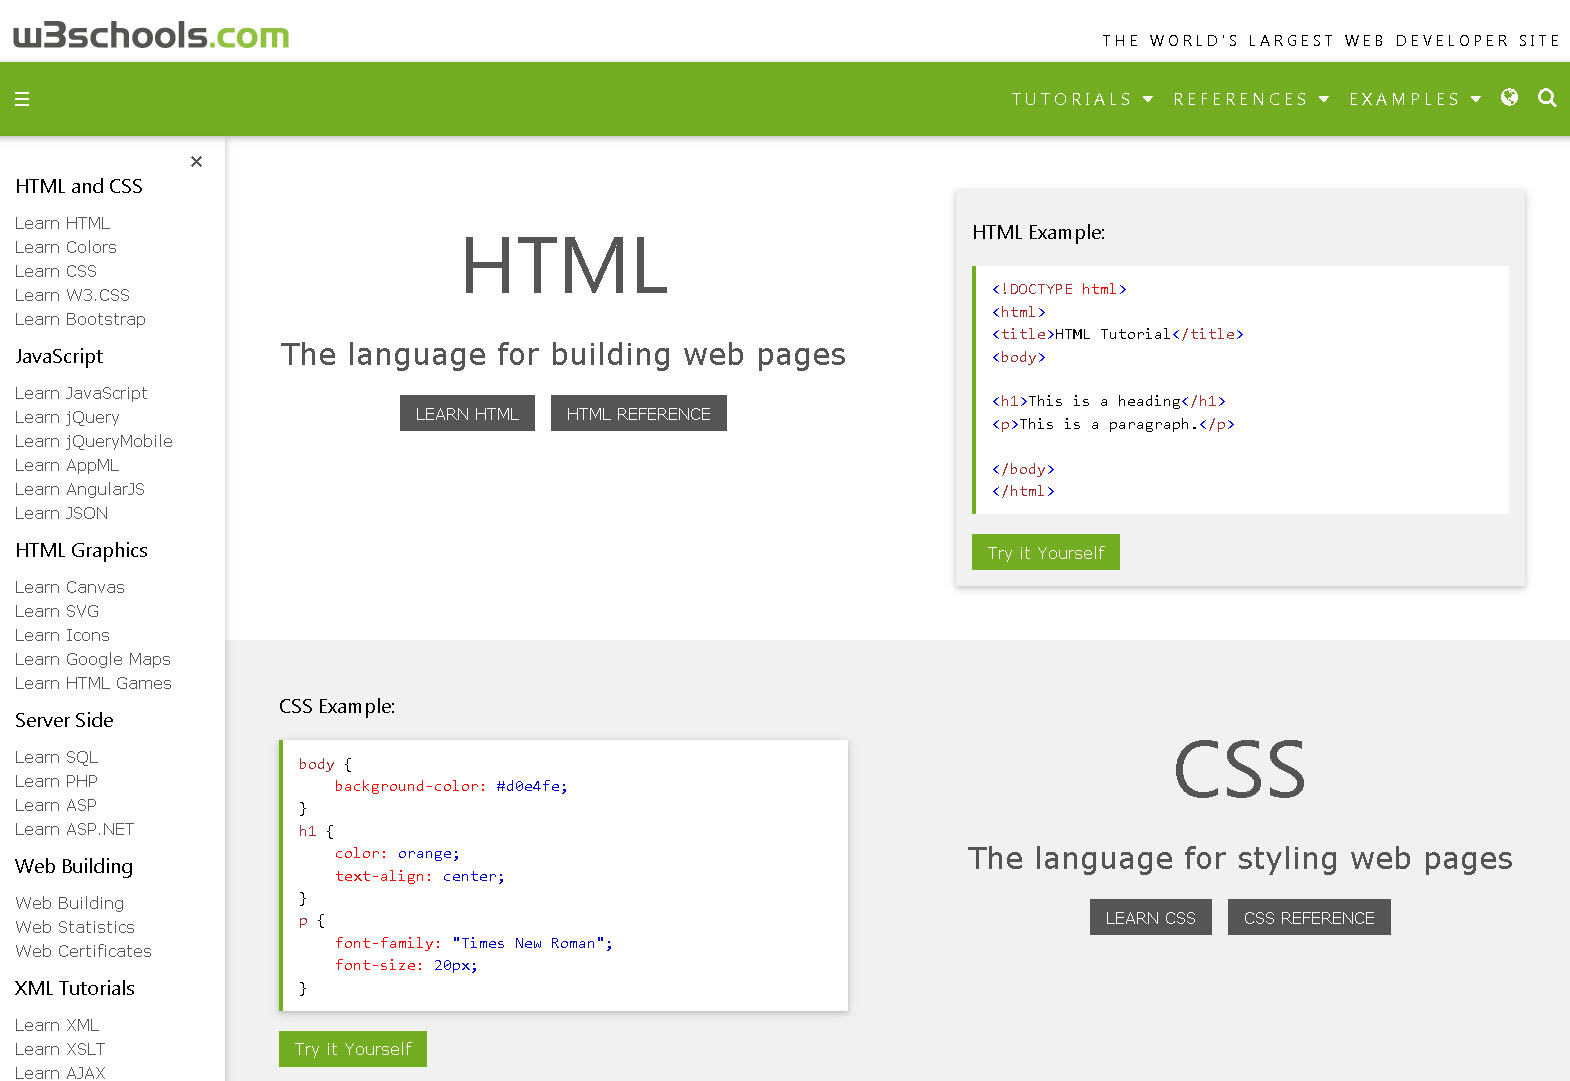
screenshot of W3schools website
CSS
Then we get into Cascading Style Sheets (CSS).
CSS is a stylesheet language that describes the layout and look of an HTML document.
It's a way to efficiently make webpages look nice.
The nice thing with Brackets is that it also live previews the css styles that we code.
Here is a picture of Brackets showing some CSS code :
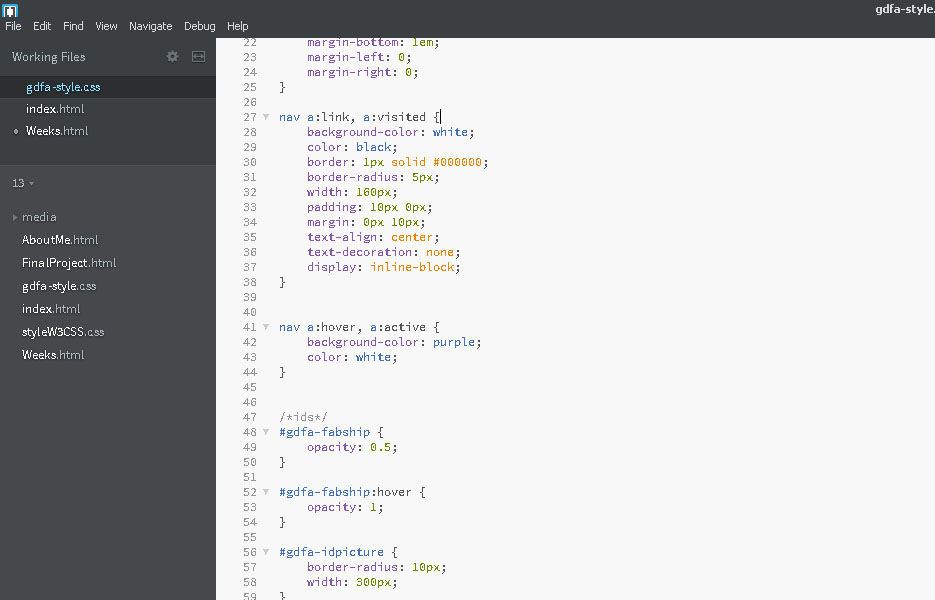
Brackets - CSS
We can find a lot of CSS templates on the web, called framework. A famous one for example is Bootstrap.
They’re great to learn from but it’s a lot of information at once. So instead of spending time learning a framework I decided to create my own. Plus, the goal is to learn here, so having to create from scratch is actually the best way to make sure I understand how all this work.
I then decided to focus first on learning HTML and CSS. Not to overwhelm myself, I chose a minimalist looking design for my website.
CSS in action :
Left - without CSS // Right - with CSS
Going through the existing CSS frameworks, I noticed the “ids” and “classes” have all the name of the template in front of them. I decided to do the same. My selectors are then all prefixed by “gdfa-” meaning : “gregoire durrens fab academy”.
A site that I found useful was CSS-Tricks.com. Especially a guide for centering. Even though it's about centering, it makes things clear.
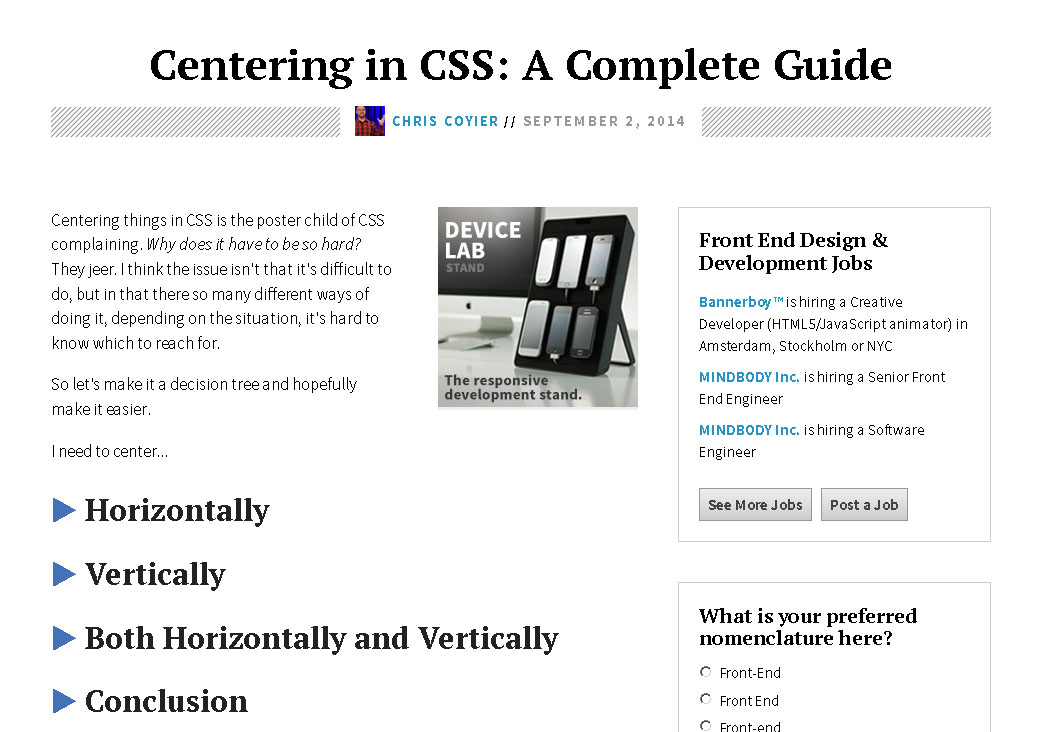
The CSS-Tricks Guide for centering.
Git
When we do any kind of project, it's nice to have an history of what we've made.
Projects involving digital files allow this beautifully, especially code.
We can control versions of files and go back and forth in time. And with massive collaboration, it's even more needed.
The FabAcademy is a perfect example of a project that has a lot of digital files, especially the website that we have to build along our academic journey.
We'll then use a version control system on our files : Git.

The Git Logo
Git is a free and open source distributed version control system. Let's install it. We can download it on the Git official website.
I'm running windows. During installation, I choose to use Git bash which uses minTTy to have a command line tool to work with.
The first thing I have to do is generate a ssh key to be able to establish a secure connection between my computer and GitLab.
Then I can configure git on my local computer. Mainly my name and email address. In the TTy terminal I enter :
$ git config --global user.name "Gregoire Durrens"
    $ git config --global user.email gdurrens@gmail.com
We can also configure our preferred text editor :
$ git config --global core.editor "C:/Program Files (x86)/Notepad++/notepad++.exe -multiInst -nosession"
After this, I can clone the remote repository corresponding to my fablab to my local repo :
$ git clone git@git.fabacademy.org:fabacademy2016/greenfablab.git
Et Voilà ! I have the latest files in my local working repository. These files are actually all the files of the students of my fabalab.
I can see the status by typing :
$ git status
I understood that files can be in 4 different stages
- Untracked
- Unmodified
- Modified
- Staged
I found this figure from the Git website very helpful :
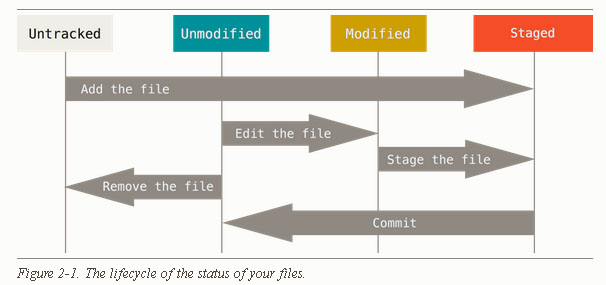
The four states files can be in
So once I've done my modifications and copied all my website files on my local repository (...\greenfablab\students\13), I add them.
But first I need to go in the directory Git is controlling :
$ cd greenfablab
    $ git add -a
Then I can commit and name it to describe what is the purpose of this commit :
$ git commit -m
I can then see the changes by using the log function :
$ git log
Everything done so far was on the local repository, the "working repository".
Now that I'm happy with my changes and want to share that with the world of developpers that work with me, I can "push" :
$ git push
Git invites me to do a pull first and merge the changes others made to my branch, then I can push :
$ git pull
    $ git push
There we go! I pushed all my commited modifications to the remote repository :)
If I ever need help on the git commands (And I do!), there's always the command :
$ git help config
I also did that in parallel with Linux.
I created a virtual machine with Oracle VM VirtualBox and installed Lubuntu on it. I installed then Git using the terminal :
apt-get install git
After that, the process is pretty much the same.
Personal project
Conclusion
This week, I saw the basics of website creation. HTML codes the content, CSS codes the layout and style.
I was then able to create a little website (this one!) that will show my progress during the academy. I also started to sketch an idea of a final project that you can find here.
I also learnt to use a powerful free and open source distributed version control system, Git.
***